
Free Motion Quilting Part 3. Assemble the Quilt Sandwich
Dear Friends and Readers,
Following on from the previous post,
Free Motion Quilting Part 2 The Sewing Set Up
The quilt sandwich is much as the description sounds. Once the patchwork top is completed the actual quilt is then made. The sandwich consists of a backing layer of fabric, a filling of batting which can be, wool, cotton, bamboo or polyester, or silk. I believe in times gone by anything that could be used to fill a quilt was used, like straw. Anything for warmth. Sometimes quilts also had no filling.
These days there are many choices, and some quilters use two layers of batting to really enhance the look of their quilts. Sometimes some parts of quilts have extra bits of batting, extra filling to make special parts of a quilt stand out and this technique is traupunto.
But, for the purposes of this discussion, I am focusing on regular quilt filling. It is a personal preference, which kind of batting to choose and what purpose the quilt is for and who is the recipient. Personally I like cotton, wool and bamboo, with wool being a little warmer and bamboo a bit thinner but with great drapeability. Another thing about bamboo is I believe it’s becoming more popular as a sustainable resource. It comes down to personal preference, but I tend to stay away from polyester.
Getting back to the quilt sandwich. You need a backing fabric. It can be whatever suits you. I have used a pieced backing on quite a few, or two lengths of fabric joined together for the backing. When joining large backing pieces, I treat that more like regular sewing with a larger seam allowace an then pressed open.
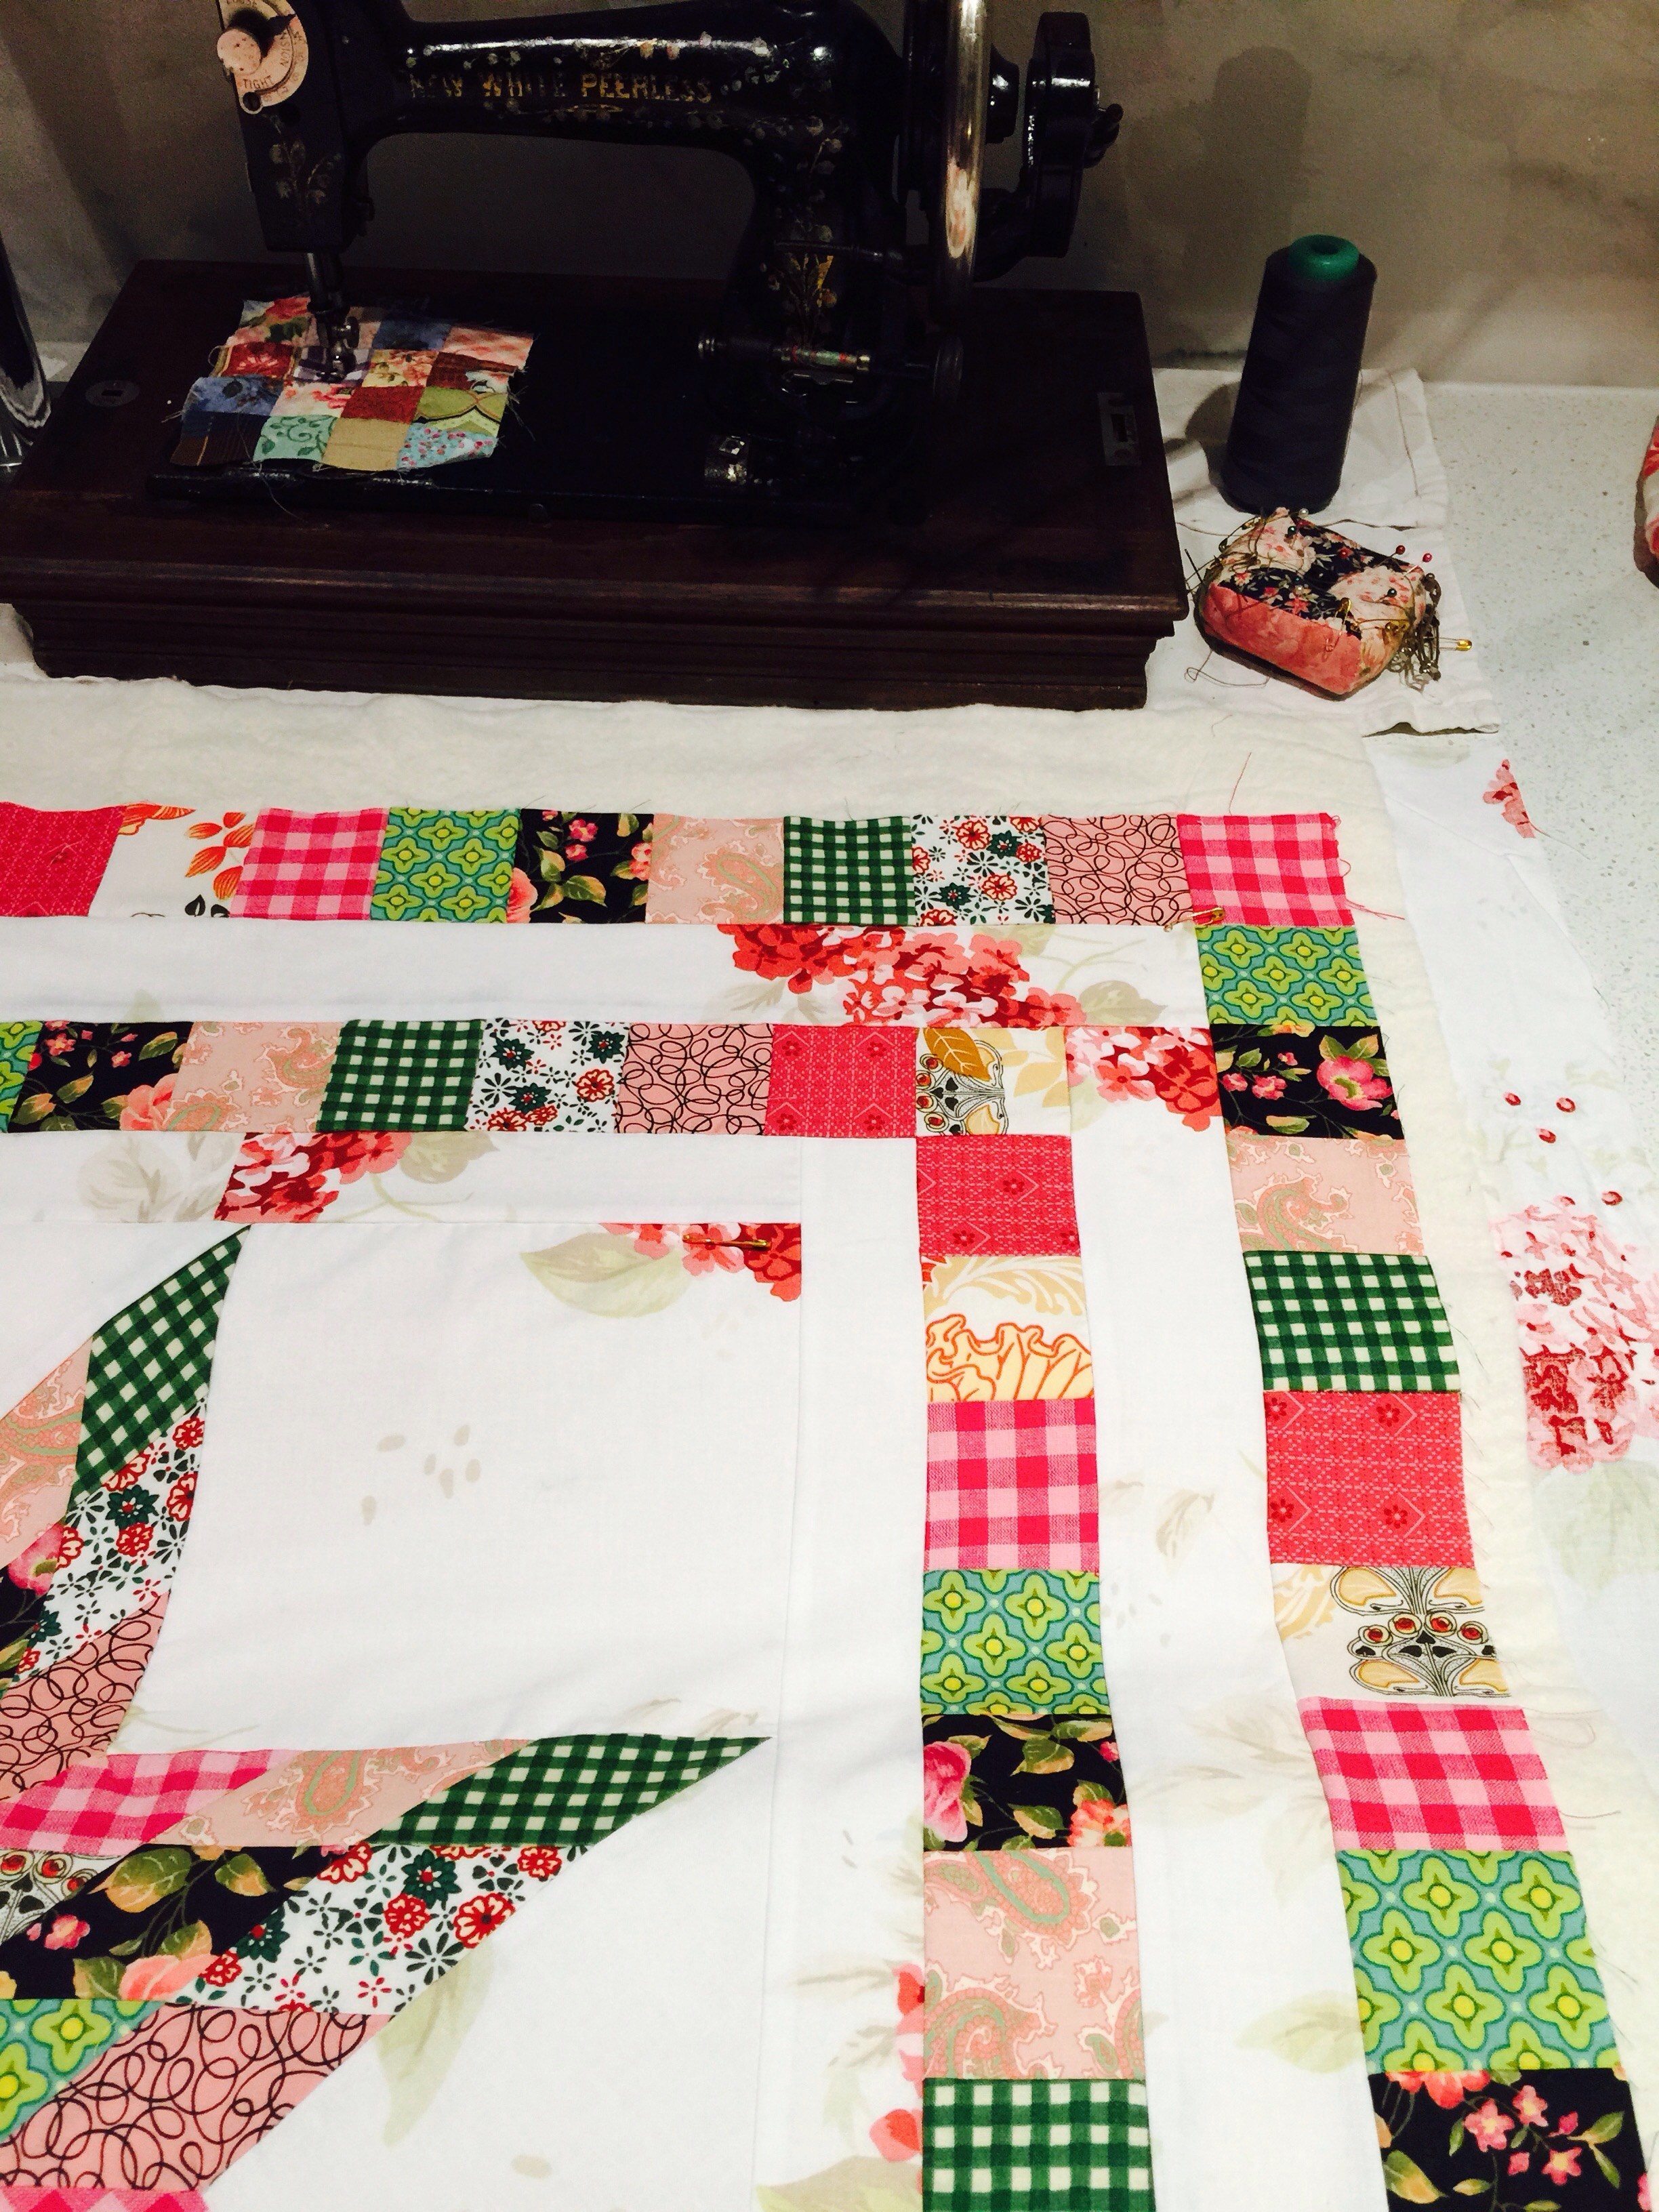
Ensure the backing piece is larger than the quilt top. Lay out the backing piece right side down, followed by the batting piece, which should also be larger than the quilt top, by at least 2-3 inches for a baby quilt, the bigger the quilt is the more allowance on the backing you should have, and up to 6-8 inches for a queen size quilt. I try to centre the batting as much as possible, don’t stretch it just pat it out, until it’s as flat and centred as you can get it. Then add the quilt top right side up. I always try the line the front centre of the quilt up with the centre back of the backing and as much as possible follow the grain line of the backing. This is especially important if you have a pieced backing.

Begin pinning from the centre front and the centre of the sides, and then work from the centre out. At this stage I don’t over pin, just enough to get the layers together.
Now there are many ways of going about this and I think I’ve tried quite a few. The trick now is to get the three layers together as smoothly as possible. Now that doesn’t sound that hard but it can be tricky, especially if the quilt us big. I’ve tried using bull dug clips and clipping to a table. I’ve tried pinning and pinning, basting. I’ve also tried sticking the bottom later to the floor and trying to get it smooth. One thing I haven’t tried is spray basting, but, I didn’t want to buy another product, and I thought it could potentially be like covering school books or wallpapering, where once there are bubbles in it, it’s a bit of a carry on to reposition it.
Anyway the long and the short of it is I didn’t find any of those methods particularly good. There would always be unexpected lumps or areas in which the fabric would double up in the backing during the quilting and have to be unpicked. One of the major problems I decided is the batting. It’s never really smooth.
So then I came up with this idea, which I use every time now. I just press it. I layer the three layers then pin with safety pins. at this stage my pinning commences with the centre front of the quilt, then take the whole sandwich to the ironing board and begin pressing. Use some caution, whatever your batting is will dictate the heat setting on your iron, i.e. wool – wool setting, cotton – cotton setting. I do both sides at least twice, starting from the centre and working out, and adjust the safety pins along the way as necessary. I avoid stretching the fabric, it’s just pressing. I find by doing this that the fabric seems to “stick” to the batting. I do this no matter what size the quilt is. I begin in the centre and work out.
This is also an excellent time to clean up the front of the quilt. It is amazing how many threads will be worming their way through. Also if you can see threads showing through the light areas, this is the chance to clean them up too. Once I have pressed it fully a couple of times then I will add extra pins to really secure the whole sandwich.
I find this really prepares the quilt beautifully, for free motion quilting. The batting is nicely smoothed out and the fabrics have some natural adhesion to the batting, and no extra products. Once it’s all beautifully smoothed and pinned, it’s ready for the quilting!
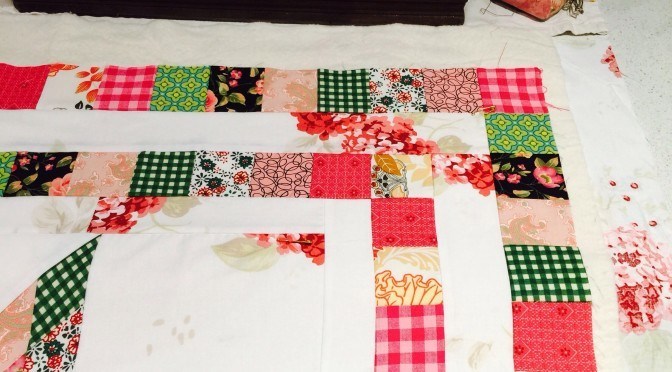
The quilt I am preparing here today is this one
Matilda’s Star Quilt and Pattern

Jump to Part 4 to begin Free Motion Quilting
Free Motion Quilting Part 4 Begin FMQ
All the best, Susie