
 Wendy’s Way Snowball Table Quilt
Hello Dear Friends and Readers,
A few months back, my friend Wendy, sent me a lovely pile of scraps from her fabric collection.
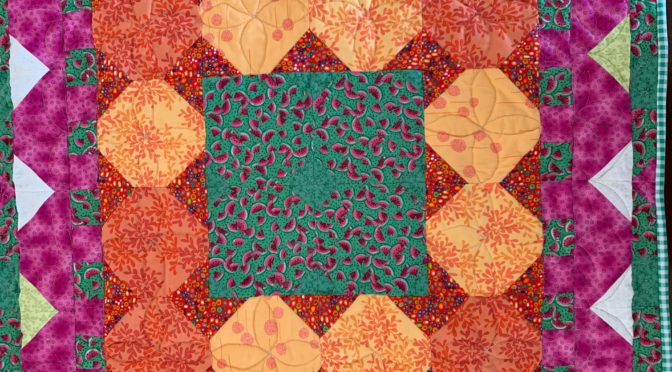
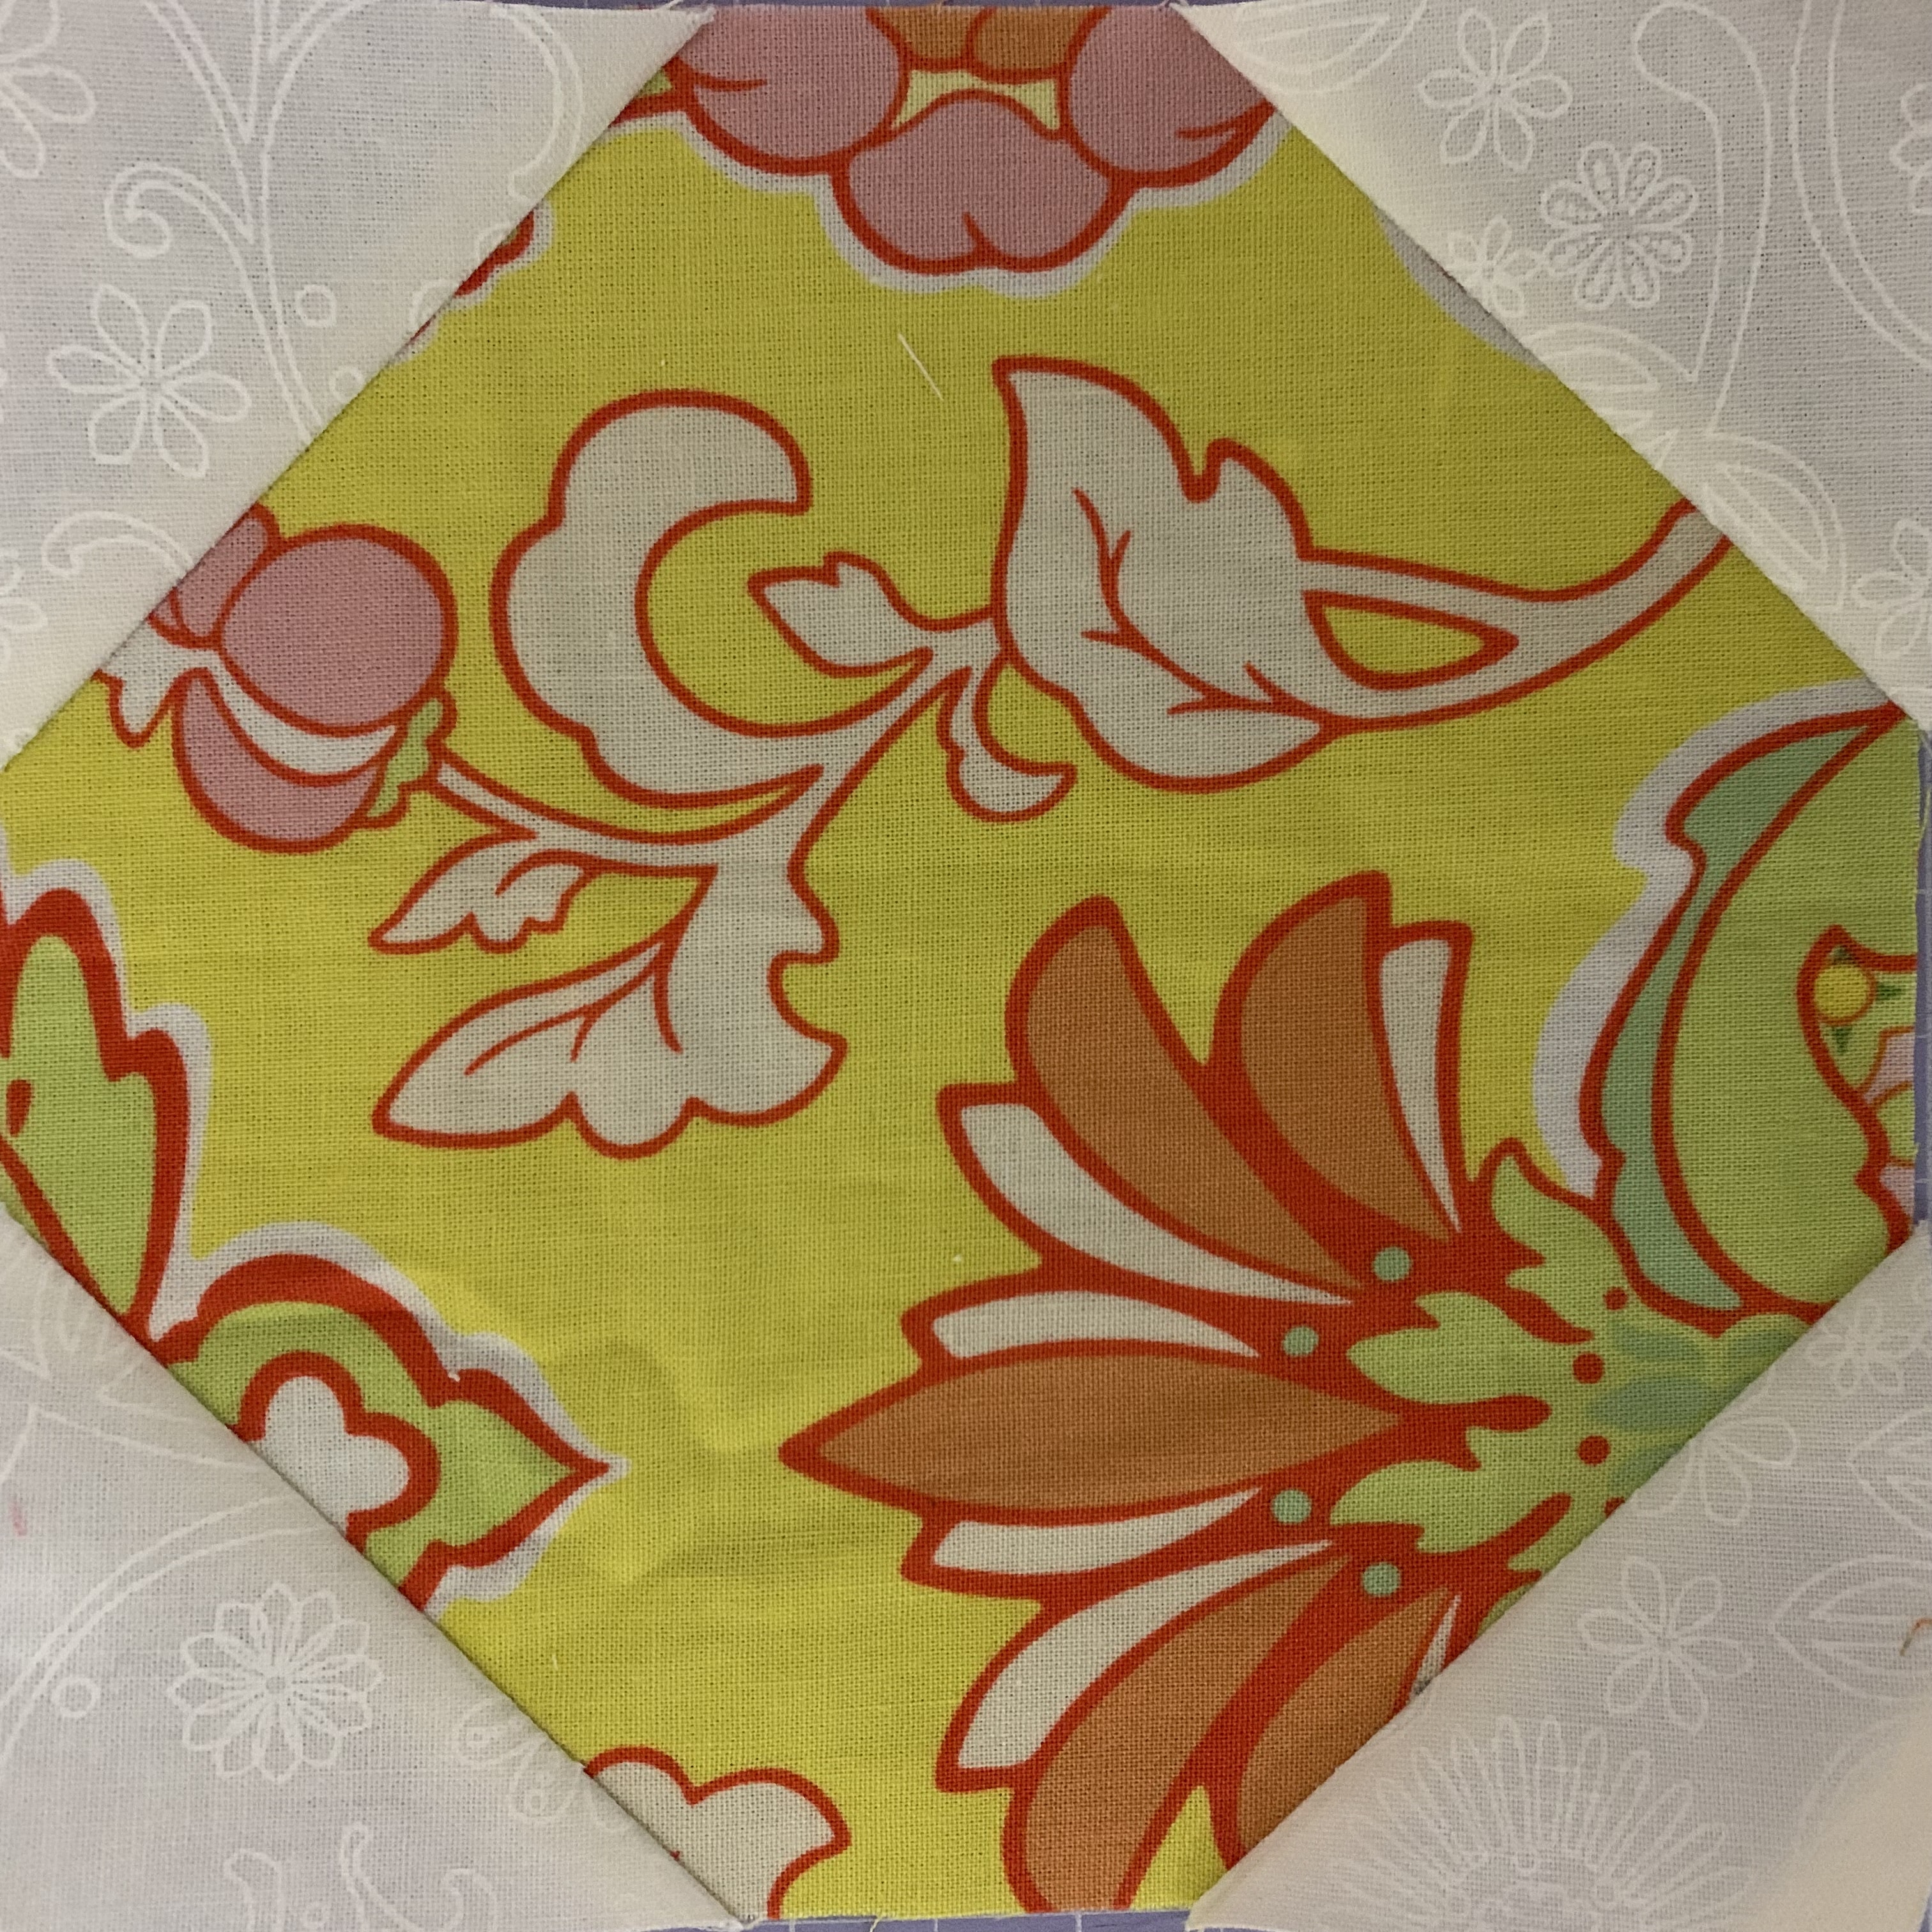
Among the scraps, were a few snowballed blocks. (Gotta love Snowballed Blocks) I figured they were part of another quilt project? There were some scraps of the same fabric line……….it was inevitable, that I could not resist gathering every last square inch and challenging myself to create something from them. The colourway is a very appealing hot pink, oranges and green. I know that Wendy loves bright colours, especially Kaffe Fasset.
If you like Wendy’s fabrics, you may also like this post.
So I decided to see if I would have enough to make a table quilt.
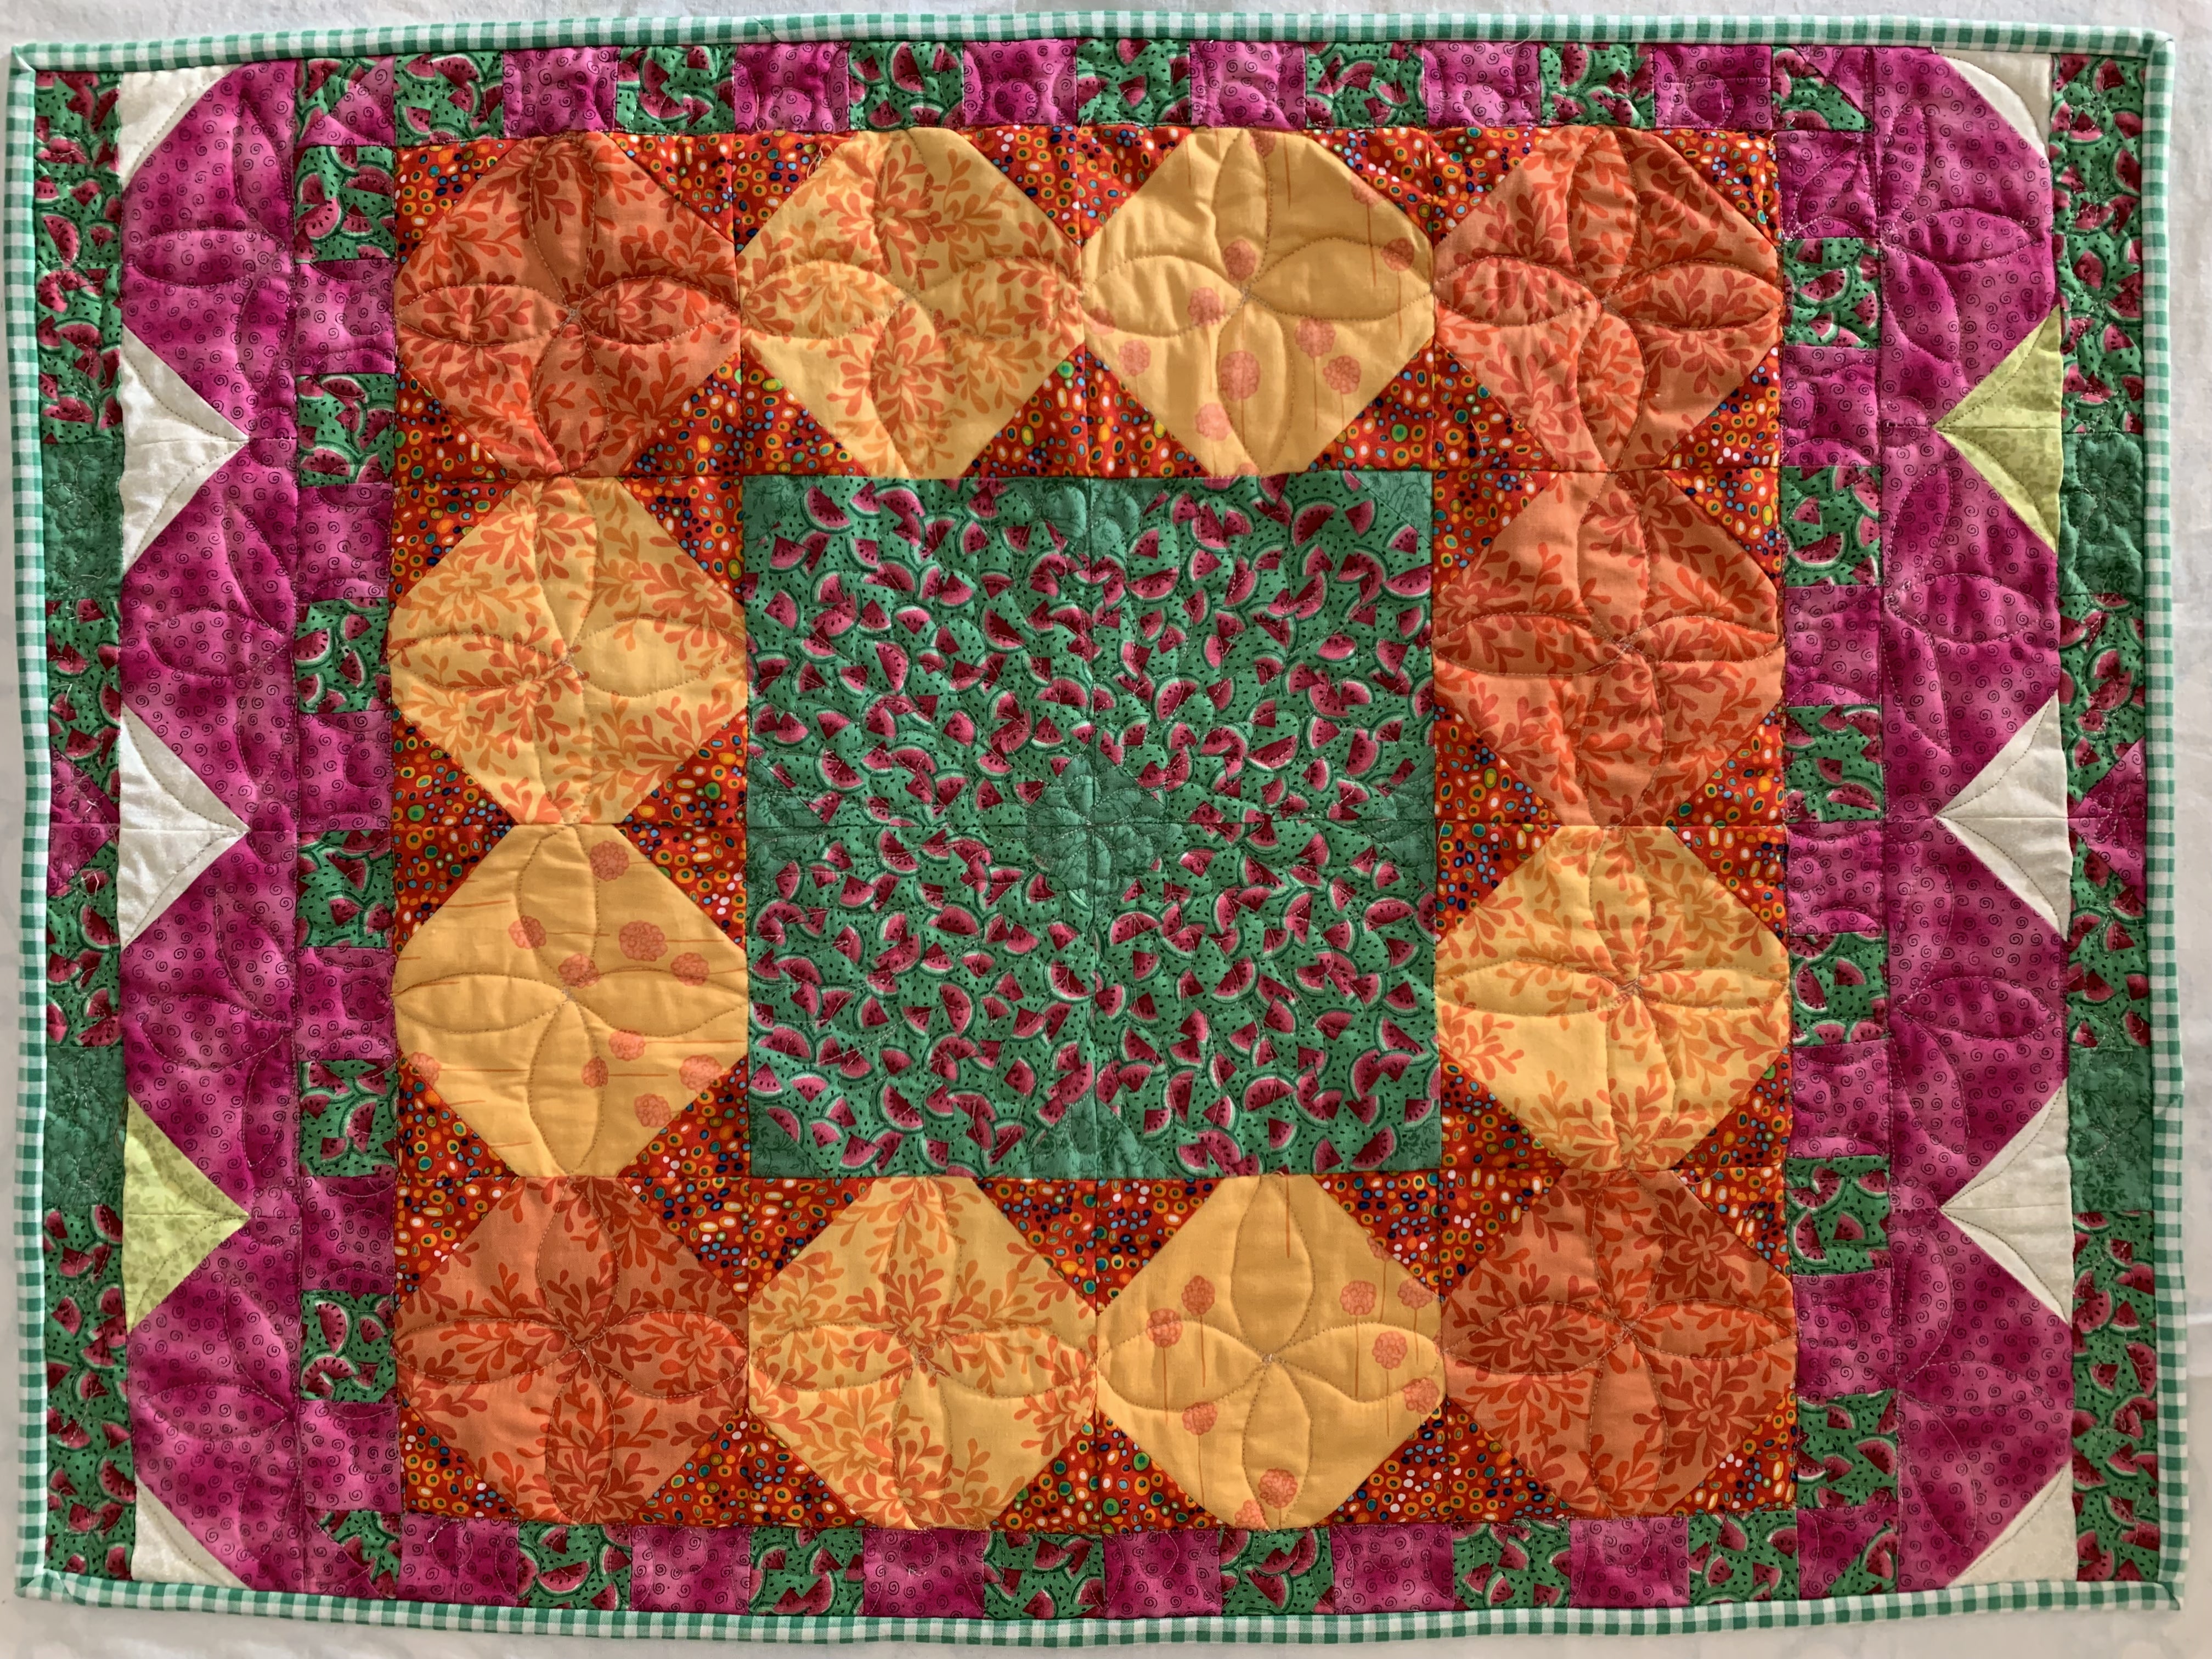
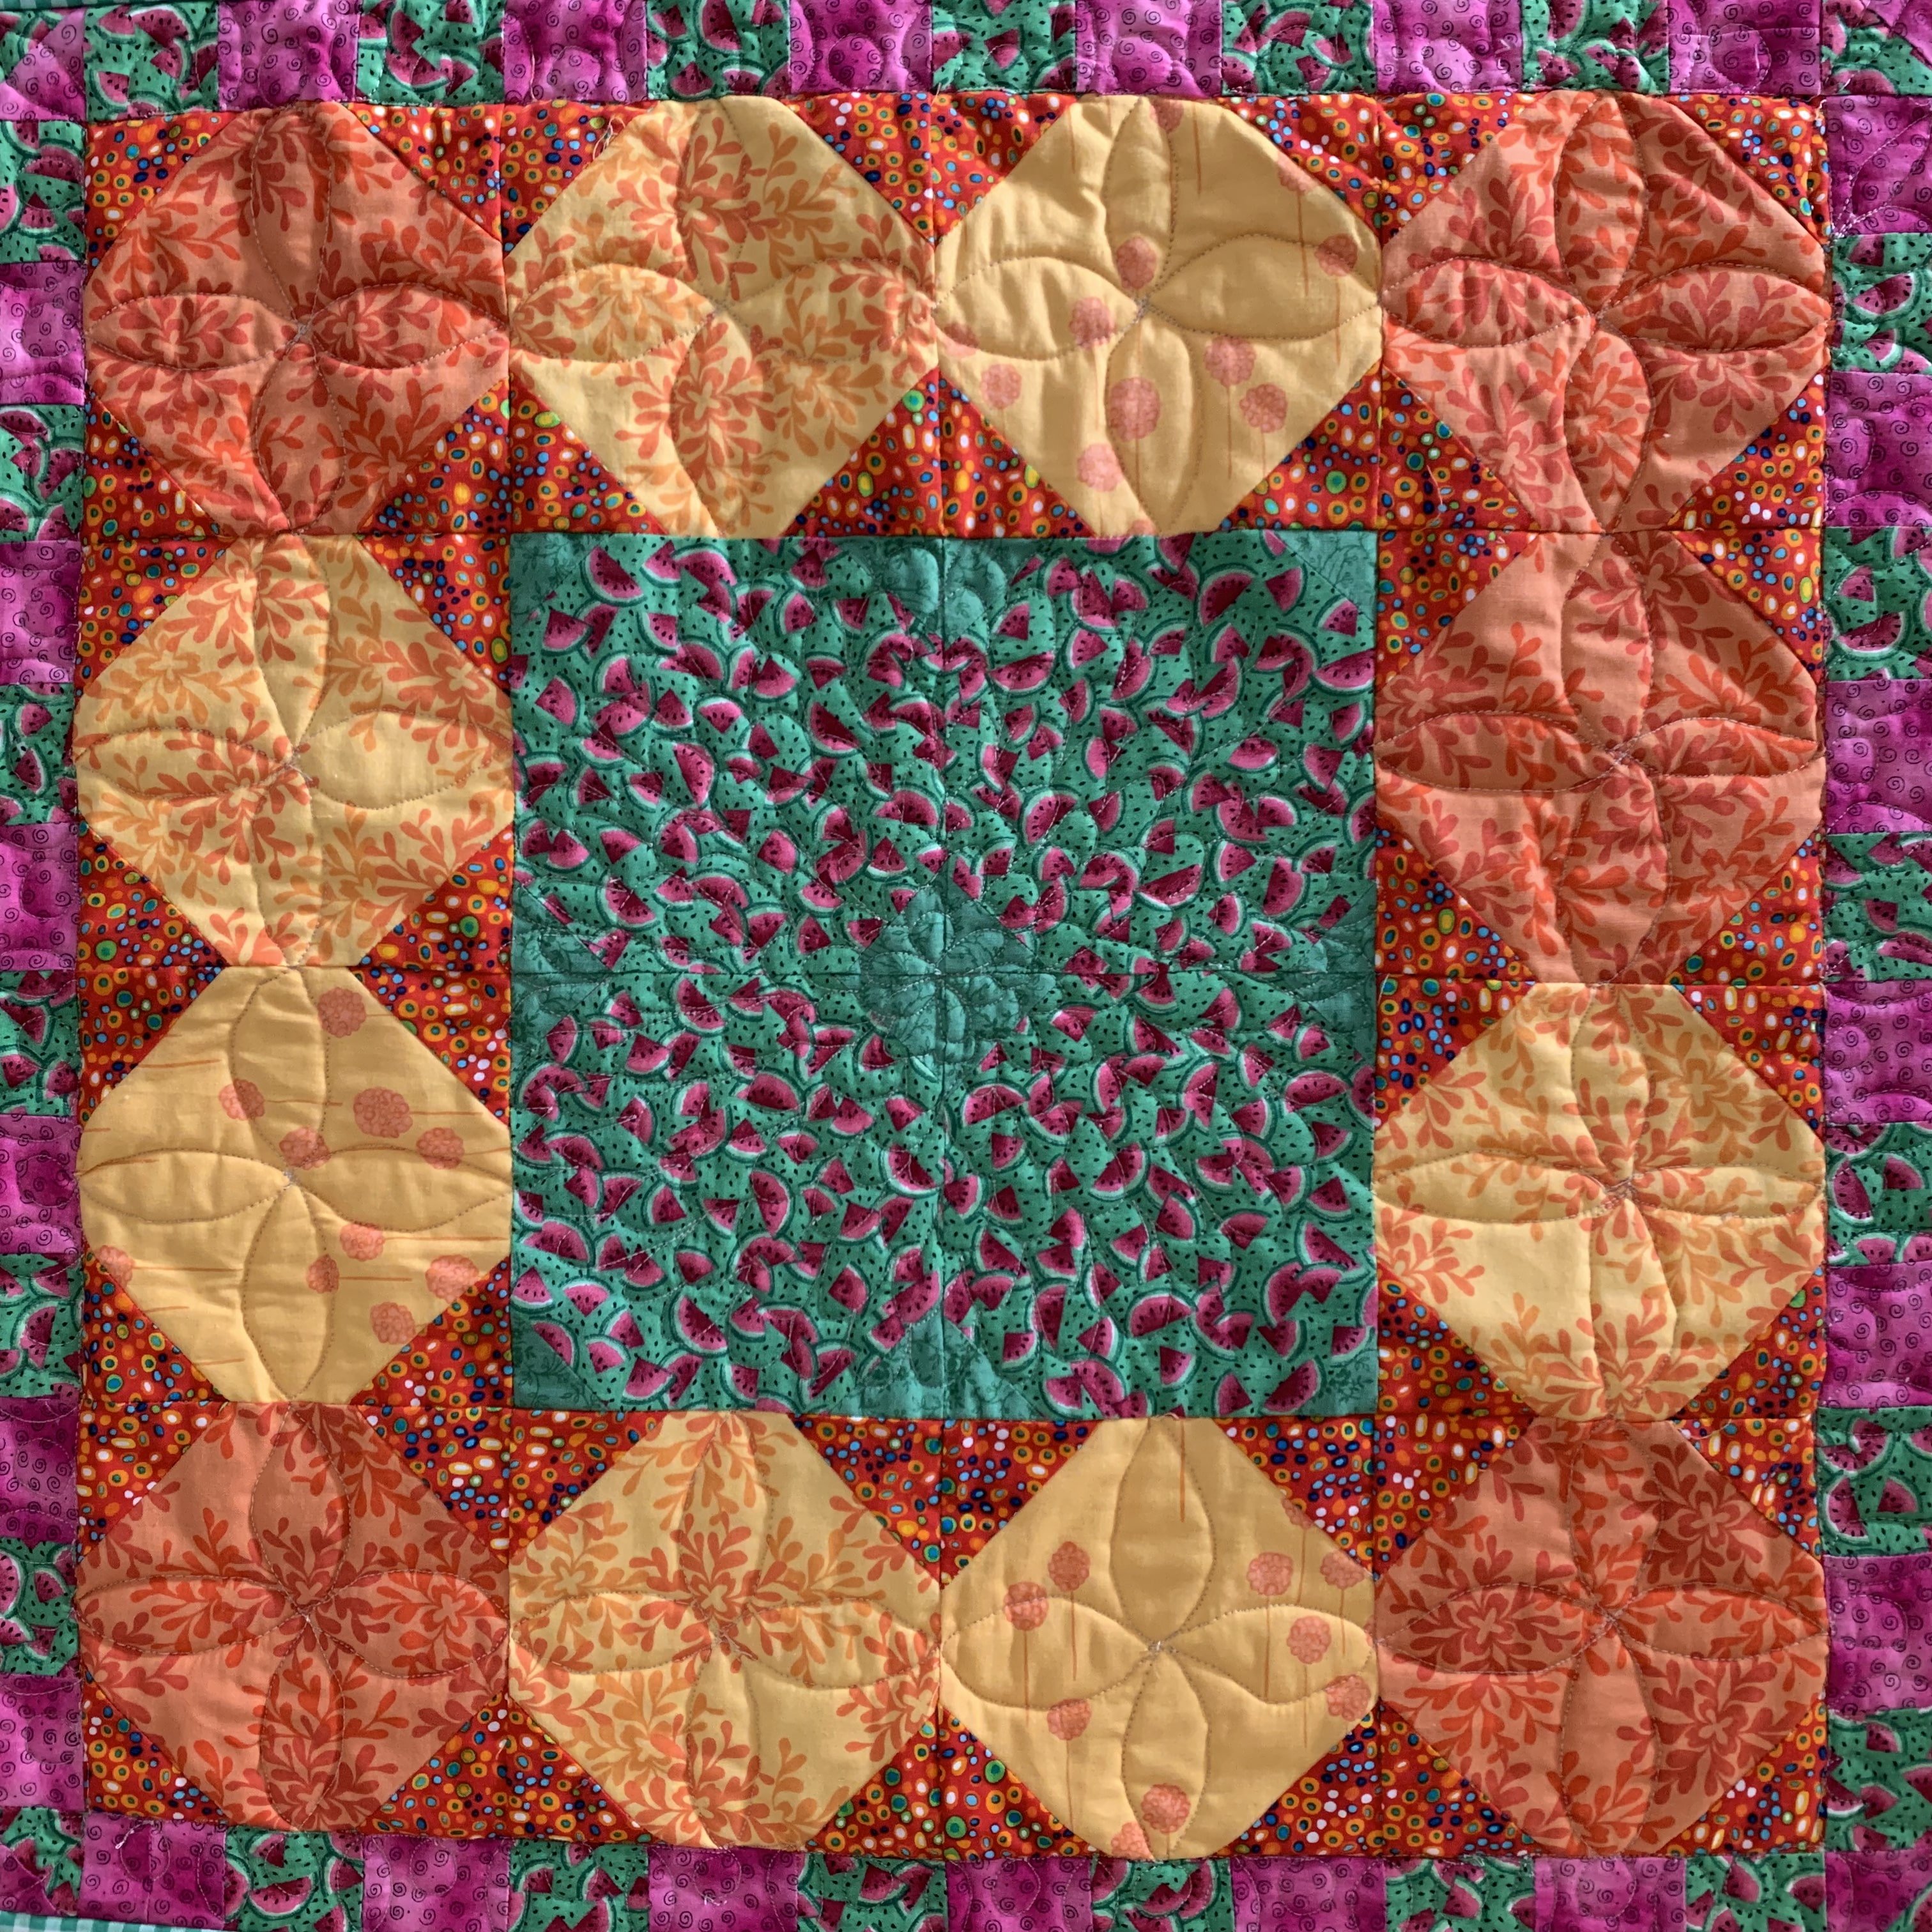
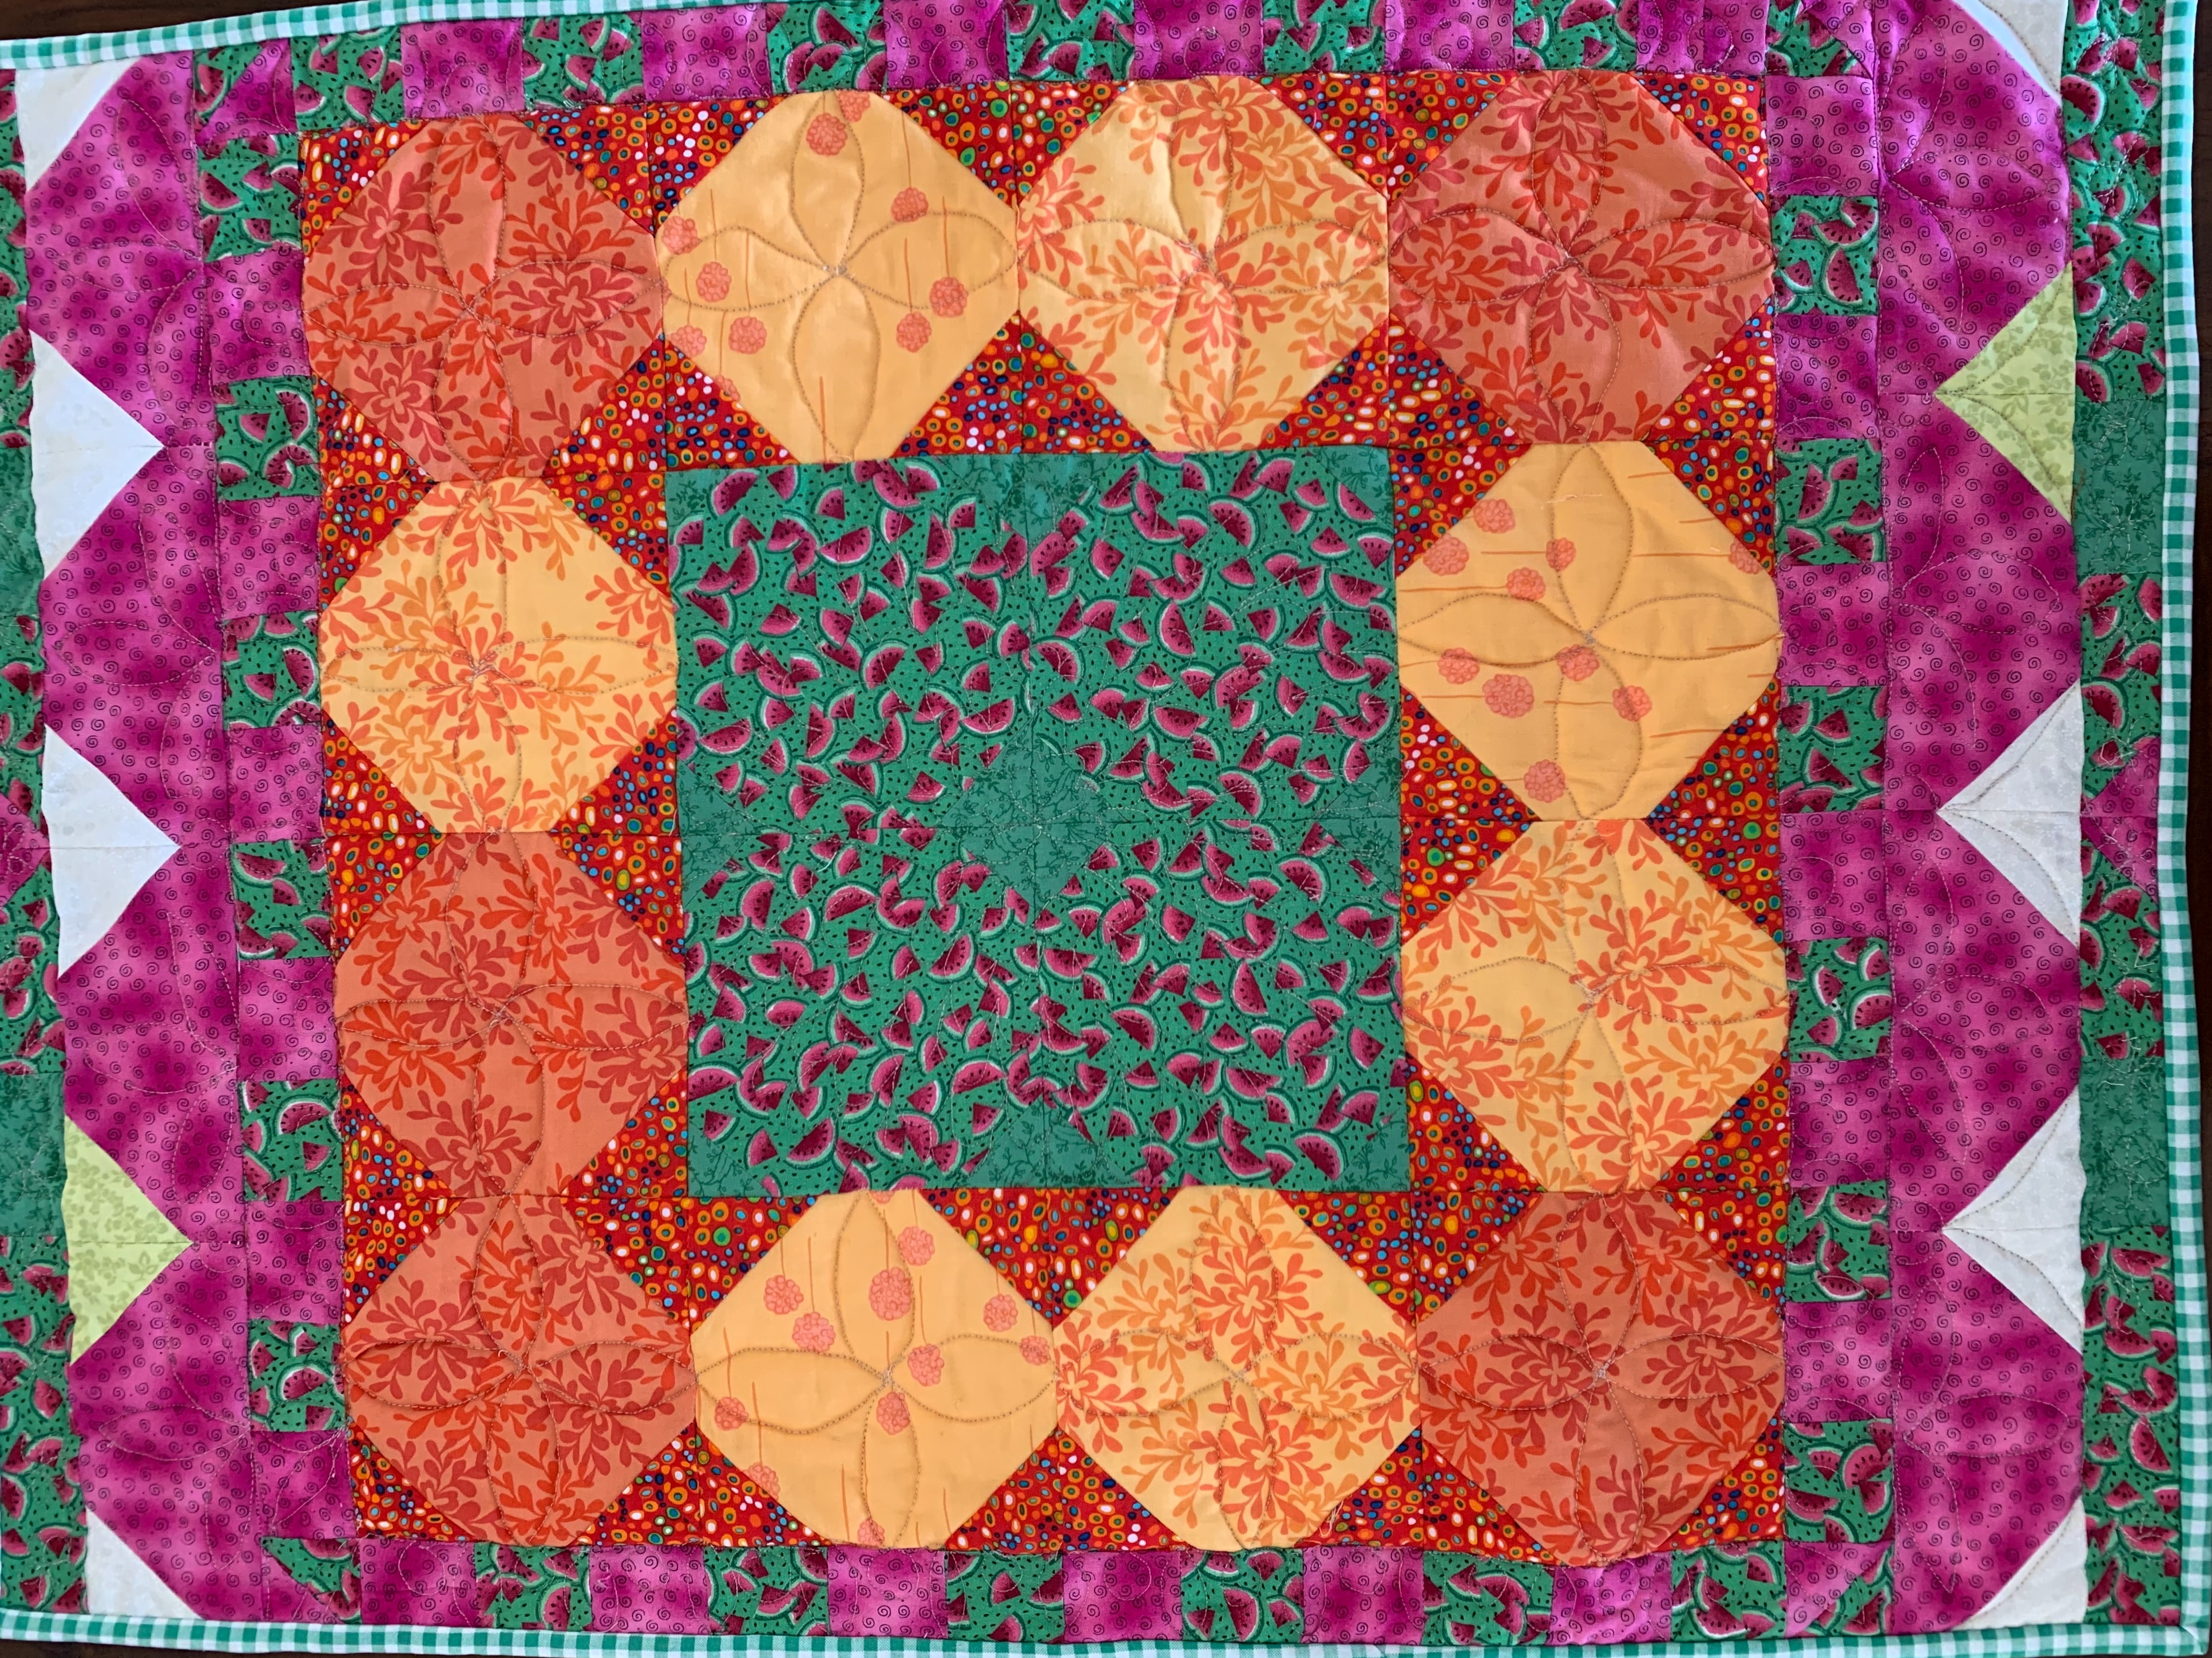
This is what I came up with, If you would like to make a similar one, pull out some of your leftover scraps to make one too!
As always all fabrics have been washed before commencement. As this truly was a scrap project, I will translate it into easier measurements! I am not going to suggest colours or fabrics as you know your own fabrics. The challenge is to make it your own!
Finished size approximately 38 3/4” x 28 1/2”. Please read all directions before commencement.
Requirements for Wendy’s Way Table Quilt
16 of 6 1/2” x 6 1/2” squares for the centre panel (The centre 4 can be in a contrasting colour, like Wendy’s is in green)
144 of 2 1/2” x 2 1/2” contrasting squares for the snowball corners and the borders
4 of 7 1/2” x 7 1/2” squares for the side borders
16 of 3” x 3” light or white squares
Method of Construction
Centre Panel
Take the sixteen 6 1/2” x 6 1/2” squares and 64 of the 2 1/2” x 2 1/2” squares. Draw a diagonal line across the back of the 2 1/2” squares.
To make one Snowball block, use one of the 6 1/2” squares and 4 of the 2 1/2” squares.
Line up a 2 1/2” square exactly on a corner of a 6 1/2” square, right sides together.
Sew across the line. I do suggest doing a test square, reason being, when you fold back the fabric to the corner your 6 1/2” b lock it should still be square. If you find it is a little “off”, try sewing approximately one thread width to the right of the line towards the corner. That should give you a perfect square. Repeat for each corner. Trim off the excess fabric from behind each corner. There is your snowball block. Make 16. Press.
Sew the 4 centre contrasting snowball blocks together. Then sew two to two opposing sides. Follow with a set of four to the other two sides. Ensure your seams are nicely nested. Press.

First Border
Take 48 of the 2 1/2” x 2 1/2” squares to make the first border. Sew two sets of 12 and two sets of 14. Attach a set of 12 to two opposing sides. Then sew the two sets of 14 to the remainder sides.
Second Border
Use the four 7 1./2 “ squares and the 16 light or white squares to make four more snowball blocks as described above. Sew them into a line of four. Press. Now cut exactly through the long centre to make two halves. Place one on each of two opposing sides of the panel with the white areas pointing out. Pin right sides together and stitch on. Press open.
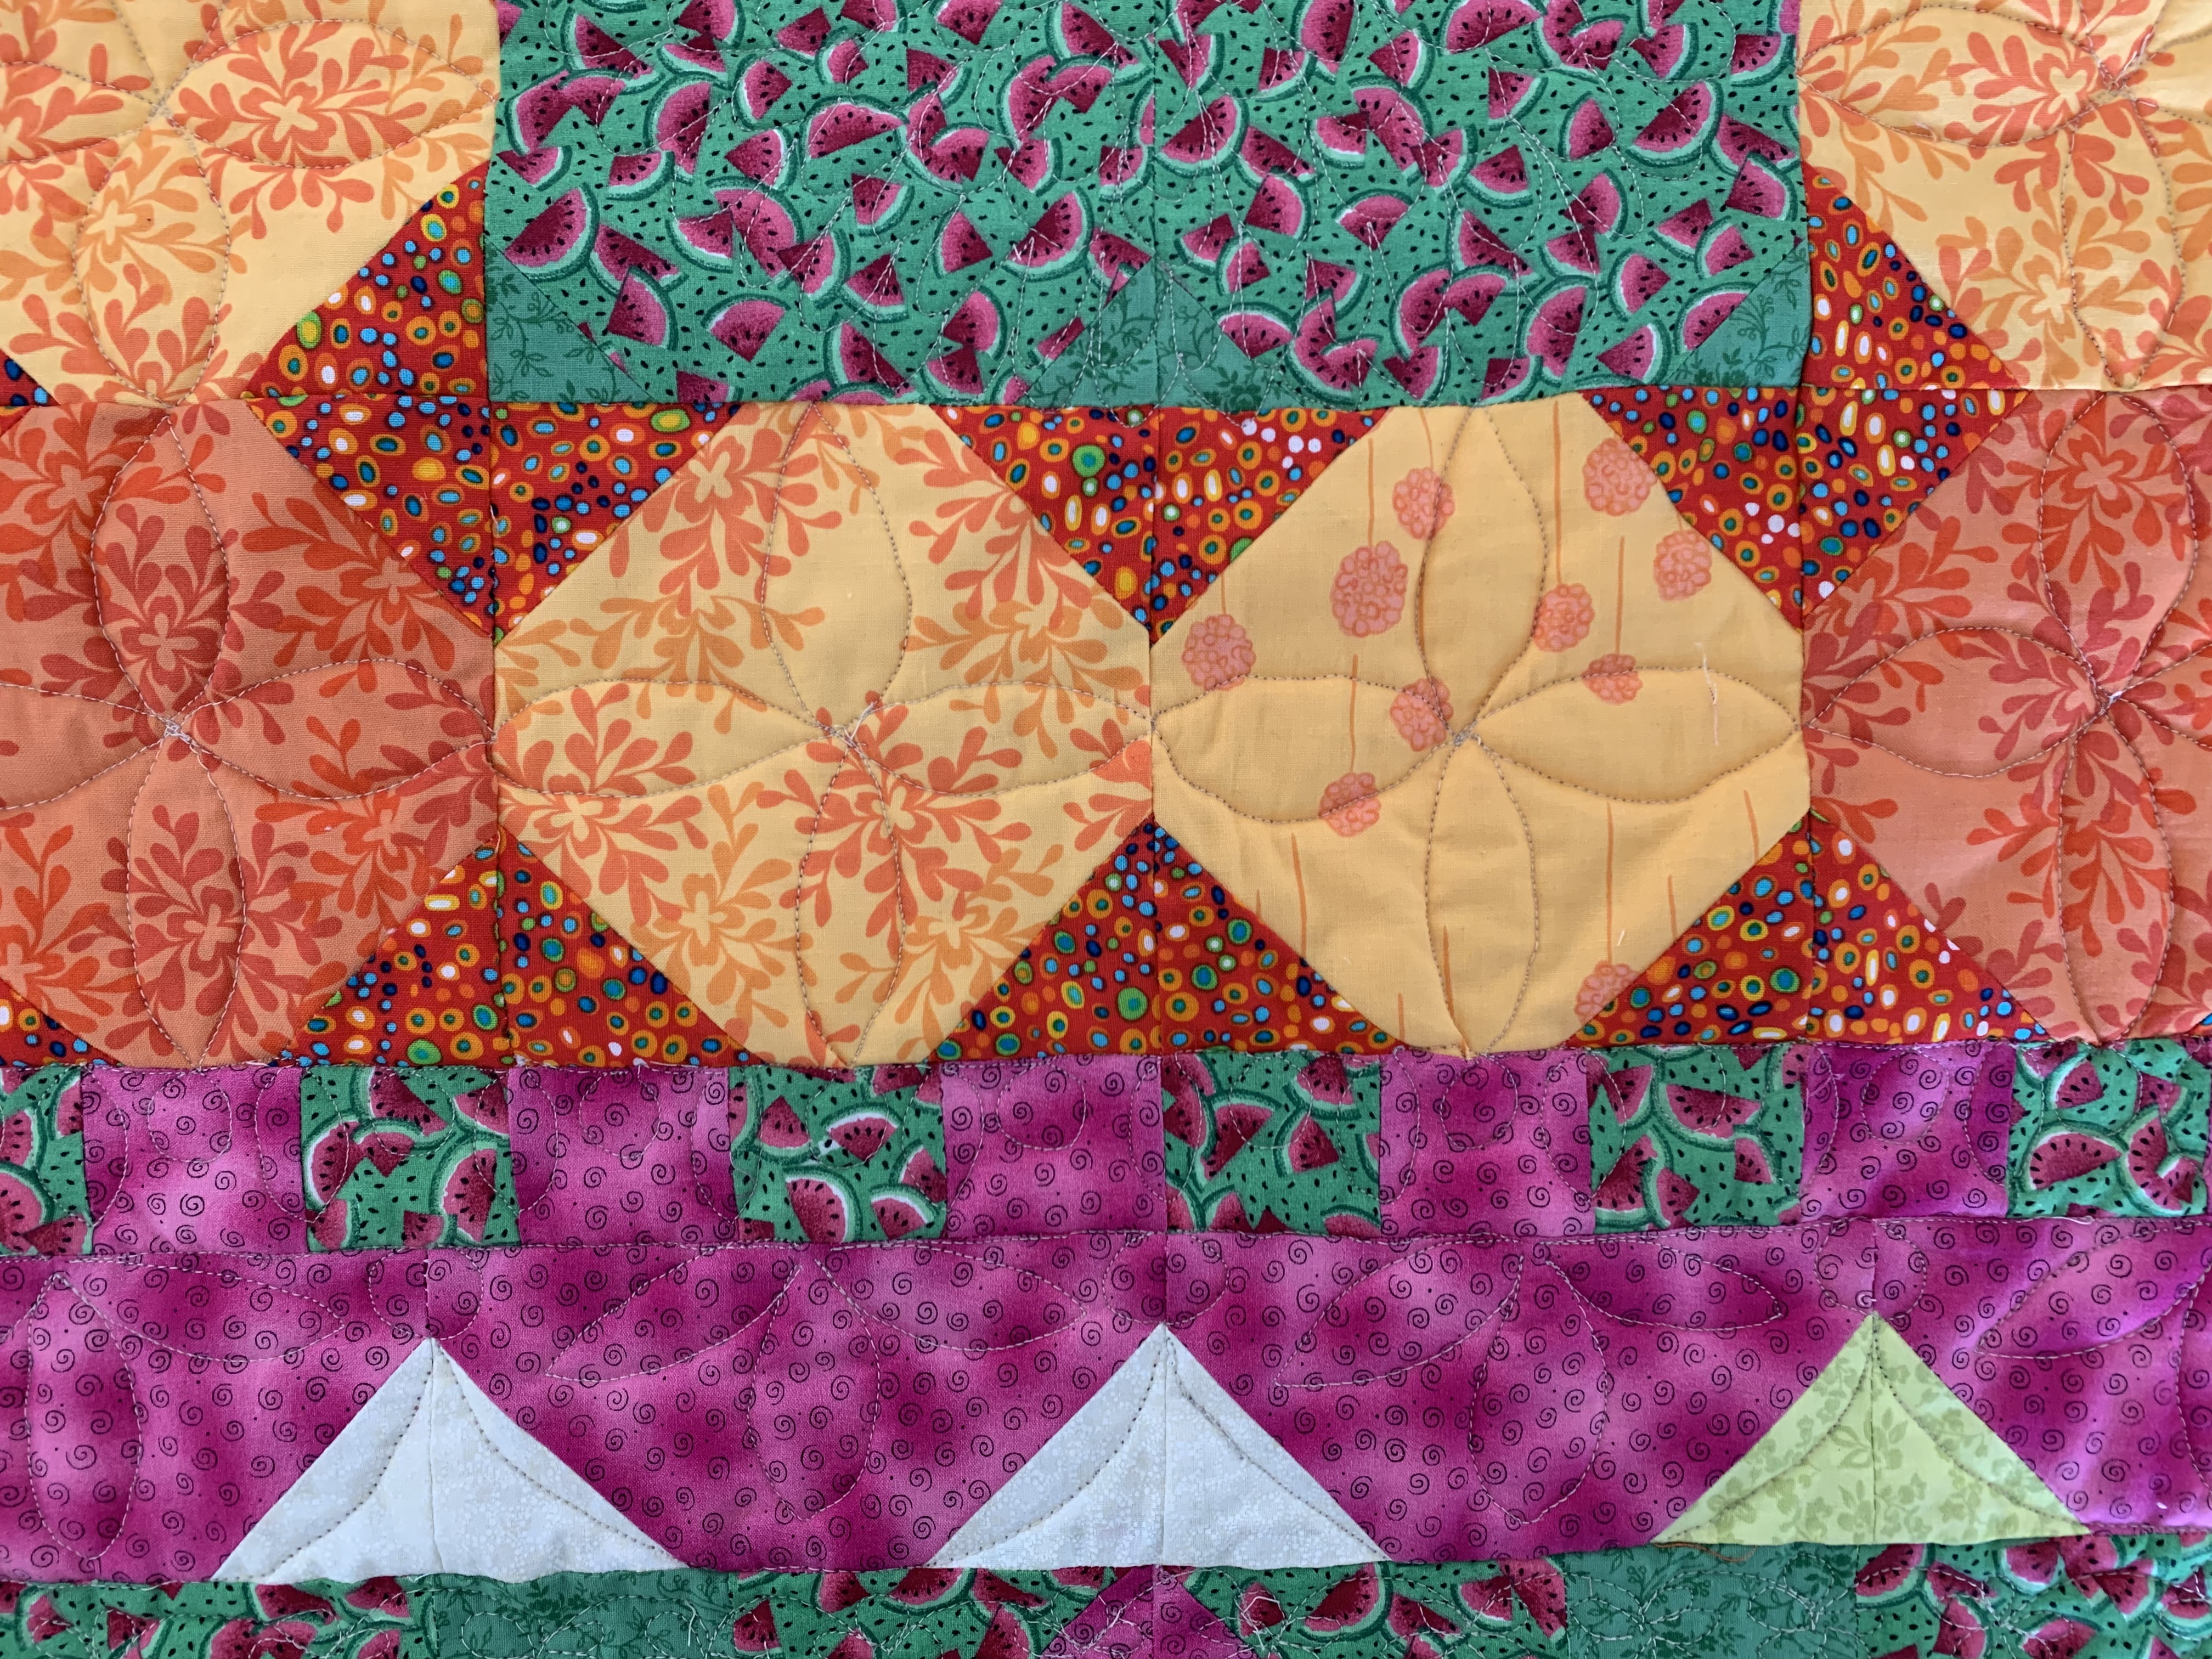
Third Border
Using the remainder 28 of 2 1/2” x 2 1/2” squares, sew them into two lines of 14 each. Attach each line to the two short sides of the table quilt to finish.
Quilt and bind as desired.
Happy days. If you enjoyed this post you may also like it’s precursor,
Or
Christmas Stars Table Runner and Pattern
Are you looking for a super quick project?
or speaking of happy days, you might just like this…which would be an excellent accompaniment!
Happy Day Microwave Bowl Holder Pattern
Enjoy your sewing, all the best,
Susie