
Making a Mystery Quilt – Part 2
Hello Dear Friends and Readers and a warm welcome to today’s post. Welcome to susies-scraps.com Thank you for joining me today. Here is the update on the Bonnie Hunter Lupine and Laughter Mystery Quilt which I started in the previous post. Making a Mystery Quilt
A New Year Finish
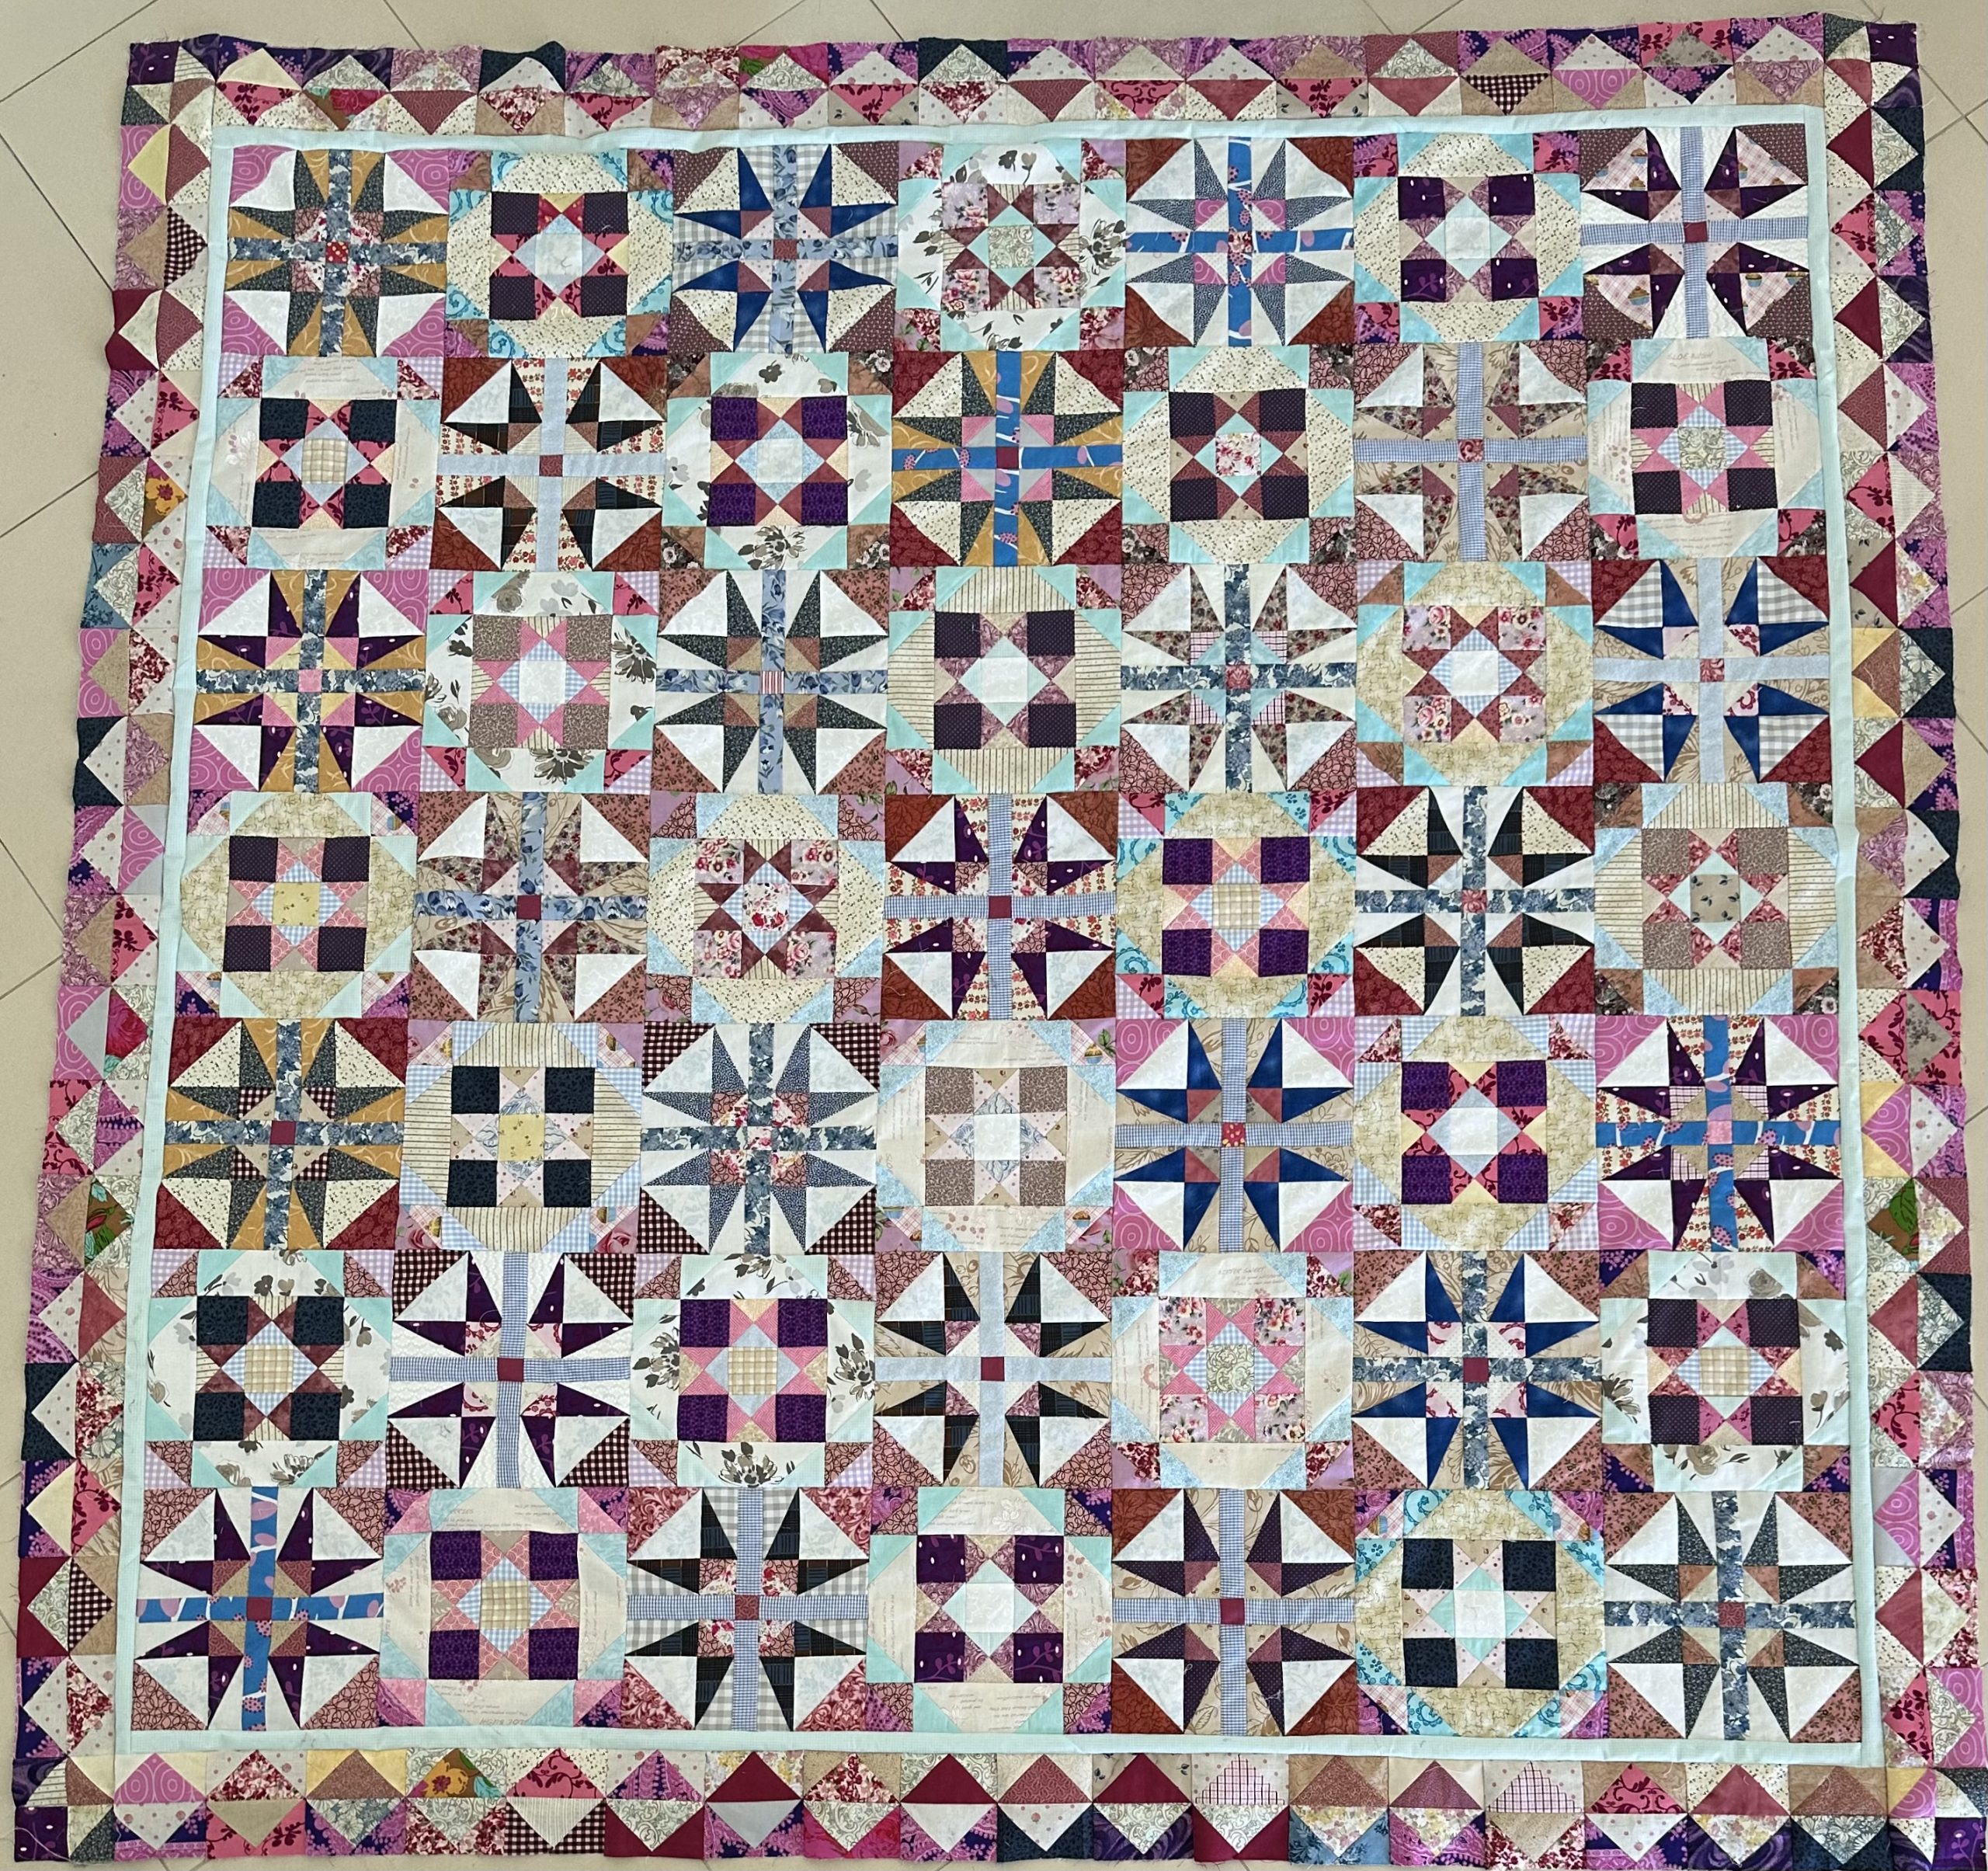
Today I will share the finished quilt top. I am happy that I have finished the top and January is not yet done, so I can go back to my own projects which I am working on and the next finish will be Scrappy Diamonds Kaleidoscope Beauty Star Medallion Quilt – Part 3 and I will continue with my hand quilting project which is this quilt Pink Streak of Lightening Baskets Quilt and Pattern – Antique Inspired – Part 3
Cleaning up the Sewing Space
I am glad that I participated in the mystery. I really did manage to clean up a lot of loose scraps (quickly becoming dust collectors) and try to get to the bottom of my cutting table area, for which the working area was slowly shrinking….. not good. As much as possible, I worked from that pile. This was good, because I cut extra strips and squares from the left over left overs as I went along and this surely is inspiring in itself. The possibility of further inspiration and other projects shines from the neat piles. Cut Up Your Quilting Off-cuts
The Joy of Surprise
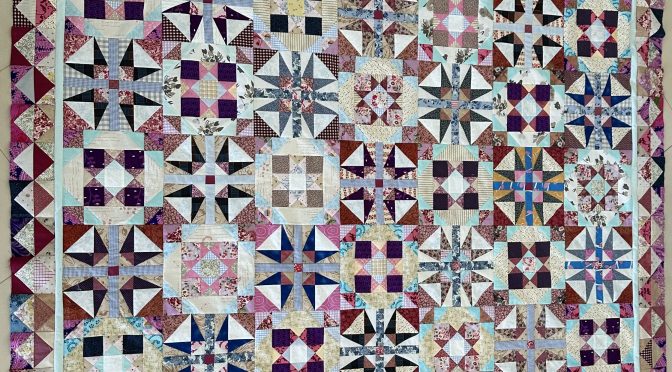
One interesting past of the construction which surprised me was the elongated triangles which are traditionally used in the Storm at Sea quilts. Secretly, I have never really warmed to those triangles. However, I was surprised that I actually really enjoyed making them, once I got into the groove. And I think they turned out particularly pretty and i believe that most of the points are pretty much intact!
Pressing and Trimming
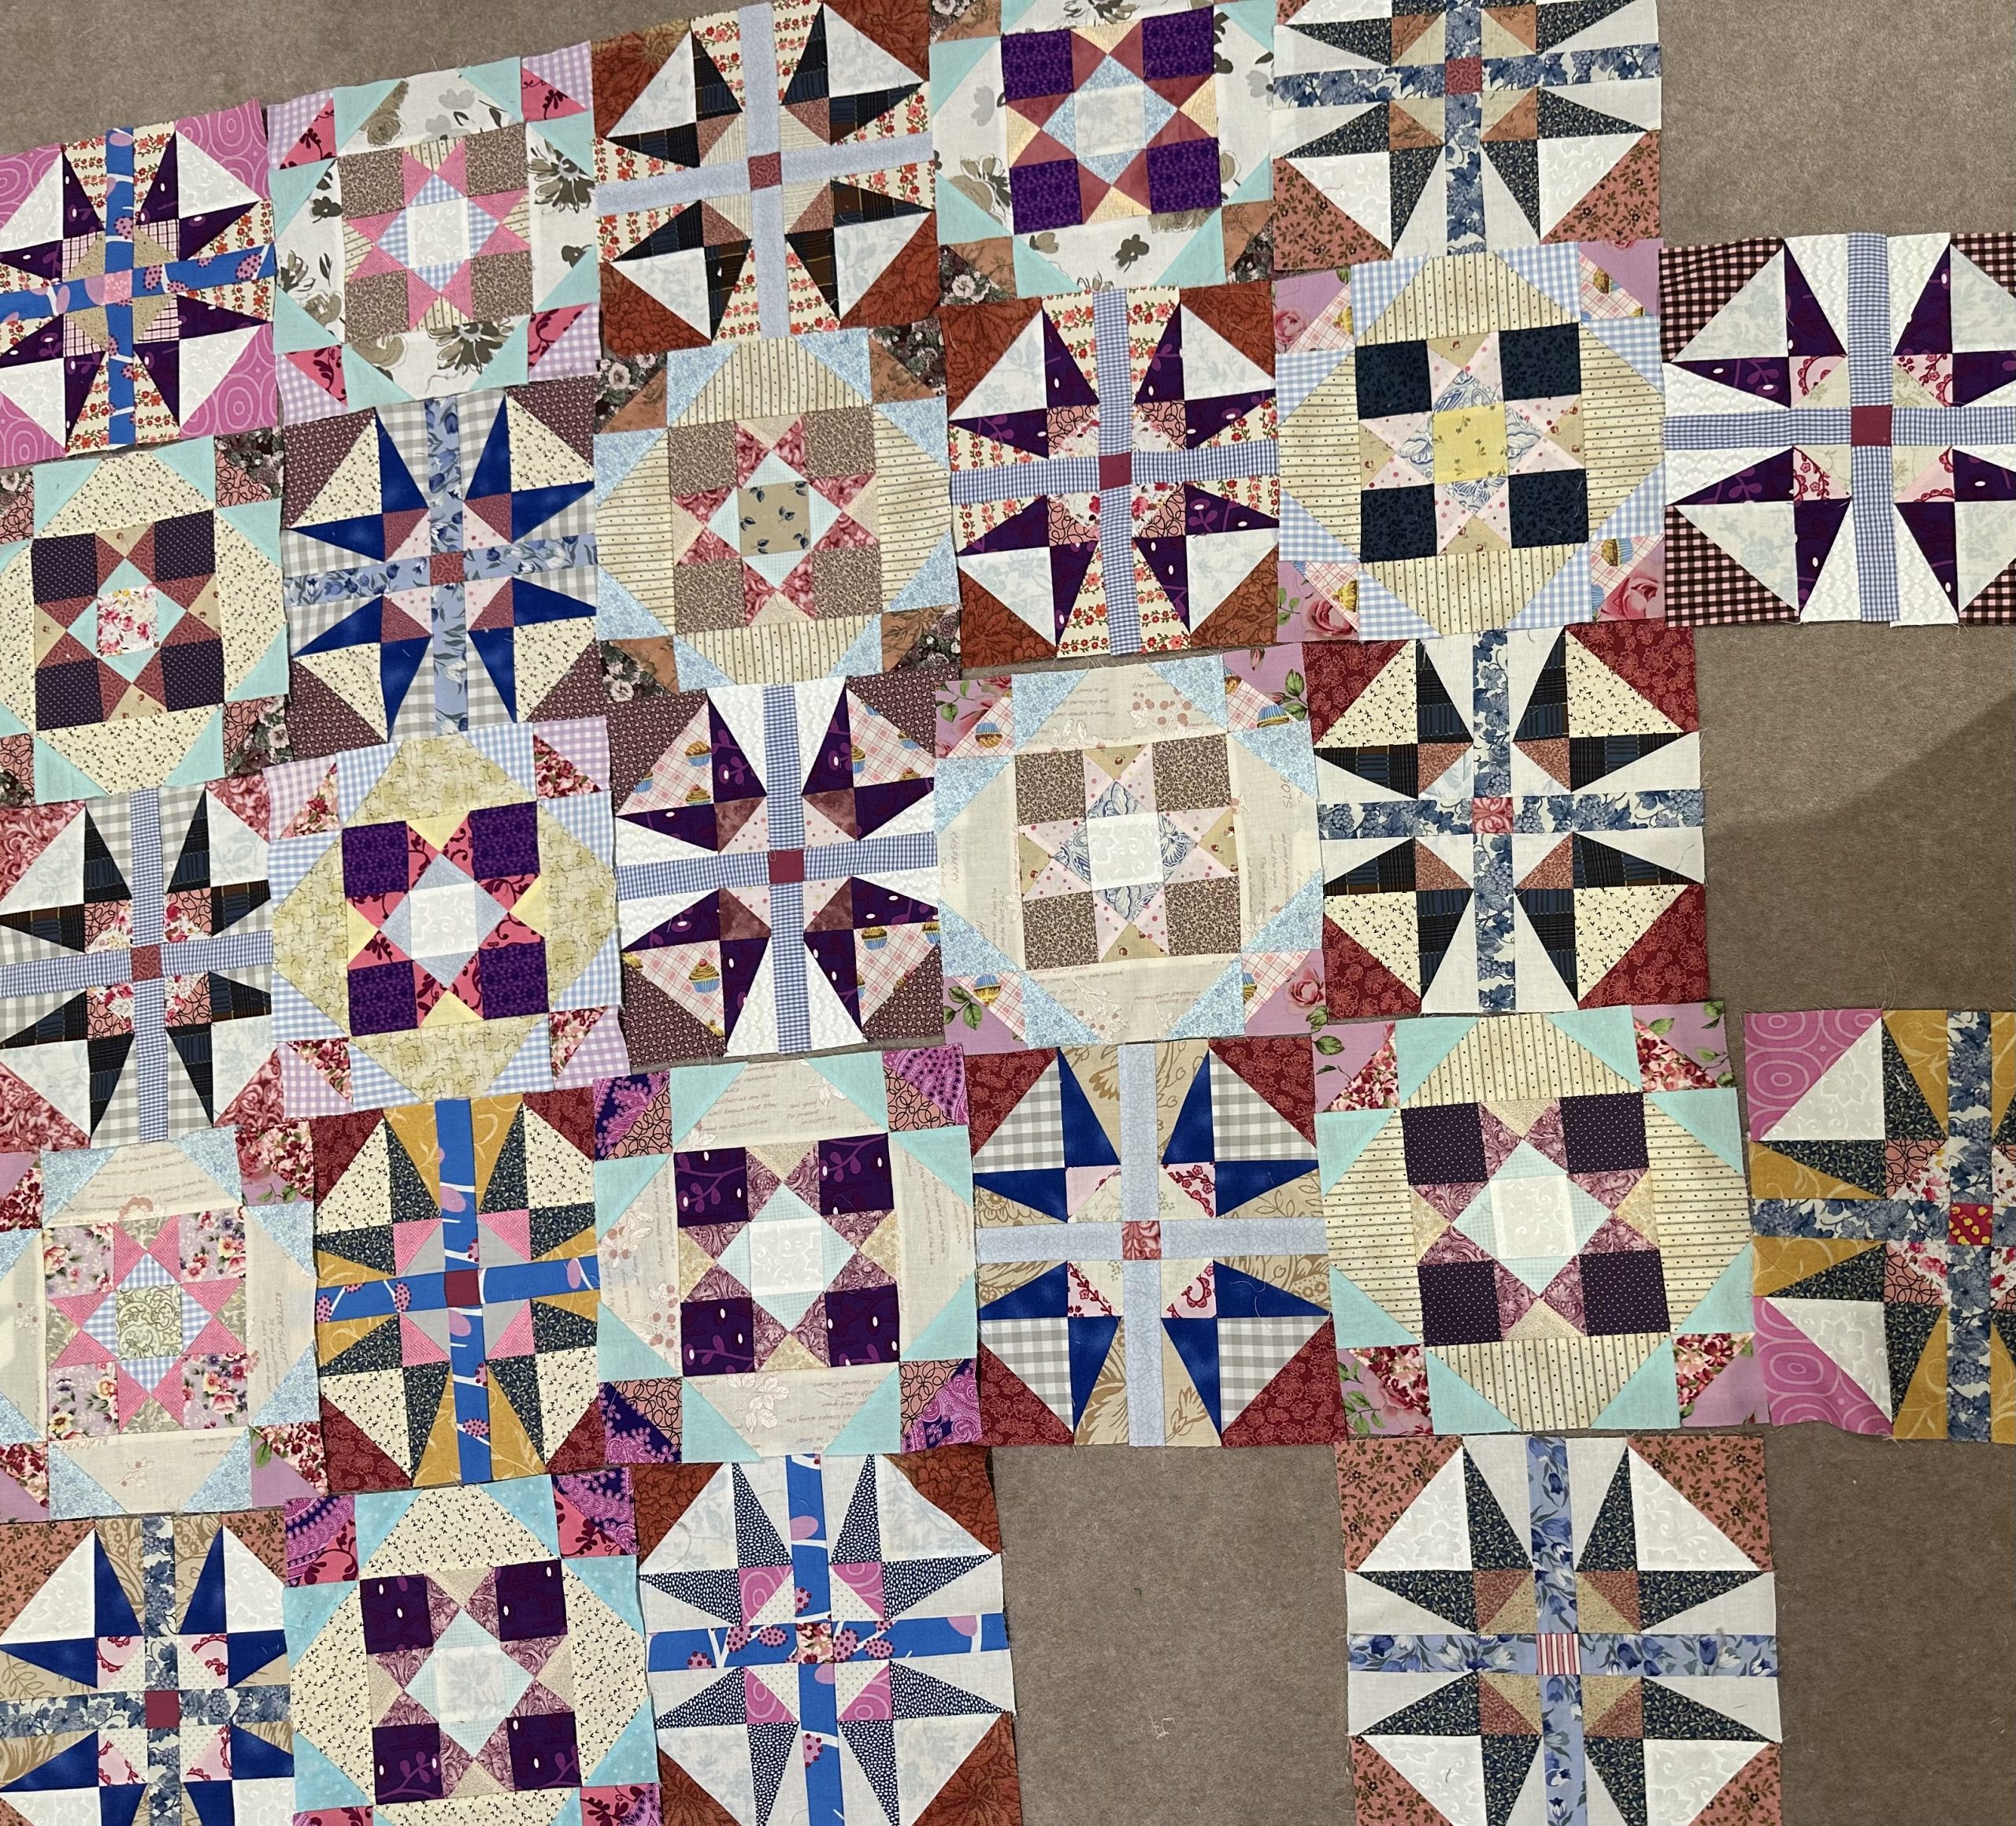
Much of the time was spent pressing and trimming. This often did not seem onerous, as when one cannot see the whole picture and is concentrating on the clue at hand it was not as overwhelming as looking at the 2300 + pieces.
Putting the Blocks Together
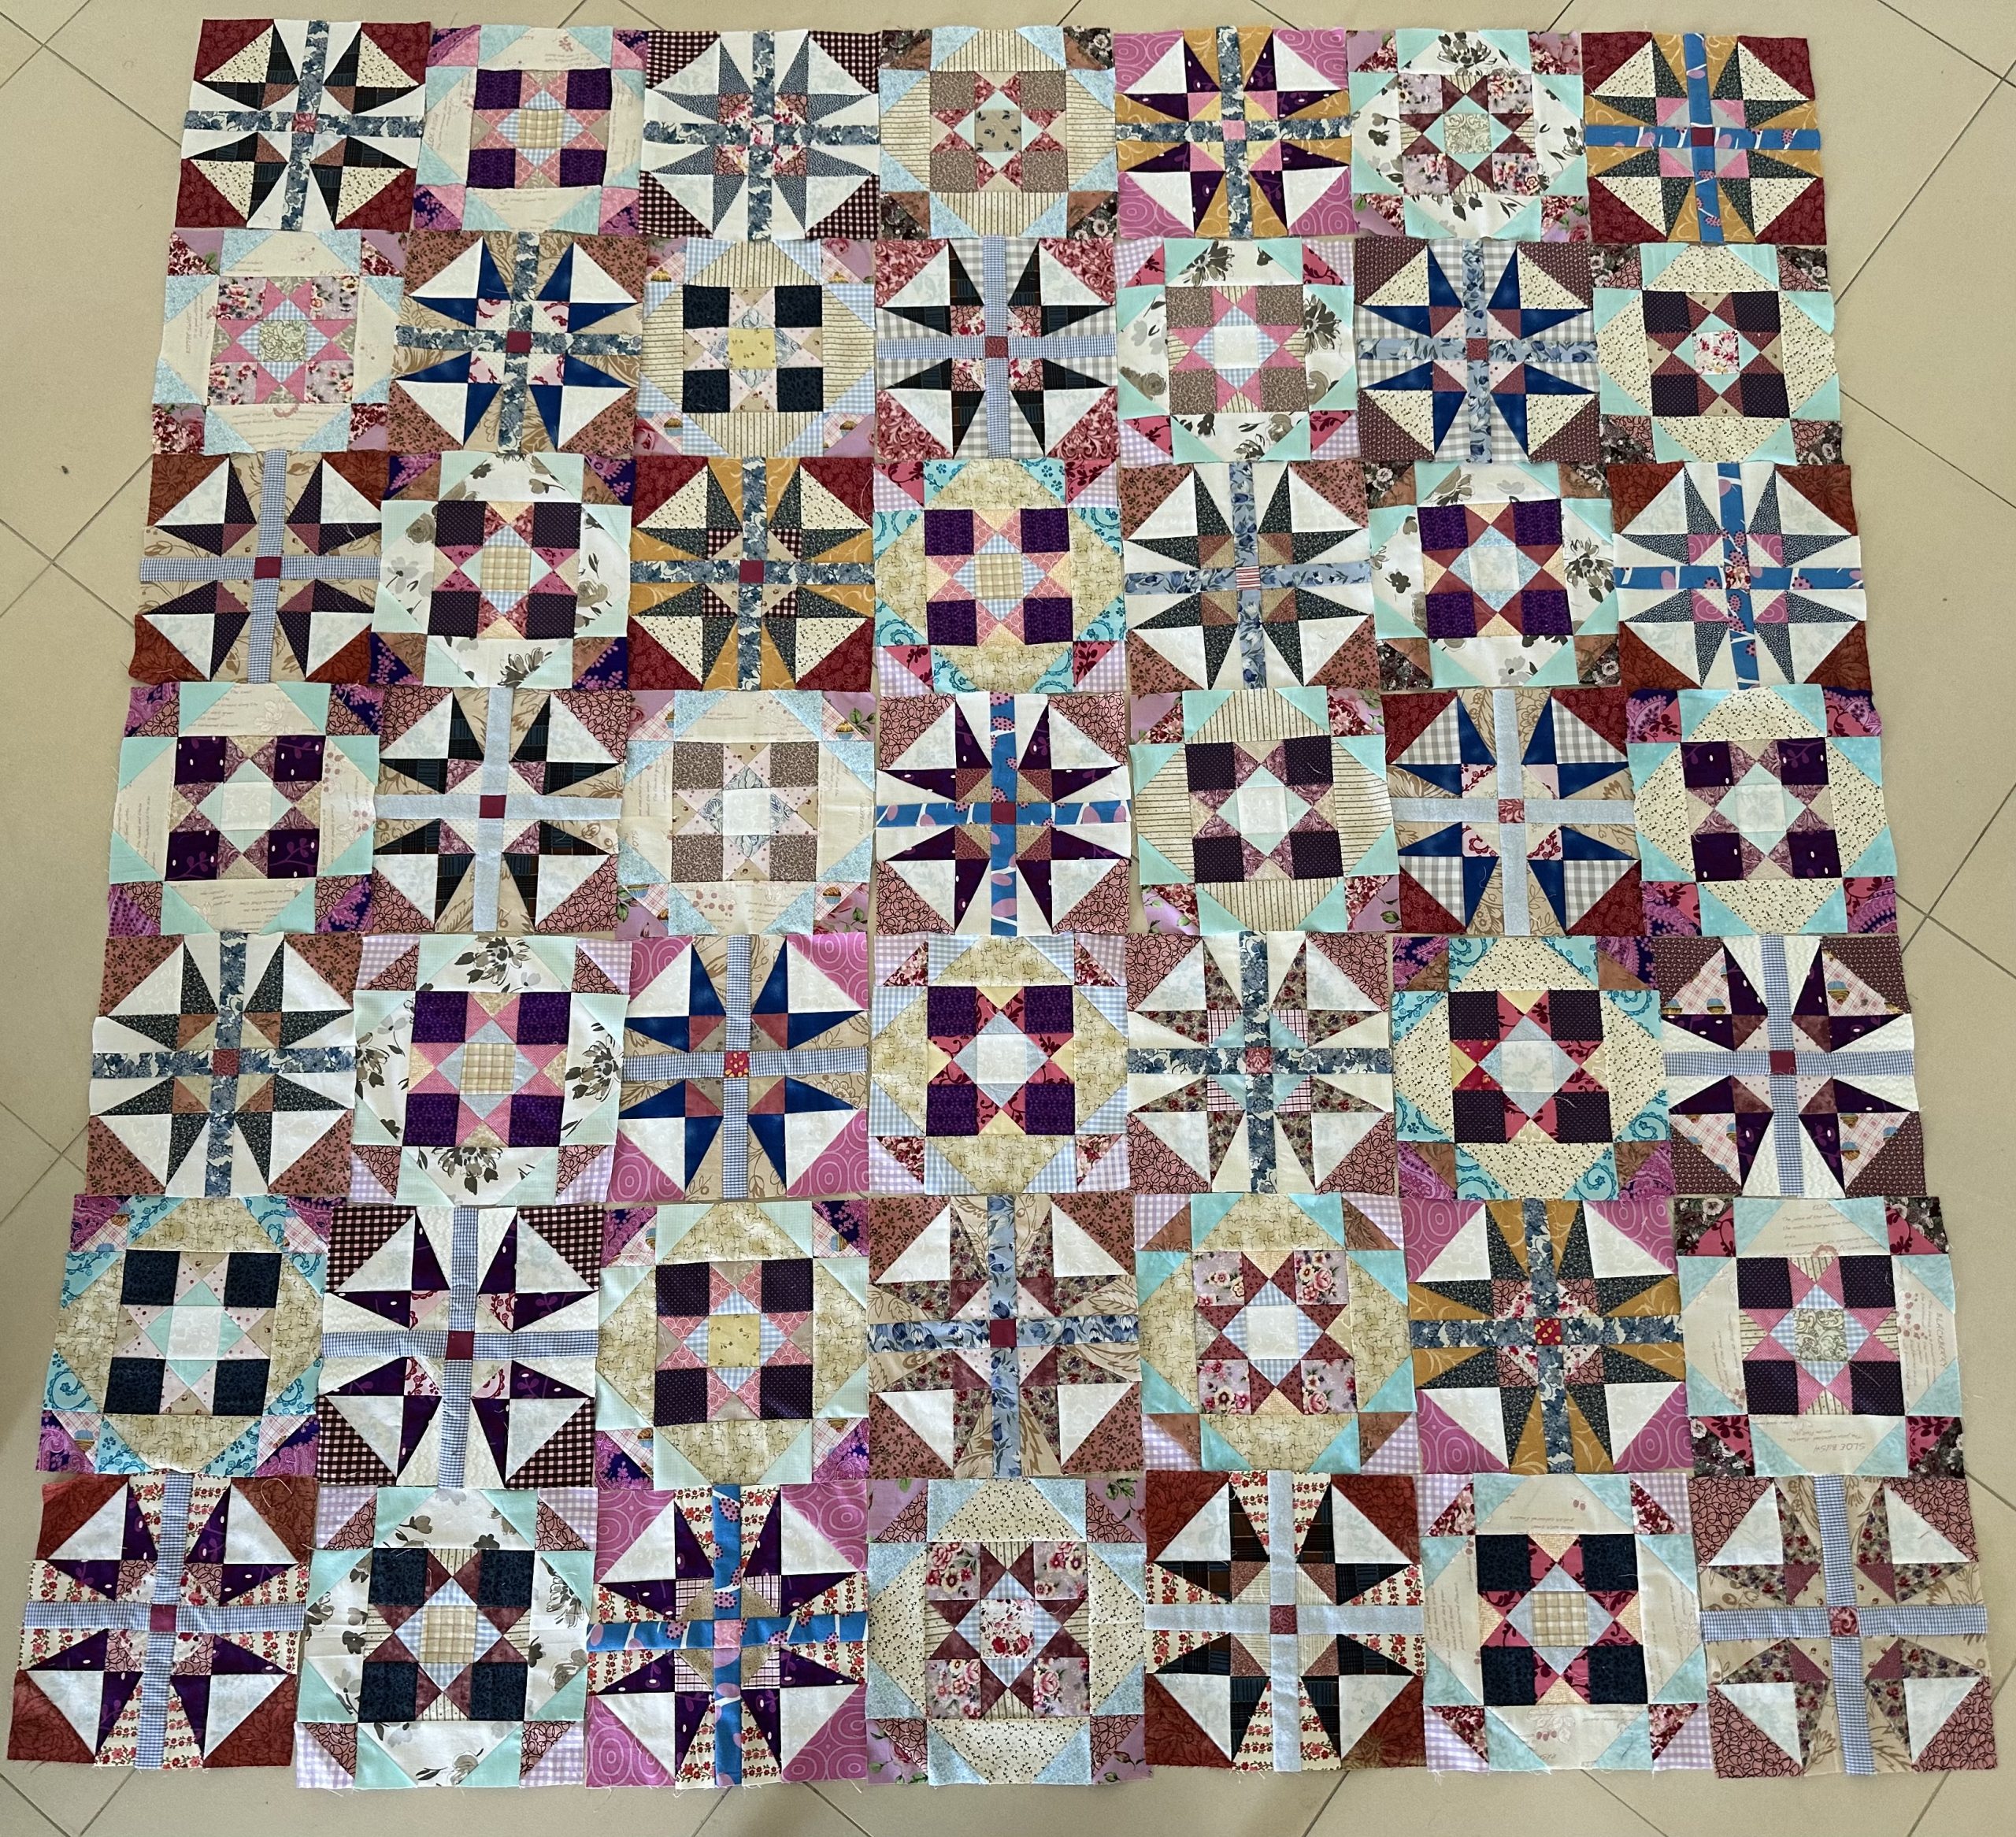
As there was no sashing and the two blocks were quite different, putting the blocks together was pretty simple because there was minimal seam matching. This certainly was an advantage. I am most happy that I worked from my scrap pile. One thing I noticed when I was putting the blocks together is that I had used quite a few recycled shirting fabrics, because they had fitted the colour requirements. I believe in the end, using the scraps, rather than trying too hard with fabric or colour matching really makes the quilt “sparkle” a bit more. In a couple of the blocks I used a floral stripe and from the distance those seem to shimmer. I will do that again in the future. These are things which one can notice from the distance when it all comes together. Standing back away from the finish to view the whole, much like an impressionist painting the colours and patterns dance. Being too close does not give the same appreciation. Therefore, it is good to trust your scraps. They give surprises. I saw that this in this quilt Log Cabin Free Motion Quilting
Adding the Borders
I like the border, it does give a nice finish. These were simple to add as the blocks had been made early in the mystery.
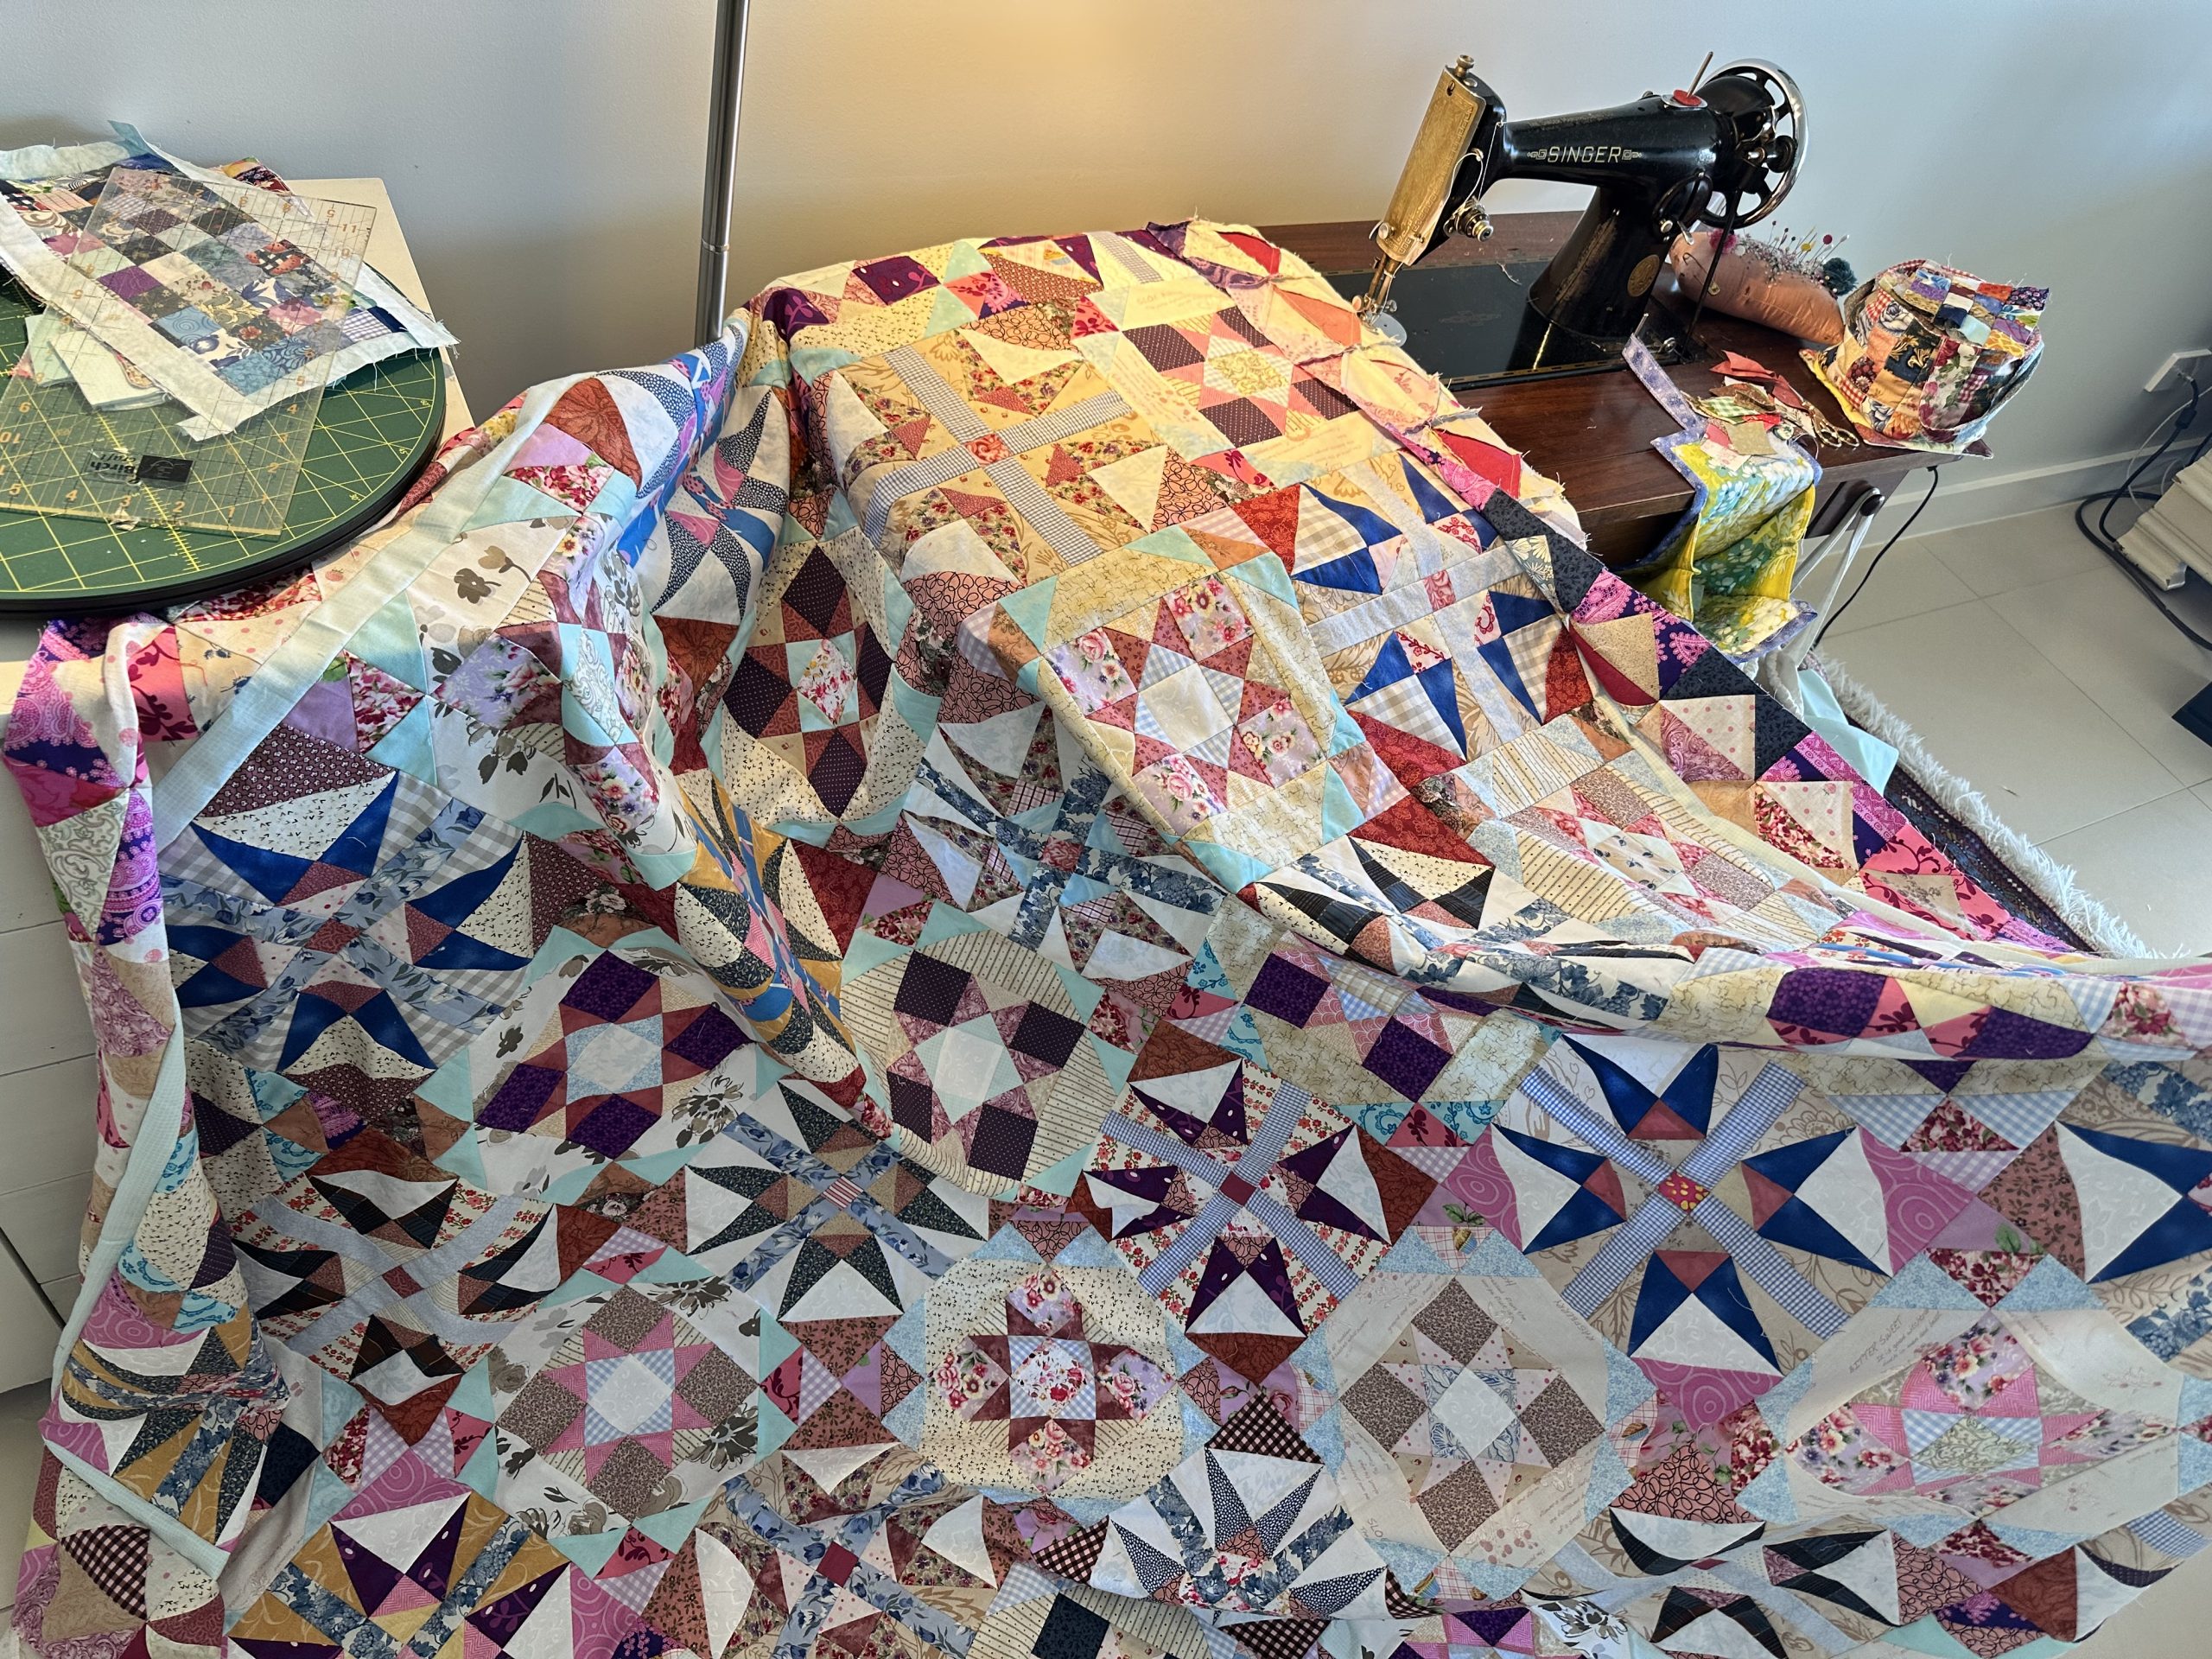
It is January, but anytime is a good time to get the sewing space cleaned up and improve motivation. So here is the finished quilt top. It measures approximately 80” square.
I should mention that this was all sewn by treadle. Singer 201K Treadle C1947
If you enjoyed this post you may also like The Arrowhead Quilt Block Made Easy and Crossed Canoes Quilt Blocks
Please feel free to share your experience or opinion in the comments.
Happy Stitching,
Susie
© Susan Stuklis 2026