
Diamond Star Quilt Block Made Easy
Hello Dear Friends, New Friends and Readers, welcome to todays post. Christmas is coming and I have a great block for you to enjoy! I had a lovely question from Mary who asked if I had a pattern which was like the Crossed Canoes block but with a solid centre and more like a star.
Well I went back to my post, Crossed Canoes Quilt Block Antique Inspired Made Easy
Well, at first I thought, nooo, this will be a bit trickier and need some hand piecing but that’s not the case. In fact this block will be easier to complete than the Crossed Canoes Block. Easy to cut. no templets or special equipment is required. And when I thought about it , this would also make an awesome patriotic quilt design too. So, what do you think, are you interested? If so come along on this quick block journey with me.
This is essentially a four patch type of block and also a Four Pointed Star Block.
As Christmas is rolling in soon, I am going with Christmas colours.
Block size approximately 8” x 8”.
All seams based on 1/4 inch.
Requirements for One Diamond Star Quilt Block Made Easy
2 of 5” x 5” red squares
2 of 5” x 5” green squares
1 of 1 3/4” x 1 3/4” cream squares

Marking the Squares for Cutting
Stack the 4 of 5” squares neatly and exactly on top of each other.
From the bottom right hand corner, make a small mark 1 1/2” exactly from the corner on each side. on the opposing left top corner make a mark 3/4” from the corner on each side.
Placing your quilting ruler on the diagonal between these two corners, make a mark 1 ½” from the bottom right hand corner.
Five marks in total. I used a permanent marker.
Cutting the Pieces for the Diamond Star Quilt Block Made Easy
Place the ruler between the top left corner and the bottom right mark. Cut along that line. do the same for the opposite mark to the corner.

Keeping all the pieces in place cut across between the two left hand corner marks which are 3/4” away from the corner. Discard tose little pieces. Now move the pieces apart. Cut across the lower part of the centre piece at the marking which is 1 ½” from the base.
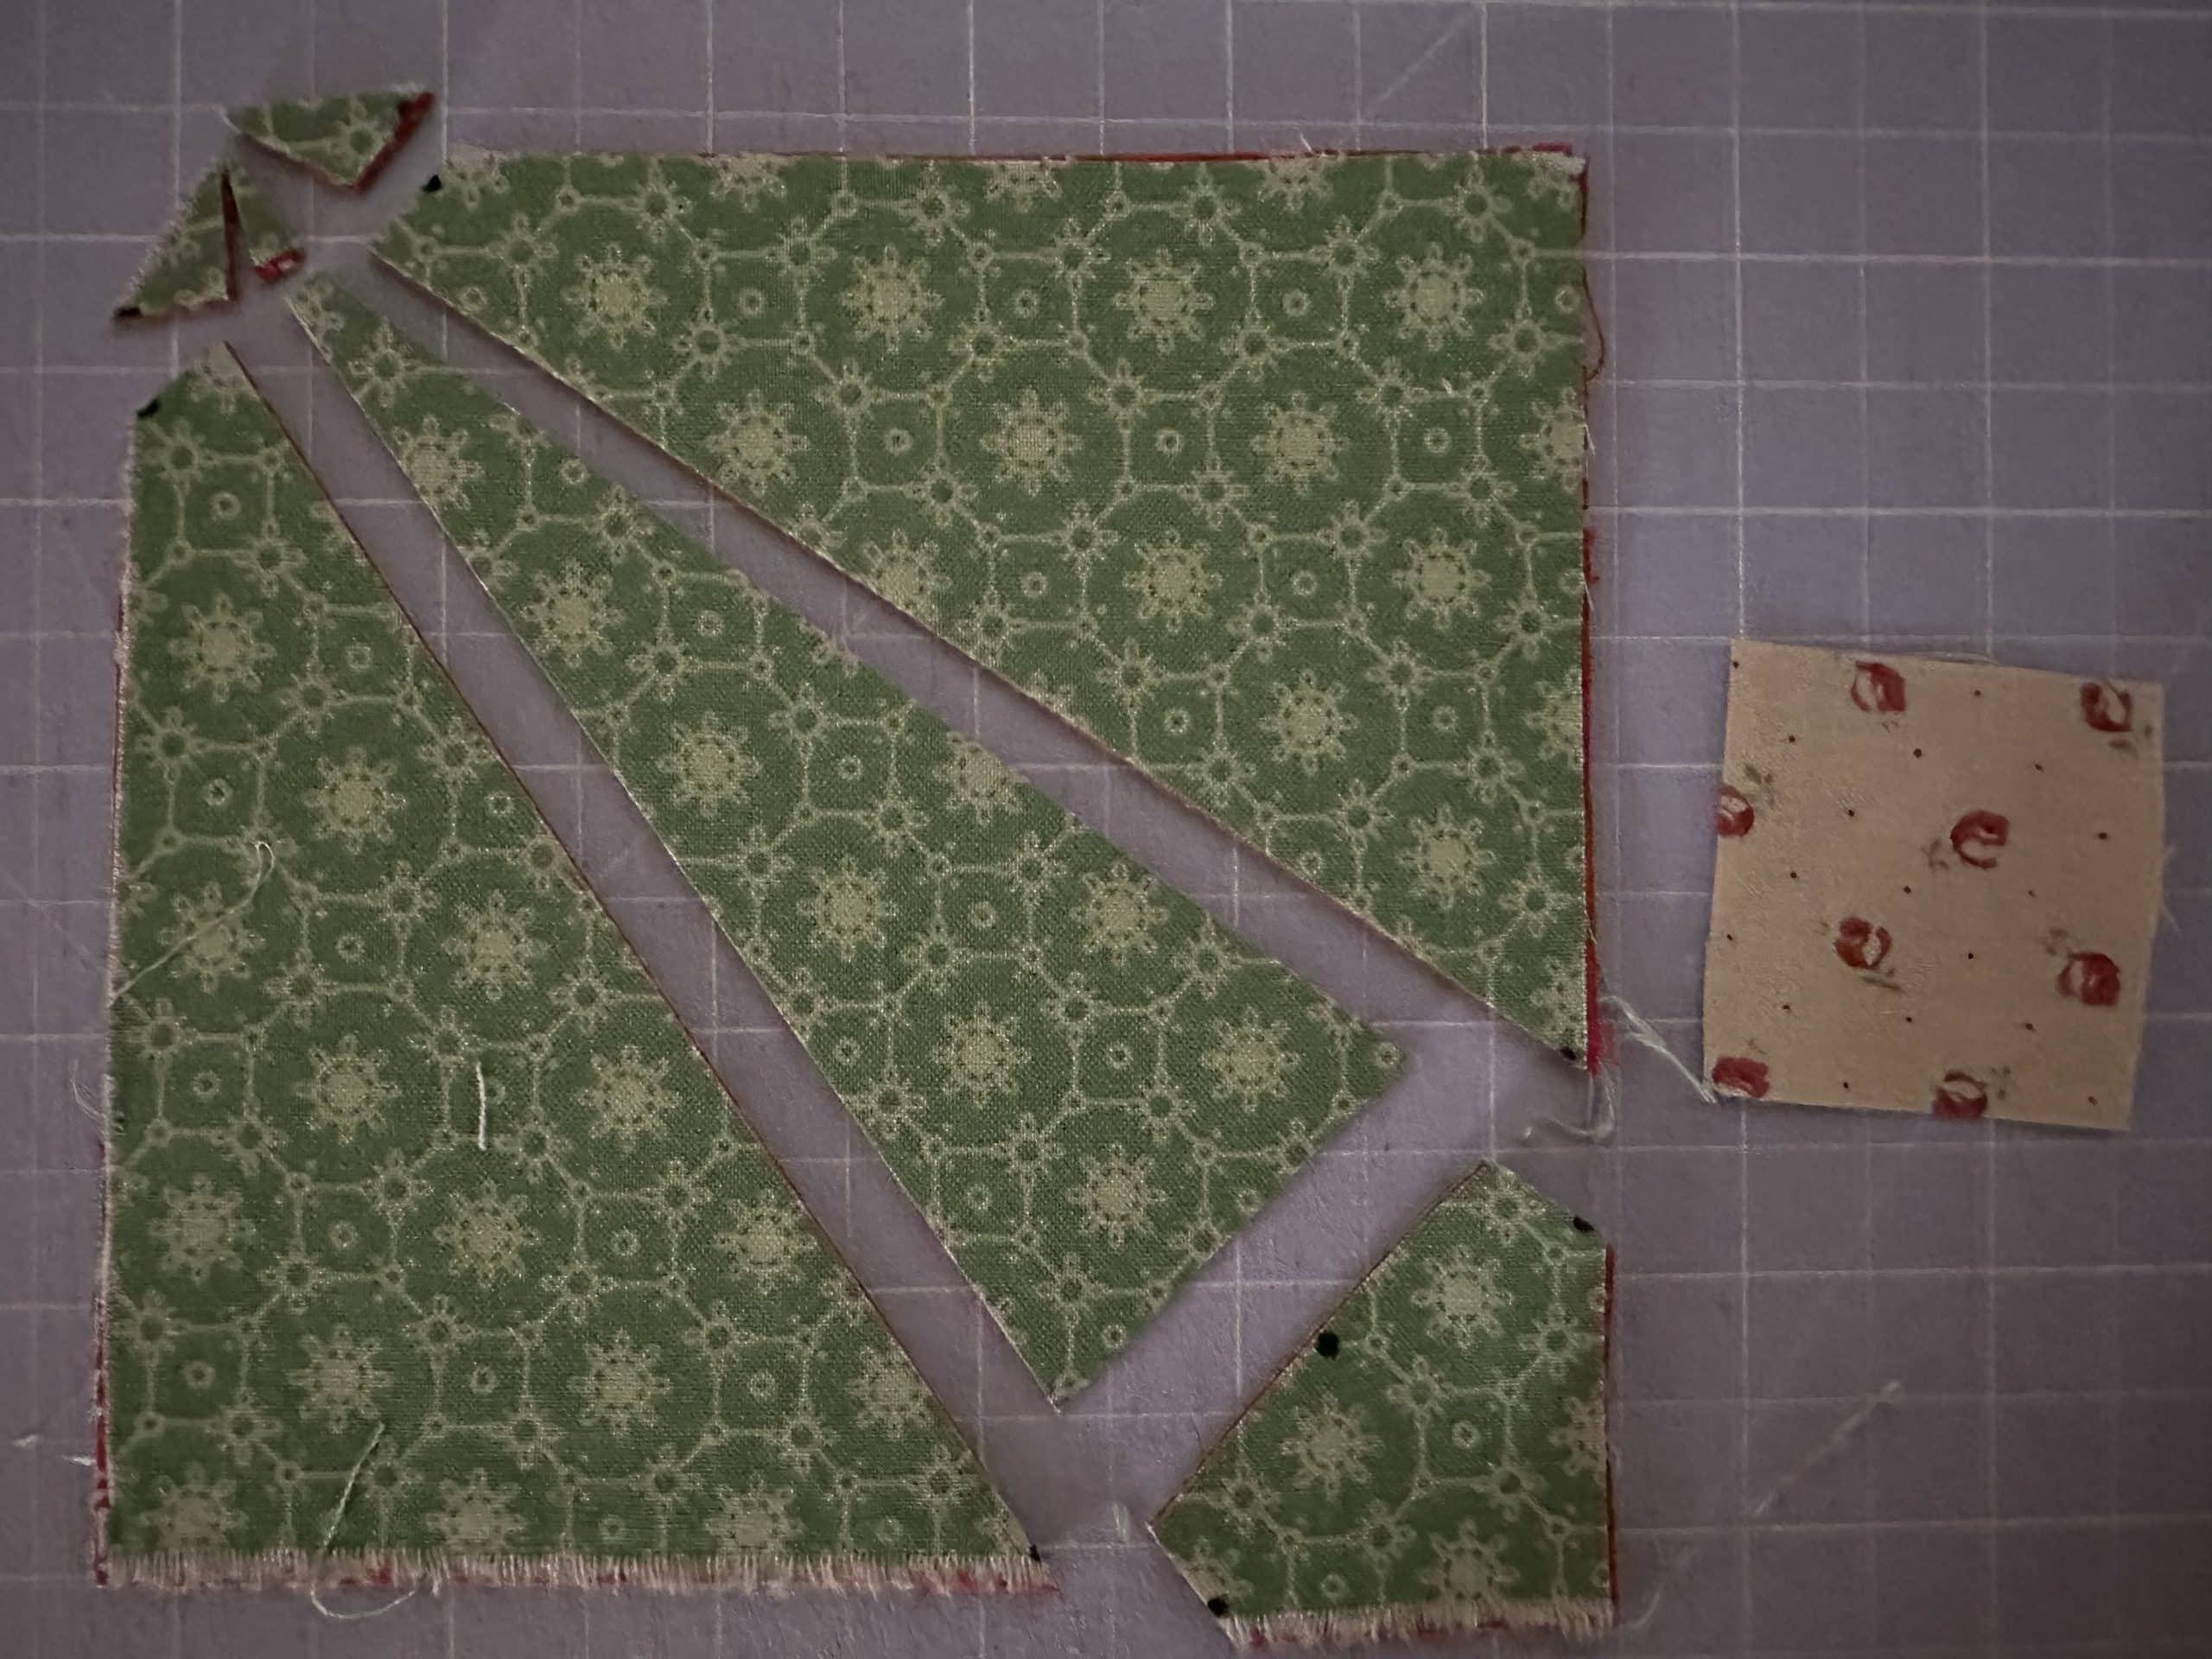
Remove the 4 bottom right corner pieces. replace with the single 1 3/4” square as pictured below.

Undo each stack of four pieces and interchange them around the centre square so that it resembles a four pointed star with the two colors opposing for each square of the block, as pictured below.

Constructing the Diamond Star Quilt Block Made Easy
With right sides together sew the centre seam of each of the four side triangle sets. each triangle set will have one red side, and one green side.

With right sides together carefully pin the the green centre star point to one side of a side triangle set. Note that the bottom right corner will slightly overhang the bottom of the two triangle set so that when it folds back it will be in line with the base of the two triangle set.
Sew the two red star points to the centre cream square. We will call this the red centre star point strip.

Tip
After sewing, fold back and finger press, the green centre star point. Note that the bottom of the star point lines up with the base of the triangle set. Use your rotary cutter and ruler or small scissors to remove the small excess fabric at the top of the star point where it joins to the side triangle set. I have marked this area with black texta or sharpie in the image below. Make sure to do this for one side of each of the star points to remove excess fabric from the corners of the block.

Attach the next side triangle set to the other side of the green star point. Finger press to open. Repeat for the two side triangle sets green star point on the opposite side, See image below.

Carefully pin the long red center square and two star points two to the green star point and side triangle sets, ensuring that the center square perfectly lines up with the green star point. These seams should nest around the center square. Remember to remove the little excess fabrics at the at the points.

Repeat to attach the other whole side of the block to the opposite side of the red centre star point strip. Make sure to pin carefully before sewing.

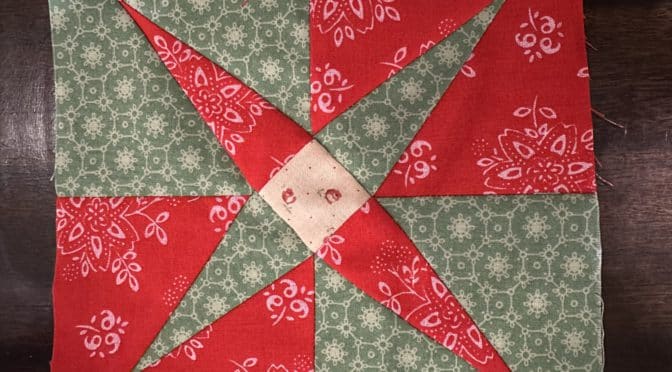
Open out the block and press to open fully. Here is how the completed diamond star block should look.

Thank you for joining me today for this Diamond Star Quilt Block Made Easy.
if you enjoyed this post, you may also like,
Stitching by the Pool – Six Pointed Stars Antique Inspired
The Arrowhead Quilt Block Made Easy
Crazy Little Strings – Diamond Charms Quilt Block and Tutorial
Starmania Trip Around The World quilt challenge
Yankee Puzzle Block Made Easy.
Happy sewing,
Susie
© Susan Stuklis 2022
What a great block! Thank you for the tutorial to make it much easier to put together!
can you sale the pattern /love to bye it. thanks
Dear Cecilia,
Thank you so much for your lovely comment. The pattern/ tutorial is free. Just follow the instructions in the link to make the blocks. Everything on my website is free. Feel free to message me if you have any issues.
Best wishes to you
Susie
Thank you so much for a fun and different block patter!
I was intimidated looking at that block. You really showed us a simple way to make that block. Thank you so much. This block would definitely be a good block for a patriotic quilt. It would also be wonderful as pot holders or a pillow. I have so many ideas running through my head right now for this block. Thank you, thank you, thank you!
Thank you Amy! So glad you are feeling inspired!
Thank you for the tutorial for this one. I’m going to make one of these blocks as its so interesting!
Fantastic!
Love it, thank you for sharing ⛄🎄🧬