Six Pointed Hexagon Stars Antique Inspired Part 2
Hello Dear Friends and Readers. Welcome to today’s post and a very warm welcome to all my new subscribers. Although I still love machine stitching, today I would like to share the progress of my current hand sewing project. I should explain that I really like to have a hand sewing project on the go at all times. Even if I do not touch it for quite a while it doesn’t matter. This is slow stitching. This is therapeutic stitching. It is something to take with you when you are not at home. That may be a holiday or a visit to friends or family, road trip or something as simple as waiting in the car to pick someone up or waiting at an appointment. It kind of goes with that old adage “A stitch in Time Saves Nine” and although that can mean to fix something while it is a small problem it can also mean to create something a little at a time and eventually it will be something that otherwise would have been nothing.
I began this project last year, which I entitled Stitching by the Pool – Six Pointed Stars Antique Inspired.
If you love the look of antique style quilts then you may like how this is coming along.
It is a good project to use up jelly rolls or strips from your stash.
Let’s get to it.
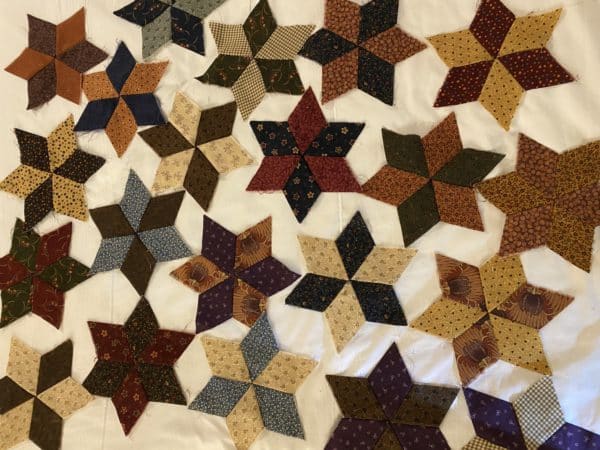
In the previous post I had shown you how I was using some scraps to make these stars.
Now I am adding the next round of diamonds to the stars.
Requirements for a Six Pointed Hexagon Star Antique Inspired Part 2
One of the Previously made Six Pointed Stars
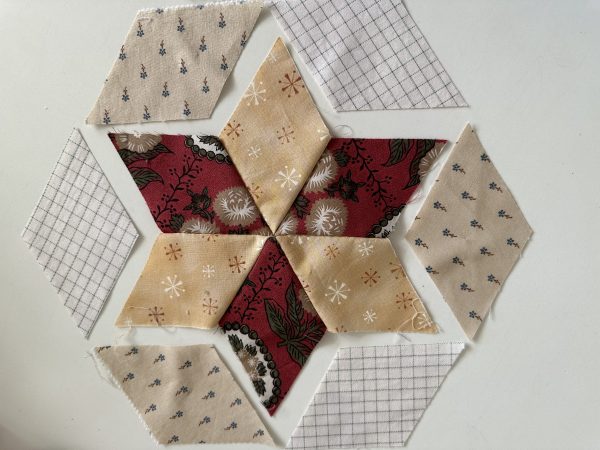
6 of 2 ½” 60 degree diamonds in light background fabrics. I used two fabrics for each Six Pointed Hexagon Star
Those diamonds are made from 2 1/2” width of fabric strips
Please see this link for a reminder on how to easily cut these 60 degree diamonds from strips Stitching by the Pool – Six Pointed Stars Antique Inspired.
Hand Sewing the Six Pointed Hexagon Star
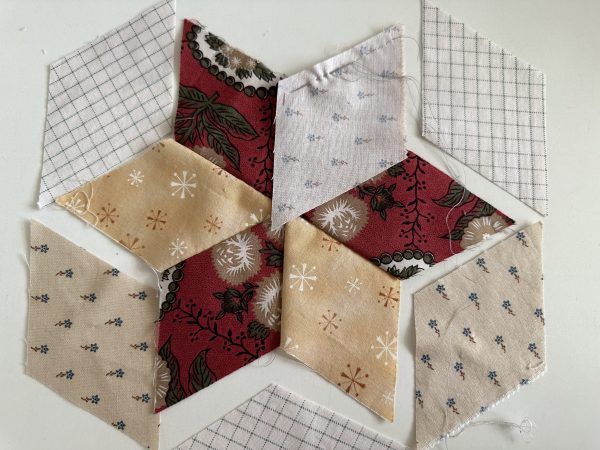
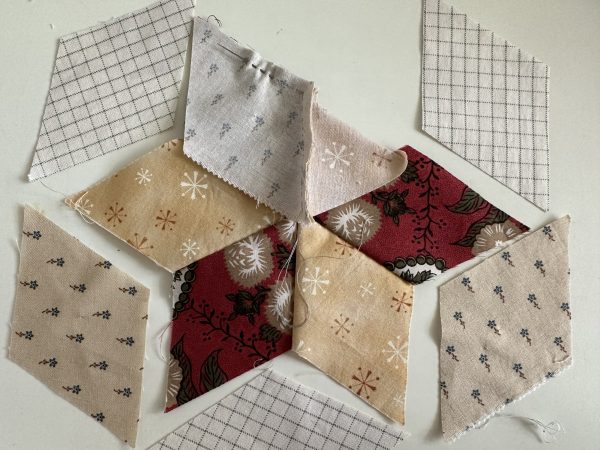
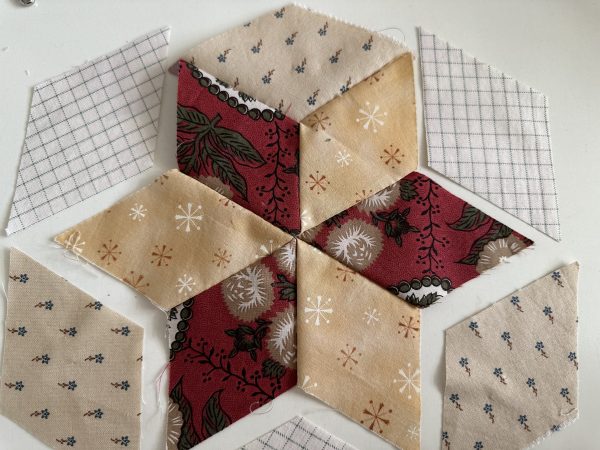
Position a light fabric diamond right side down against the Six Pointed star. Try to align the tip points. Begin stitching approximately 3/8ths” from the 60 degree point using a 1/4” seam.
Once you reach the 120 degree angle of the diamond and the seam of the two adjoining diamonds of the star underneath, then pivot the top diamond to now mach with the side of the adjacent diamond and continue stitching until 3/8ths” from the end. Lock stitch to secure.
Begin sewing the second diamond in the other background fabric in the next adjacent space sewing in the same manner.
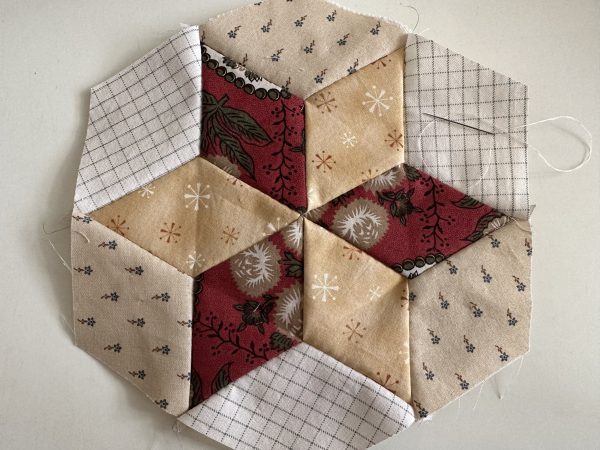
Continue alternating the fabrics until the Six Pointed Star now is a hexagon shape as pictured below. Each side of the hexagon should measure 5”.
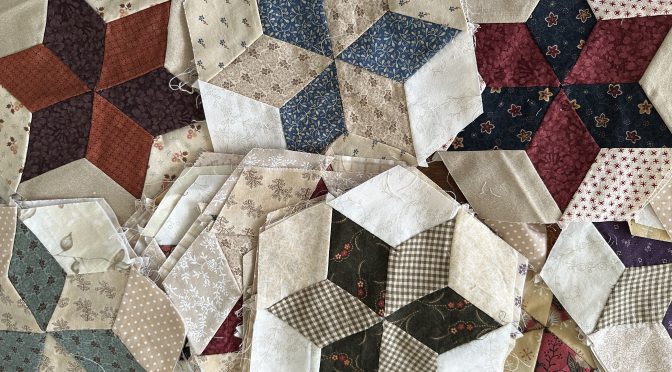
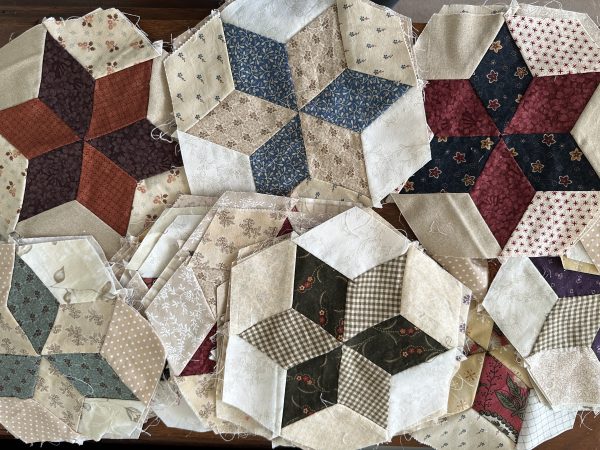
Slowly stitching these Six Pointed Hexgon Stars I have now accumulated about 50 blocks.
They are looking rather nice! Not bad for scraps and idle time.
Moving along to the next part…Here is the link to Part 3
Star Points for Hexagon Stars Antique Inspired – Part 3 Star in a Star
If you enjoyed this post and you would like some other hand stitching projects, you nay also like these posts.
Hand Pieced Spool Blocks with Instructions
Hexagons Charming Free and Easy
If you like quilts with stars and using up scraps then here is some further inspiration …
Friendship Stars Block Tutorial – Fast & Fresh
Irregular Triangle Foundation – Tutorial
Reabsorption Foundation Triangle Stars Tutorial
Half Square Triangle Units – Fast and Multiple – Tutorial
Happy Stitching,
Susie

I have made these hexagon star blocks and now I am trying to figure out how to join them to complete my quilt top. Any advice please?
Just love the toad pattern thanks