Scrappy Pinwheel in a Square.
Three challenges in one! I’m so excited to share this new block with you all! Making a pinwheel block is a challenge, but then so is a square in a square block, – cutting all those extra triangles and then getting them lined up. More often than not these blocks would need squaring up as well, creating an extra challenge. Well this is super easy! There are no triangles to cut. I’ve bypassed these issues to bring you a new way of construction. This is a terrific block for scraps. You can use any kind you like, the more the merrier.
You may remember recently I shared the Double Pinwheel Block Easy Scrappy Style. Do you remember when Jenny Doan showed us how to make a pinwheel block using two squares. This was my inspiration! I explored other options of what else can be done using the same principal but adding a four patch unit instead.
Double Pinwheel Block Easy Scrappy Style
Well, I’ve taken this a step further to create this delightful block which looks complex but is really very easy to put together. In order to get a uniquely scrappy effect you will make two blocks at a time. This is good as you can chain through each pair of blocks.
There are just two things to be careful of. Please observe the quarter-inch seam allowance and be aware that you will be dealing with bias seams, so treat them gently until they are incorporated into your quilt.
So let’s get to it!
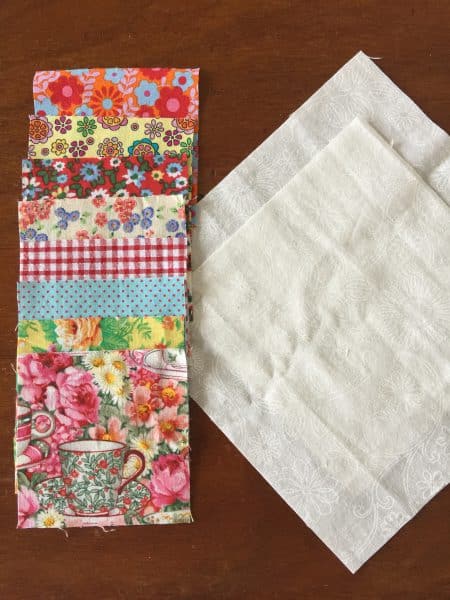
Ingredients for Two blocks
Now take the two sewn blocks to the cutting board. Align the ruler diagonally across one of the blocks and carefully cut. Cut with the four patch side towards you to line up the centre. Repeat for the other diagonal, then do the same with the other block. Now you will have eight units. Separate them out so that you have two sets, each with four different units. Arrange them with the scrappy units in the centre and the background square in the outer corners as shown.
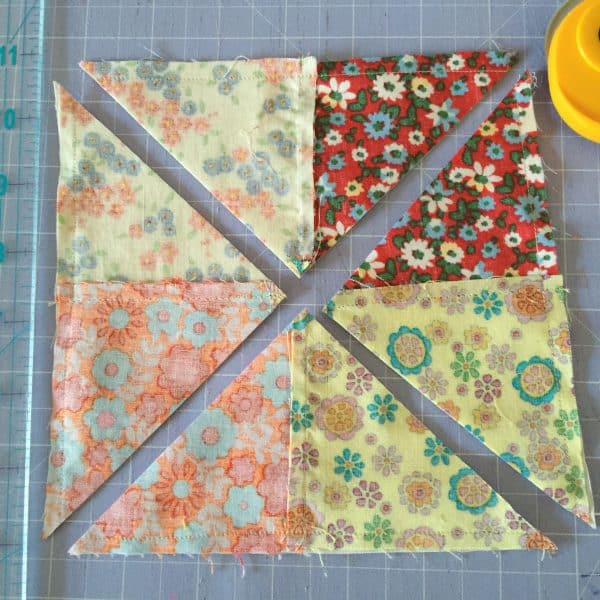
Be sure to remove the extra pieces of dog ears from the centre and this will assist in your block sitting nicely in the centre. Trim the dog ears and press. Now you will have eight delicious units like this.
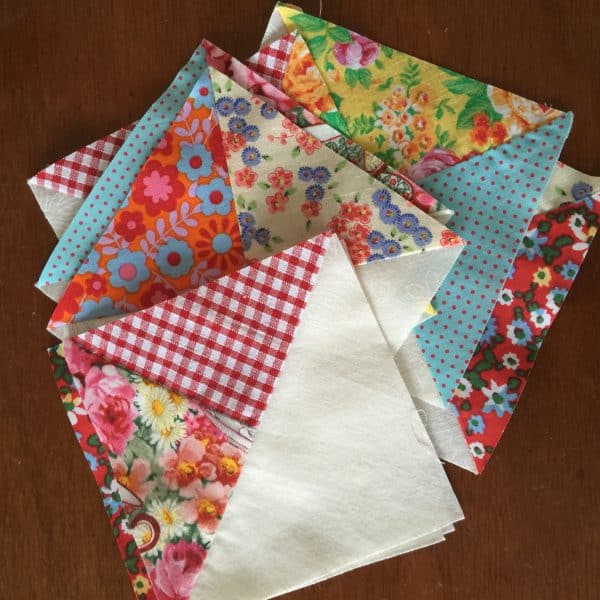
Assemble them into the two blocks making sure that no fabric is repeated in each block. It’s a bit of fun!
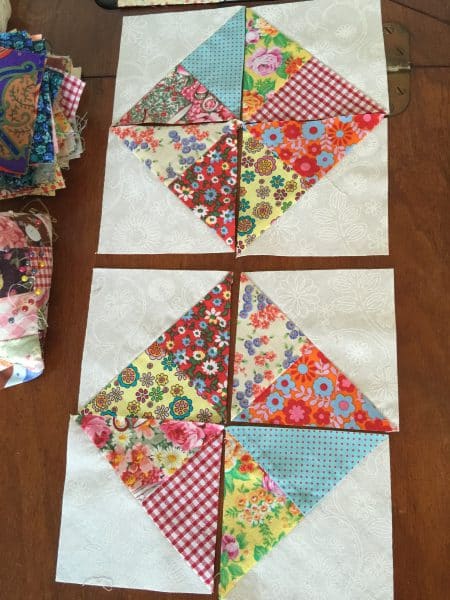
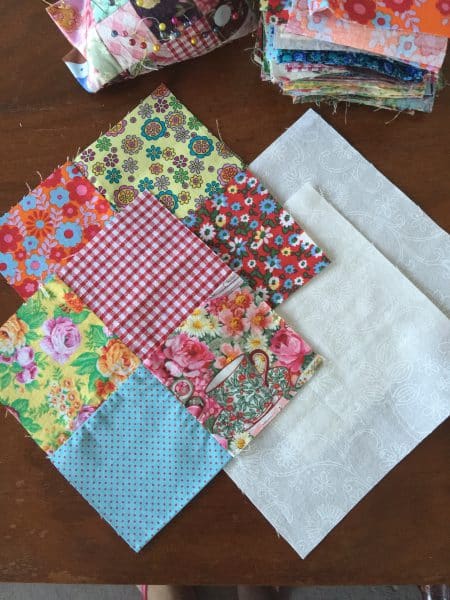
Now sew the units together like a four patch. Sew slowly at the point. Pin if necessary and ensure that the seams line up.
TIP
Don‘t forget to spin your seams at the back. For more details see this post Pinwheels On Point Blocks – Made Easy

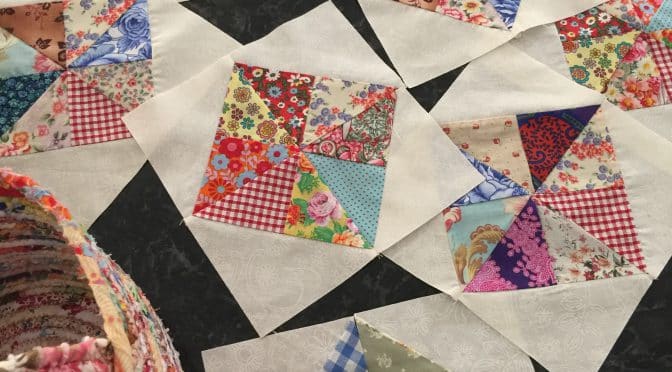
Now you will have these two lovely units. Press carefully. I’ve been making some more. By the way, I’m planning to make a baby quilt with these. Stay tuned as in a future post I will be showing how I finish these blocks to stabilise them.
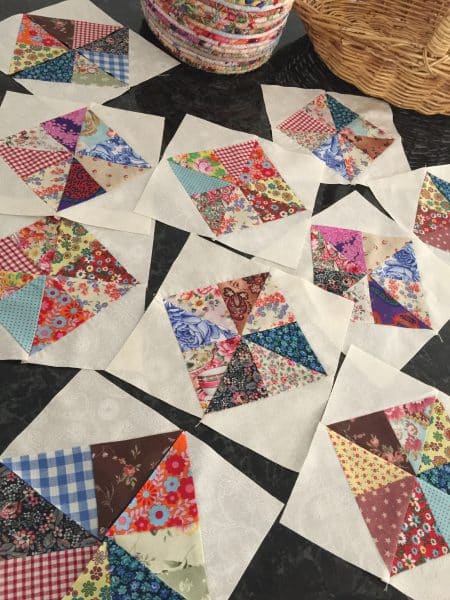
Unbeknowns to me I’m am now aware that this unit of construction is also called a Boston Block, thanks to Preeti at Sew Preeti Quilts! She had also come up with a similar idea of this method of construction. Please do check out her tutorial at Boston Block Tutorial http://sewpreetiquilts.blogspot.com/2014/04/four-patch-hst-boston-block-tutorial.html. She also has some other great ways of using and placing these blocks! This is great as she uses 5″ Charm Squares to achieve the same block. More excellent ways to use up those leftover charm squares to make a scrappy quilt!
Maybe you would like to check out how I used these blocks???
Framing Pinwheels Quilt and Pattern
Incidentally, if you liked this post, and quick methods, I am pretty sure you will love these too!
I Spy Pinwheels Quilt and Pattern
Scrappy Yankee Puzzle Block Made Easy
Have a wonderful Quilty Day!

This tutorial is great. I am going to be making these for sure. Thanks.
Much easier without HST.
I’ve been searching for a baby quilt to sew for my great granddaughter, coming end of May. My search is over, thanks to you, Susie. Your quilt is so pretty and it is SO neat to see the machine that you use. I had one similar, my 1st machine and wish I still had it. I sew w/ a Montgomery Ward model from 1973. I honestly don’t know what I’d do if I had to get a new machine. Thanks again for this pattern. Very much appreciate it.
Would like to try this and just wondering if you have any tips on pressing this block for ease of construction, many thanks, Margaret.
Have many 5″ squares so will try one of these to begin with.. lovely guilt pattern. Can’t wait to also try the 3 1/2 ” squares.. THANK YOU
Great tutorial – I love ‘square in a square’ scrappy blocks, but have always been hesitant because of the fiddily triangles and bias edges …. not any more … thanks a lot.
I was given a large bag of fabric pieces, plus I have my own scraps. I’ve already cut pieces for hexies and yo-yos and I still have tons left! This pattern is glorious! I’m going to start cutting my 3-1/2 squares tonight. Thank you so much for sharing.
Will be trying this ASAP.. looks really pretty.. thank you.
Awesome!!! And so easy !!! I absolutely LOVE scrappies, so this is on my to-do list 😁
I love this so much, I began cutting 3 1/2″ squares as soon as I read it. Thank you!
Thanks for the tutorial. Will start one very soon.
Susie,
Hi I am Preeti and I blog at Sew Preeti Quilts. I posted a tutorial on this block and this method in April, 2014. I also showed several different layouts for these blocks. It is actually called a Boston Block. I’d appreciate if you can acknowledge my tutorial (since it predates your post) on your blog. Here is the link http://sewpreetiquilts.blogspot.com/2014/04/four-patch-hst-boston-block-tutorial.html
Thank you and Best Wishes,
Preeti.
Dear Preeti, Thank you so much! I had no idea! I most certianly will. Lovely to meet you.
Kindest Regards, Susie
this looks fantastic I can’t wait to try it