
Antique Four Patch Economy Block Tutorial
Some time ago, I shared with you a post about making Four Patches. Here is the link to that post.
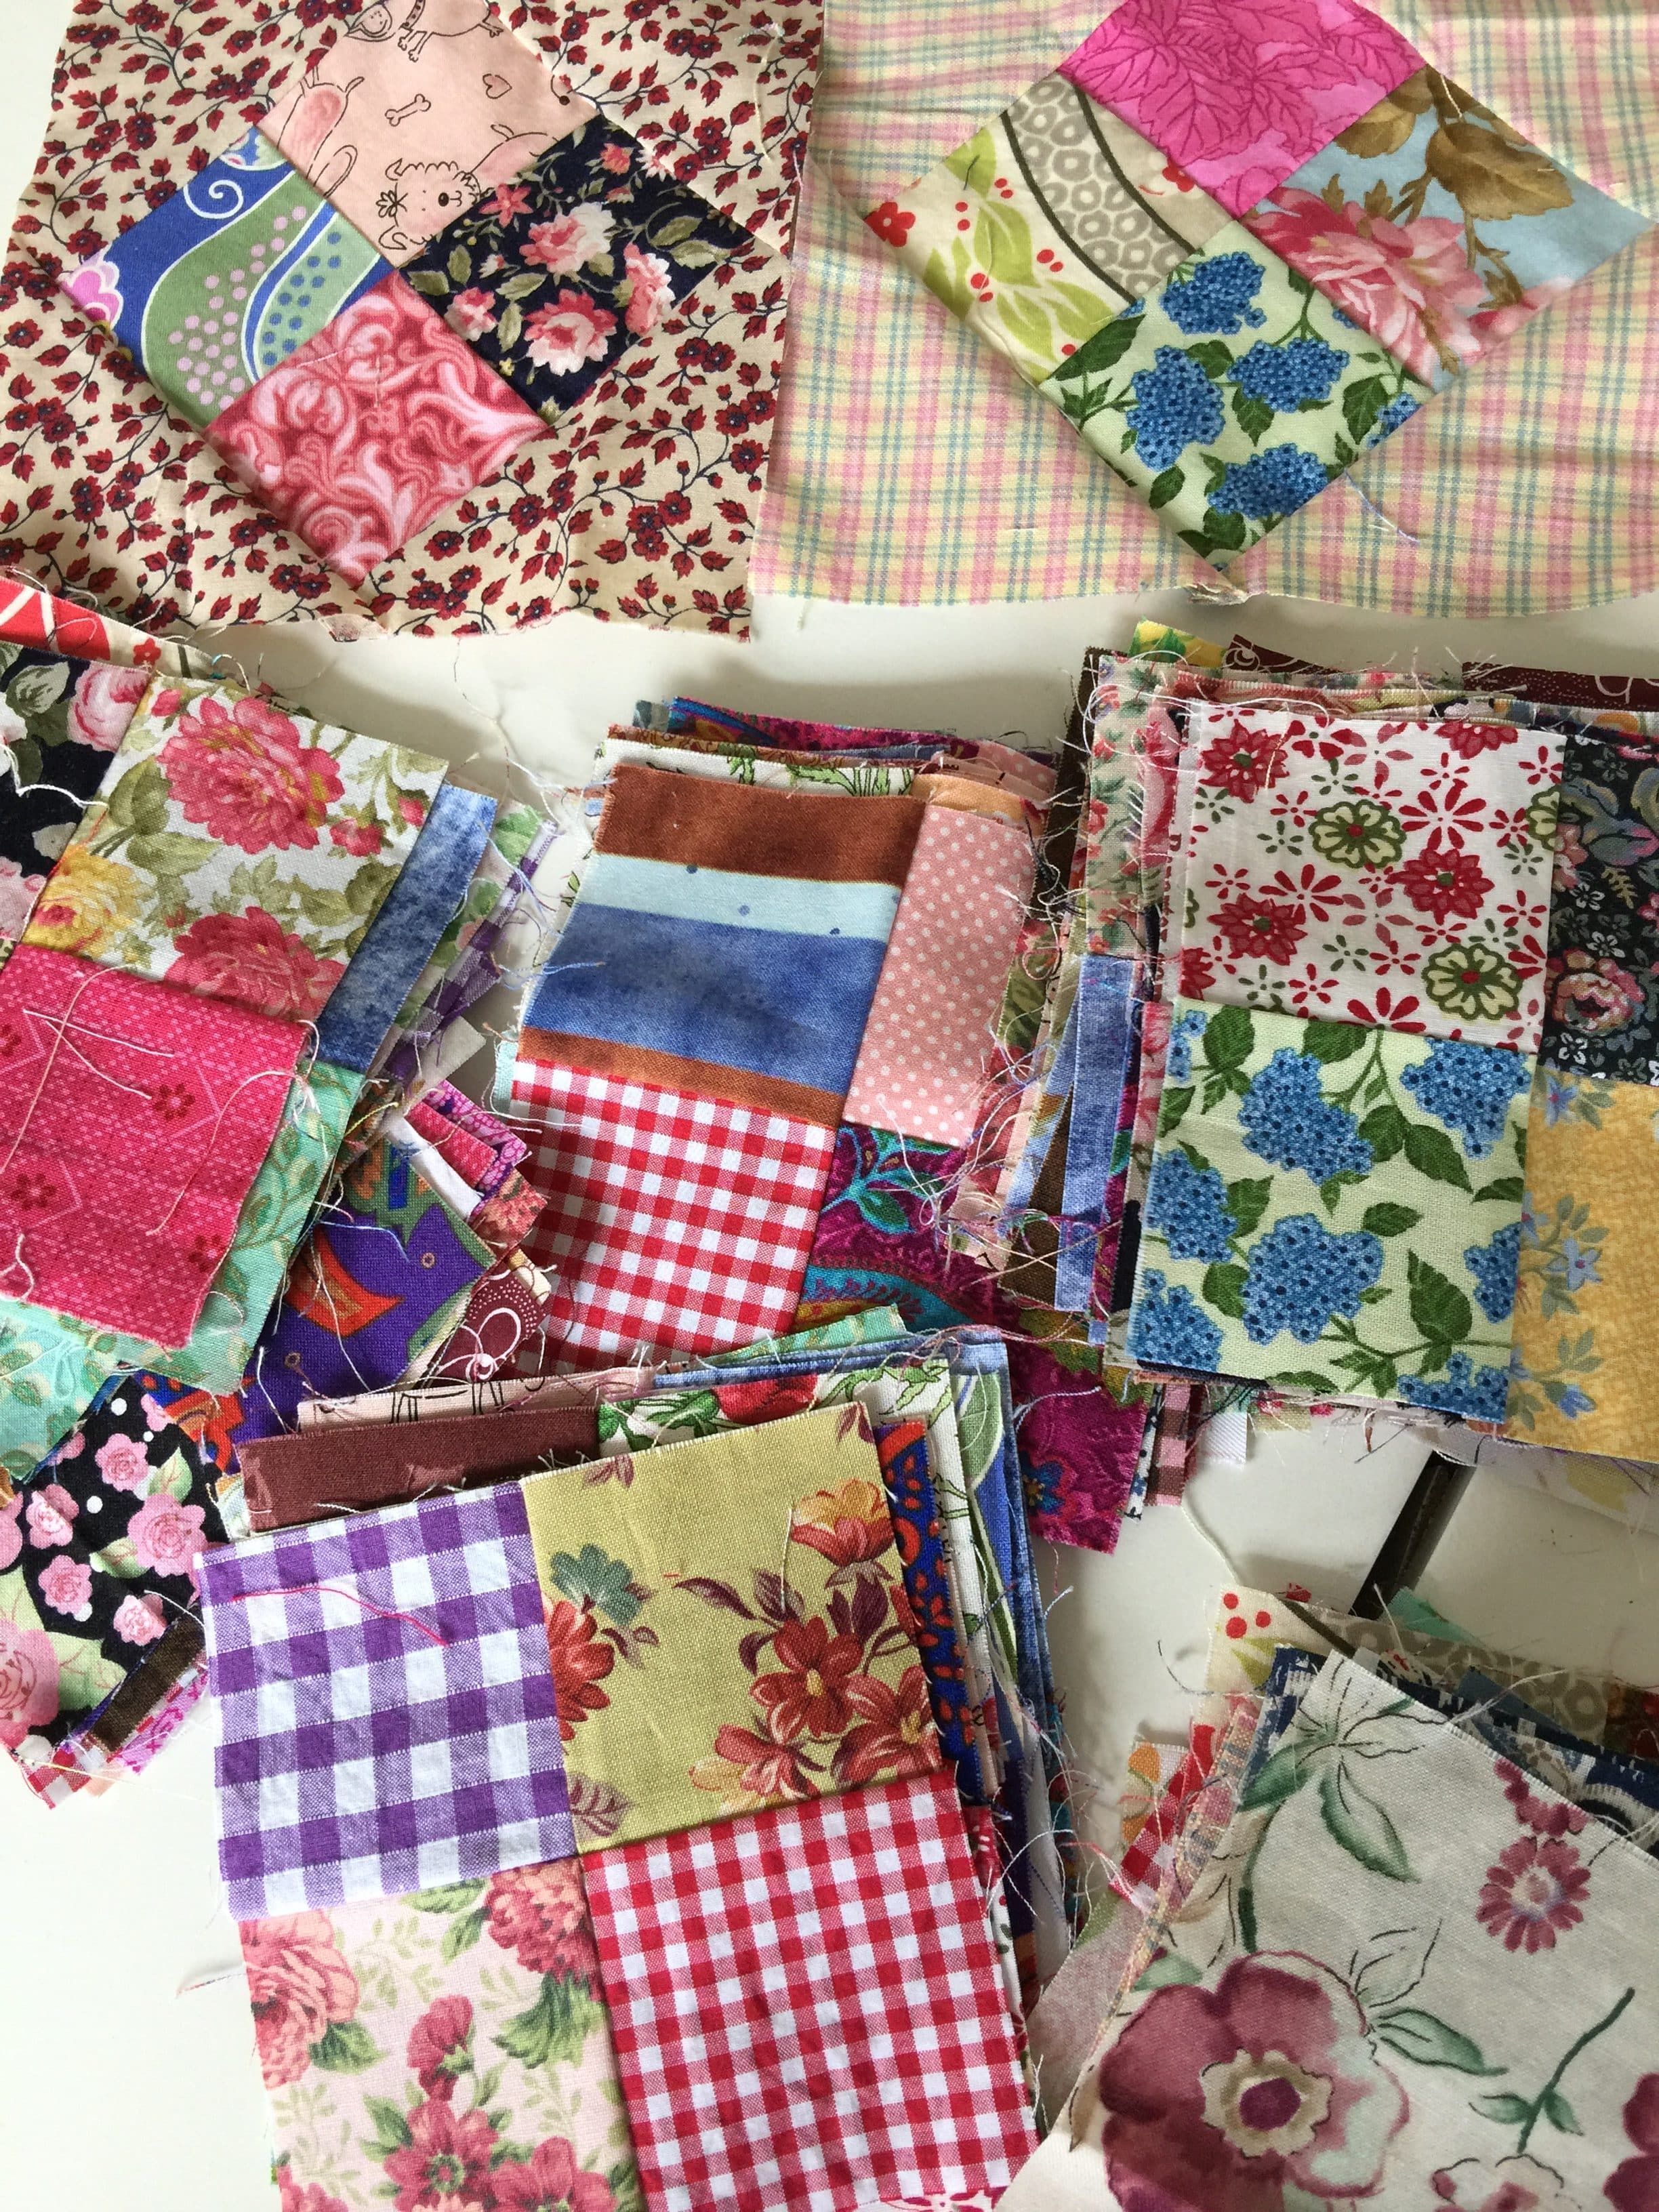
Four Patches are a basic quilt block unit, that anyone can make. They are fabulous for using up scraps. I have made a stack of really scrappy Four Patches some time back. I put them away until I decided how to use them this time.
If you love Four Patches like me you might also be interested in this post.
Scrap Double Four Patch Quilt Block Tutorial
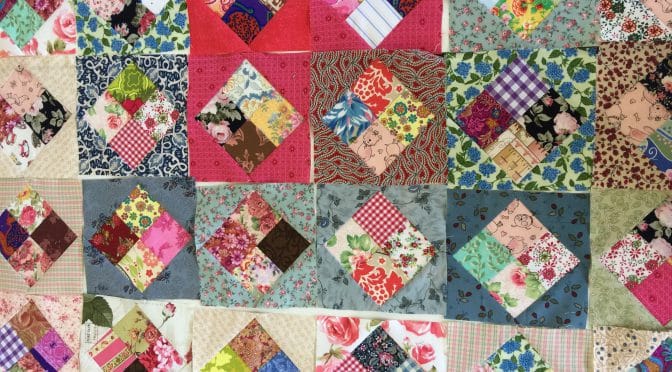
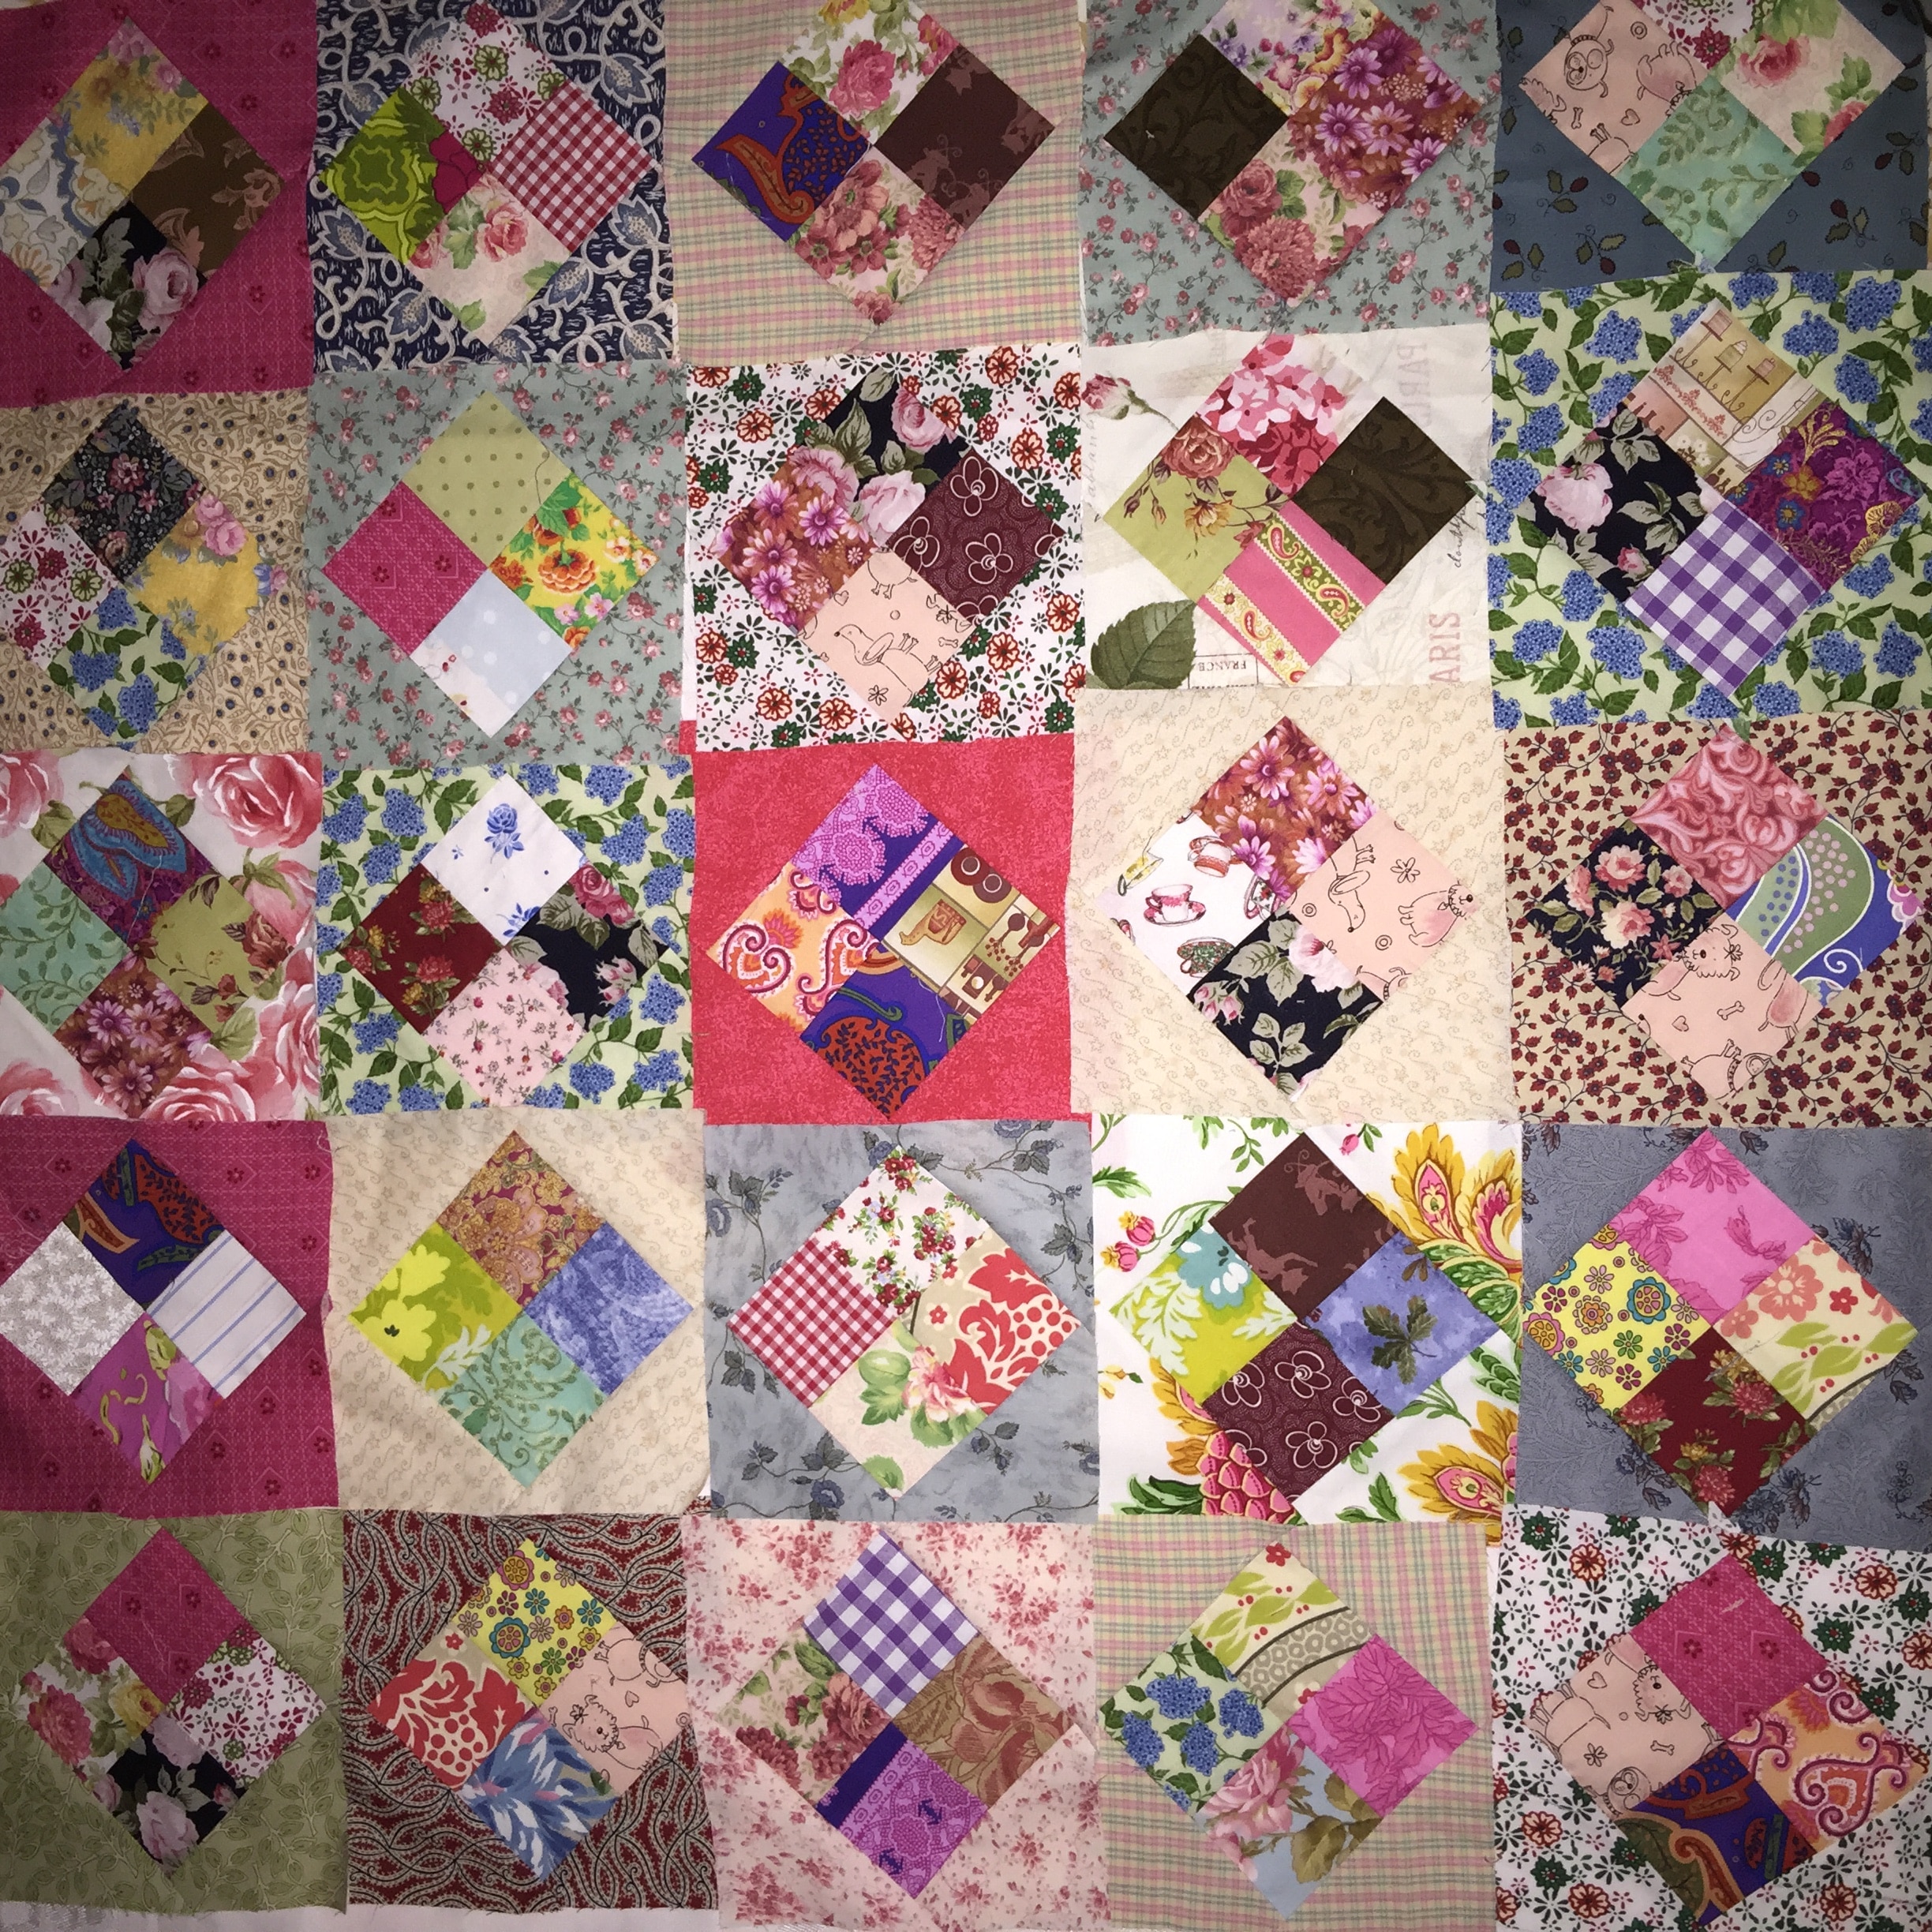
This is an antique style block. The beauty is, you can make as many or few as you like. There is no stress because you will just use up some scraps. There’s no waste. I love the way the four patches are set on point. This will create a lot of interest in the quilt as the eyes will want to move around the quilt
Whilst this may appear to be a simple block, there are a lot of secondary design possibilities which will emerge depending on how the blocks are placed. By grouping blocks with similar background colors you can create four patches or nine patches, stripes, borders, a maze, medallion design or just lay them out randomly. It’s up to you.
I hope you love making this block as much as I do.
All fabrics have been washed before commencement. All seams based on 1/4″.
Requirements for one block
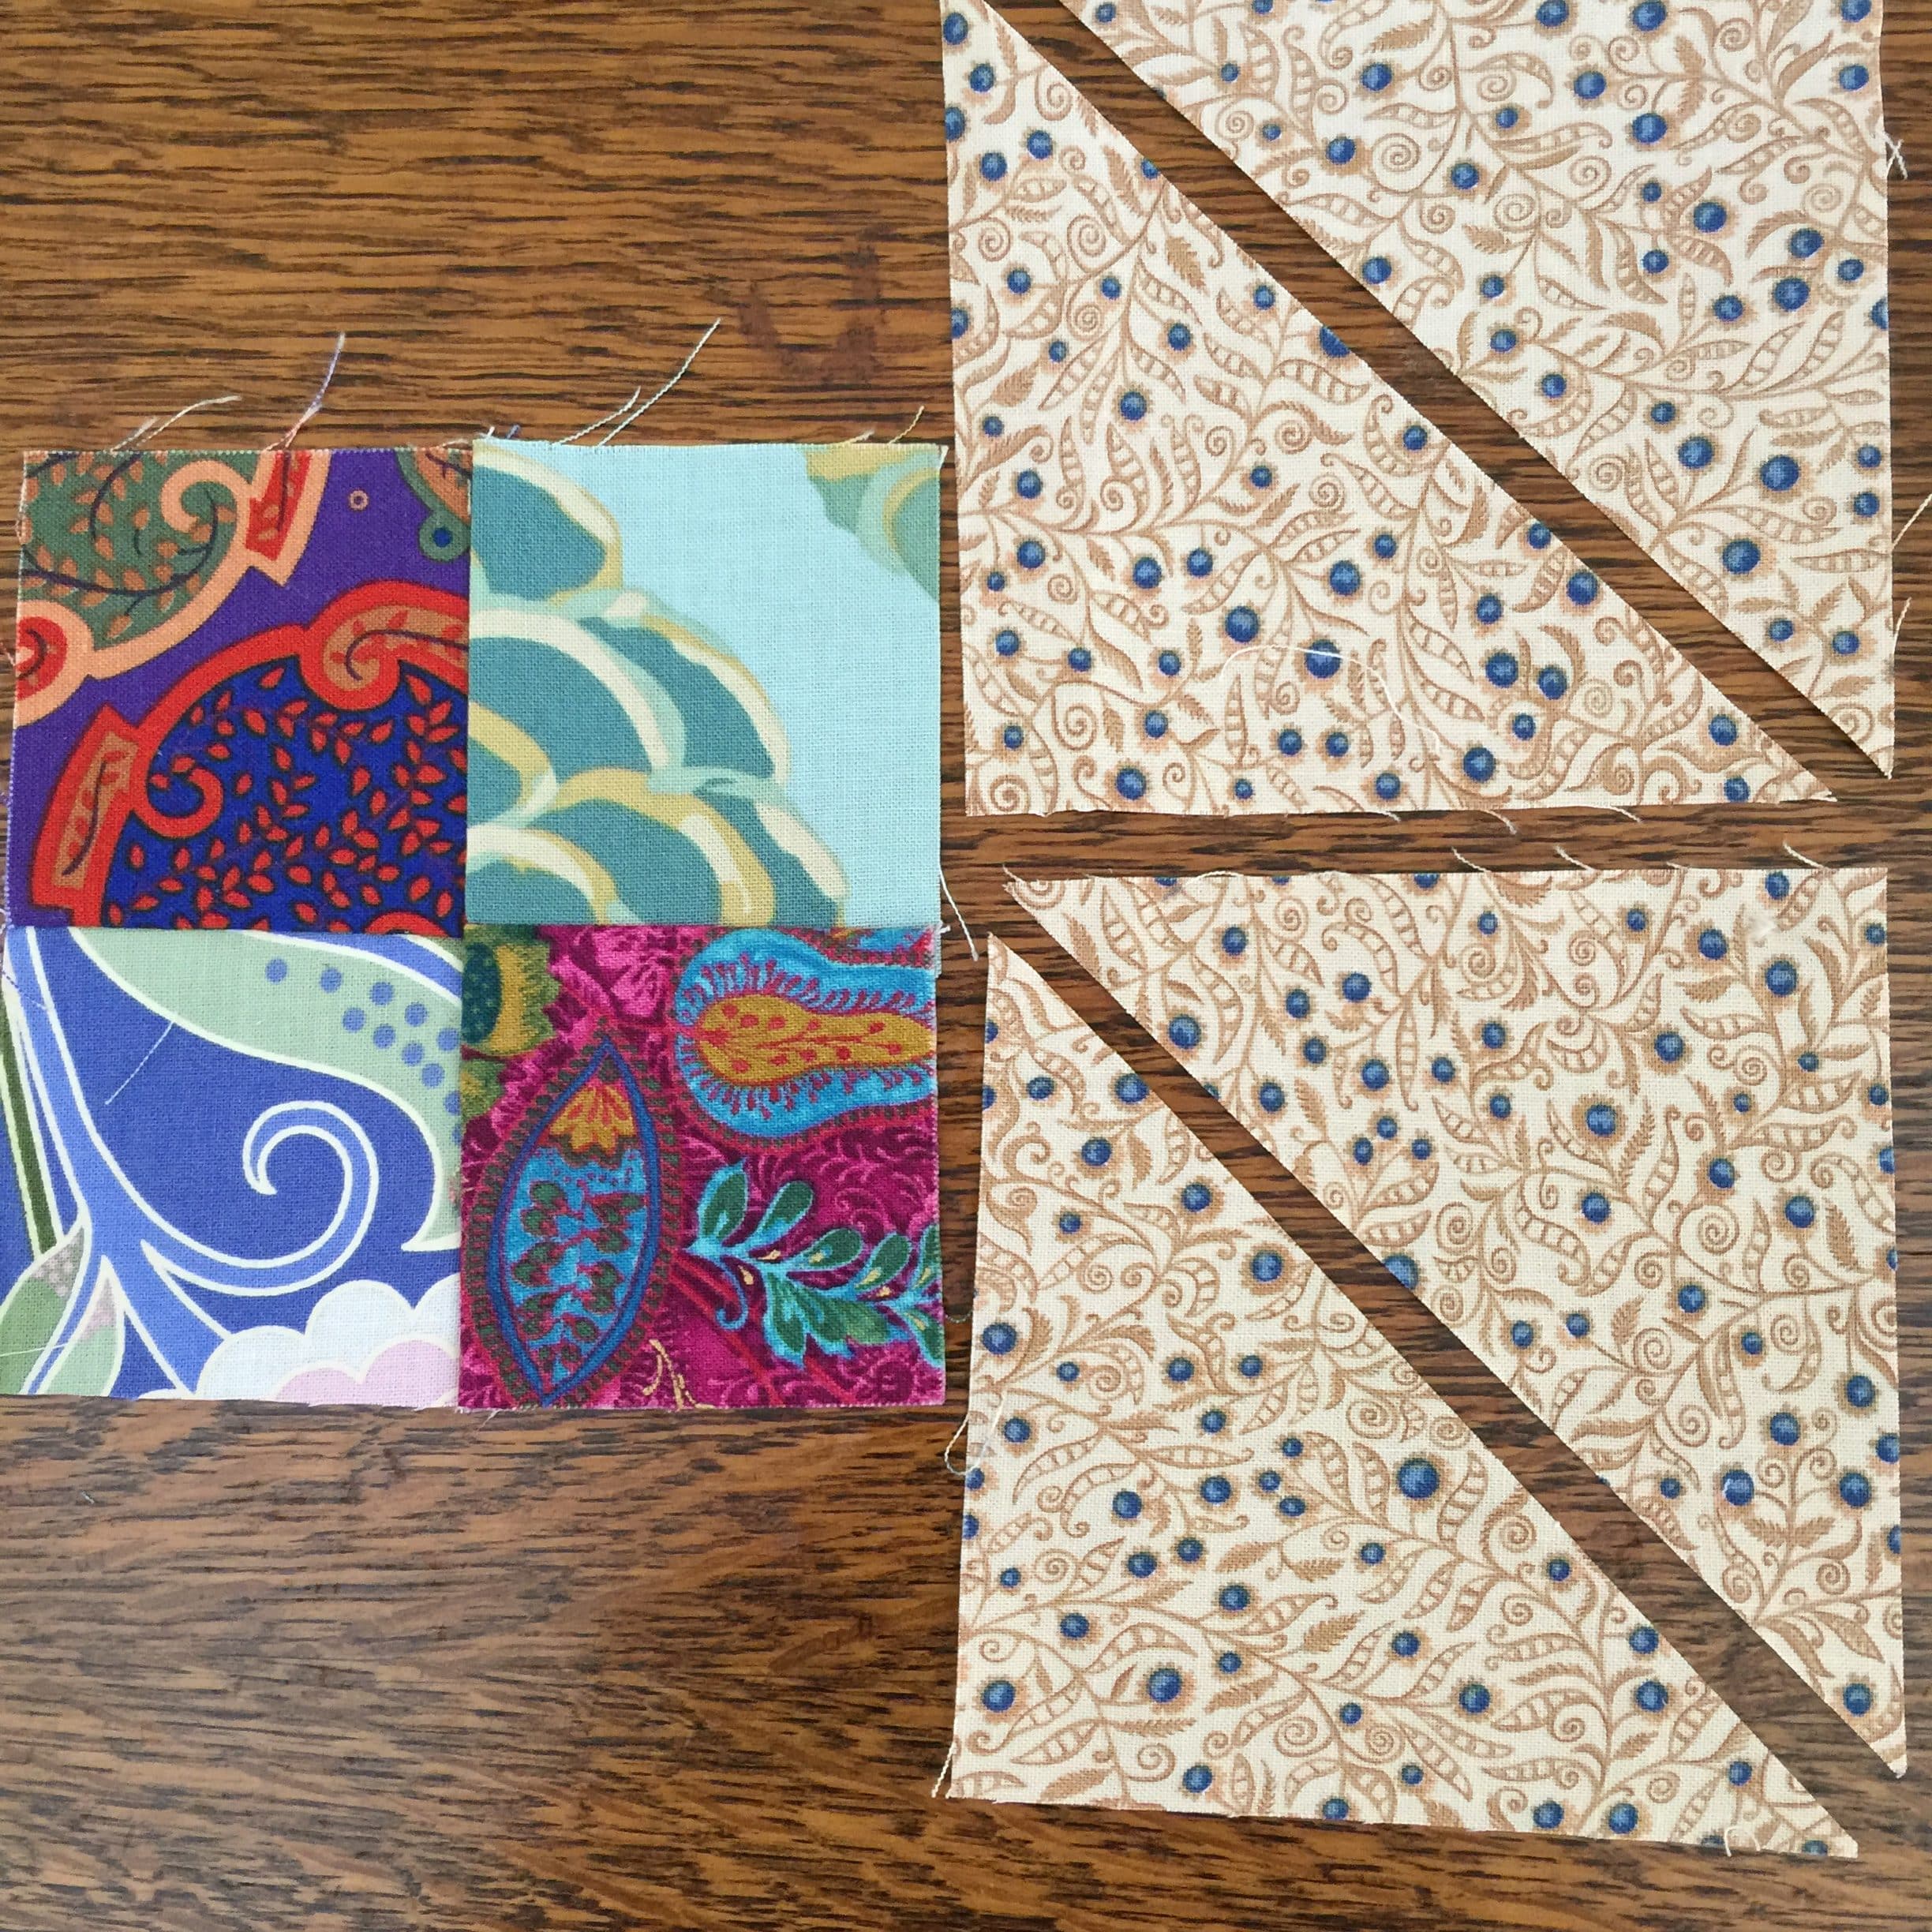
1 x four patch block made with 4 of 2 1/2″ x 2 1/2″ units
2 of 4″ x 4″ matching squares cut once on the diagonal to reveal 4 triangles.
Method
Make sure that your Four Patch is squared up, especially when one is making from scraps. Lay a triangle piece, right side down on one edge of the four patch. The point of the triangle should line up with the mid line of the four patch. Pin in place. Use 3 pins. This will help to keep the seam stable and make it easy to sew, as the triangle is on the bias. Sew across the seam. Repeat with a triangle on the opposite side.

Turn back the triangles and finger press.
Today I’m treadling on my Singer 66. Here’s a link to the story of this machine.
Make Your Singer Sing (Part 1)
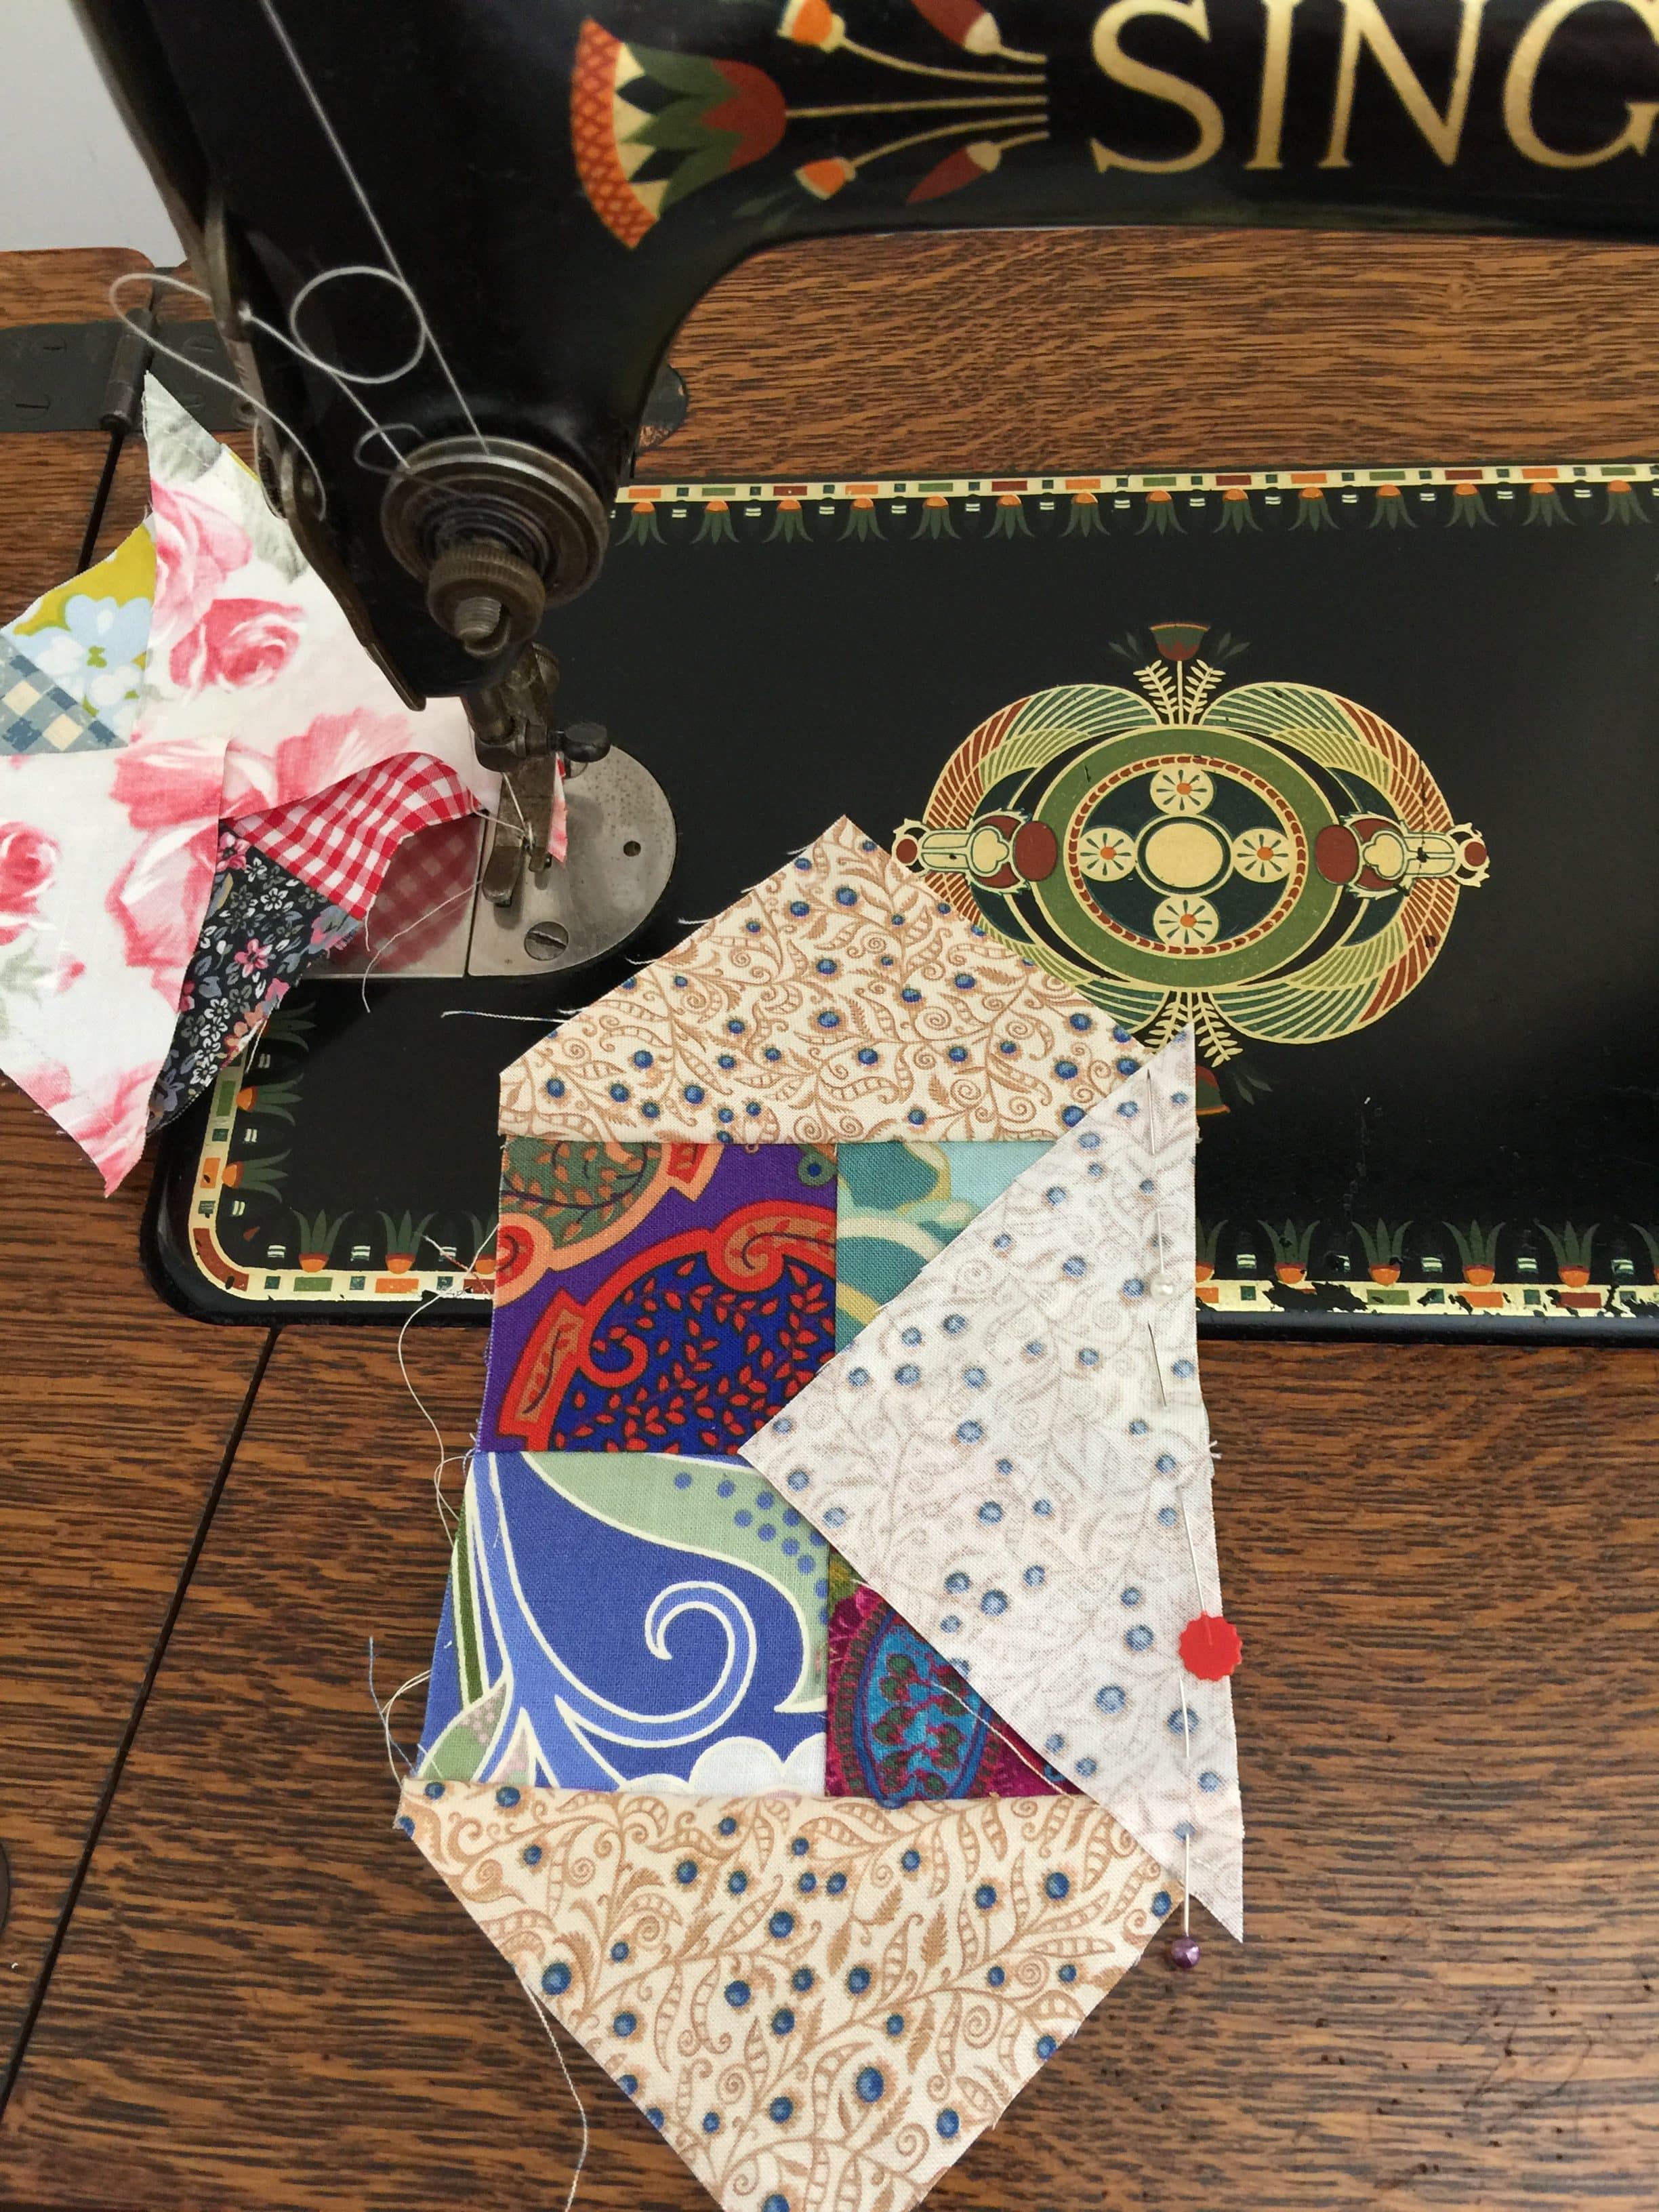
Now repeat adding the two remainder triangles to the other two sides. Make a few blocks at a time so that you can keep chaining the pieces through.
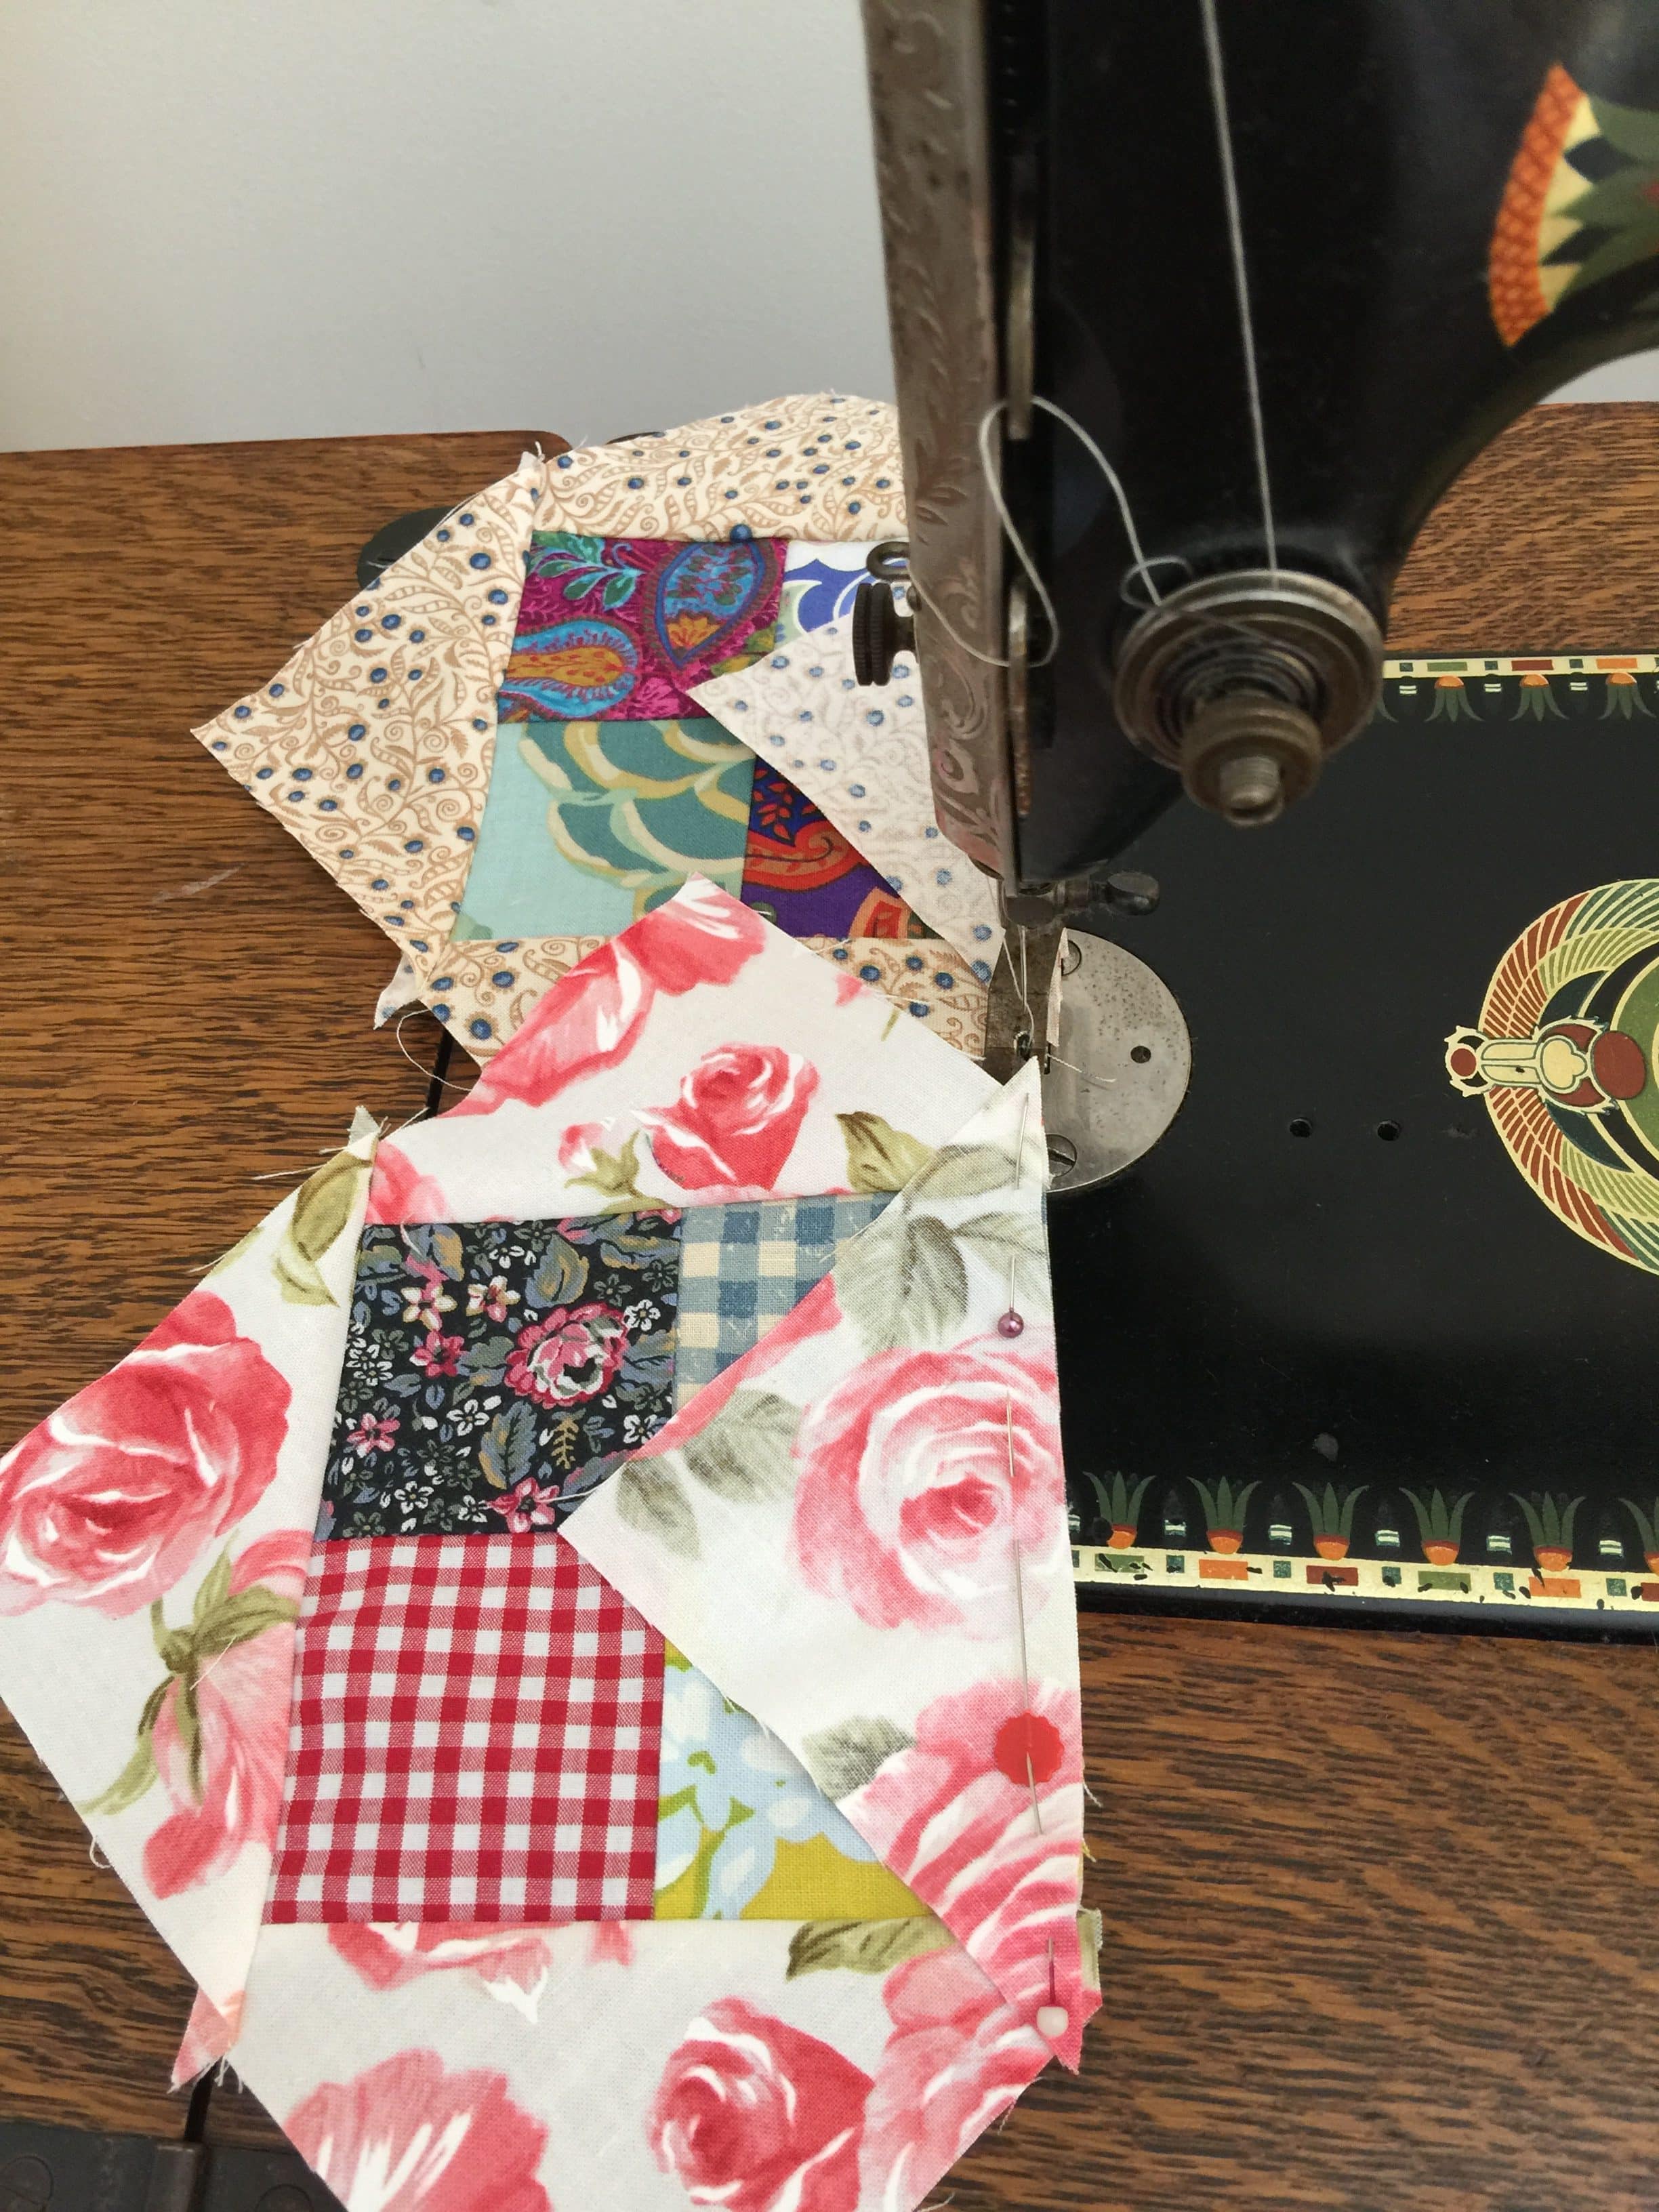
Press. Trim off the doggy ears only after all four sides have been sewn on.
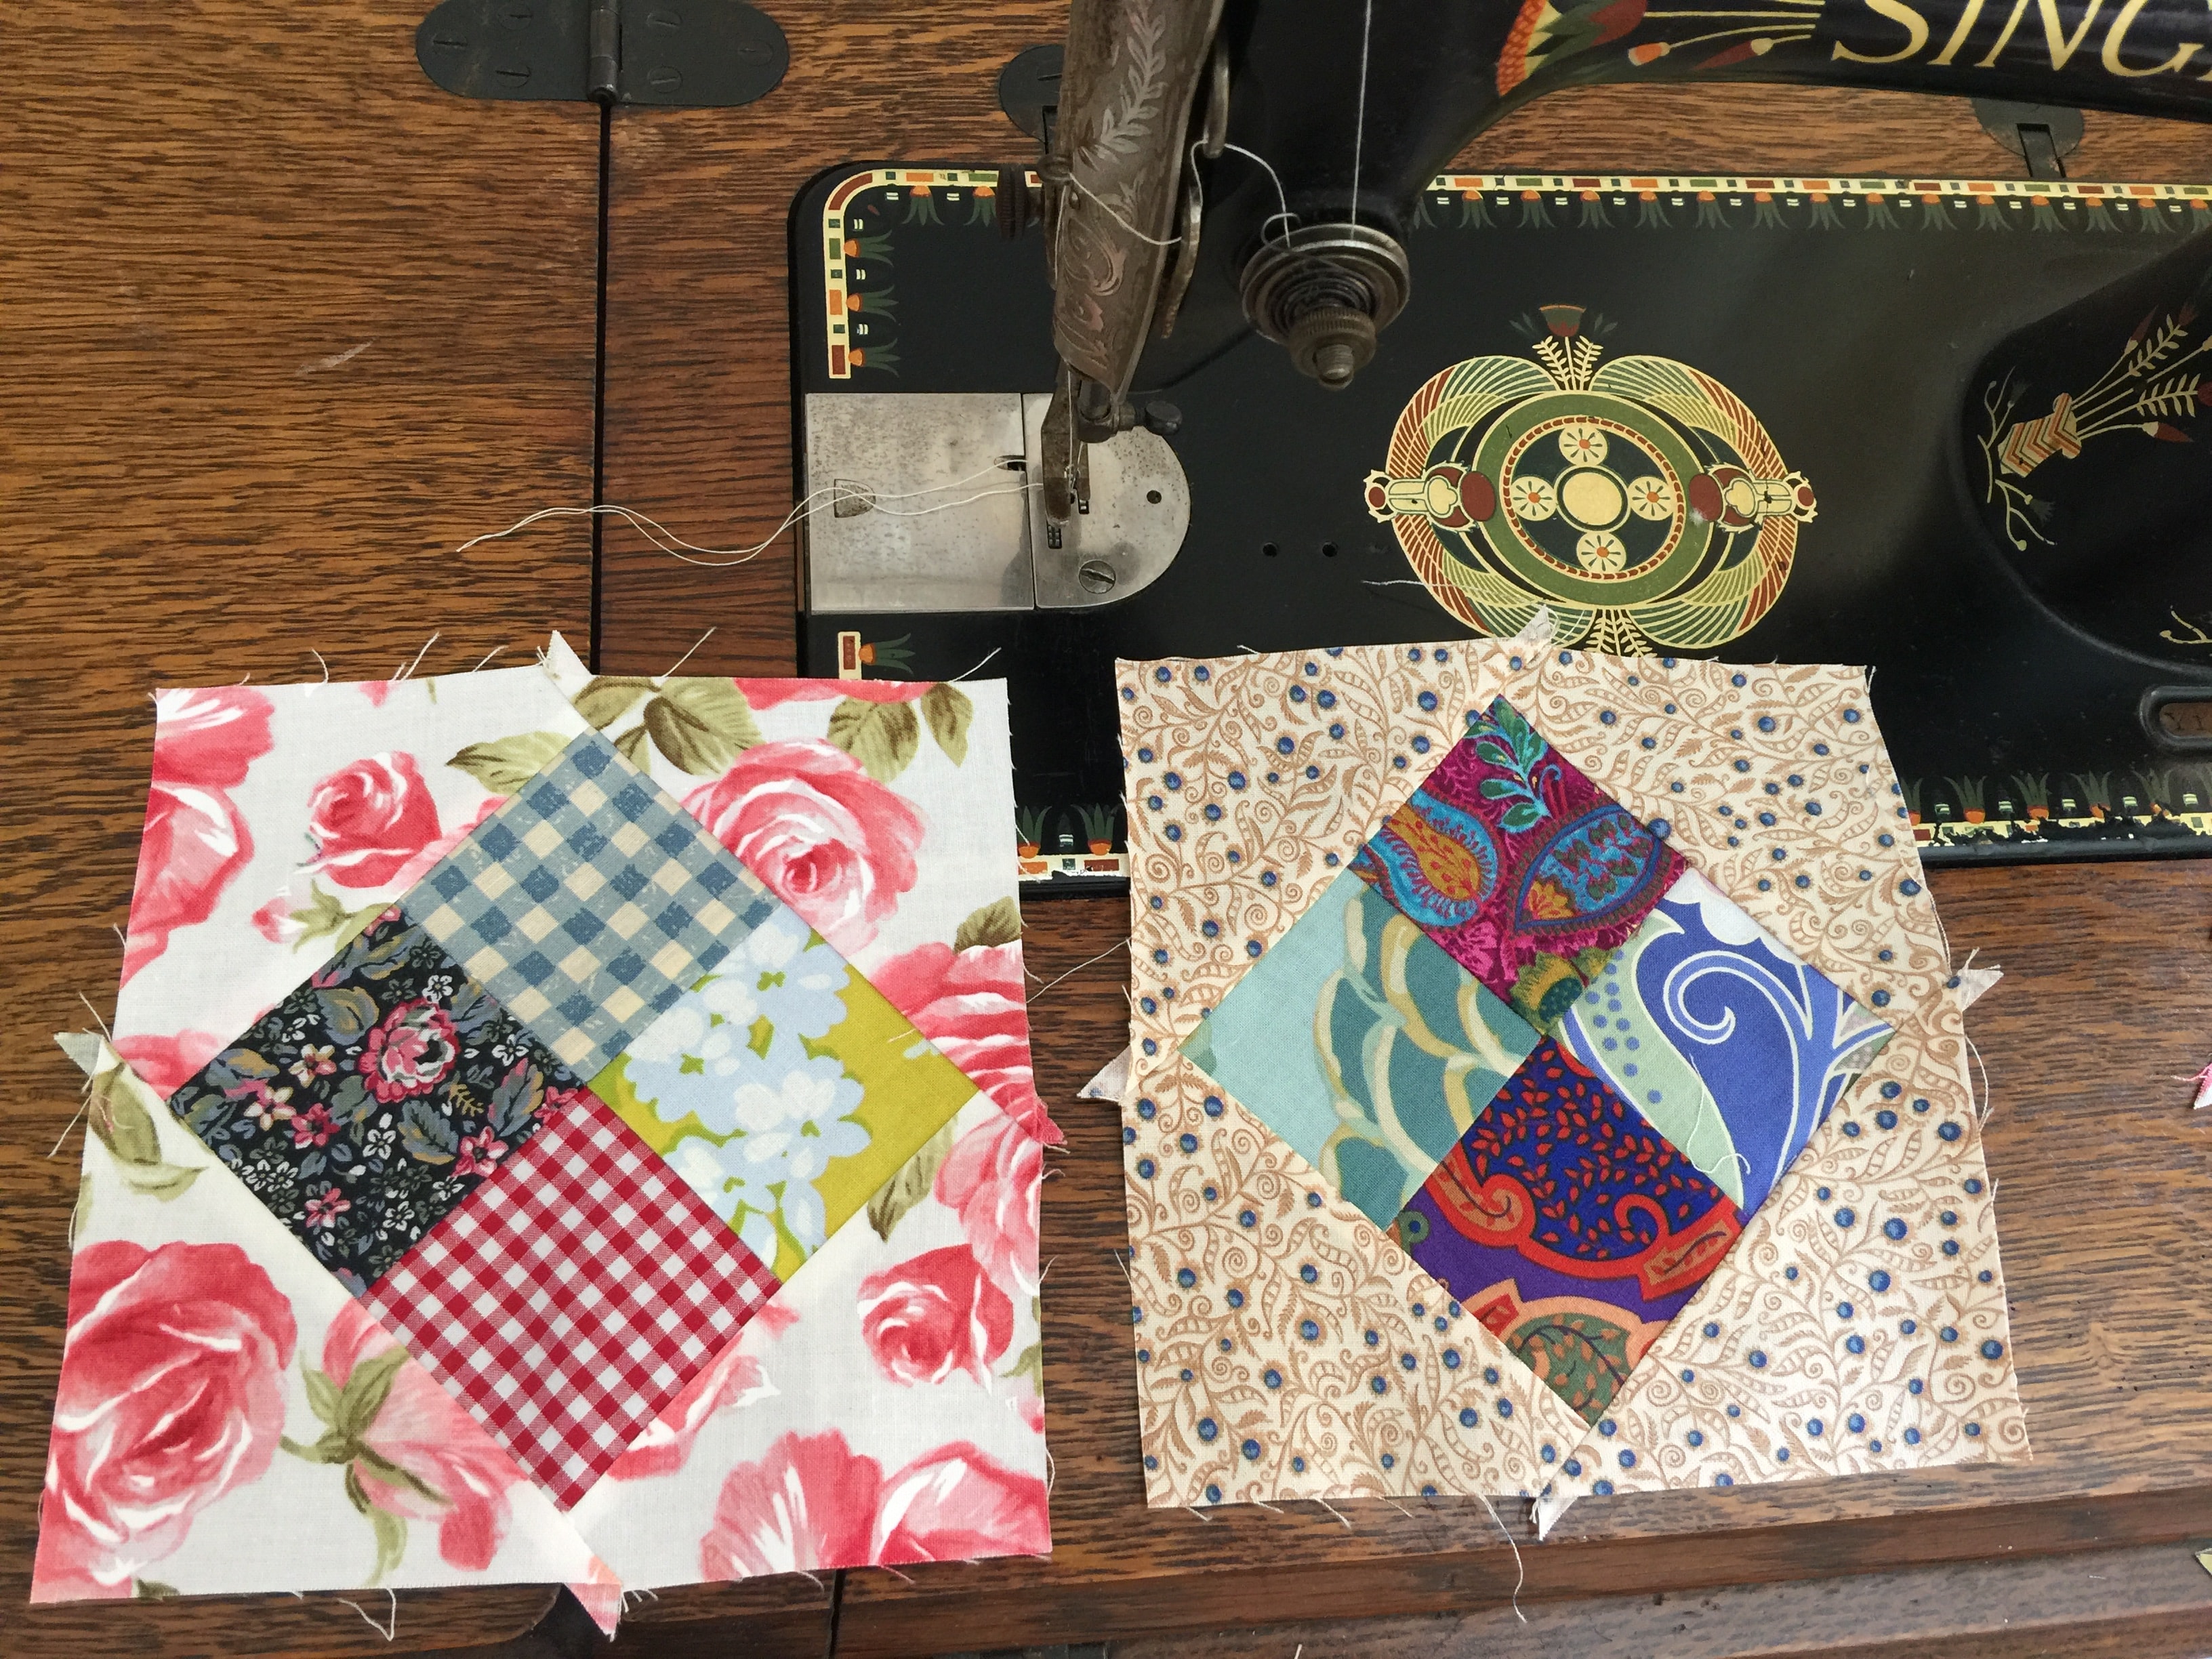
Sliver trim the block if necessary. Ensure you have a good quarter inch seam allowance which extends beyond the corners of the four patch block.
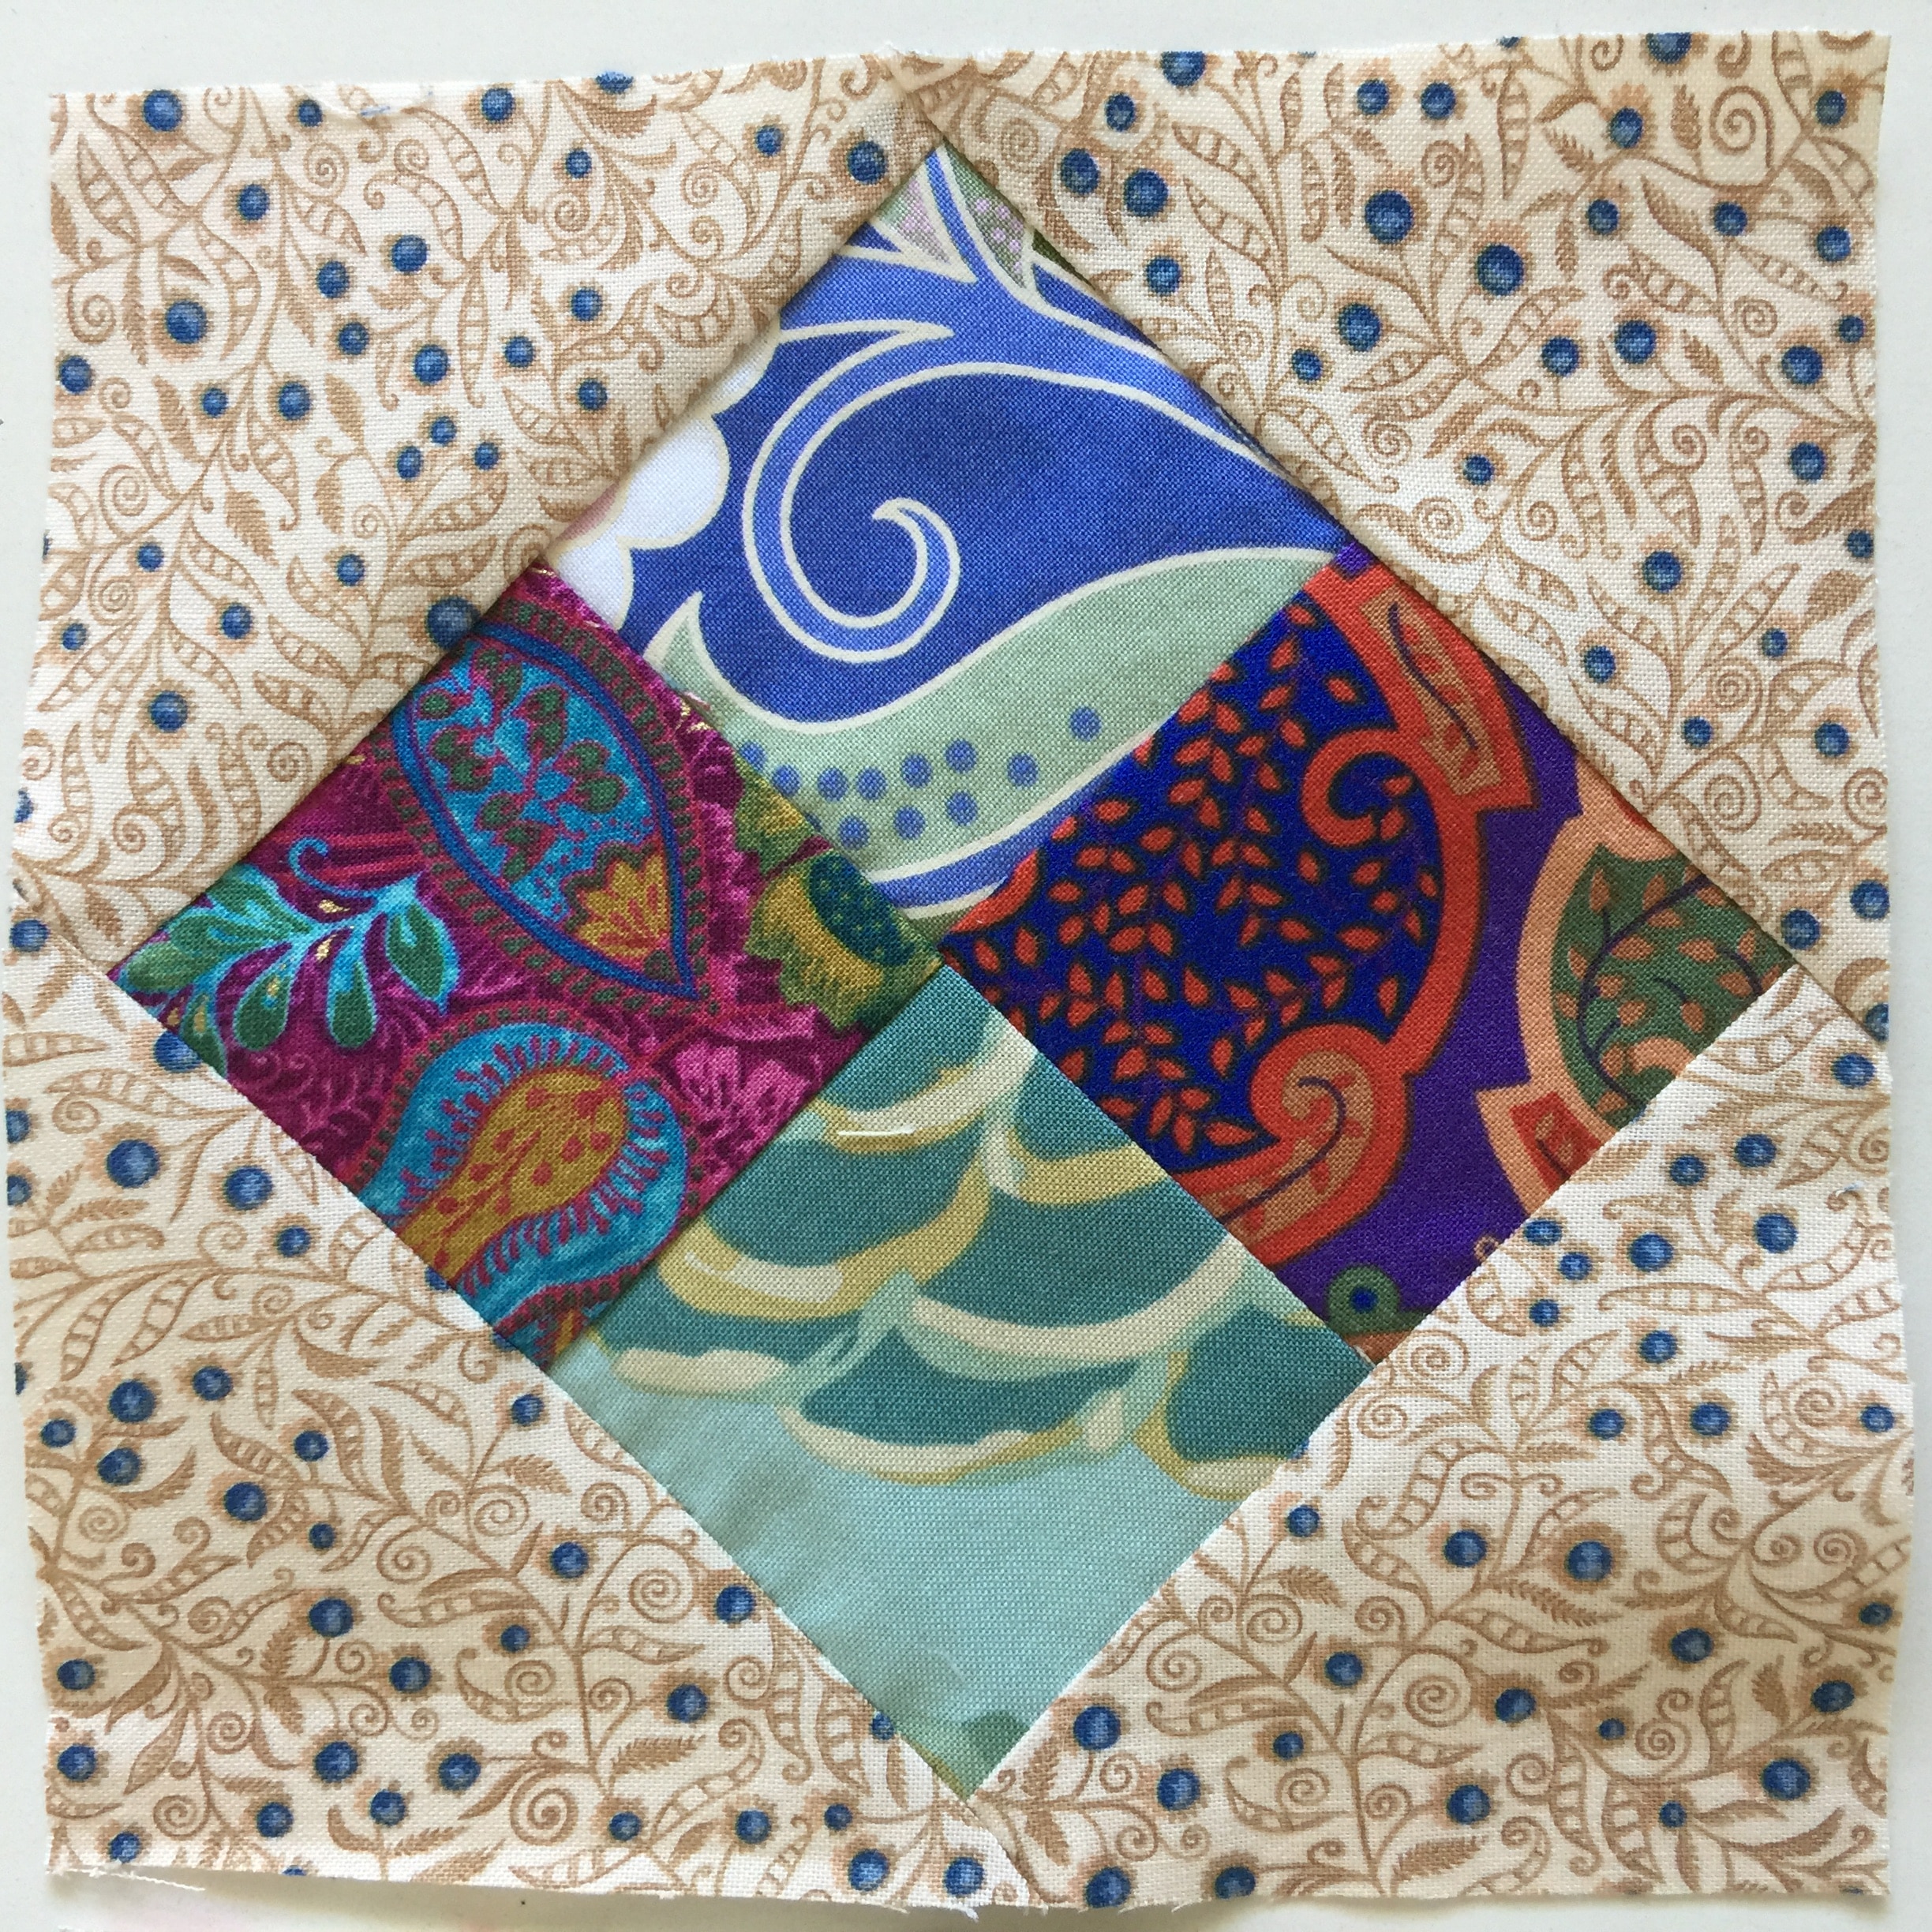
It will measure appropriately 6 1/4″.
Heres how they are starting to look.
If you enjoyed this post, and you love antique style quilts, then you may also enjoy this post…
Uneven Nine Patch Quilt Pattern Antique Style
Or this super easy scrappy one..
Antique One Patch Block Made Easy
Happy stitching,
Susie
Susie, love your site. I have started using my mother’s Singer 66-16 (electric). Do you use a full quarter inch seam or do you use the edge of the presser foot and go with an eighth inch seam?
Great site
Susie, so glad to have found your site searching for economy blocks. I’ve never seen this combination before. And I love your fabrics and colors. Well, I love your whole blog, you sound like my kinda gal with cooking and gardening and sewing and vintage machines. So fantastic. Truly this is a home for those of us interested in the Art of Living, and living Beautifully. Thank you.
💖 Laura G, thank you!
Susie, I must say I’ve become a bit obsessed with you Economy block. I’ve been trying to deal with my scraps and find good sizes to cut scraps. Read your other essays on the topic. I’m trying to work out sizes. The only “cheat sheets” and guides I can find are to make the three level square in a square. Really 3 squares with the interior most one on the long flat side, not on point which I think is ever so attractive.
I was trying to work out cutting the side triangles since I don’t have lots of 4” scraps. When I measured from the hypotenuse I see it’s 2 1/2” the same size as the square starting with the 4 patch. Eureka! This means I could use 2 1/2” strips to make those triangles using a right angle ruler. I see as the four patch inner square gets larger the side triangles actually decrease slightly in size so using a strip the same size as your initial 4 patch block won’t always work. But 2 1/2” strips are very common and something I’ve been cutting. So I’ll go with that for now.
If you ever re-visit the economy block I’m all ears…
Dear Laura,thank you! That is so awesome! I might have to give that a try! I’m sure our other readers will be most interested too! Thanks again! Susie
Maybe not. Using strips means you end up with a bias on the outside edges. Hmmmm.
Dearest Susie, love reading your posts. Have lost your contact details. Would like to get in contact again. My details have not changed.
Love, love, love your blocks! I’ve been cleaning up my scraps into useable units and think I will follow your example. 💕
I am inspired to make some of these thankyou. I am wondering if I should get a special ruler for trimming?
Dear Katlorien, I don’t think it’s necessary, just make sure that you leave a good quarter inch seam allowance beyond the four patch corners. I’m just using my 6″ x 12″ ruler. It has 1/4″ markings and right angles. Good luck!
Lovely quilt tutorial and machine. I have a Lotus, but the decals are not as pristine!
So beautiful.Love this design.Thanks for the tutorial!
Susie I am loving these antique quilt tutorials. I am working on one with the uneven nine patch. Really love the way it’s looking. Will want to make one of these soon. Love simple but pretty quilts. Thanks for sharing.
Love your vintage style blocks – they look like jewels 🙂