
Baby Love Quilt and Pattern Part 2
Continuing on from Baby Love Quilt and Pattern. Here is the link to Part 1. Part 1 has the cutting instructions.
All seams based on 1/4″ unless otherwise indicated.
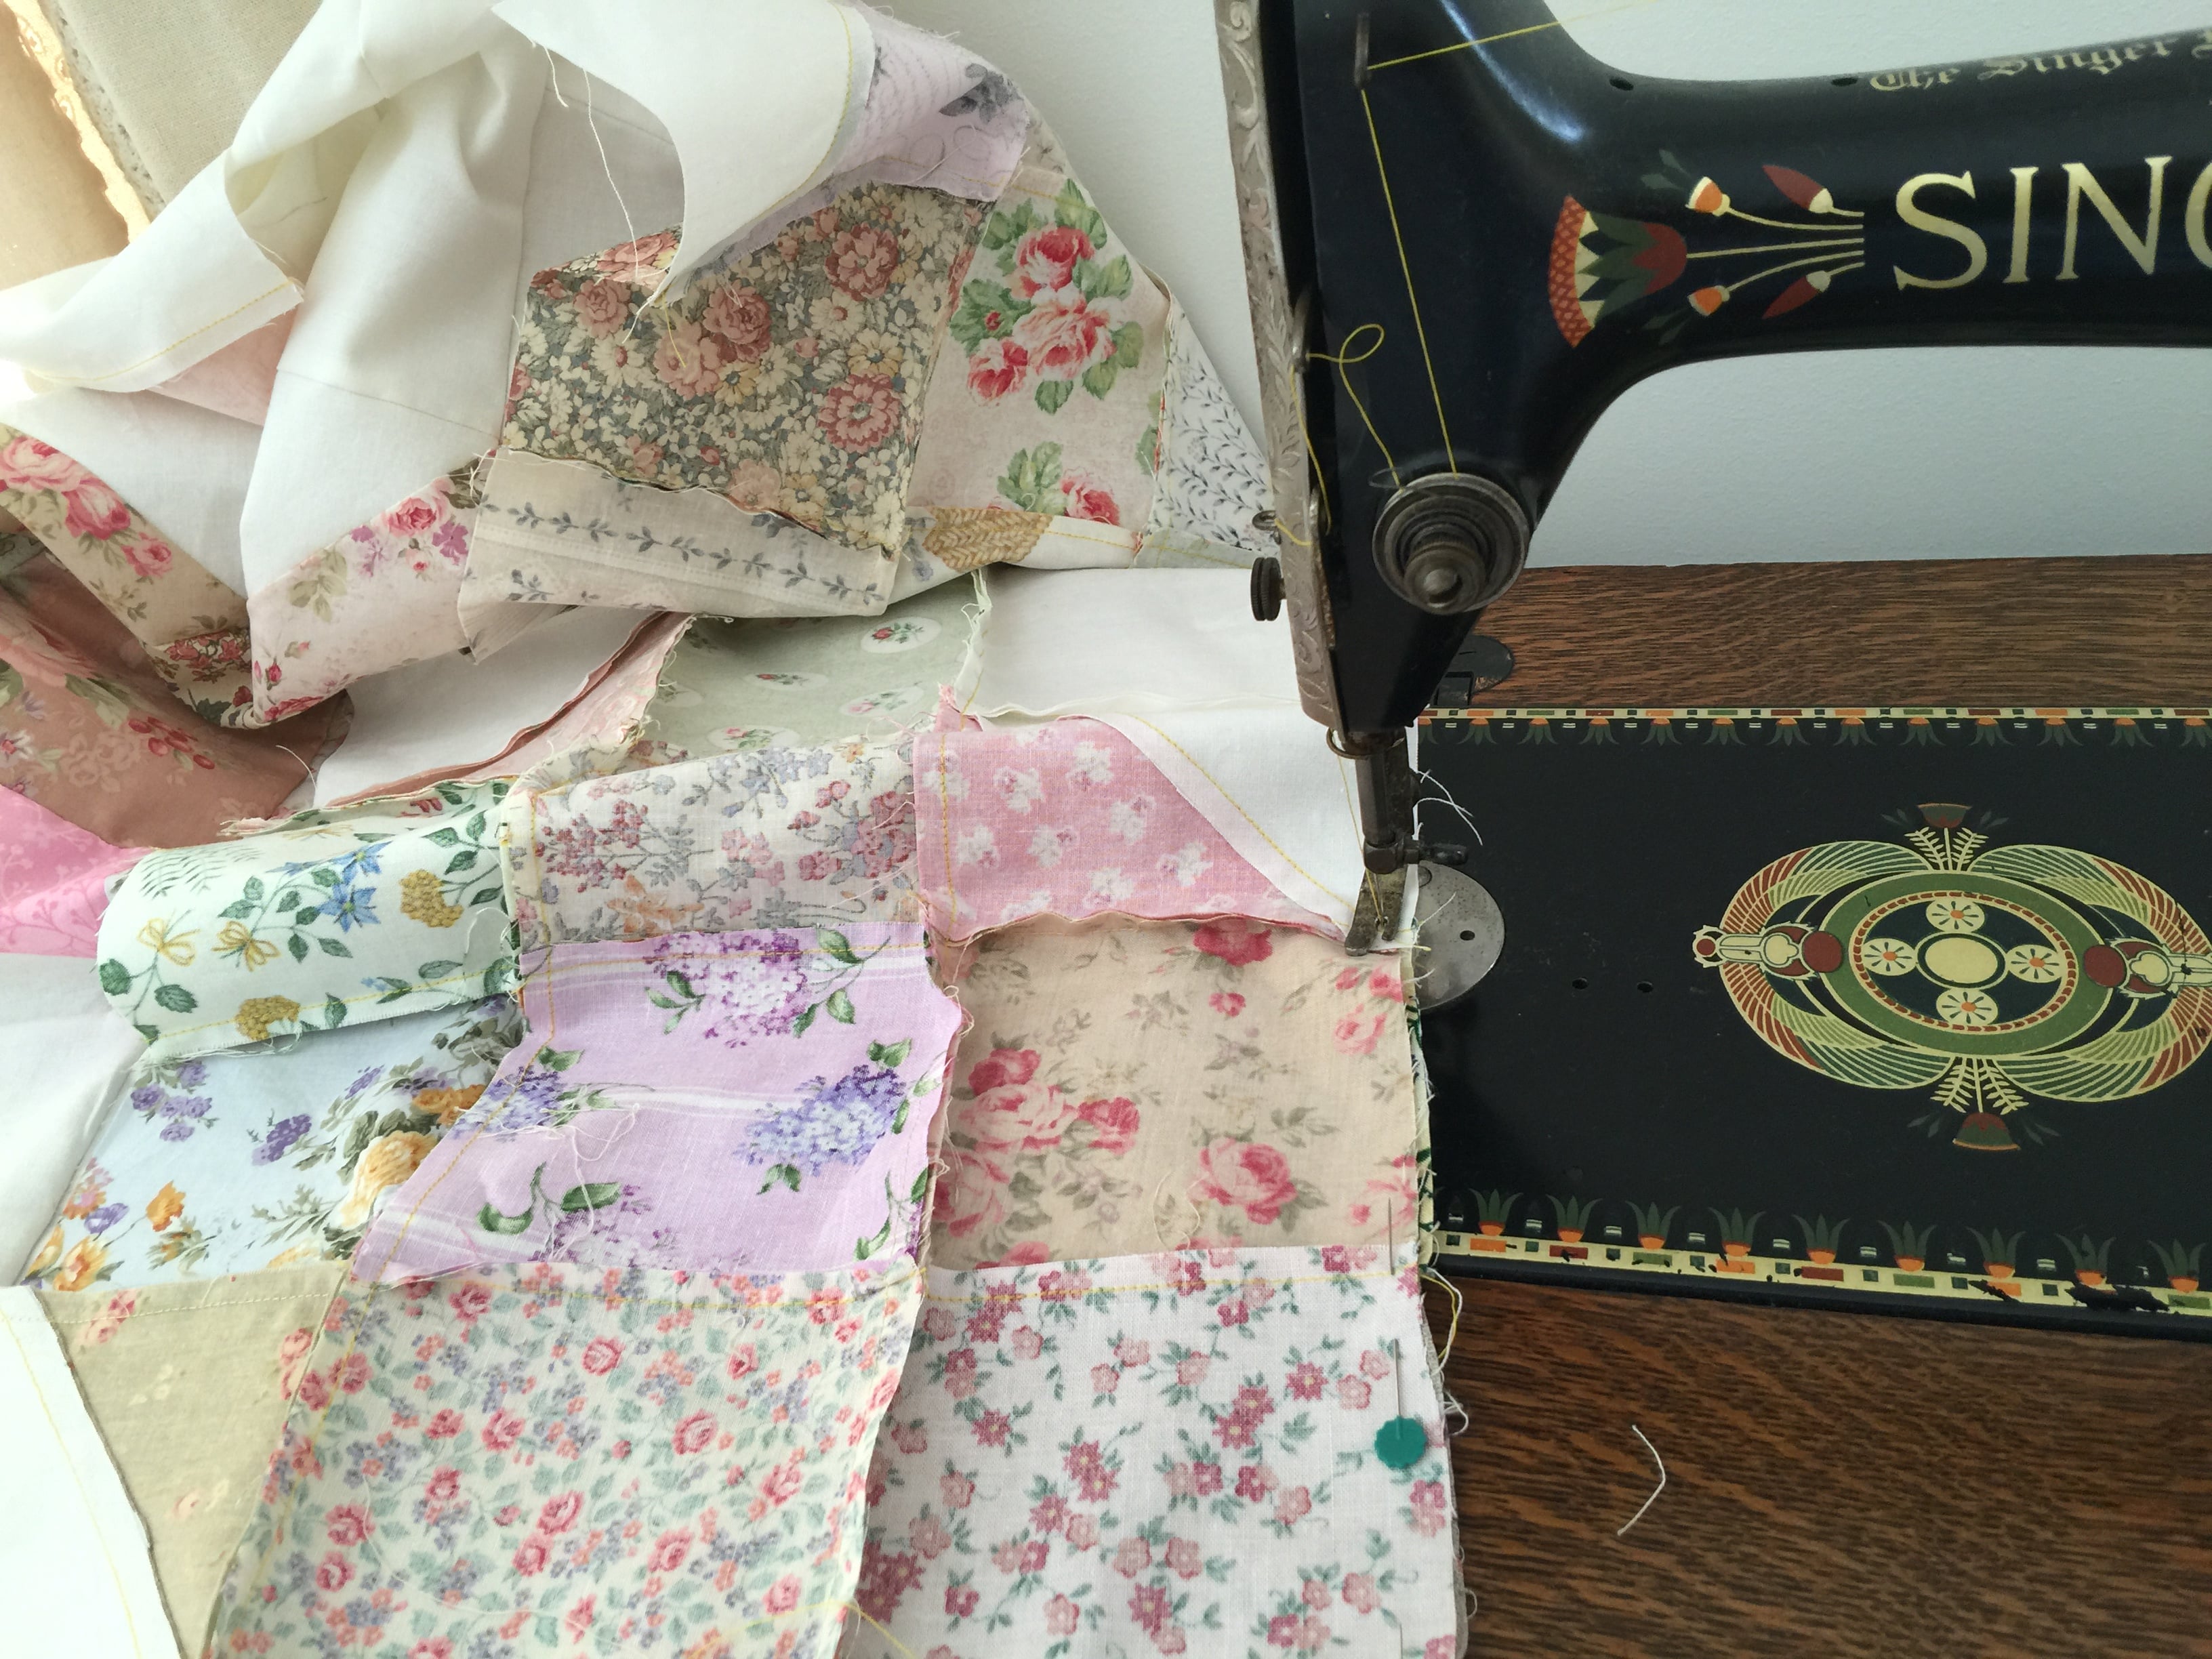
I’ve pieced this quilt on a 1923 treadle.
Begin by preparing the half square triangle units. Take the 9 floral 5″ x 5″ squares. Match them up with the 5″ x 5″ background squares, right sides together. Draw a diagonal line once across each of the background squares. Sew 1/4″ from the line on each side. Cut the units apart. Press. Trim to 4 1/2″ square if necessary.
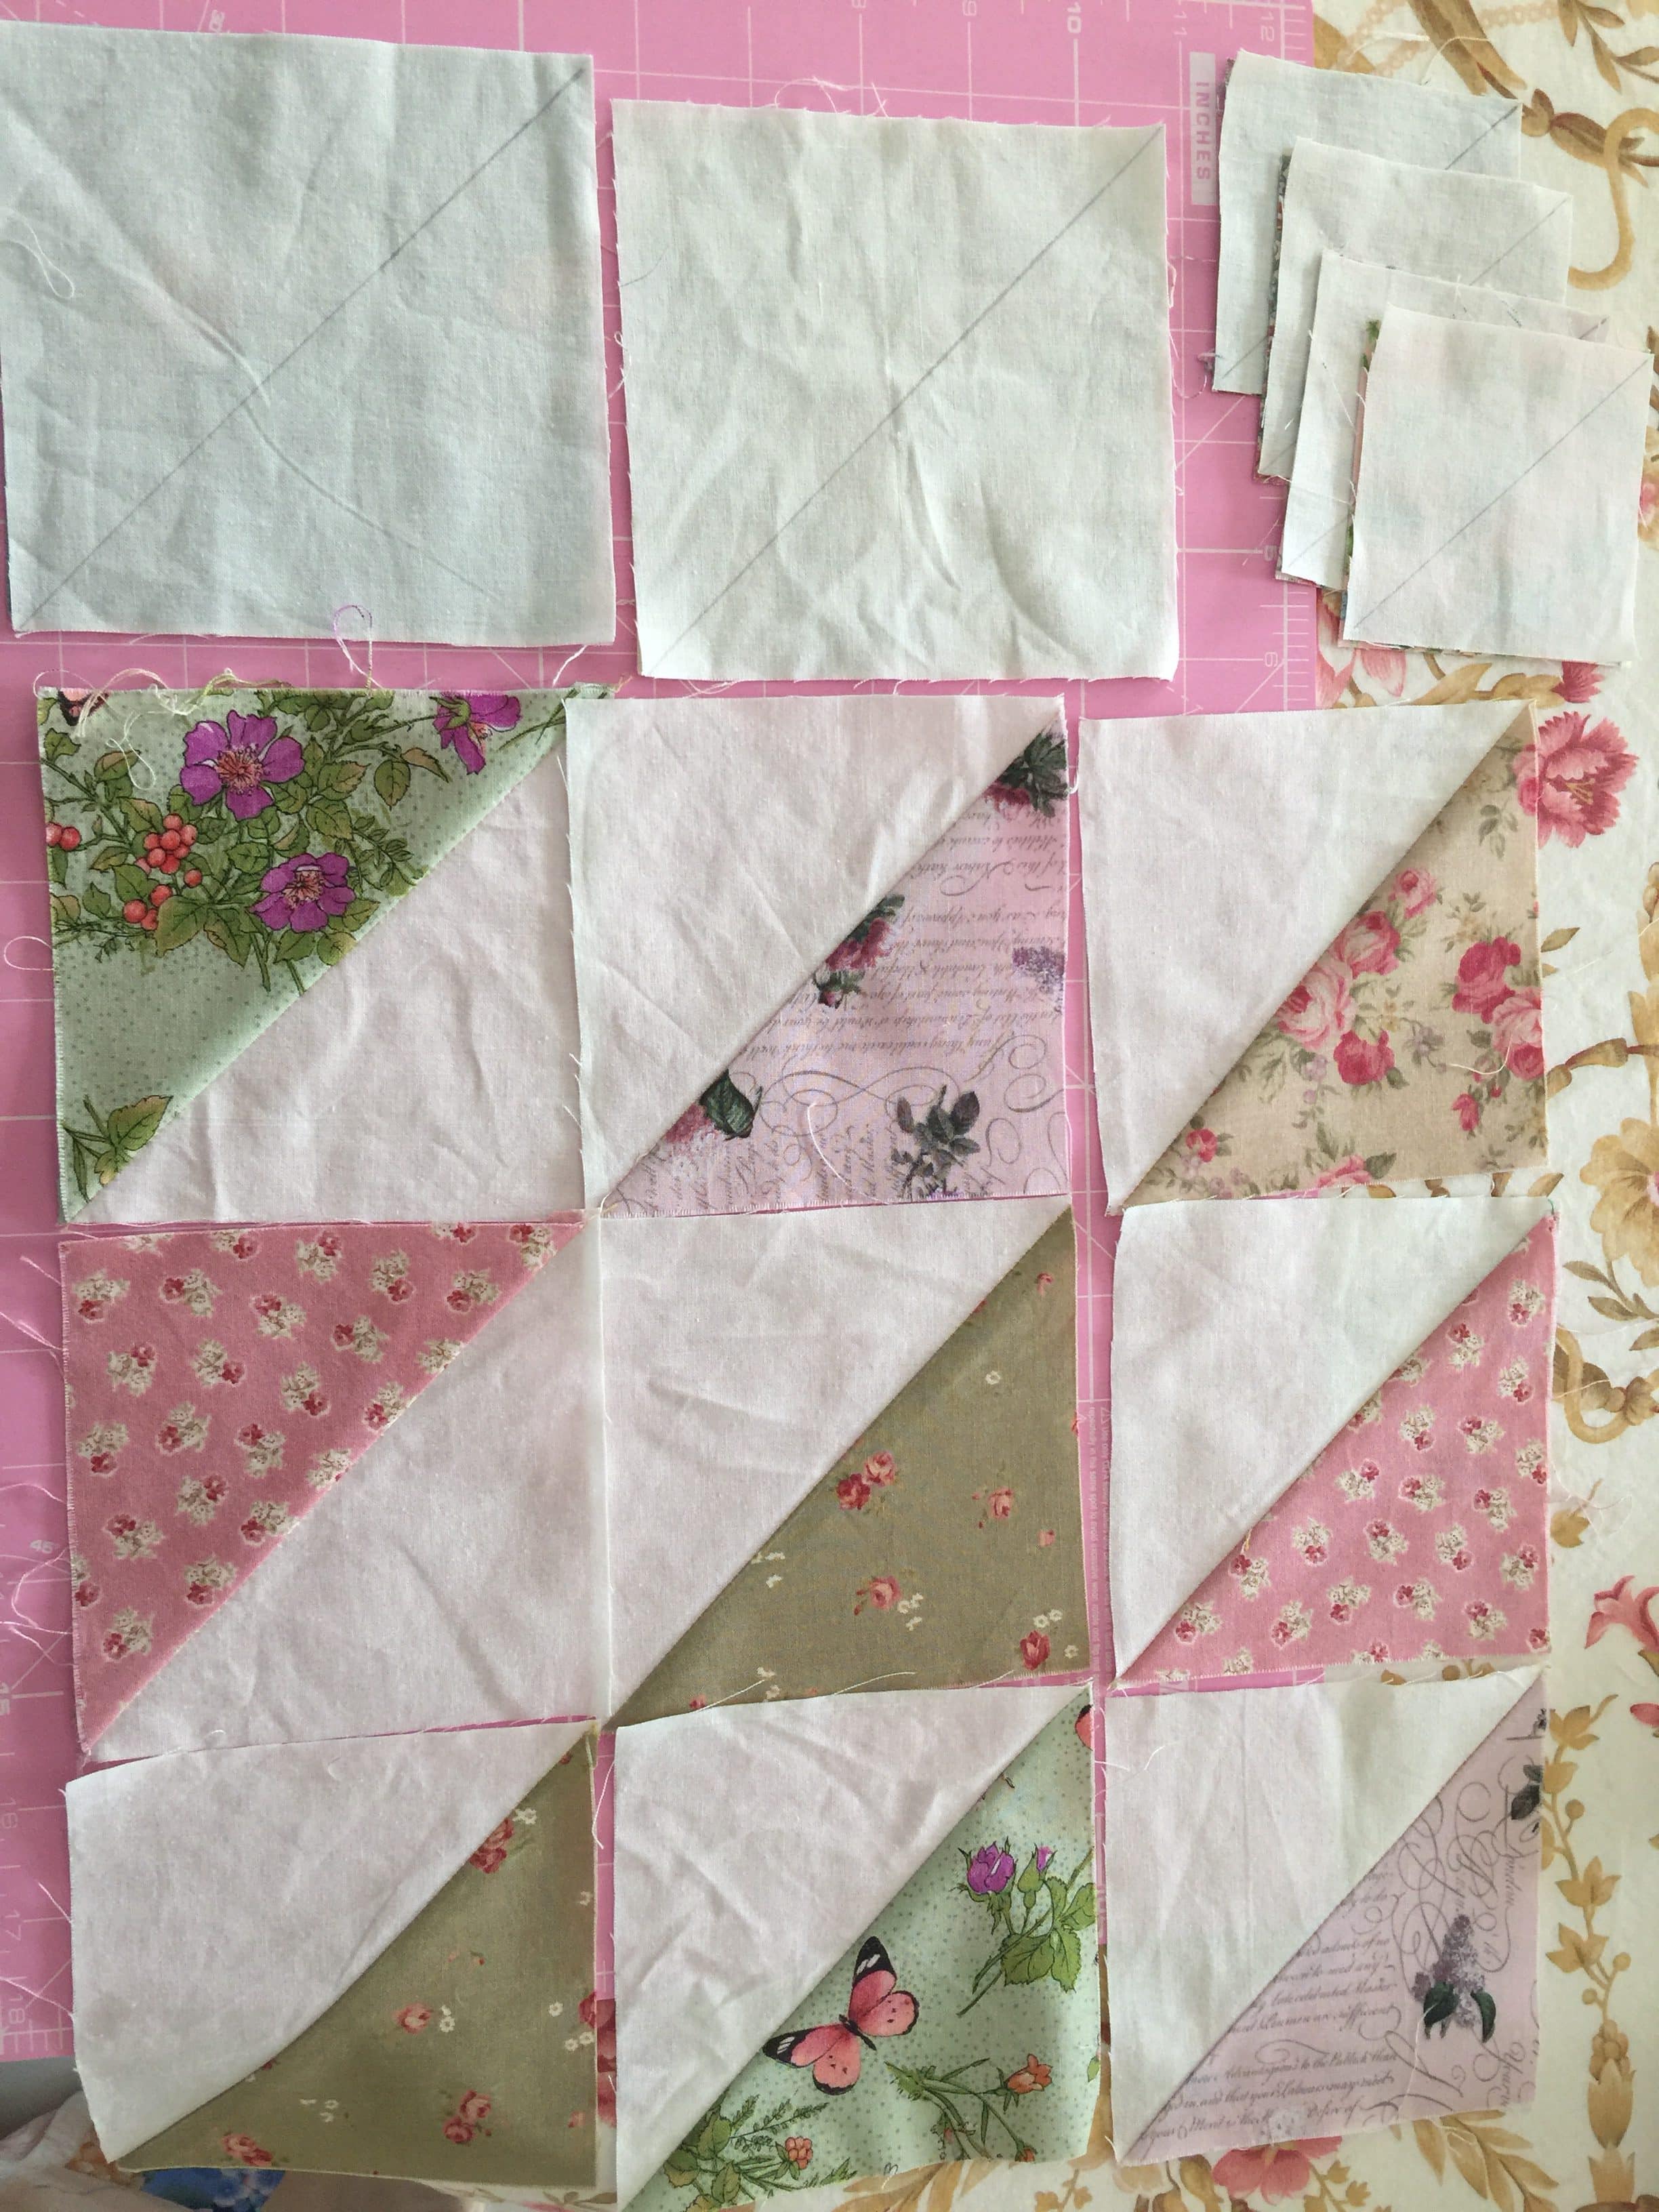
That will give 18 half square triangle units.
Repeat the same procedure with the 4 floral 3″ x 3″ squares and the background squares. Trim to 2 1/2″, if necessary. This will yield 8 half square triangle units.
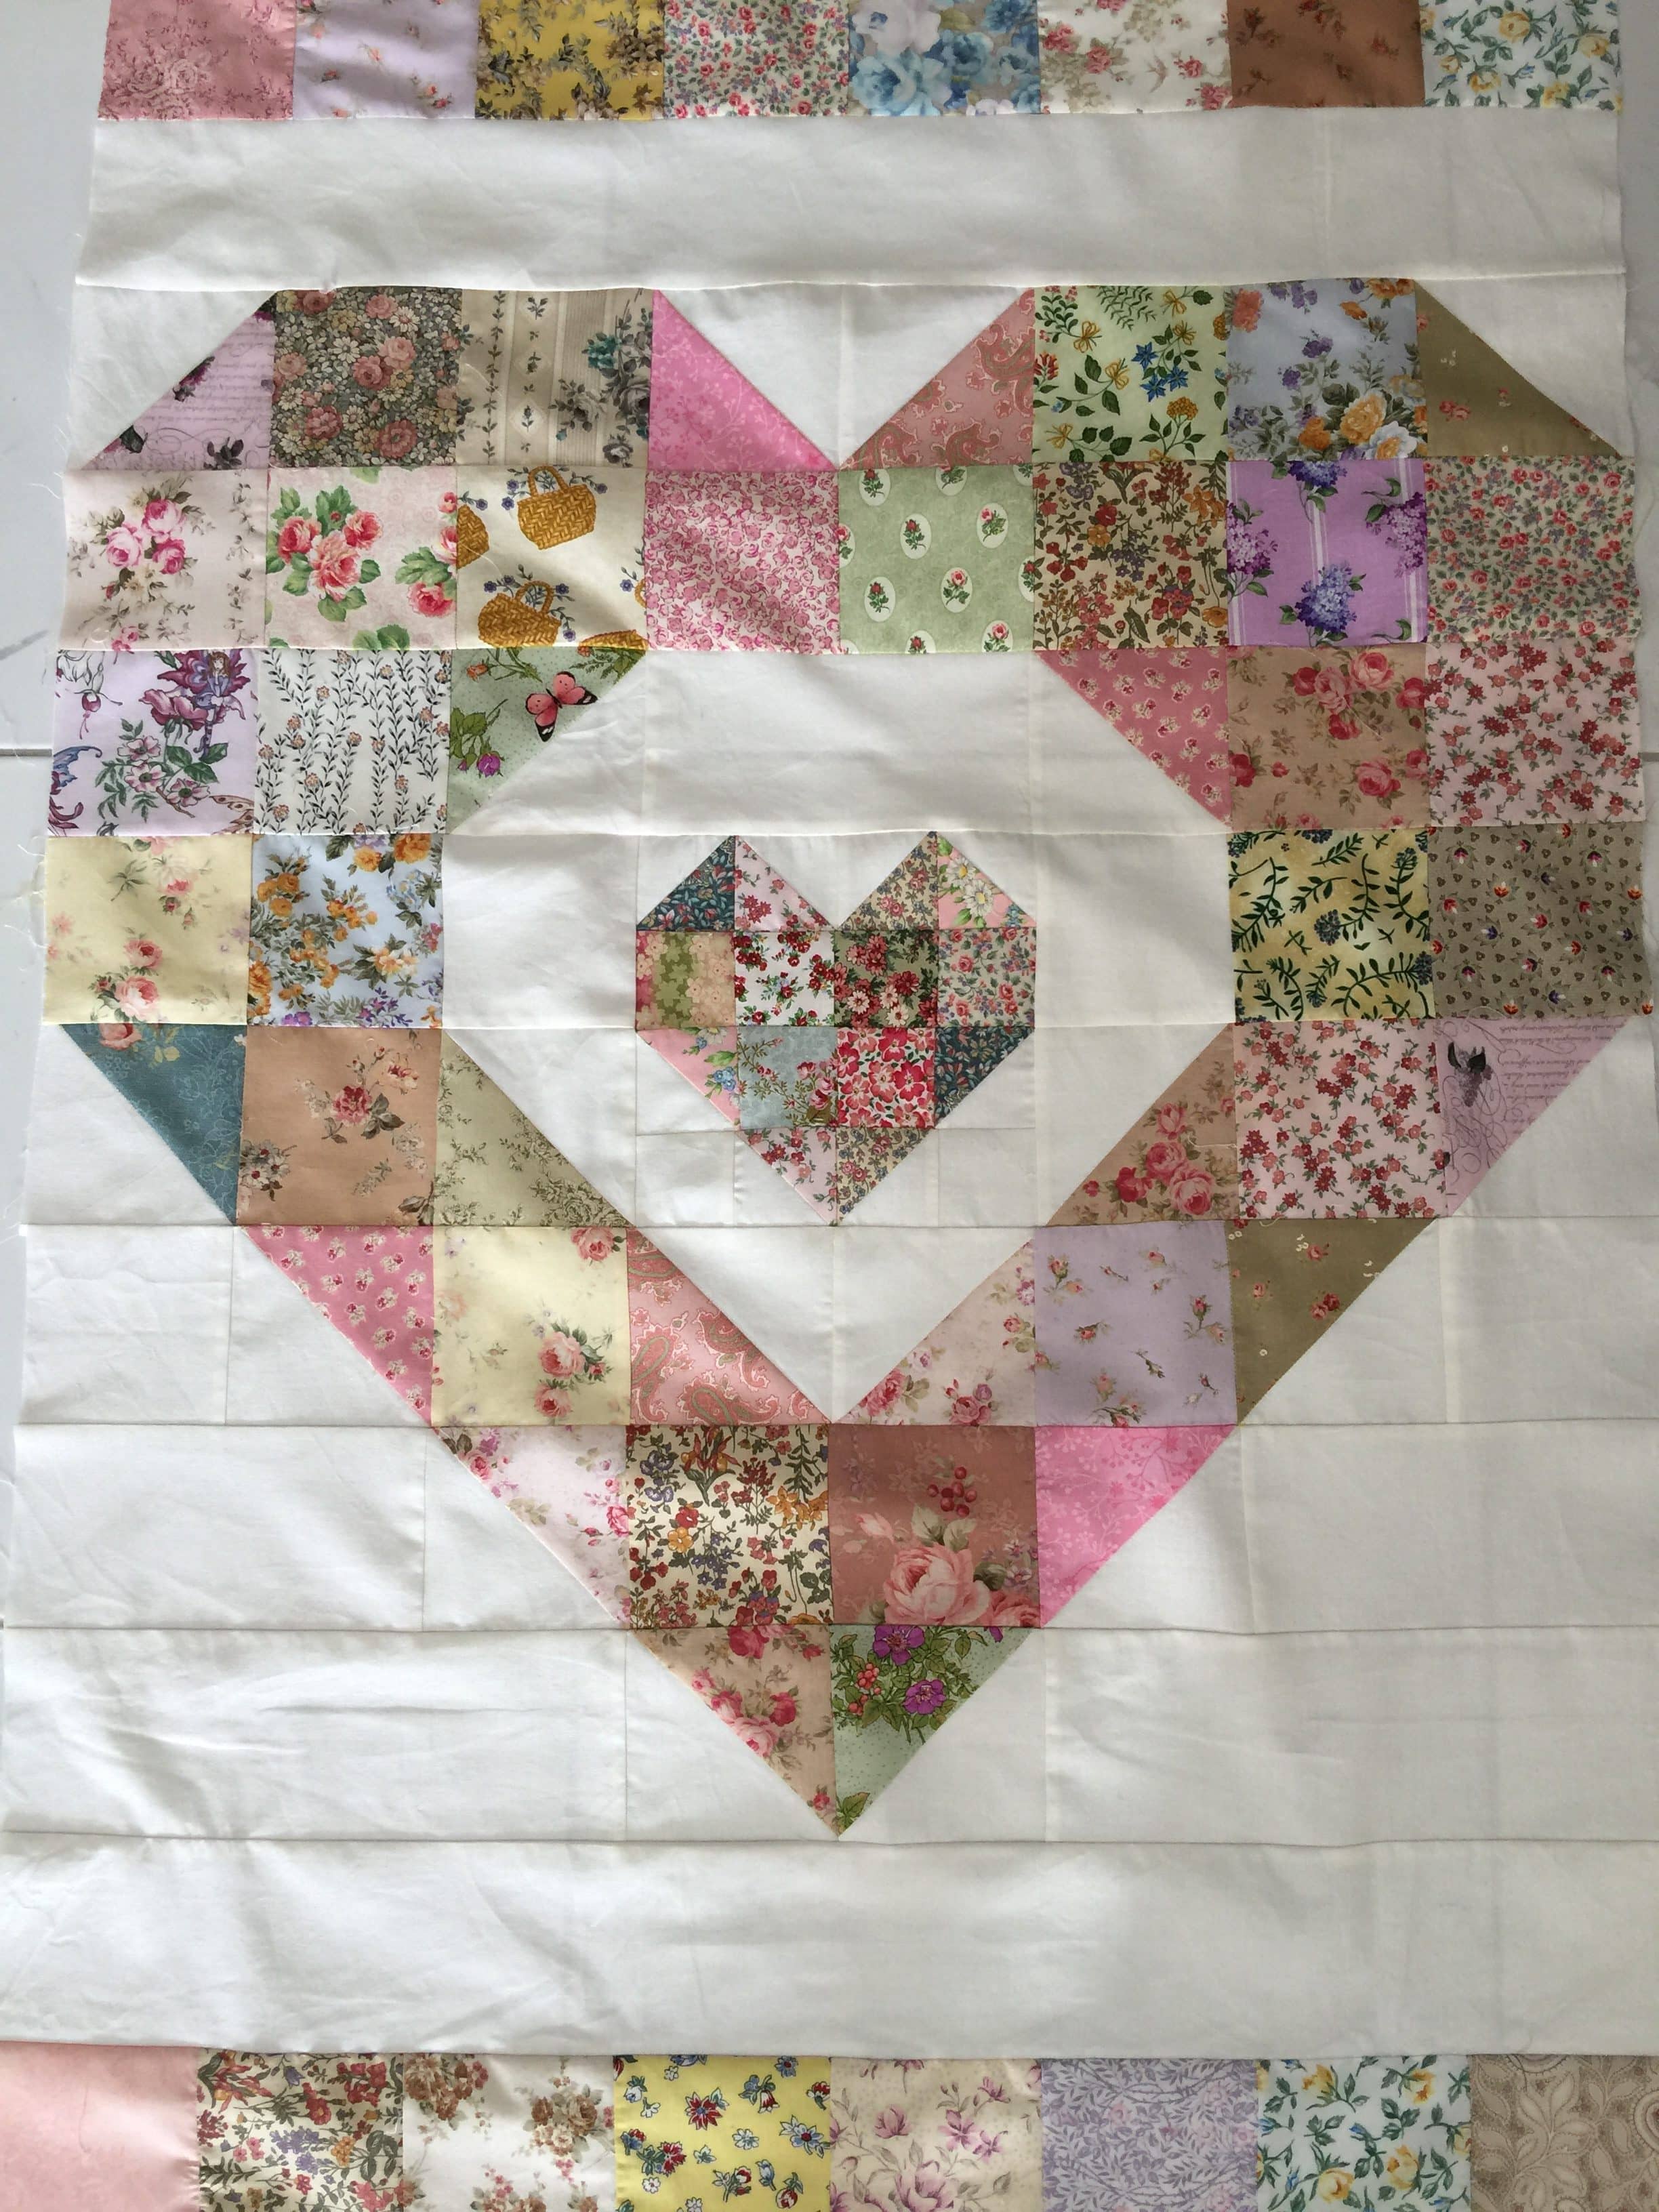
Next, make the centre heart using the 2 1/2″ units. That is, the 8 half square triangle units. The 6 floral 2 1/2″ x 2 1/2″ squares and the 2 background 2 1/2″ x 2 1/2″ squares. Lay them out as pictured below.

Sew the units together like a 16 patch. Make sure seams are nicely lined up and nested.
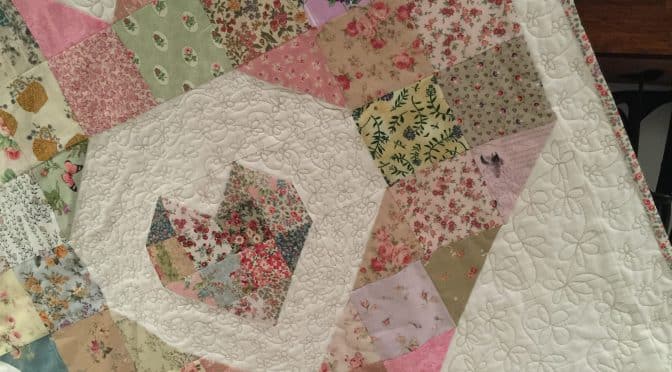
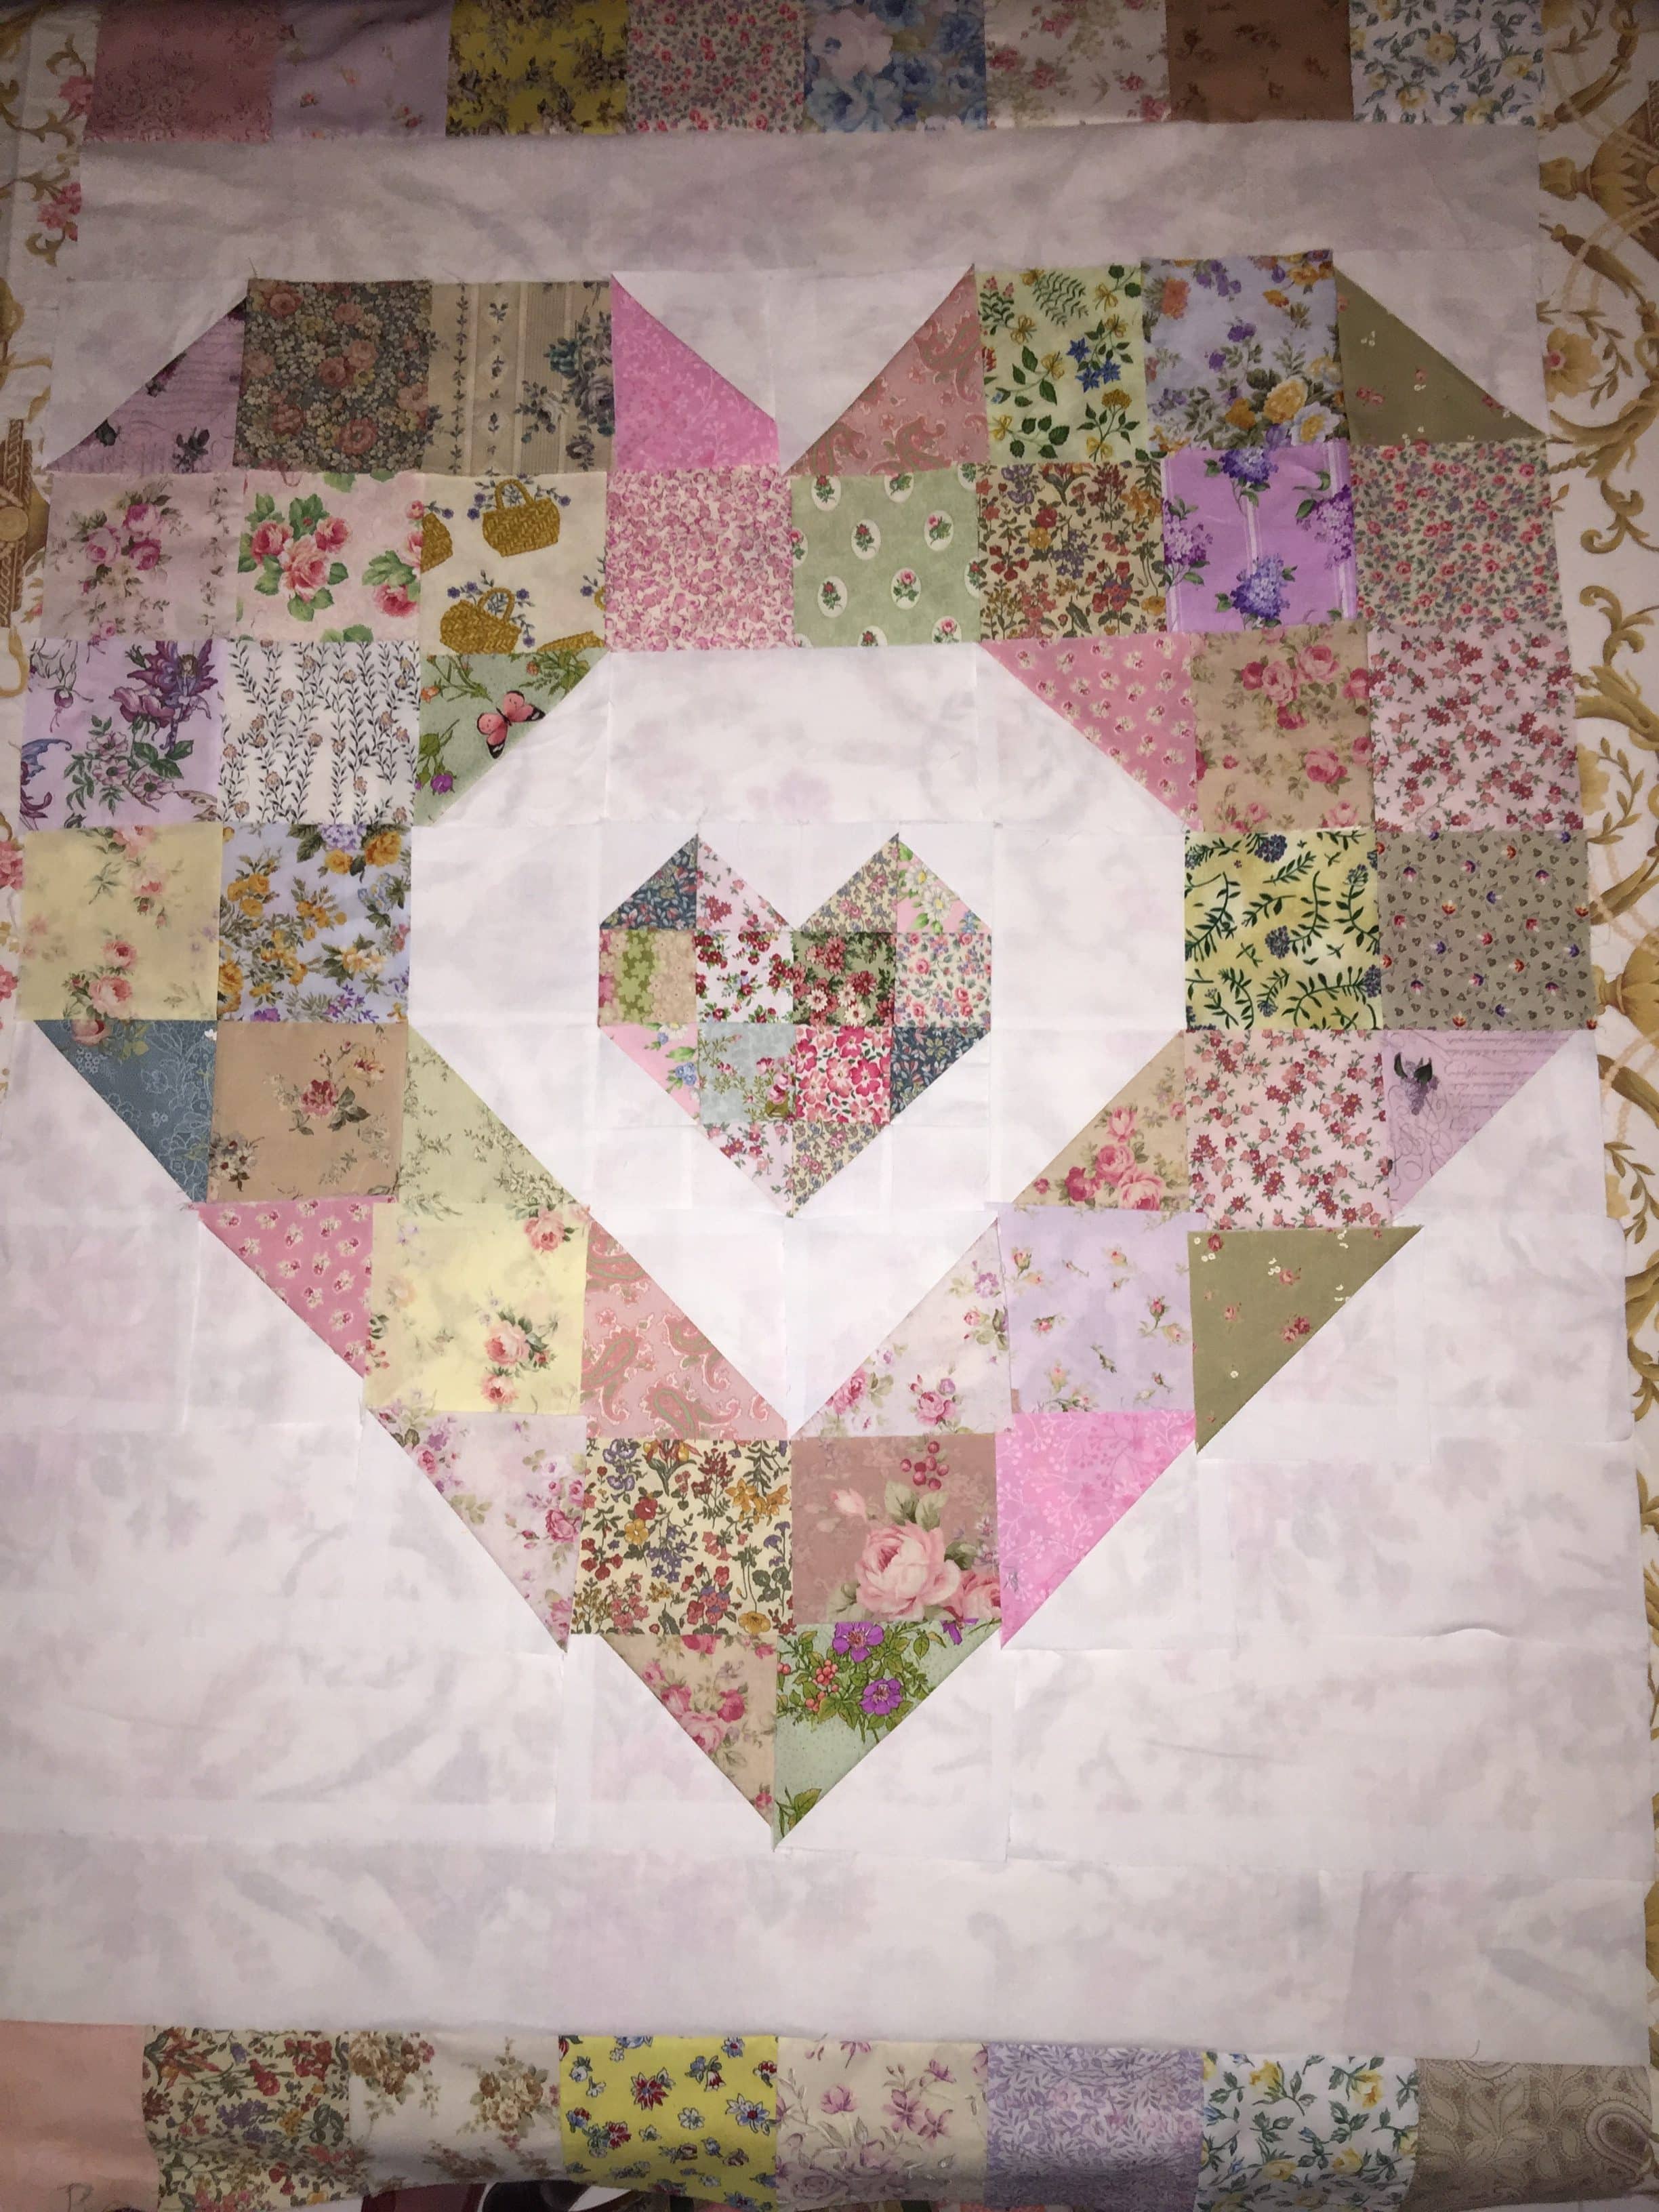
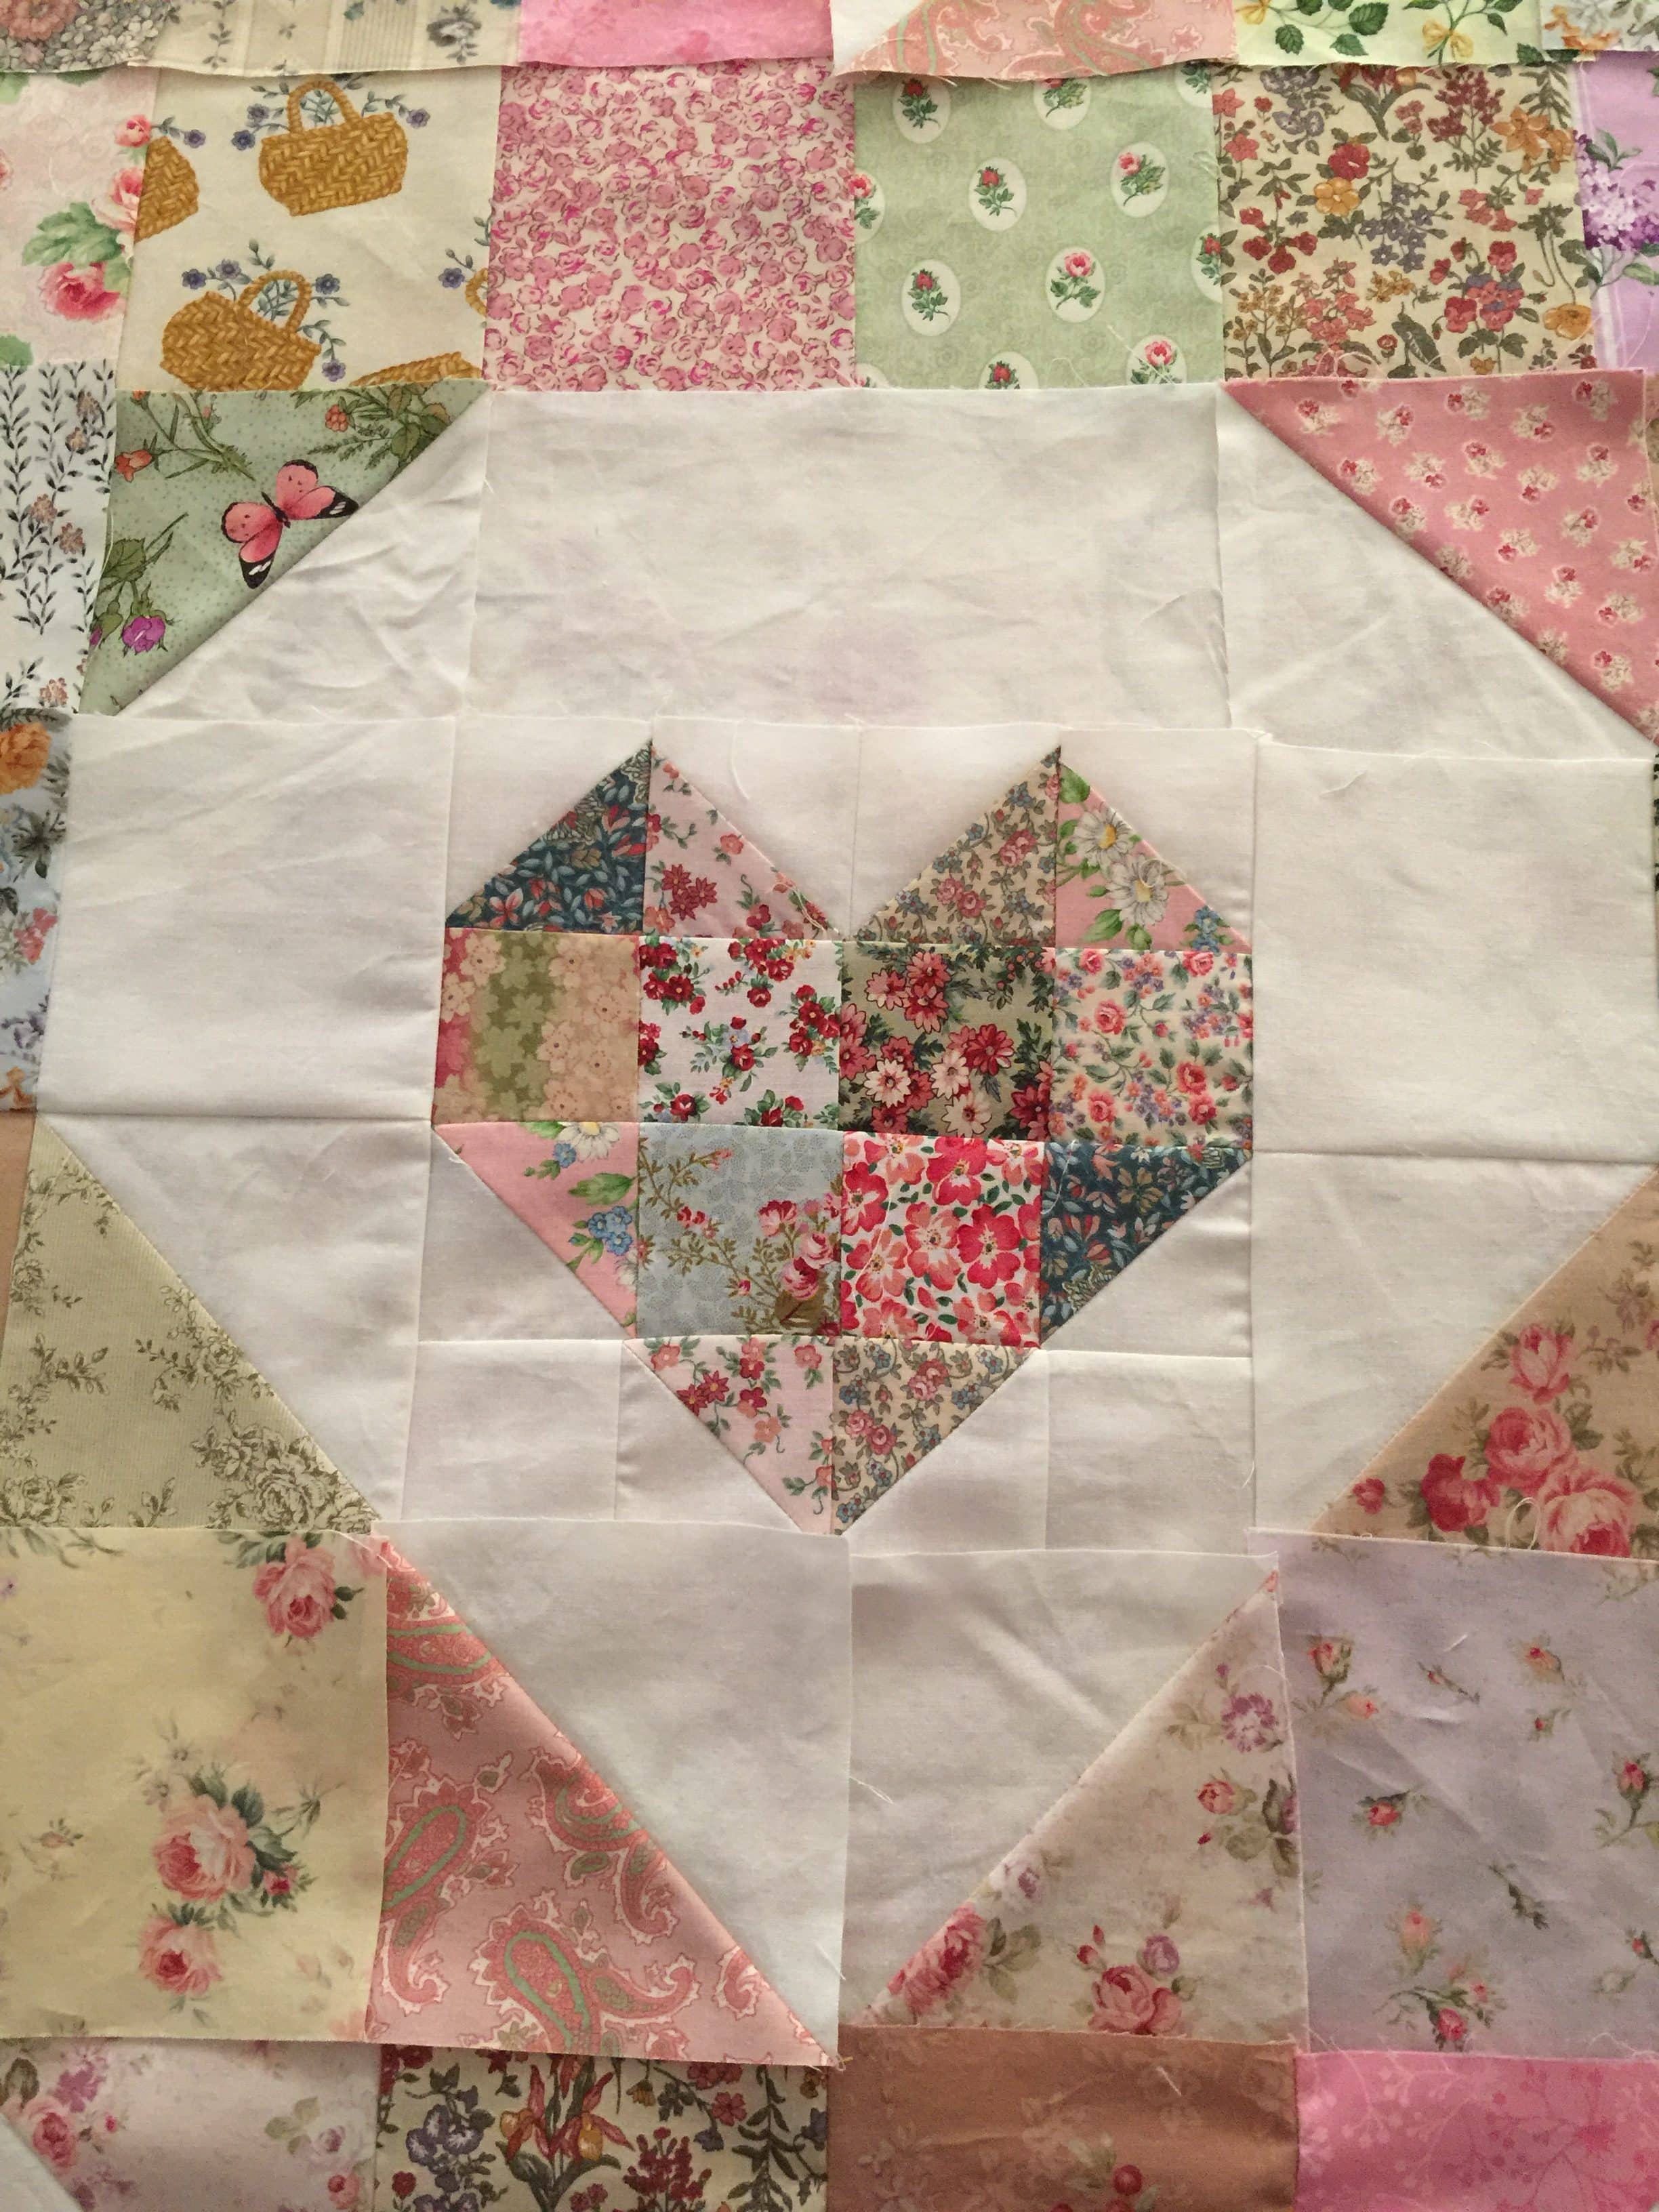
This quilt will be sewn together in rows. There are 12 rows. However the small heart will need to be incorporated into 2 centre rows.
Take 24 of the 4 1/2″ x 4 1/2″ floral squares. Sew them into three rows of eight squares each. Ensure no 2 fabrics the same are next to each other.
Now take all of the cut background pieces, the 18 half square triangle units, the centre heart and the three floral rows. Lay out all of the pieces as pictured below, beginning and ending with a floral row.
Here is a closer image of the centre area.
Sew the segments of each row together. Press.
Then assemble the quilt, one row at a time (except the two centre rows which are assembled together). Please make sure that seams are well aligned and nested wherever possible.
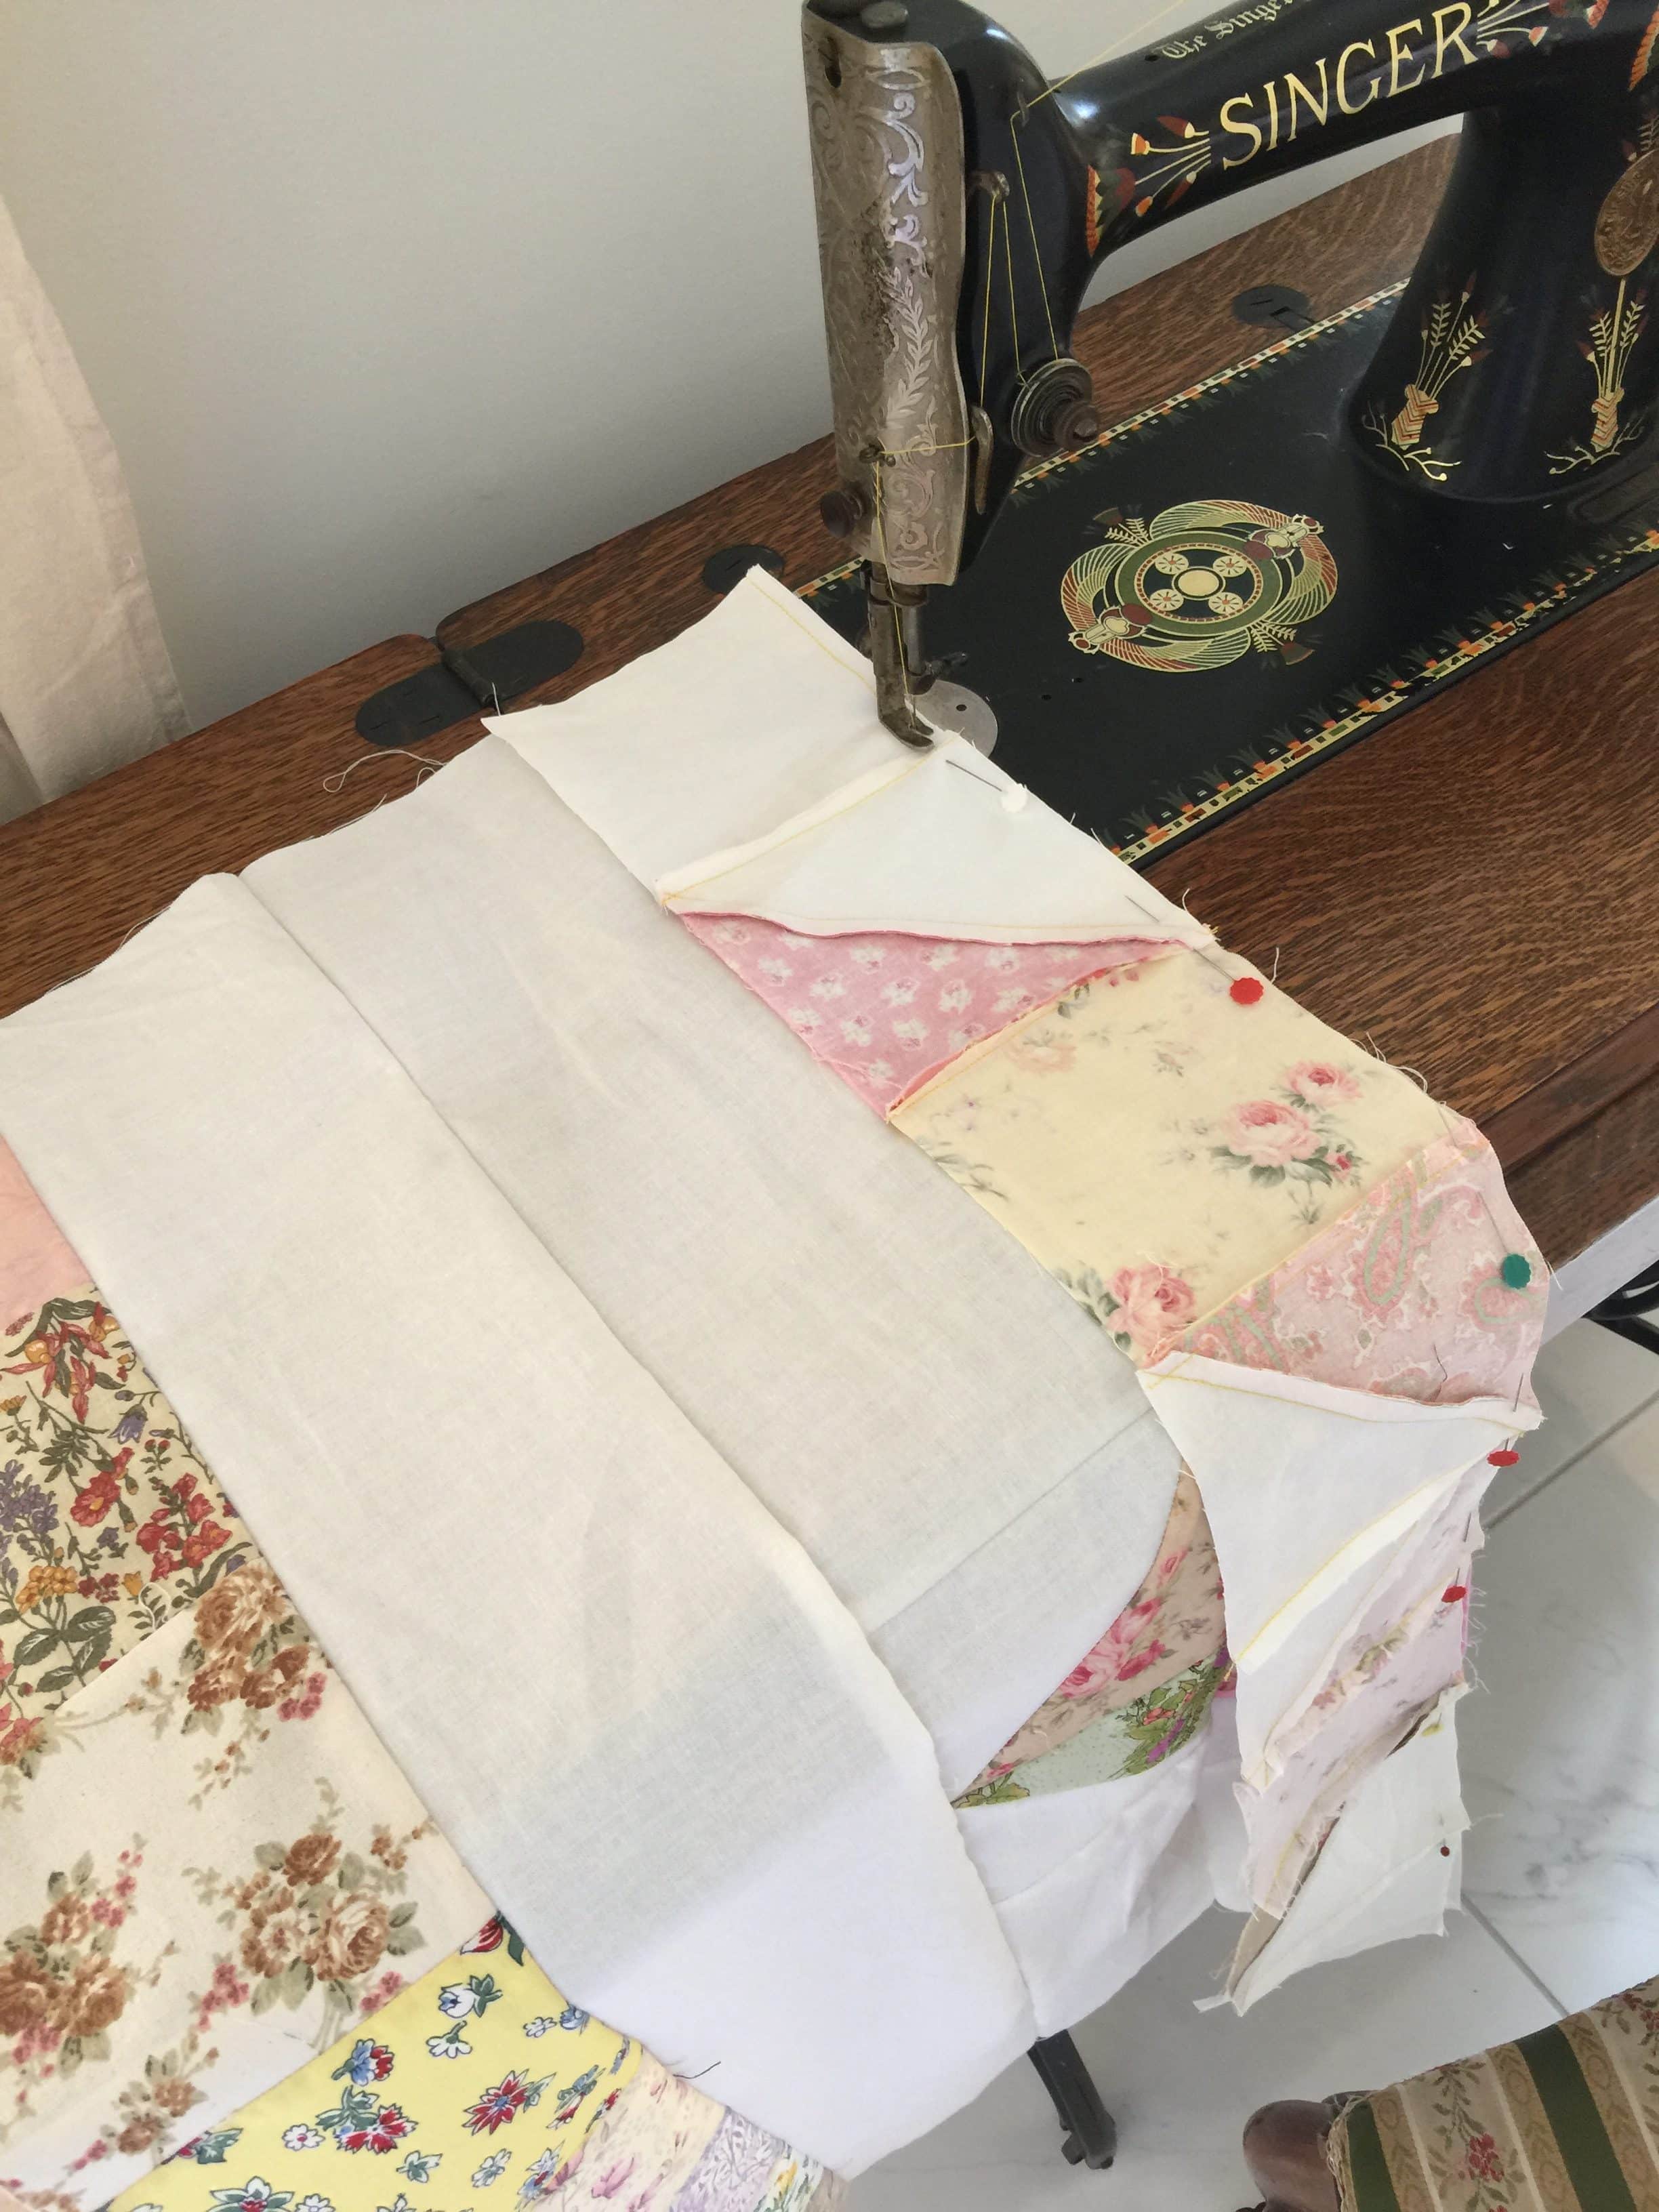
Here I am sewing on the 5th row from the bottom of the quilt. Sewing machine pictured is a Singer 66 Lotus treadle C1923.
Make Your Singer Sing (Part 2)
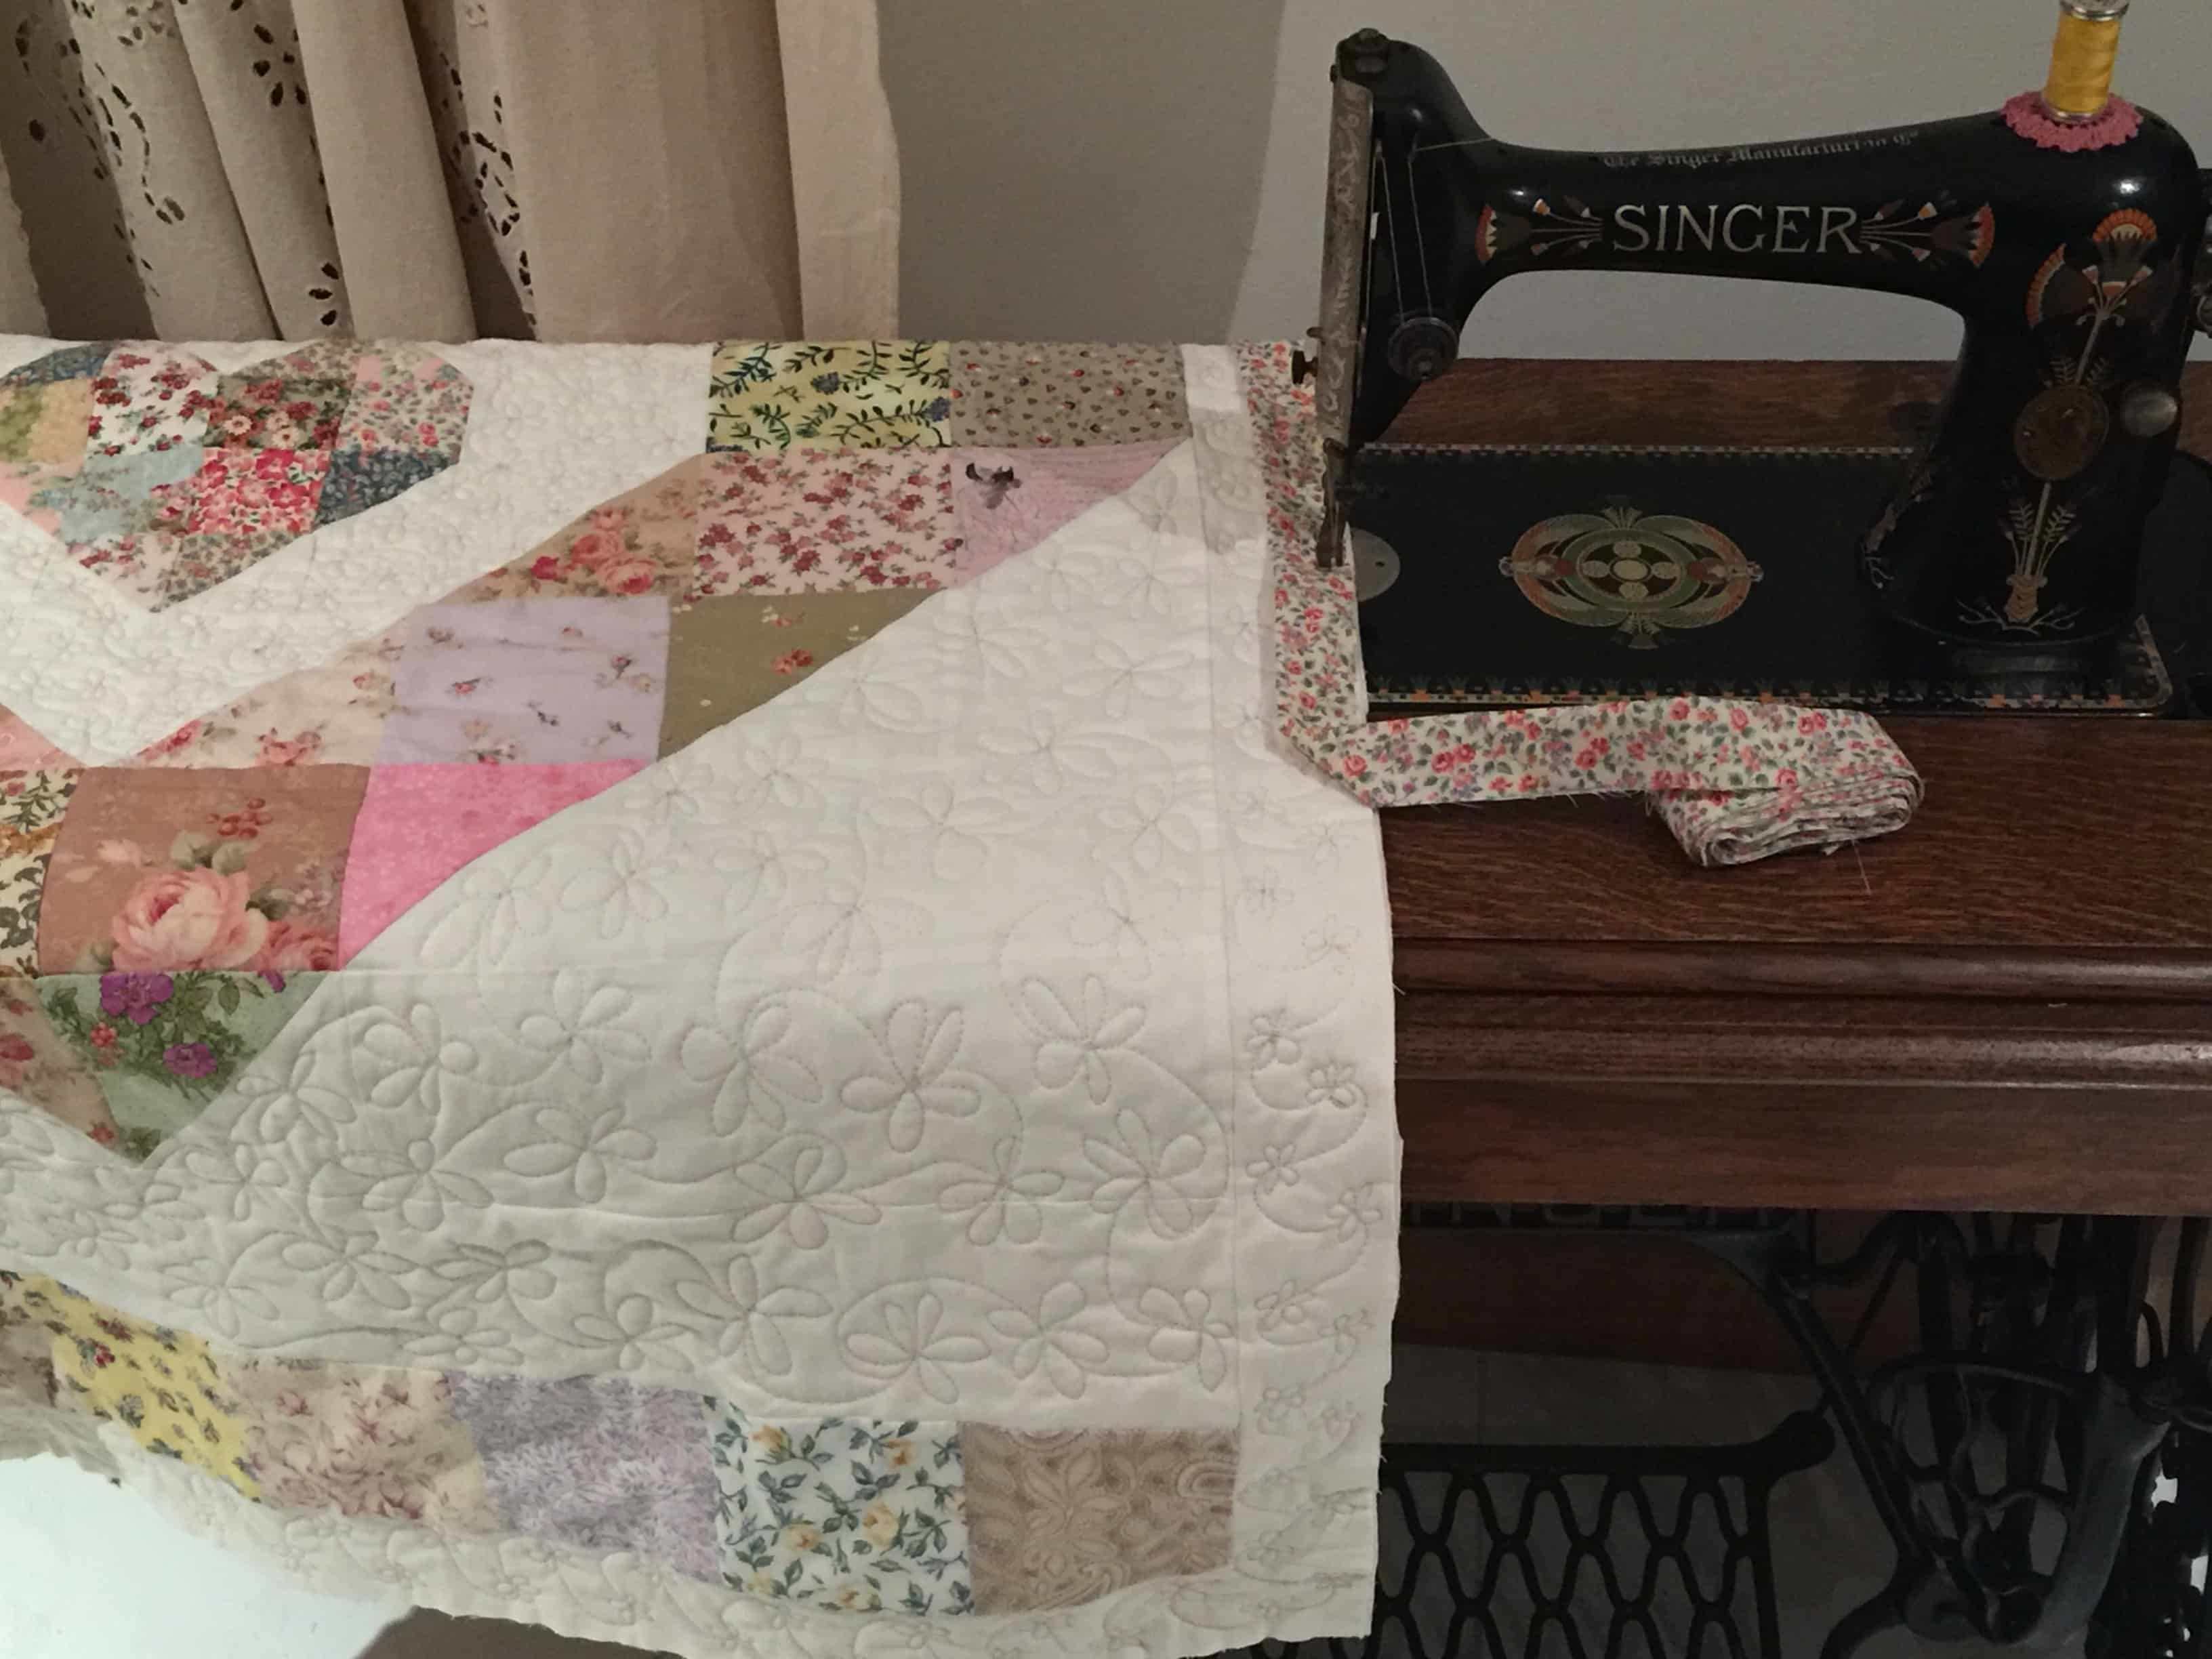
Once the quilt centre is assembled. Press. Measure through the centre of the quilt from each side to measure for the border pieces.
Sew the 2 1/2″ border strips around the perimeter of the quilt. Press.

Prepare the quilt for quilting.
Free Motion Quilting Part 3 The Sandwich
Quilt and bind as desired.
Prepare binding strips for quilts Tutorial
And there you have it….Baby Love Quilt. Have a great day!
© Susan Stuklis 2016
Author: Shay North (IP address: 65.26.154.173,
cpe-65-26-154-173.cinci.res.rr.com)
Email: sewingbyshay@gmail.com
URL:
Comment:
I’ll be making this up in navy, gray, yellow, and white for a niece’s
baby shower! Wish me luck!
do you have a tutorial on the Baby Love Quilt ?
Here is the link to Part 1 of Baby Love Quilt and Pattern
http://susies-scraps.com/2016/08/20/baby-love-quilt-pattern/
Love your blog. Everything in it from quilting instructions to cleaning vintage machines. I have a treadle with a shuttle bobbin. i need to get in there and clean it.
I totally luv this one! So sweet/romantic and simple! This really could go many directions and be made larger so easily……Thanks so much!!!!!