
Prepare Binding Strips for Quilts Tutorial
Binding strips for quilts. Love them or hate them they are pretty much a necessity for most quilts.
Of course there are exceptions and this would be quilts which are finished with Prairie Points, ruffles or unbound edges where the backing is applied to the front of the quilt, sewn around the edges with an opening left for turning, turned and then quilted. Another alternative is when the backing is left larger then turned over to the front to act as a binding.
Personally I love doing the binding on quilts. I really love making the binding strips and doing the hand sewing once the binding strip is applied.
Like most things in life, if you know how to do something, it does make it easier.
This is how I like to prepare my binding strips.
Please note that this is a method for binding straight edged quilts. I used to do a single binding but I find this method where the fabric is doubled is neater, stronger, easier to apply and superior to the single method. The edges of the quilt take a lot of wear over time and this encloses the edges very well. If you are making a quilt with curved edges or needing binding for dressmaking then you will require “Bias” binding, in this case the strips will be cut on a 45 degree angle of the fabric. This angle captures the “stretch” ability of the fabric which is required for binding curves.
I use 2 1/2 inch strips from the width of fabric for all my bindings. I’ll start by saying that it’s far better to make the binding strip too long than have it fall short.


Measure the perimeter of the quilt. Divide it by the length of the binding strips minus 5 inches for each strip to allow for the joins to get the number of strips required.
Join the 2 1/2 inch binding strips into one long strip by attaching the strips at right angles with right sides together and with a half inch overlap at each side of the strip. I’ve drawn a line to show where to sew.
Sew diagonally across the overlapping piece, from corner to corner then trim off the two triangles leaving a diagonal seam. Continue until all the strips are joined in the same manner.

Now take your long binding strip, and gently fold in half longitudinally ensuring that the edges meet. Roll up the strip as you go. I find this makes it much easier to handle once starting to press. Take the binding strip to the ironing board and press the full length of the strip.

Ensure that the dog ears are snipped off as the binding is prepared. The scissor tip is pointing to one of the dog ears. The benefit of attaching the strips on the diagonal is reducing the bulk of the binding for sewing. The alternative of sewing the binding strips together on the straight of grain will mean that as the binding is sewn on it will be necessary to sew through 10 layers of fabric plus the batting and when the binding is turned back on itself there will be eighteen layers of fabric plus batting in one spot will can cause distortion and obvious bulk.
With the diagonal seam, the most fabric layers to sew through will be six, plus the batting. When the binding is turned back on itself the seams bulk is dispersed diagonally across the edge reducing bulk.

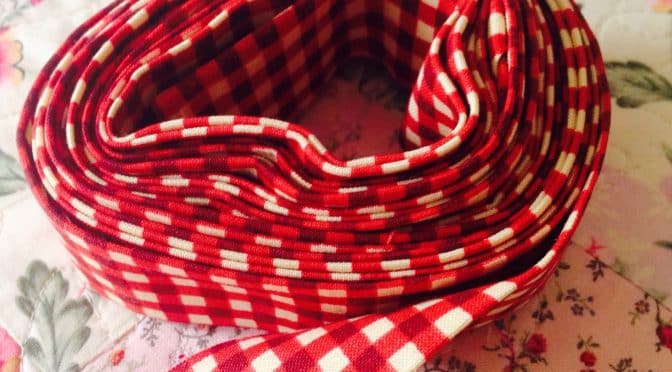
Now you have a lovely strip ready for binding onto a quilt. Remember quilt bindings don’t have to be from one fabric. They can be scrappy too . Just remember, better too long, than too short. Because it’s 2 1/2 inches wide any leftovers from the binding strip, can easily be worked into another quilt or scrappy binding.
Now the binding is made it can be attached to the quilt.
Attaching Binding to a Quilt Tutorial
If you enjoyed this post you may also like
Hand Sewing the Binding on a Quilt Tutorial
Happy Sewing,
Susie
It’s lovely. I was wondering about the finished size. I’m thinking of making it into a tablecloth.
Dear Candace, the finished size for the Stars and Crosses Band quilt is approximately 32″ X 50 1/2 (inches). If that is too small it would be very easy to upsize the measurements for a larger quilt.
Thank you for this tutorial! I really needed this. I just have made my very first queen size quilt top. I am about to sendwich it and quilt. Then comes binding! I hope I will get it done this year!
Im glad this is helpful. I will soon publish a follow up post on how to sew on the binding and mitre the corners.