
Quickstep Courthouse Steps Quilt
Hello dear friends and Readers and welcome to today’s post.
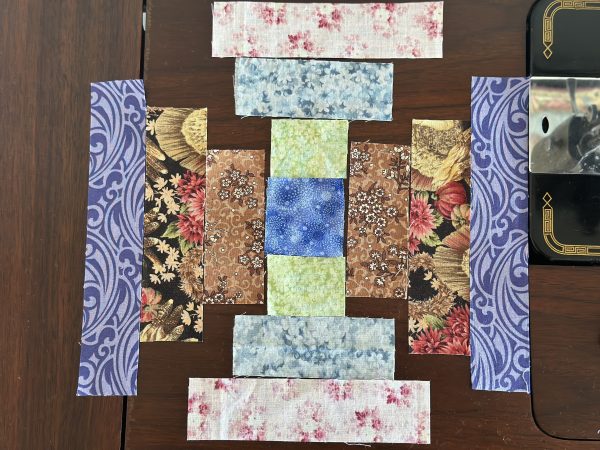
I started making these Quickstep Two Four Six Eight Block and they are so much fun, because the measurements are super simple for this type of Courthouse Steps Log Cabin Variation Block.
I think it’s understandable that the log cabin quilt block and all its variants, continue to be historically the most popular quilt blocks ever. I think one of the reasons for this is that, in reality, no matter what fabrics you would put into a log cabin block, it is always going to be beautiful. I mean, if you can have light and dark, of course that will give a great contrast effect, but even if you don’t, even if your fabrics are blending the results will still be beautiful. I have written more about Log Cabin Blocks here. Lessons in Log Cabin Blocks
My inspiration is drawn from antique and vintage quilts. When I make children’s quilts, I like to choose designs which will transcend time and still be suitable for someone to use as a lap quilt, no matter what age. and I believe log cabin quilts work perfectly.
It didn’t take very long to make the 35 blocks. The reason it didn’t take long, I believe, is because of the quick cutting method of this quilt block and its easy measurements. Another reason is because it’s a courthouse steps block so you can’t get mixed up with the direction in which the fabrics need to be placed like can happen with the Log Cabin. I decided to make enough to be a big cot quilt. This is Courthouse Steps Made Easy!
Here is the link to the block pattern. Quickstep Two Four Six Eight Block
Today I will show you how I’ve put this top together. It really is a good one for scrap strips. The only decision that needs to be made is whether your fabrics are light or dark. They will all come together very nicely in this design no matter what the fabrics.
Let’s get to it.
All seams based on one quarter inch.
Finished block size 7 1/2″ x 7 1/2″
Finished quilt size approx 35 ½” x 49 ½”
Requirements for the Quickstep Courthouse Steps Quilt
35 of 2″ x 2″ Centre squares (use a strong colour)
70 of 2″ x 1.5″ light strips
70 of 4″ x 1 ½” dark strips
70 of 4″ x 1 ½” light strips
70 of 6″ x 1 ½” dark strips
70 of 6″ x 1 ½” light strips
70 of 8″ x 1 ½” dark strips
Make 35 of the Quickstep Two Four Six Eight Blocks
Piece the 35 blocks as instructed in the block pattern. Here is the link to the blocks.
Quickstep Two Four Six Eight Block
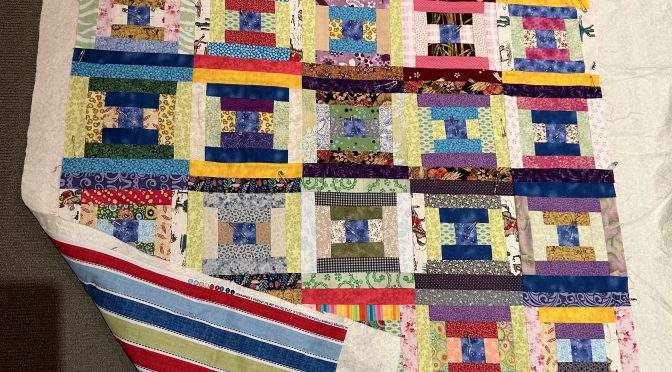
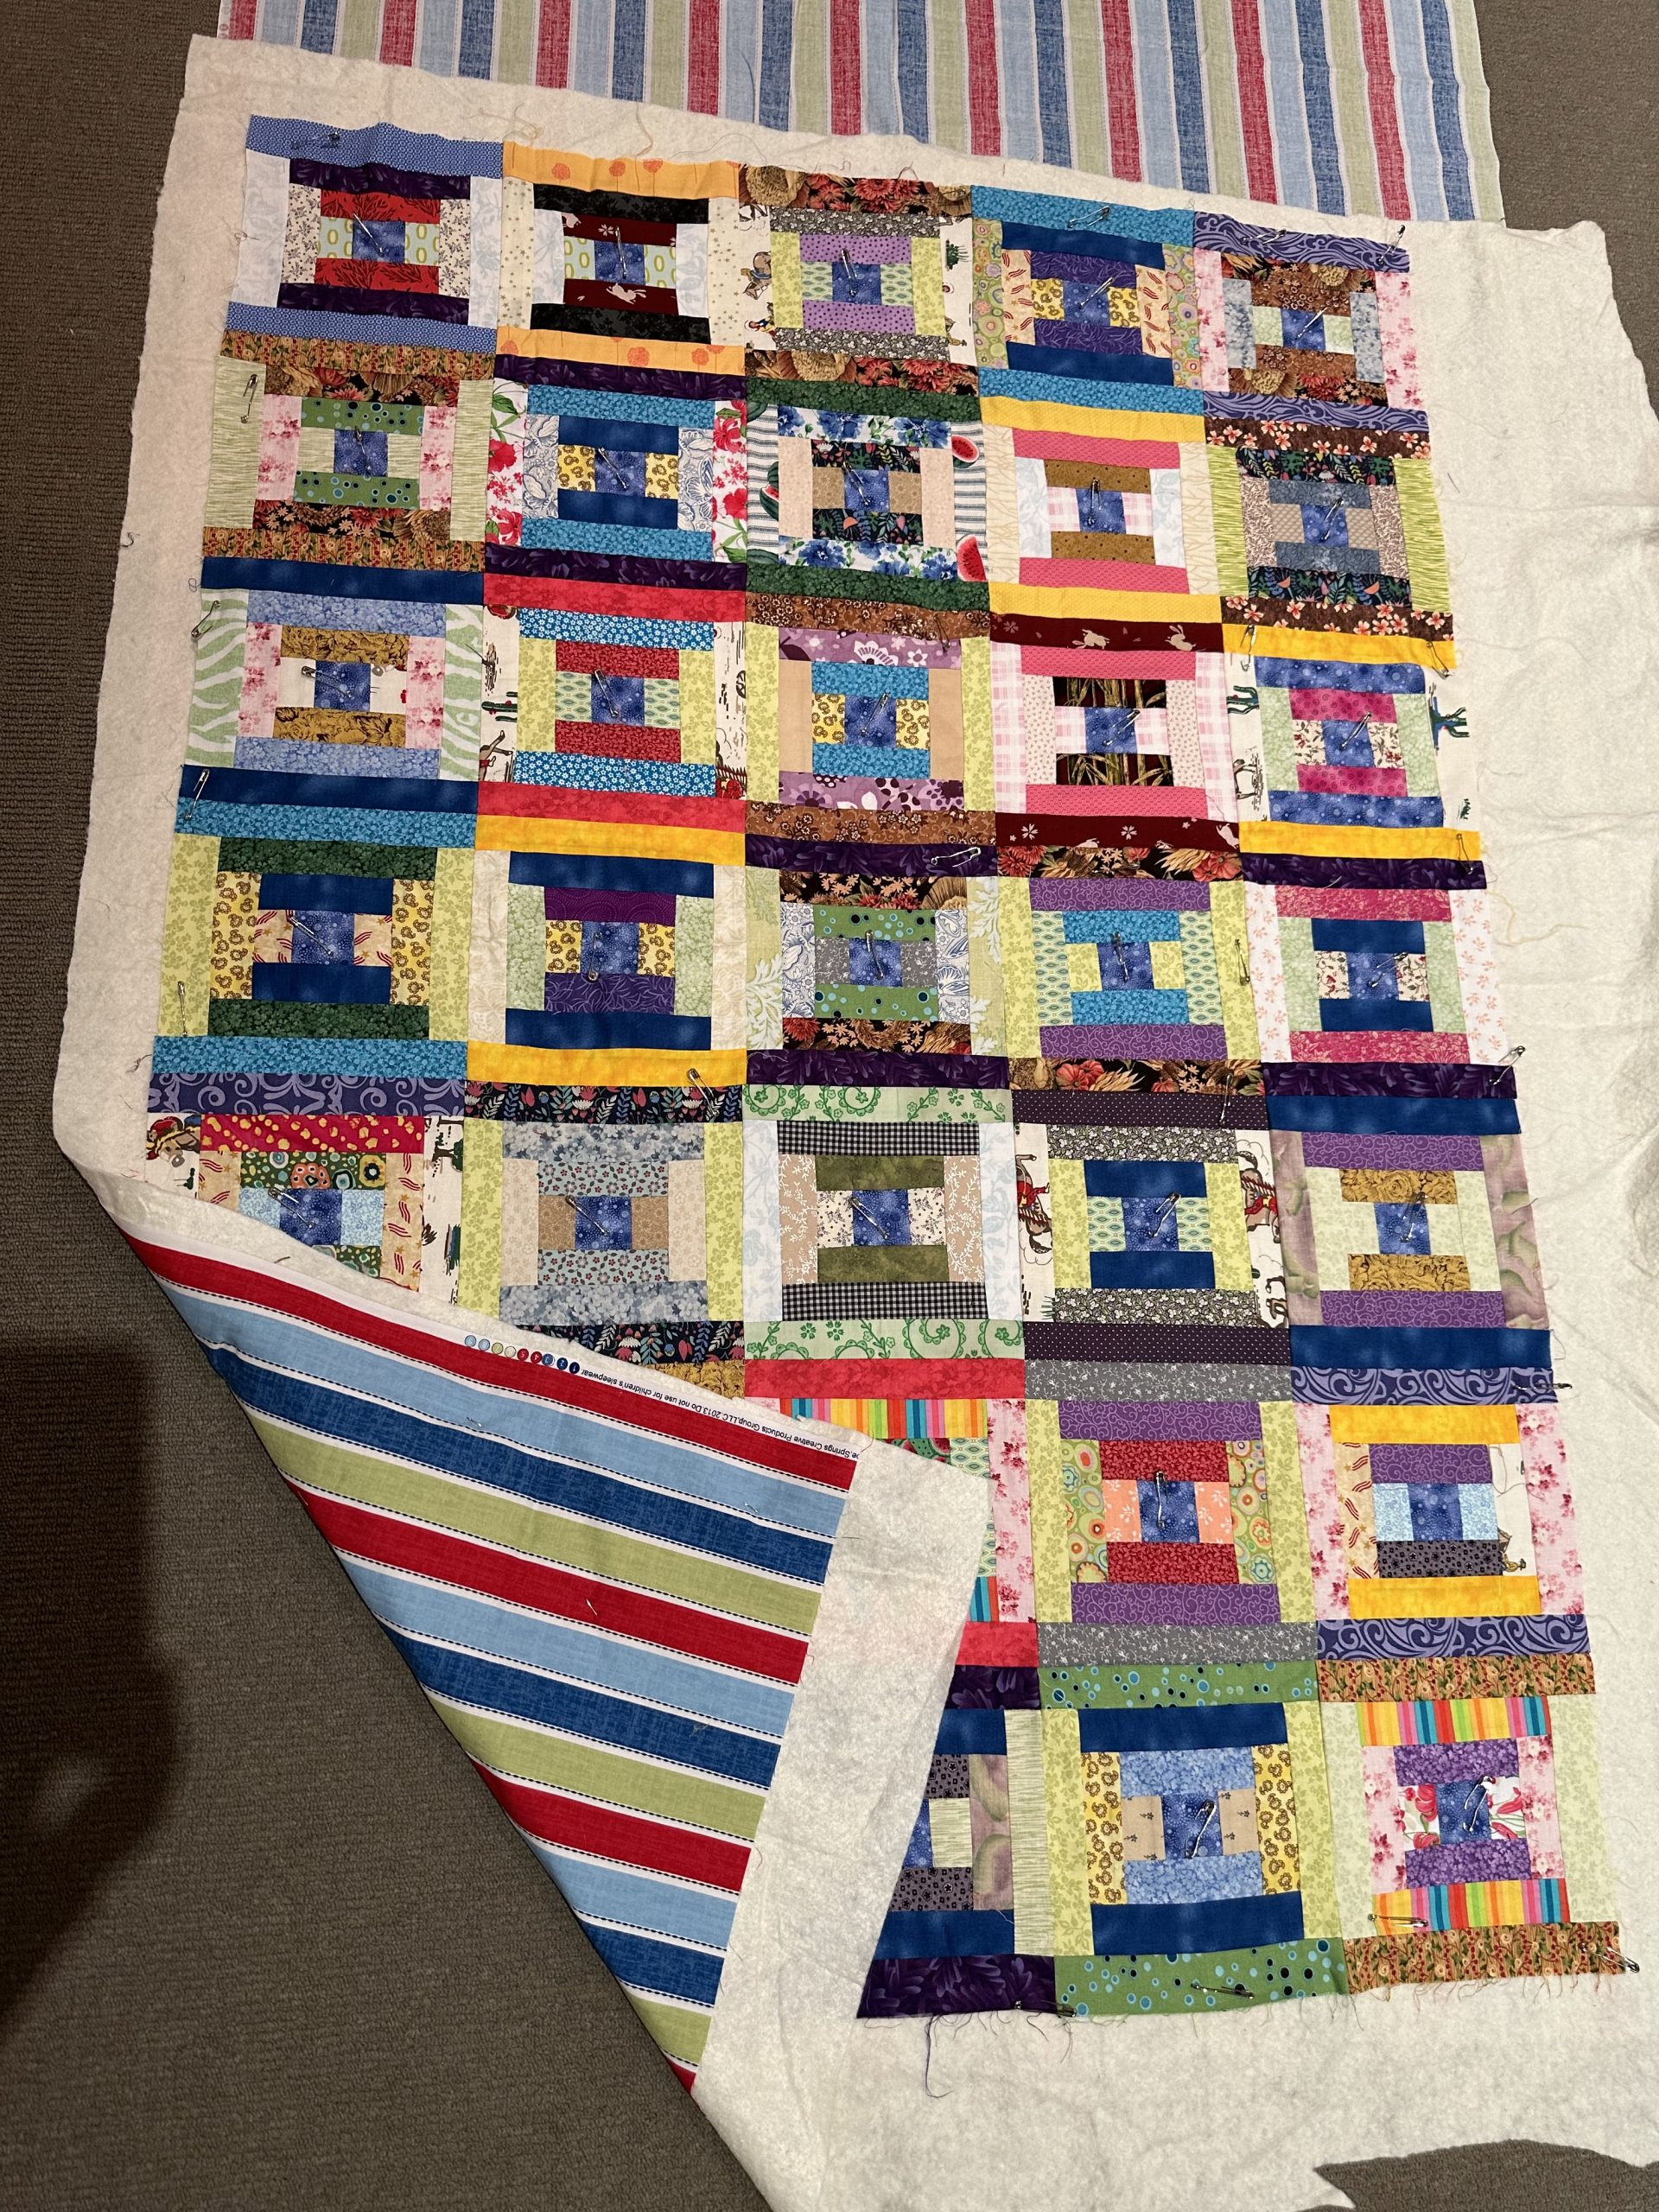
Here is how the blocks are coming along. I have decided. To stack them with the pattern all going in the same direction rather than alternating the blocks. Of course, alternating them would be easier to sew together as there is little matching of the seams to be done. It’s a matter of preference, Do it the way you like it.
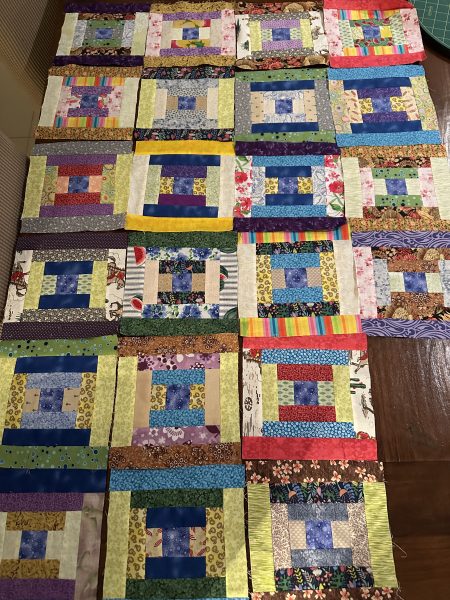
After making the 35 quick step blocks, lay the out five blocks across and seven blocks down.
TIP
Putting the Quickstep Two Four Six Eight Blocks Together
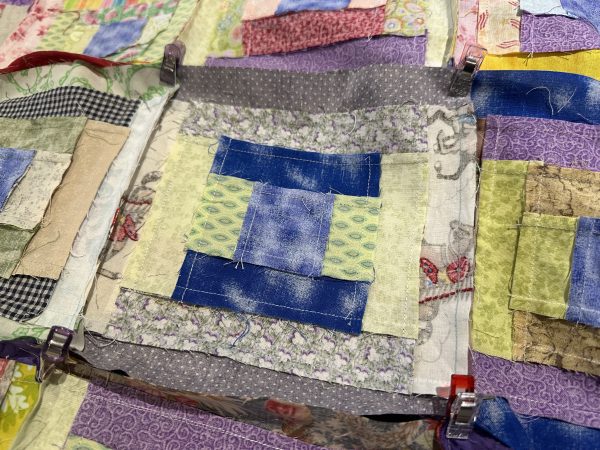
I have begun using binding clips to hold blocks and rows together when sewing the quilt blocks into their final positions
I am finding this is a very easy and comfortable method of putting blocks together. It eliminates the need for pins and prevents pricking of the hands while putting the top together. Furthermore they can take the weight of the quilt top much more readily than pins. it also can prevent the quilt top becoming tangled up which can sometimes happen when scaffolding a top together. It also means that. there is also no scratching, of the sewing machine with pins whilst in progress.
If you give it a try, let me know what you think. I will be doing this from now on. I’ve recently tried it when I was putting my hexagon stars. together which is a hand piecing project and it worked very very well. Hexagon Stars Diamond Circles Quilt – Part 5 Making the Columns
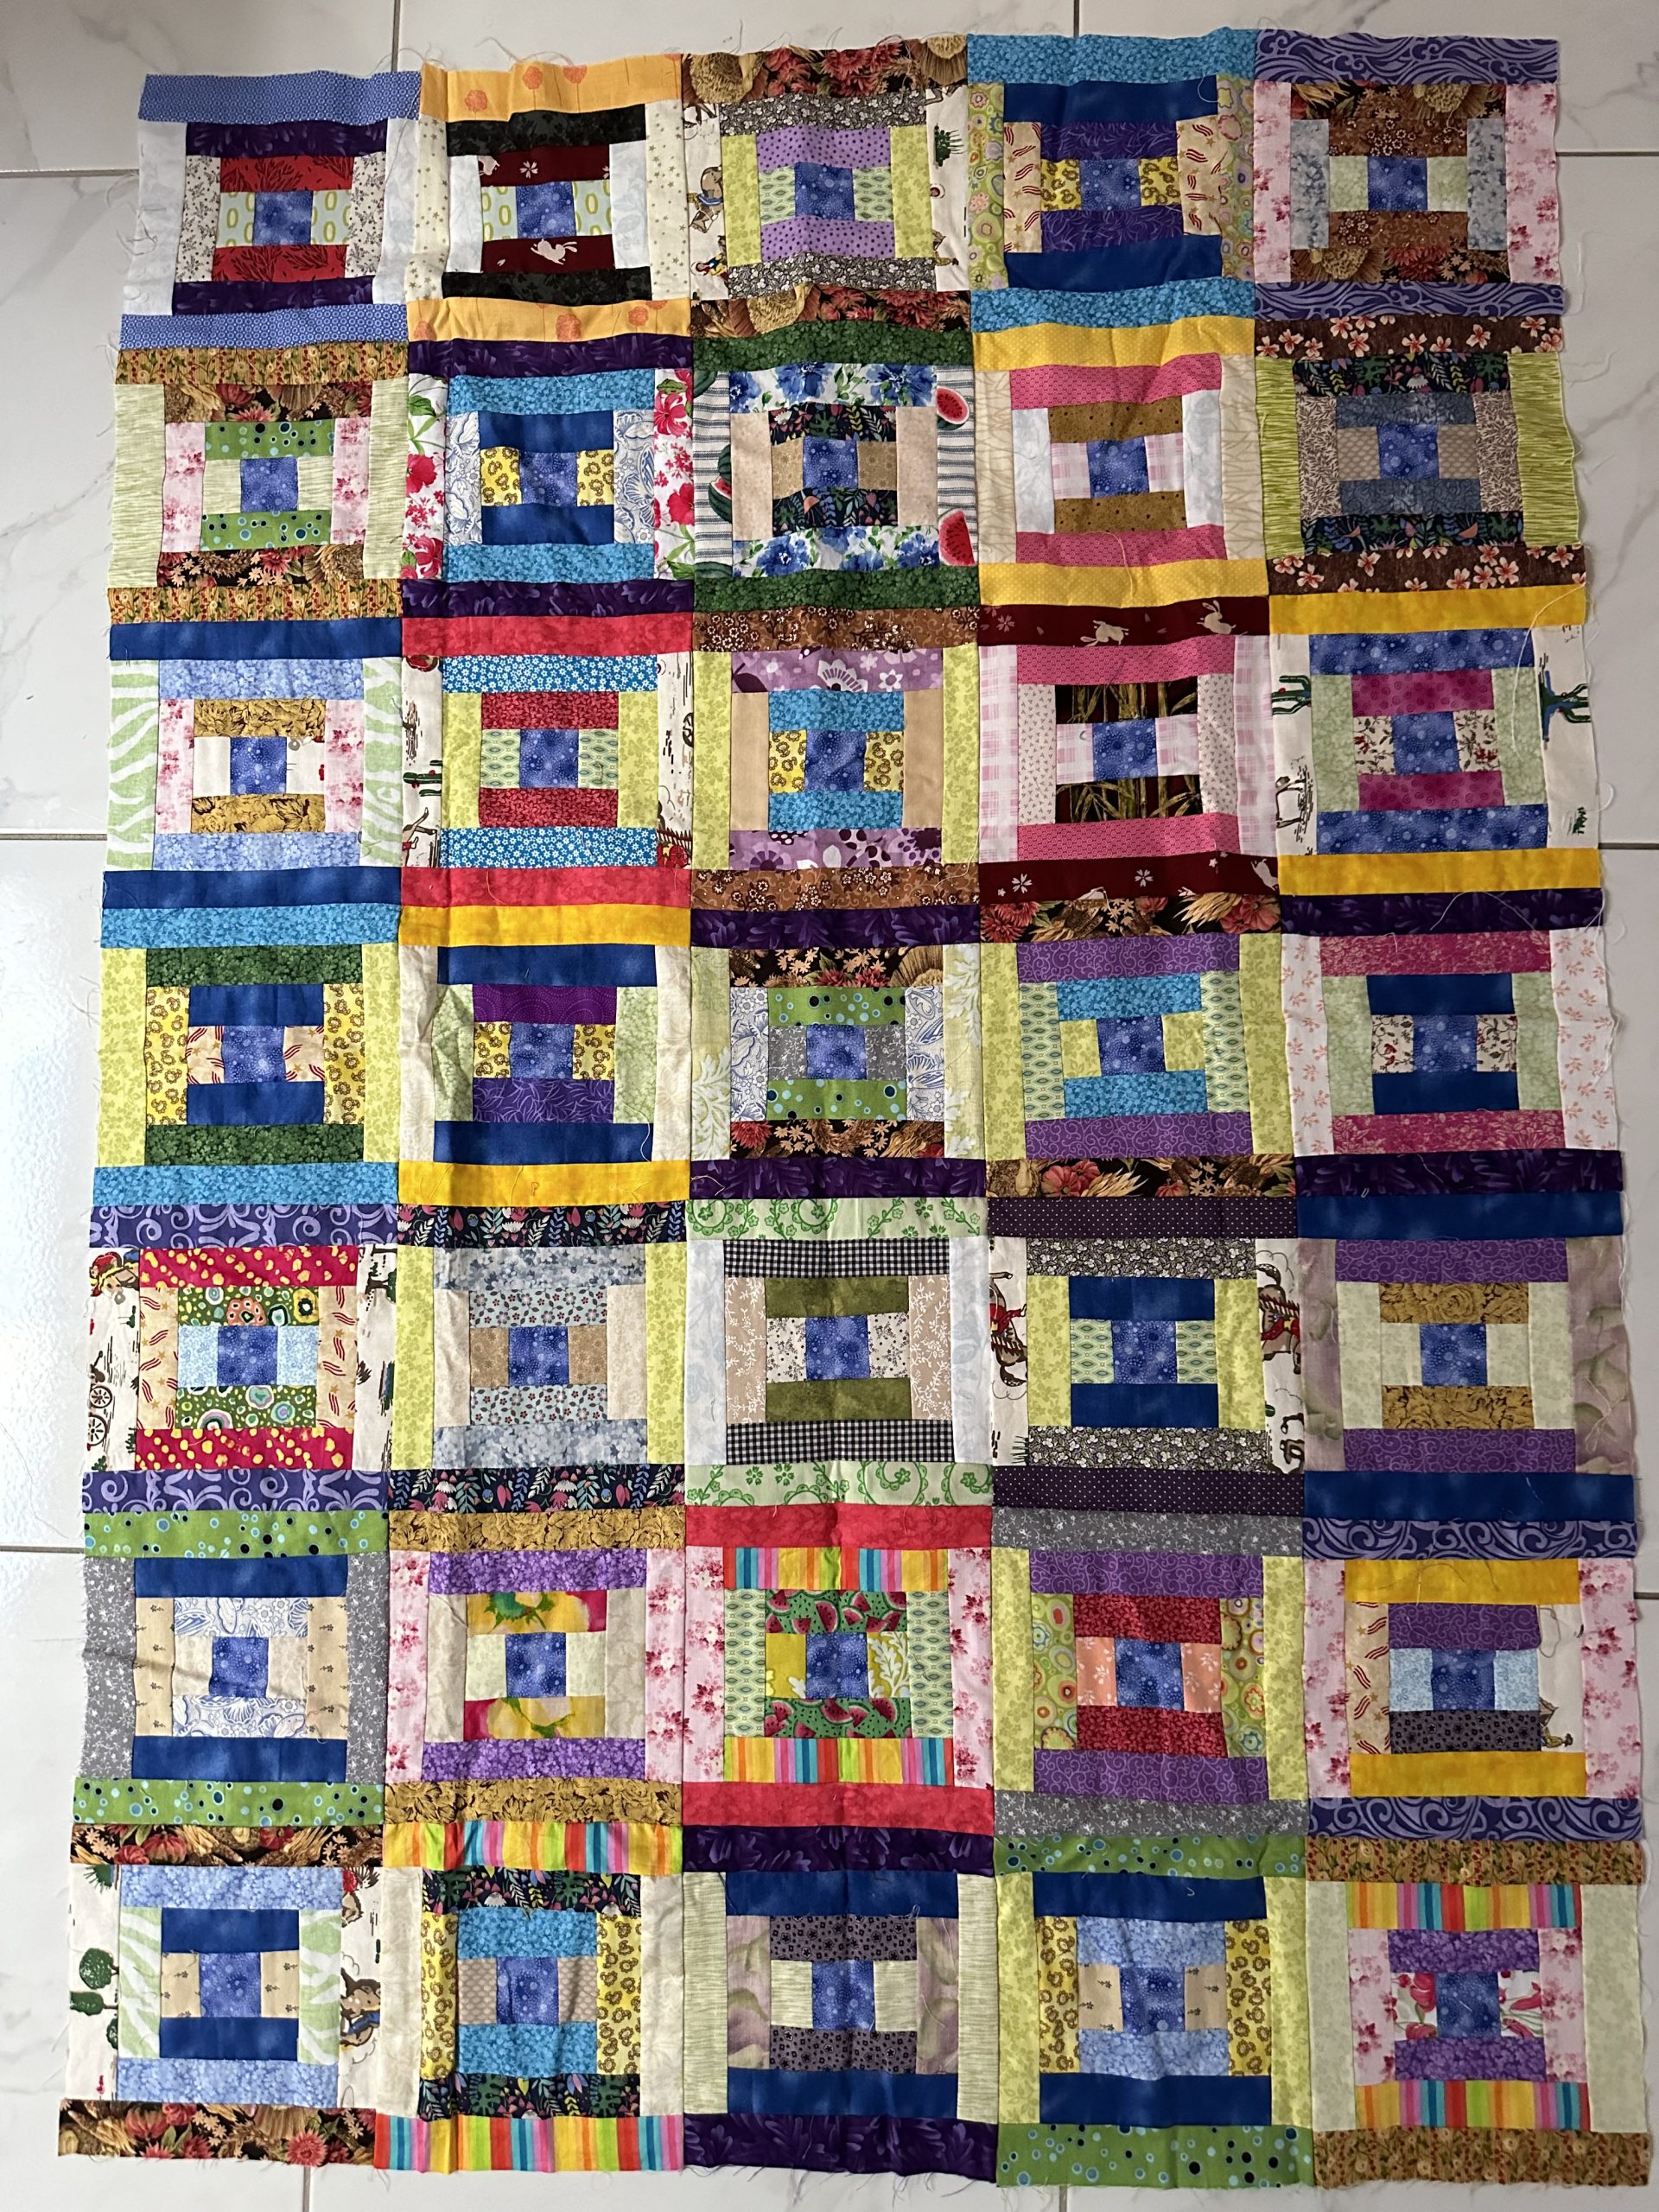
I like to scaffold my quilt tops when putting them together. This involves piecing or sewing all the rows together and then turning it to sew all the seams in the other direction. I hope this makes sense. I feel that it is much easier to do this, as it’s better for aligning the seams and making sure they lay in the right direction.
Here it is after all the rows and columns have been sewn together. I found this great backing fabric in my stash which I think is perfect. Now it’s laid out with batting layer ready for quilting. As you can see in the photo it fits a usual width of fabric which is ver convienient.
These blocks would also be fabulous for a bigger quilt, so feel free to make as many blocks as you like according to the type and amount of fabrics scraps that you have on hand at the moment.
I’m excited to get this one finished because we have a new grandson arriving in a few months. So we are looking forward to this joyous occasion.
If you found this post helpful, you may also find some inspiration from some of these other cot/lap quilts.
Vintage Twist Baby Quilt & Tutorial
Baby Love Quilt and Pattern Part 2
Disappearing Nine Patch Baby Quilt
Scrappy Broken Dishes Quilt – Antique Inspired
As always, hope you day can find some stitching in it.
Susie
© Susan Stuklis 2024