
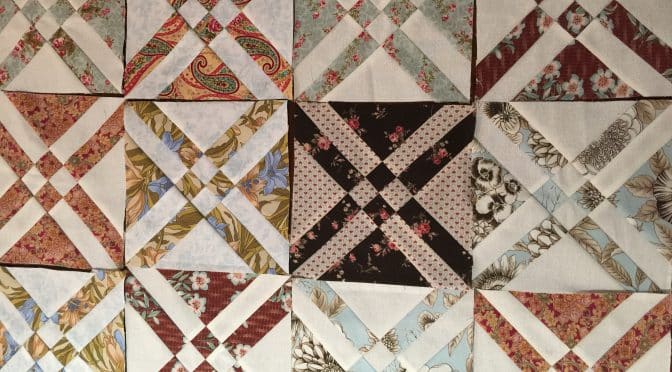
The Arrowhead Quilt Block Made Easy
Hello Dear Friends and Readers. “The Arrowhead” Block is a somewhat enigmatic name and should not be confused with “Arrowhead” which can pertain to quite a number of other blocks. Apparently “The Arrowhead” was first published in 1941 and pieced in a traditional method.
Recently, I noticed that my friend Paula J Payne at Quilting Time in Dixie had posted an “Arrowhead Quilt”. Thanks Paula! I have seen this block before, however, as you know, quilt blocks made on point, or set on point, do require more effort. However, It struck me that it looks much like the Disappearing Four Patch on point. So that got me thinking about how I could construct that in an easy method. It can also be done with layer cake squares to make it even easier.
Anyway….this is what I came up with. Incidentally, while this is an easy method, it still complies with tradition. There are no bias edges on the outside of the block! This method will make 2 blocks. All seams based on 1/4 inch. Please read all instructions carefully before beginning.
Block size = 7 1/2″ x 7 1/2″.
Requirements for Two Arrowhead Blocks Made Easy
Constructing Two of The Arrowhead Blocks Made Easy
Today I am sewing on this lovely machine.
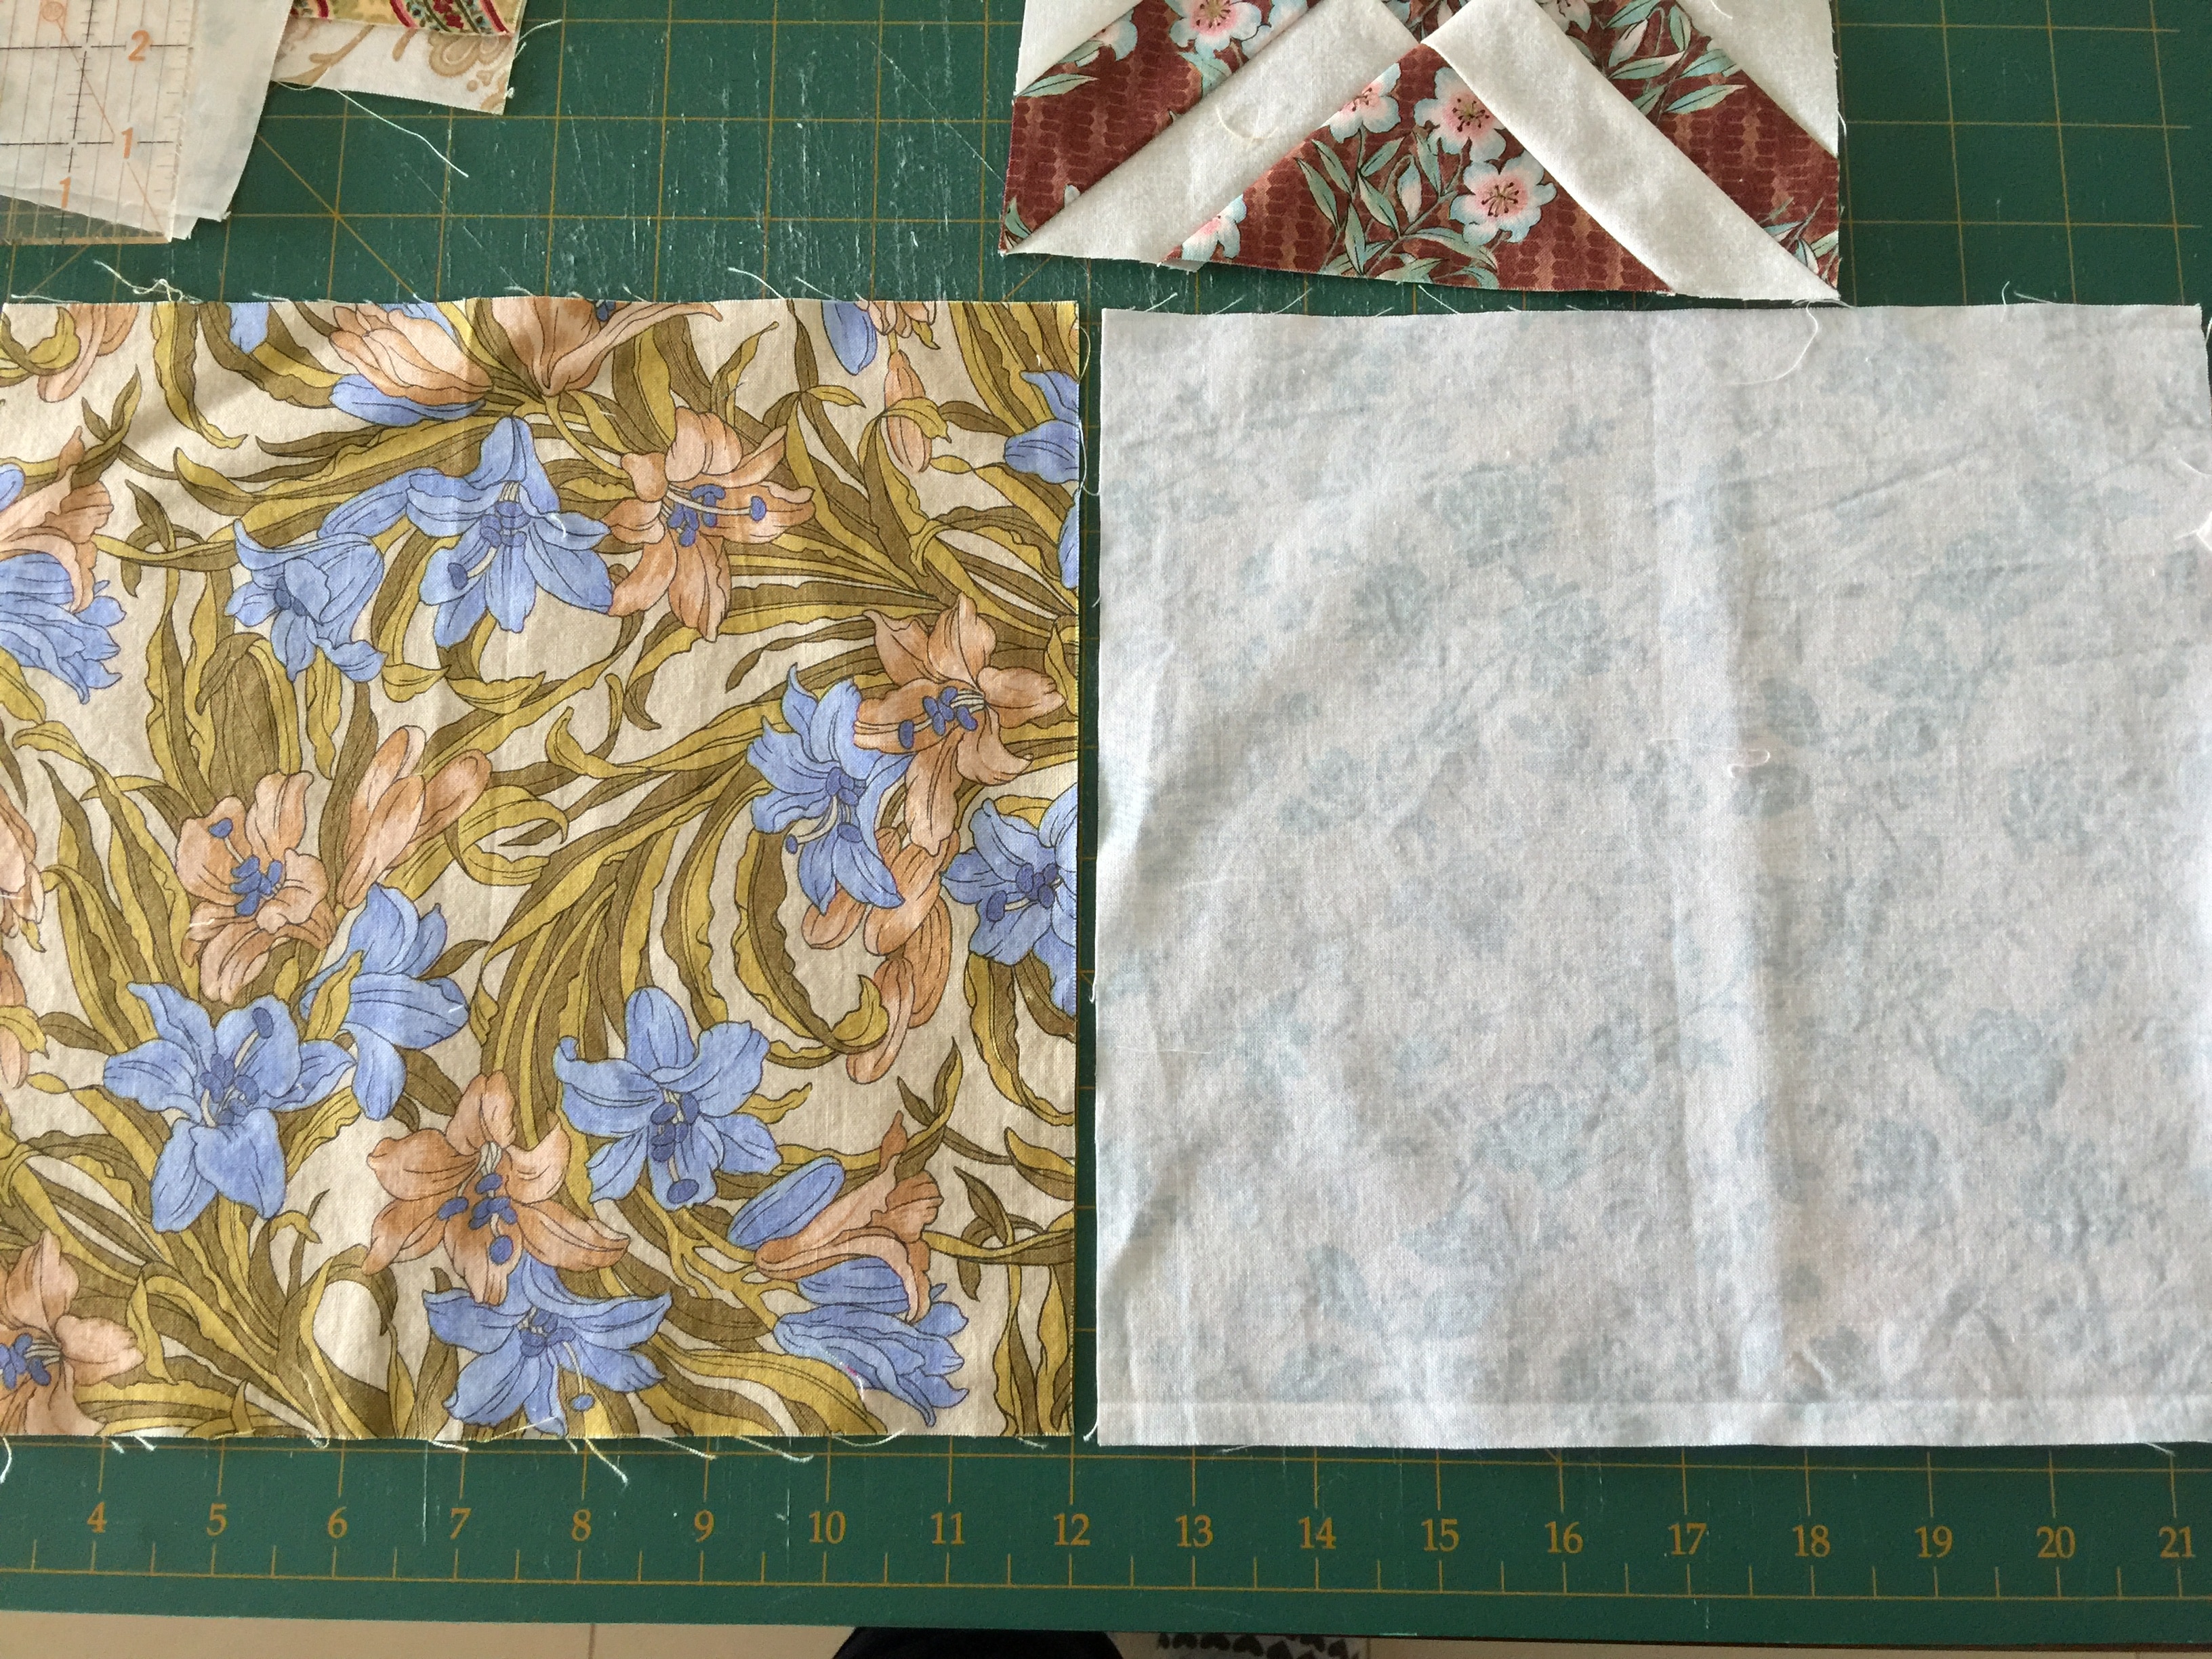
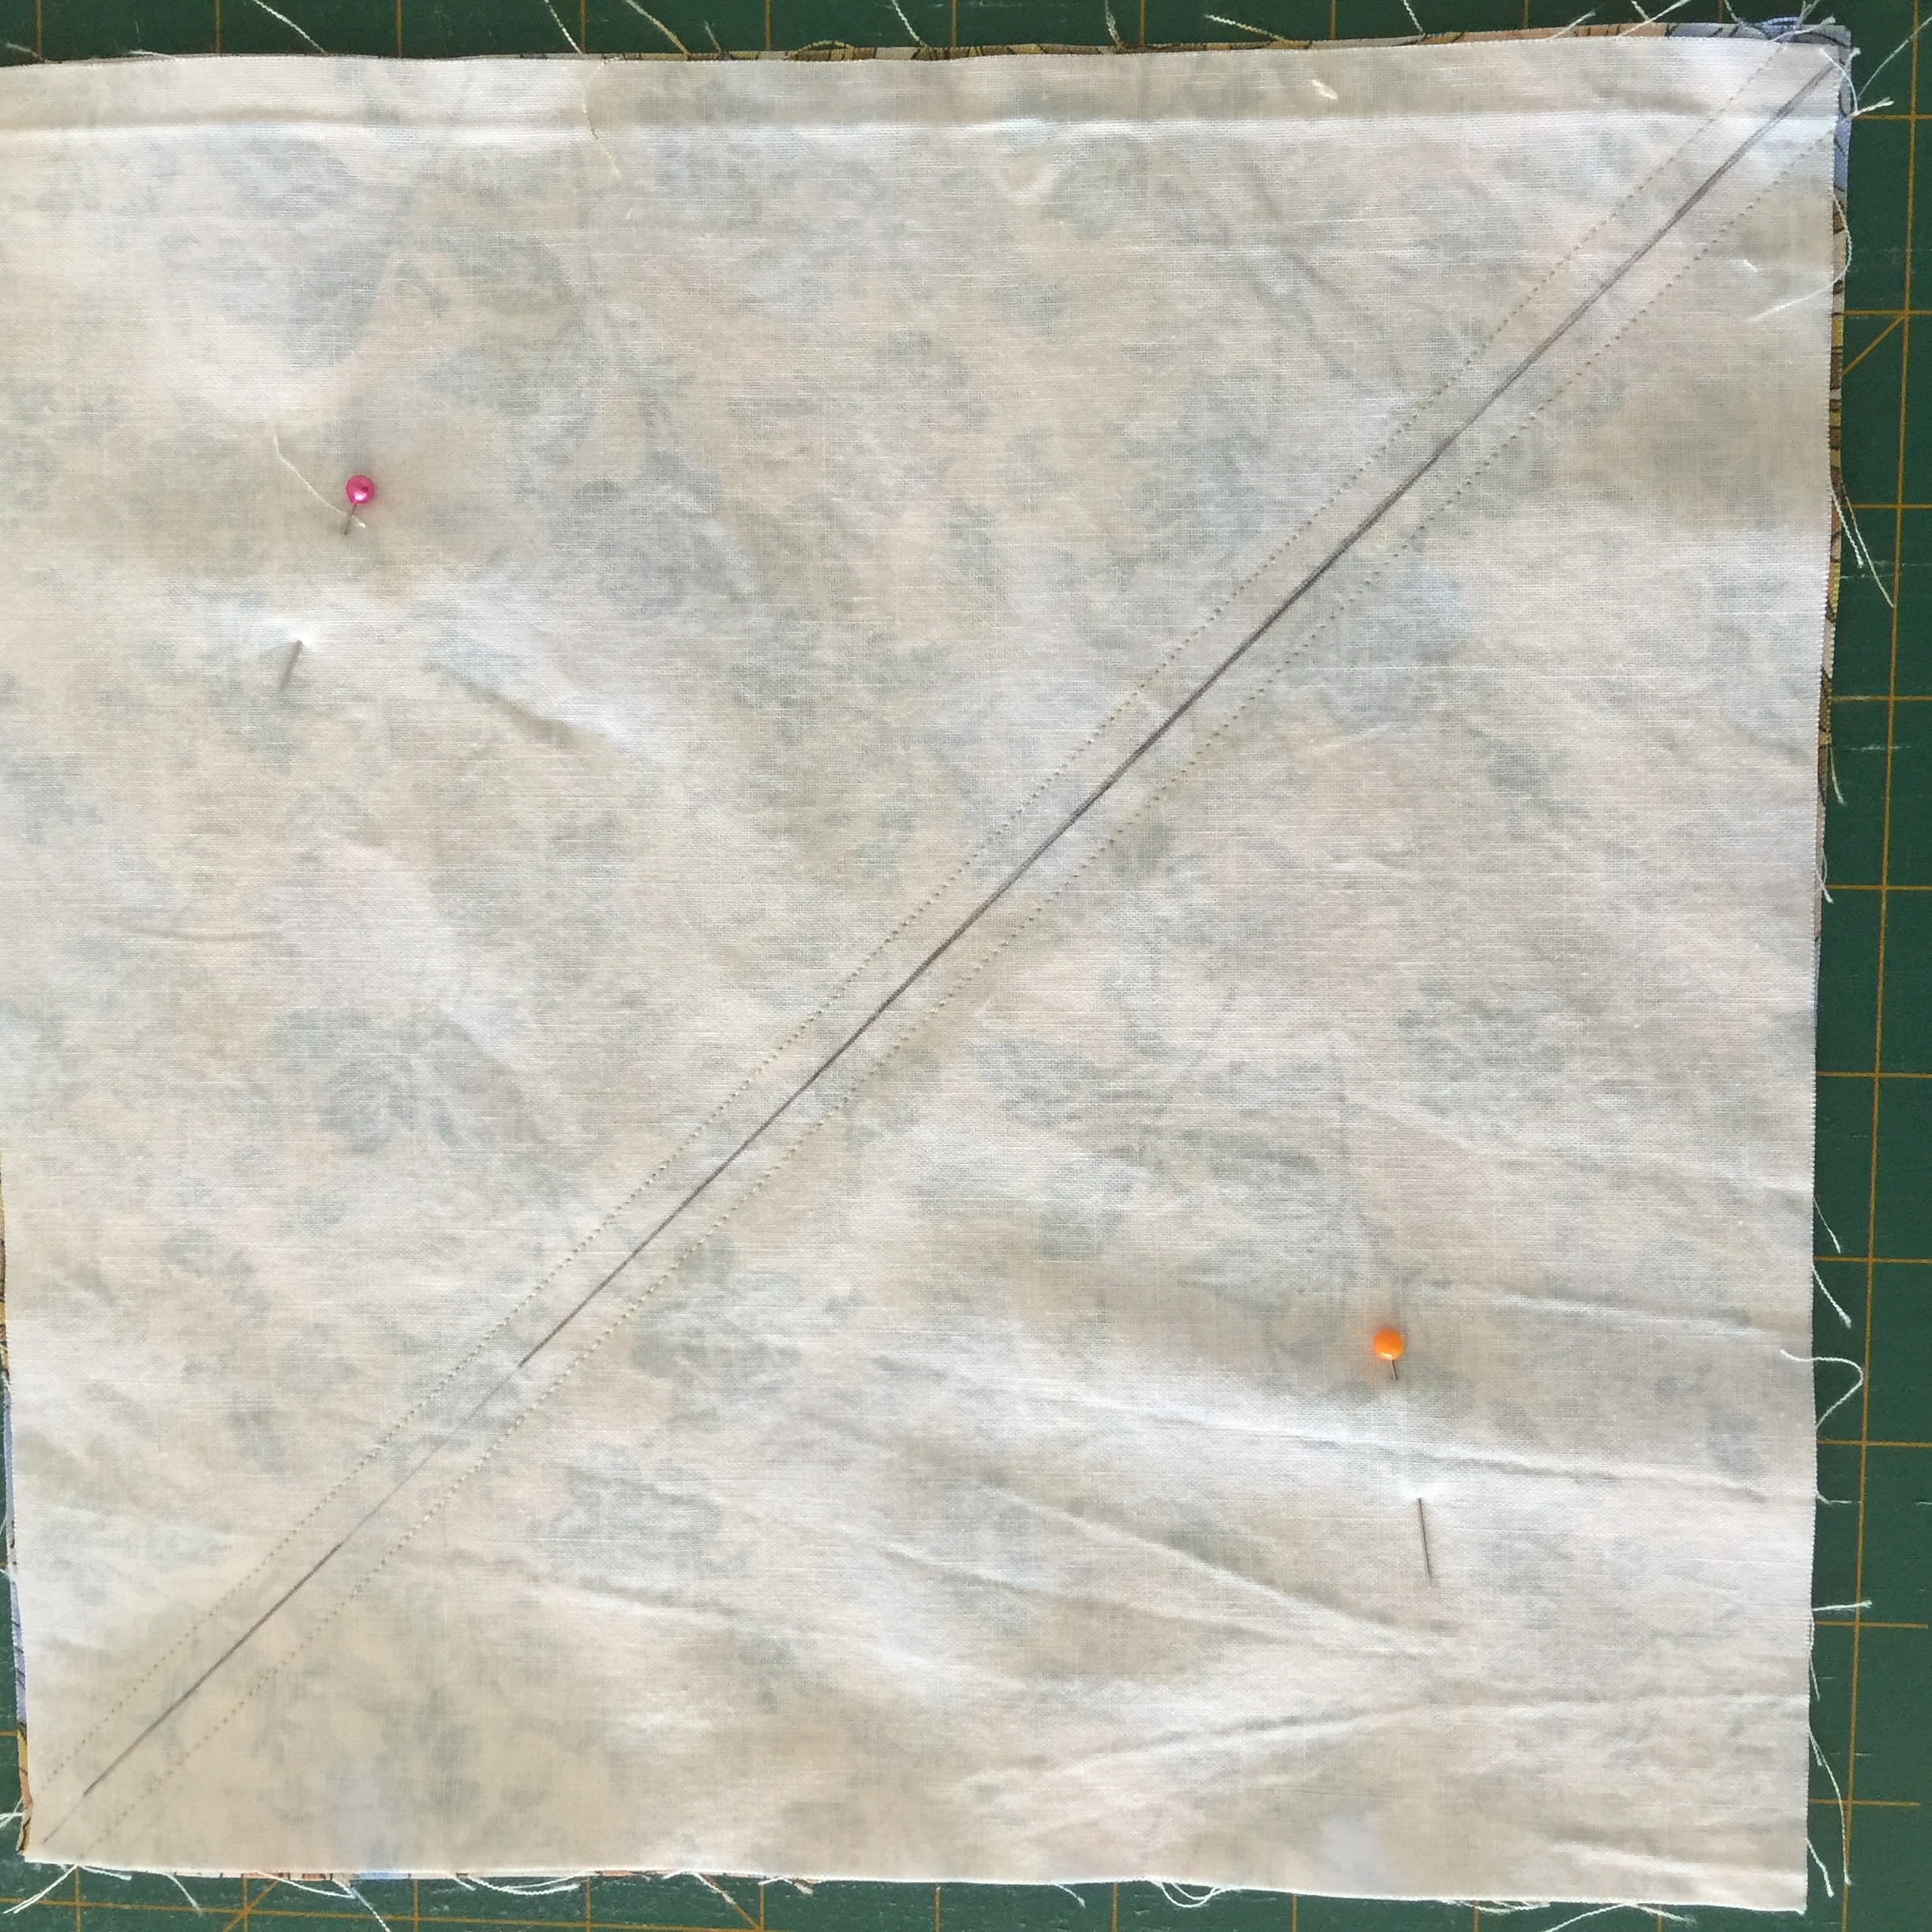
Put the two 10” x 10” squares right sides together. Draw a line across one diagonal of the light side. Sew 1/4″ seam on each side of the line.
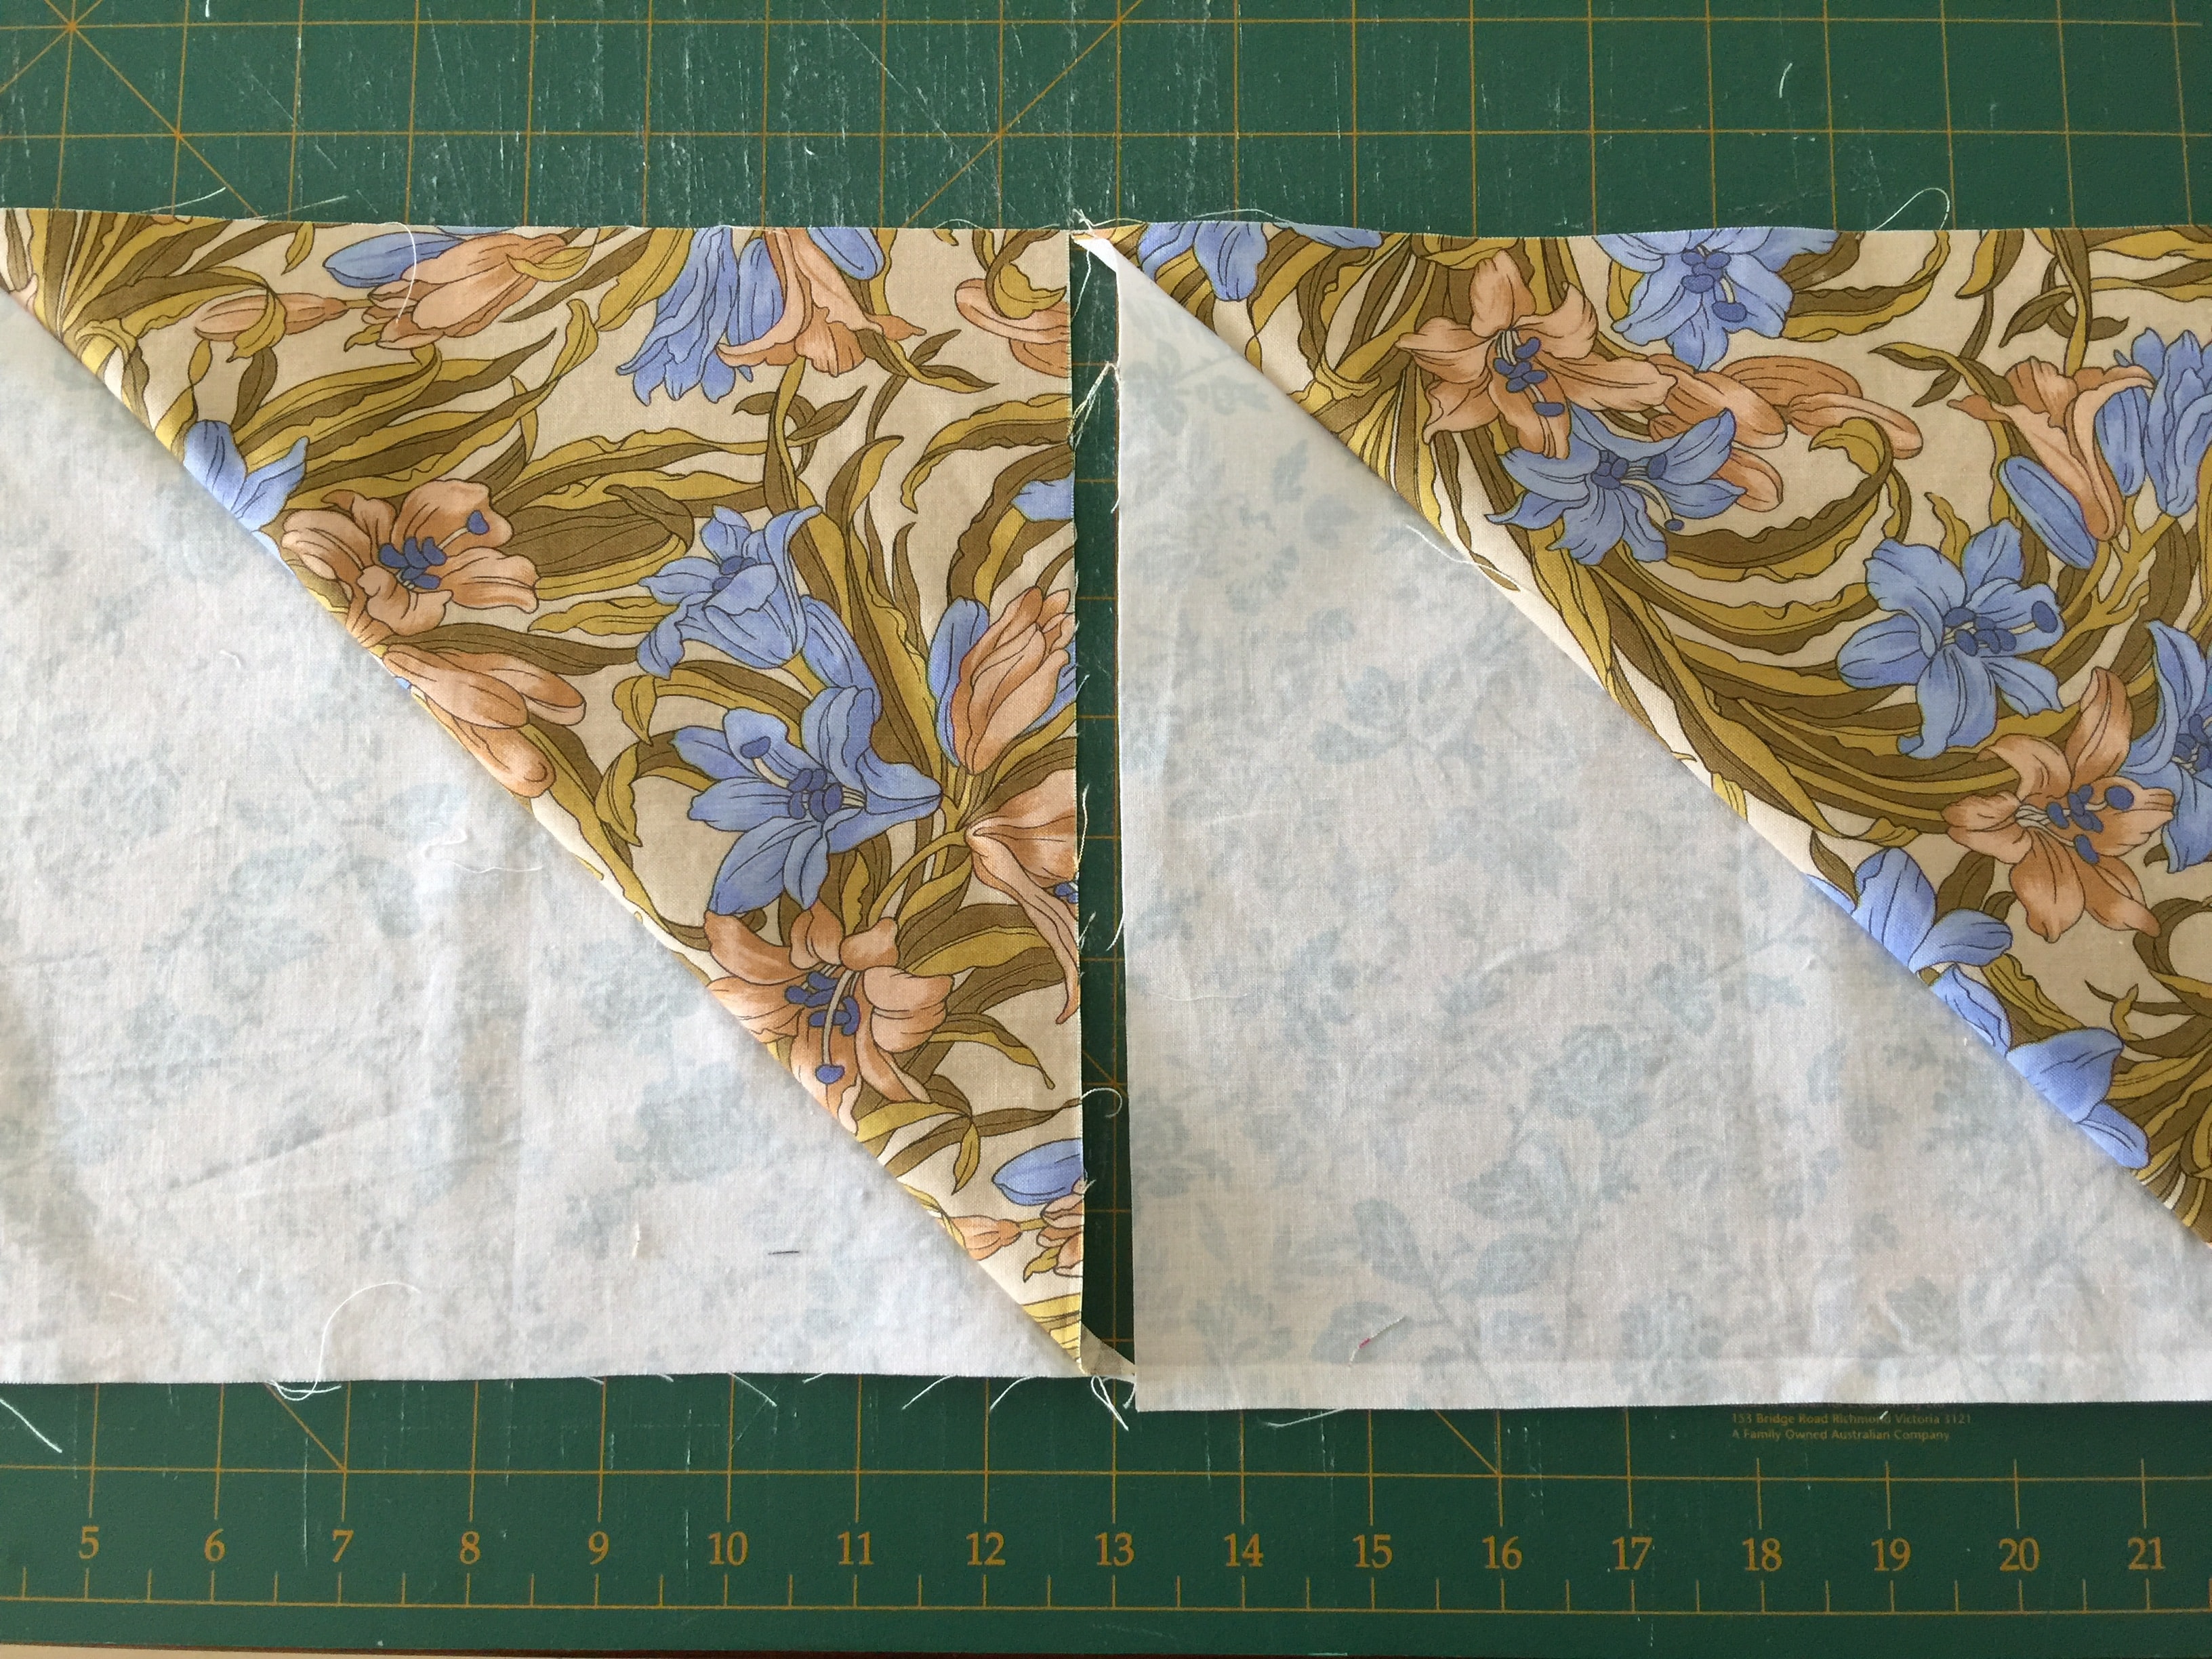
Cut along the centre line between the stitching lines. Open the two squares. Finger press. Now you have two half square triangle units.
I will be finger pressing only, until the block is complete. Press at the end. Put the two half square triangle blocks right sides together, ensuring that the seams are nested and the colours are opposing. That is light on dark and dark on light. Draw a line across the unstitched diagional. Sew a 1/4″ seam down each side of the line. Cut on the line. Open to reveal two hourglass blocks.
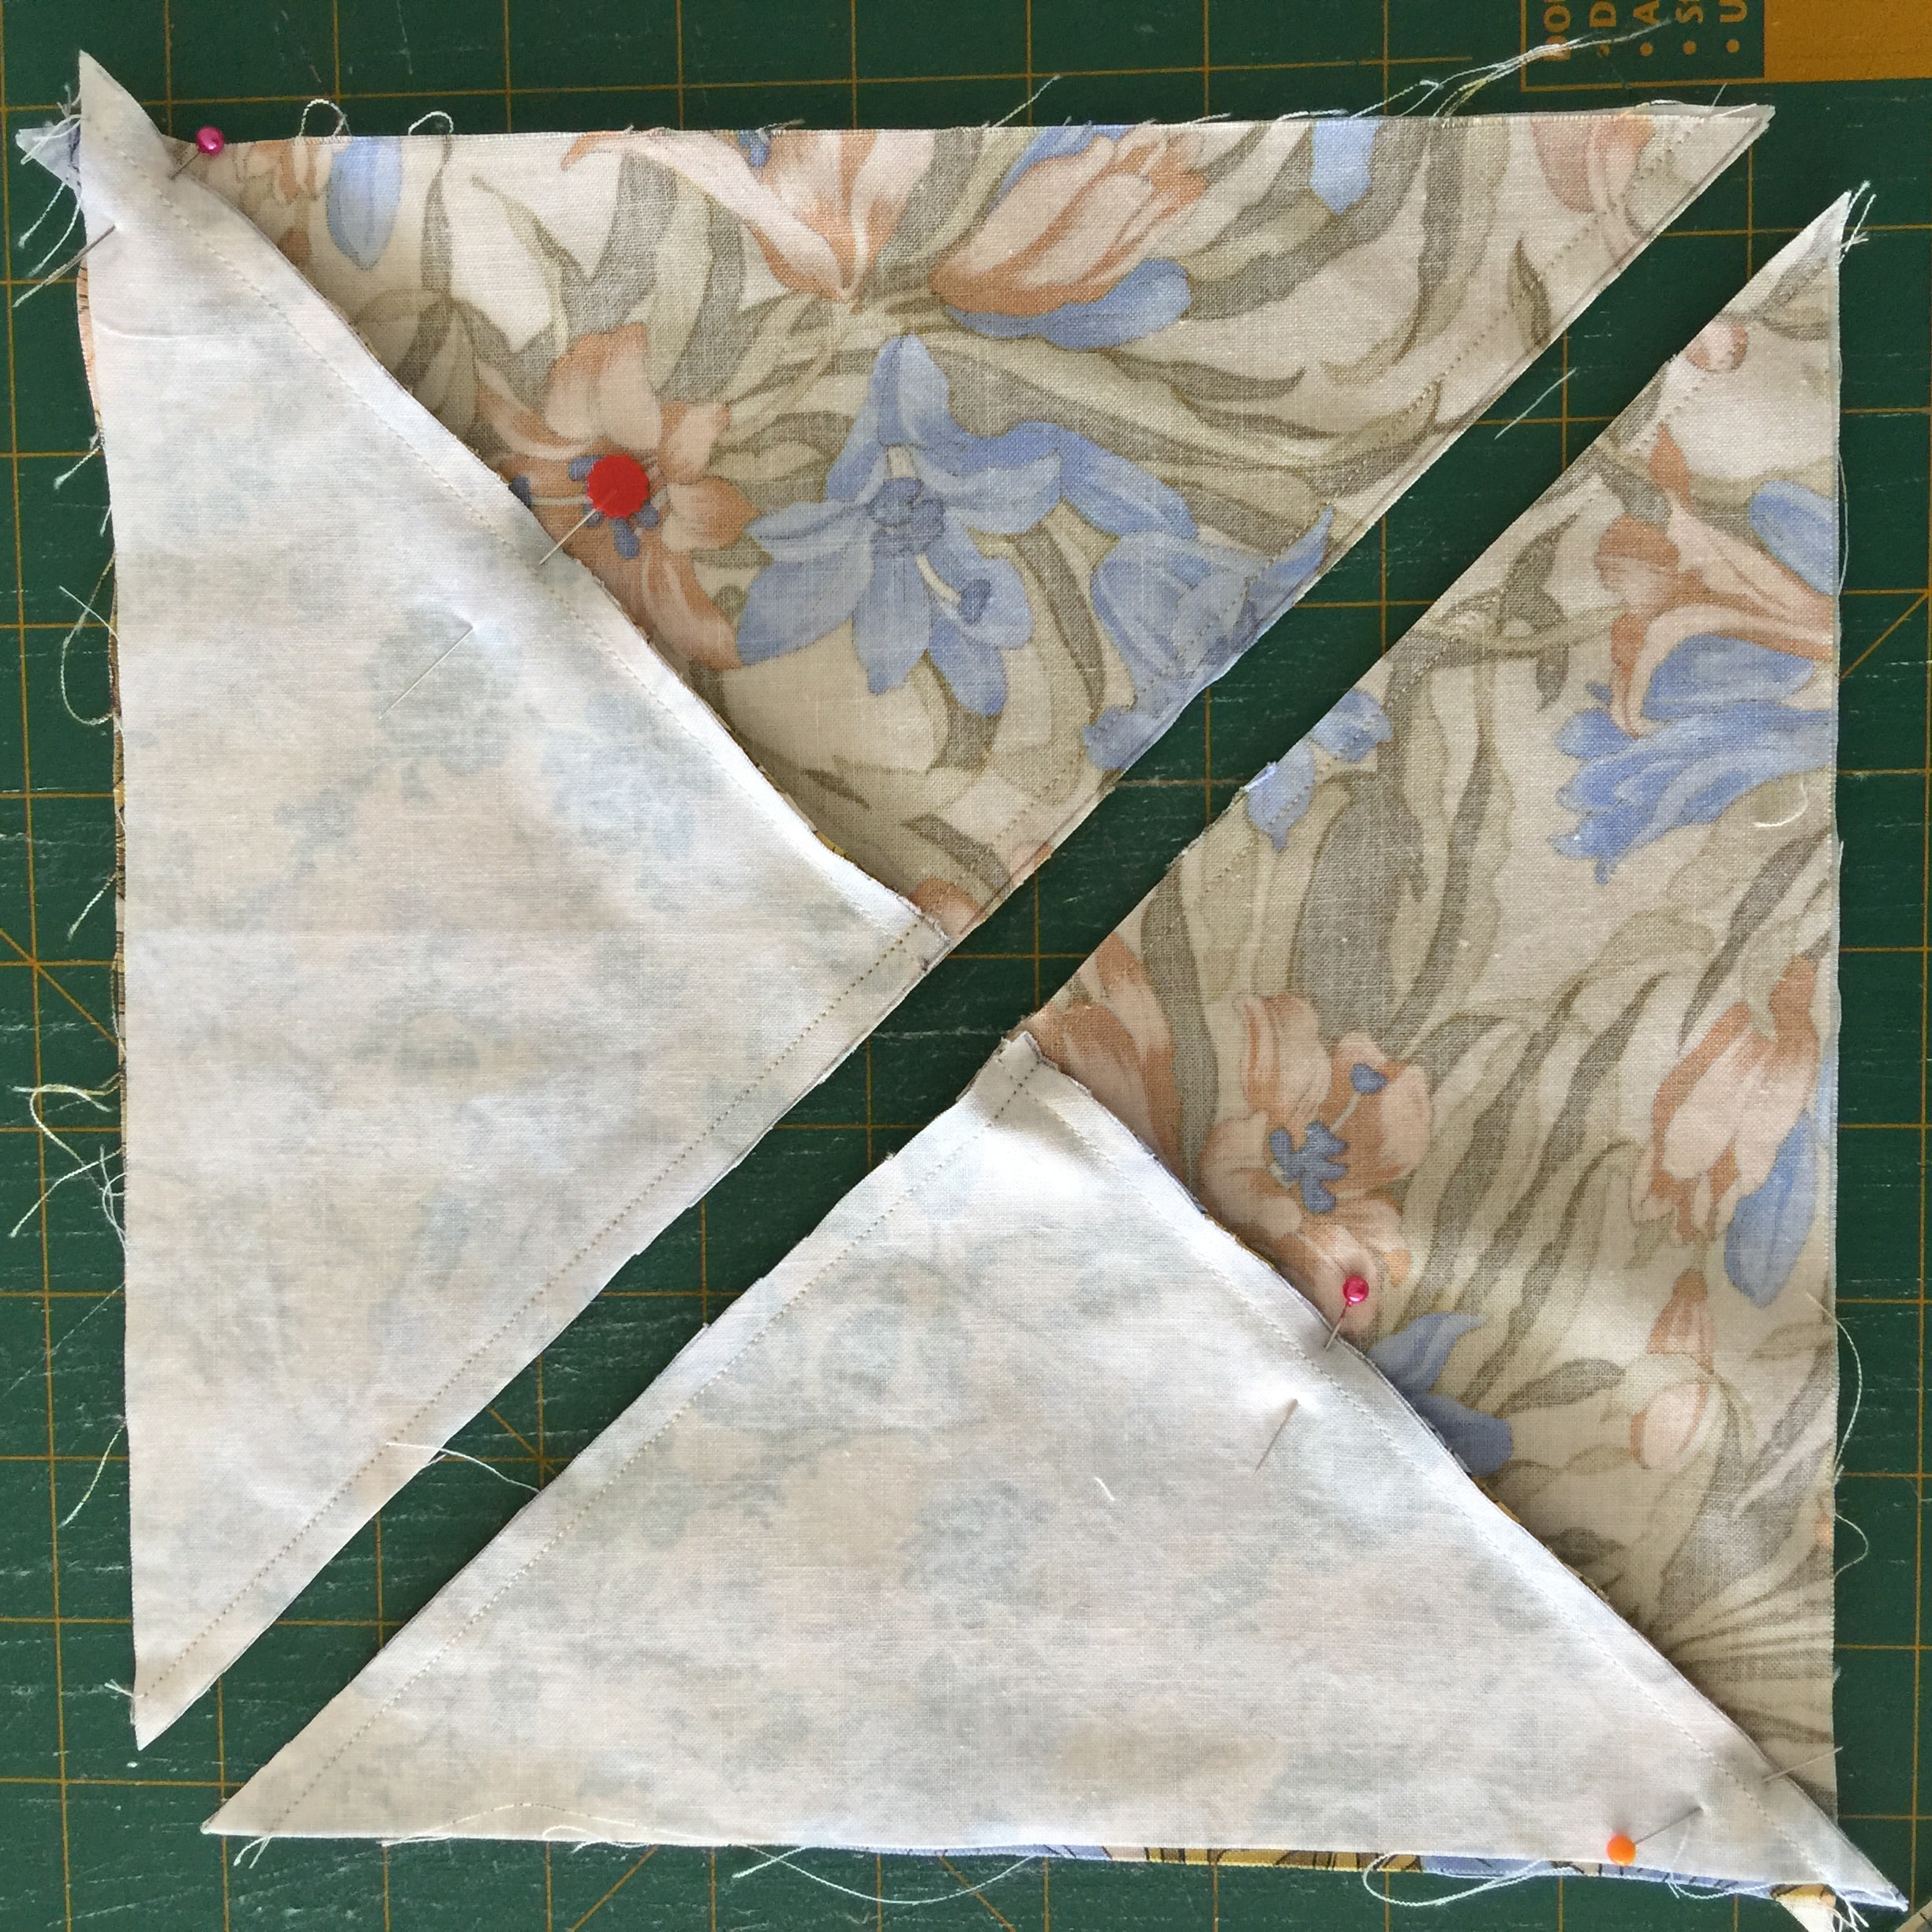
Fingerpress. Lay out the two hourglass blocks, so that on one block has the dark triangles orientated to the sides. The second block should have the dark triangles orientated to the top and bottom. This is important. Please make sure this is correct.

Place a ruler along one centre diagonal seam at 1 1/4″ mark. Rotary cut along that edge. Repeat that move on the other side of the same seam also at the 1 1/4” mark from the centre seam. Now you will have three pieces of that block.
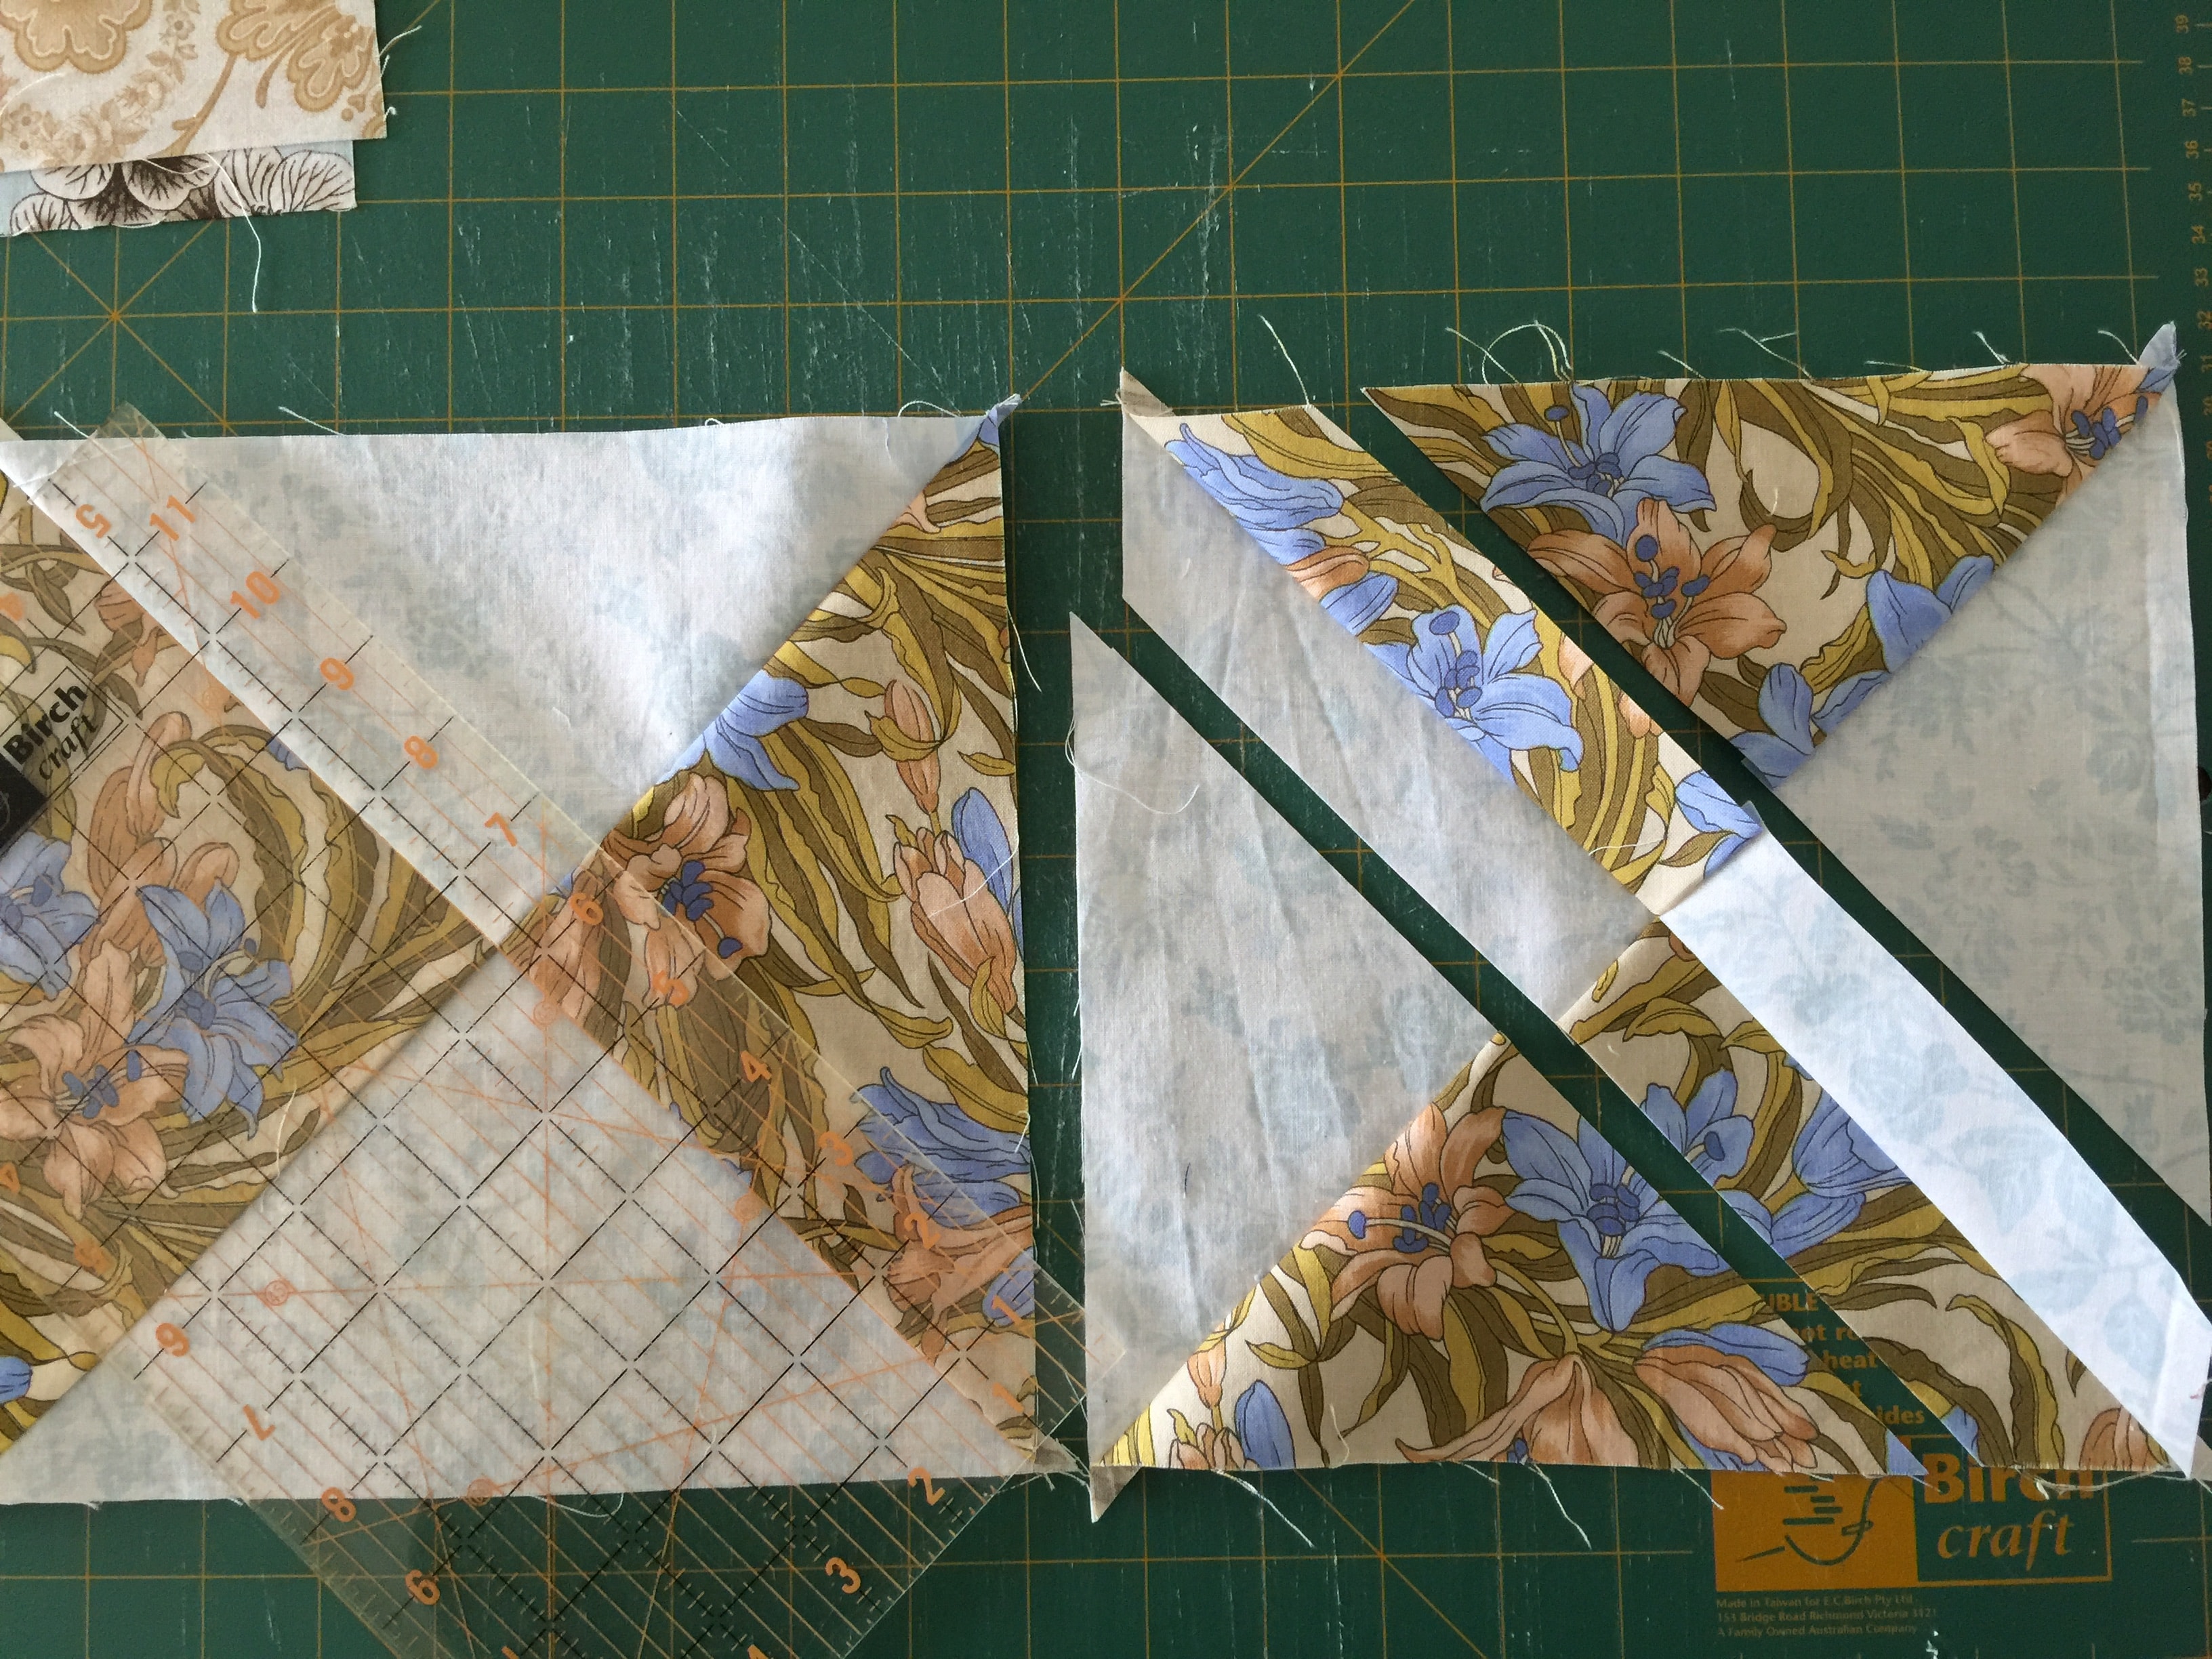
Repeat on the other hourglass block, making sure that the cuts follow the same direction, but still having the hourglasses placed as they were. Note how my hourglasses are placed, one with the dark triangles up and down, one with the dark triangles to the sides.

Remove the centre strips. Interchange them to the other block. Sew the triangles to each side, pin at the centres to make sure that the centre seams line up and nest well. Now we will repeat this process for the other two uncut diagionals.
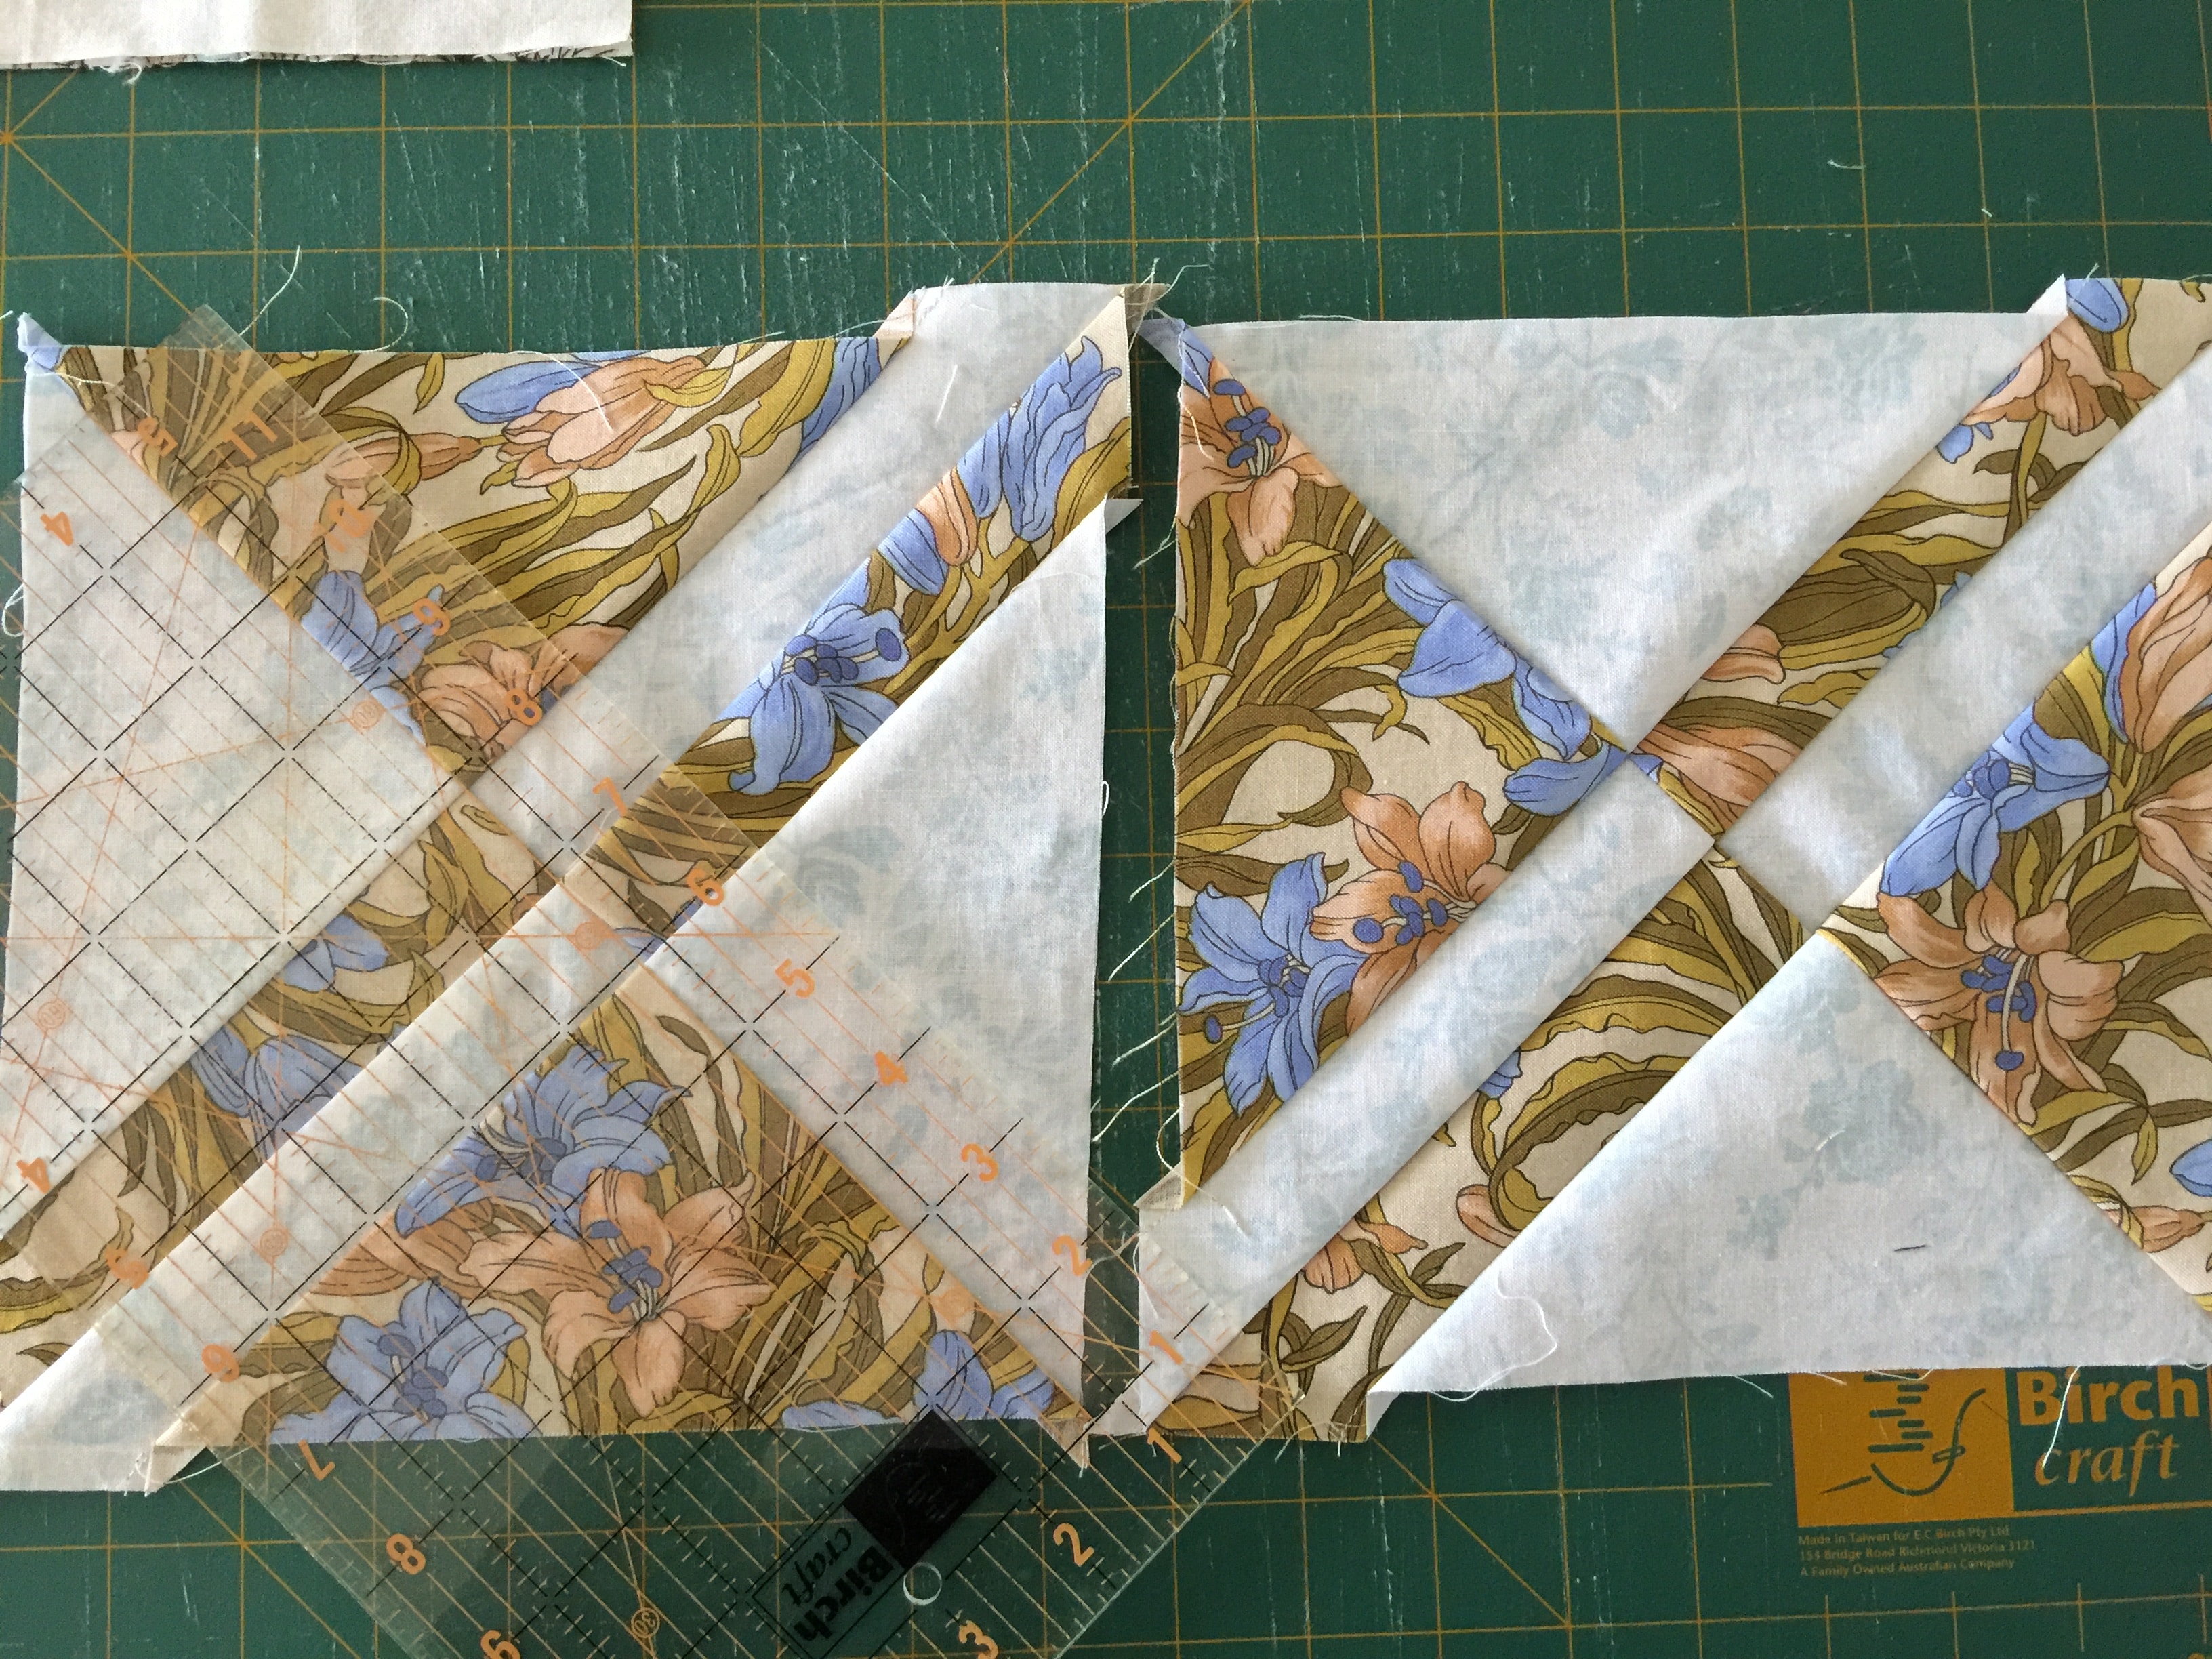
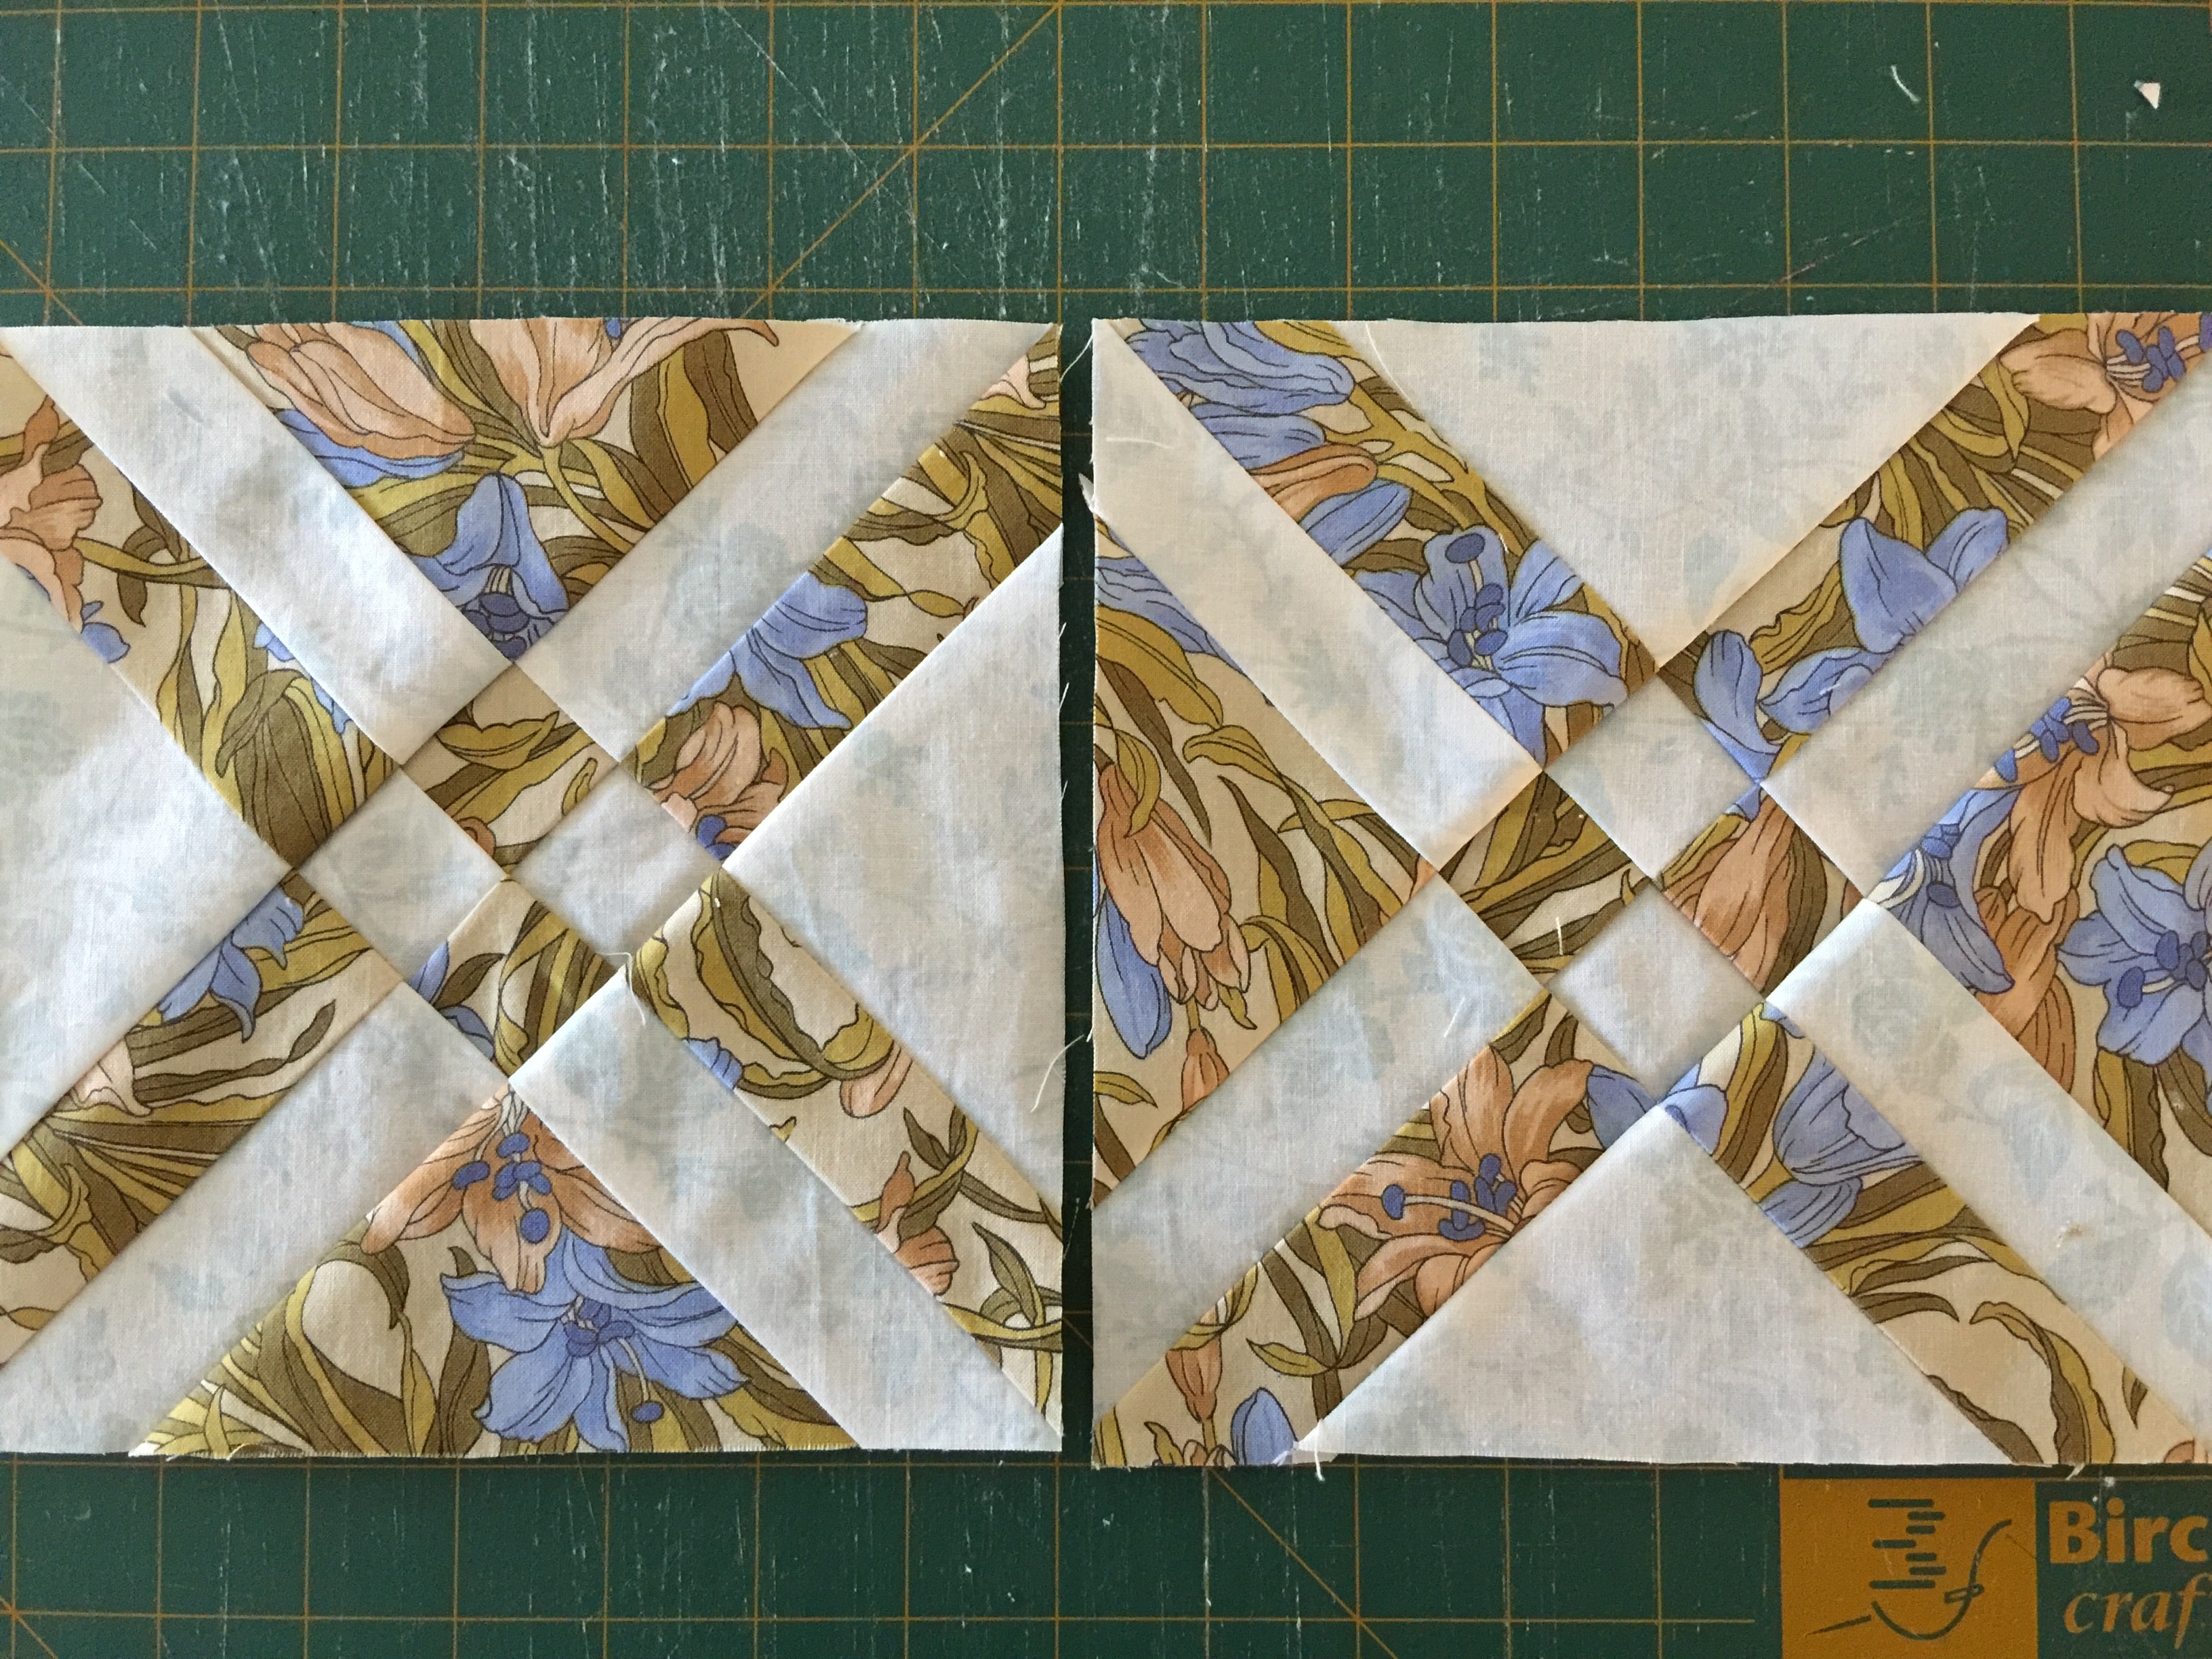
Line up the ruler 1 1/4” from the centre seam of one of the uncut diagonal seams. Rotary cut along this line. Line up the ruler on the other side of the same seam 1 1/4” away and rotary cut along this line. Repeat the same two cuts for the uncut diagonal of the other block. Interchange the centre strips between the blocks. See how this has now created a four patch in the centre. Carefully pin back together ensuring that the seams are nested and sew the two side triangles to the centre strip of each block.
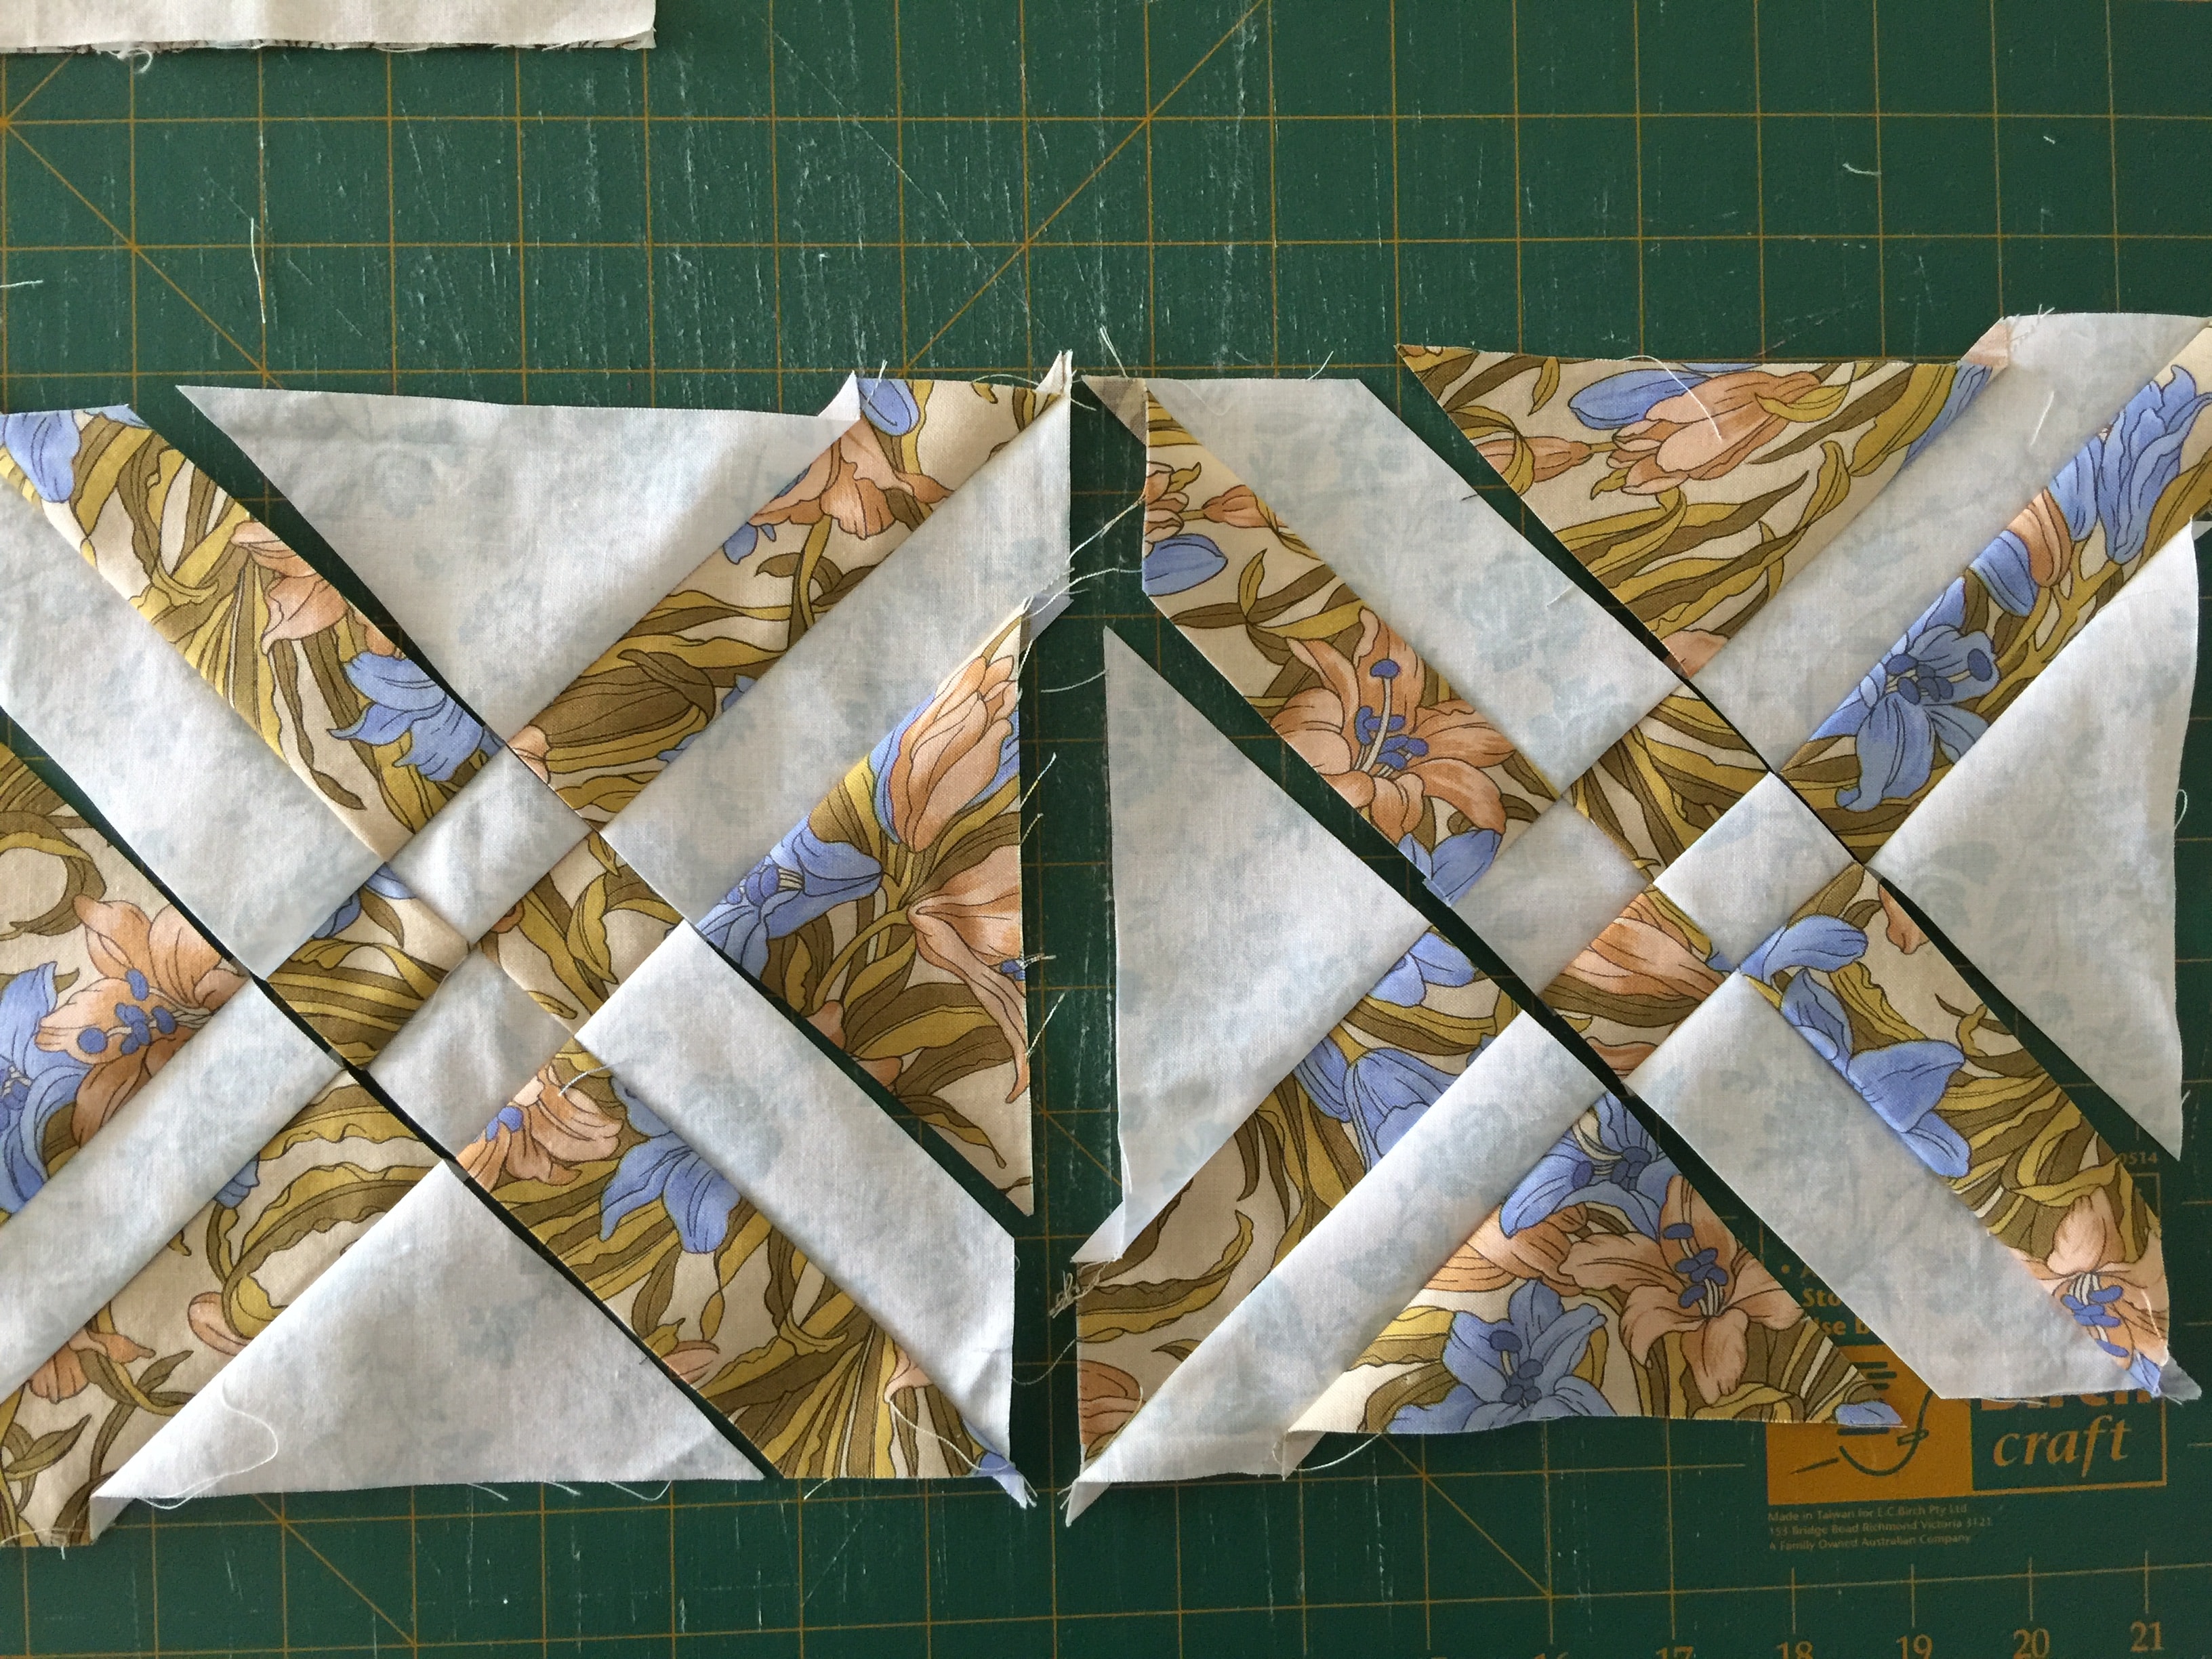
Press the blocks. Trim the excess from the corners of the blocks. Now you have two Arrowhead Quilt Blocks Made Easy. Maybe I should have called it the Arrowhead Puzzle Block!!! 😉
I know that this post is a bit wordy, but I believe once you get the idea, but making one set, yyou will see how easy it is to make these blocks. Then you can make some more…
I’d love to know what you think of this block and the method of construction!
Have fun!
If you enjoyed this post, you may also like,
Antique One Patch Block Made Easy
and
Antique Tile Block Made Easy Tutorial
Happy sewing,
Susie.
© Susan Stuklis 2017
Hi Susie,
I am going to try again, to lean how to quilt. Reading your instructions are well said, that I am somewhat confident that I could make this block. Thank you so very much.
I was wondering if you would please explain how to make a woven star? If so, I would appreciate it very much.
DeLois
demmerlyg@gmail.com
Hi Ginny,
Here is the result.
susies-scraps.com/2023/09/08/woven-star-quilt-block-made-easy/
Not sure why people are having trouble understanding the four patch in the center, I thought your instructions were pretty concise, but perhaps bullet points or arrows to the direct part of the picture, although I have no idea how that would work in a site like this.
I’m starting this today, talked out of a jewel box quilt and going to use the 7 colors with the black in each block, I’ll try to remember to let you know how it goes XD
I found another site (http://www.abbyhersey.com/journal/2015/10/1/autumn-arrowhead?rq=autumn%20arrowhead) that shows how to make this same block. It uses a smaller square and makes only one square. It doesn’t have the bias seams within the block that this one has but it does end up with bias along the edge of the outside edges of the block when finished. (I used two 7 3/4″ squares to make an unfinished 8 1/2″ ( finished 8″) block with that method. Using this method I used two 11″ squares and ended up with an unfinished 8 1/2″ (finished 8″) block.)
I also was able to spin my seams (https://quilterscandy.com/spin-your-seams/) using either method.
I really like the completed block! Going to have to try it.
Please
I need help can’t figure out
Thankyou
I learned this block years ago in a class and used it several times. Lately I wanted to use it again, couldn’t find the instructions and couldn’t remember exactly how to do it. Until now! Thank you so much, I love it ,and it can be so versatile.
Started on this block today. One thing that is missing is the instructions on the way you get the 4 patch in the middle, but I have it figured out and took pictures of the steps.
Neat block. I will refer all back to your post and in my post I will show the missing instructions on how to get to the 4 patch in the center!
Hi Nanette, thanks for that. It’s just a repeat of the same step. So glad you made the challenge! Gotcha thinking! 😉😊. Nice post!
Please share because I couldn’t figure this out! Def something missing in the directions 😁
Can you please show the piece that is missing ….can’t work out
Thankyou
I just made 2 blocks and they look great! I had won a layer cake several years ago and never knew what to do with it. To stretch the cake blocks, I’m teaming them with Kona fabrics from the solids tub. Thanks for the tutorial!
I wish I could show a picture of my two color quilt in this pattern just finished it today
well I am about half way thru I cut 42 10″ squares like a layer cake I am doing a two color quilt with this in a light teal and white so cut 42 in the white also.it is turning out pretty, been wanting to do a two color quilt for awhile now.I did have trouble at first then finally figured it out.alot of sewing and cutting in a little block. my blocks are all coming out at 8″
I have tried on several I simply cannot understand how you get the 4 corner stones in the middle?? I cannot figure out the instructions I guess I wanted to use this pattern for a two color quilt Guess I will just have to forget the corner stones.wish I could send picture
well with the help of niece we figured it out you say yours is 7 1/2″ blocks well mine are 8″???
I love this block. I made it in the first or second quilt I ever made. This one is beautiful
I made this block in my first ever quilt. It had a different name. I love this one, very pretty
I’m in West-Central Florida, USA for the winter and in West-Central Indiana, USA for the summer. Right after I’m done with this blog and my morning coffee, I’m out to my sewing room to try this block. Love the look of it and look forward to more in your blog.
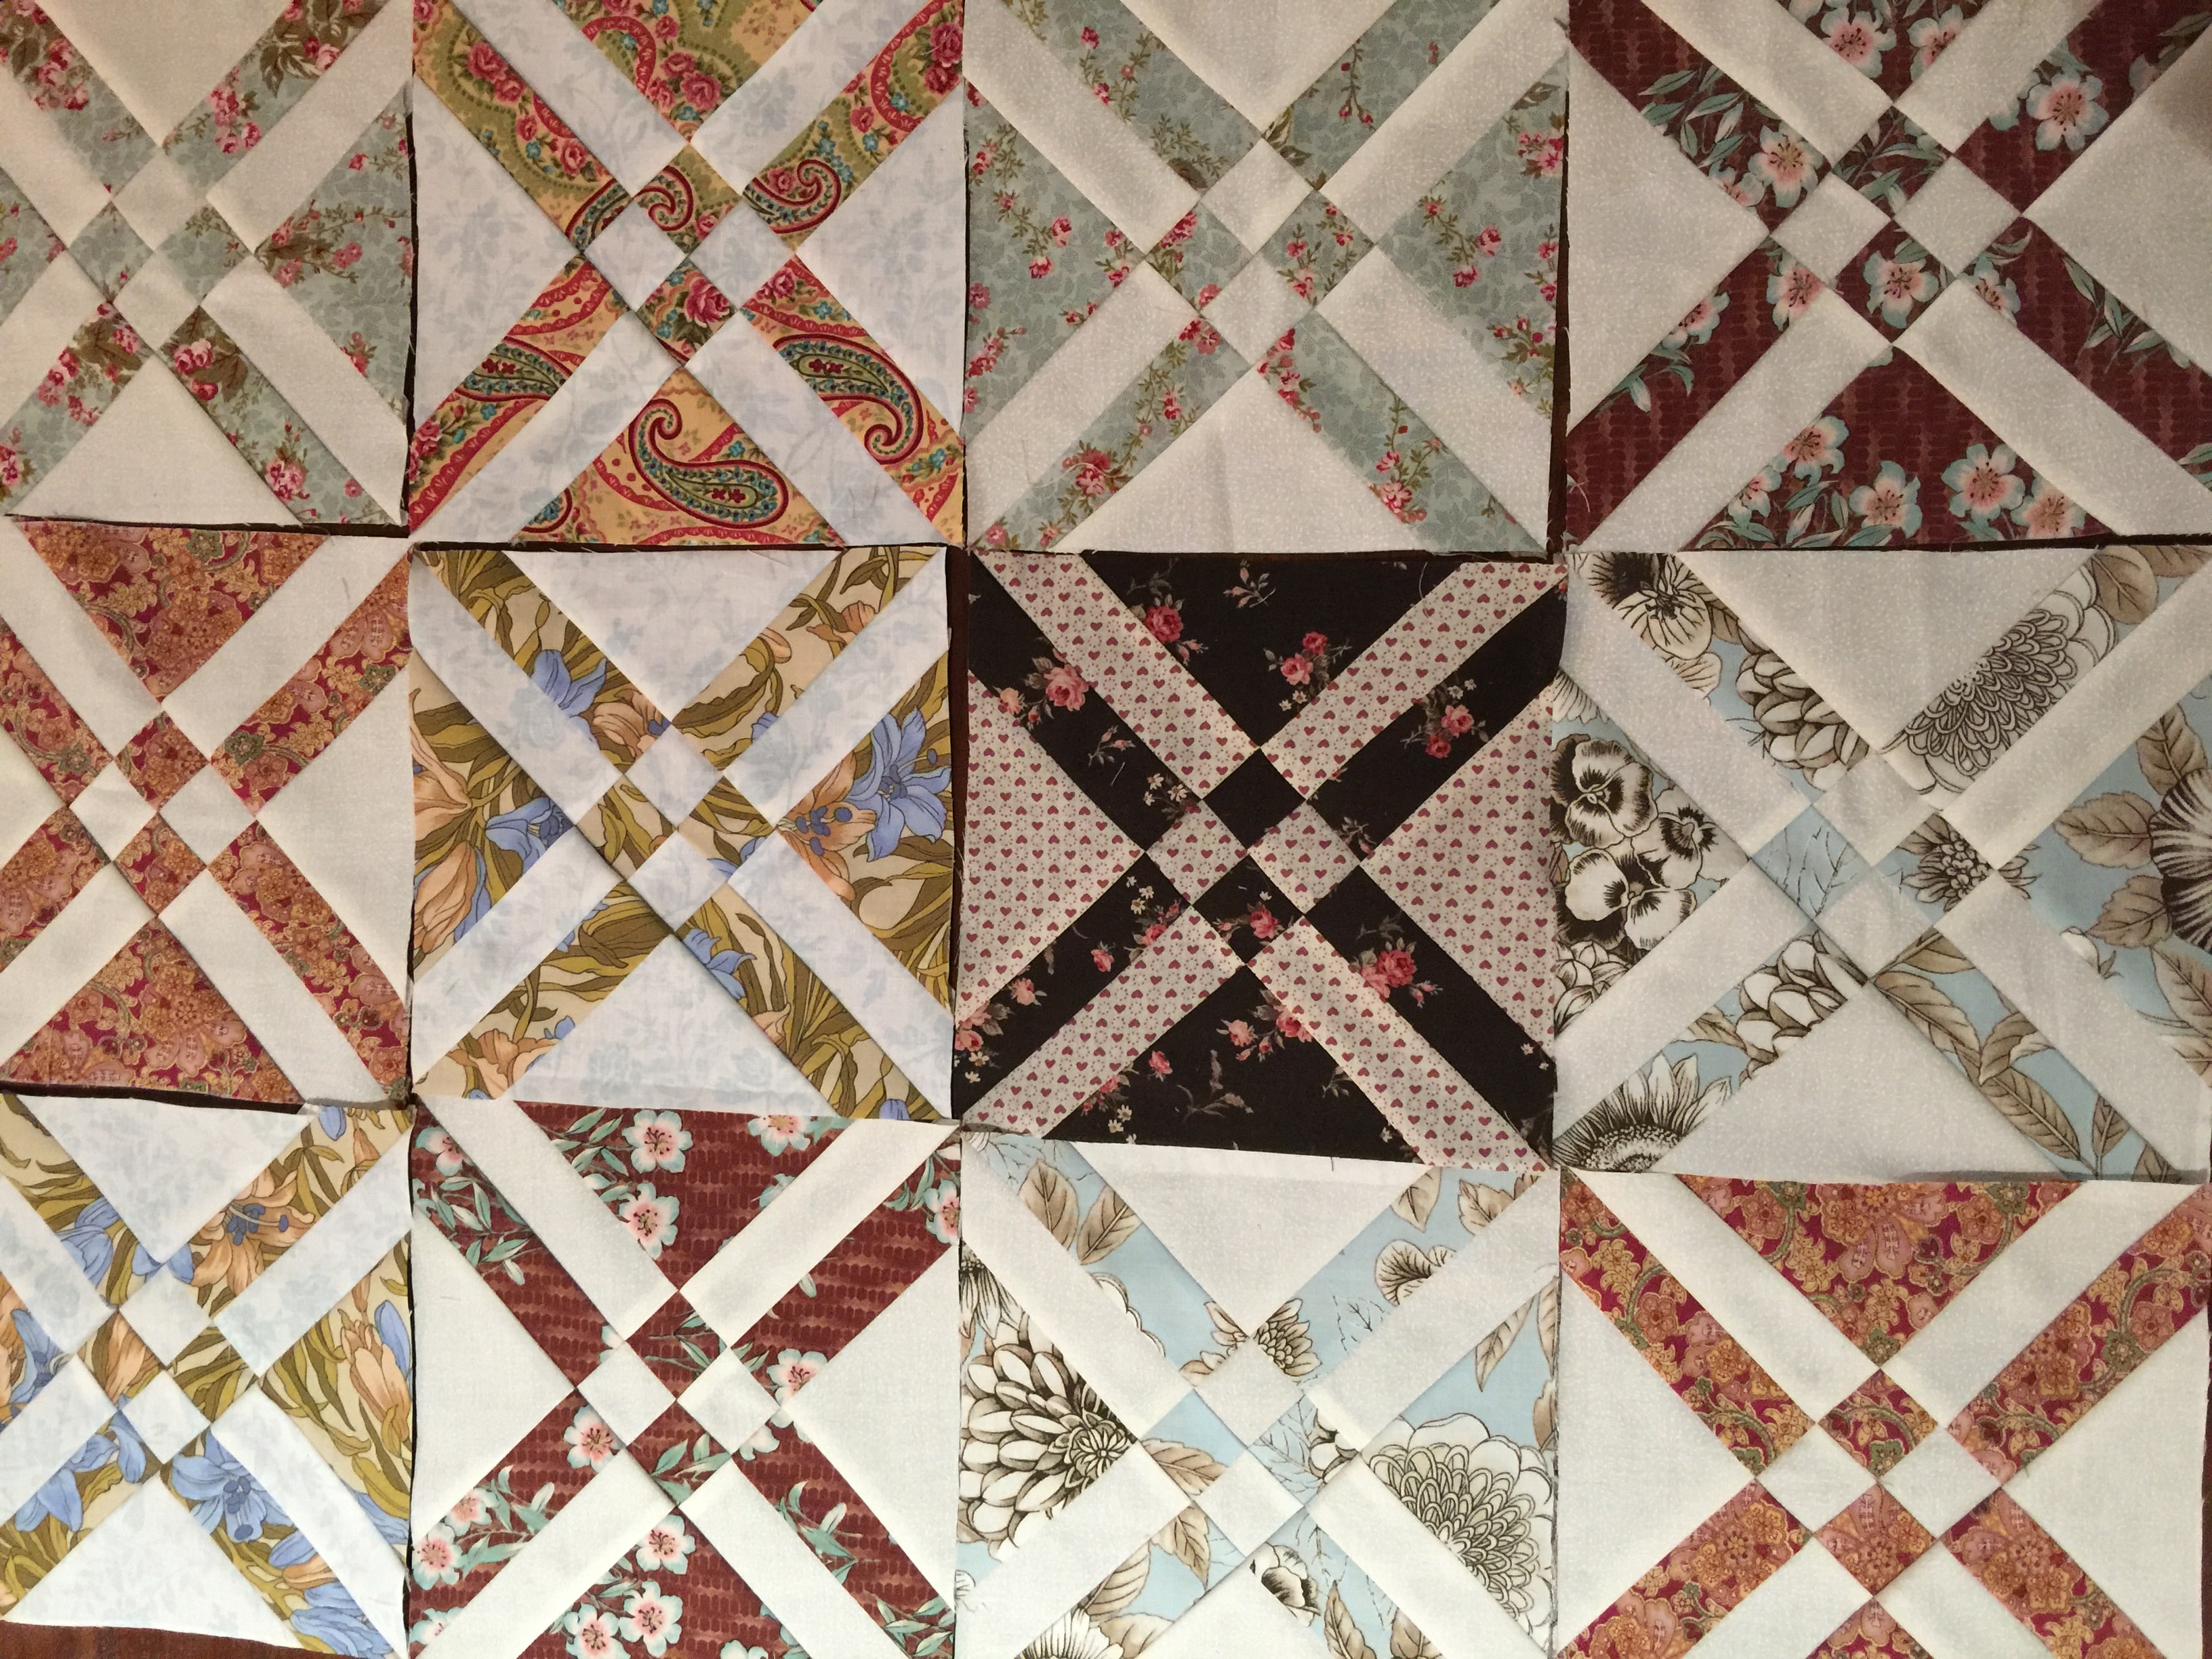
Hi Susie: I really love this Arrowhead block and I’m just finishing up with the actual blocks. Do you have pictures of any quilts made with this block?
New comment on your post “The Arrowhead Quilt Block Made Easy”
Author: Annie
Email: island.goatmail@gmail.com
Comment:
Susie – This is brilliant! What a fun, accurate and pleasant way to make this block! I wanted to make the blocks slightly larger, so just cut 12” squares and increased the width of the center strip cut to 1-1/2” on each side of the center seam to maintain the relationship. Worked great. These go fast, and with starch and careful pinning, yield great results. I am in awe of people like you with such great spatial sense who come up with this sort of thing. Thank you!!
Dear Annie, thank you so much for your lovely comment and feedback. Much appreciated, Susie
After squaring up, what is the size of finished block
Dear Mary, it is 7 1/2″ x 7 1/2″.
I have made this block before but not this way and not this simply. This seems much better and I will try this way on some Layer cakes left over from another project. It is a lovely block and your colours are so soft and complementary.
Fairly easy
I did not do so well. My blocks seemed to stretch out of shape after the second cutting.
I just tried it out–it looks so complicated, but comes together so easily–I’m hooked!
I love this! Can’t wait to try it!
You do the sixth step twice right?
You will be making two blocks at a time and interchanging the pieces. Step six is the same as step five, but on the opposite diagionals of both blocks. At step six you will see the four patches emerge in the centres.
In the last cutting step, just switching the two strips will end up the same, I believe.
Switch the triangles, not the strips.
I love this block and canlt wait to try it out, in the morning!!!!