Pink Strippy Baskets Quilt Antique Inspired Part 2
Hello Dear Friends and Readers and to all my new subscribers. a warm welcome to you. Best wishes for this New Year of 2024. Christmas this year was very much saddened by the loss of my MIL after a nasty battle with cancer. For all of you who have also suffered a loss I send you my condolences.
Today I would like to kick off the new year by getting back to some unfinished projects. For those of you who followed this basket project, you may recall that I had run out of pink!!!
Here is the link to putting the strips together.
Pink Strippy baskets quilt antique inspired.
And for those of you who are new to susies-scraps.com, I love to use up scraps, and these blocks are no exception. this is the link to making those little blocks. They are easy and fun to make. Small waste triangles are utilised for these blocks.
Little Beauty Scrappy Baskets in a Nine Patch
Although the construction of these baskets is quite modern, I really love the antique/vintage look it has with setting the blocks in a sea of pink. I like pink but you could choose any colour that you prefer.
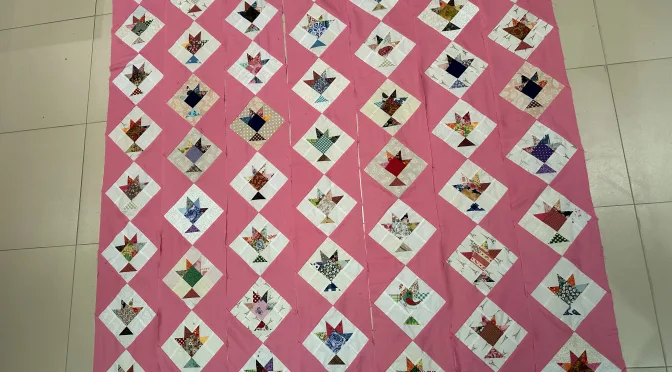
This is where I was up to last time. I did find some more pink to finish to strippy pink columns. Now for finishing the ends. I made 3 columns of 7 baskets blocks and 4 columns of 8 basket blocks making 53 baskets in total.
Requirements for Finishing the Pink Strippy Baskets
1/2 Yard/Metre extra of the pink background fabric for the setting triangles.
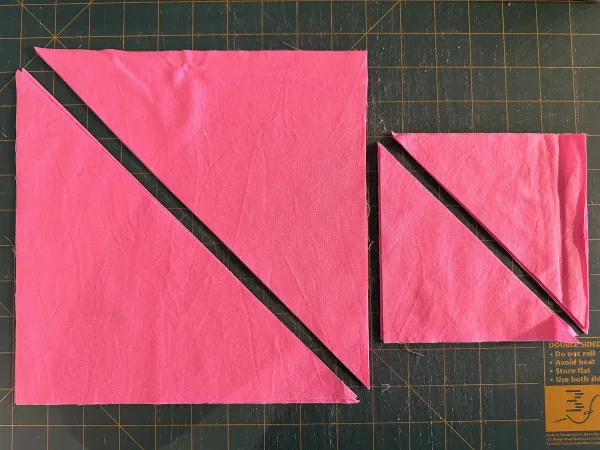
Three of pink squares 9 ½” x 9 ½” cut once on each diagonal to reveal six end triangles.
Eight of pink squares 5 ½” x 5 ½” cut once on the diagonal to reveal 16 end triangles.
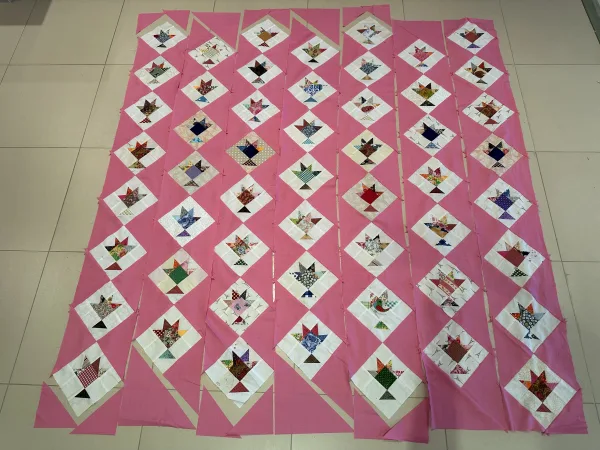
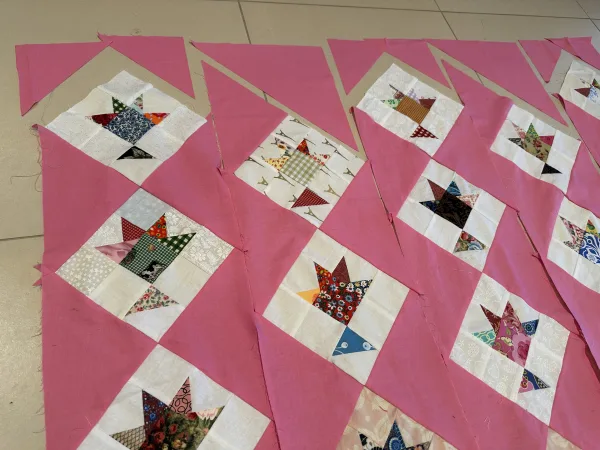
Here is how they will fit at the ends of the columns.
Finishing the Pink Strippy Baskets
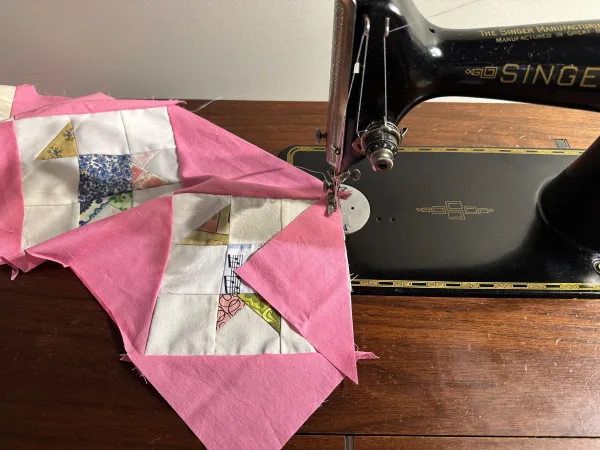
The smaller end triangles will be sewn to the four strips of 8 baskets.
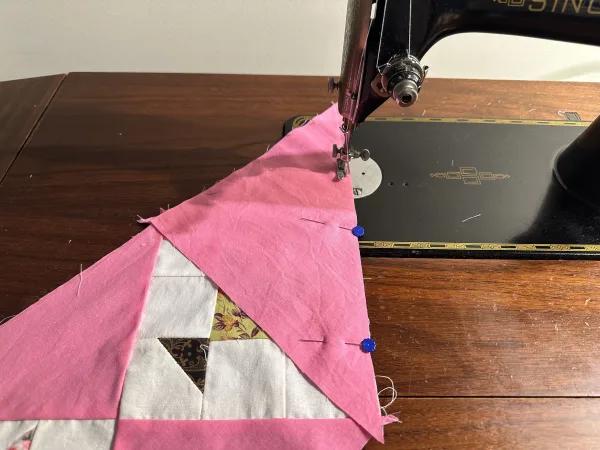
The larger six triangles will be sewn to the ends of the three strips of seven baskets.
Sew a large end triangle, right sides together, to the end of a strippy column of seven baskets. Repeat for the remainder five large triangles.
Sew the smaller triangles to the ends of the sets of 8 strippy baskets as pictured below.
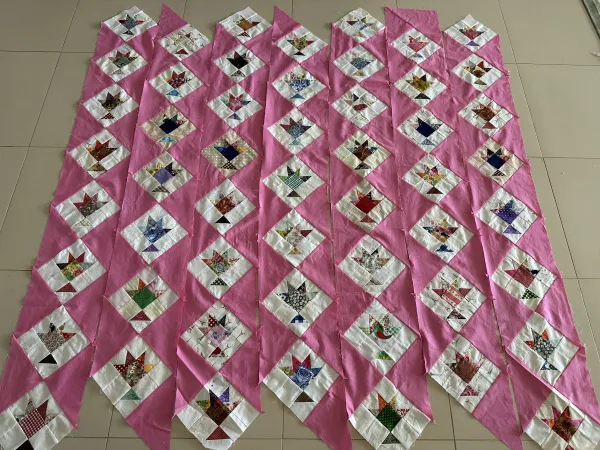
Trim off the doggy ears from the sides of the strips.
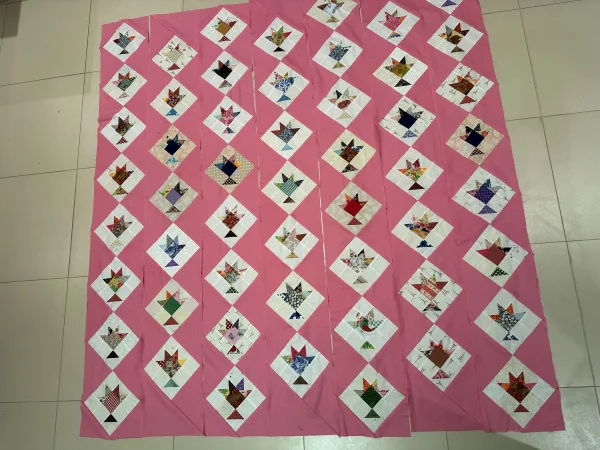
Line up the strips beginning with a column of eight and alternating with the strippy sets of seven baskets.
The baskets will alternate creating the zig zag or also known as A Streak of Lightening between the blocks.
Carefully pin the strips together and sew down each vertical seam.
Next step will be to add a border and I will be back with that.
Finished size at this stage is 62 ½” x 68″.
If you enjoyed this post, you may also like
Country Roses Four Patch Quilt Pattern
Holiday Stars Quilt and Pattern
Scrappy Thousand Pyramids Quilt and Lessons in Pyramids
Double Pinwheel Block Easy Scrappy Style – Tutorial
Old Italian Blocks Quilt Finish
Looking forward to more happy sewing time this year. Hope you are too,
Susie
© Susan Stuklis 2024

I’m sorry for your loss. It’s so difficult to watch someone we love suffer.
The quilt top is gorgeous.
Susie~
Thank-you for sharing. Sadness and loss are difficult, especially during the Holidays. I hope you move forward in peace and grace, finding comfort in your wonderful sewing art which you generously share with so many. Sending hugs across the miles.
Karen M.
Beautiful!
Dear Susie,
Receive my sincere sympathy for your loss.
And thank you very much for your fantastic pattern and for your instruction in this beautiful work!
With love
Marianne