
Dear Friends and Readers. Packing can be quite a chore. It doesn’t really matter whether it’s a special overseas trip, a business trip, an overnight visit somewhere, or a trip to hospital for that matter. They all require a certain amount of planning and organisation and decision making, which can result in that feeling of not knowing where to start.
This is what I like to start with every time. I find that this one item starts me off on the right foot and gives me a sense of achievement of bag packing. I find the rest comes so much more easily after this. I try to keep packing minimalistic as it is very liberating when there isn’t much to carry.
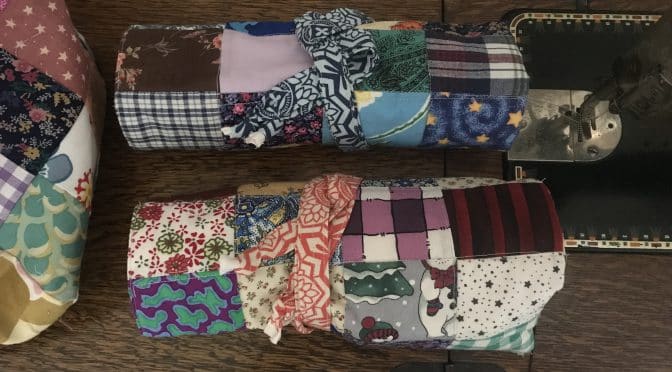
I keep my roll prepared with basic essentials, toothbrush, toothpaste, deodorant and whatever…..in my travel bag ready to go, and this, I find, is very helpful. Frankly it’s the best thing ever. I can feel a sense of accomplishment even if I haven’t done anything ! My son travels extensively for work and he tells me he has had so much joy from using his. It also gives a sense of home, when in a hotel setting, which can be very comforting. Today, I’m making these bathroom rolls using 2 1/2″ x 3″ units.
Sew, my friends, get out your scraps. You can make these on a shoestring. You can make one for your friends and family and goodness knows you could even make one for yourself!!!
Ingredients for one Quilted Travel Roll
48 of 2 1/2" x 3" scraps of fabric
Cotton batting or toweling approx 18” x 18”
A fat quarter of fabric for the lining
1 of a 2 1/2" Width of Fabric (WOF) strip
Method of Construction Quilted Travel Roll
All seams based on 1/4” unless otherwise indicated.
Finished size approximately 16” x 10”.
Lay out your 2 1/2″ x 3″ rectangles in an 6 X 8 configuration. That is six down and eight across. The 2 1/2″ edges uppermost in a line of eight and the 3″ sides in a line of six as pictured.
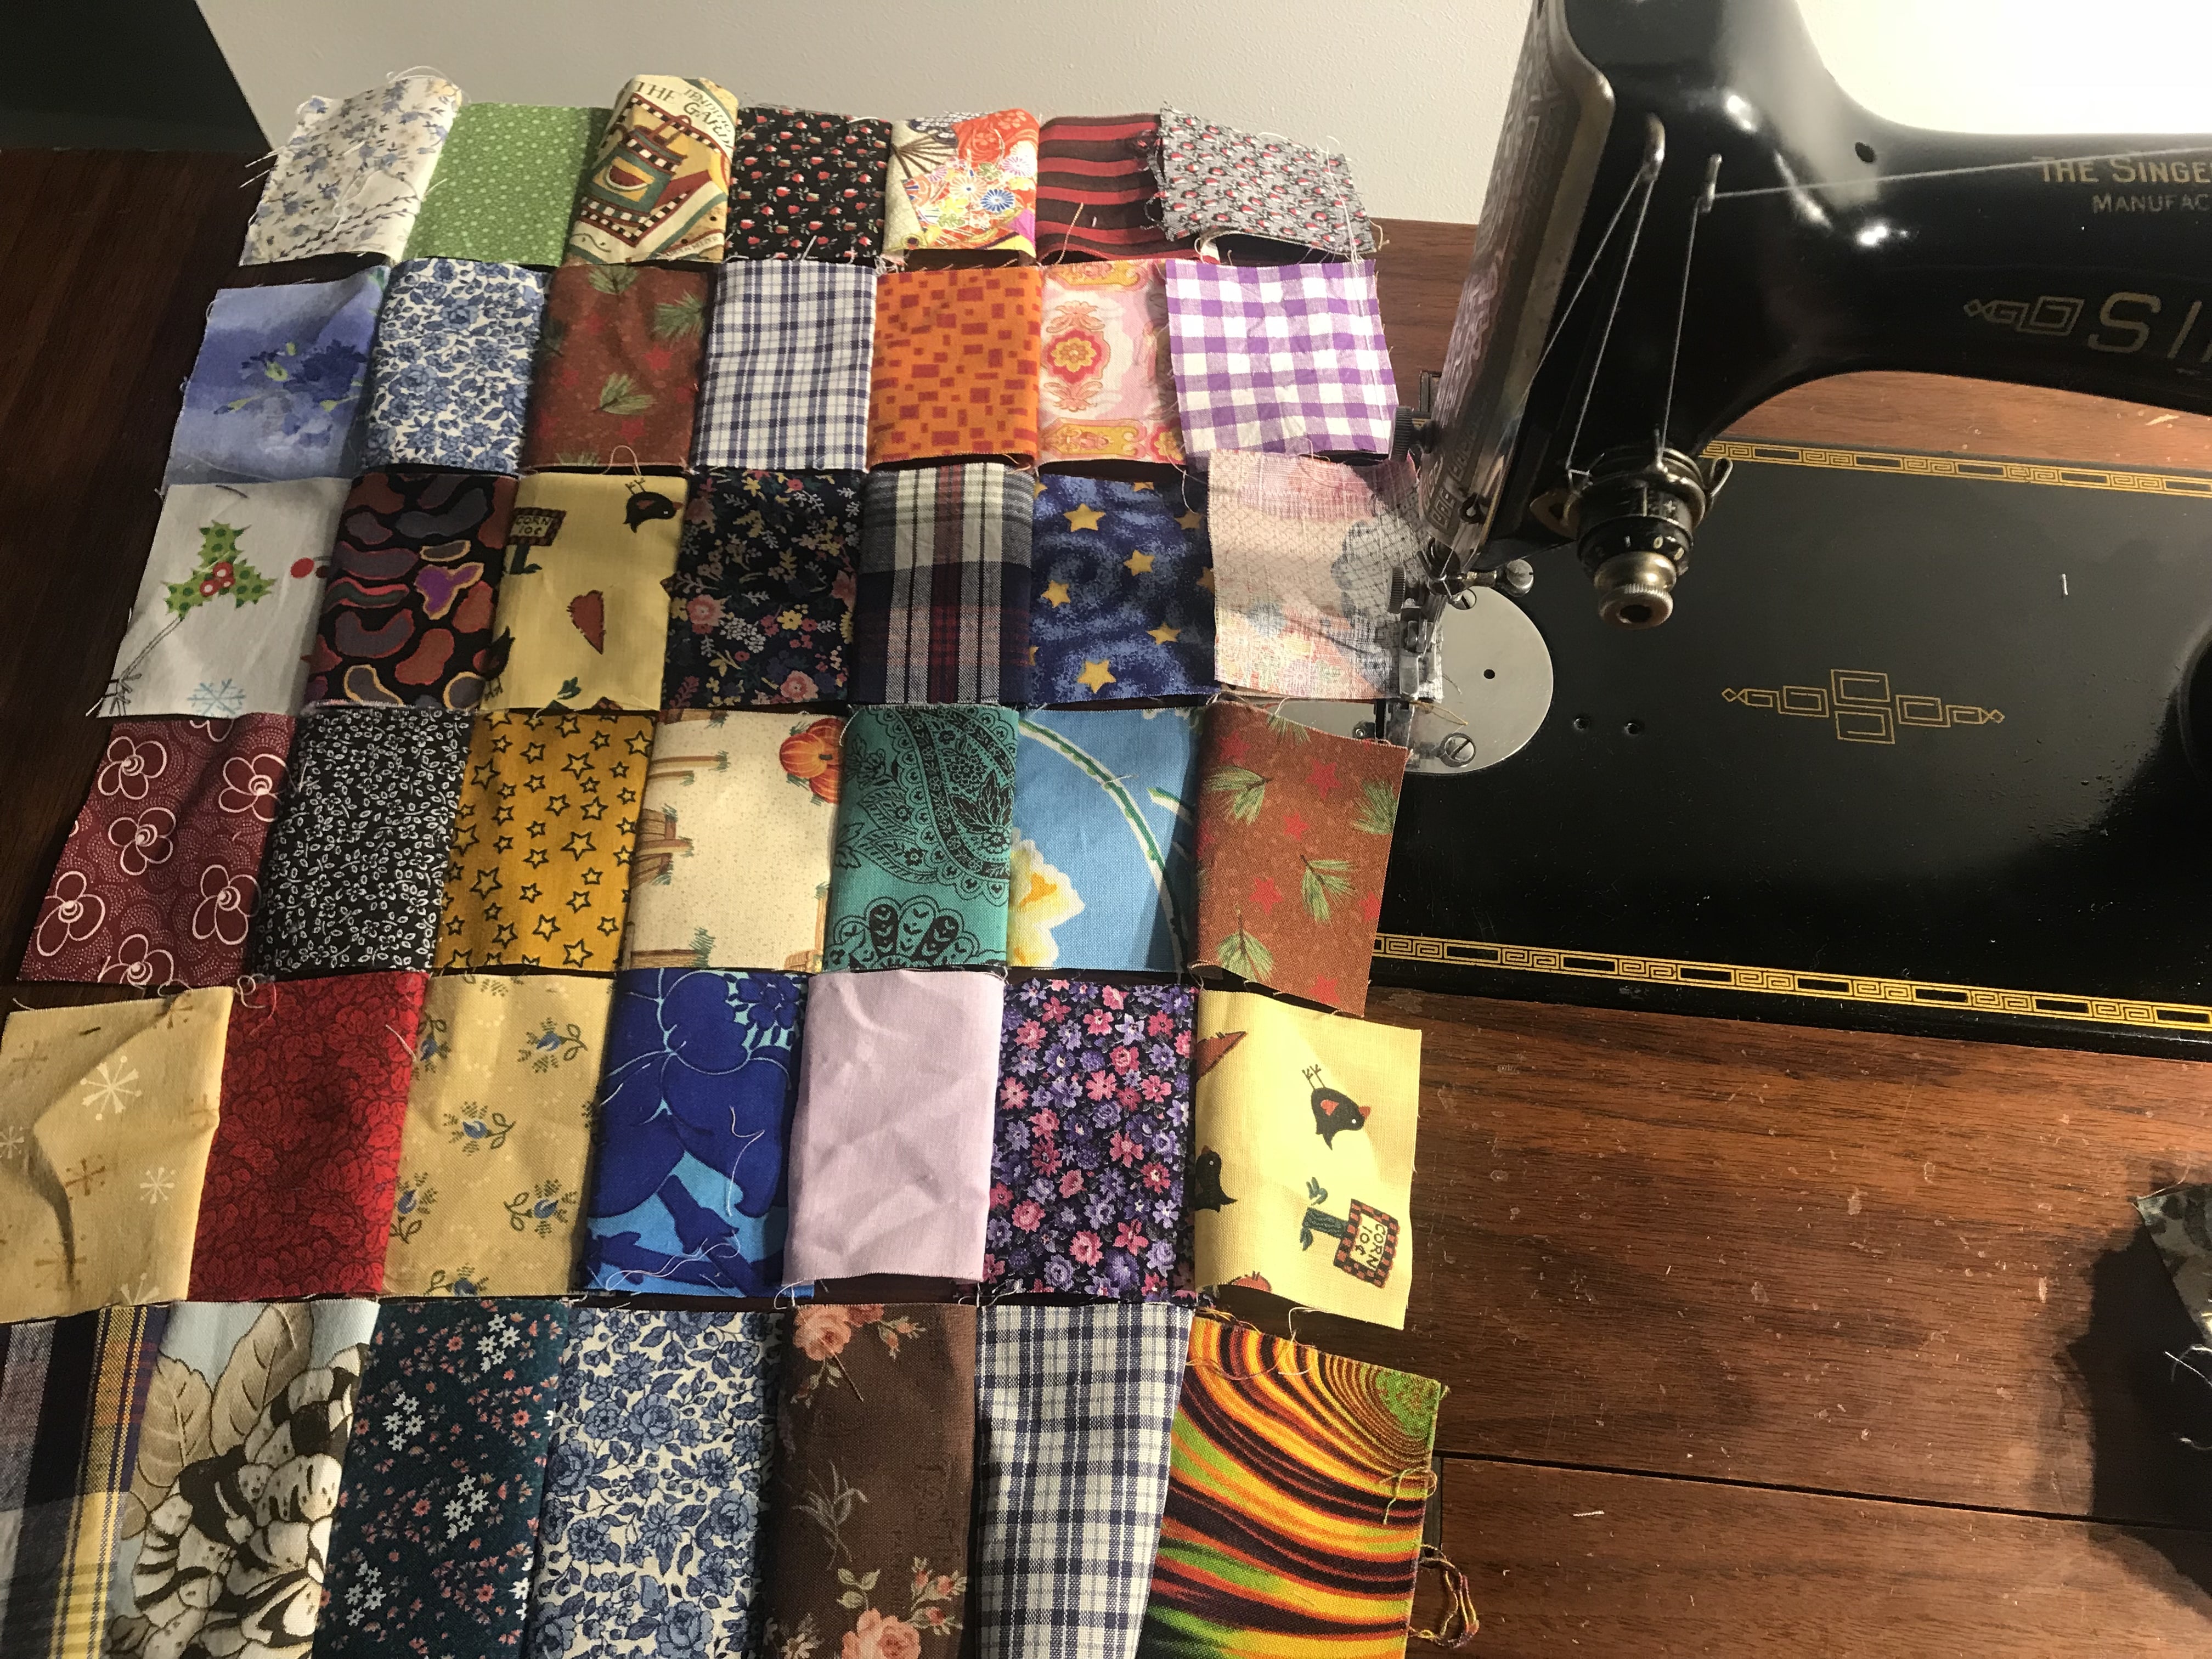
Sew into a square. Press.

Lay the piece on top of the battting. Quilt each row in the ditch forming a grid. Trim the excess batting.
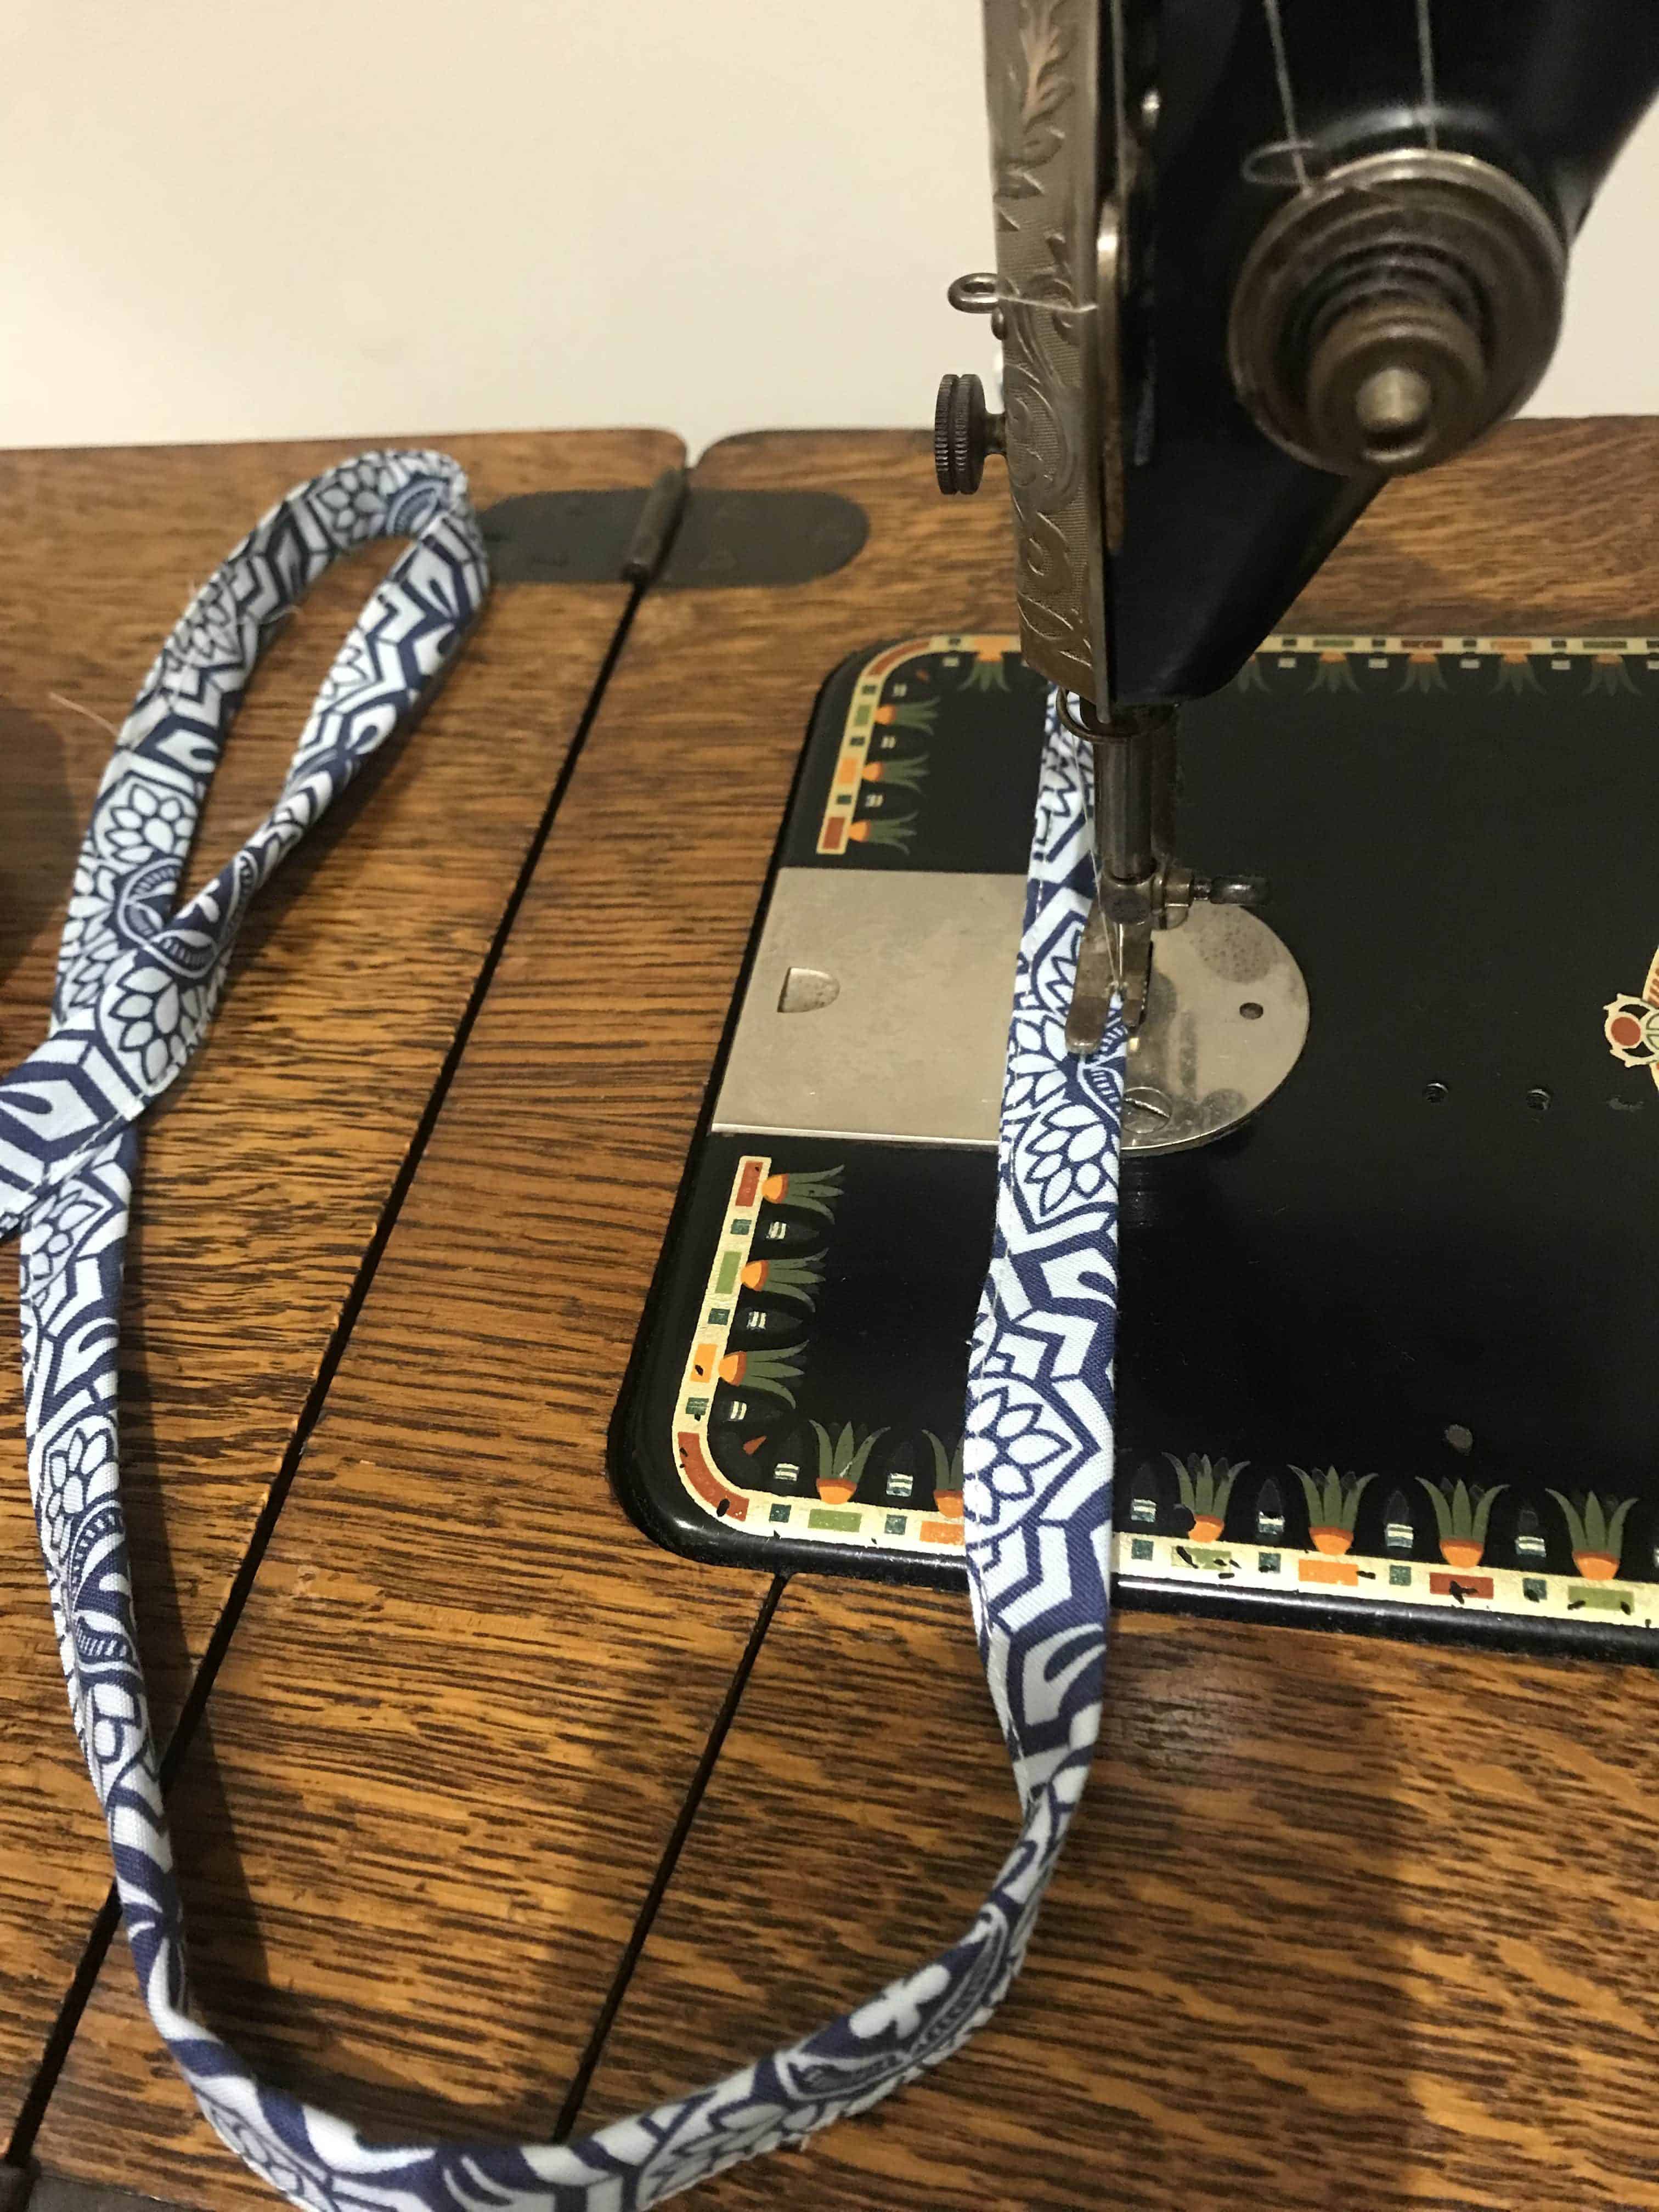
Turn in the long sides of the 2 1/2” WOF strip, then fold the whole in half lengthways. Sew close to the edge on each side.
Lay the quilted piece on top, of the lining piece, right sides together. Position it in front of you with the eight across and six down.
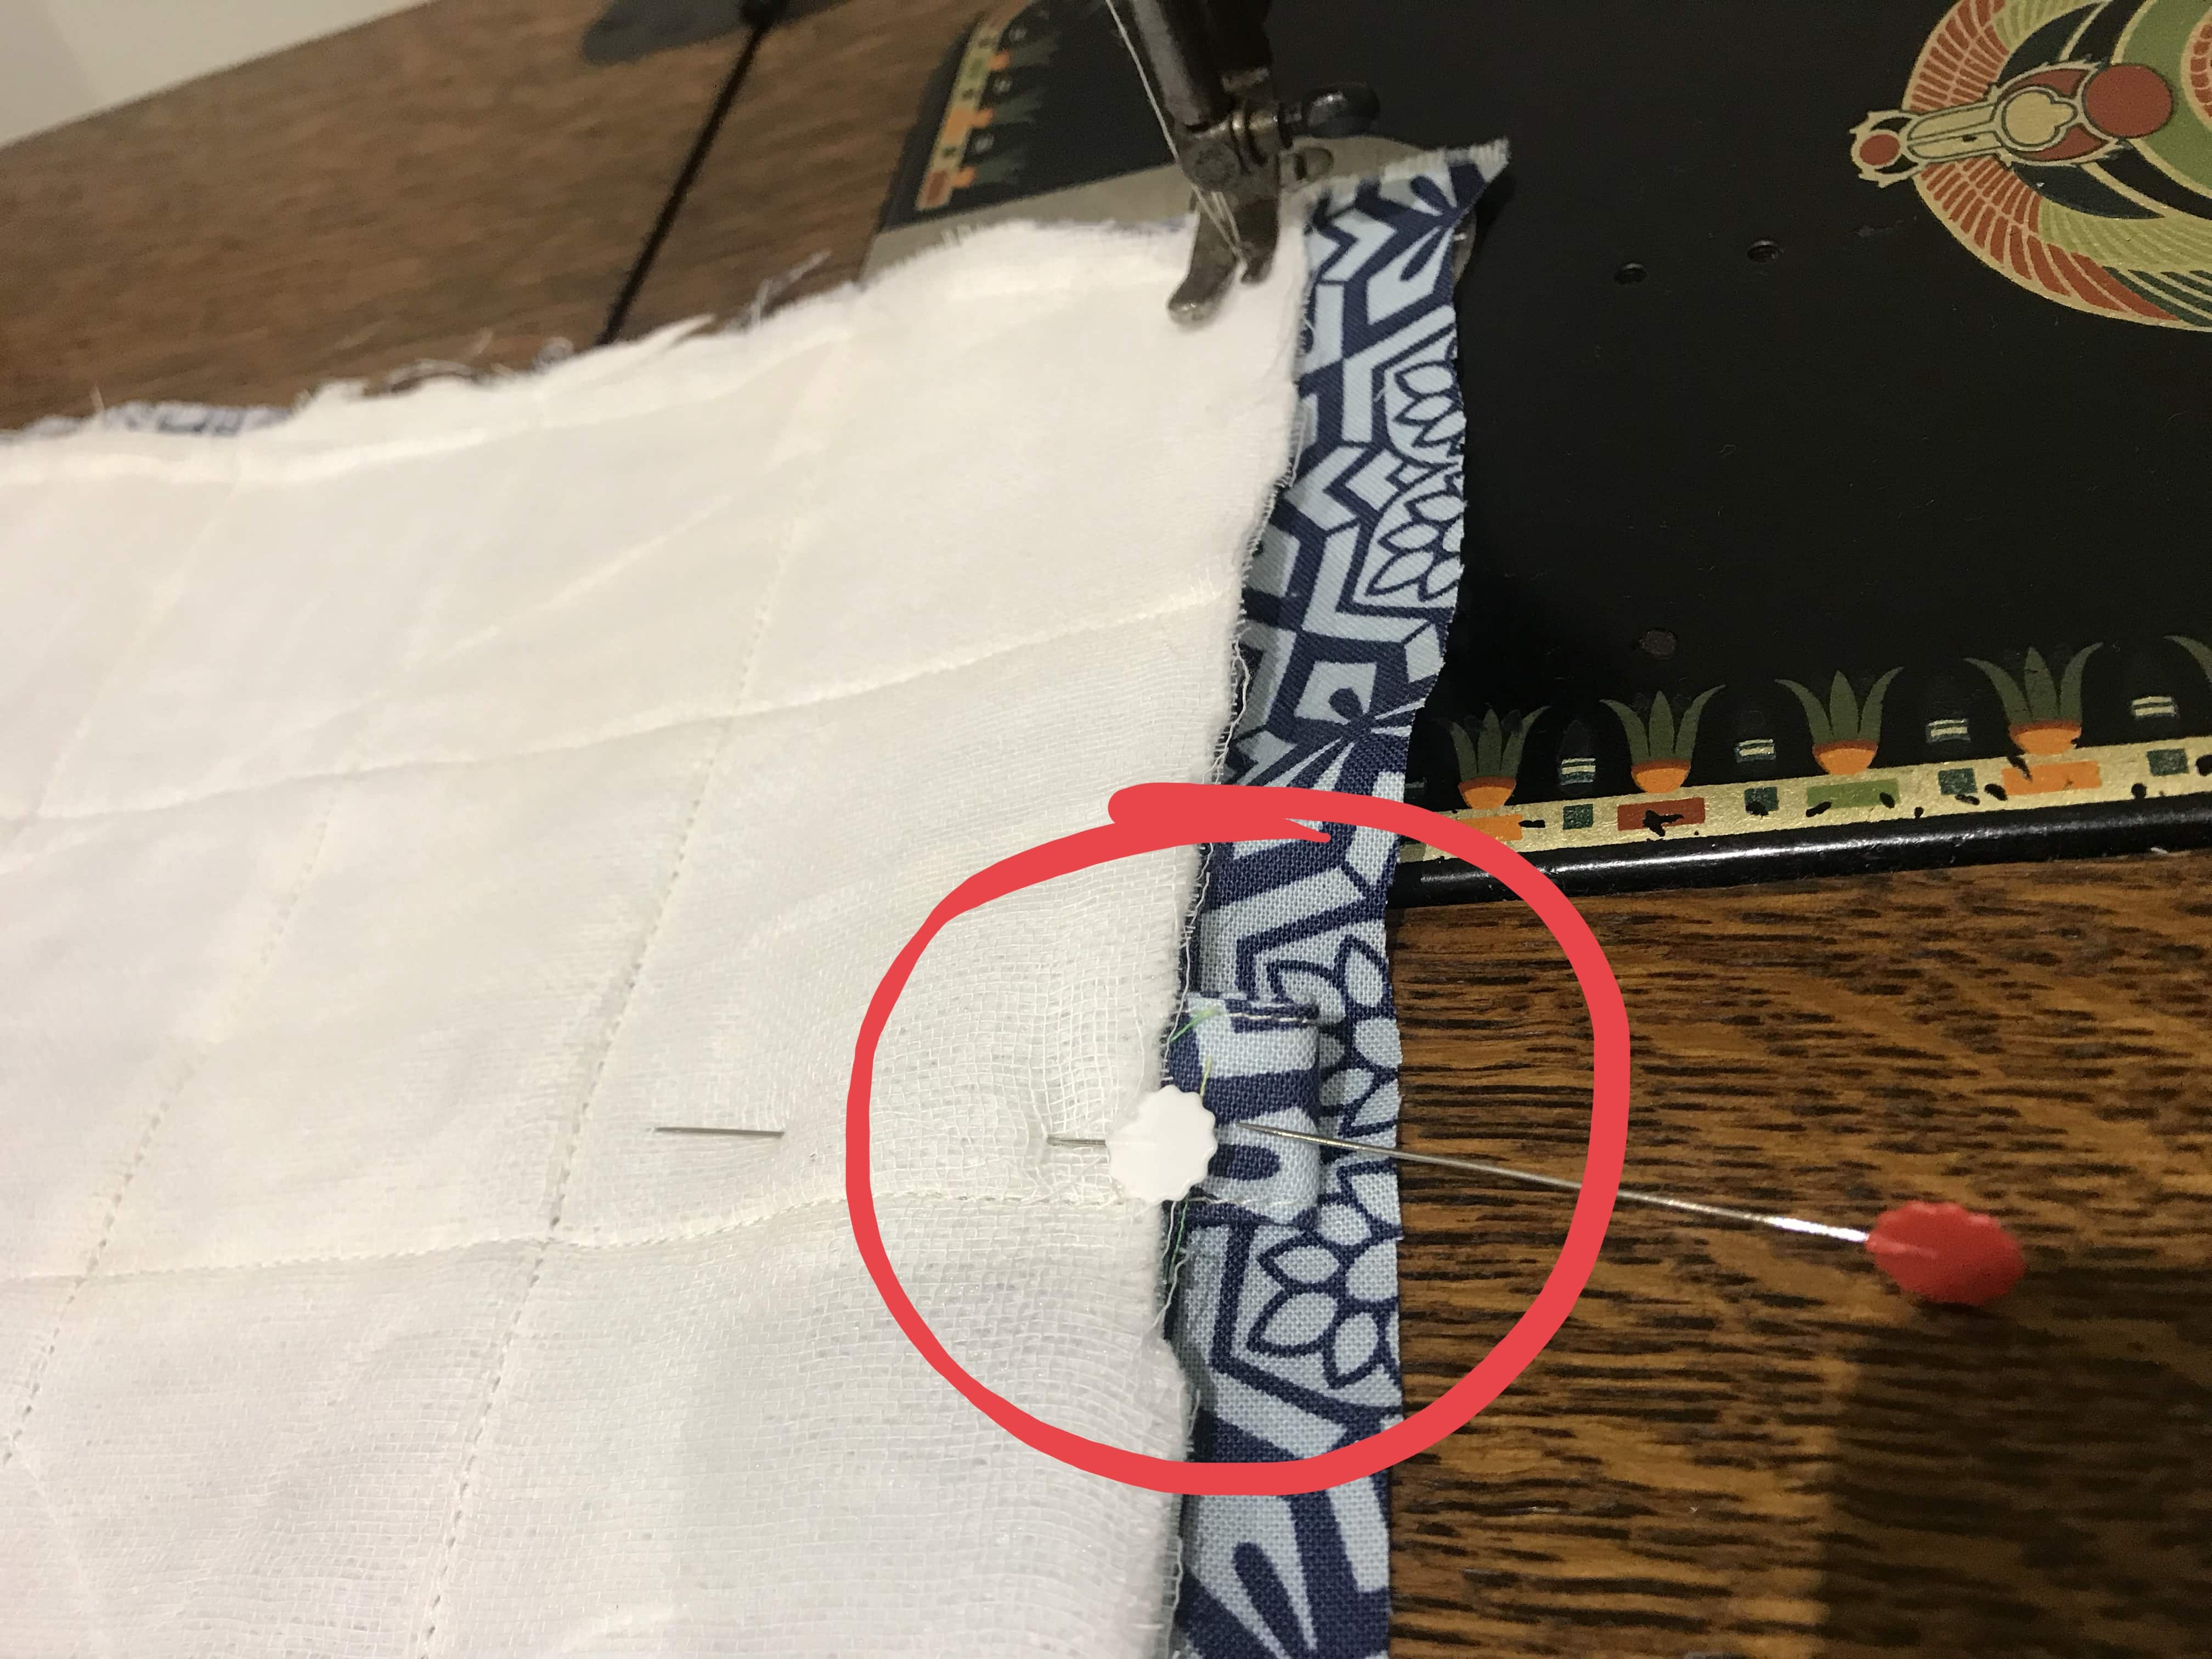
Fold the strip in half. Put it between the layers with the folded edge showing. The two lengths will be between the two layers, on the right hand side. The folded strip should line up at the second row of quilting as pictured. Sew around the perimeter, sewing in the strip and leaving an opening for turning. Clip the corners. Turn to the right side. Use a chop stich or similar to ease out the corners. Press. Turn in the unfinished edges. Pin. Top stitch close to the edge around the perimeter.
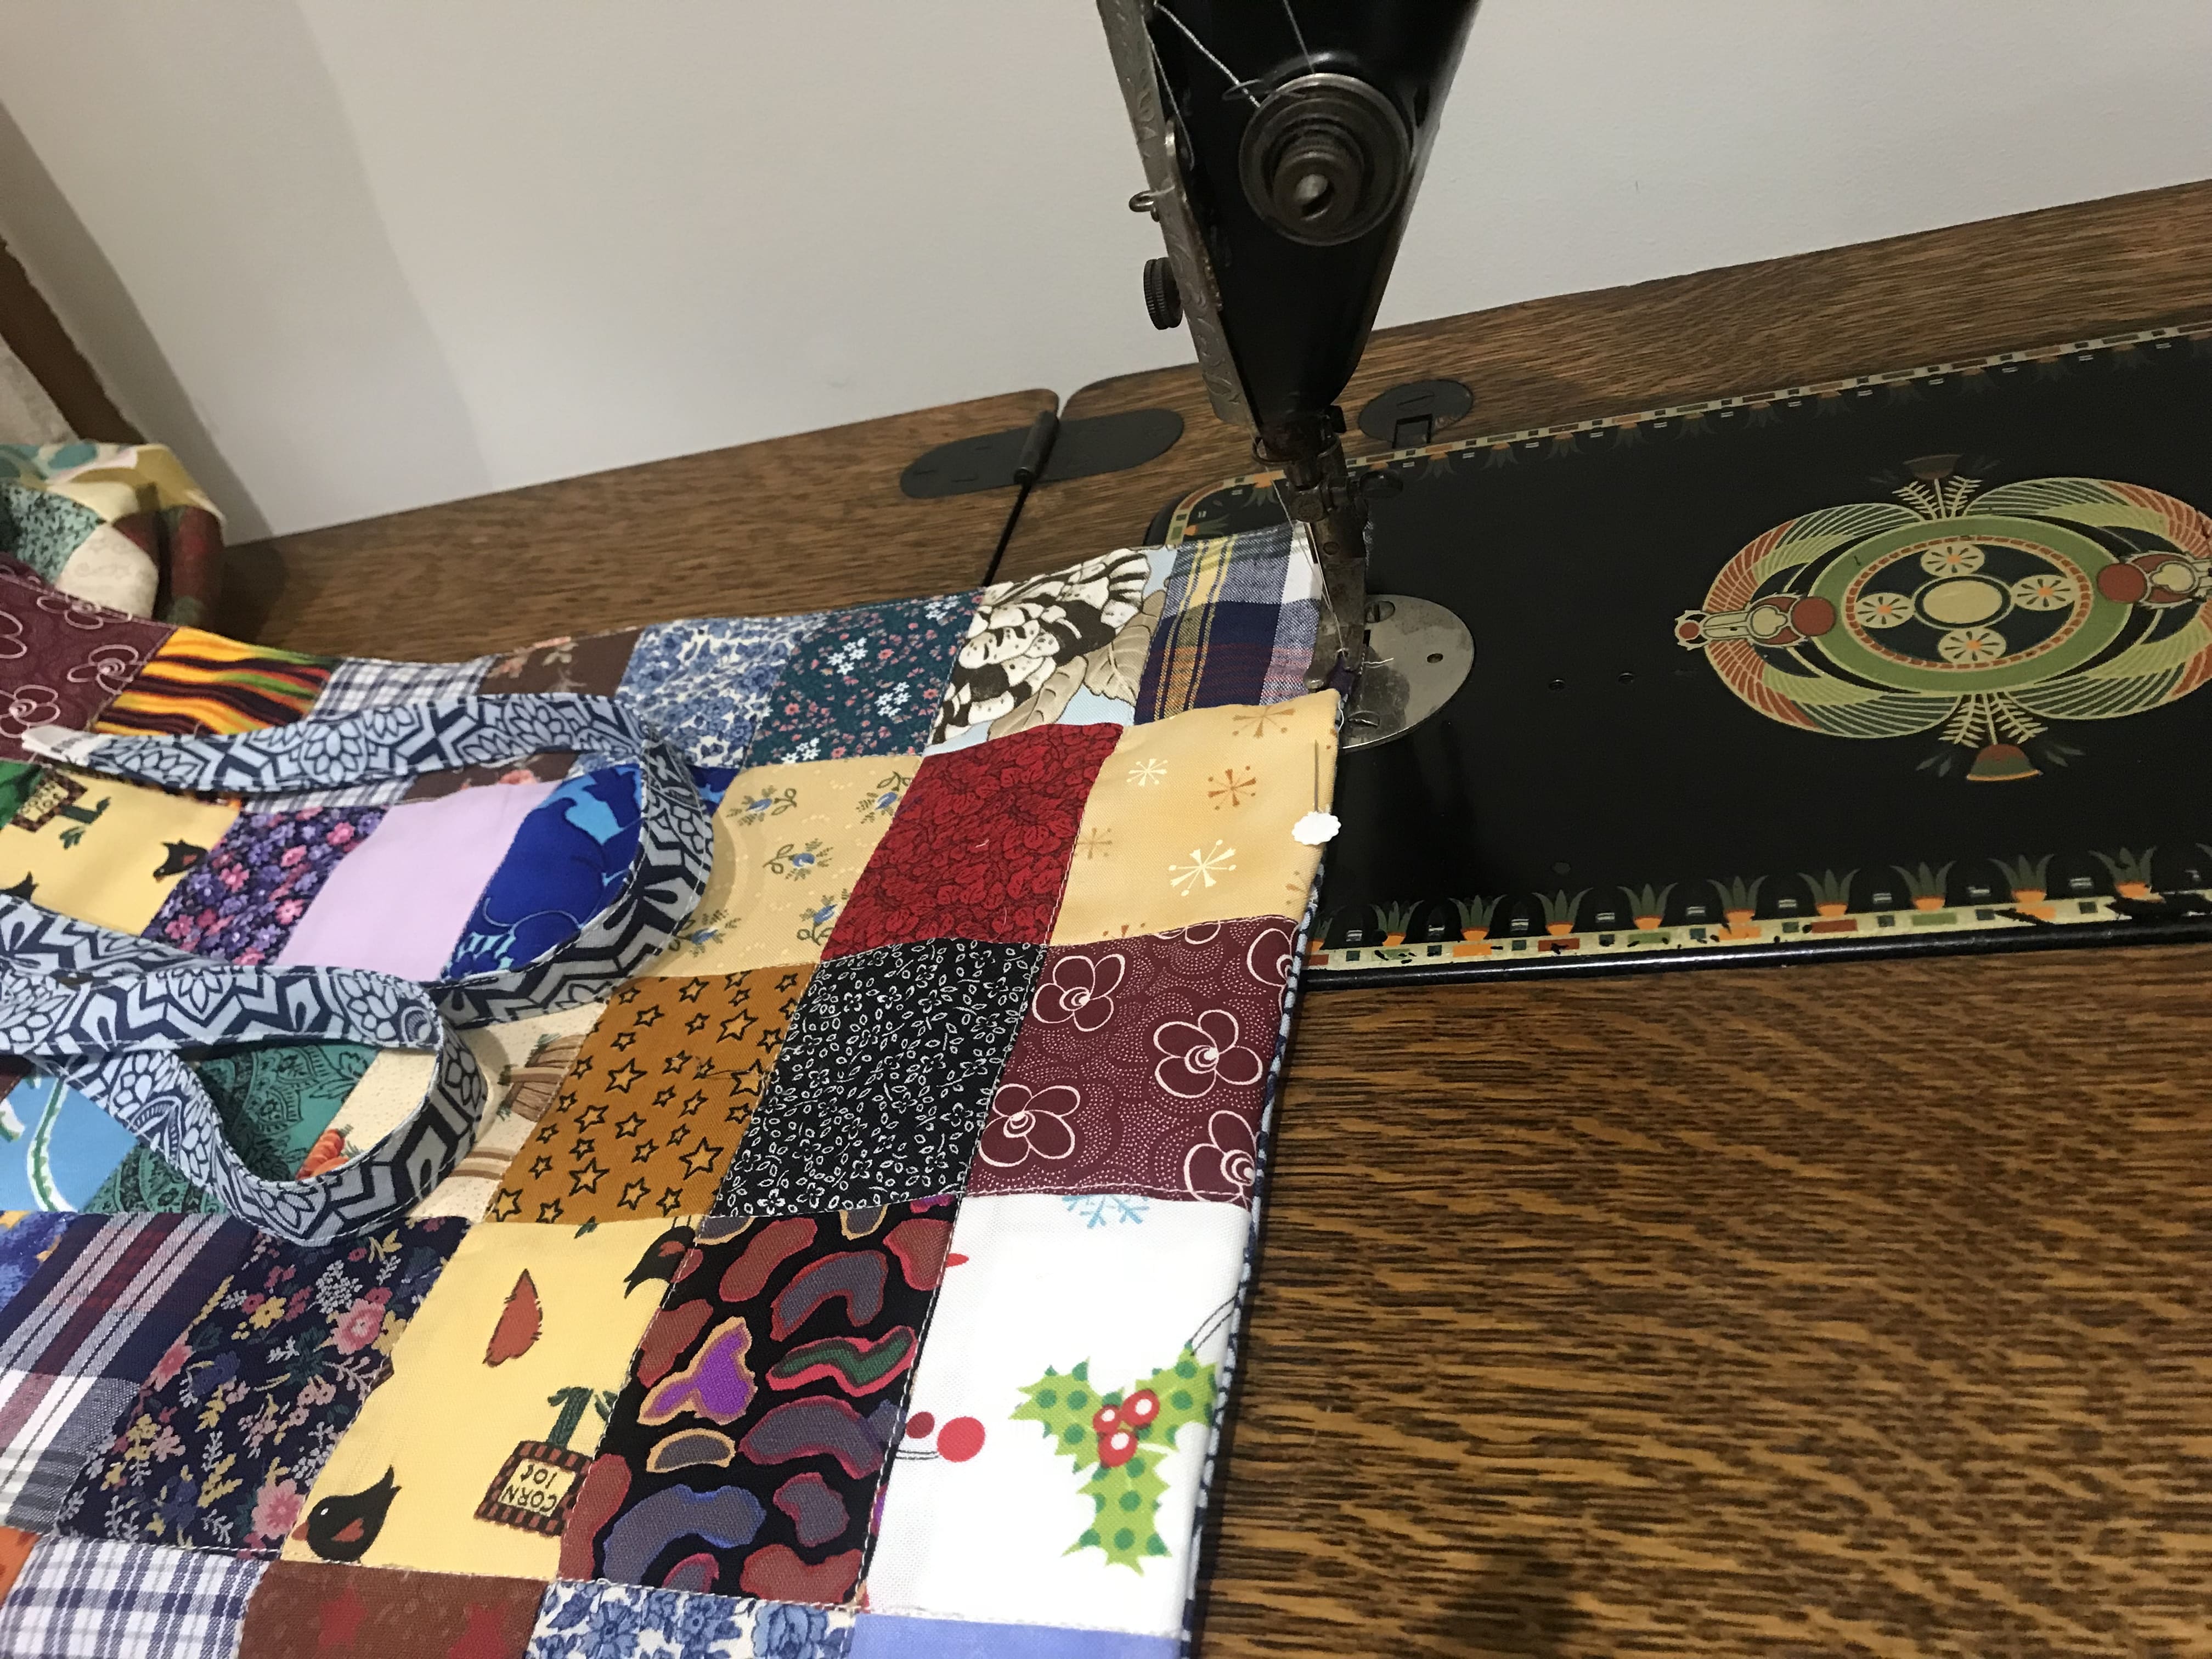
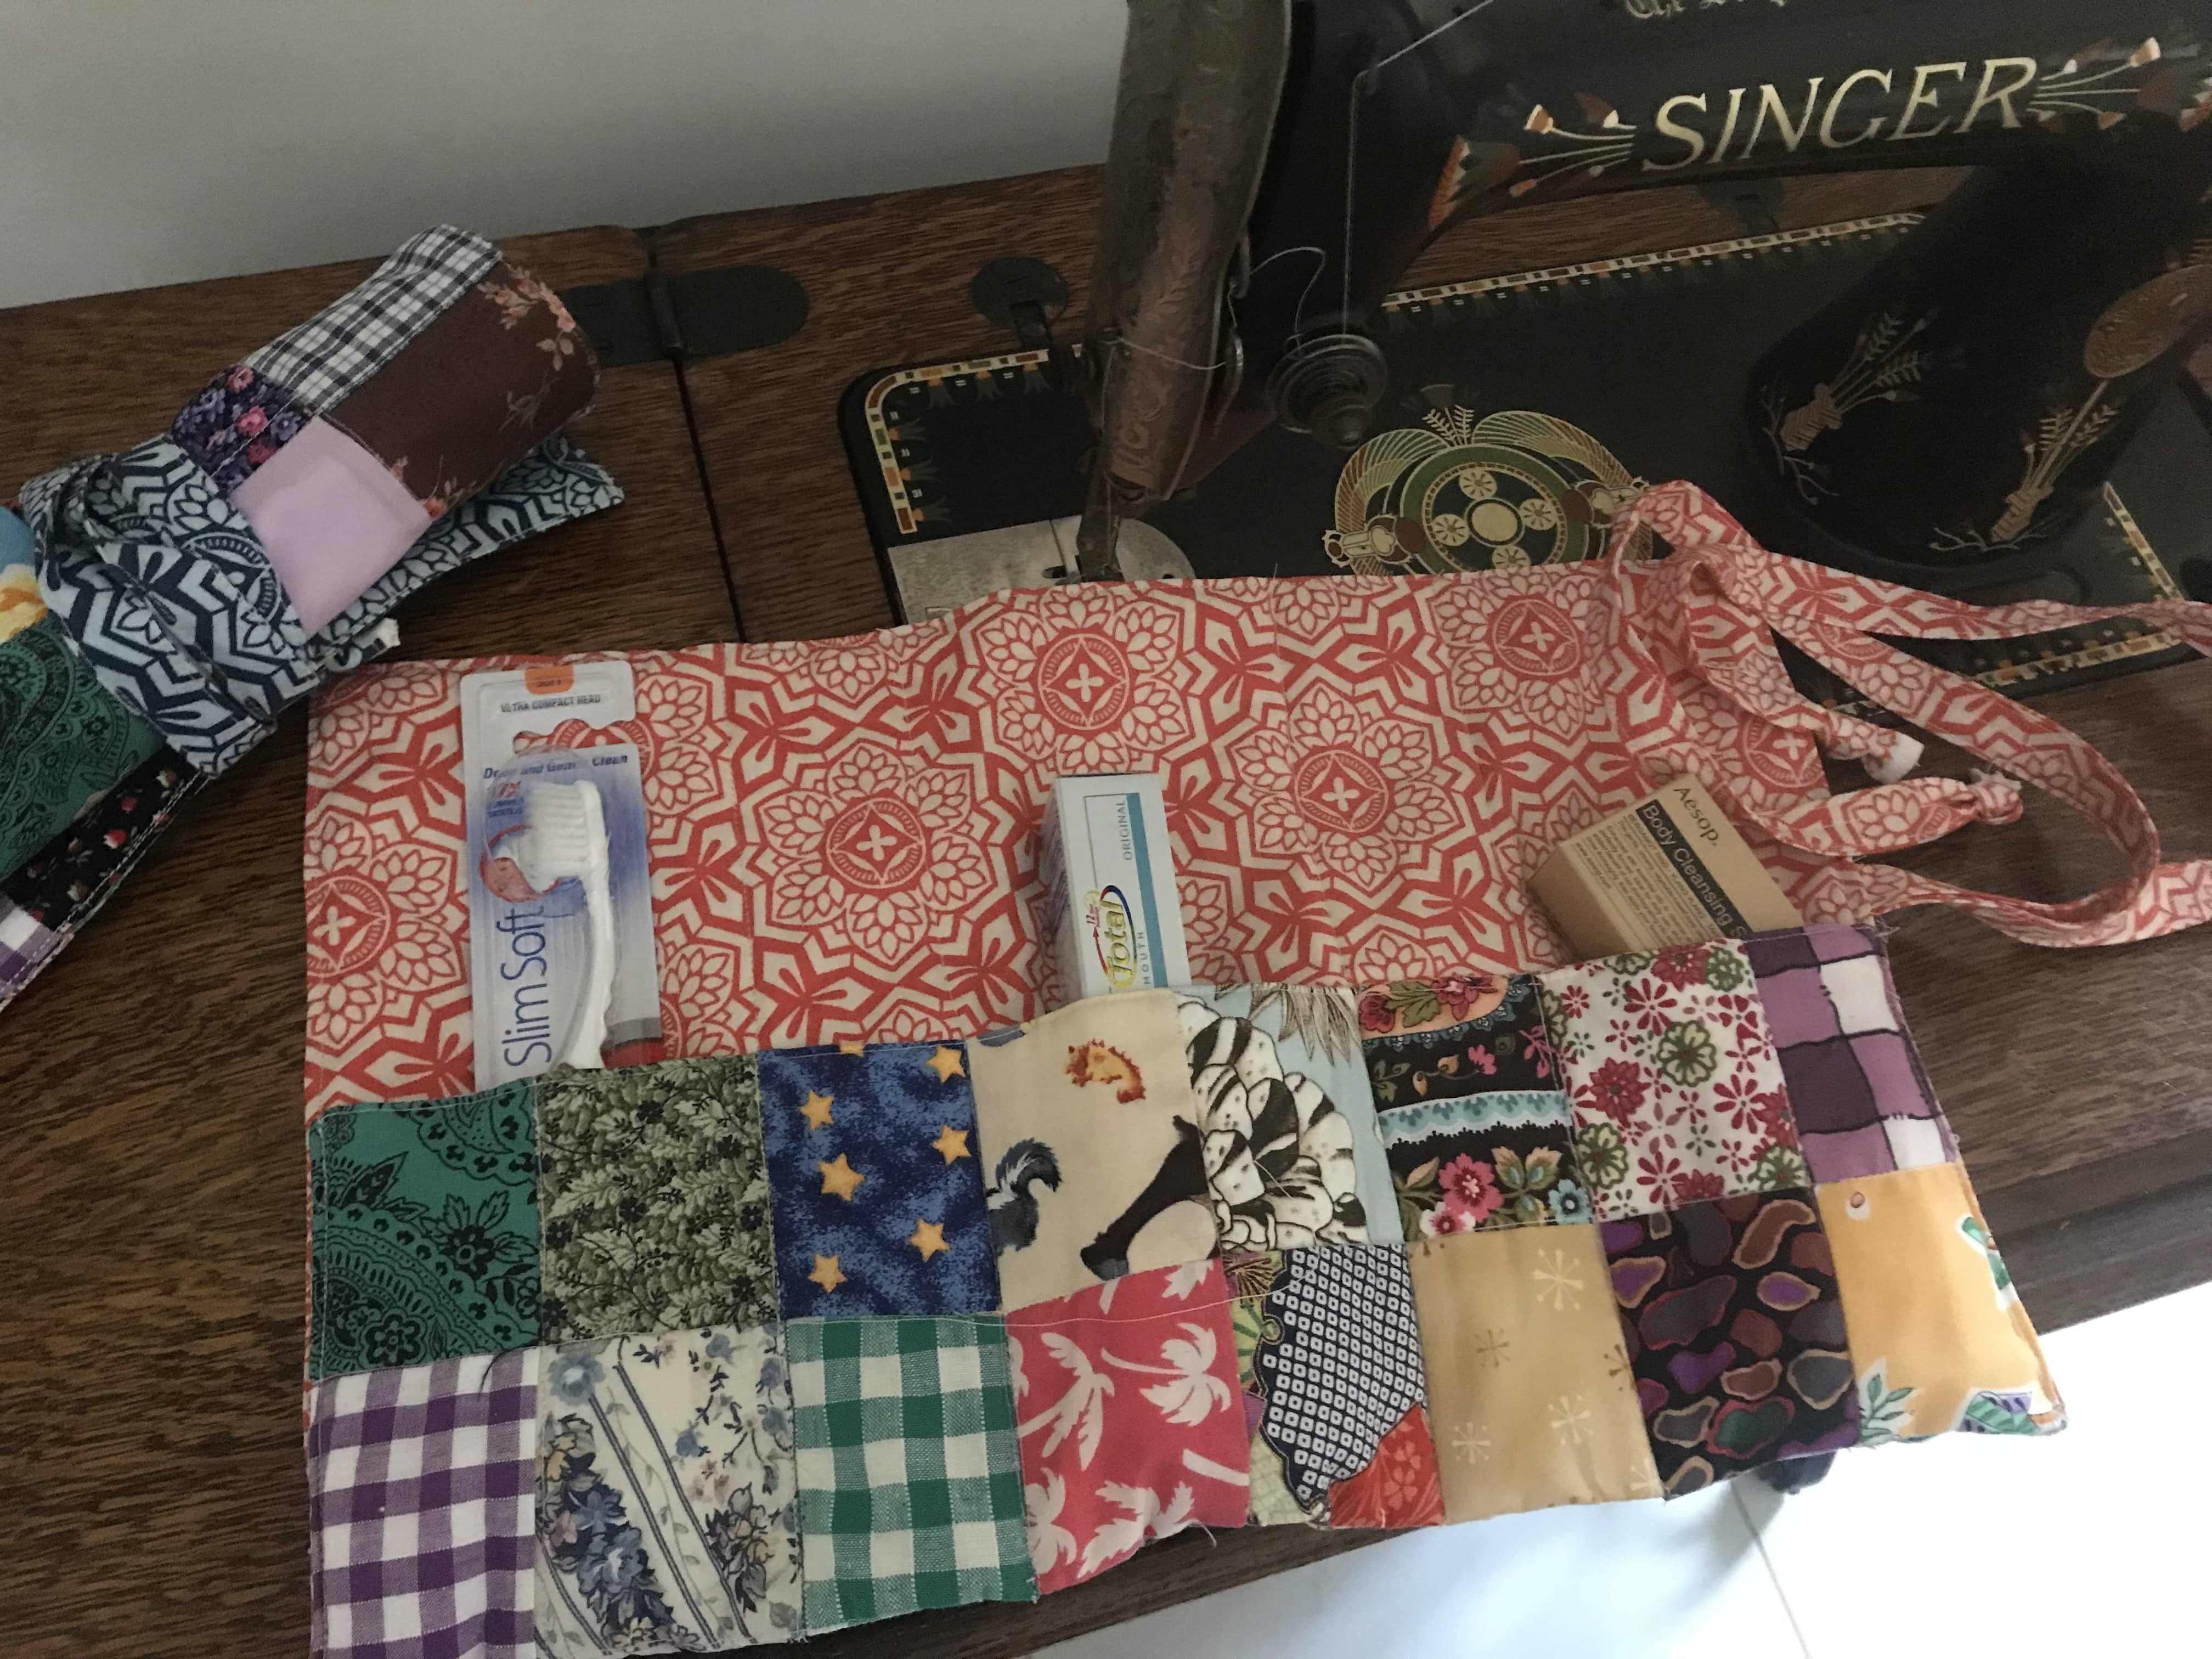
Fold the lower third of the length towards the lining side. Sew pockets as desired, to fit your toiletries. This will also quilt the layers together. In the image below, im sewing it from the base to the top. This gives a neater result. Here you can see its upside down.
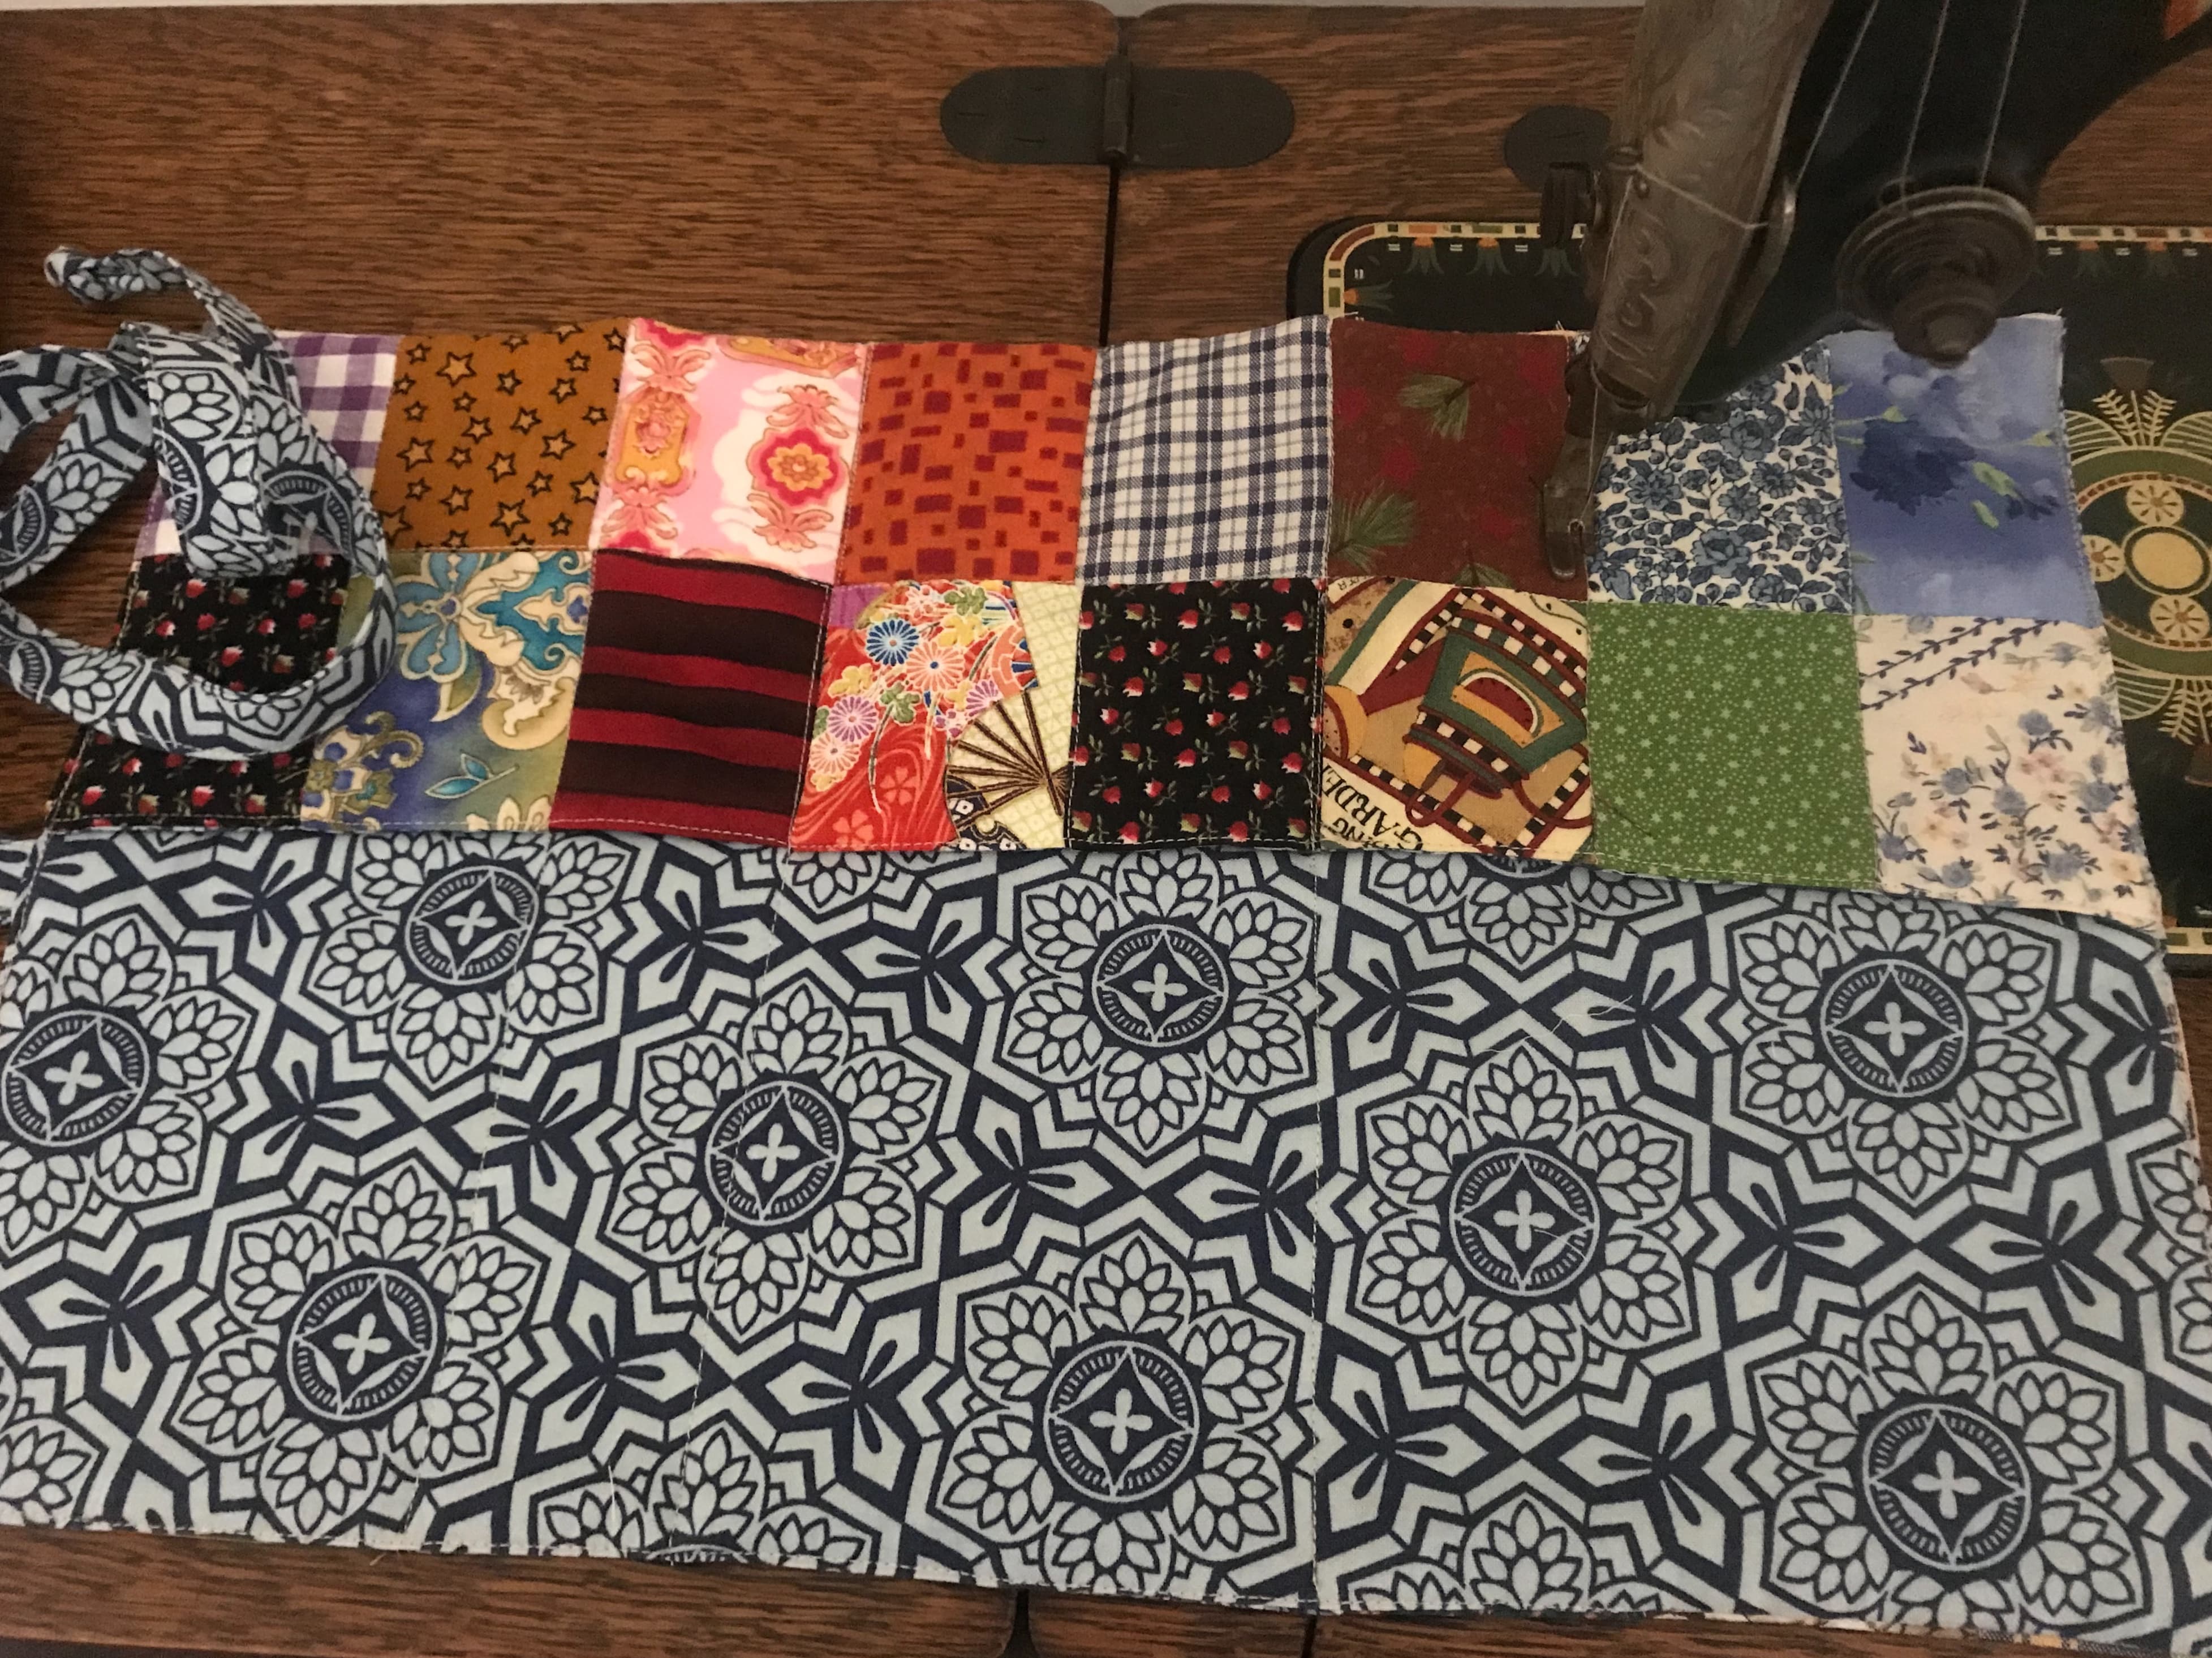
This is how they look open.

Add your favorite toiletries.
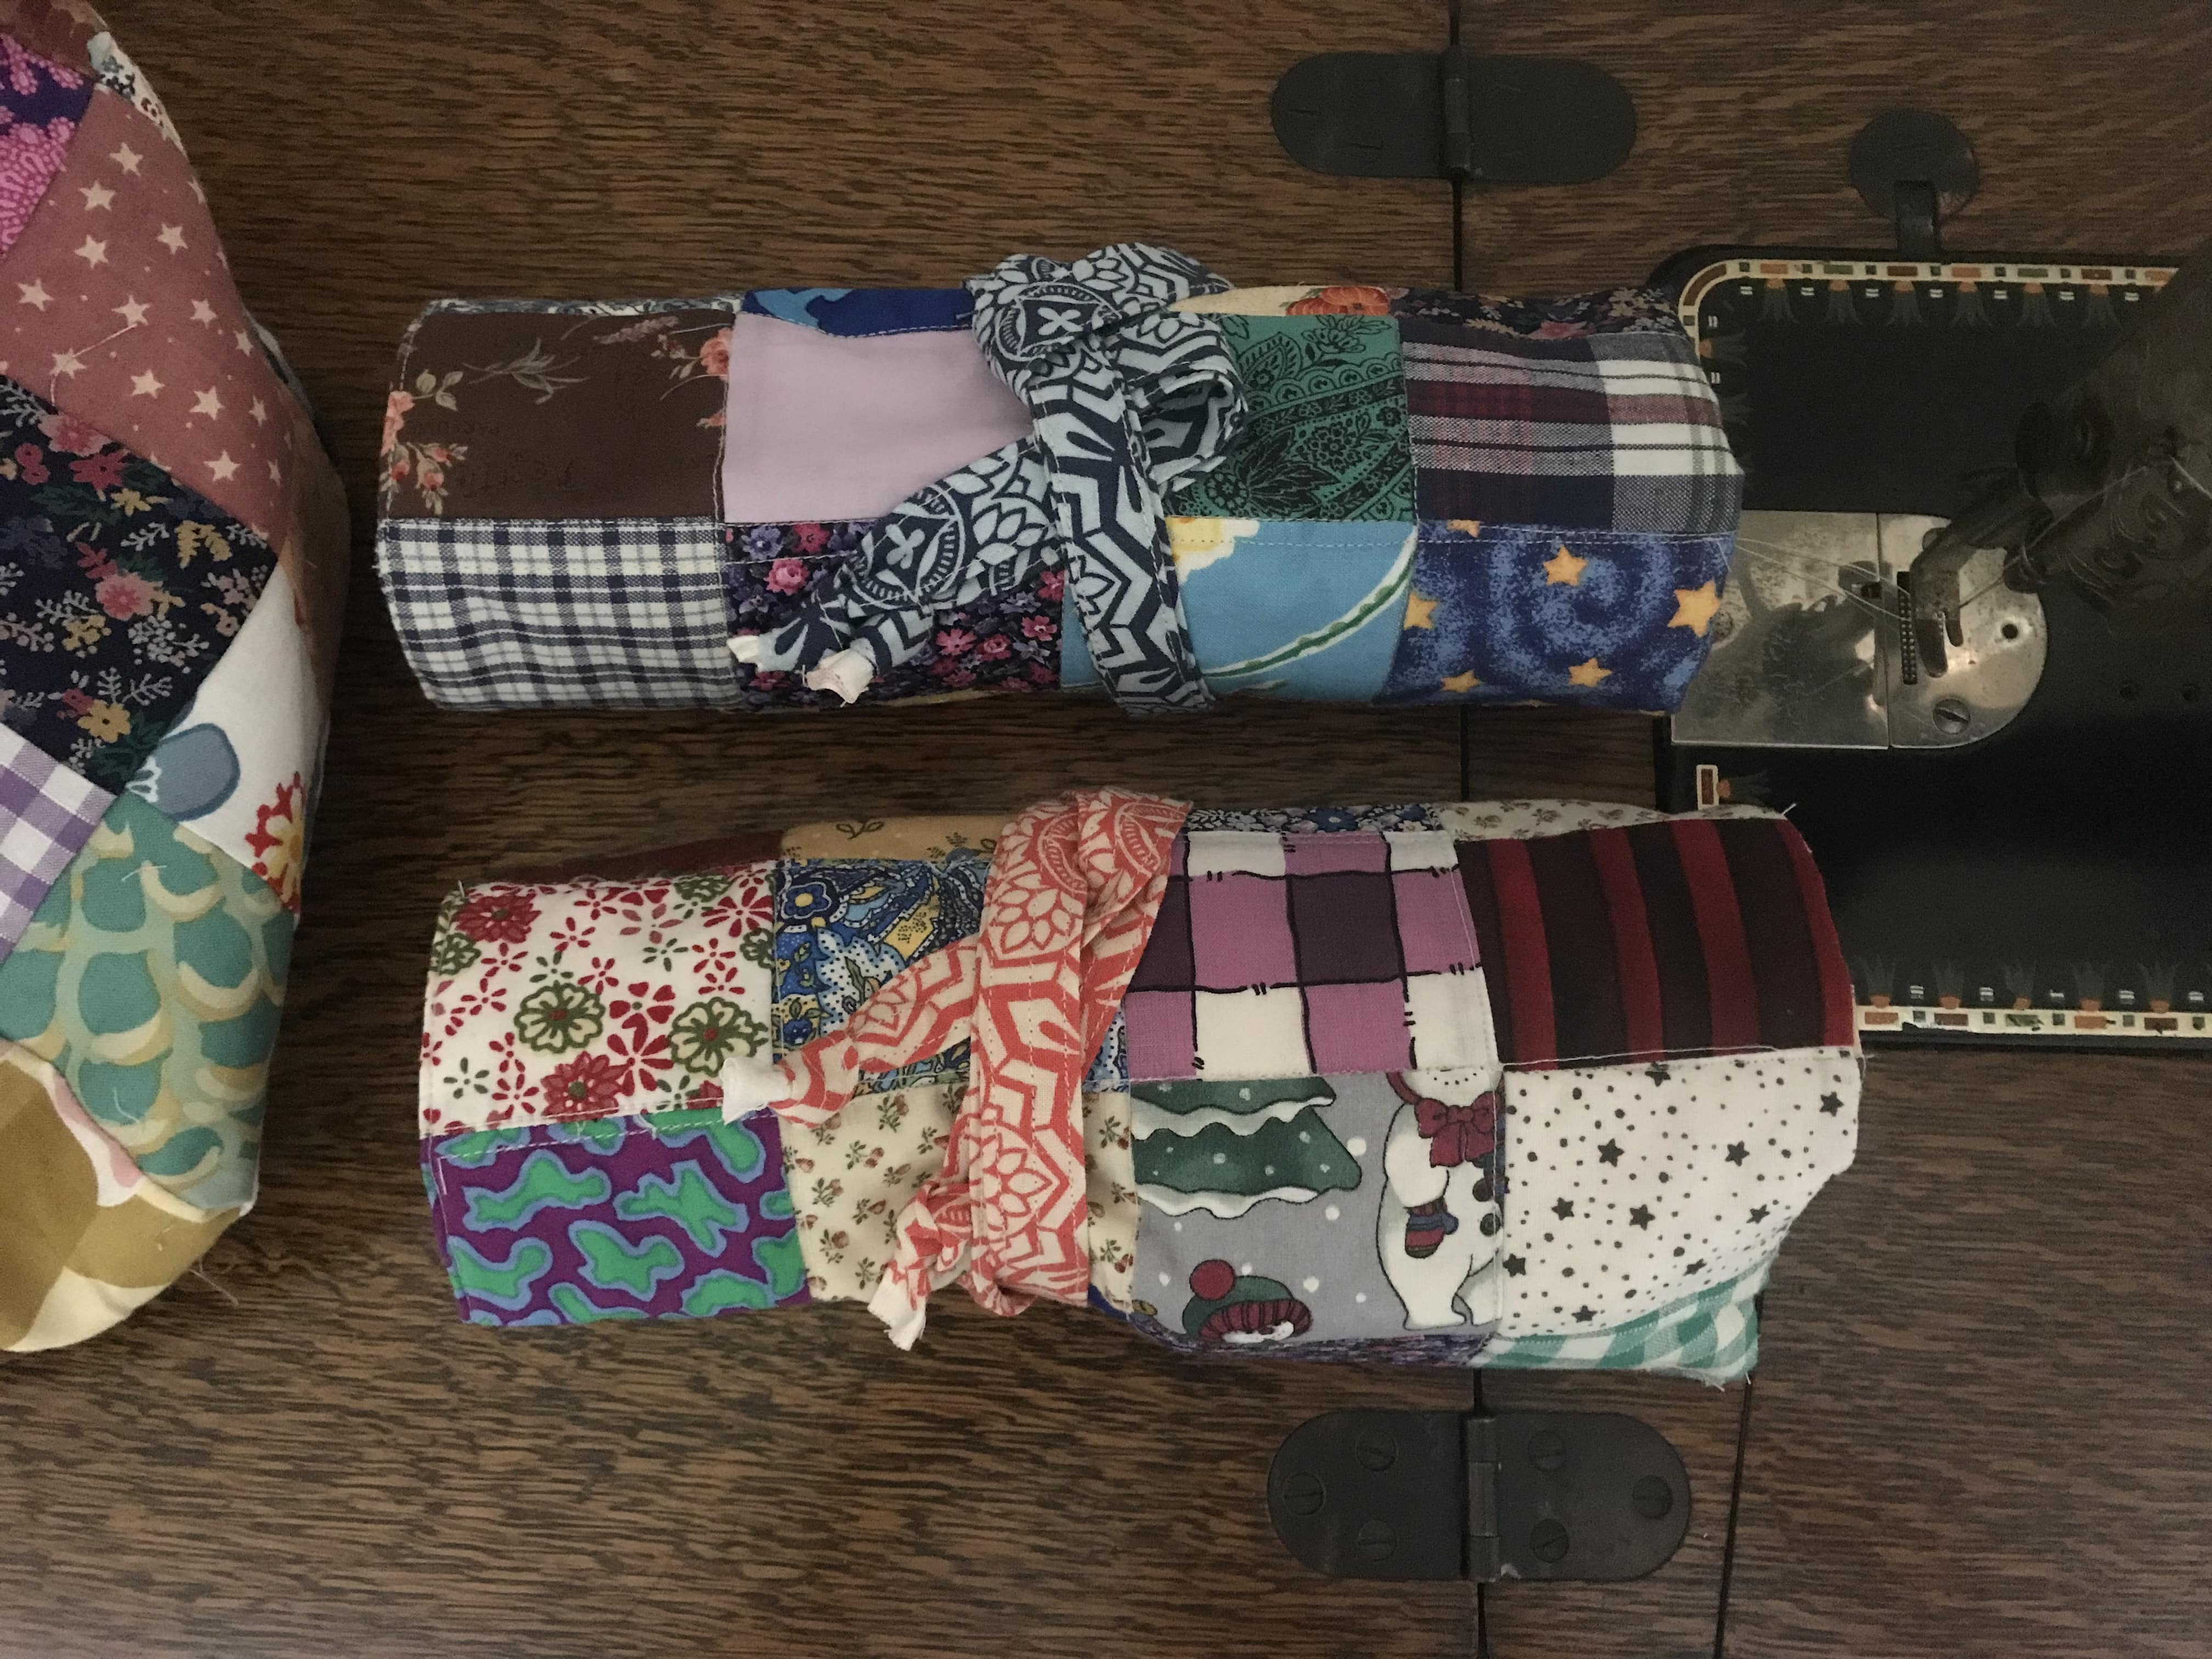
Roll up – ready to go!
Enjoy!
If you enjoyed this post and you still have some of these 2 1/2” x 3” units, you may like this matching cover.
Quilted Scrap Fabric Book Cover Tutorial
Or these matching bags…
Patchwork Celebration Bags – Antique Japanese Style & Tutorial
Have fun making something lovely from your scraps.
Susie