
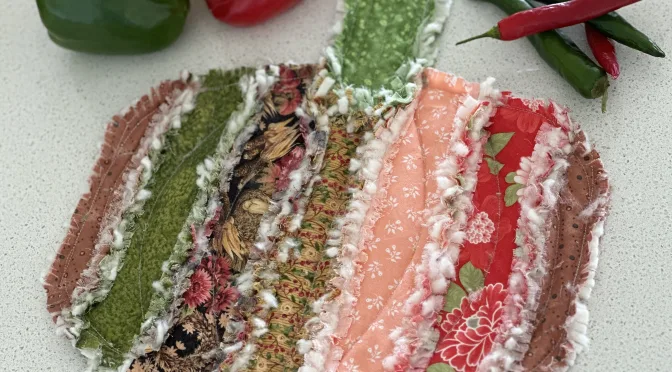
Pumpkin Hot Pad
Hello Dear Friends and Readers and welcome to todays post. If you like quick projects that use up odd scraps, then this might be for you.
Today is Halloween, but I think pumpkins are good all year round. I was inspired to make a ragged pumpkin by a lovely lady called Amber. She has a site on FB called Jonquil Junction.- Unique Handcrafted Items. I recall that she once posted a pumpkin with ragged edges and it looked really good. So I thought I would give one a go. Today I’m making a Pumpkin Hot Pad out of scraps of batting and fabric. Also, one could use flannel as the filler and it would be very nice for the ragging. I never have enough of these kinds of hot pads in my kitchen. They are great counter protectors, noise, dampers, and heat protectors, as well as being absorbent and they probably help to stop hot dishes getting cold too quickly too. Besides that they look nice, and always handy. Here is another Pot-Holders Quilted Flower Pots
Even though it is Halloween today, there’s still time to make one of these. As this is a ragged project. It helps to make it quick. Let’s get to it.
Finished size 13“ x 14“ including the stem.
Seams based on ½”
Ragged edges clipped at approximately 3/8”
Requirements for one Pumpkin Hot Pad
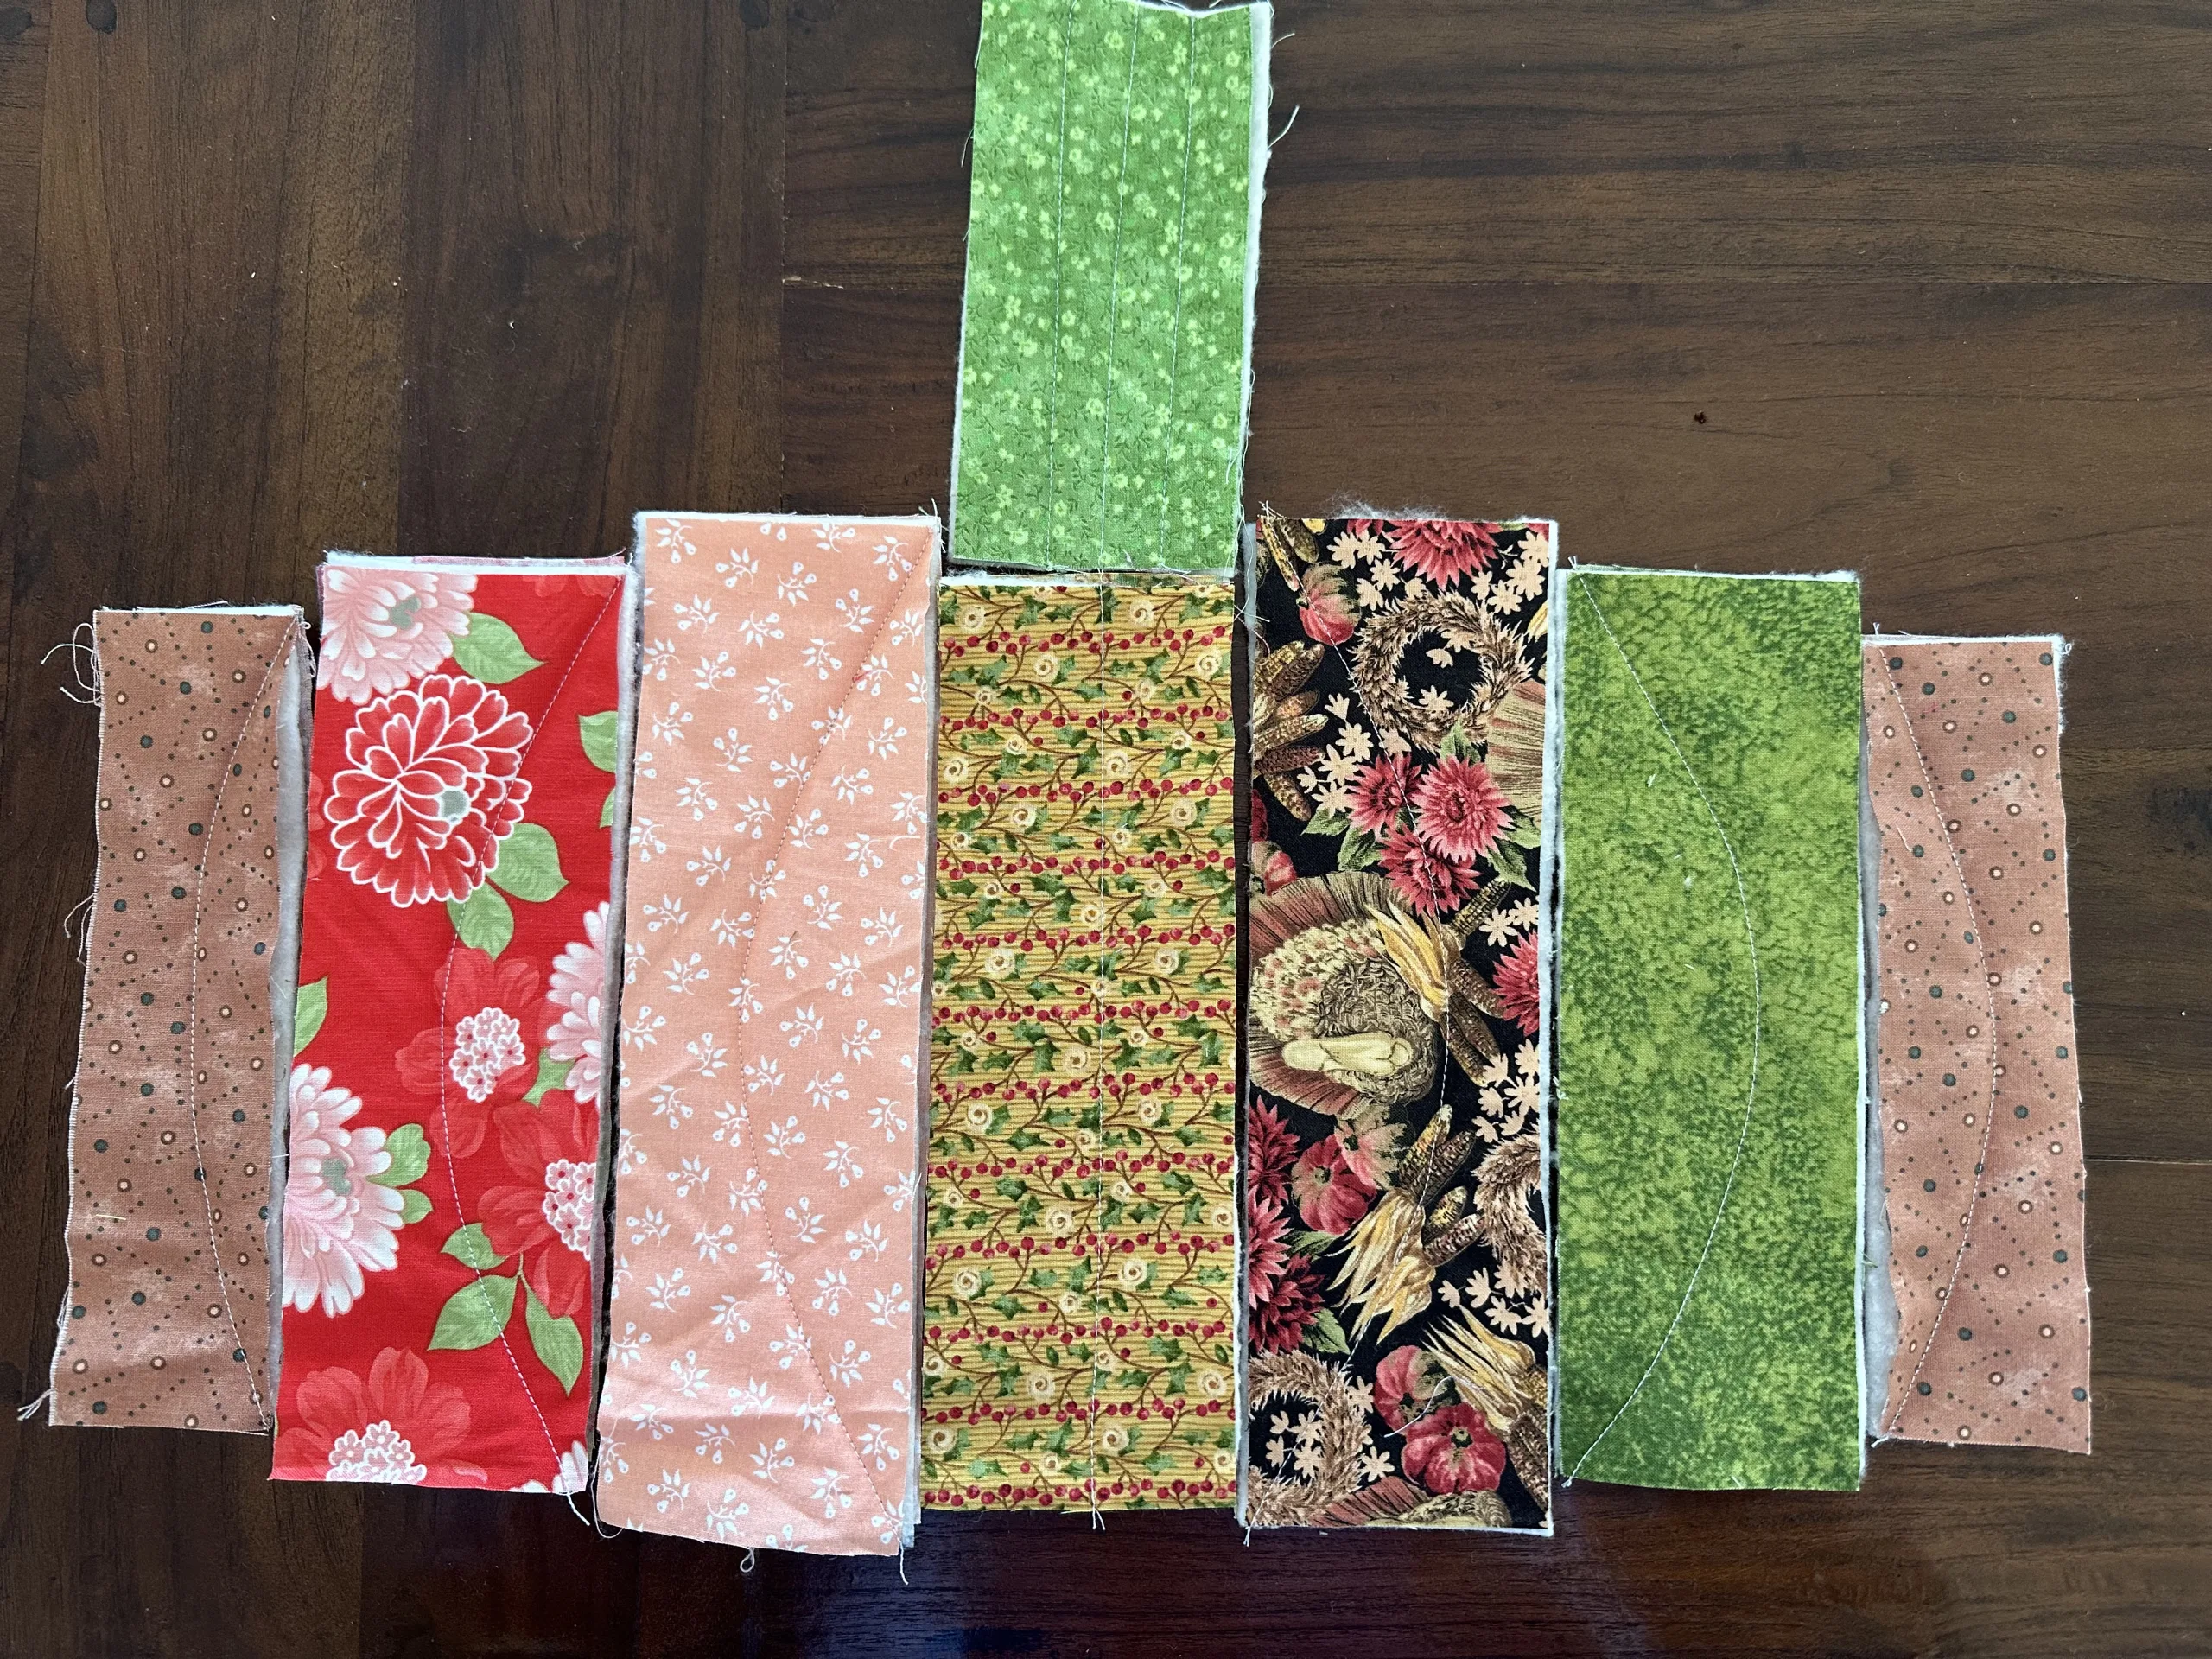
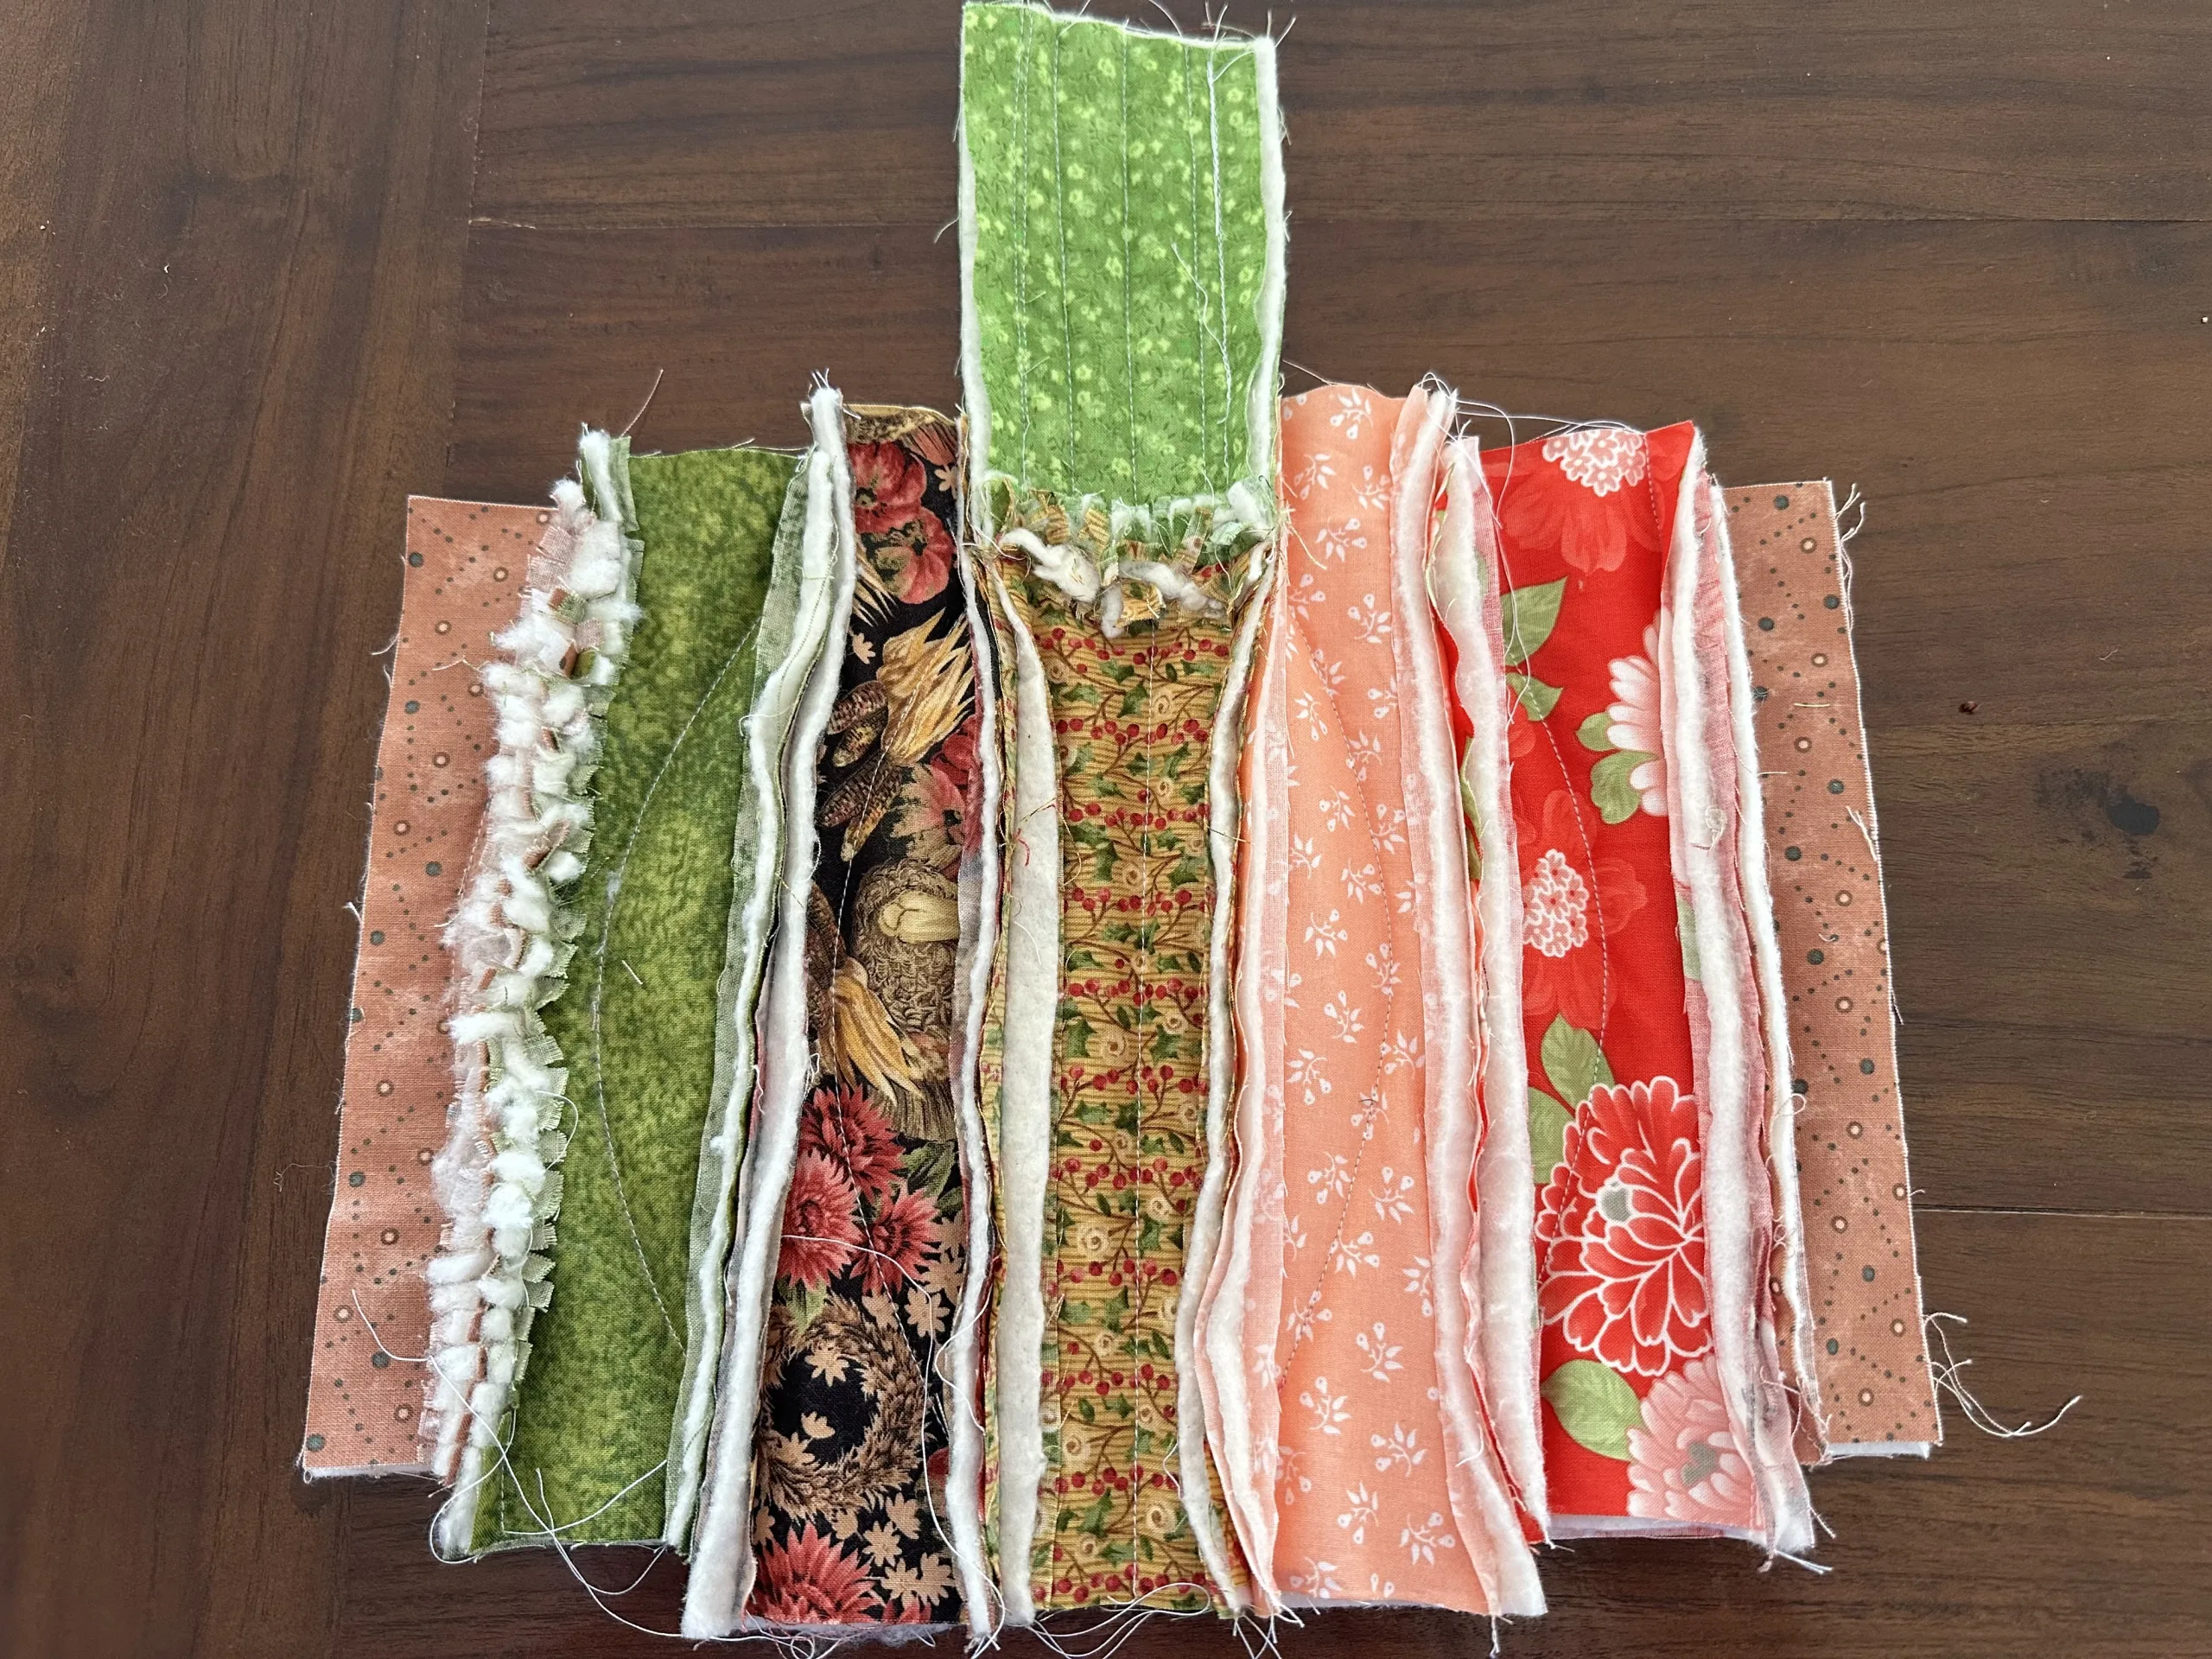
First layout, the batting or flannel pieces for the centre of each layer as pictured below.
Batting or flannel pieces
Two each of 8“ x 2“ for the edge pieces
Three of 9“ x 3“ for the centre and the two pieces next to the 2 inch edges
Two of 10“ x 3“ to go either side of the centre.
One 6“ x 3“ for the stem
Fabric pieces in autumn tones
4 of 8“ x 2“ strips
6 of, 9“ x 3“ strips
4 of 10” x 3” strips
2 of 6“ x 3“ strips for the stem in green

Arrange the fabrics to match each batting or flannel piece and place them on the front and back of every piece.
Making the Pumpkin Hot Pad
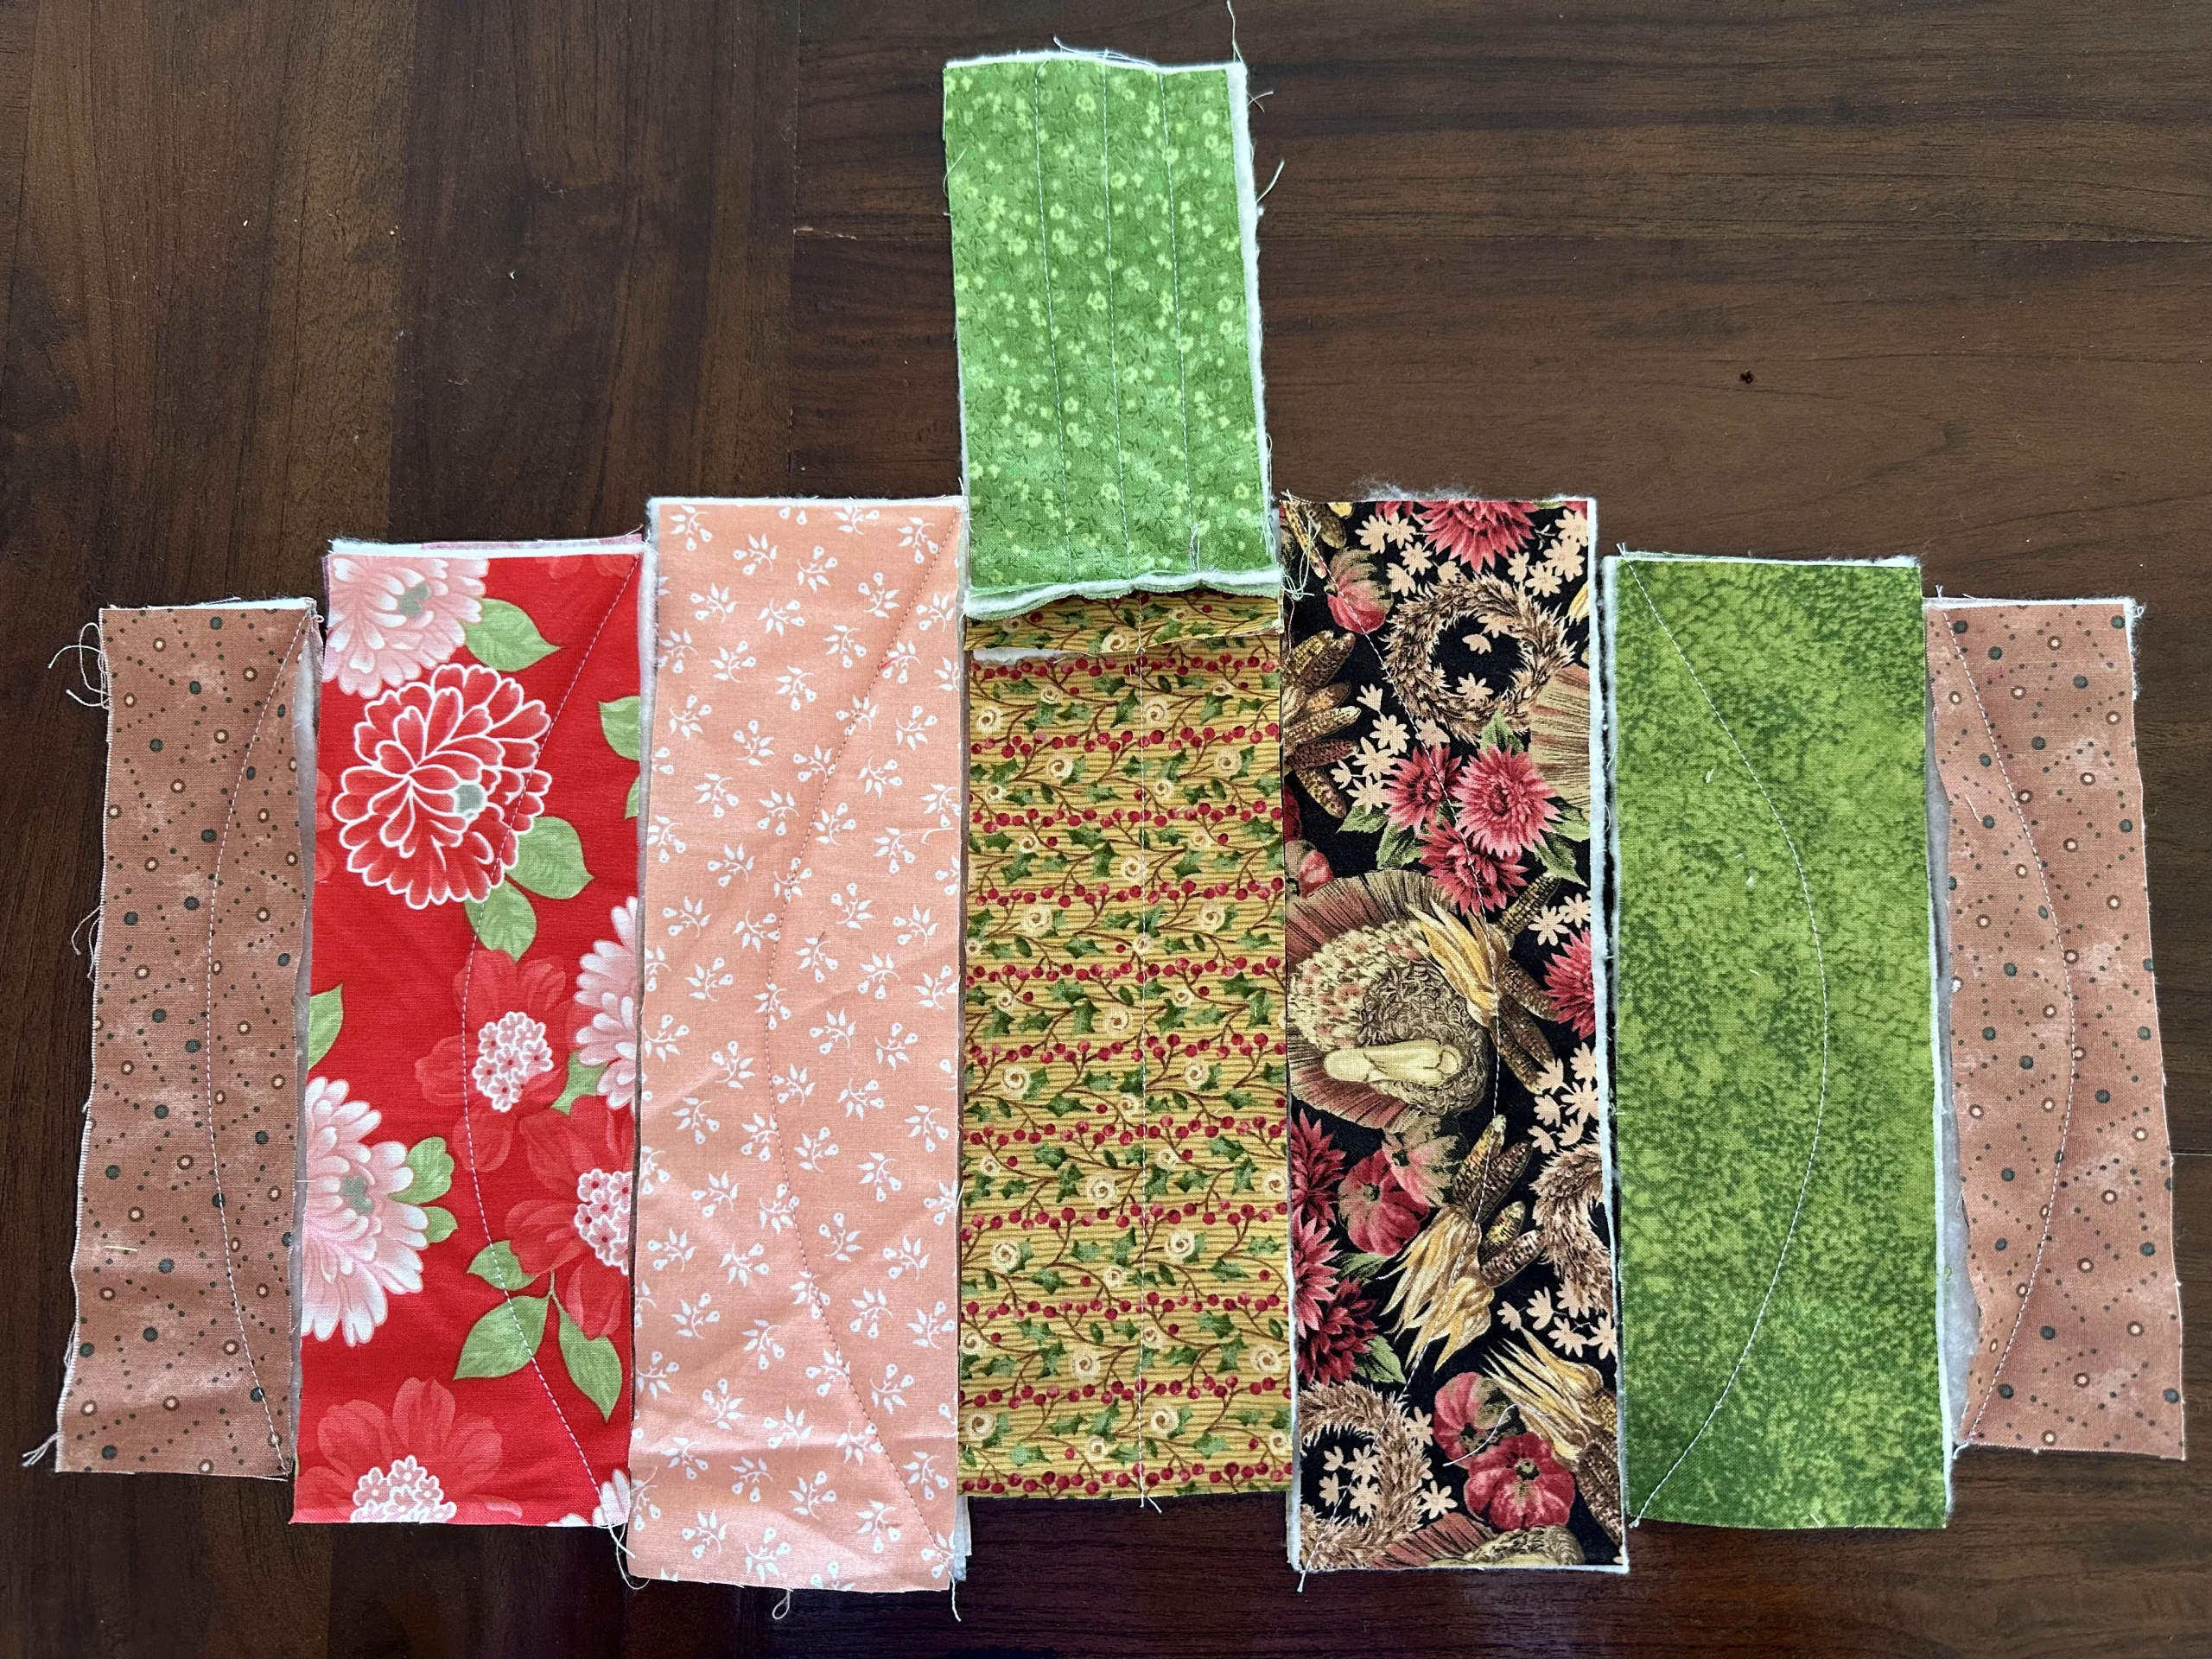
Optional Quilting Sew a seam down the centre of the centre piece through all the layers.. Sew an arc though the side pieces like the shape of pumpkin. Remember not to go too close to the edges as the seam allowance is half an inch. Sew a few seams through the stem.
Using a half inch seam allowance, sew the stem to the centrepiece, wrong sides together. Clip the seam allowances as you go or wait until the end if preferred. I like to use this method Clip As You Go Technique
Keeping the next two 10” x 3” strips even with the base of the centre piece sew them to the sides of the centre piece, wrong sides together using a ½” seam allowance.
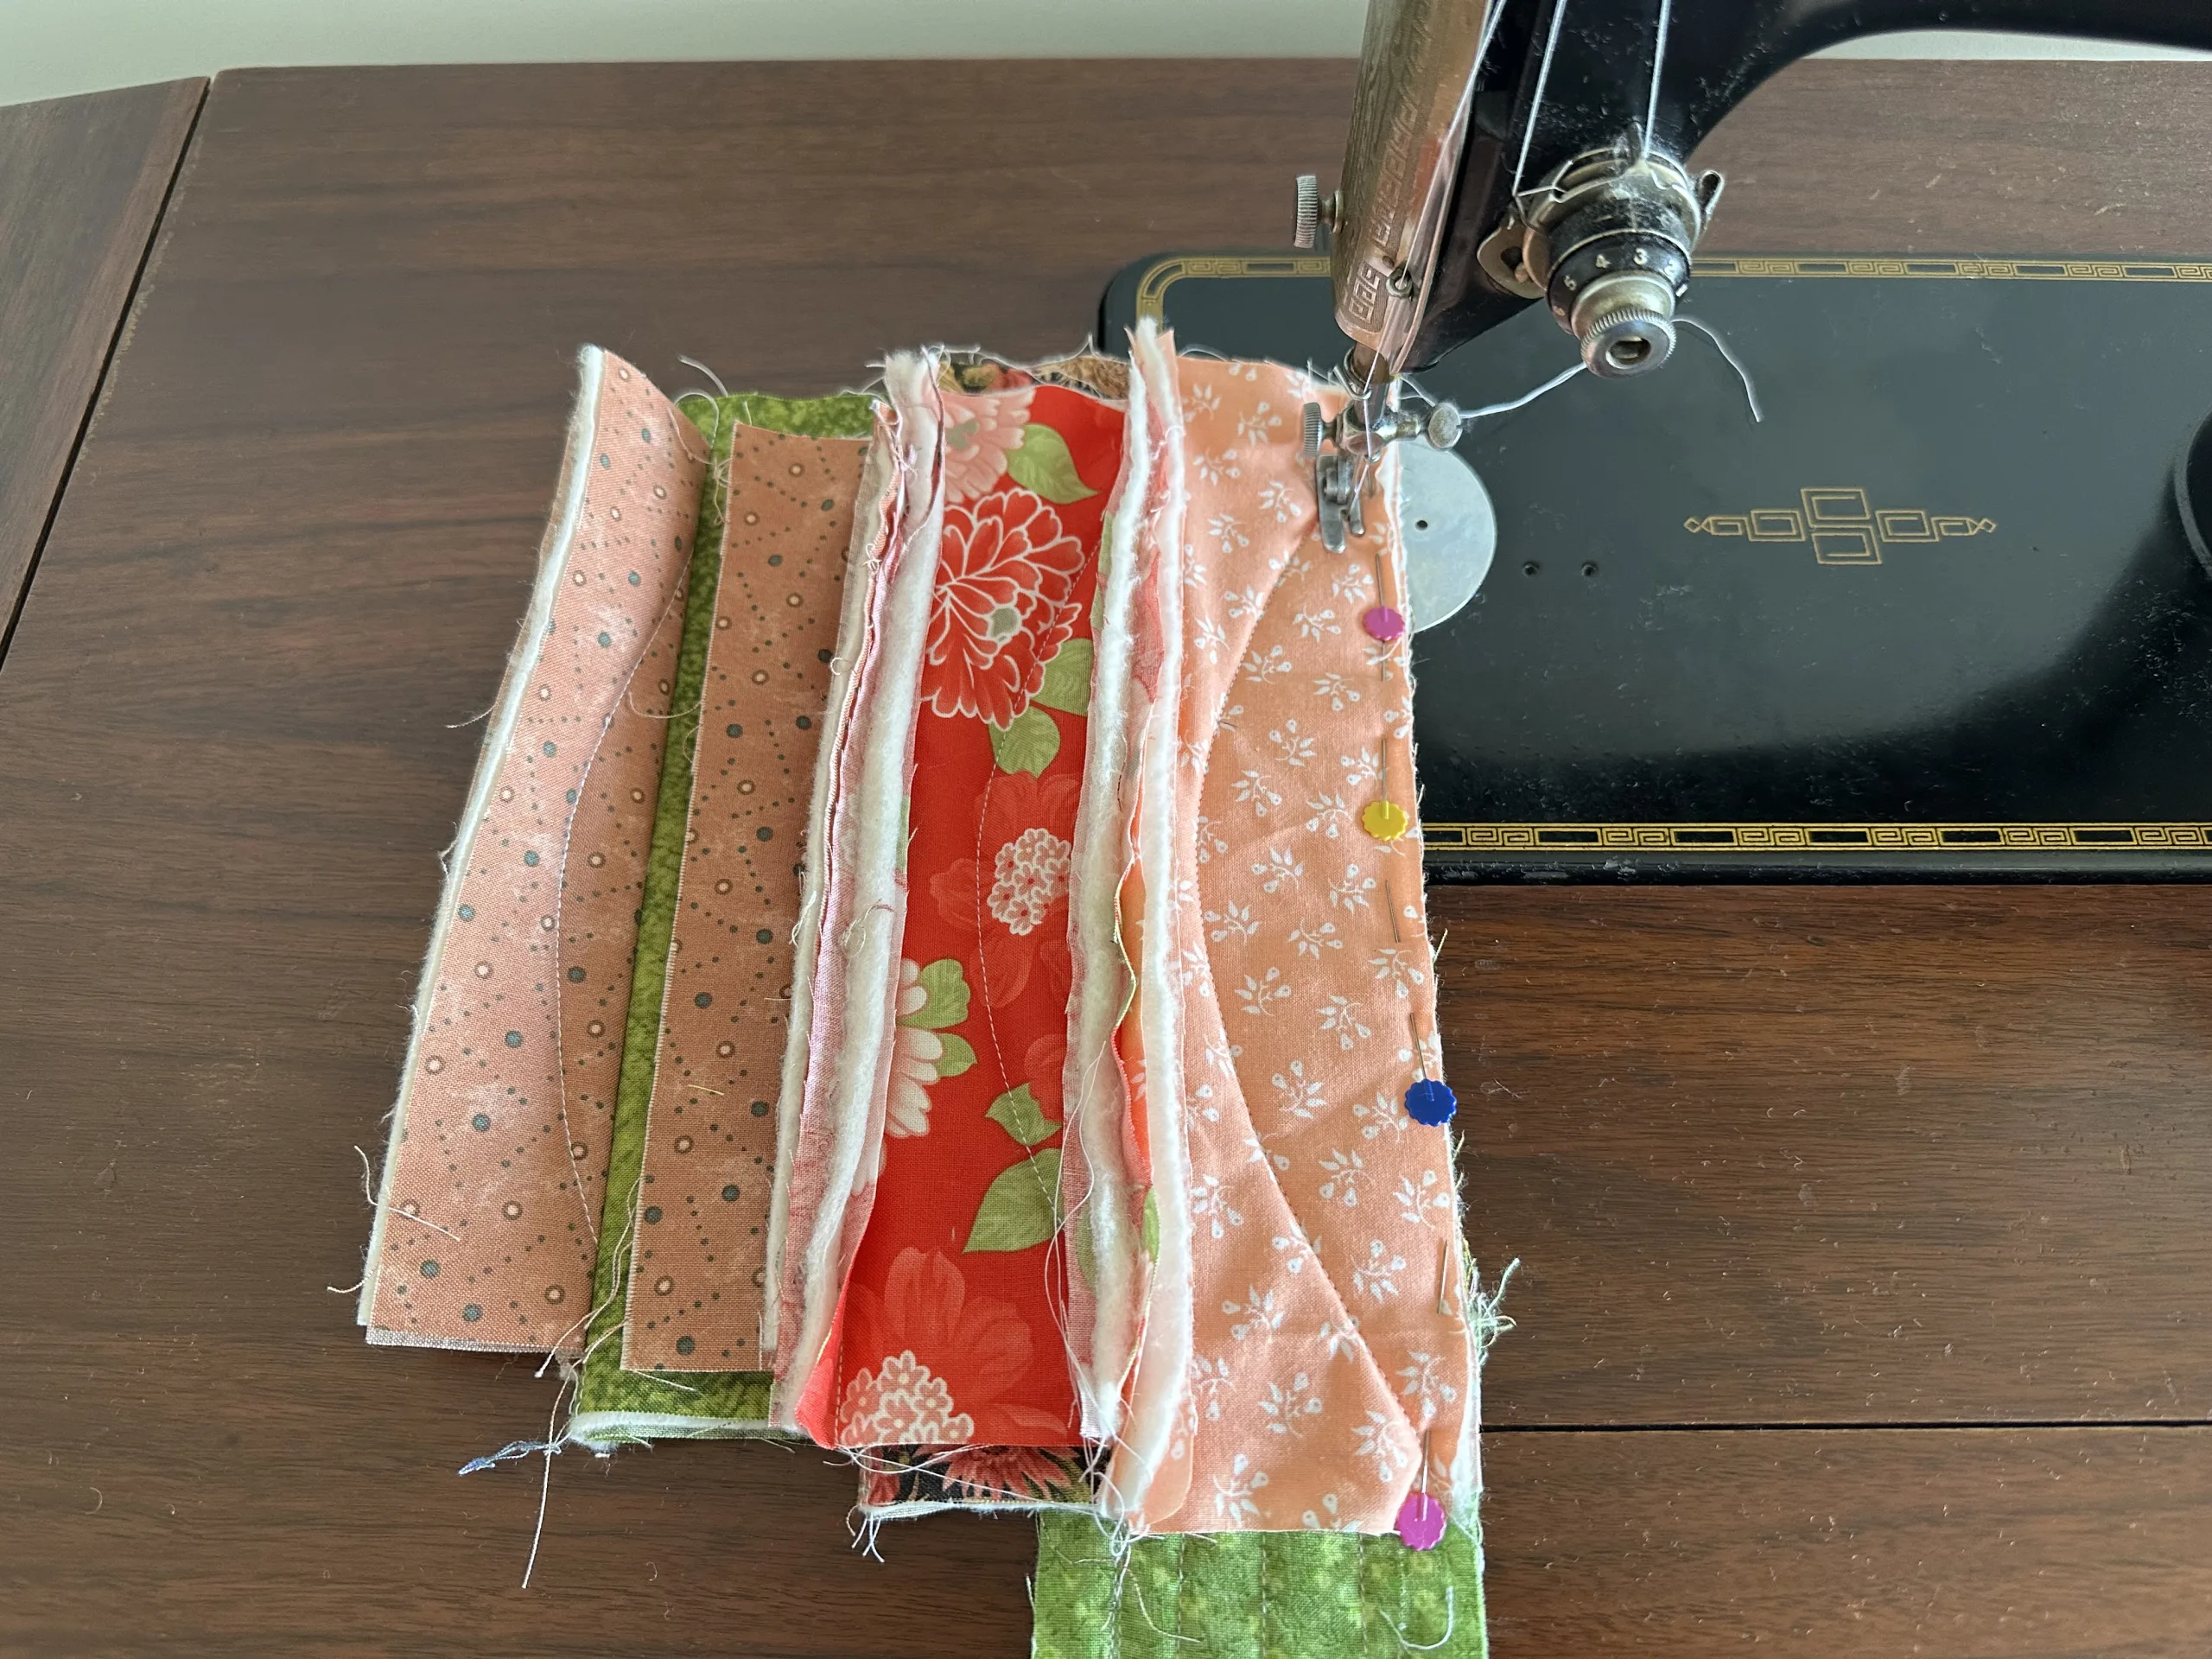
Sew the next two side pieces so that there is a half inch graduation at each end as they are attached. See image below
Clip the seam allowances then use scissors to trim the graduations to make the pumpkin have curved edges. Trim the corners of the top of the stem in the same way.
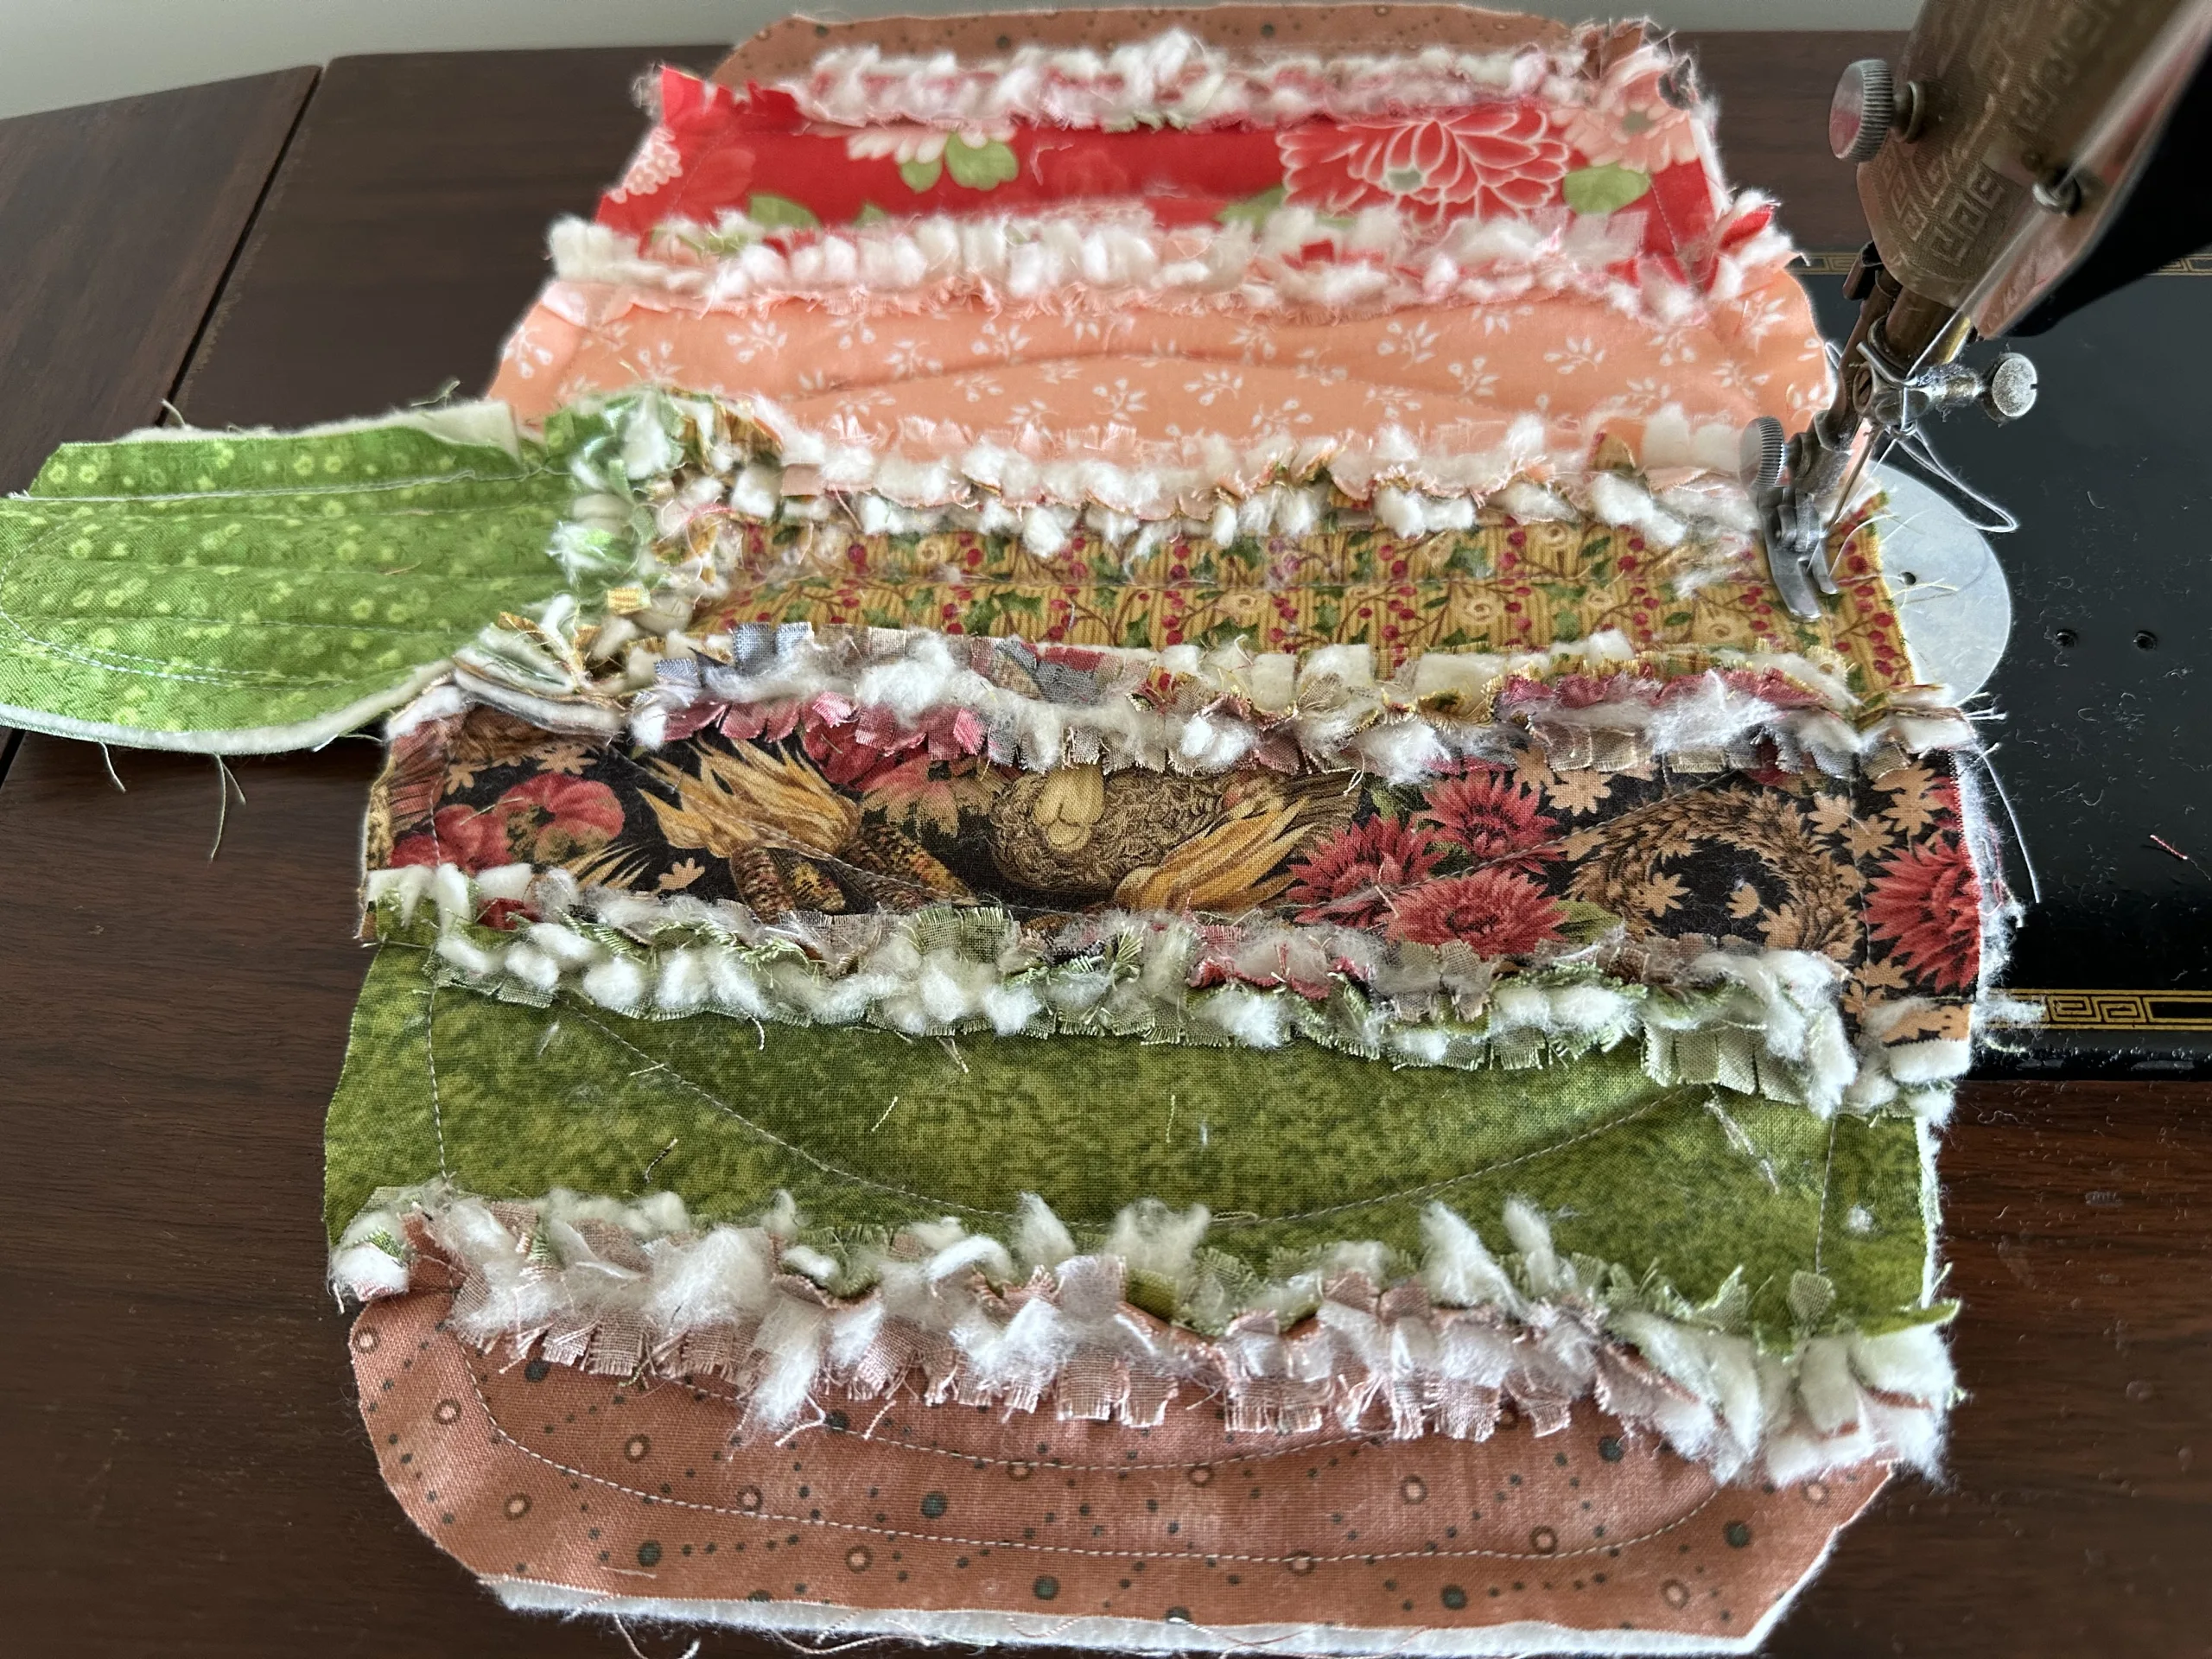
Sew around the perimeter of the whole pumpkin and stem ½” from the edge to secure. Clip all the edges.
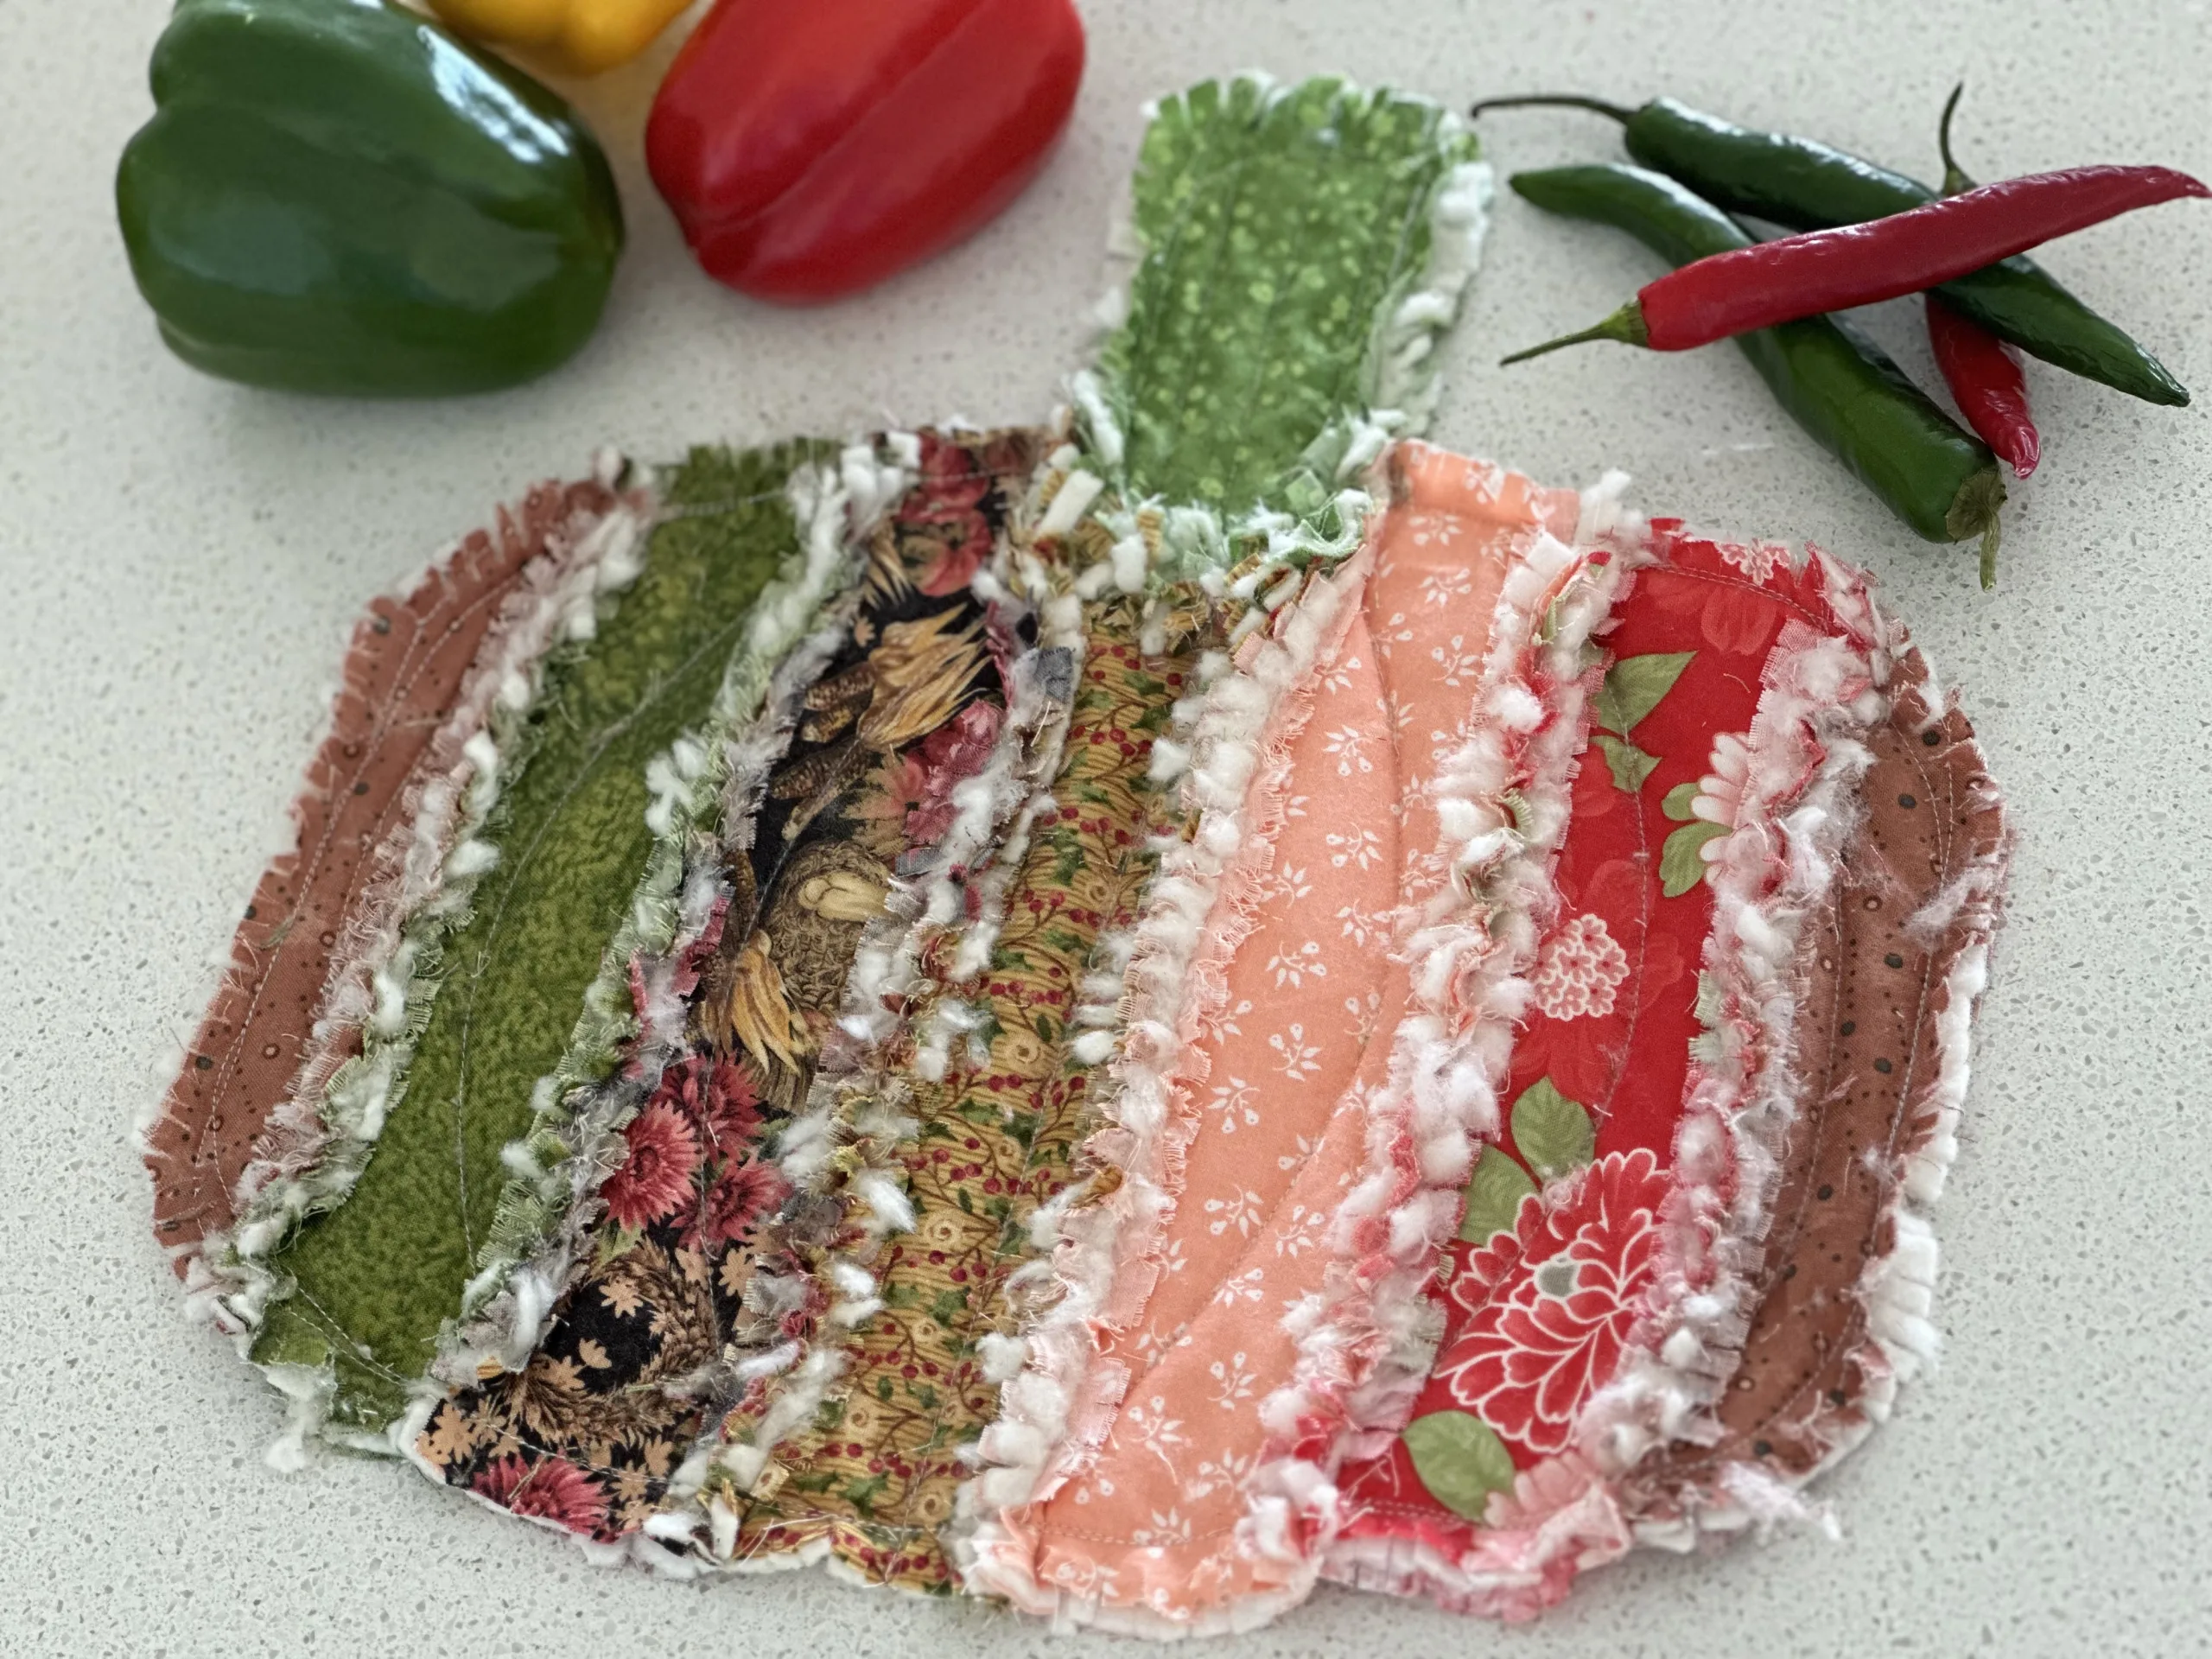
The Pumpkin Hot Pad is ready to use.
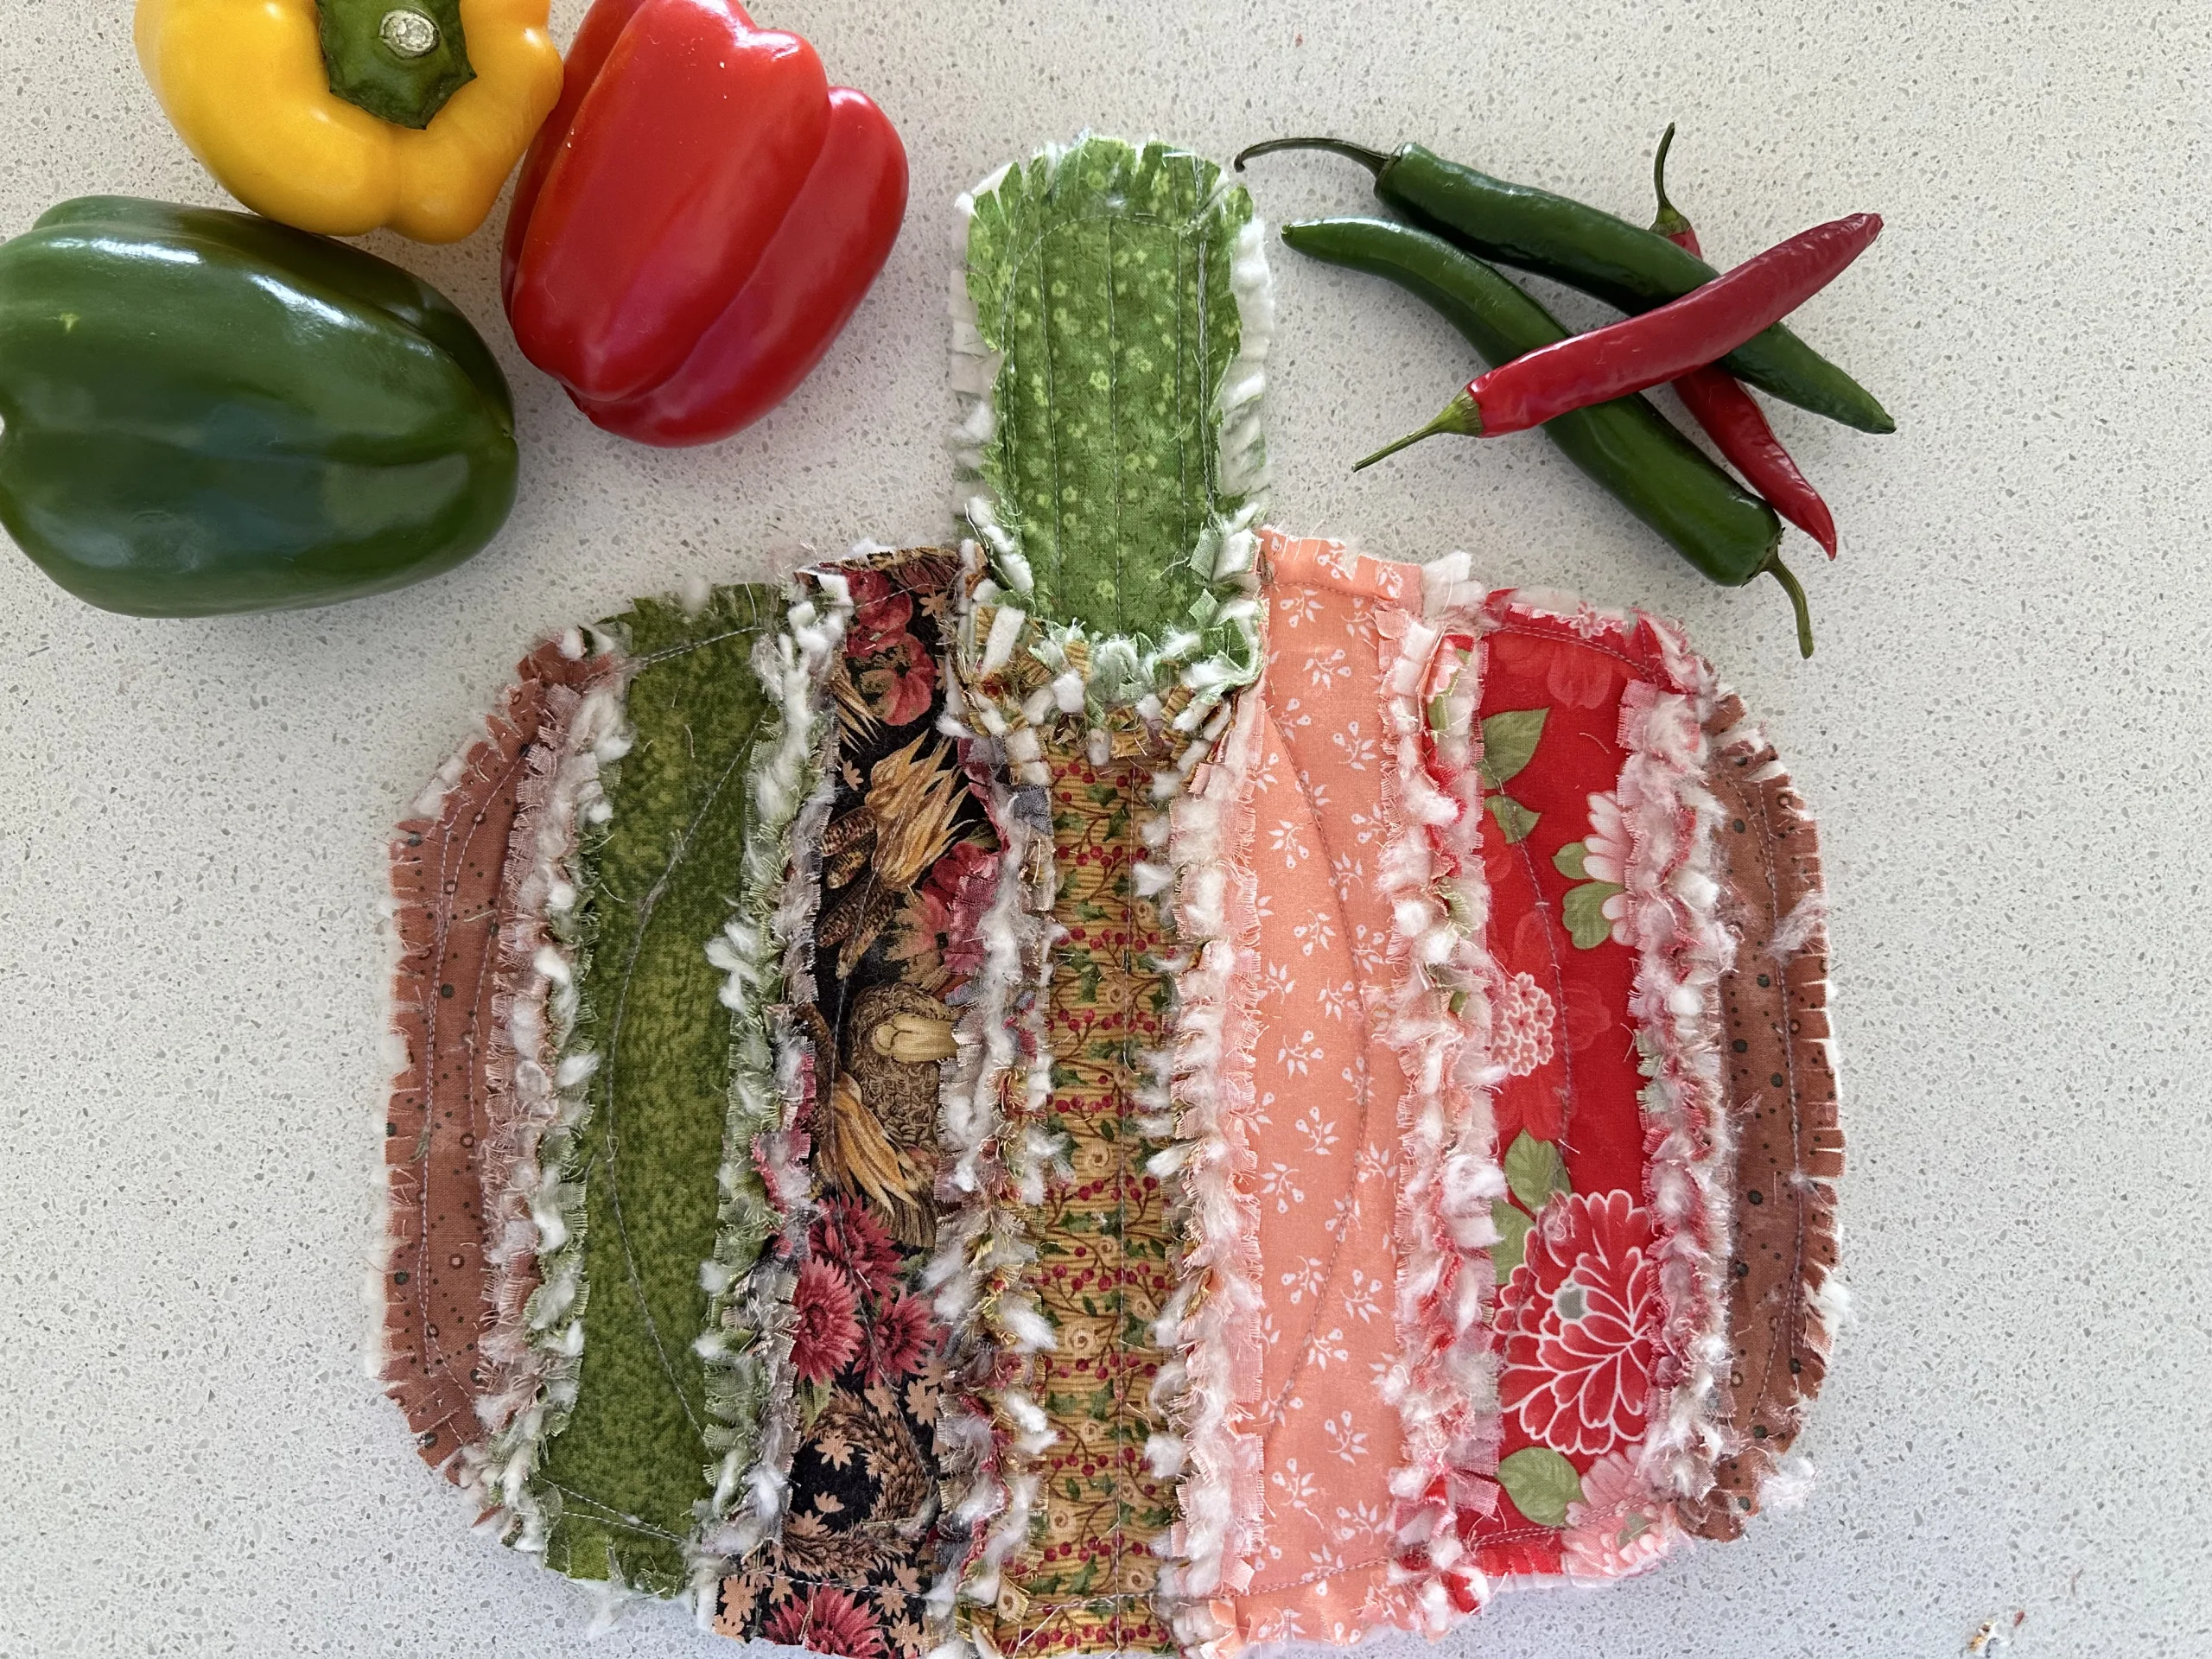
Enjoy using the Pumpkin Hot Pad. Maybe make some pumpkin soup. Or a risotto Roast Pumpkin Risotto – No Oil
If you enjoyed this post, you may also like,
Happy Day Microwave Bowl Holder Pattern
String Pot Holders or Trivets for Christmas or
Quickest Queen Quilt Ever & Tutorial of a Rag Quilt
Susie
© Susan Stuklis 2023