Woven Star Quilt Block Made Easy
Hello Dear Friends and Readers and welcome to today’s post. This is the result of a comment I had from Ginny, who had seen my Arrowhead Block Made Easy.
The Arrowhead Quilt Block Made Easy
I think she felt inspired to be able to make this block, and she also requested that I explain how to make a Woven Star Block. I had a look at some of the blocks online, and they seemed somewhat overly complicated, with way too many pieces and too many seams and points to match.. So I decided to take on the challenge and make it in an easier fashion….. at least I hope so.
It also happened that I have a bunch of homeless scraps which were perfect for this project.
After studying the block briefly, initially I thought that it could be made by using strip piecing and some other quick units. So I gave that a go but I was not happy with the result. Too many bias edges ….so I decided to sleep on it….
Following some rest and contemplation, I considered making it like the way that a French Braid Quilt would be made. This also took a few more tries to get it right.
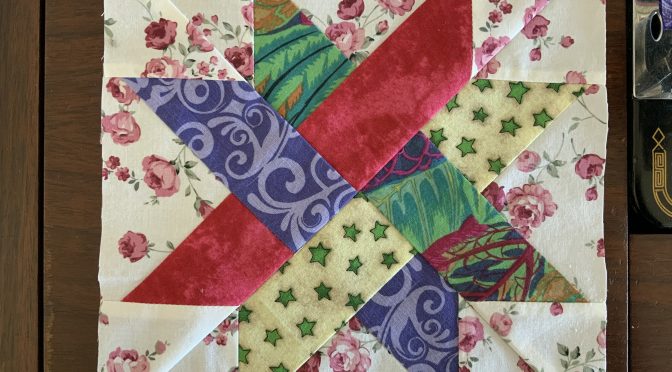
This is what I came up with. In the end it is really like a four patch of triangles. No bias edges on the outside of the block with less pieces and seams. That’s a winner for me!
My suggestion would be to use four fabrics, which have good contrast, either in colour or dark and light and a background fabric which will contrast with them all.
By the way, I have no idea where this block originated from.
As always all my fabrics were pre washed.
The blocks are approximately 8 ½” x 8 ½”
Seams based on 1/4”
Requirements for the Woven Star Quilt Block Made Easy
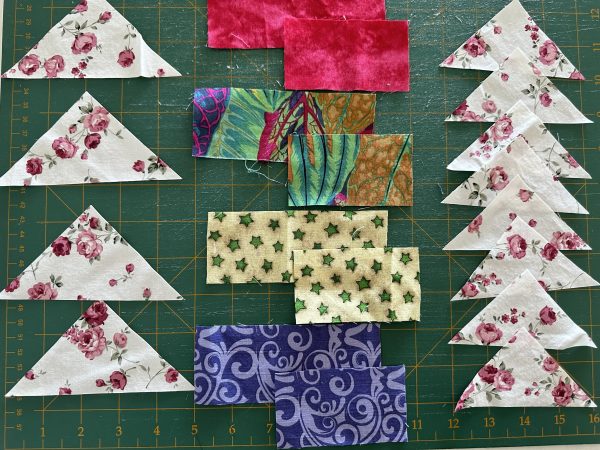
For the Woven Star Cut
Four of 2” x 3 1/2” strips (one of each colour)
Four of 2” x 5” strips (one of each colour)
From the Background Fabric Cut
One of 2 1/2” width of fabric strip – Subcut using your ruler on the 45 degree line to cut four base triangles ( The hypotenuse should measure 5”)
Four of 3” x 3” squares cut once on the diagonal to make 8 corner setting triangles.
Making the Woven Star Block Made Easy
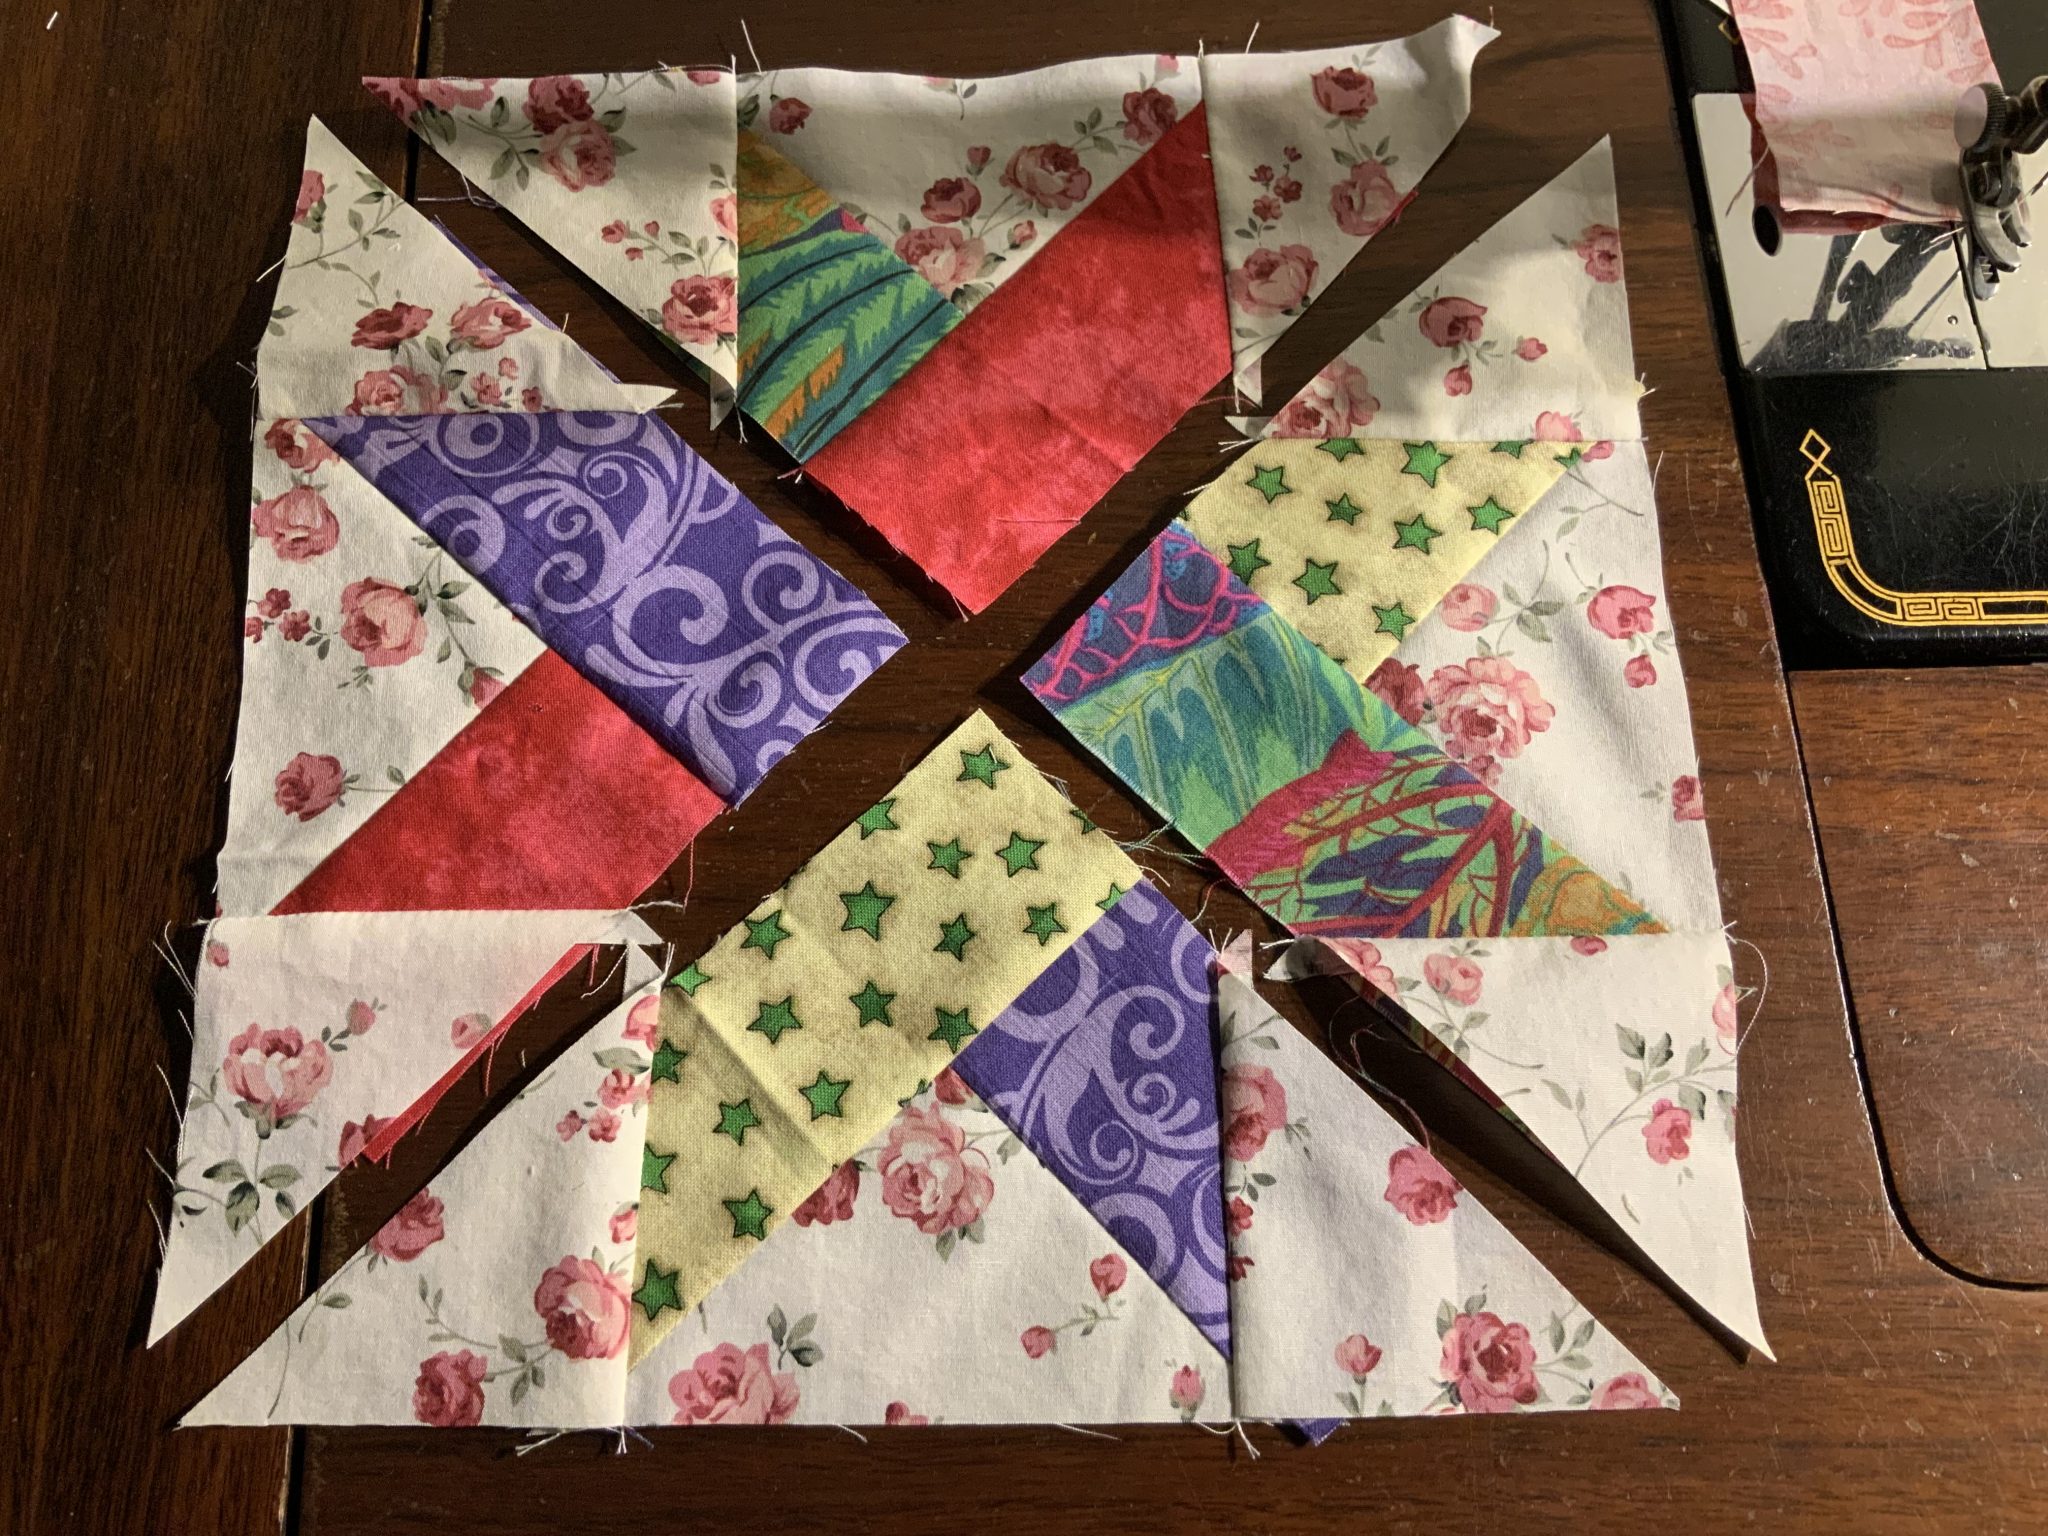
Now we will lay out the pieces to make the block.
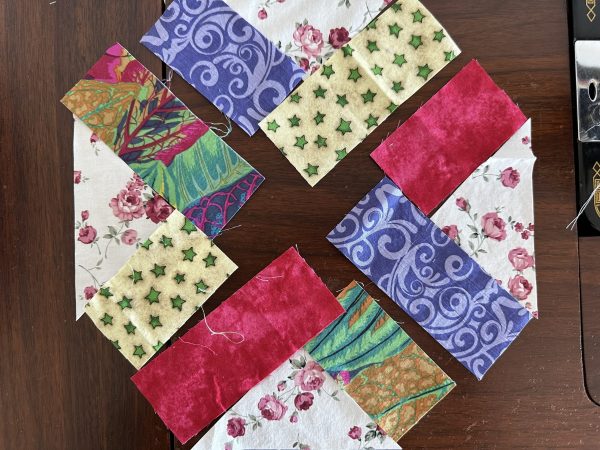
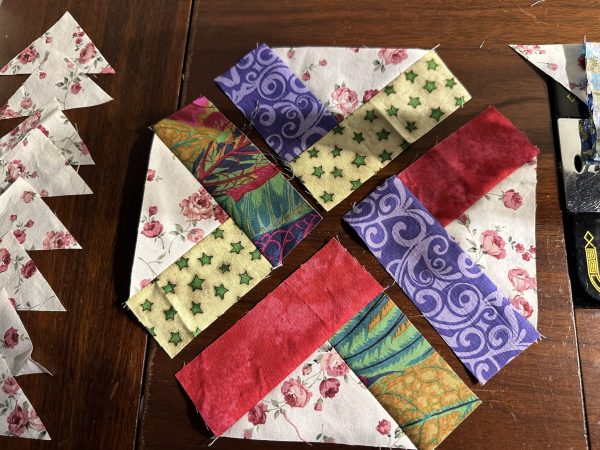
Lay out the base triangles as shown below. To the right side of each base triangle add one of the short 2” x 3 1/2” coloured strips. Then place each of the 2” x 5” strips to the other side of each triangle so that they oppose the strip of the same colour.
Note that we are keeping the setting triangles on the side for the moment.
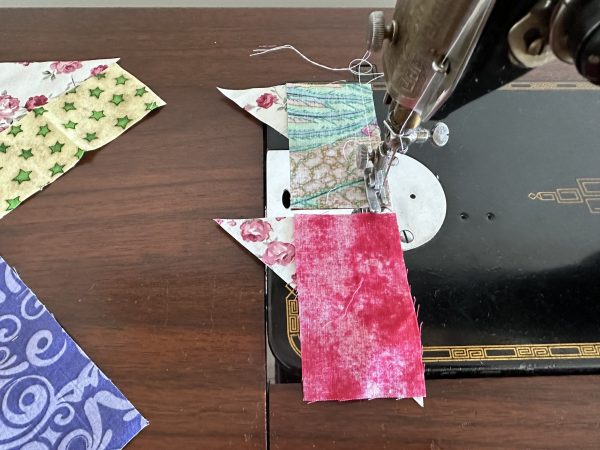
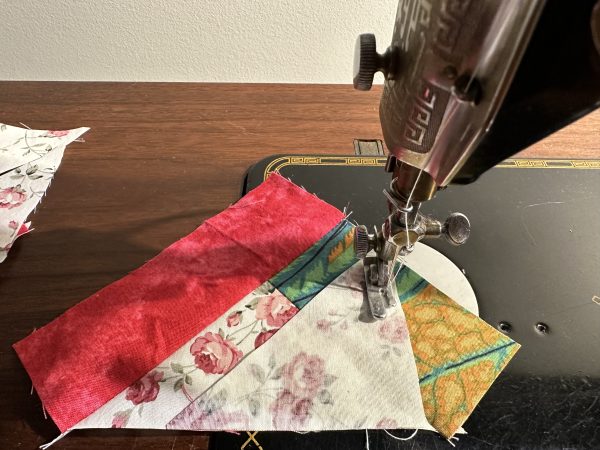
Sew a 2” x 3 1/2” strip, right sides together to the right side of a base triangle. Repeat for the other base triangles. Finger press toward the strip.
TIP replace each unit to the original position of the layout before adding the next strip to make sure they are in the correct position.
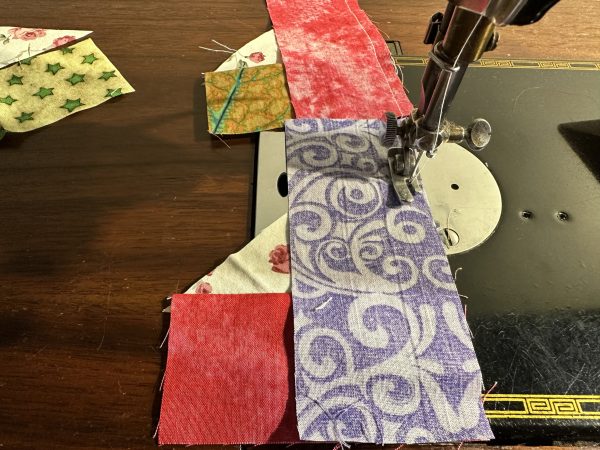
Sew the 5” x 2 “ strip to the left side of the base triangle. Press toward the strip. Repeat for the other three units.
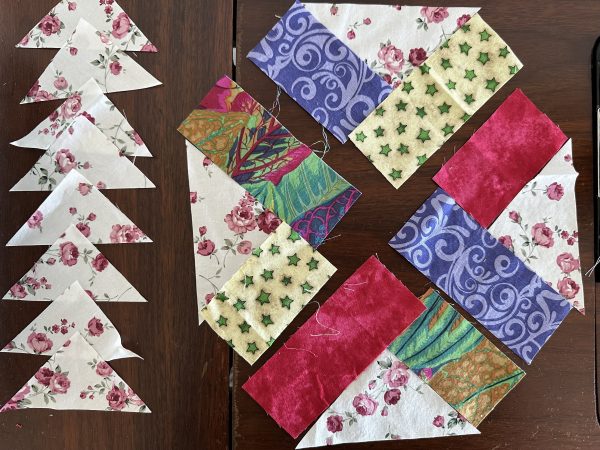
Now there should be four units which look like this. Note how each colour strip is opposing the same colour strip to make the weave pattern.
Now we will add two of the corner setting triangles to each unit.
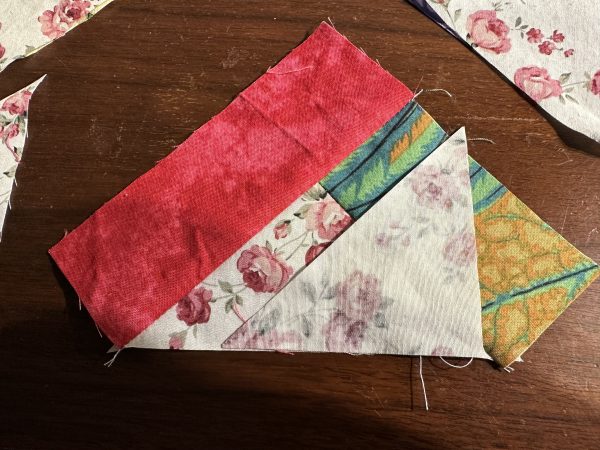
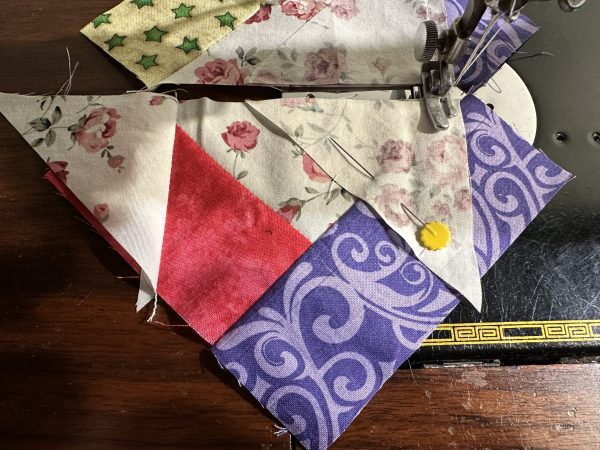
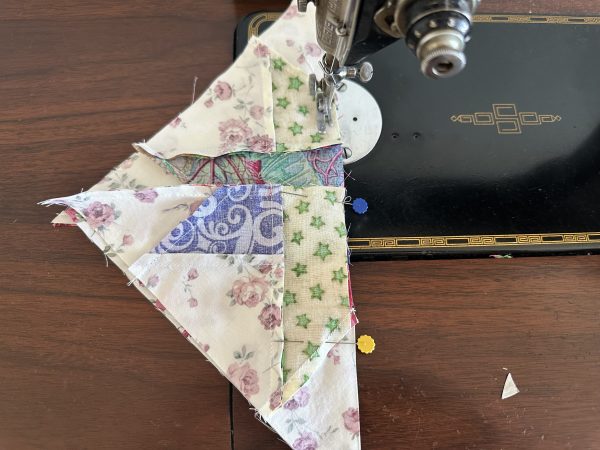
With the base triangle at the bottom, put a corner setting triangle right sides together so that the right angle of the triangle is sitting adjacent to the bottom of the seam intersection of the base triangle and the 3 ½” strip. The hypotenuse of the corner setting triangle should follow the same line as the 5” strip. ( I hope that makes sense) Check the photo below.
Pin if desired.
Sew the right side of the corner setting triangle to the unit using 1/4” seam.
Fold the triangle back and finger press. Add a second corner setting triangle to the other side of the unit in the same manner.
NOTE The unit should now be a triangle
Trim out the excess fabric from behind each unit and trim off the doggy ears.
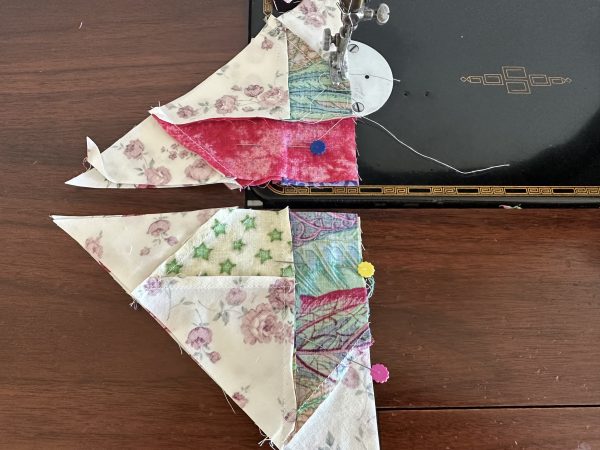
Make sure each unit is in the correct position then put right sides together matching the star seams. Handle carefully at this stage as the corner triangles are on the bias.
Sew together like a triangular four patch.
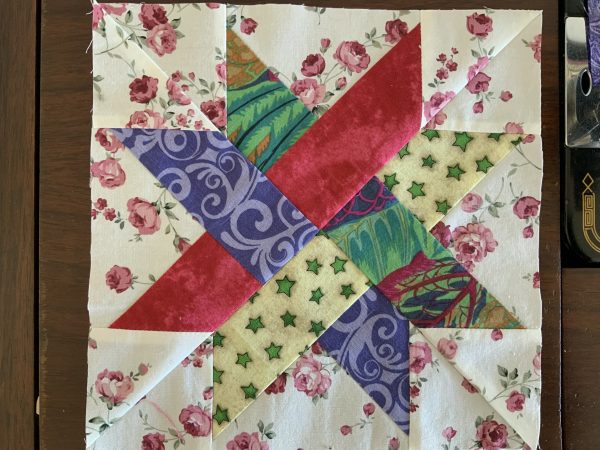
Press and sliver trim if necessary. Here is the Woven Star Block Made Easy
This block is calling Christmas to me!
If you enjoyed this post, you may also like
Uneven Four Patch Block Tutorial or
Ohio Star Blocks and Tutorial or
Six Pointed Hexagon Stars Antique Inspired Part 2
Susie
© Susan Stuklis 2023

This is brilliant! I’m using this in my Wanderer’s Wife quilt. I love the cleverness of this assembly!
Awesome! Great instructions and pics! Thanks for doing all the technical work😉❣️
Clever you. Thanks for doing all the hard yards for us Susie.
It looks great and yes Christmas perhaps.
Cheers
This is brilliant! Thanks for working it out for us.
Where is the printed pattern for the woven star?
Hi Mary, for PC press Control + P, for Mac/iPad use Command + P or choose the print option under the file menu from your browser. The post contains all the instructions to make the block.
Looks fun!
I do enjoy your posts and noting possible future projects for the day I finally manage to whittle down my pile. Thanks, Fiona.
Thank you Susie for working out a more simple version but must confess it still looks complicated to me, probably because I don’t know how to build it the original way. I have a bit of exploring to do.