

Sashiko Daisies Handbag
Hello Dear Friends and Readers,
Today I would like to share with you all a special gift I made for a very special lady. This project will require some quilting, machine stitching and hand stitching. It’s seems probable that the origins of this style probably come from origami. It reminds me of the little folded lollie baskets we had sometimes as children for birthday parties. Do you remember? I would like to say at the outset that I have seen this style of bag before in a Japanese pattern, although I am not sure who to credit with the original design.
Some people call it a “Tulip“ or “Petal“ style of bag. Consult Google to see some other variations. The crossing over of the bag sides to the base is quite ingenious as this can be used to reinforce the sides of the bag. For the version I have made, the sides to base will make two extra, secret two way pockets. And lets face it, we all need extra pockets!
Although this project may not necessarily appear scrappy, I believe in its own way it probably is as some leftover fabric and batting could be used. ‘
The pattern is quite adaptable, it can be made extremely simply with just two layers of fabric, plus or minus a layer of Interfacing, or as I have done, with a layer of batting and then quilting to reinforce the fabric and give some “guts“ to the construction and a much more stylish finish.
I have preceded this post with the quilting of the fabric for the handbag. You can do the same or choose your own style!
Finished Size approximately
Base width 6″ x 6″
Top width approximately 10″
Height approximately 12″
Sashiko Daisies by Treadle Free Motion
So lets do it!
Draft the pattern as stated.
One large piece of paper ( I used paper from a flower bouquet)
Requirements for the Sashiko Daisies Handbag
One quilted piece from Sashiko Daisies as in the above link
Approximately 4 yards of 2“ contrasting bias binding
Drafted paper pattern
Purchased clip on or sew on leather handles
purchased bag feet (optional)
Buttons x 2
Drafting the Sashiko Daisies Handbag Pattern
You will need a piece of paper measuring 21” x 30”
I used a florist wrapping paper. Carefully fold the paper into four. Orientate the long fold to the right and the short to the base.
From the left base cut out a section 6 1/2” wide and 3 1/2” high.
From the top left round off the corner beginning 6” above the cut out around to the 5” mark from the top edge.

.
Constructing the Sashiko Daisies handbag
Open your paper pattern.
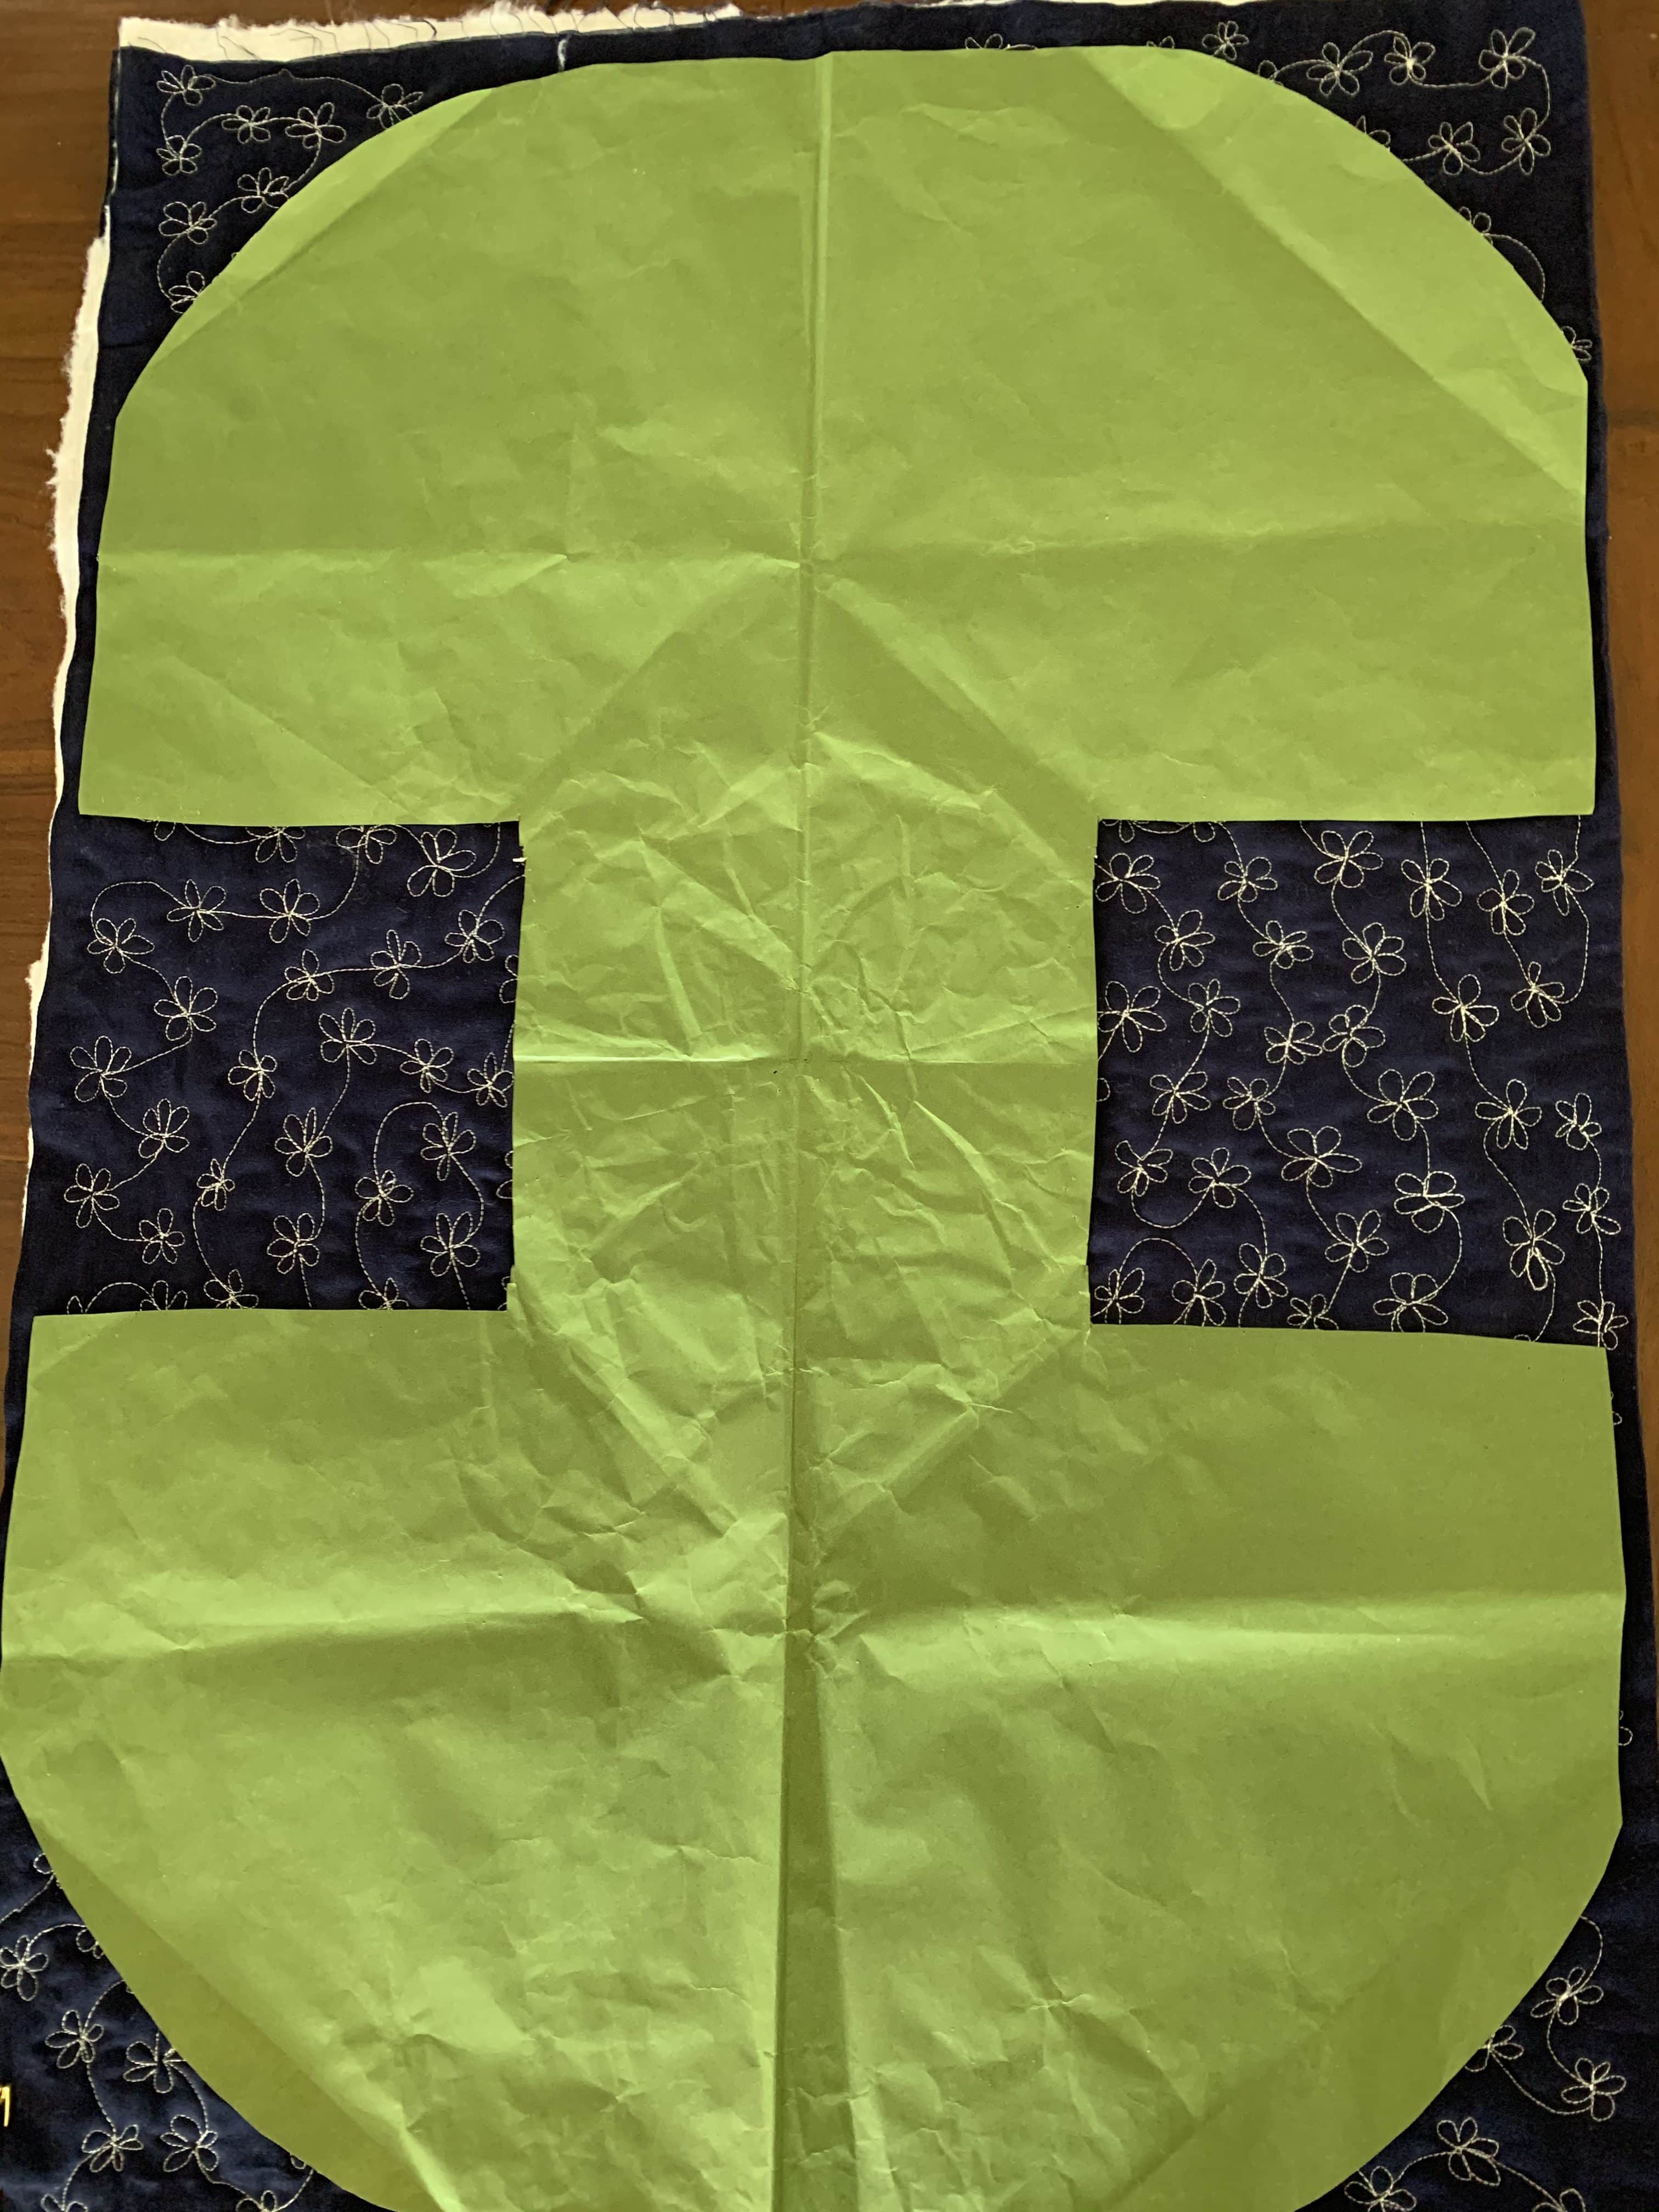
Lay the drafted paper pattern on the quilted fabric. The square areas will be saved to make extra pockets.
Pin and cut carefully around the patten preserving the two squares either side of the pattern piece to be used for pockets if desired.
Fold the binding strips in half lengthwise and pin to the right side of the round edges of the quilted fabric, raw edges aligned. Machine stitch 1/4” from the edge.
Do the same for the two square pockets.
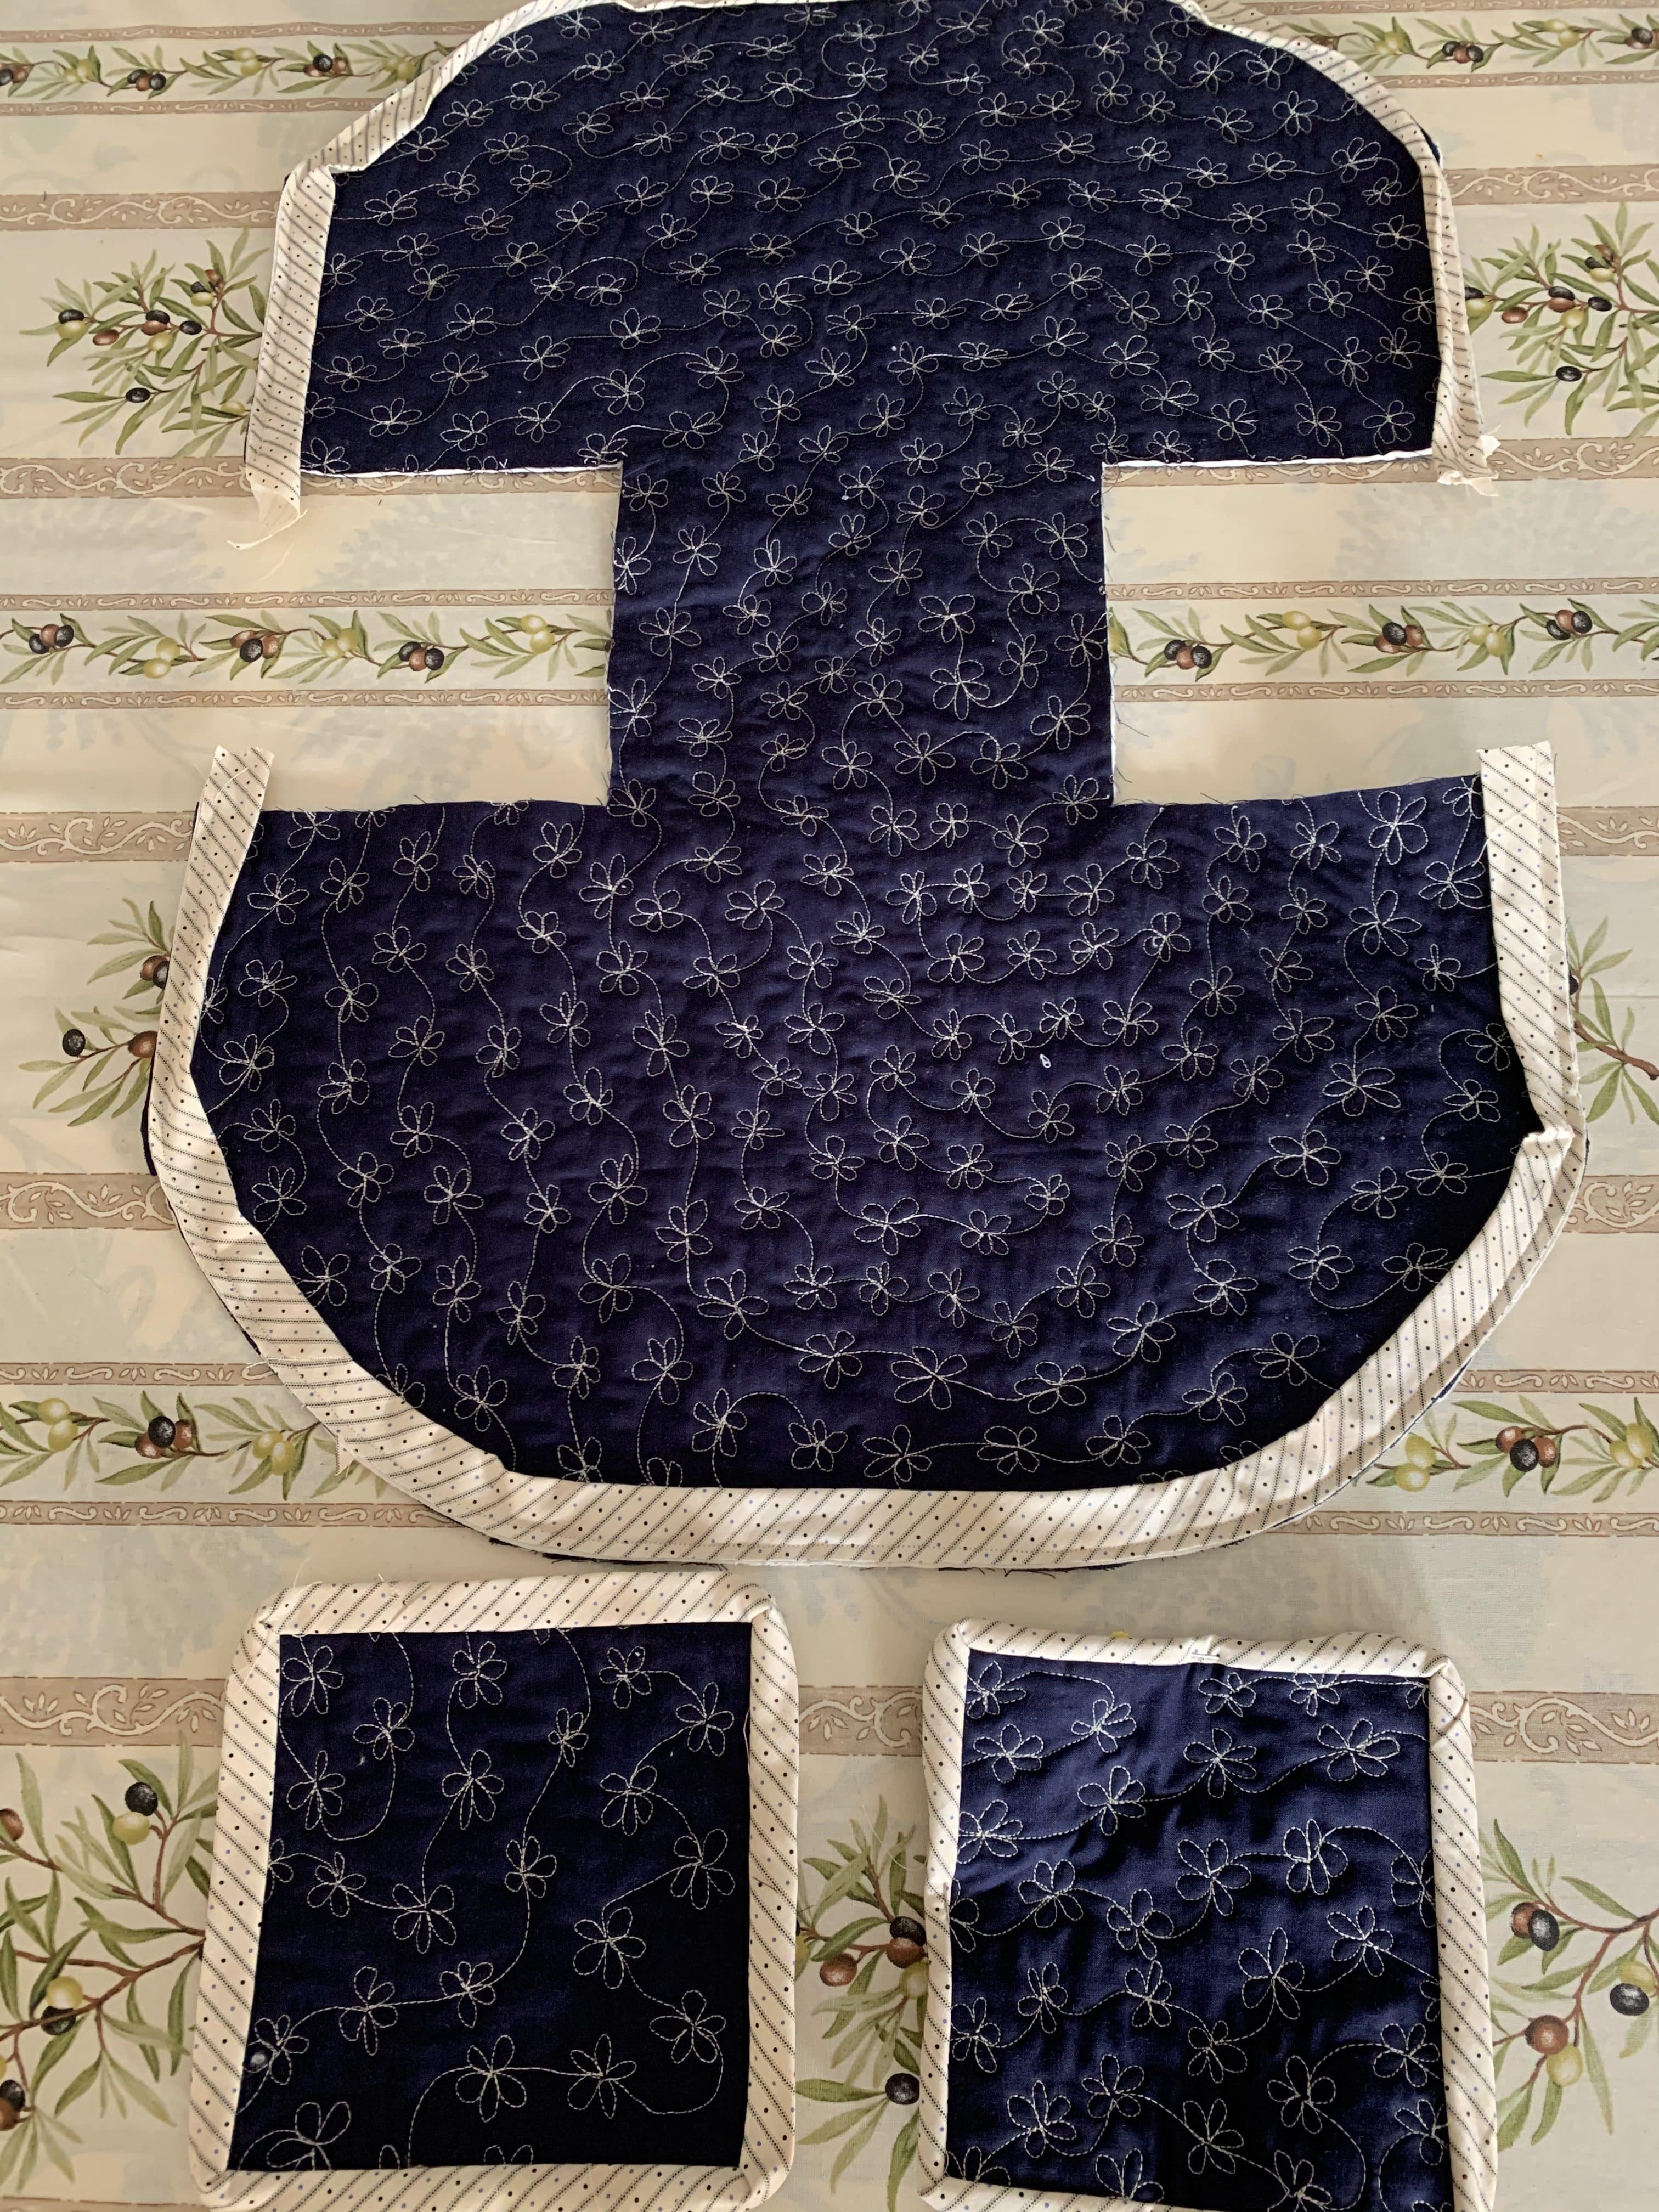
Turn the binding strips to the wrong side and hand stitch them in place. Do the same for the pocket bindings.

Trim the excess binding from the ends of the round edges. With the wrong side (inside) facing, lay the wrong side of the pocket pieces at the centre of each side of the bag piece about 1/2” from the base area as pictured. When you are happy with the placement, pin in place and carefully hand stitch three sides of the pockets to the bag making sure that your stitches do not appear on the outside. Leave the top edge open to make the pocket.

With the wrong side facing, fold the sides down to the lower edge of the base at a 45 degree angle so that the edges are all aligned.

Pin to secure.
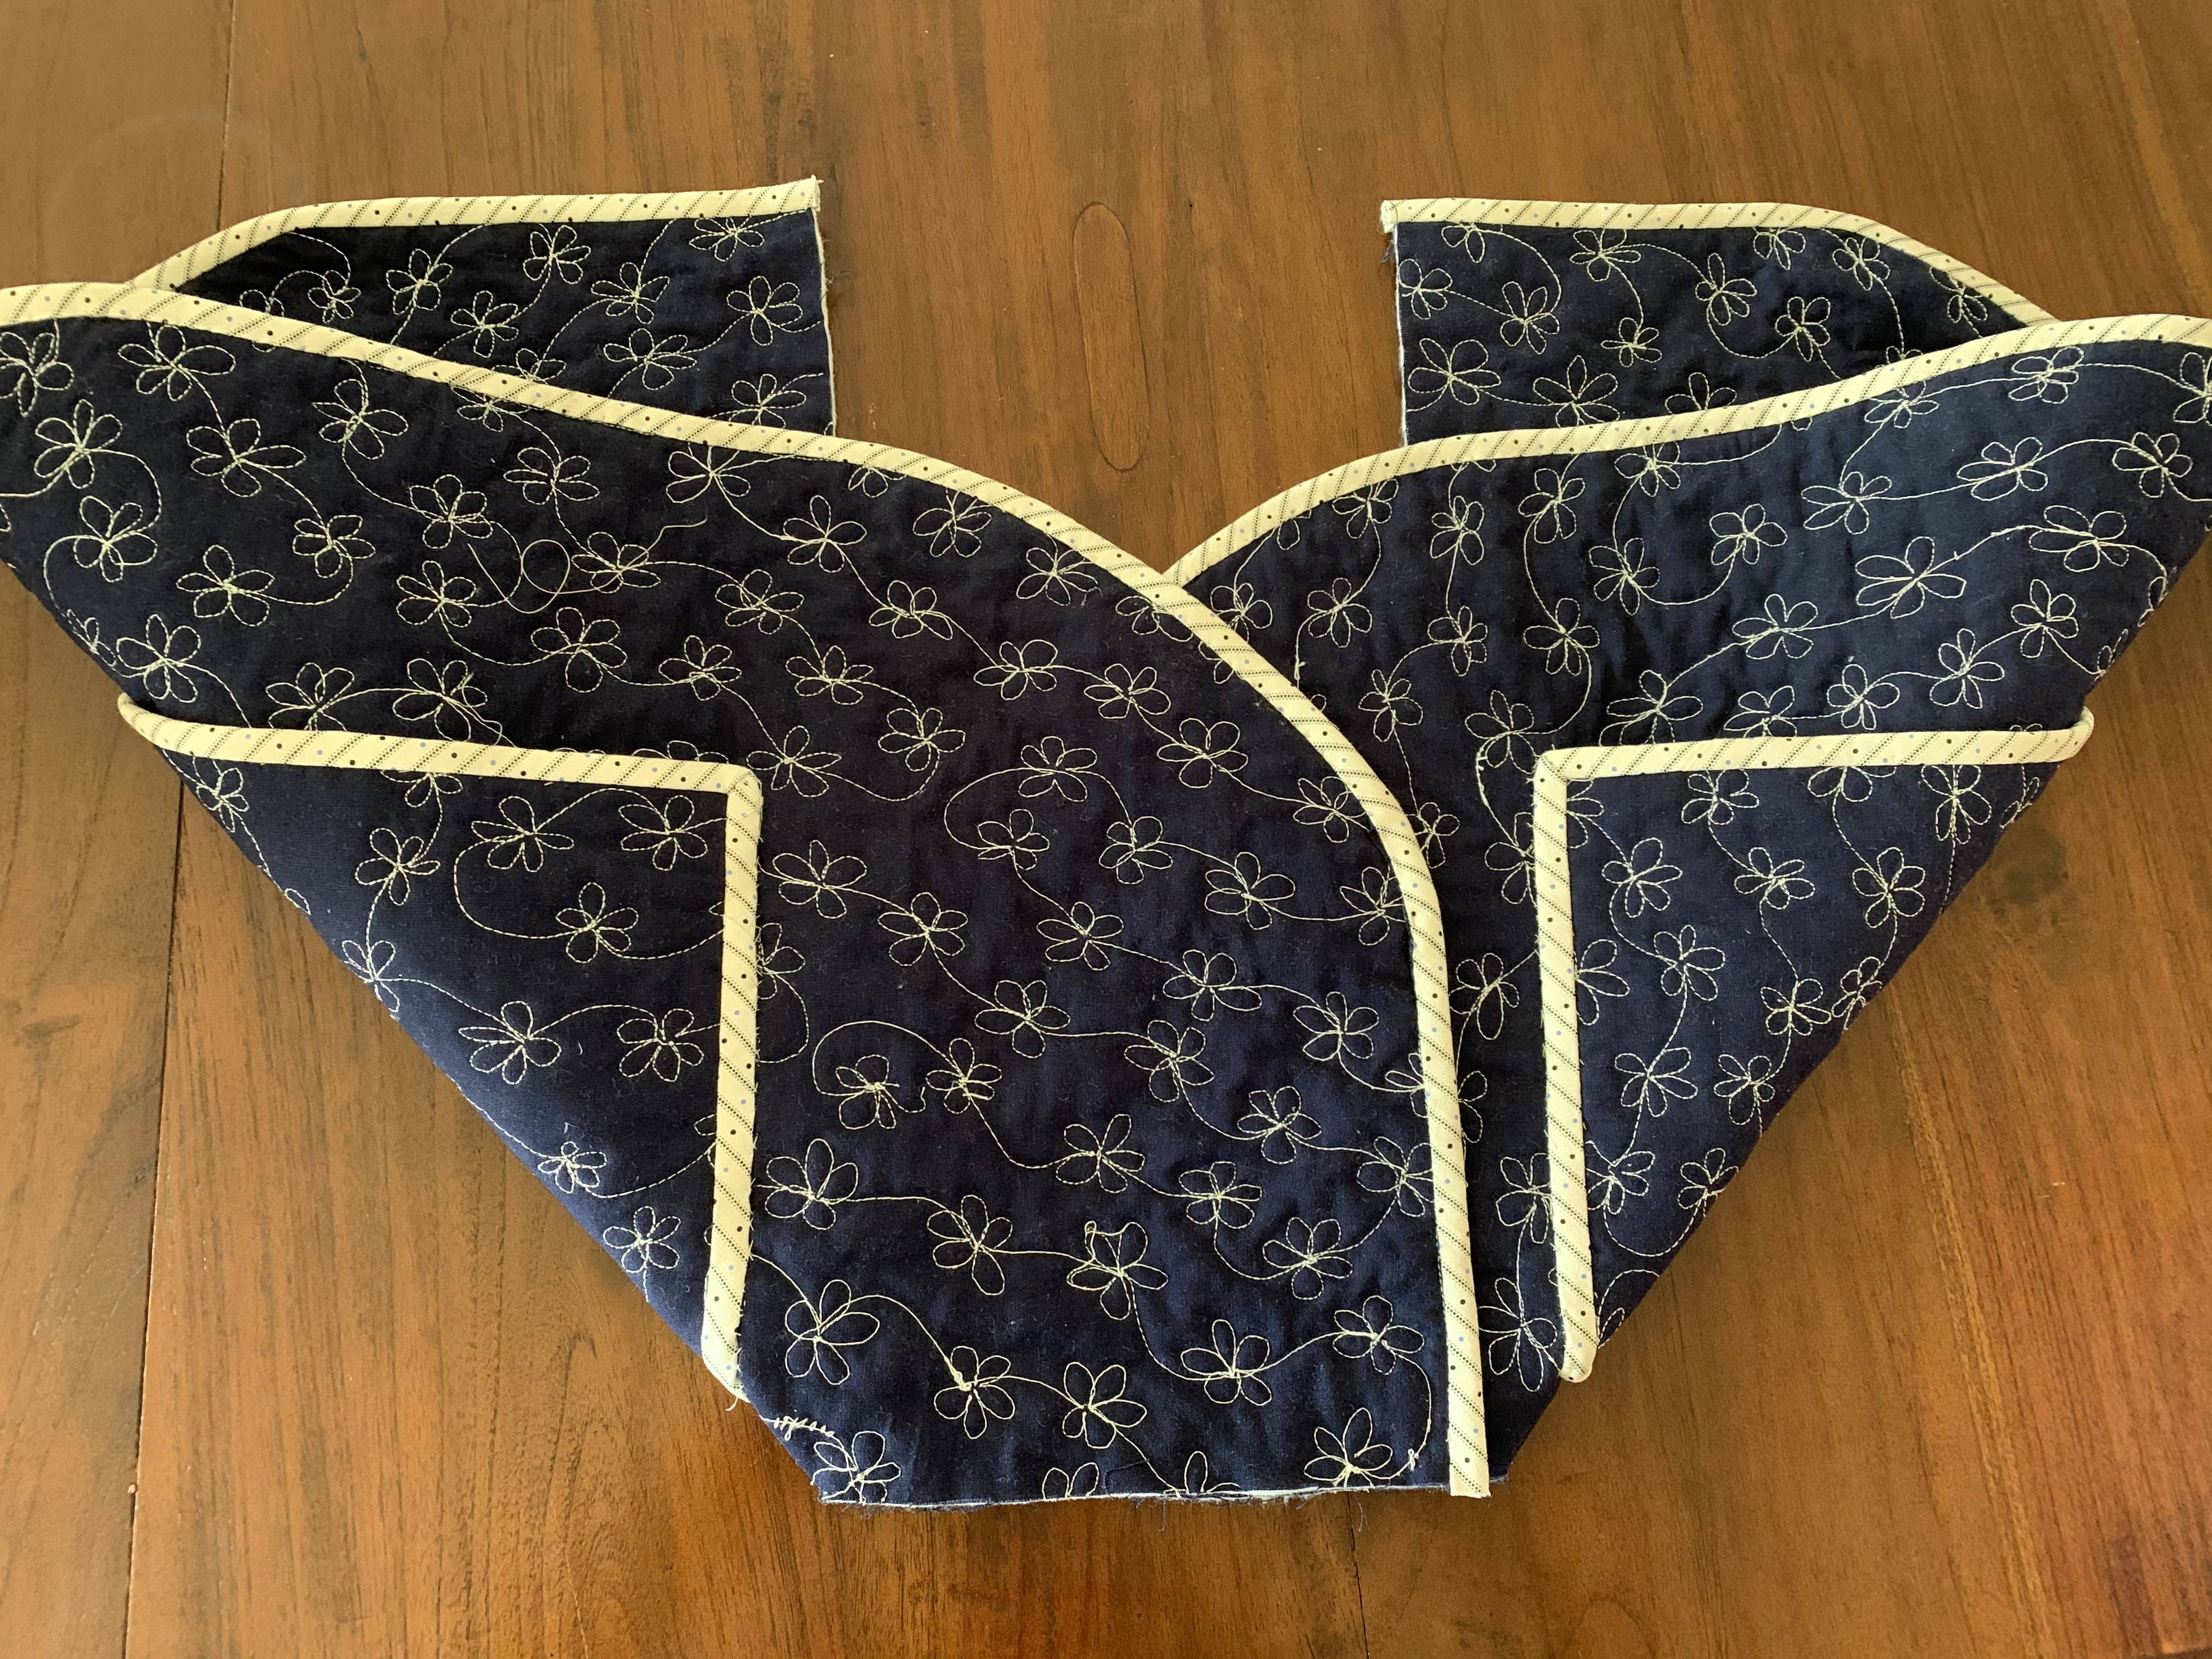
Use a 10” open length of the 2” bias strip right side down, and centre on these edges, all raw edges aligning. Pin to secure all layers together. Slowly machine stitch in place 3/8” from the edge.

Turn the binding strip to the other side turning under all raw edges and enclosing the seam allowances. Top strich in place.
Repeat the last three steps for the other side of the bag.
Now it should look like this.
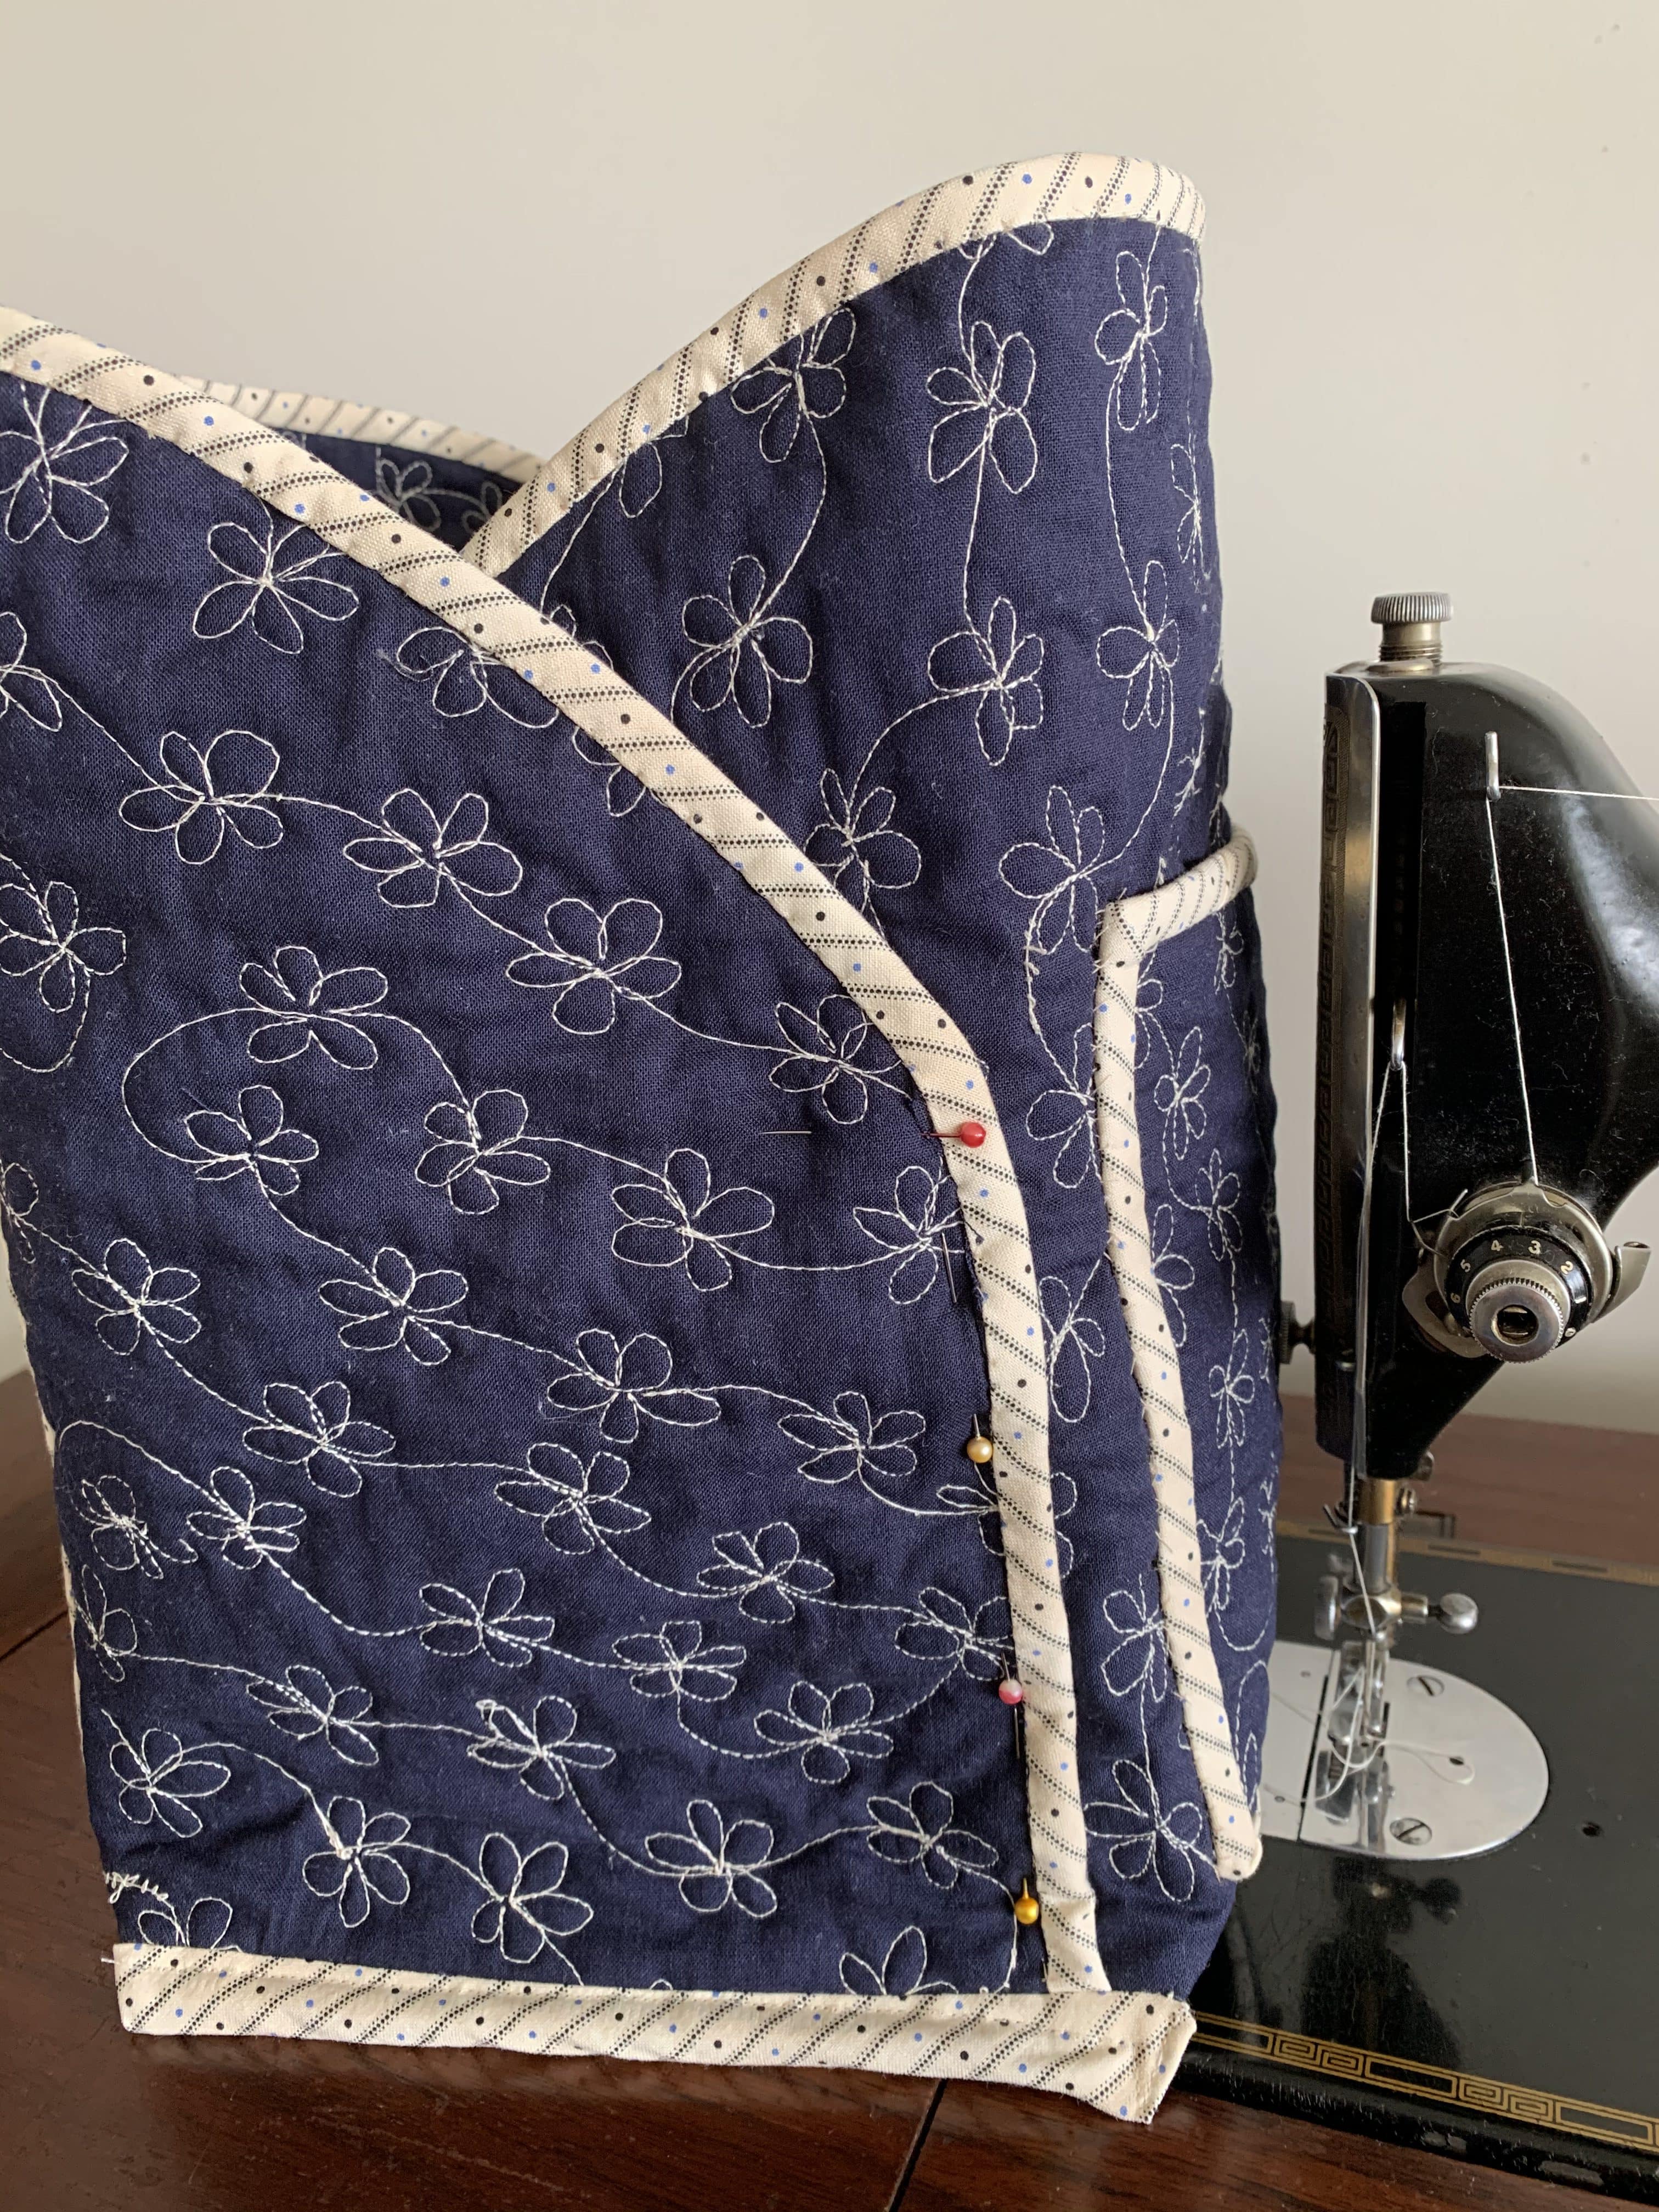
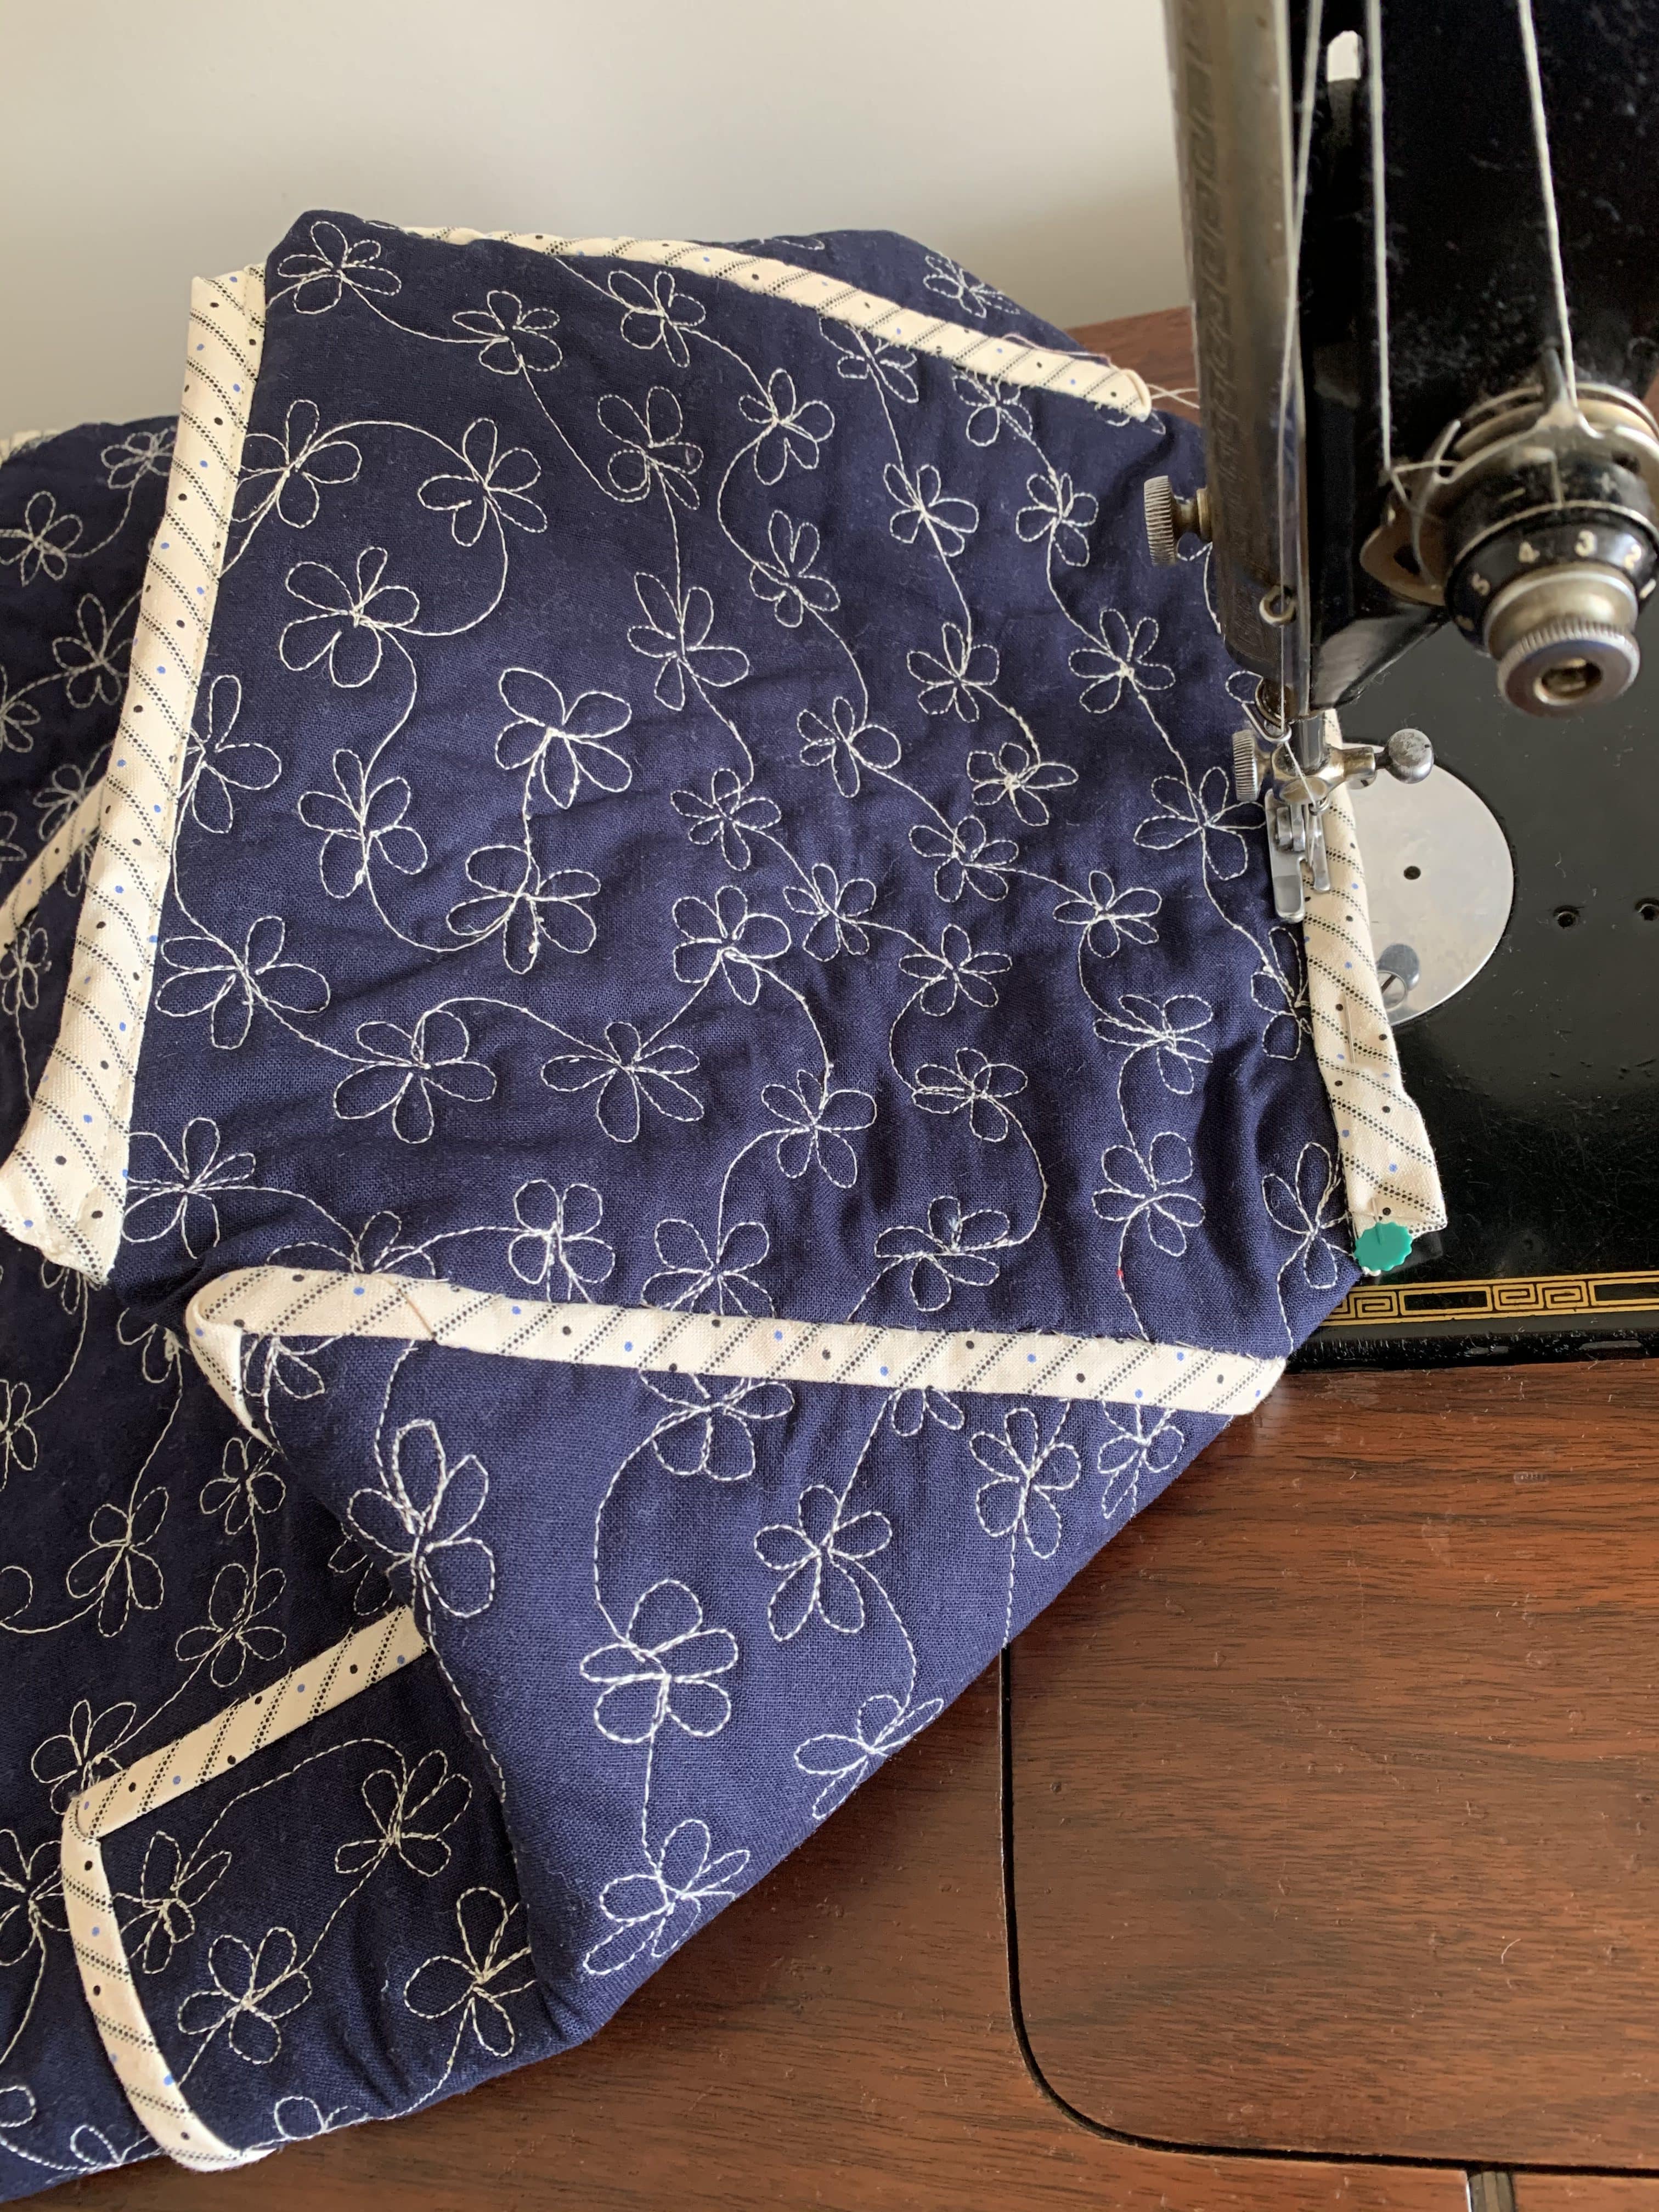
To secure the bag shape. Whilst the bag is still inside out, carefully pin up the sides of the bag ensuring the bag is upright. Hand stitch from the end of the curve (where you can see the red pinhead) down to the base of the bag on both sides.
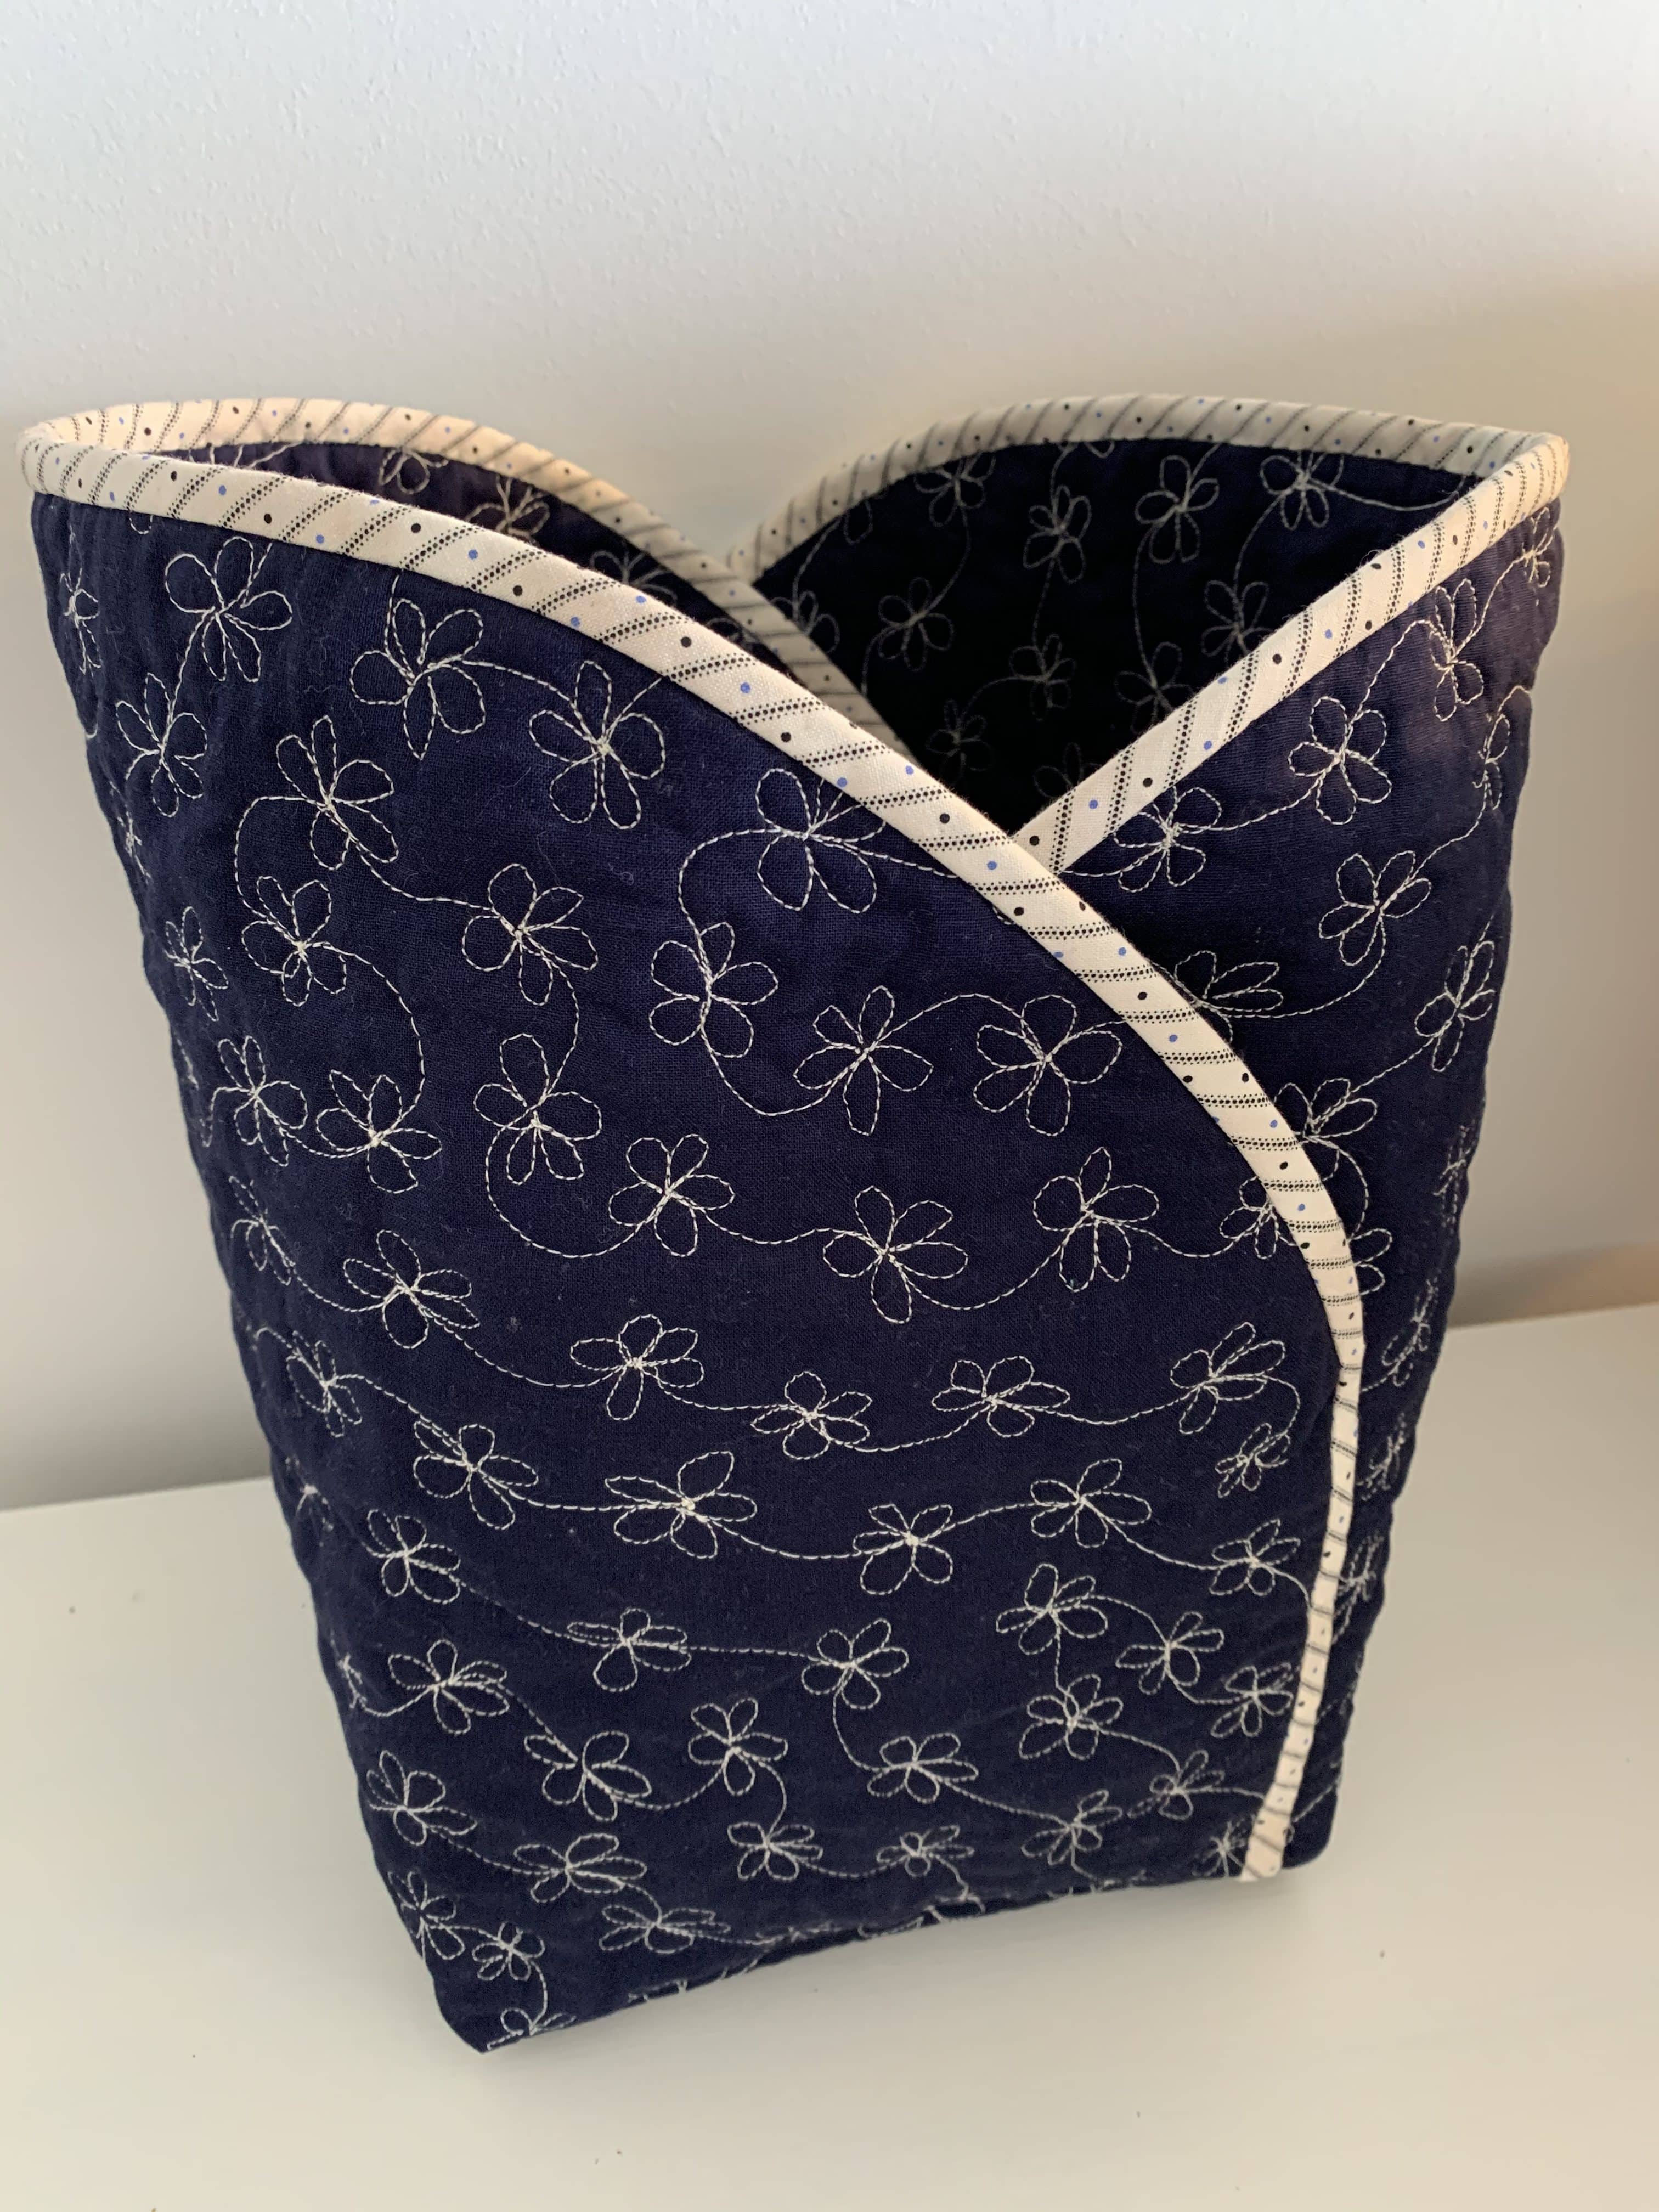
Turn the bag to the right side and hand stitch the sides from the base of the curve as before.
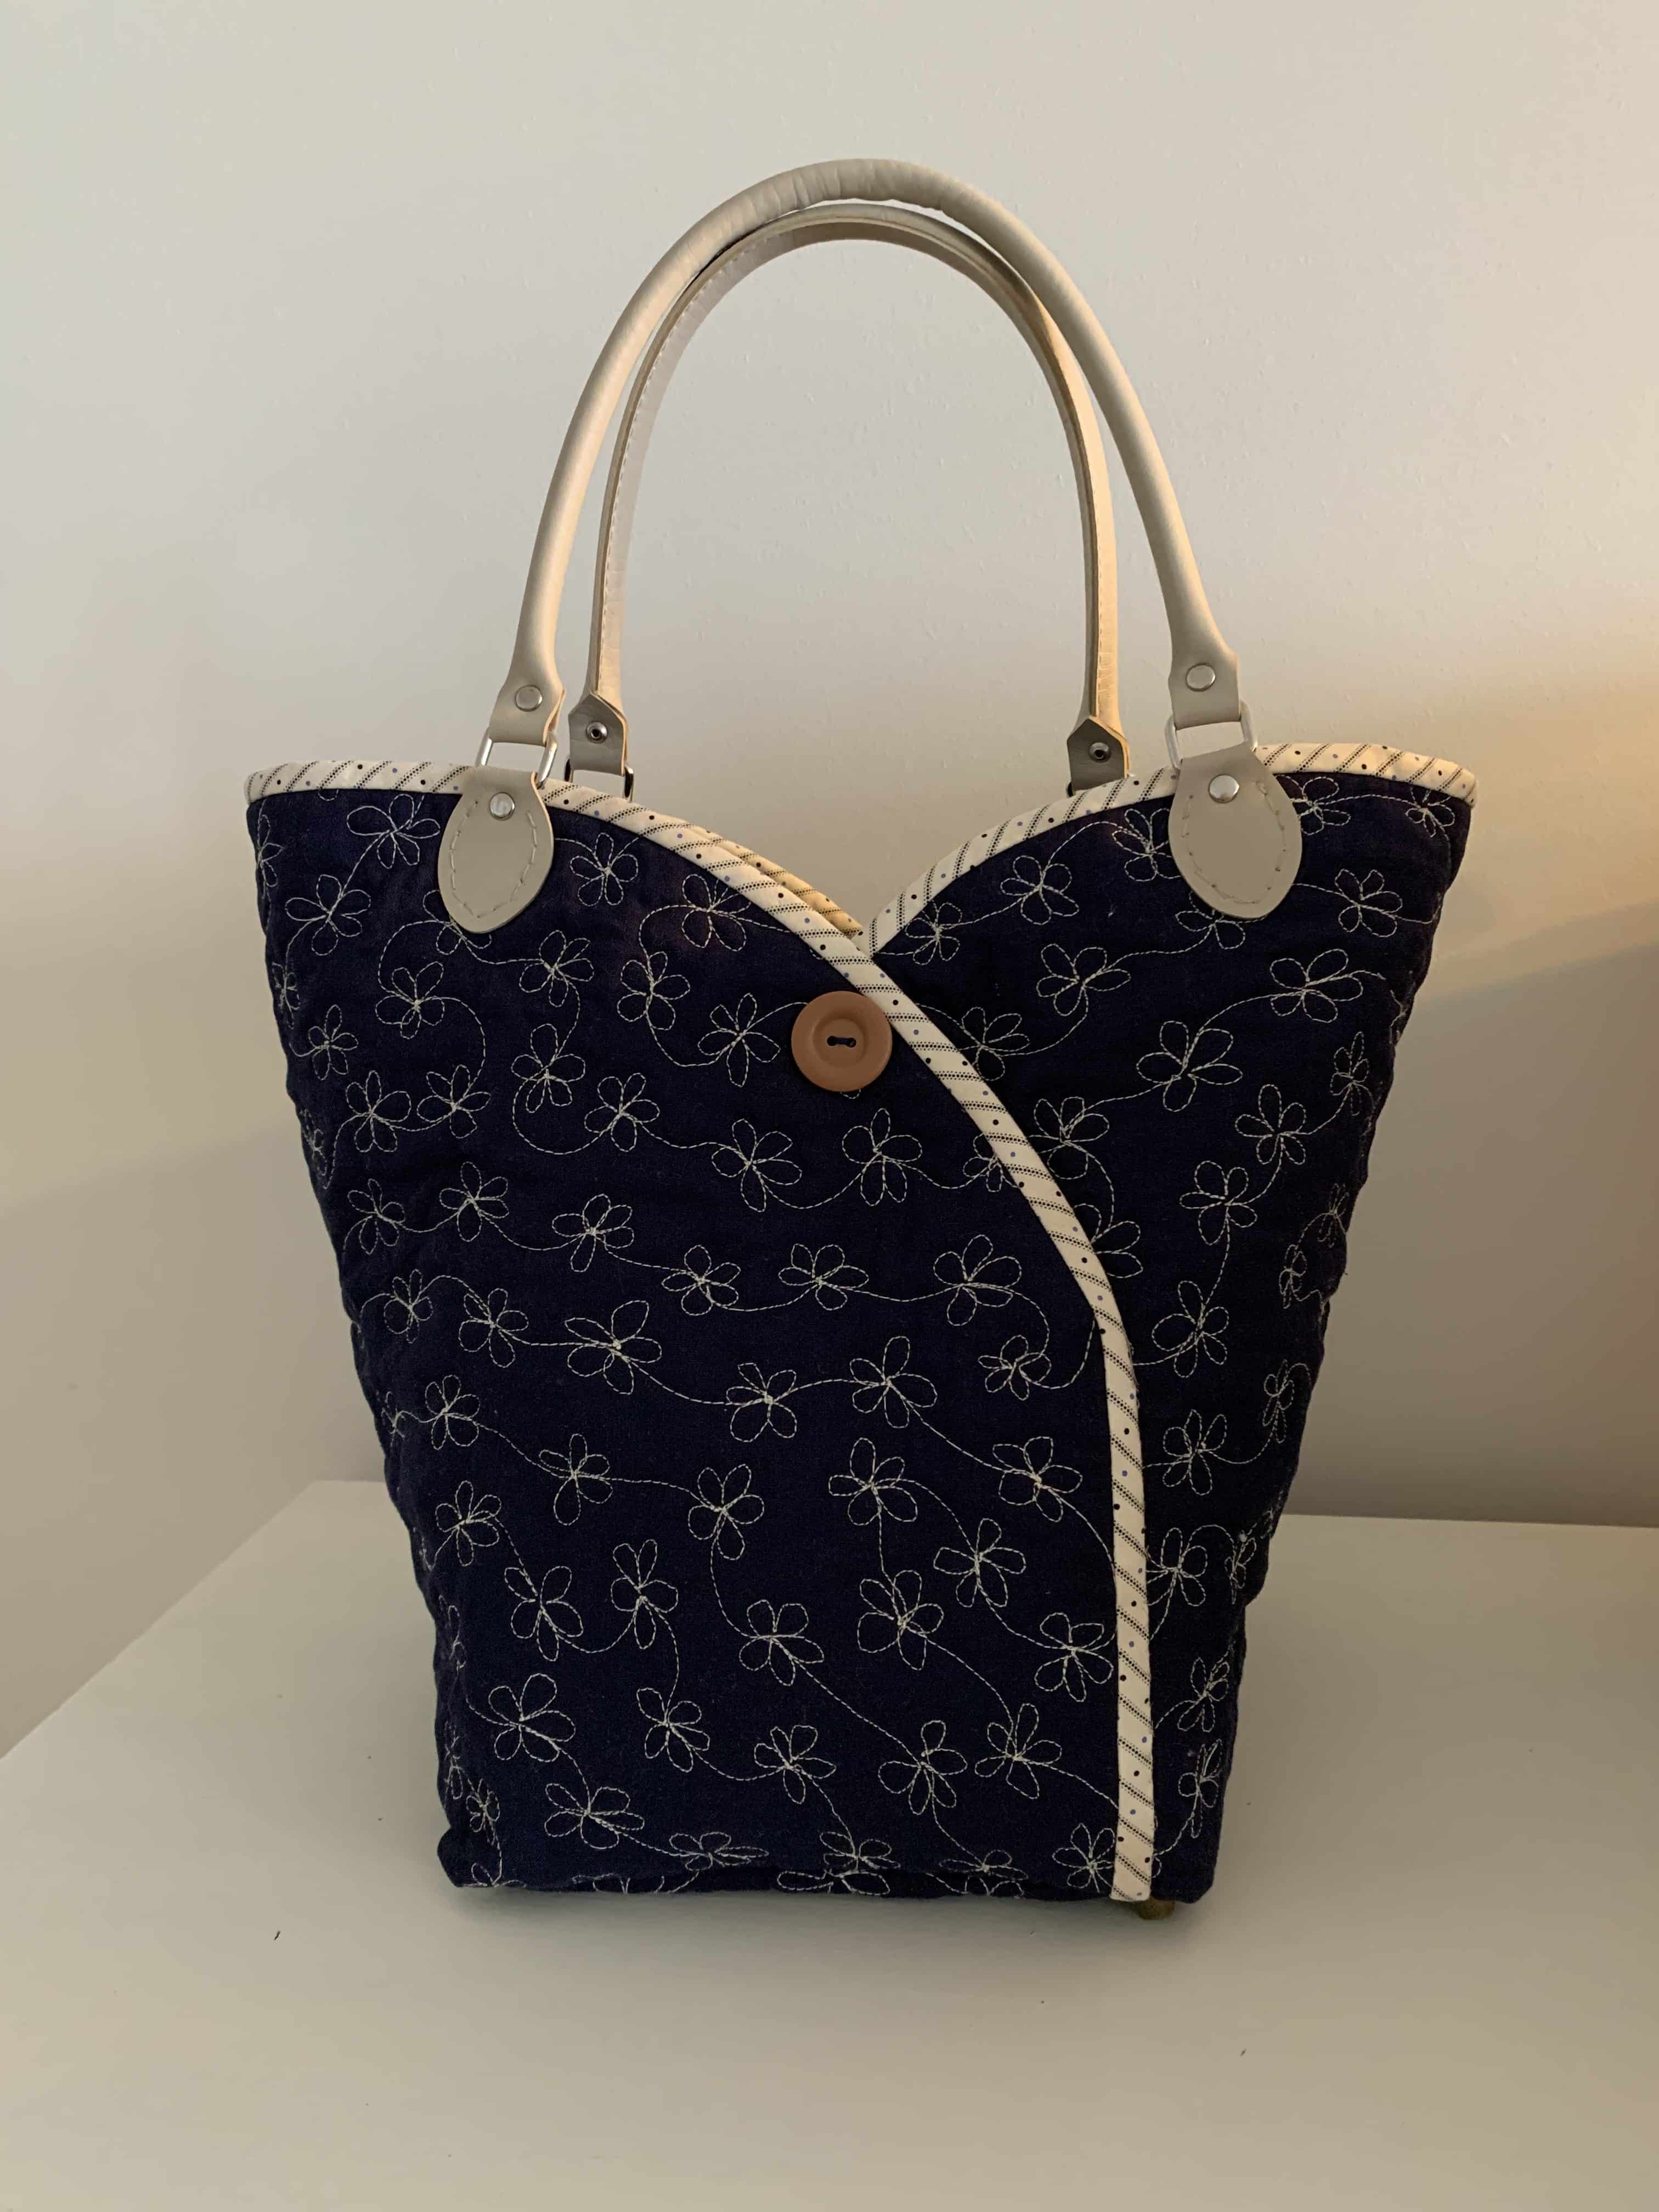
Hand stich the purchased bag handles in place. Stitch a button to each side at the junction of the two curves. Your hand will still be able to fit through the side to the two way pocket.
Add the bag feet if using.
There is the Sashiko Daisies Handbag.
If you enjoyed this post, you may also like these other projects
Japanese Knot Bag A New Pattern
Schlep It Good Bag and Pattern Part 1
Quilted Scrap Fabric Baskets & Tutorial
Happy sewing,
Susie © 2020
What is the finished size?
Base width 6″ x 6″
Top width approximately 10″
Height approximately 12″