
Scrappy Pinwheel in a Square – Part 2
Hello Dear Friends and Readers and welcome to today’s post.
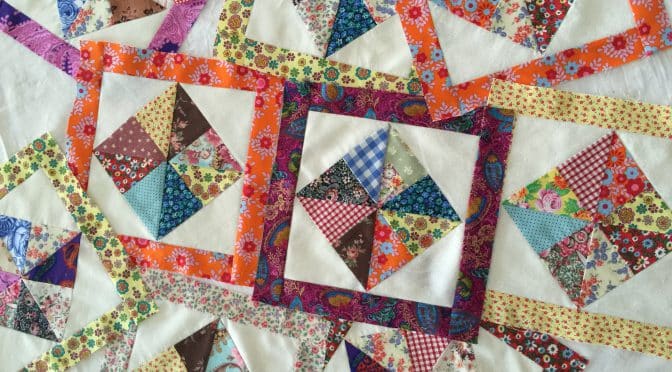
Just a short time ago I showed you my new block idea of Scrappy Pinwheel in a Square. No triangles to cut and no squaring up! I’ve been having a lot of fun making these blocks. It’s really quite satisfying to make such a pretty block from scraps. Actually I think they are quite addictive and not at all boring. Read more about that here.

Today I’m showing how I am finishing those blocks ready to go into a new baby quilt. I thought the blocks needed something extra. I decided in order to overcome the bias edges of the block and finish them ready to go into the quilt. To do that I thought they would look and behave beautifully with a frame.
This is how I do it.
Ingredients for the framed Scrappy Pinwheel in a Square Block
1 x a 1 1/2″ Width of Fabric (WOF) strip for each block
Method
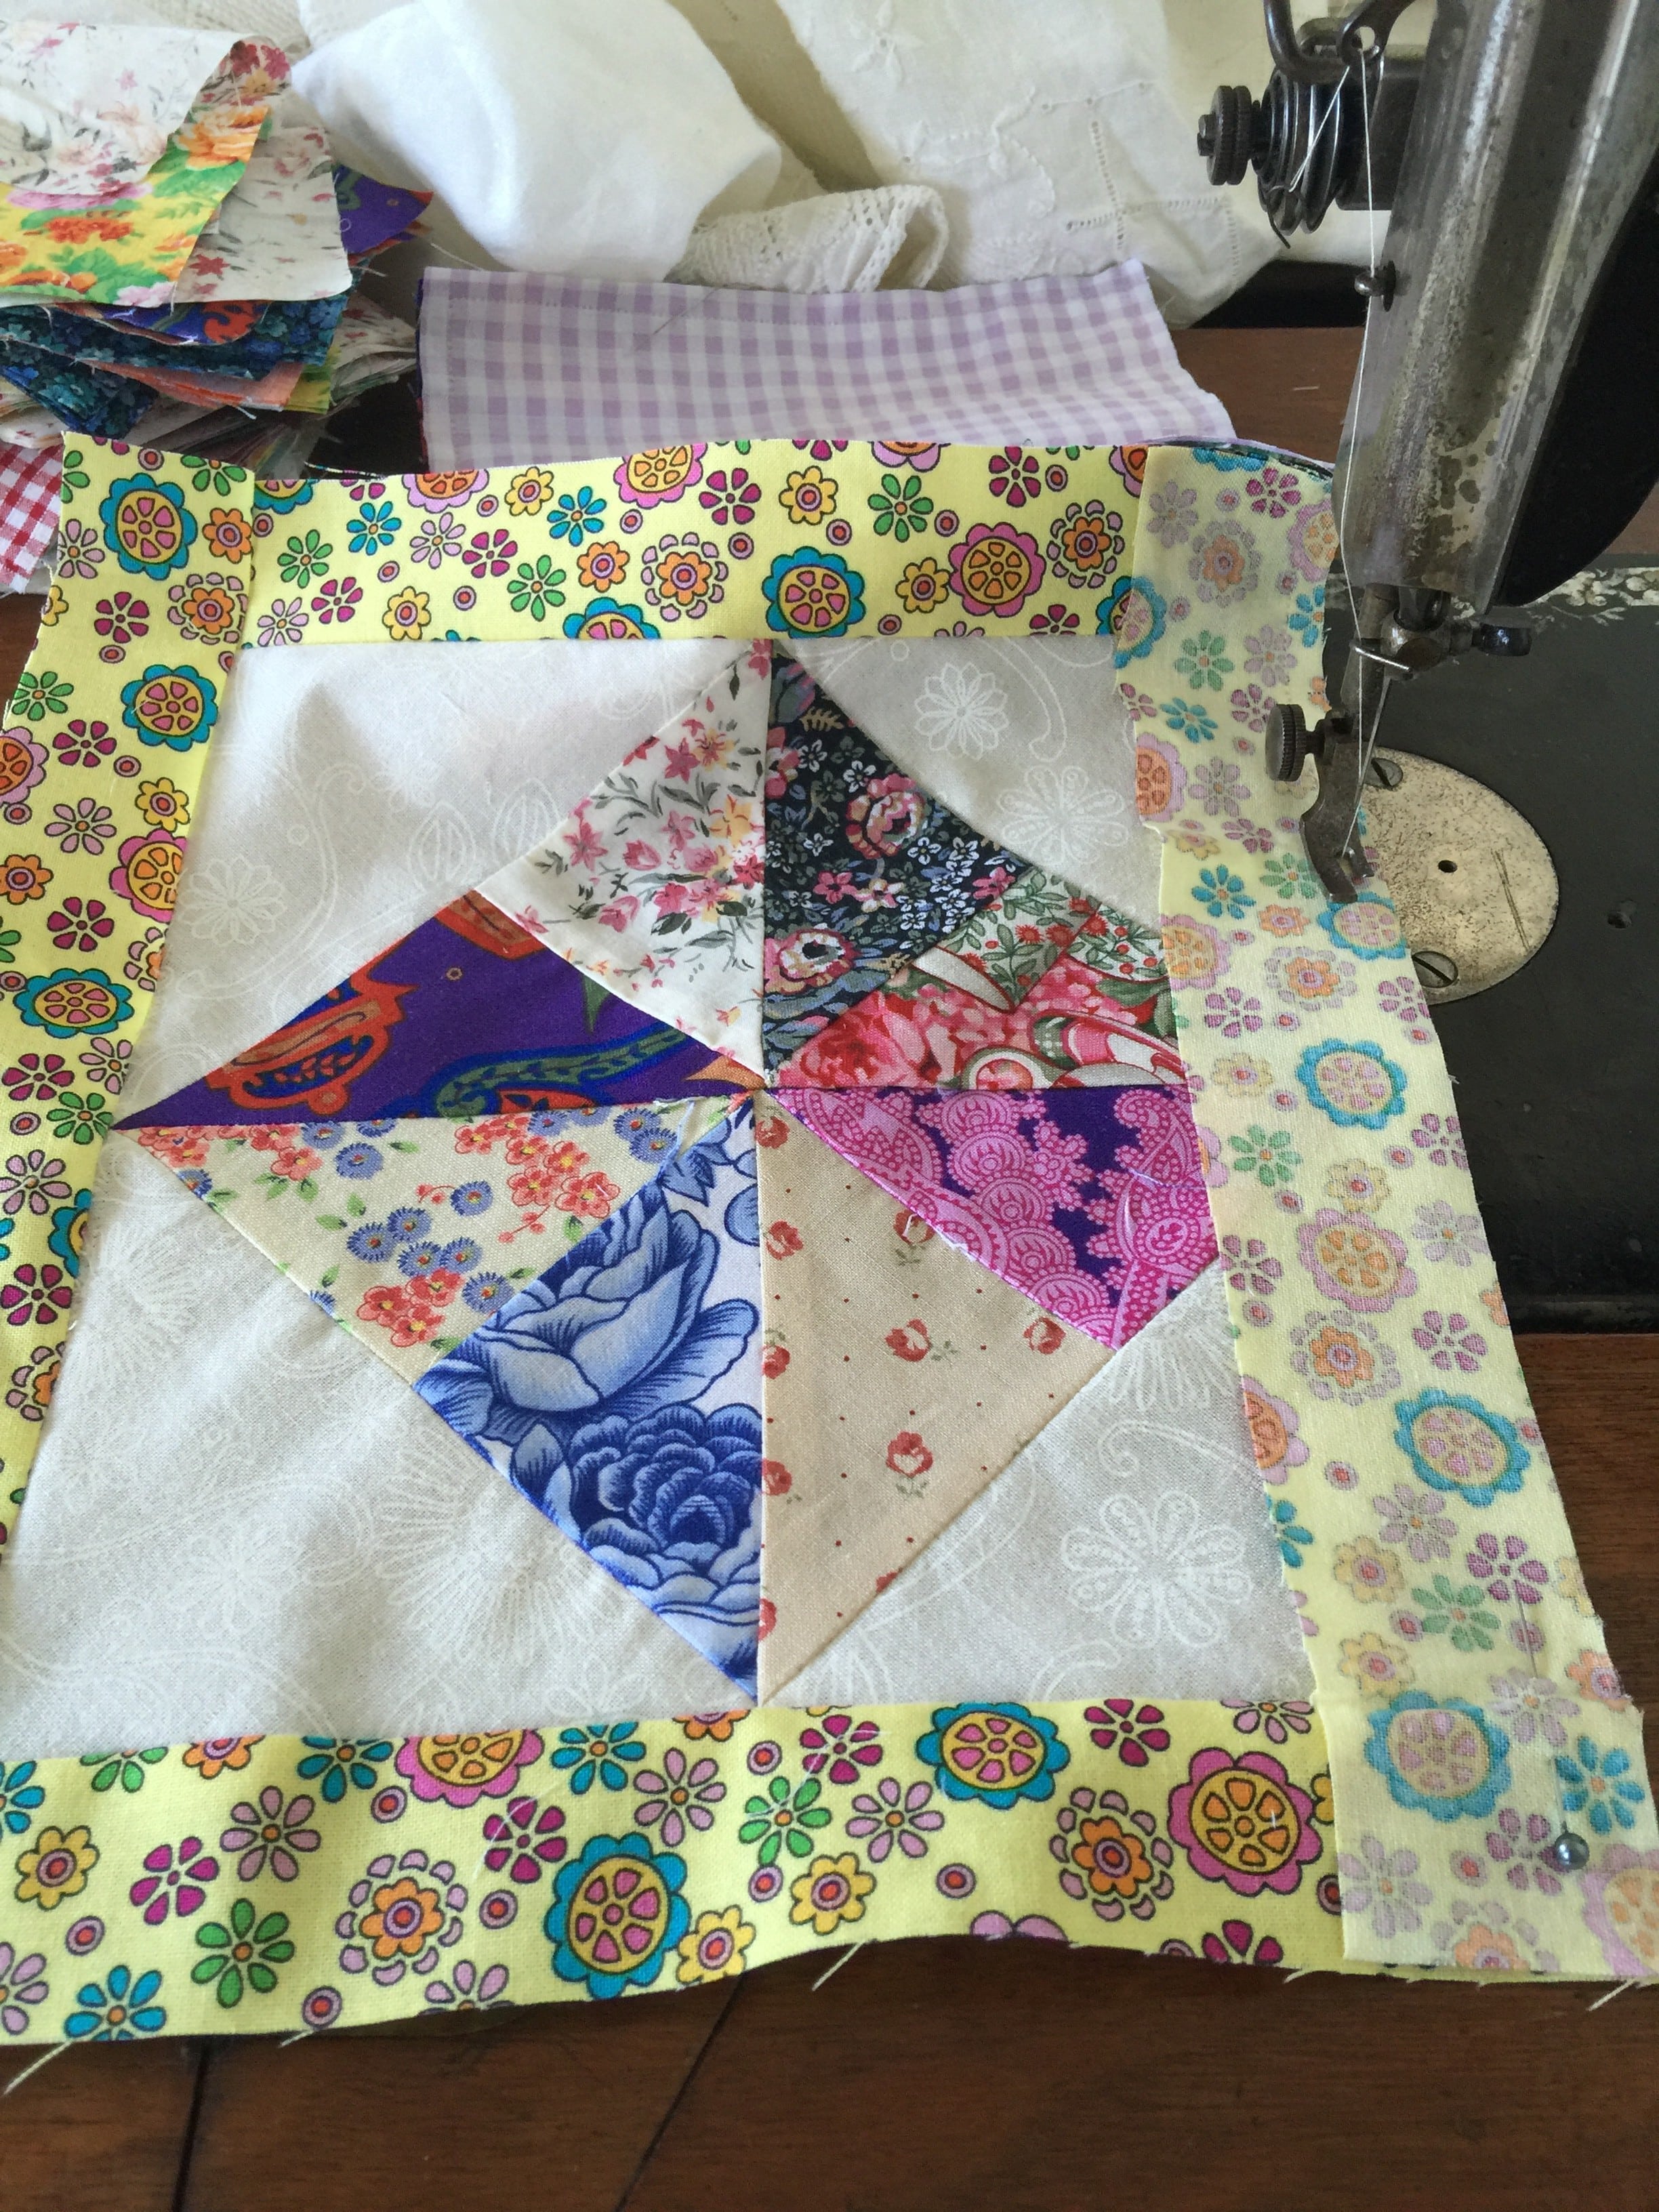
Gently press your blocks without stretching. From each 1 1/2″ WOF strip, sub cut the strip into;
2 x 10″ strips

Pin a 8″ strip evenly to two opposite side of a finished block. Sew them on, being careful to observe your 1/4″ seam so that the points are not lost. Finger press.

Pin a 10″ strip evenly to each of the remainder unfinished sides and then sew on.
Scrappy Pinwheel in a Square – Part 2 susies-scraps.com
There you have it a framed scrappy pinwheel in a square. No more bias edges and I think it looks more finished.

Press to finish the block. Make some more!

Finishing the Scrappy Pinwheel in a Square Quilt
If you have read this far, you might be interested to know how these blocks finished up.
I put them together in a quilt for my niece. I think it turned out quite nicely, however I will let you be the judge of that. Here is the link to the finished quilt.
Framing Pinwheels Quilt and Pattern
If you enjoyed this post, you may also like
I Spy Pinwheels Quilt and Pattern
Baby Love Quilt and Pattern Part 2
Glowing Pinwheels Quilt and Pattern (not quite Amish)
Happy stitching!
Susie
© Susan Stuklis 2016
Love this block/quilt finish. I always love scrappy projects and I enjoy seeing how you make it easy for us to achieve the same result – thank you Susie 🙂
Would you provide a picture of the finished quilt top?
Here is the link to the finished quilt.
https://susies-scraps.com/2016/04/02/framing-pinwheels-quilt-pattern/
Is it possible to obtain PART 1?
Dear Ro. Here 9s the link to part 1 Scrappy Pinwheel in a Square. https://susies-scraps.com/2016/02/26/scrappy-pinwheel-square/
All the best, Susie
I’d like to get PART 1
Why can’t I open the link in part one?
Hi Marika, try refreshing your browser. It is working well here.
Thank you, it works on my Ipad. Just another question please? How did you put the white triangles on the sides of the coloured triangle block? Did you sew it onto the back of the main block an make a slit and cut the white on the back, from the middle to corners and then open it? Please explain, I,m lost. Thank you. Marika
Dear Marika,
I am not sure if you have read part one. Hopefully this will clarify the blocks.
http://susies-scraps.com/2016/02/26/scrappy-pinwheel-square/
Let me know if that helps.
😊 Susie
I am making the quilt for the church bazaar, thanks for a great idea!
ceci
You have some really pretty scraps 🙂