
Vintage Twist Baby Quilt & Tutorial
As luck would have it, I happened across a beautiful vintage quilt on Pinterest which had been posted by Barbara Brackman, renowned antique quilt expert and author. The quilt was a beautiful 1930’s vintage quilt with an unusual design.
Upon closer Inspection I realised that the angles were set at 60° ( I believe). The vertical rows were inversely related to each other. It was obvious that the only way that this quilt could be made was by hand piecing.
You can view this quilt here on her blogspot.
http://barbarabrackman.blogspot.com/2016/11/threadneedle-street-free-pattern-for.html
At this point I should mention that I now considered using a Seminole style of design in order to achieve just that.
Seminole Patchwork involves using the same design but offsetting it repeatedly so that in itself it becomes the design. So that’s what I decided to do. Of course I now contemplated as to how that could be achieved in a timely fashion.
I used 30 different prints and a pale lemon for the background fabric.
This is how I went about it.
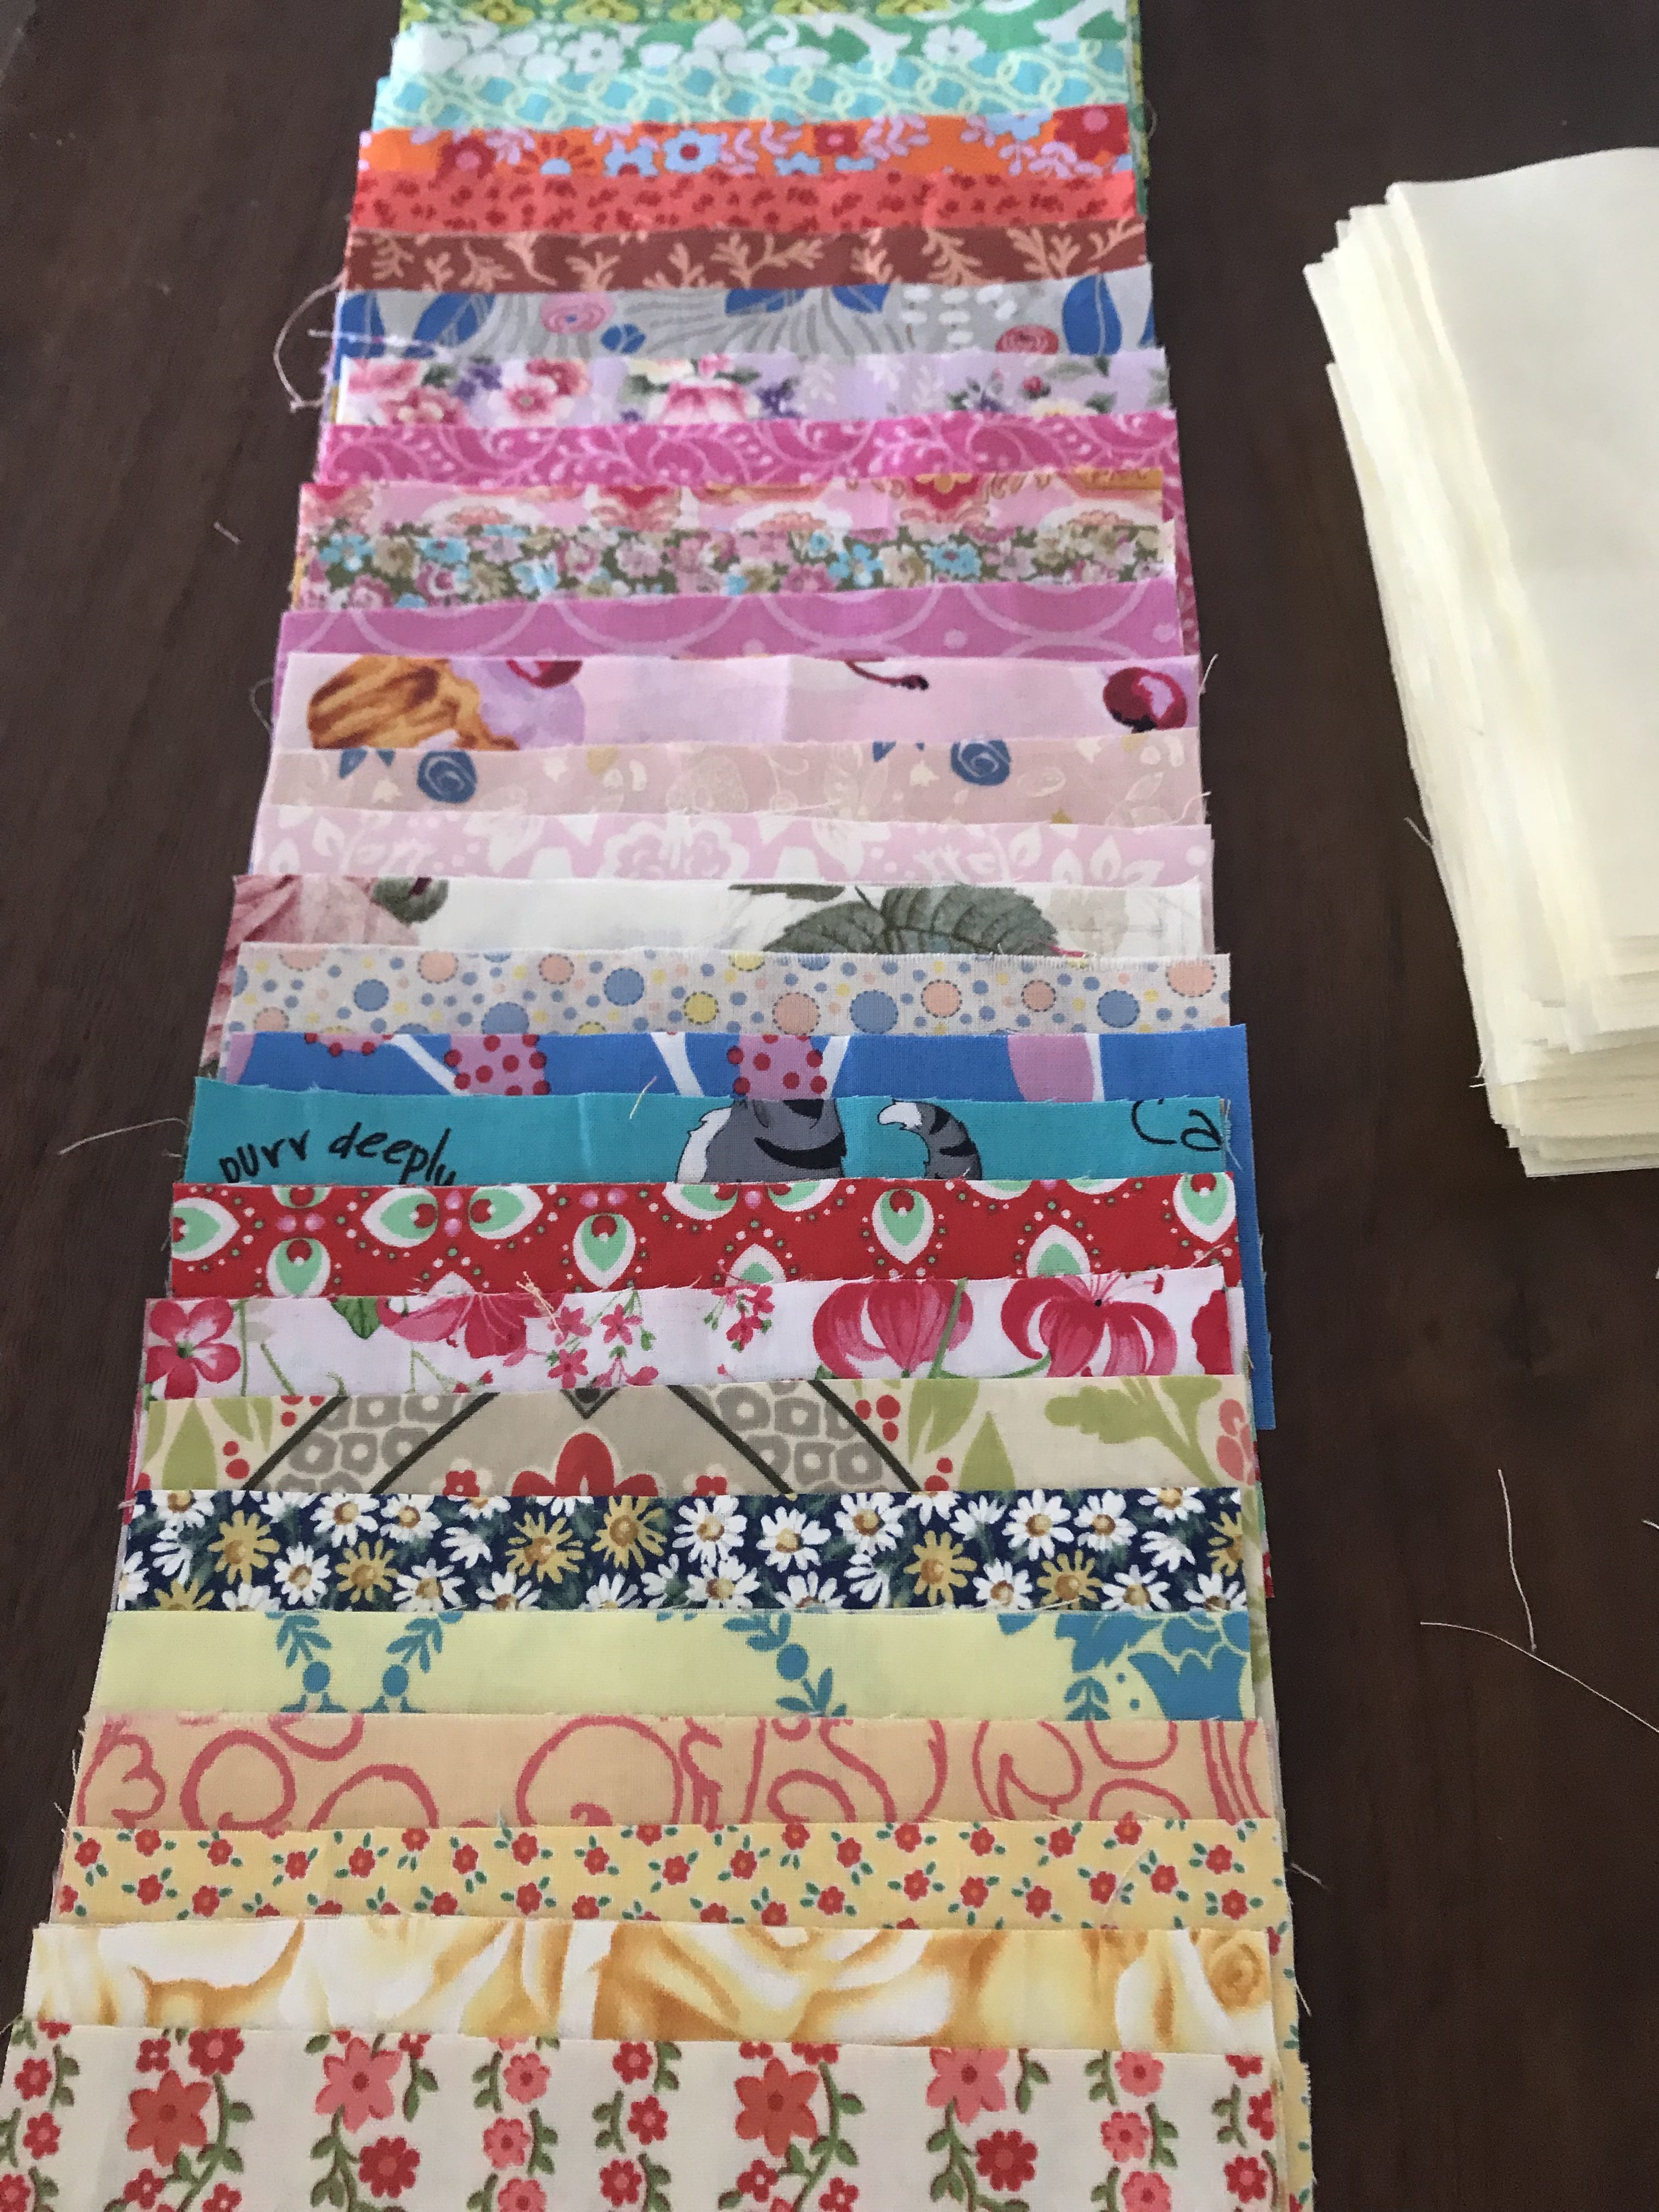
Here is an image of my 30 differing prints.
Construction
Keep 30 of the 6 1/2” x 2 1/2” printed oblongs aside for the border (one of each print).
Make 20 strips from the remainder pieces. To do this begin with a 2 1/2”x 2 1/2” square. Join a background 6 1/2” x 2 1/2” oblong to one side. Now join a 6 1/2” x 2 1/2” print oblong to the background oblong. Follow with a background oblong, then a print oblong, background oblong, print oblong, background oblong then finish with a 2 1/2” x 2 1/2” square. This will yield a strip which is 46 1/2” x 2 1/2”.
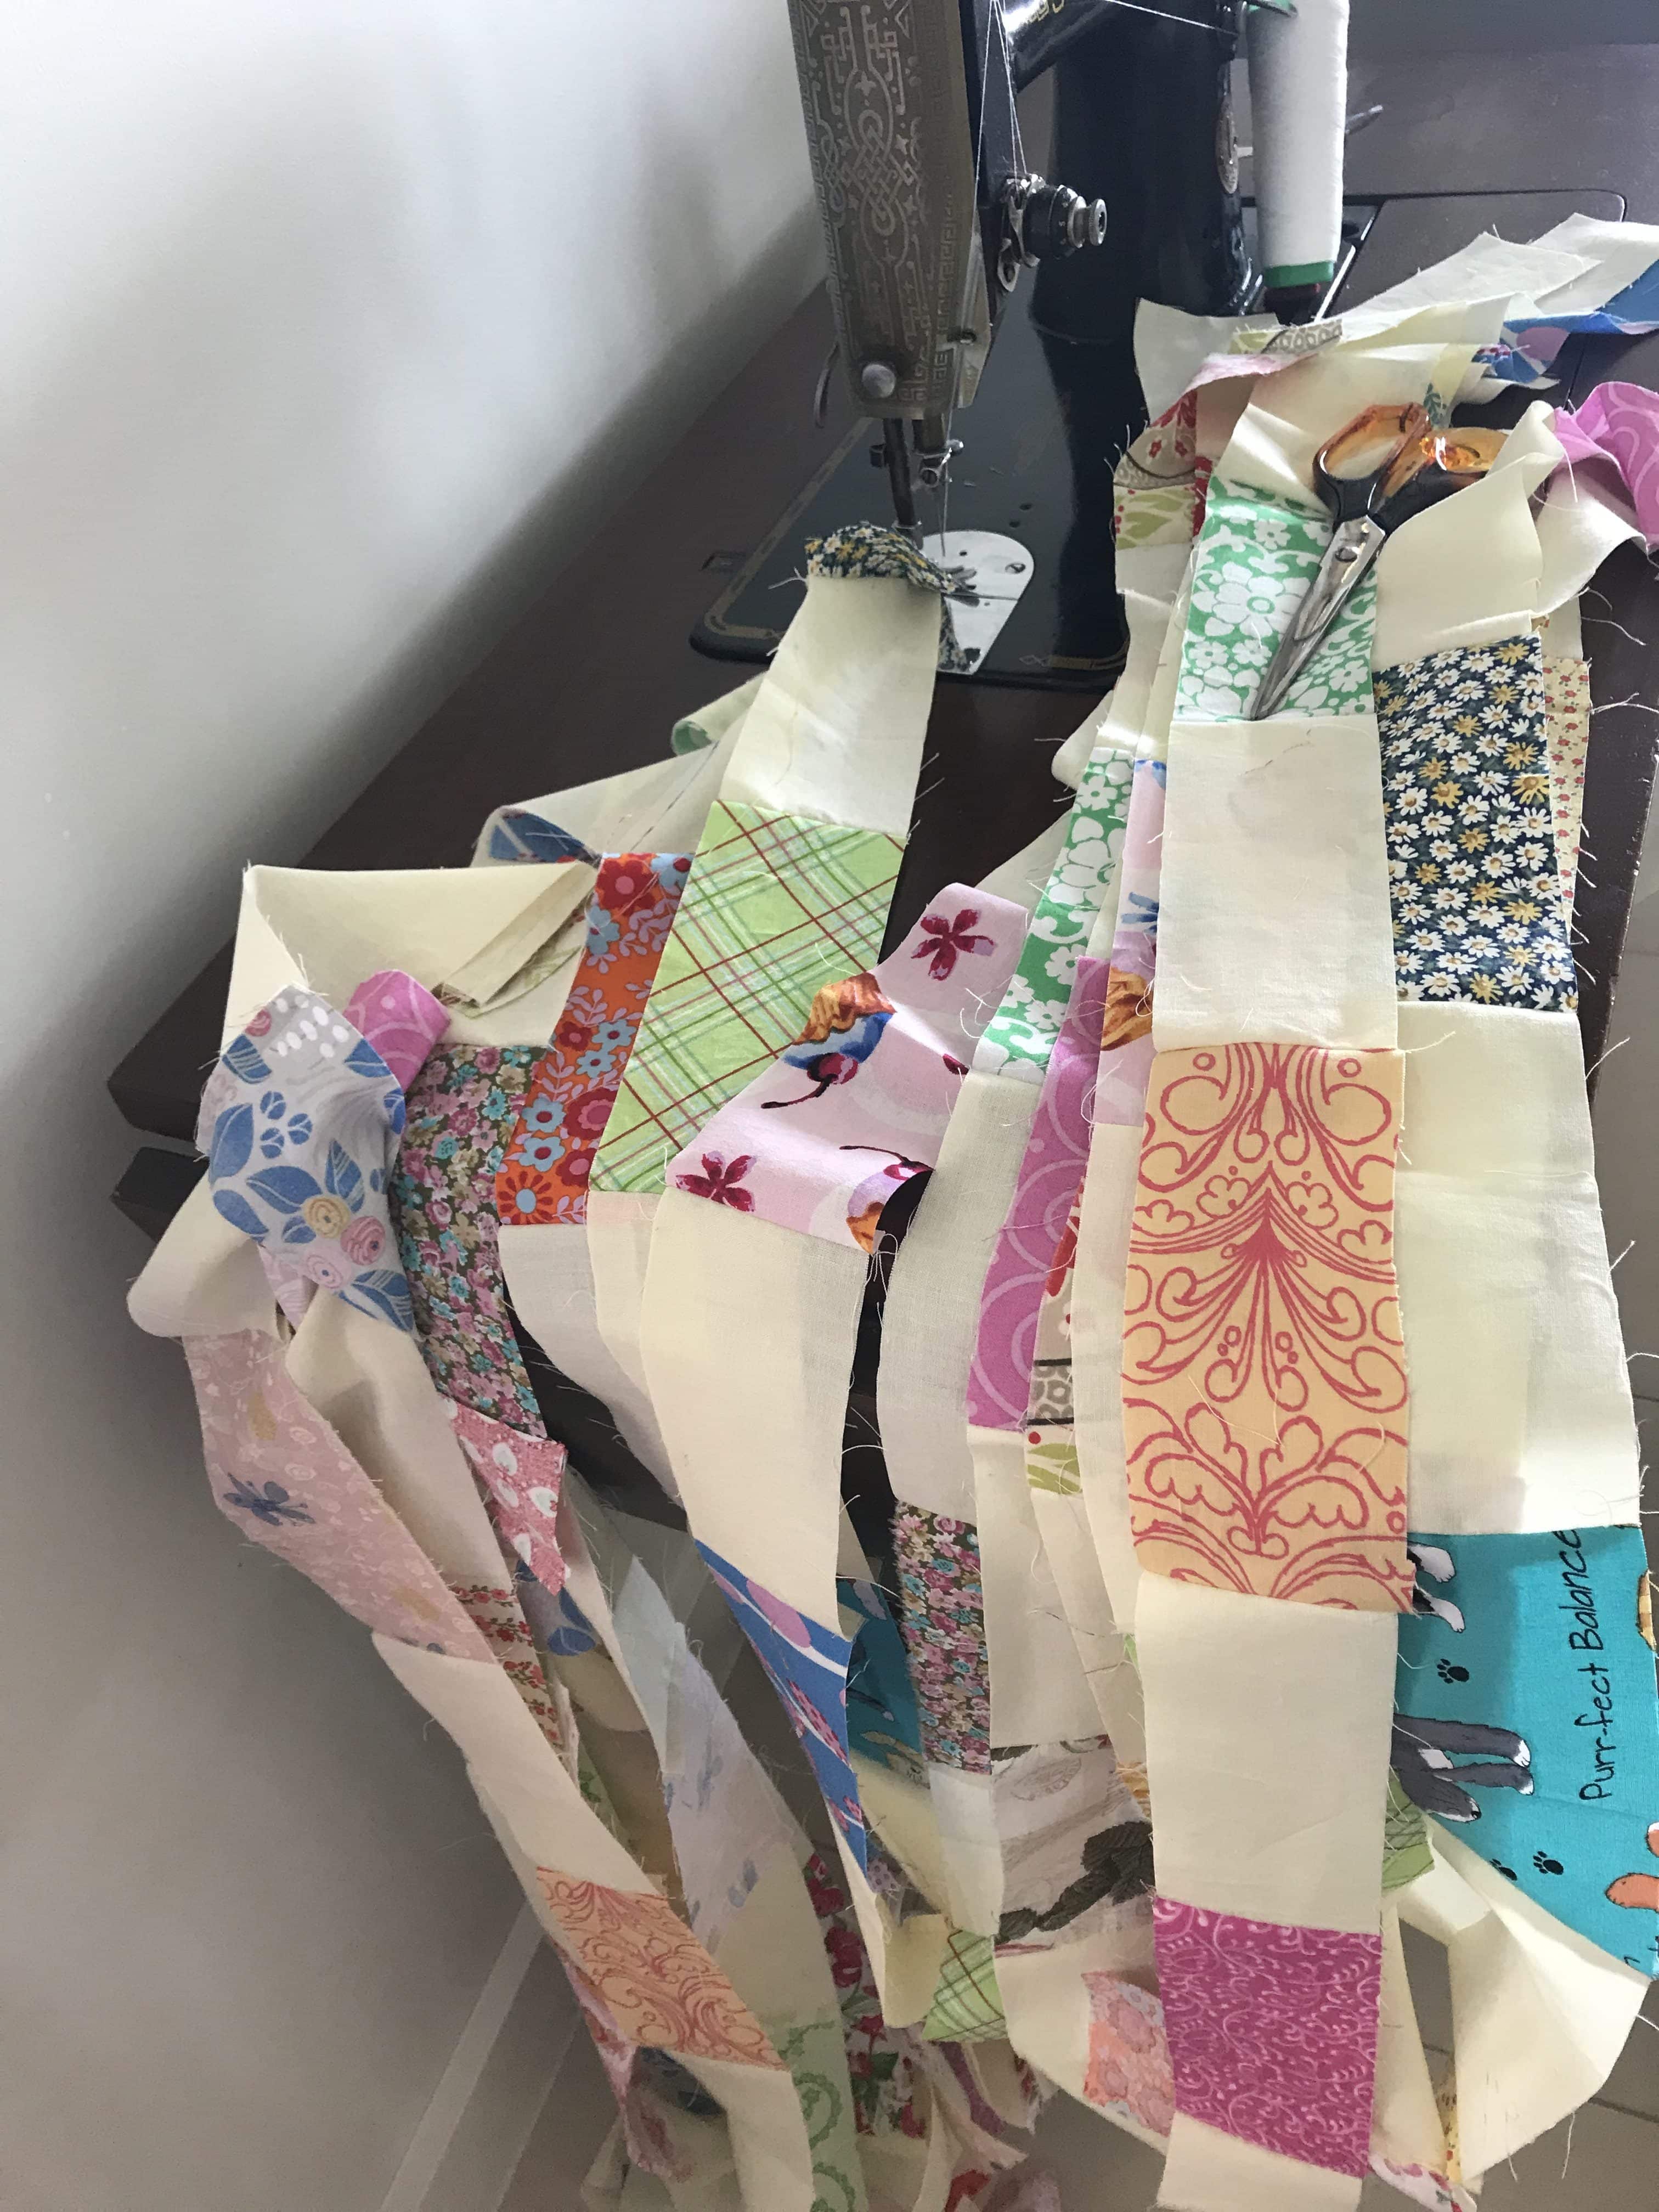
Repeat to make 20 strips altogether the in the same manner.

Lay out the pieces at 45 degrees offsetting each strip as shown above. Ensure no two same fabrics are together.
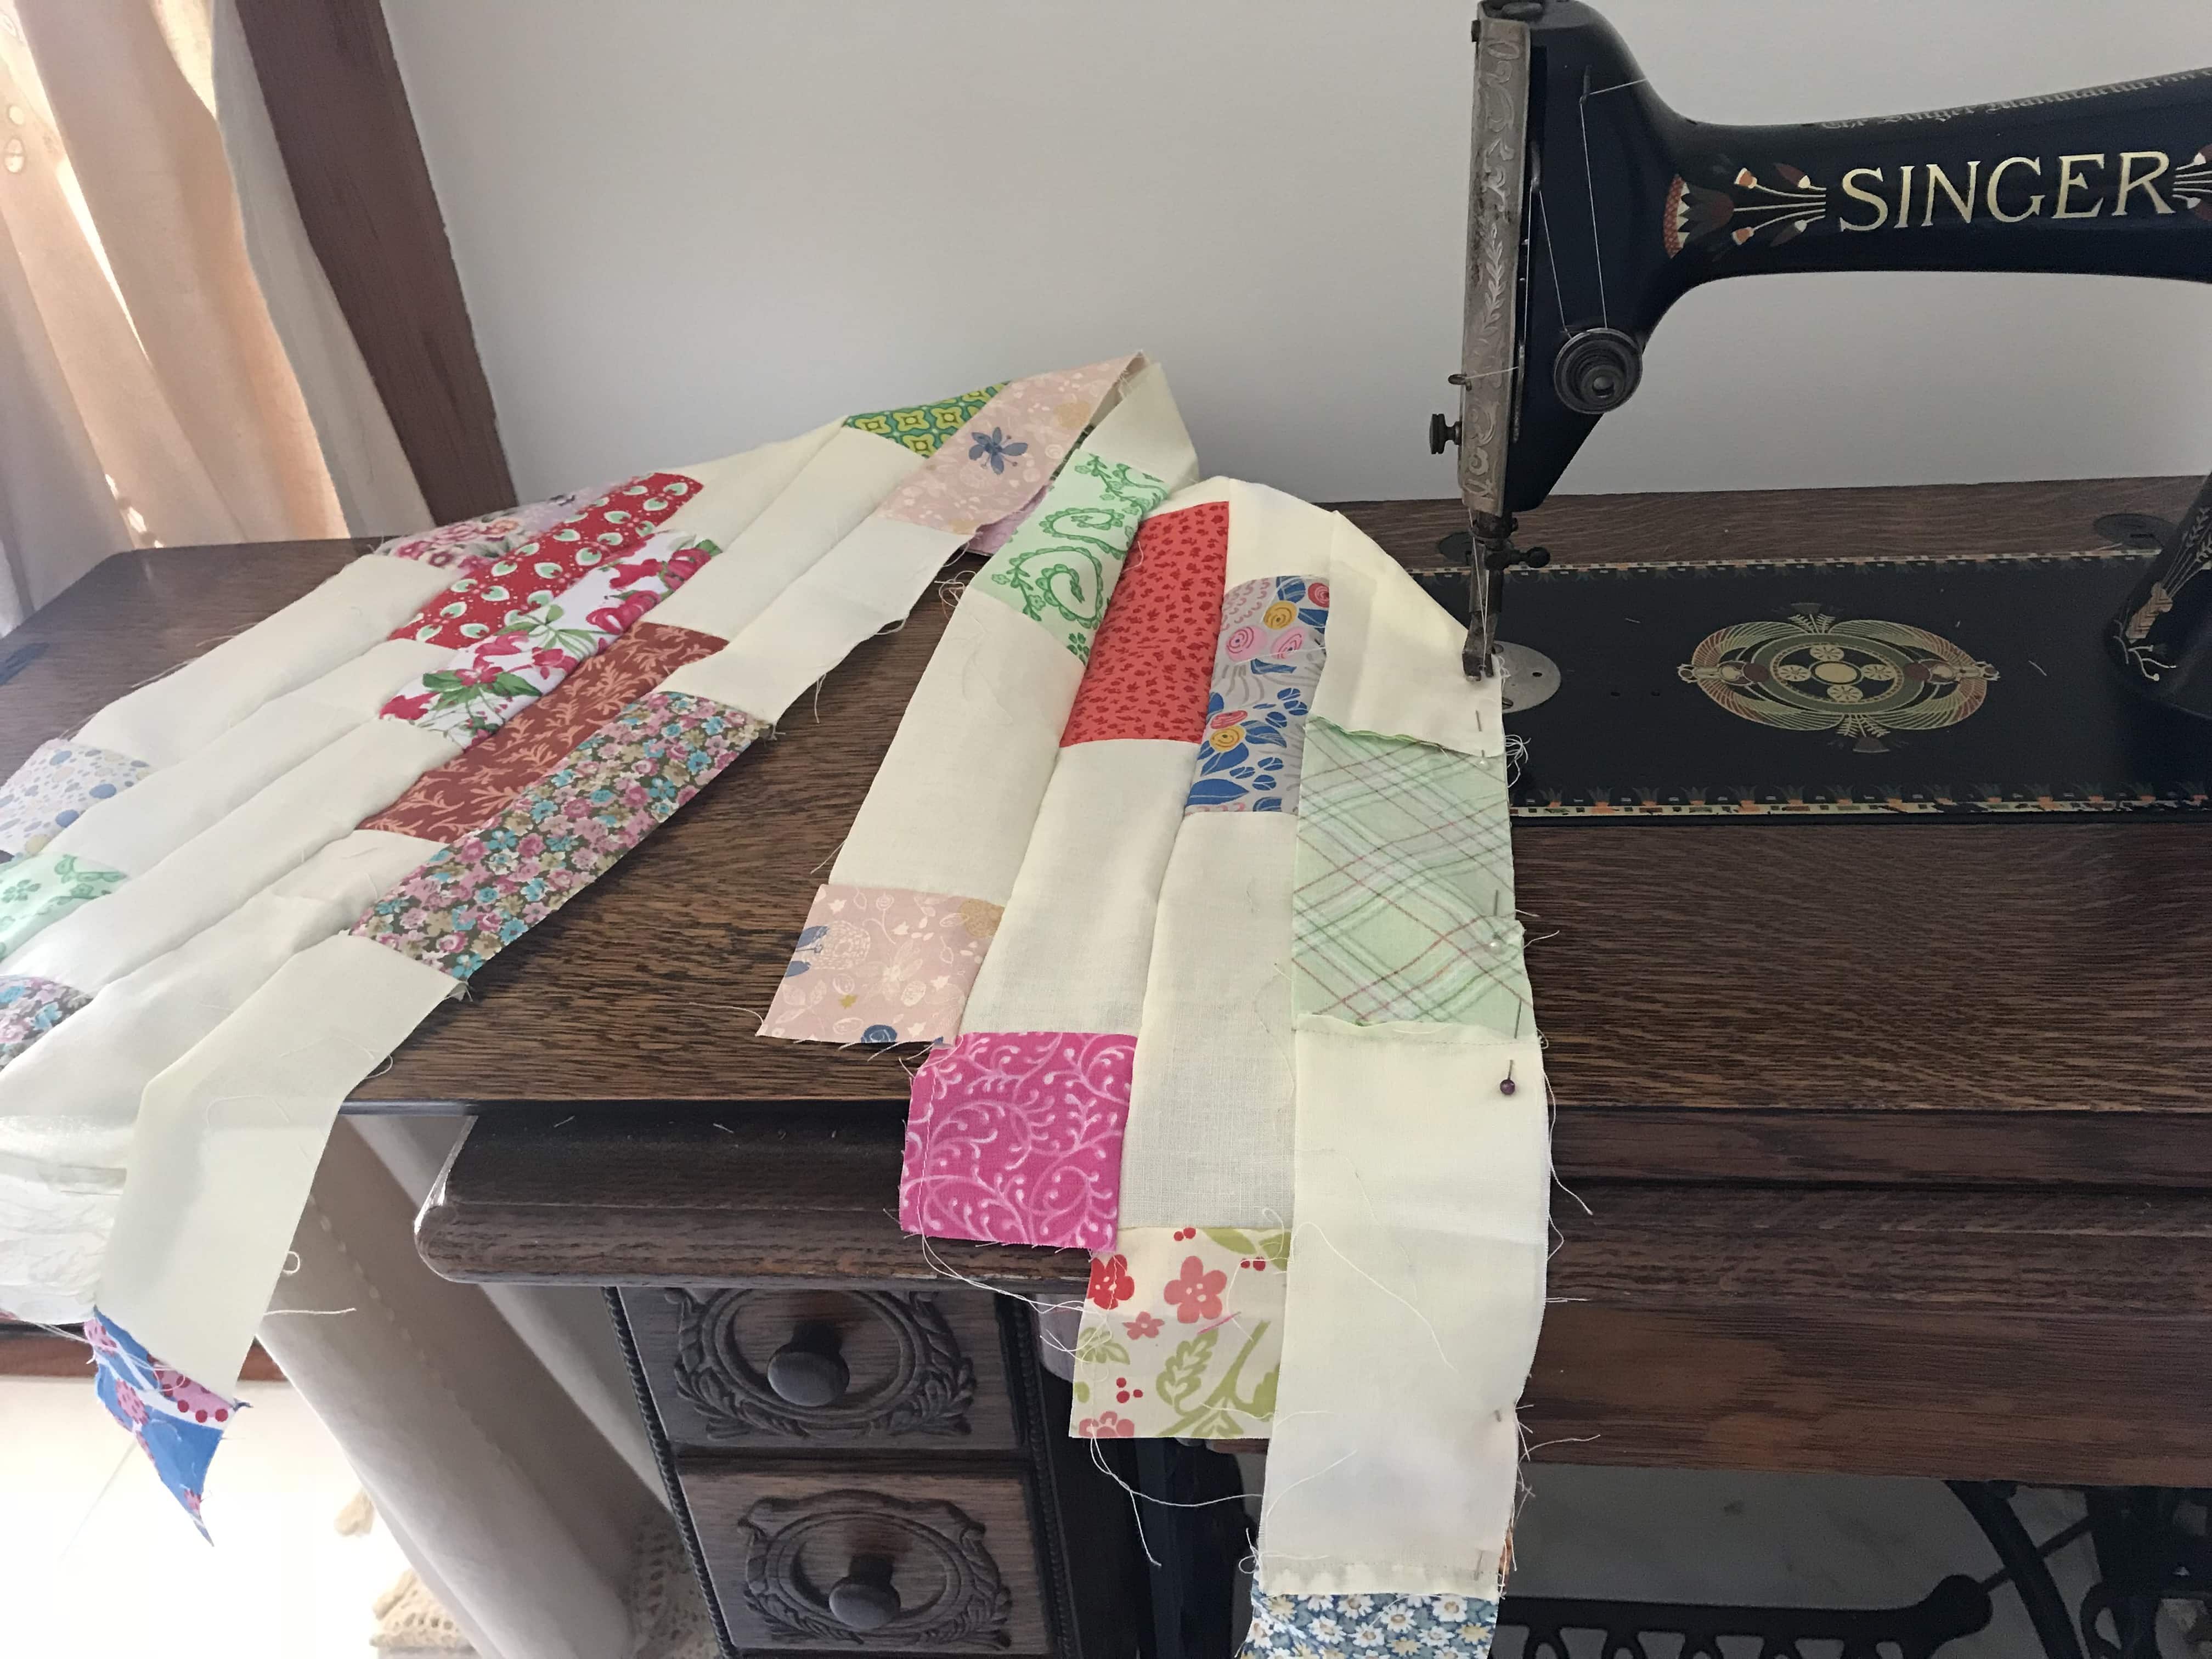
Sew the strips together in groups of four or five panels, offsetting each row by 2”. Alternate the direction of sewing for each row to prevent bowing of the quilt.
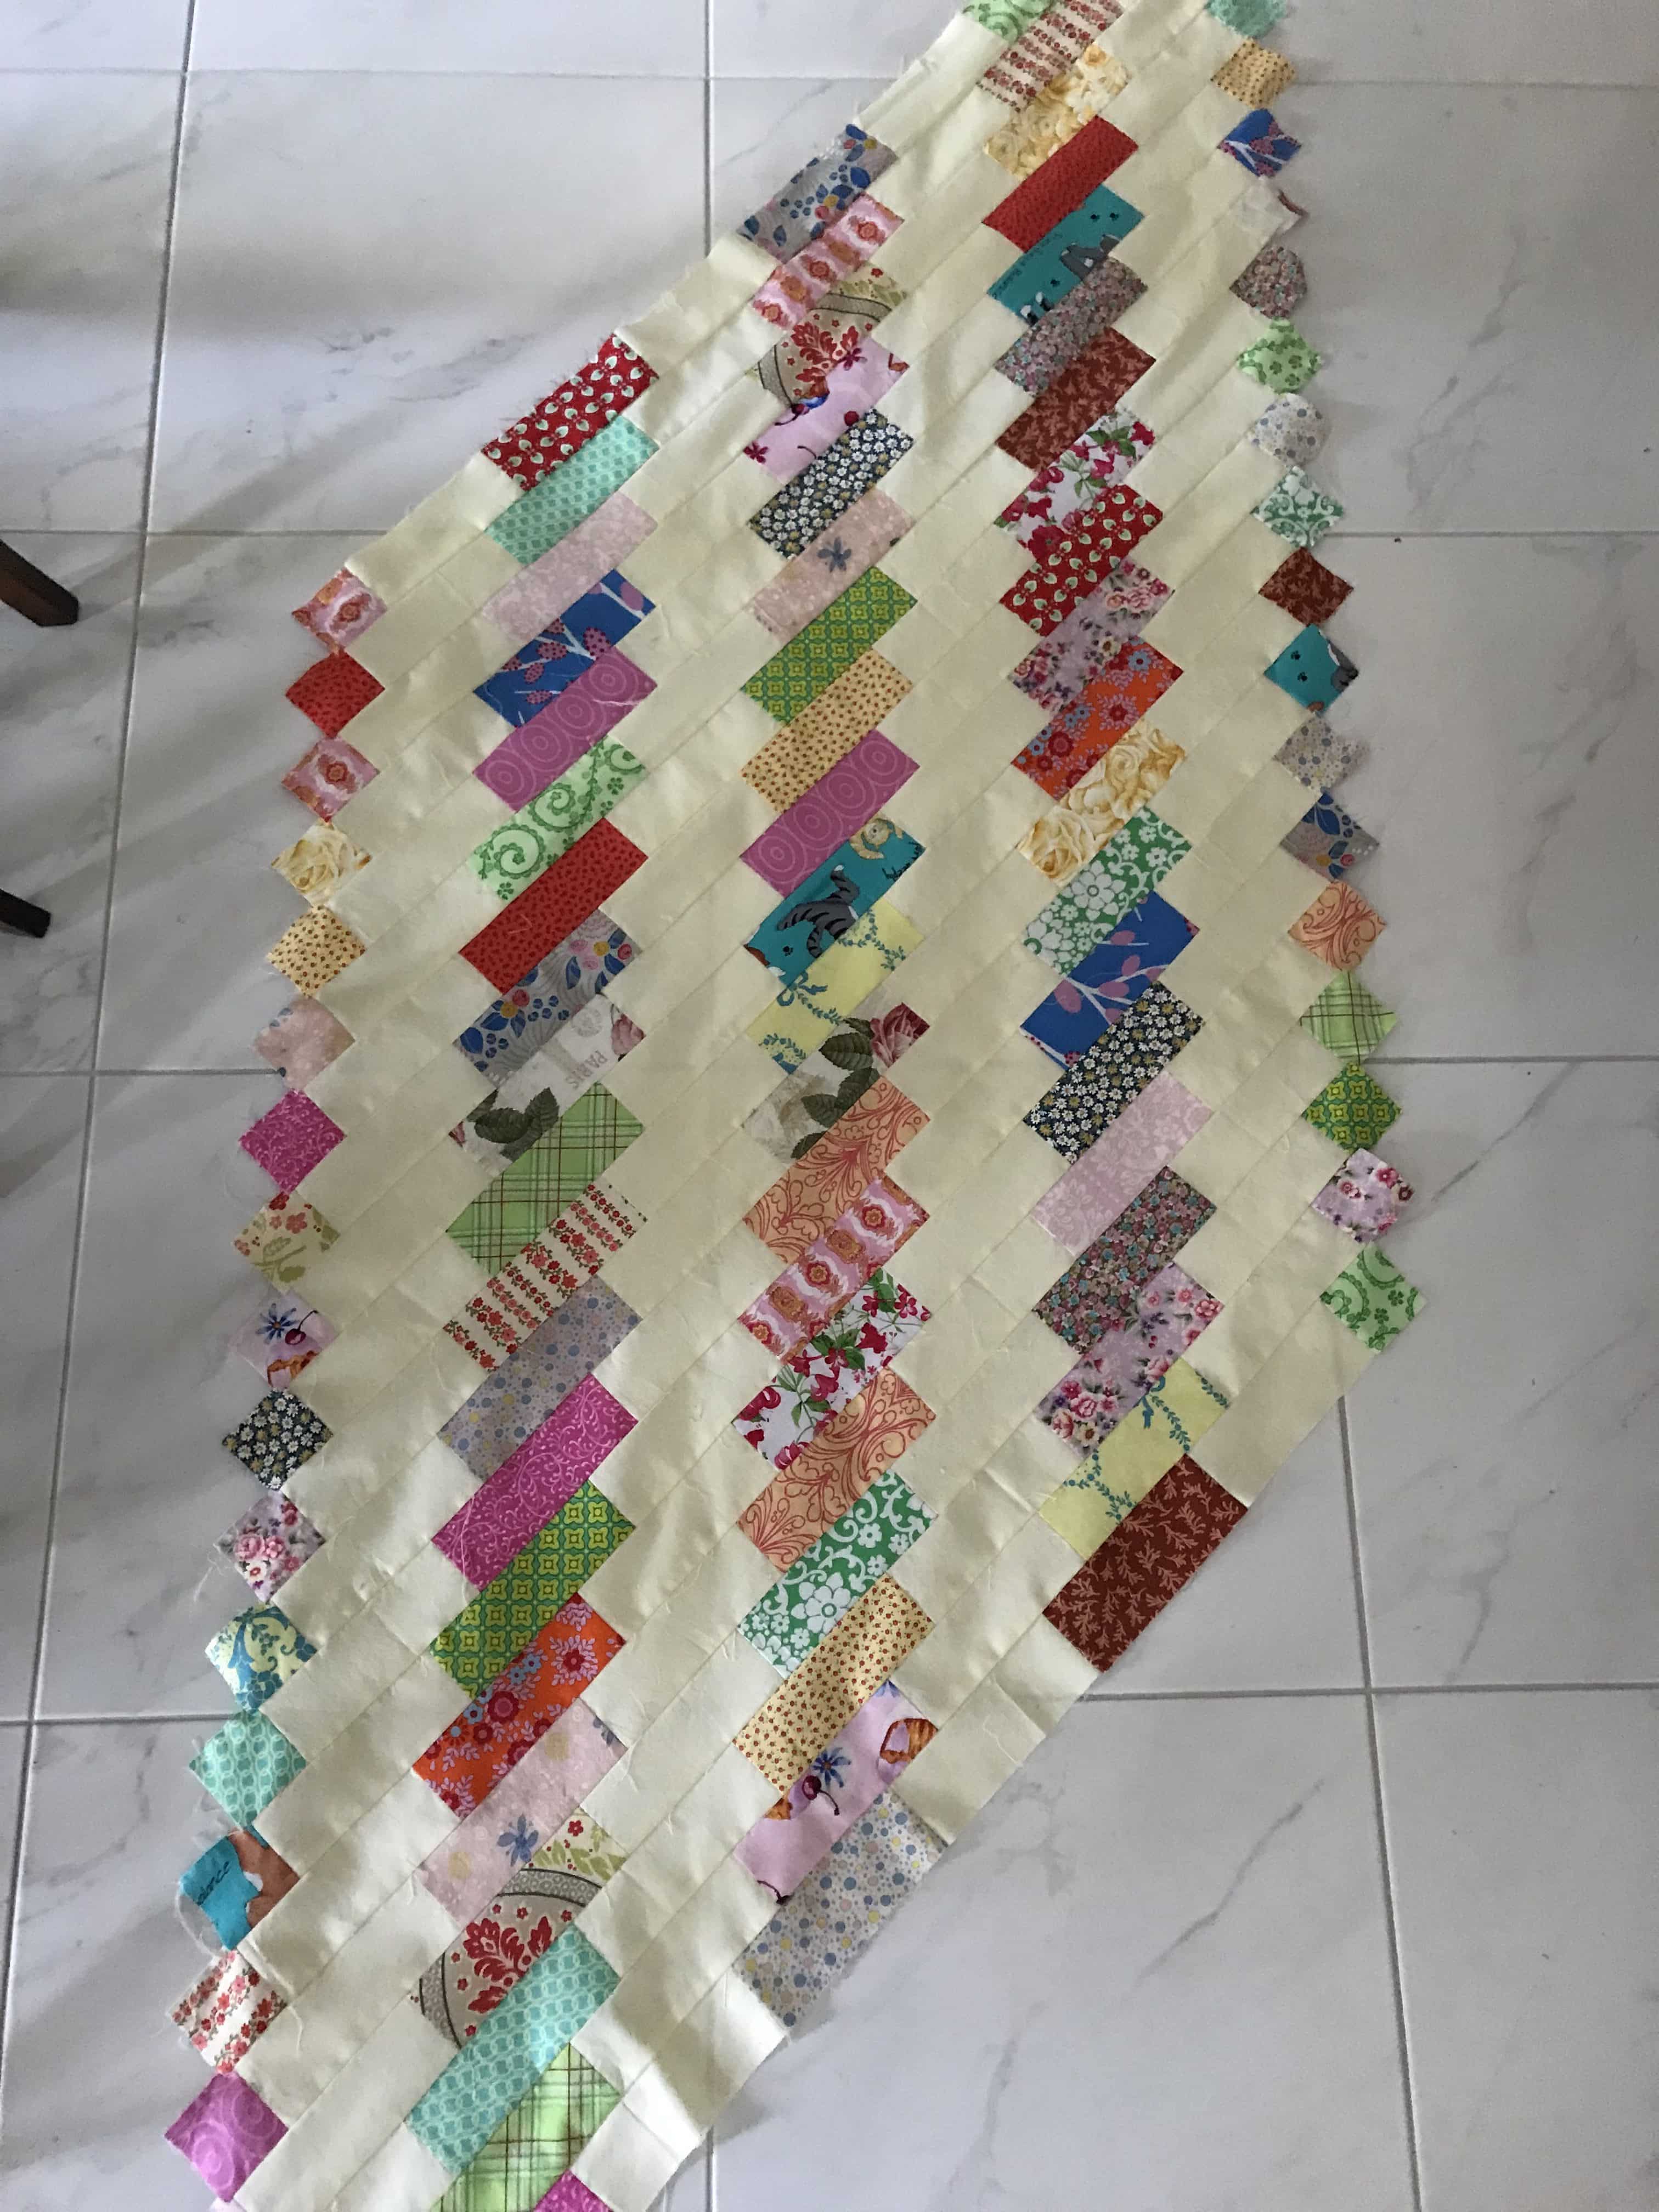
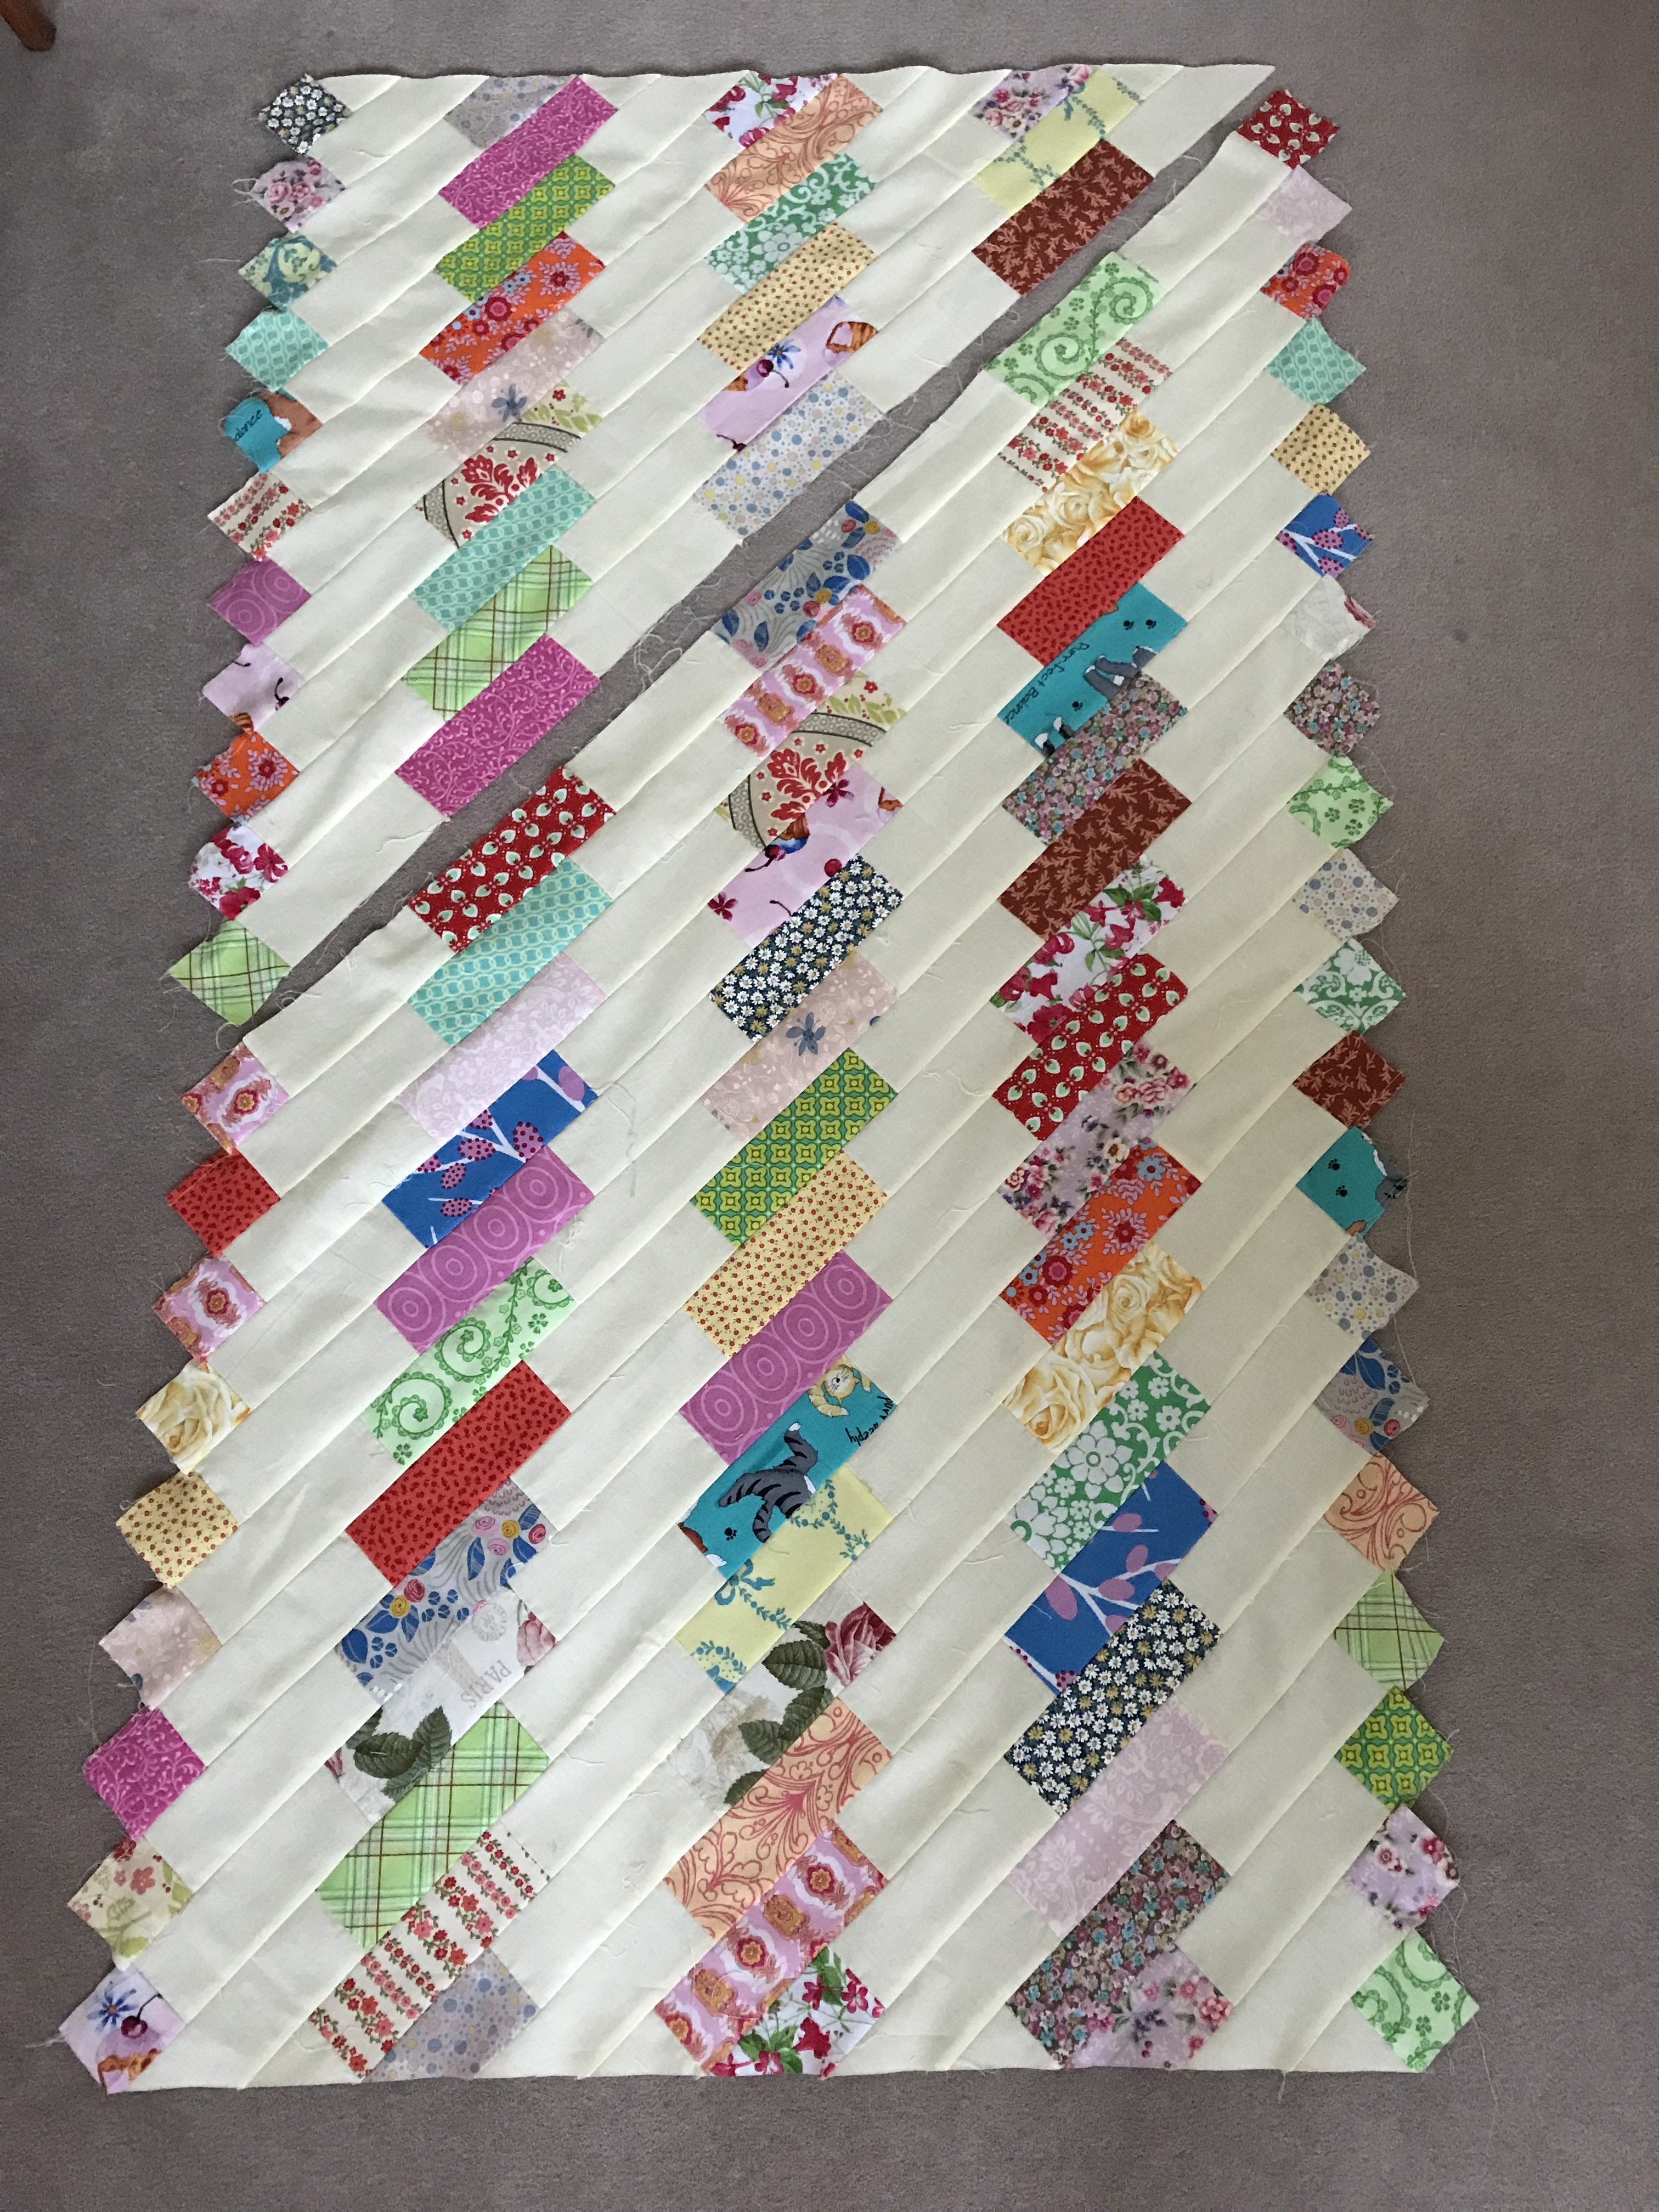
Now the quilt should look like this. It’s a parallelogram.
Now for the magic.
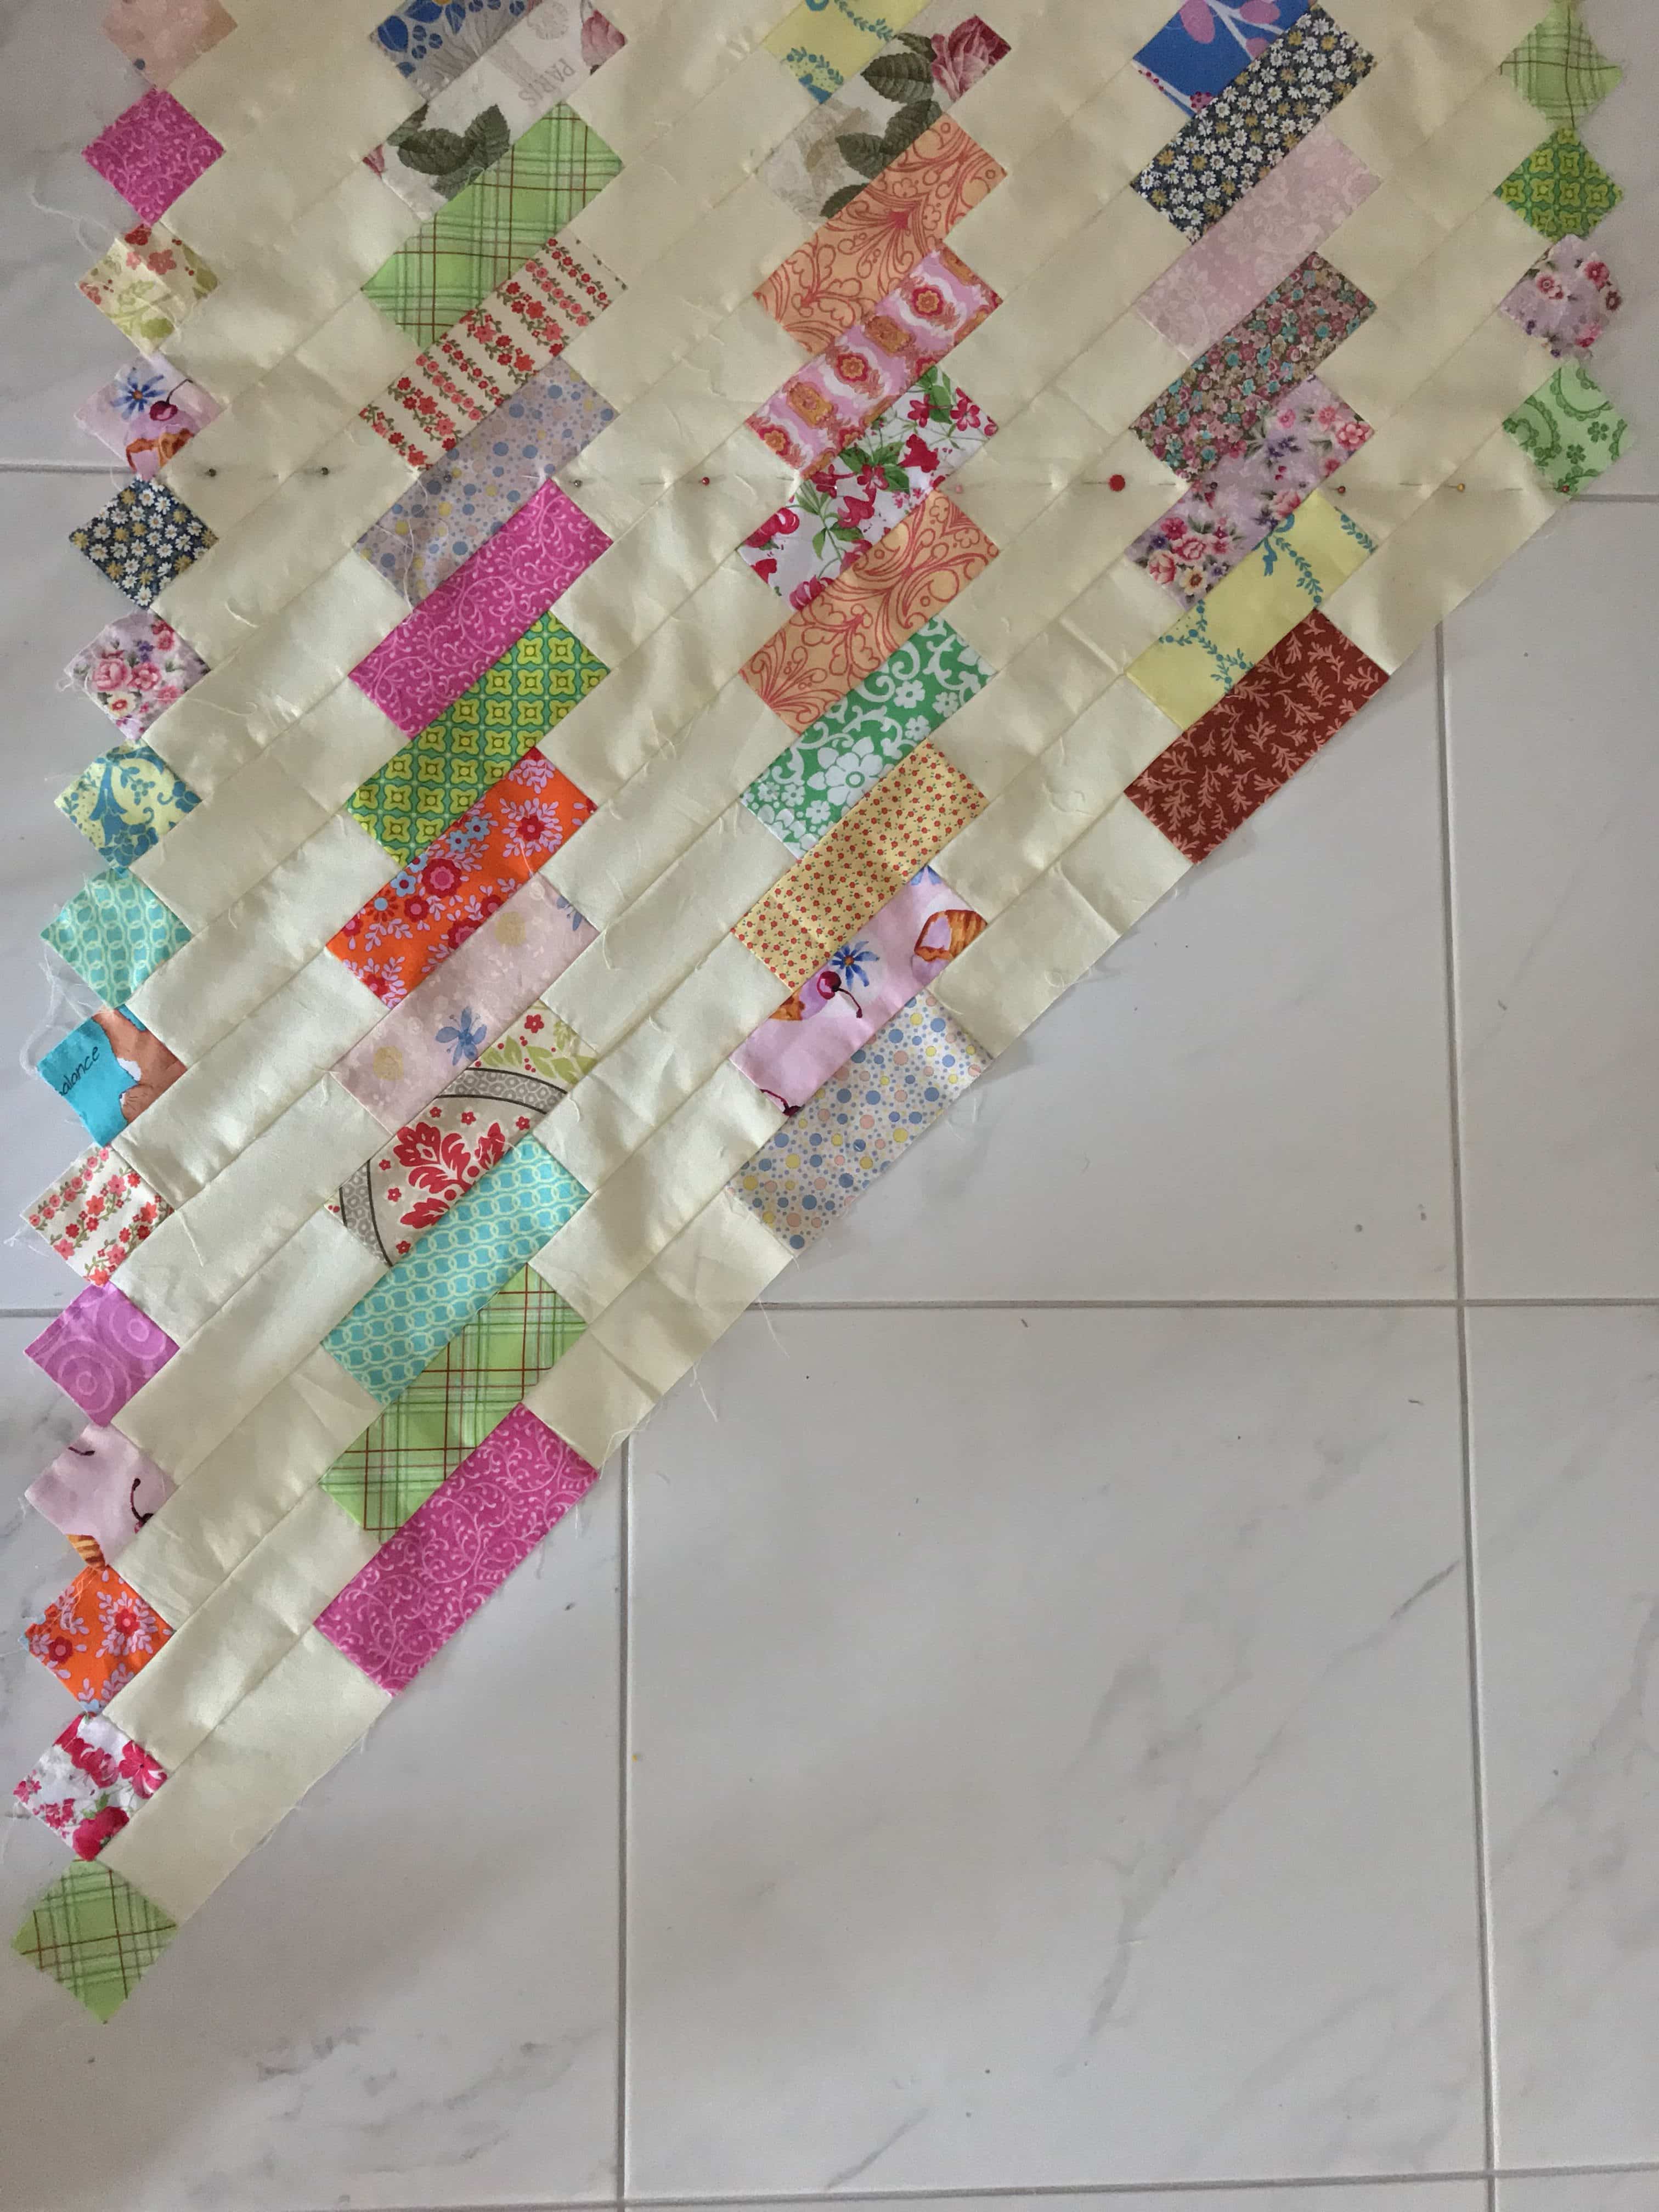
Count up 11 squares from the lower left hand side. Pin mark from the bottom right square across to the top of the 11th square on the left hand side. I hope you can see the pin line in the above photo.
Take the whole piece to the cutting mat. Very carefully cut along that pin marked line.
Now move the piece that has just been cut off, to the top of the quilt as pictured above. Sew it together in the same manner as the previous panel pieces.
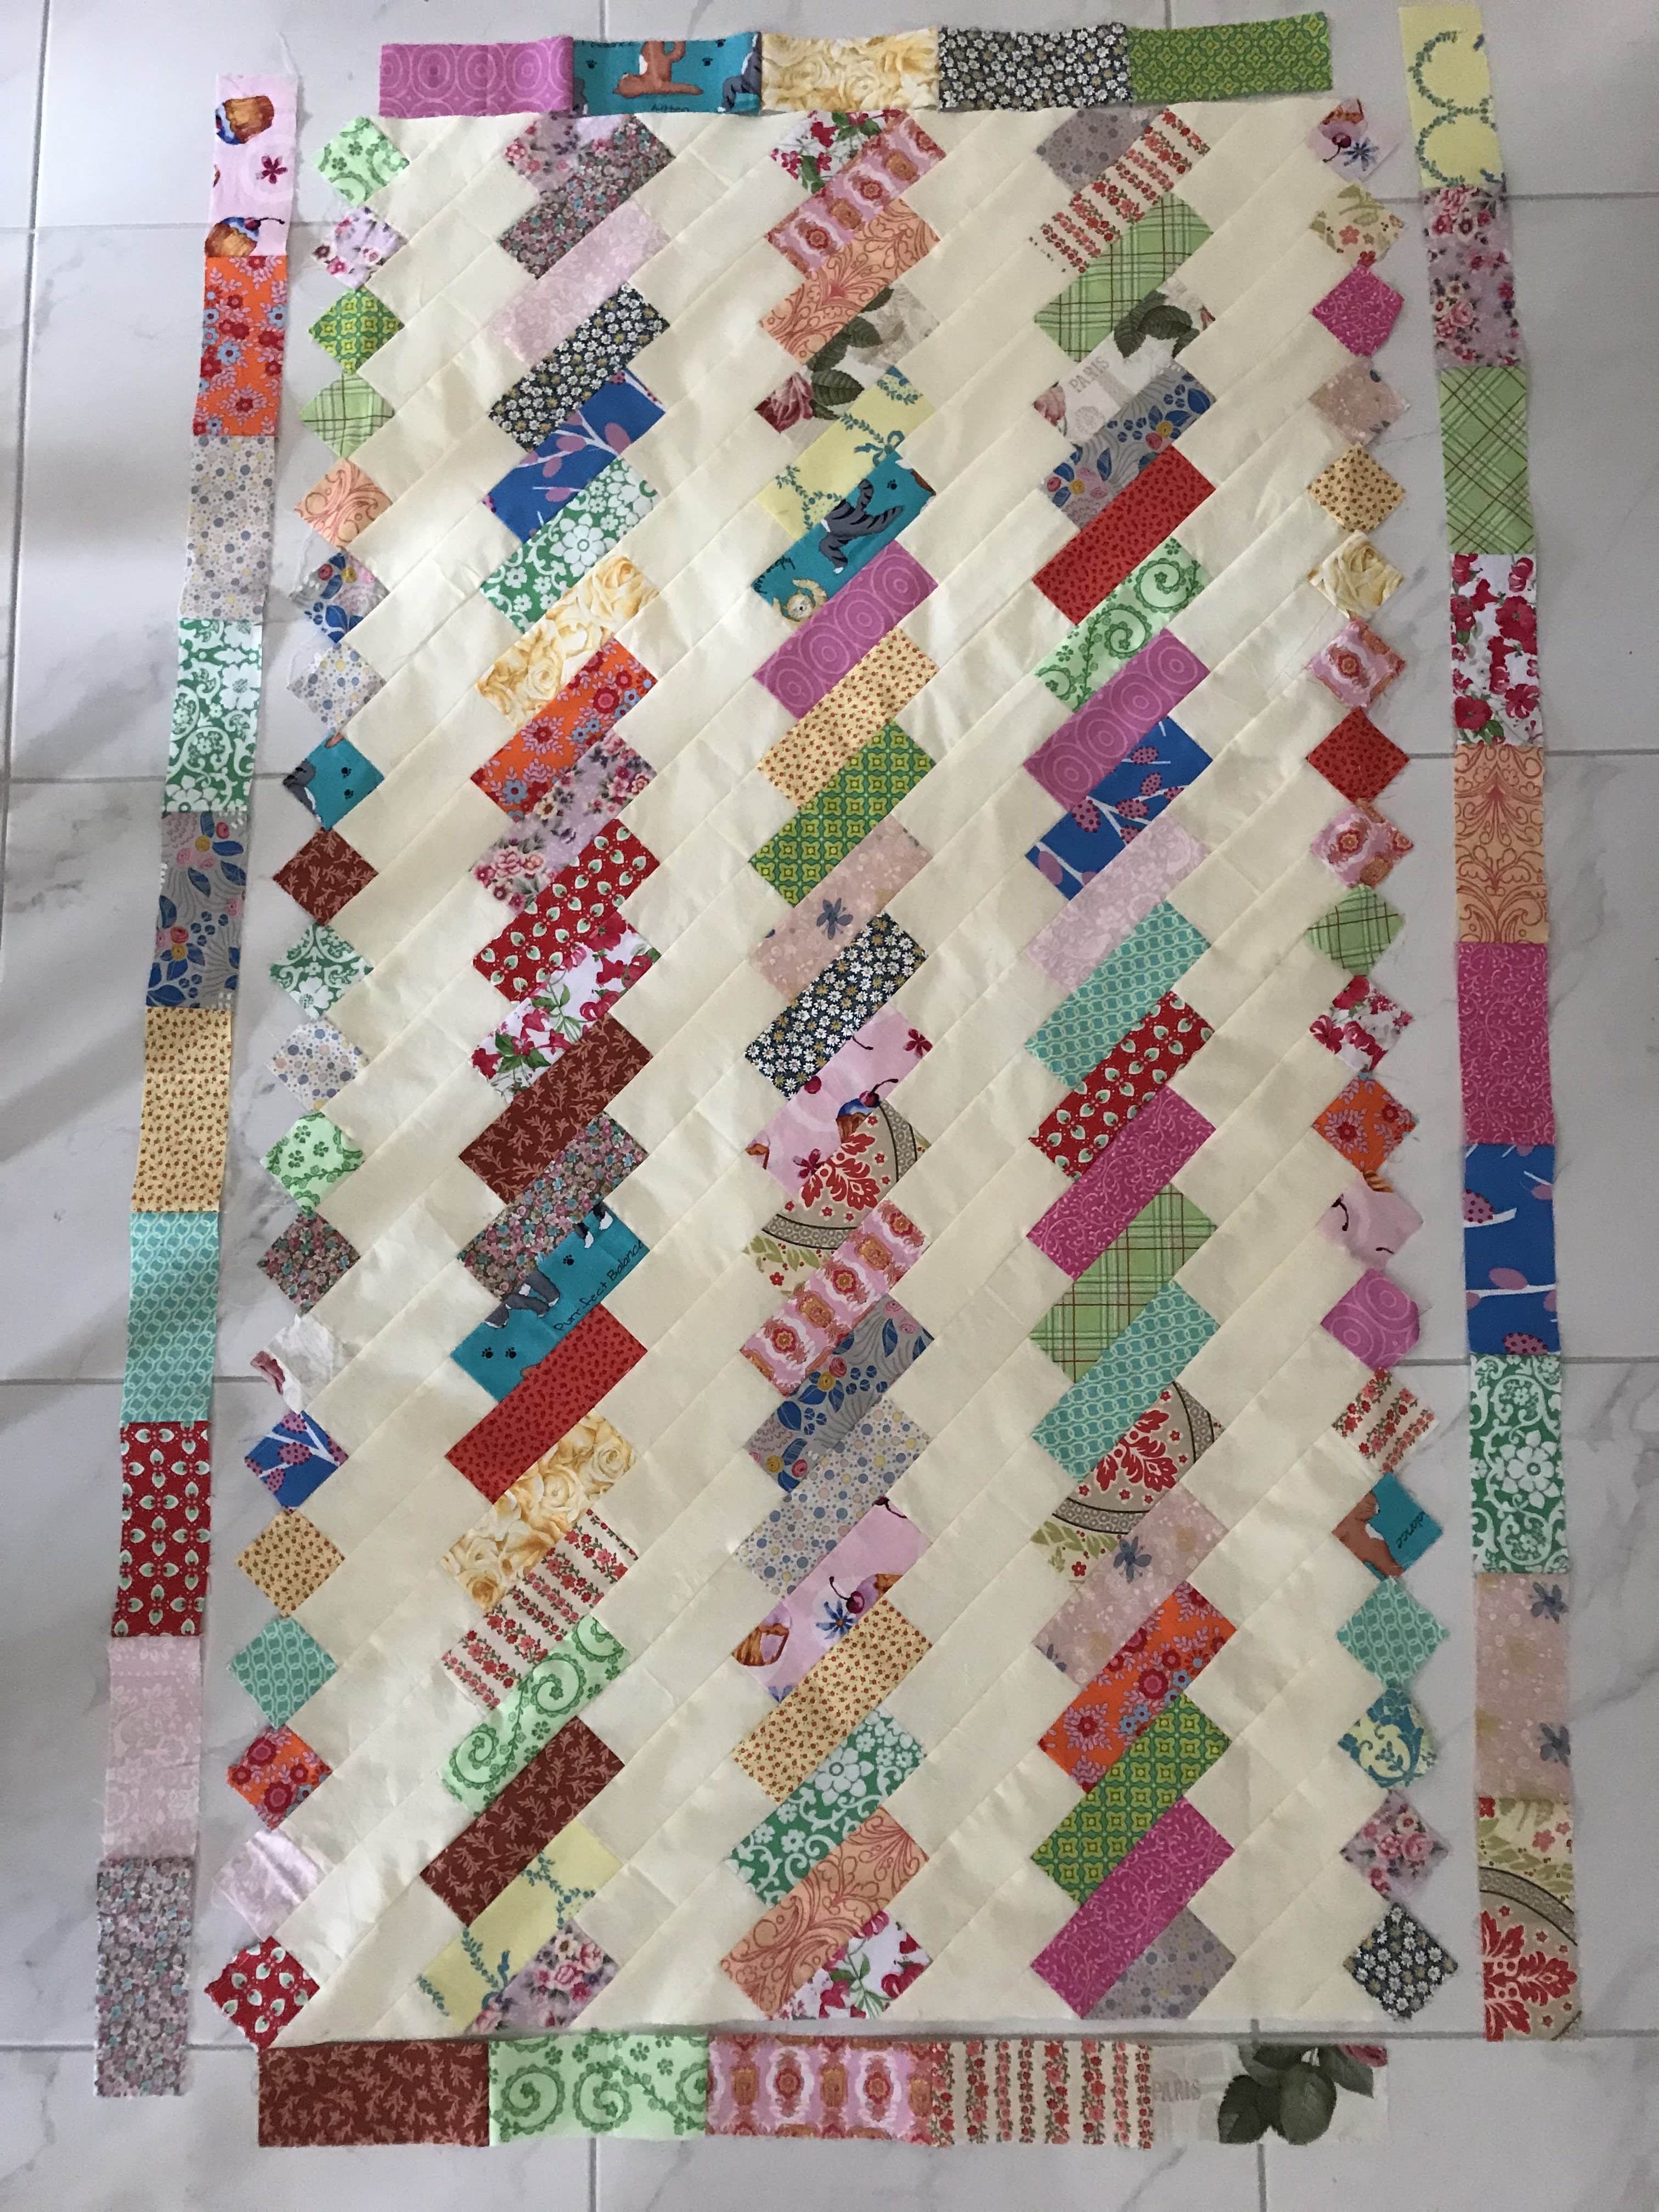
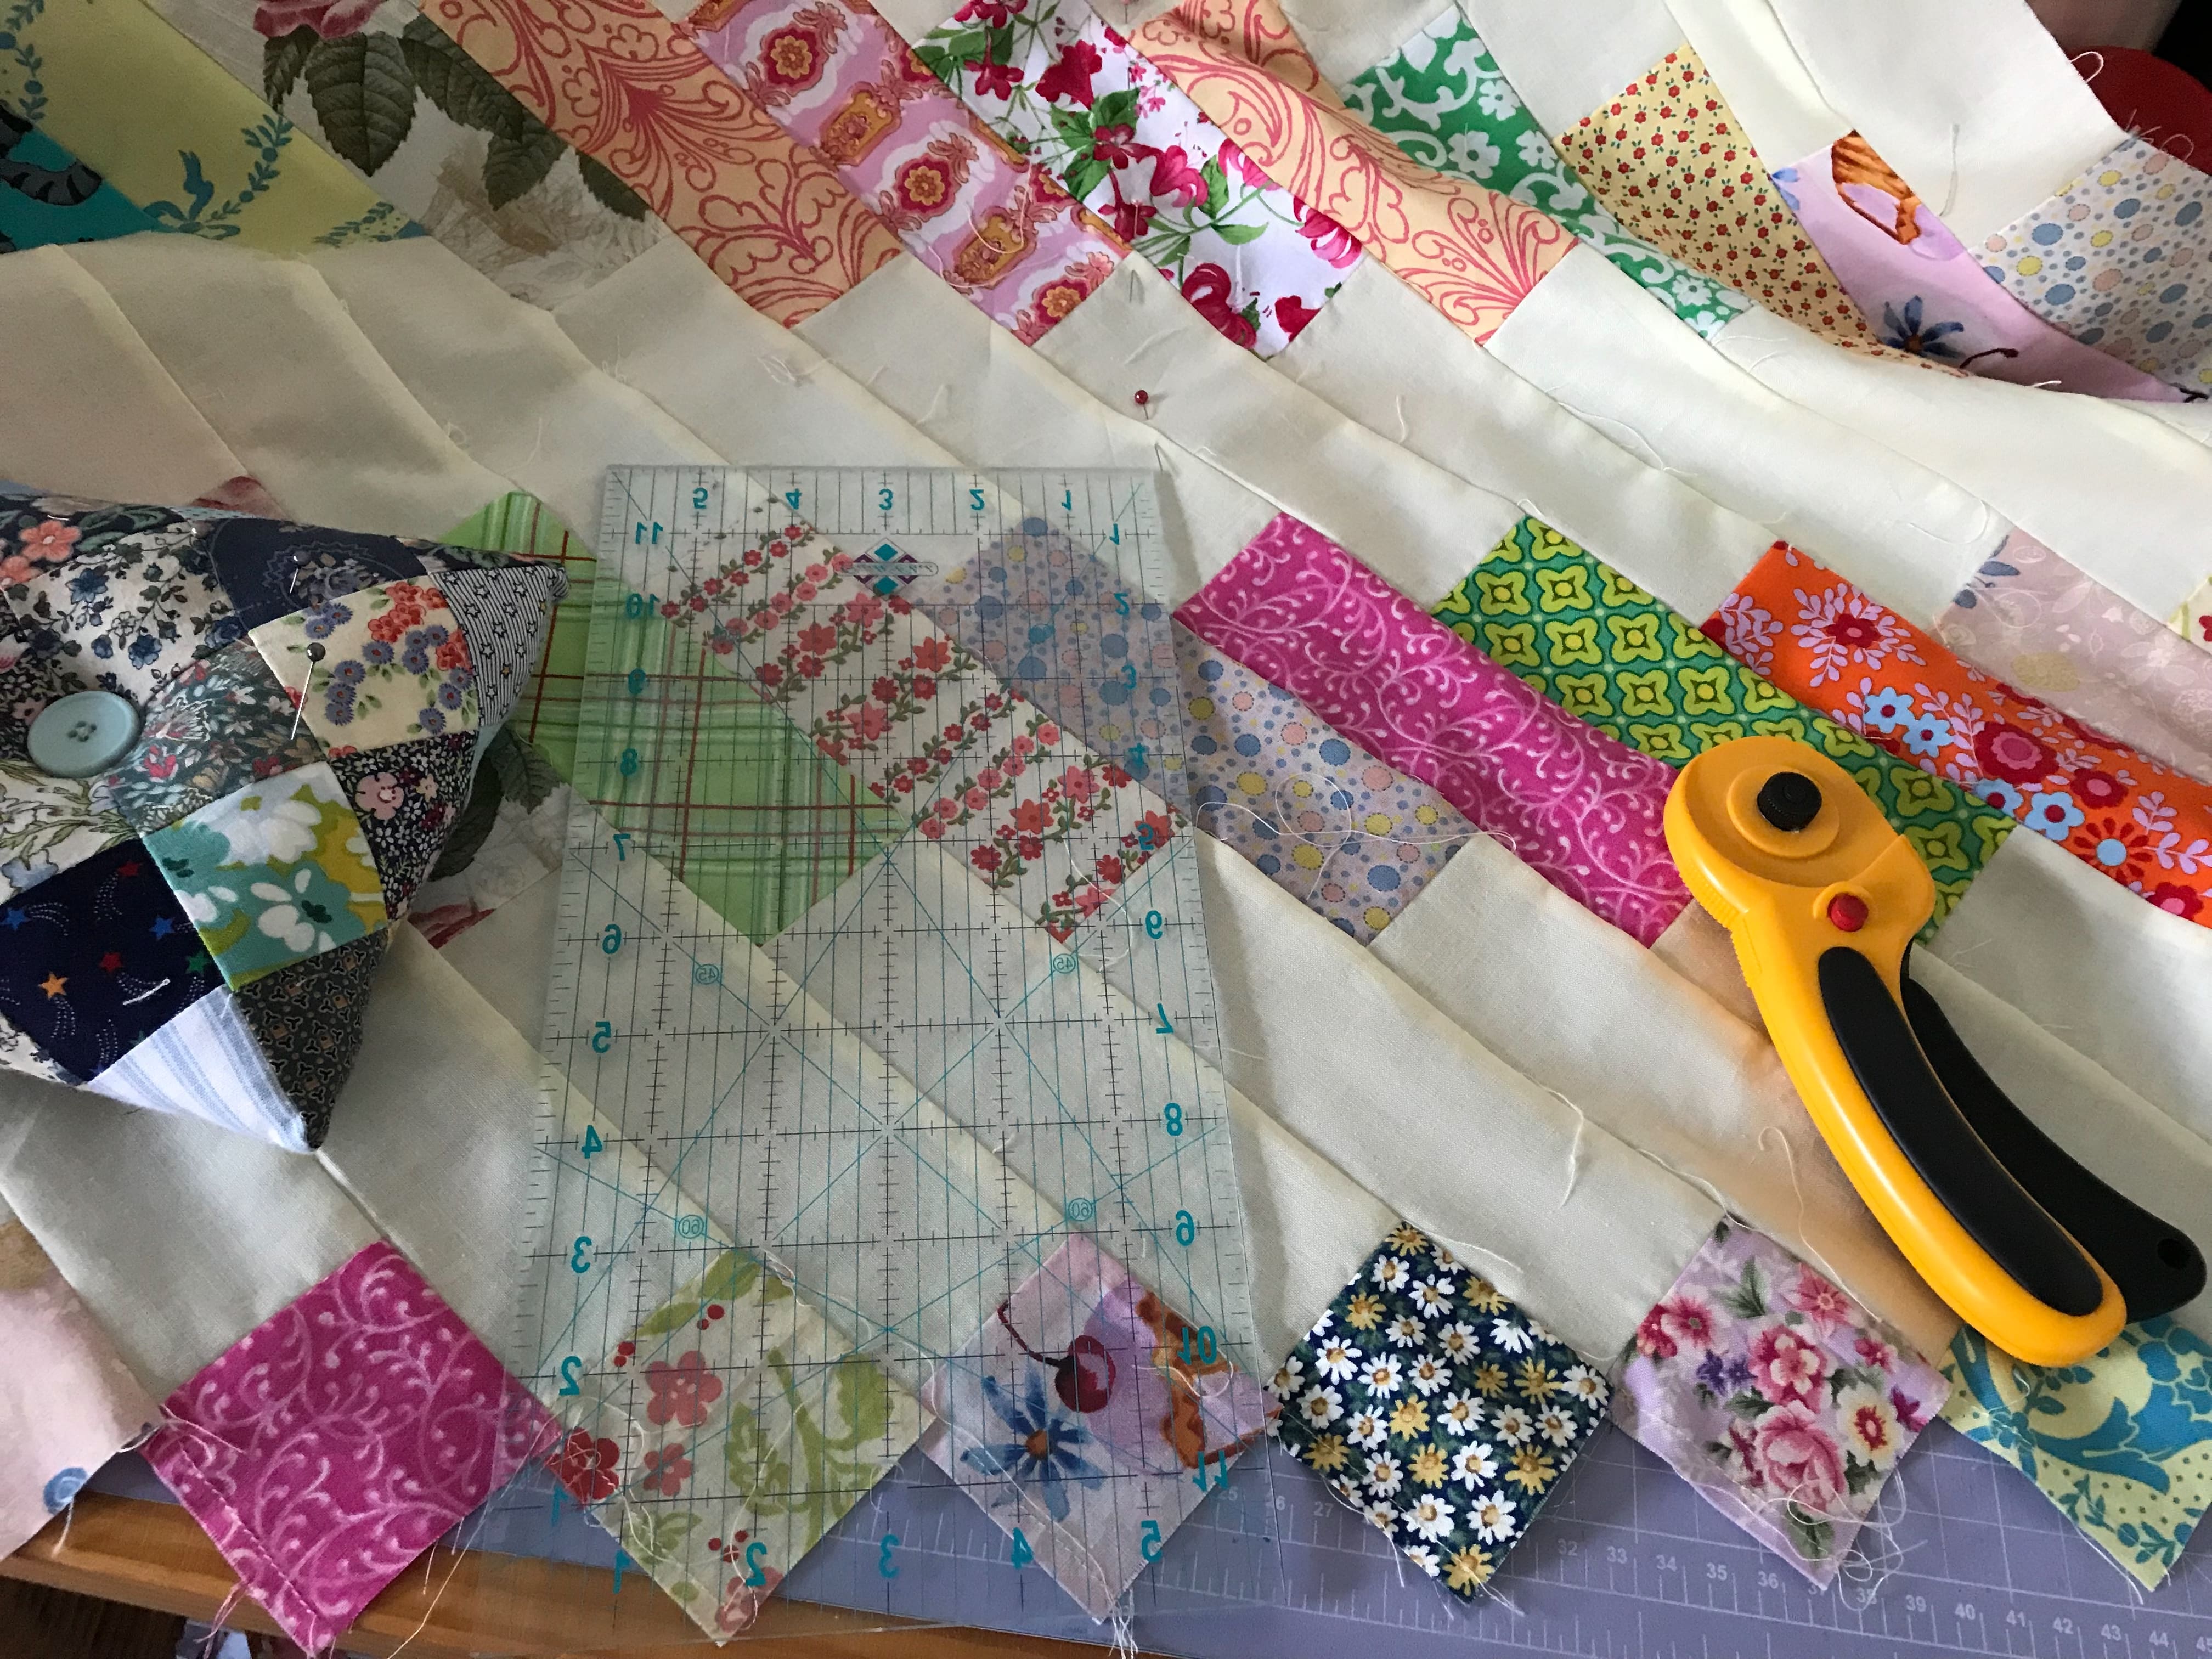
Now construct the borders using the remaining 30 of 6 1/2” x 2 1/2” oblong prints. Sew 5 pieces end to end and make a strip. Repeat to make a second strip. Sew 10 pieces end to end. Repeat to make a second strip.
Carefully pin the two strips of 5 evenly to each of the short ends of the quilt top. Please bear in mind that at this point we are dealing with bias edges so be careful not to stretch them. Sew on. Now carefully add the two long strips of 10 to each long side of the quilt. Check as you pin that the points will be nice after the border is sewn on. Sew carefully. Trim the excess scrap triangles after the border is sewn on. Press.

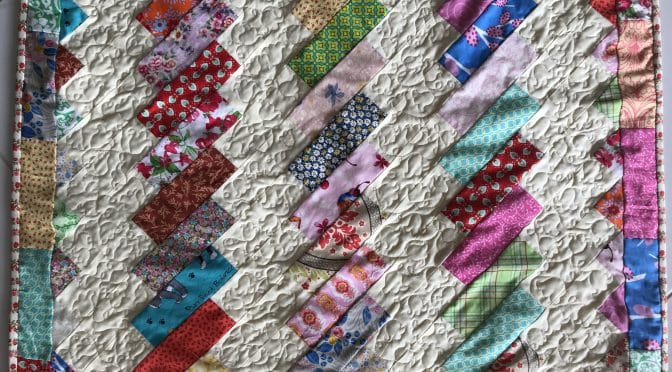
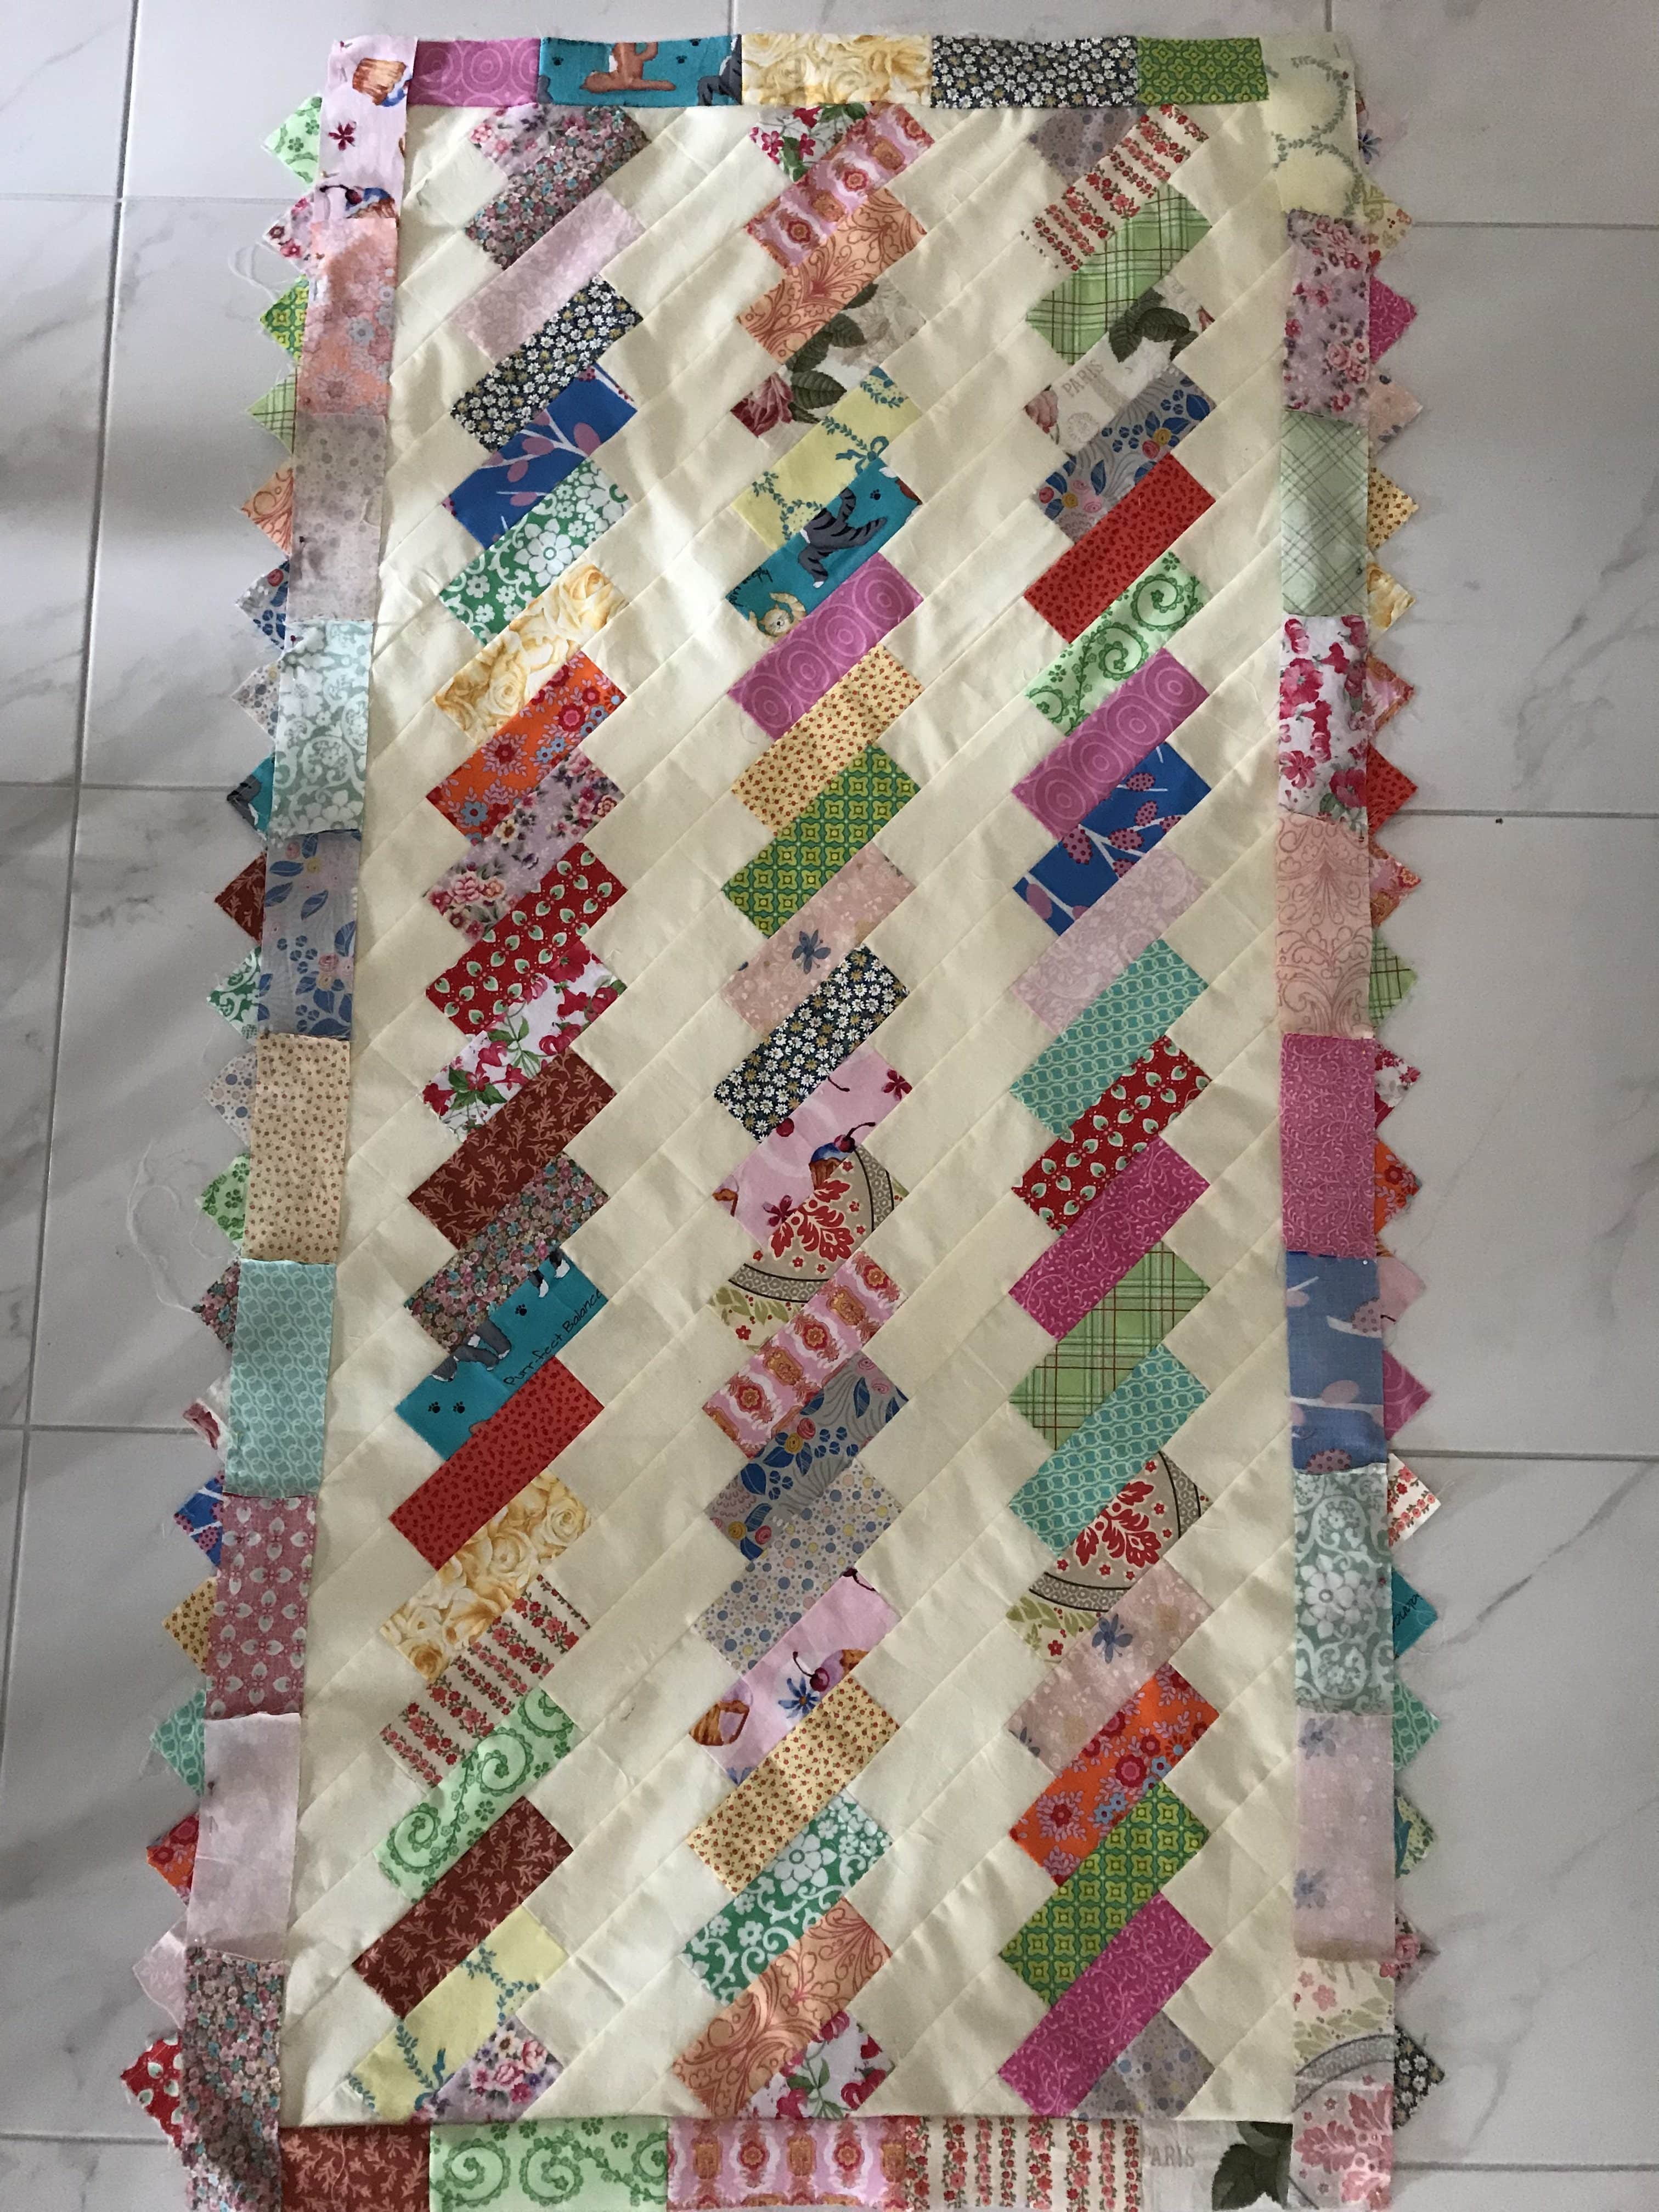
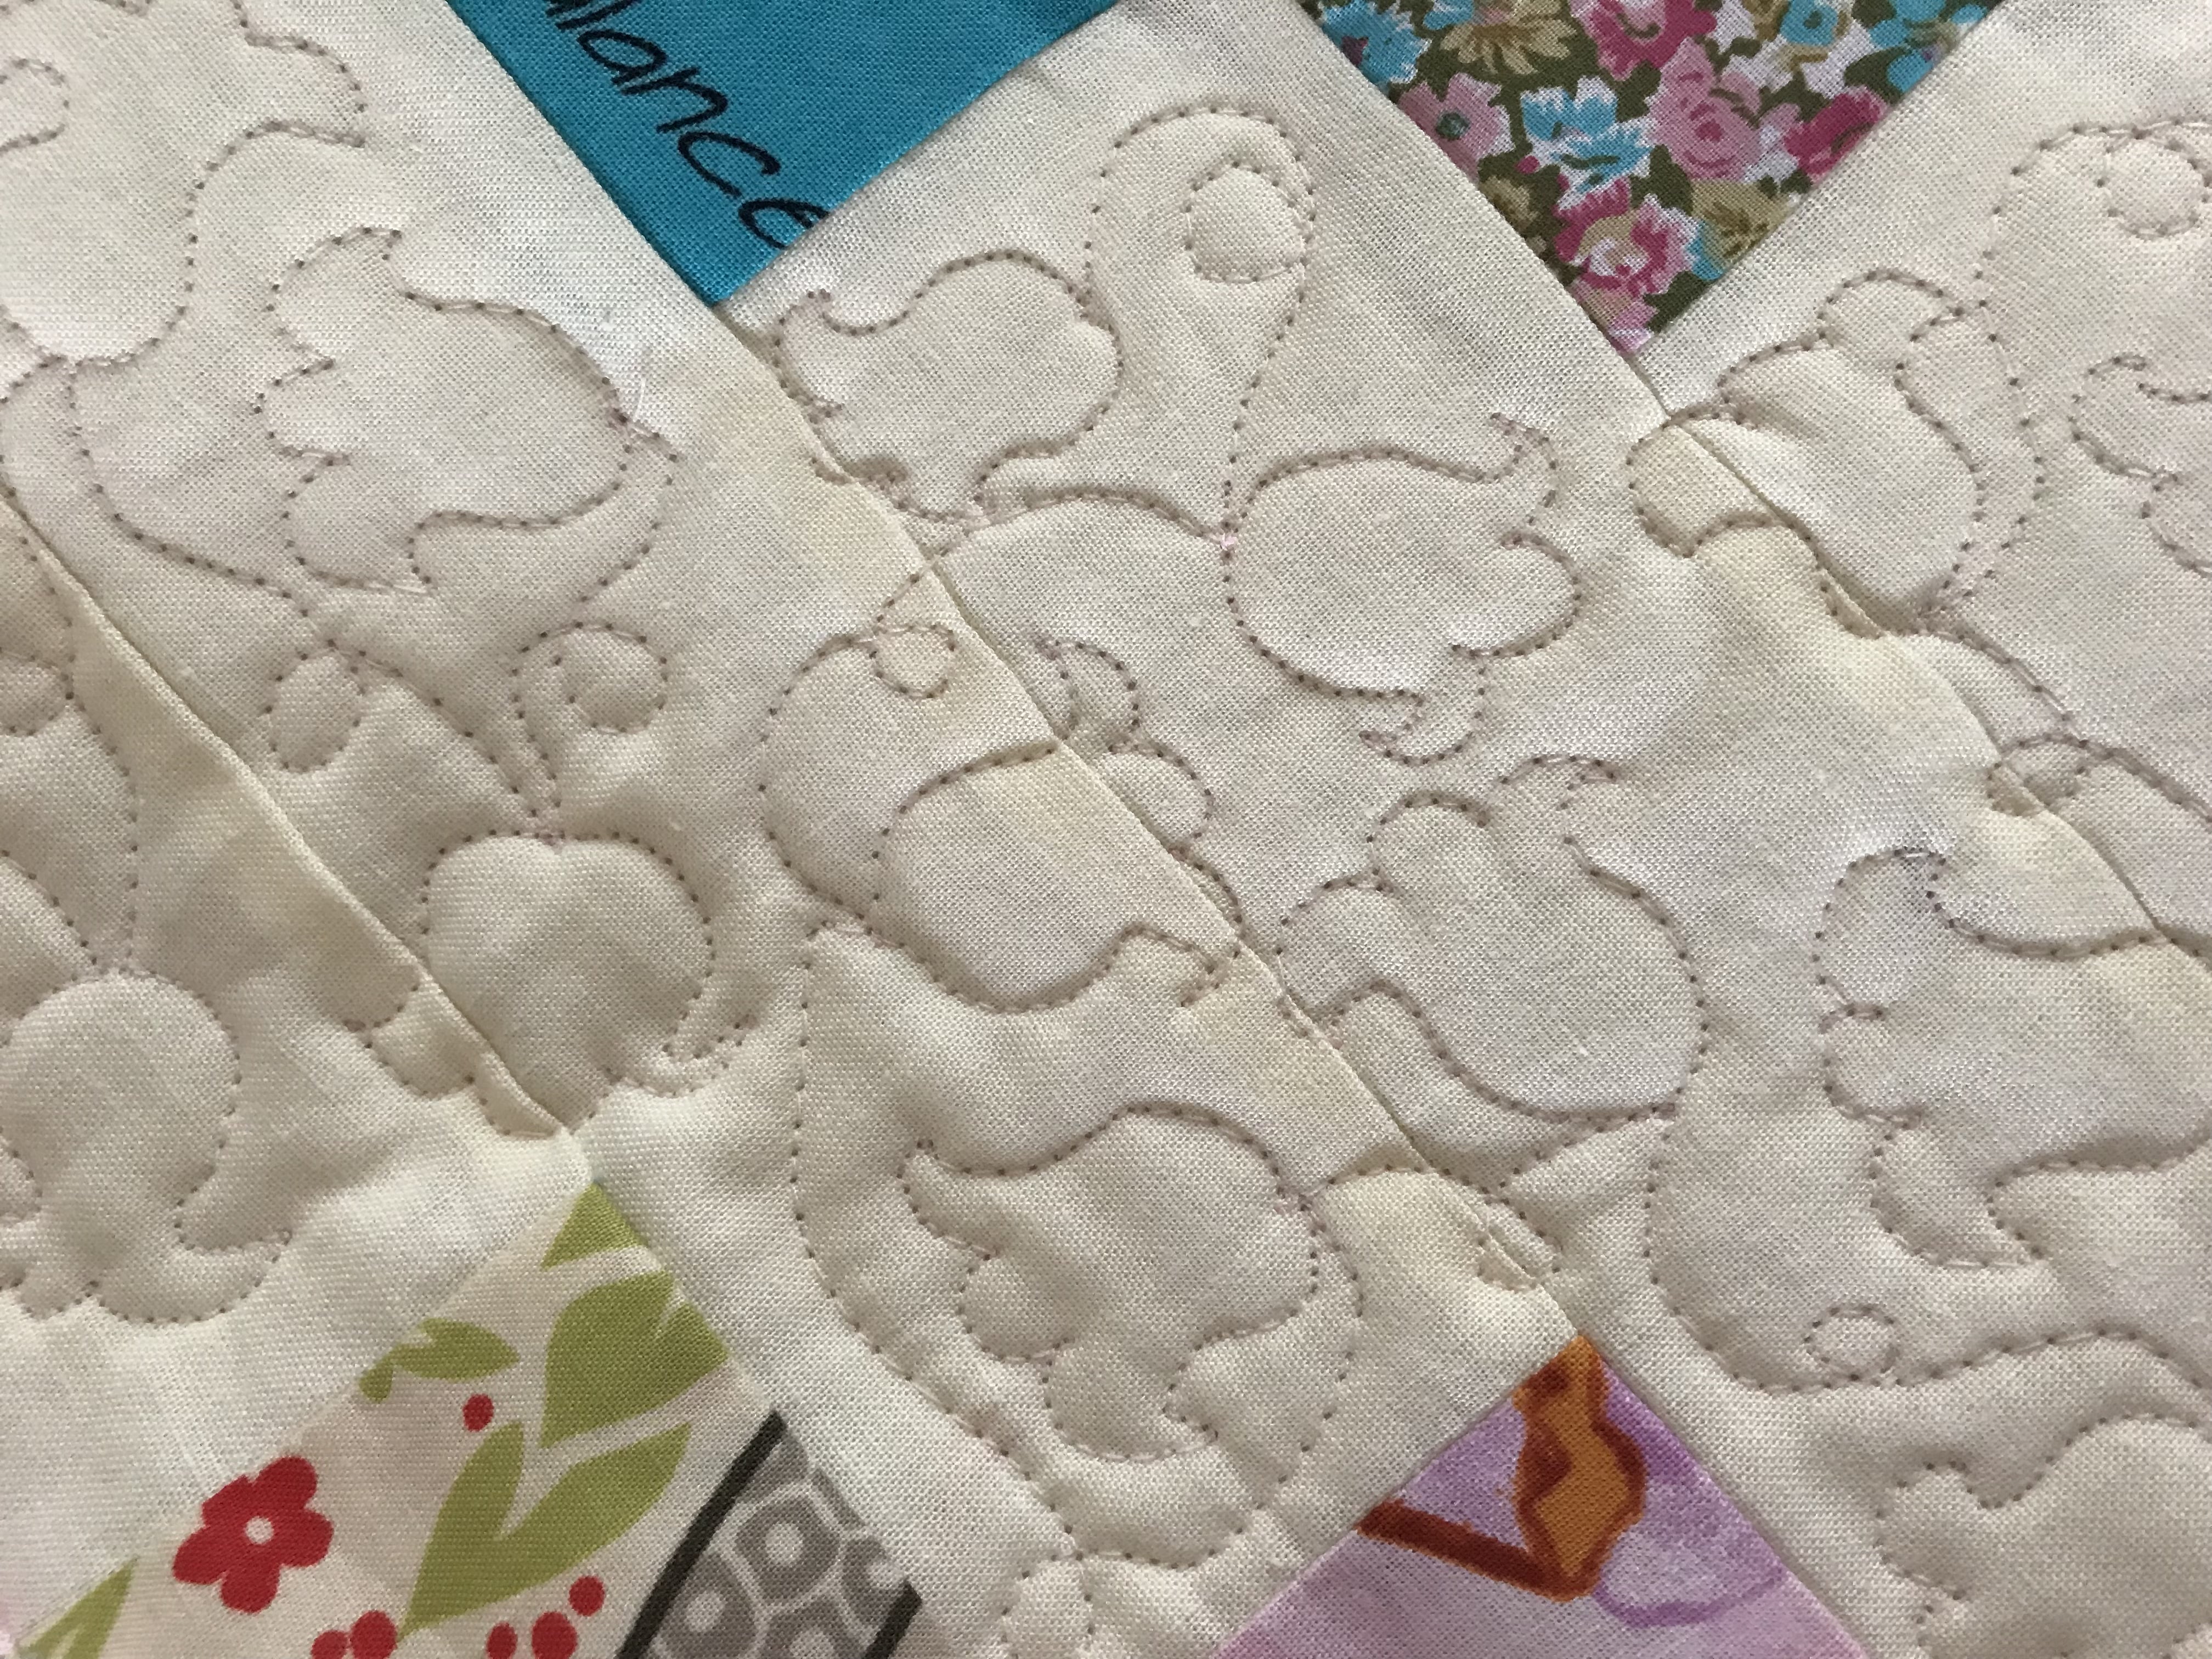
Now here is the Vintage Twist ready for quilting. I quilted this quilt on a vintage treadle, a Singer 31K20.
I quilted Lily of the Valley Flowers. Here is the link to the tutorial.
Free Motion Lily of the Valley Treadle Quilting Tutorial
Loved that quilt. I will try it with strips I’ve saved over time 😊
I have done a similar quilt for years but do it quilt as you go with the batting and backing. Start in the middle and work one direction and go back and do the rest. Border is done next and than binding.
Love this design. Beautiful colors
My next quilt! Thank you!
WOW, Love this, great idea for scraps