Amish Hexagons from Circles – Part 4 Coming Together
Hello Dear Friends and Readers and a warm welcome to today’s post. Today I will share the next installment of of Amish Hexagons from Circles. This is a hand stitching project. For those of you who have been following along, you may already appreciate that I love to have a hand stitching project on the go, concurrently with machine stitched works. It is really very nice to have a little project for all those moments when time is available but a machine isn’t. This can extend to traveling, waiting for appointments or to pick someone up or evenings when it’s nice to put one’s feet up and still have a needle in hand. While We Wait
A Helpful Tool
Normally, I am not in the habit of recommending or promoting products, however in this instance I would like to share that I have been using these Clover sharp needles for this project. They really are sharp and make sewing 🧵 these hexagons very easy. Hexagons from Circles
Amish Hexagons from Circles – Part 4 Coming Together susies-scraps.com
The Coming Together – Round Four
In the previous post of this project Amish Hexagons from Circles Round Three Making A Floral Path I showed how I used many different floral fabrics to complete the 3rd round of the units. Now it is time to put them together. I decided to to use a pale pink solid fabric as my background. The reasoning for this is, I believe, that this quilt will have an antique appearance. I felt that it would be complementary to all the other fabrics. As a note, I have several metres of this pale pink solid fabric fabrics to cut my circles. Each unit will require 24 of the 3” circles.
Amish Hexagons from Circles – Part 4 Coming Together susies-scraps.com
Amish Hexagons from Circles – Part 4 Coming Together susies-scraps.com
Making Unit 2
Then they will be joined together using two of these initial units Hexagon Flowers Antique Inspired By adding three of the pale pink units to each one will form a triangle shaped unit. We can call this Unit 2. As pictured below.
Amish Hexagons from Circles – Part 4 Coming Together susies-scraps.com
Amish Hexagons from Circles – Part 4 Coming Together susies-scraps.com
Make two of the Unit 2 for every one of the first unit. These units are the bridge for the Floral Path rounds.
This, incidentally, makes it very easy to join the rows together. Making a Grandmothers Garden quilt can be somewhat challenging as normally the units are offset. By adding a bridging unit, it allows for creating rows which can then be sewn together later. I hope that makes sense.
Amish Hexagons from Circles – Part 4 Coming Together susies-scraps.com
Progress So Far
This is how it looks so far. I still have plenty do do, however this will give an idea of how the top is coming together.
Amish Hexagons from Circles – Part 4 Coming Together susies-scraps.com
Thank you for joining me today. Feel free to email me with any questions or comments.
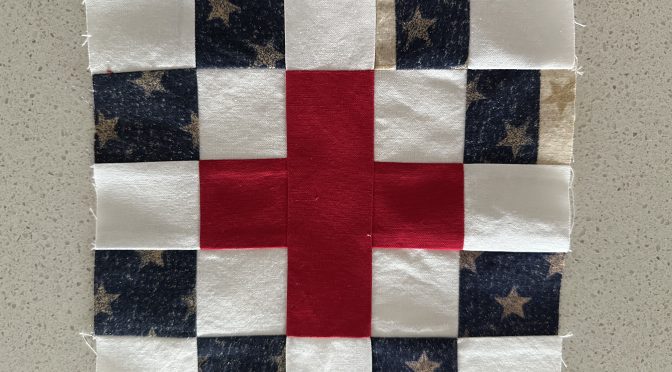
Hello Dear Friends and Readers and a very warm welcome to today’s post. Today, I would like to share a block which I have created and named the Veterans Cross Quilt Block. In Australia, we have just commemorated ANZAC Day. In respect of ANZAC Day, I will now post this Veterans Cross Quilt Block. Over the next few weeks I will post the instructions for the full Veterans Cross Quilt.
This block has come about from inspiration from my friend Wendy Churchill who sent me some red, white and blue scraps. For quite some considerable time I could not decide how to use them and then, over the Christmas period when I was using some bright red fabric from my stash, the inspiration came. I decided to cut these pieces smaller and add some white and the Veterans Cross Block was born.
I have family members who have been to war and who have been affected by wars and so I have felt strongly that I would like to make a quilt to honour them. so here is the block I created, This is a very easy yet very effective block which is suitable for a patriotic quilt or a quilt of valour.
Let’s get to it. Red, White and Blue!
Requirements for the Veterans Cross Quilt Block (Make 25 Blocks)
12 of 2″ x 2″ white squares
8 of 2″ x 2″ navy blue print squares
2 of 2″ x 2″ red squares
1 of 2″ x 5″ red strip
Block size 8″ x 8″
All seams based on one quarter inch.
Veterans Cross Quilt Block susies-scraps.com
Making the Veterans Cross Quilt Block
Put a 2 inch white square and a 2 inch blue square right? Sides together. Sew a quarter inch seam. sew a second unit in the same manner. Put the two units together with colours opposing to make a four patch. Press the seams where possible to the dark side. (I used scraps, however, the strip piecing method may be used if preferred.)
Repeat to make four of four patches using two white and two blue 2″squares for each.
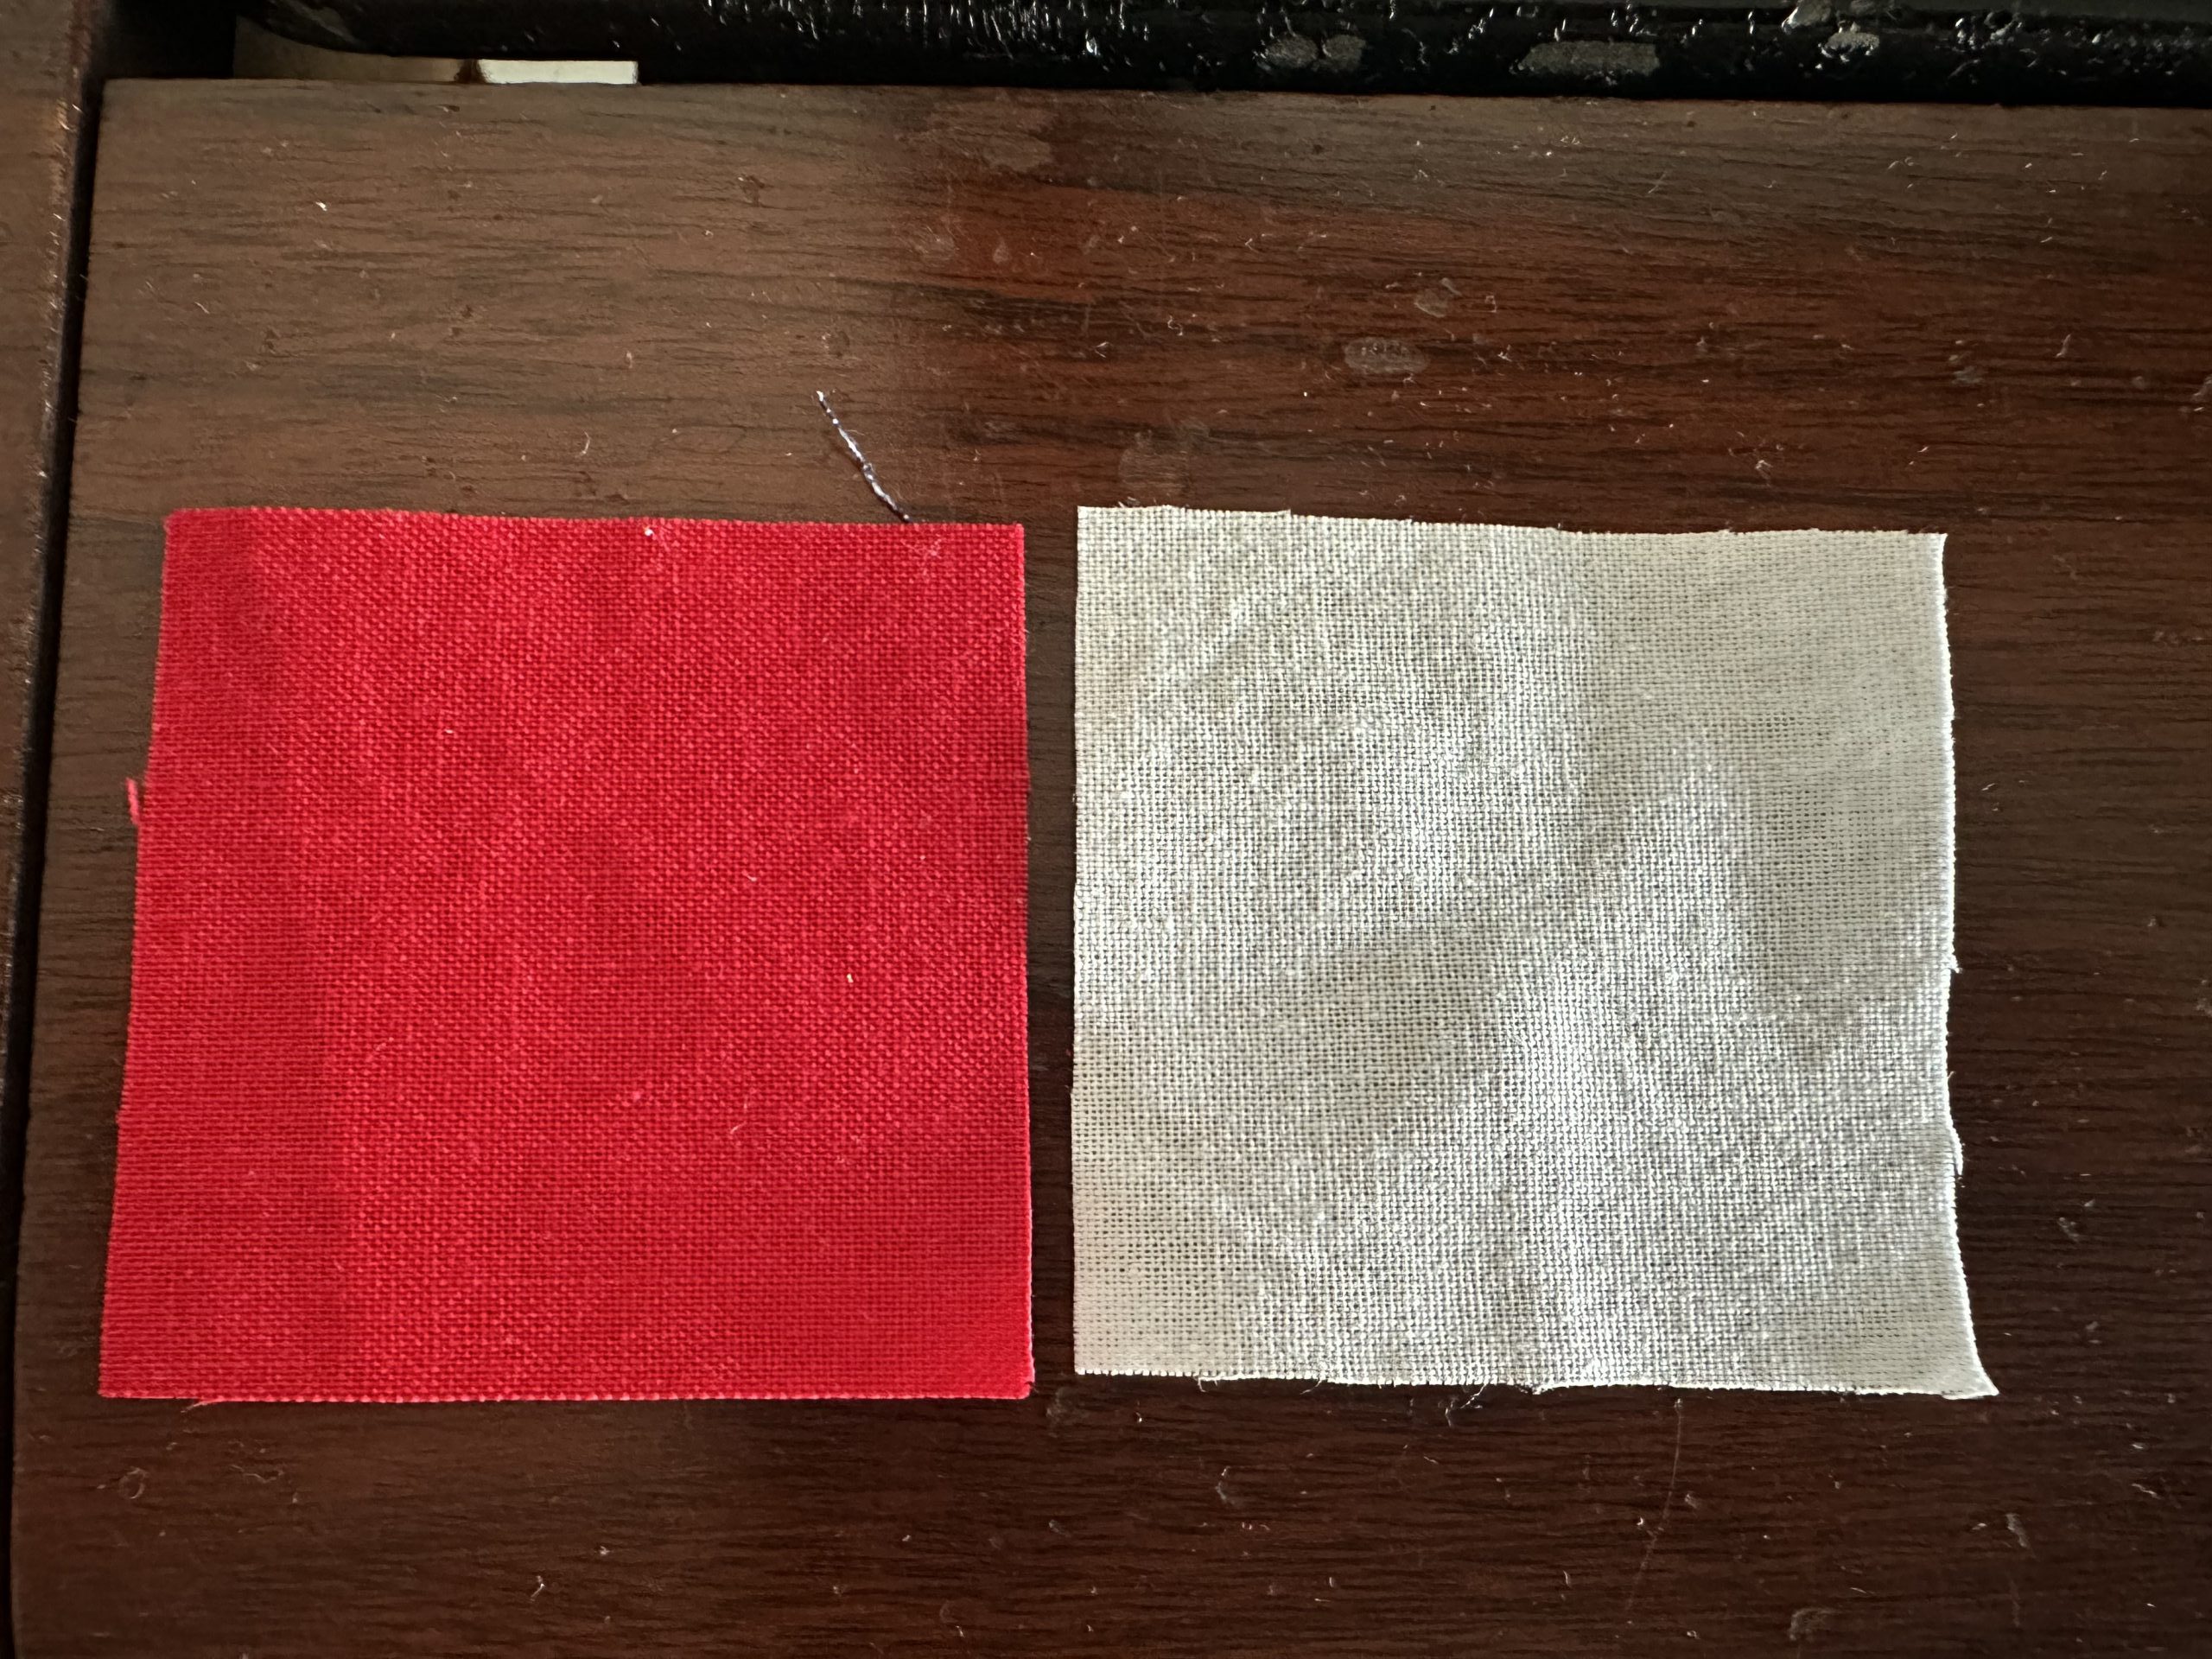
Sew a white square to a red square. Repeat to make two units.
Veterans Cross Quilt Block susies-scraps.com
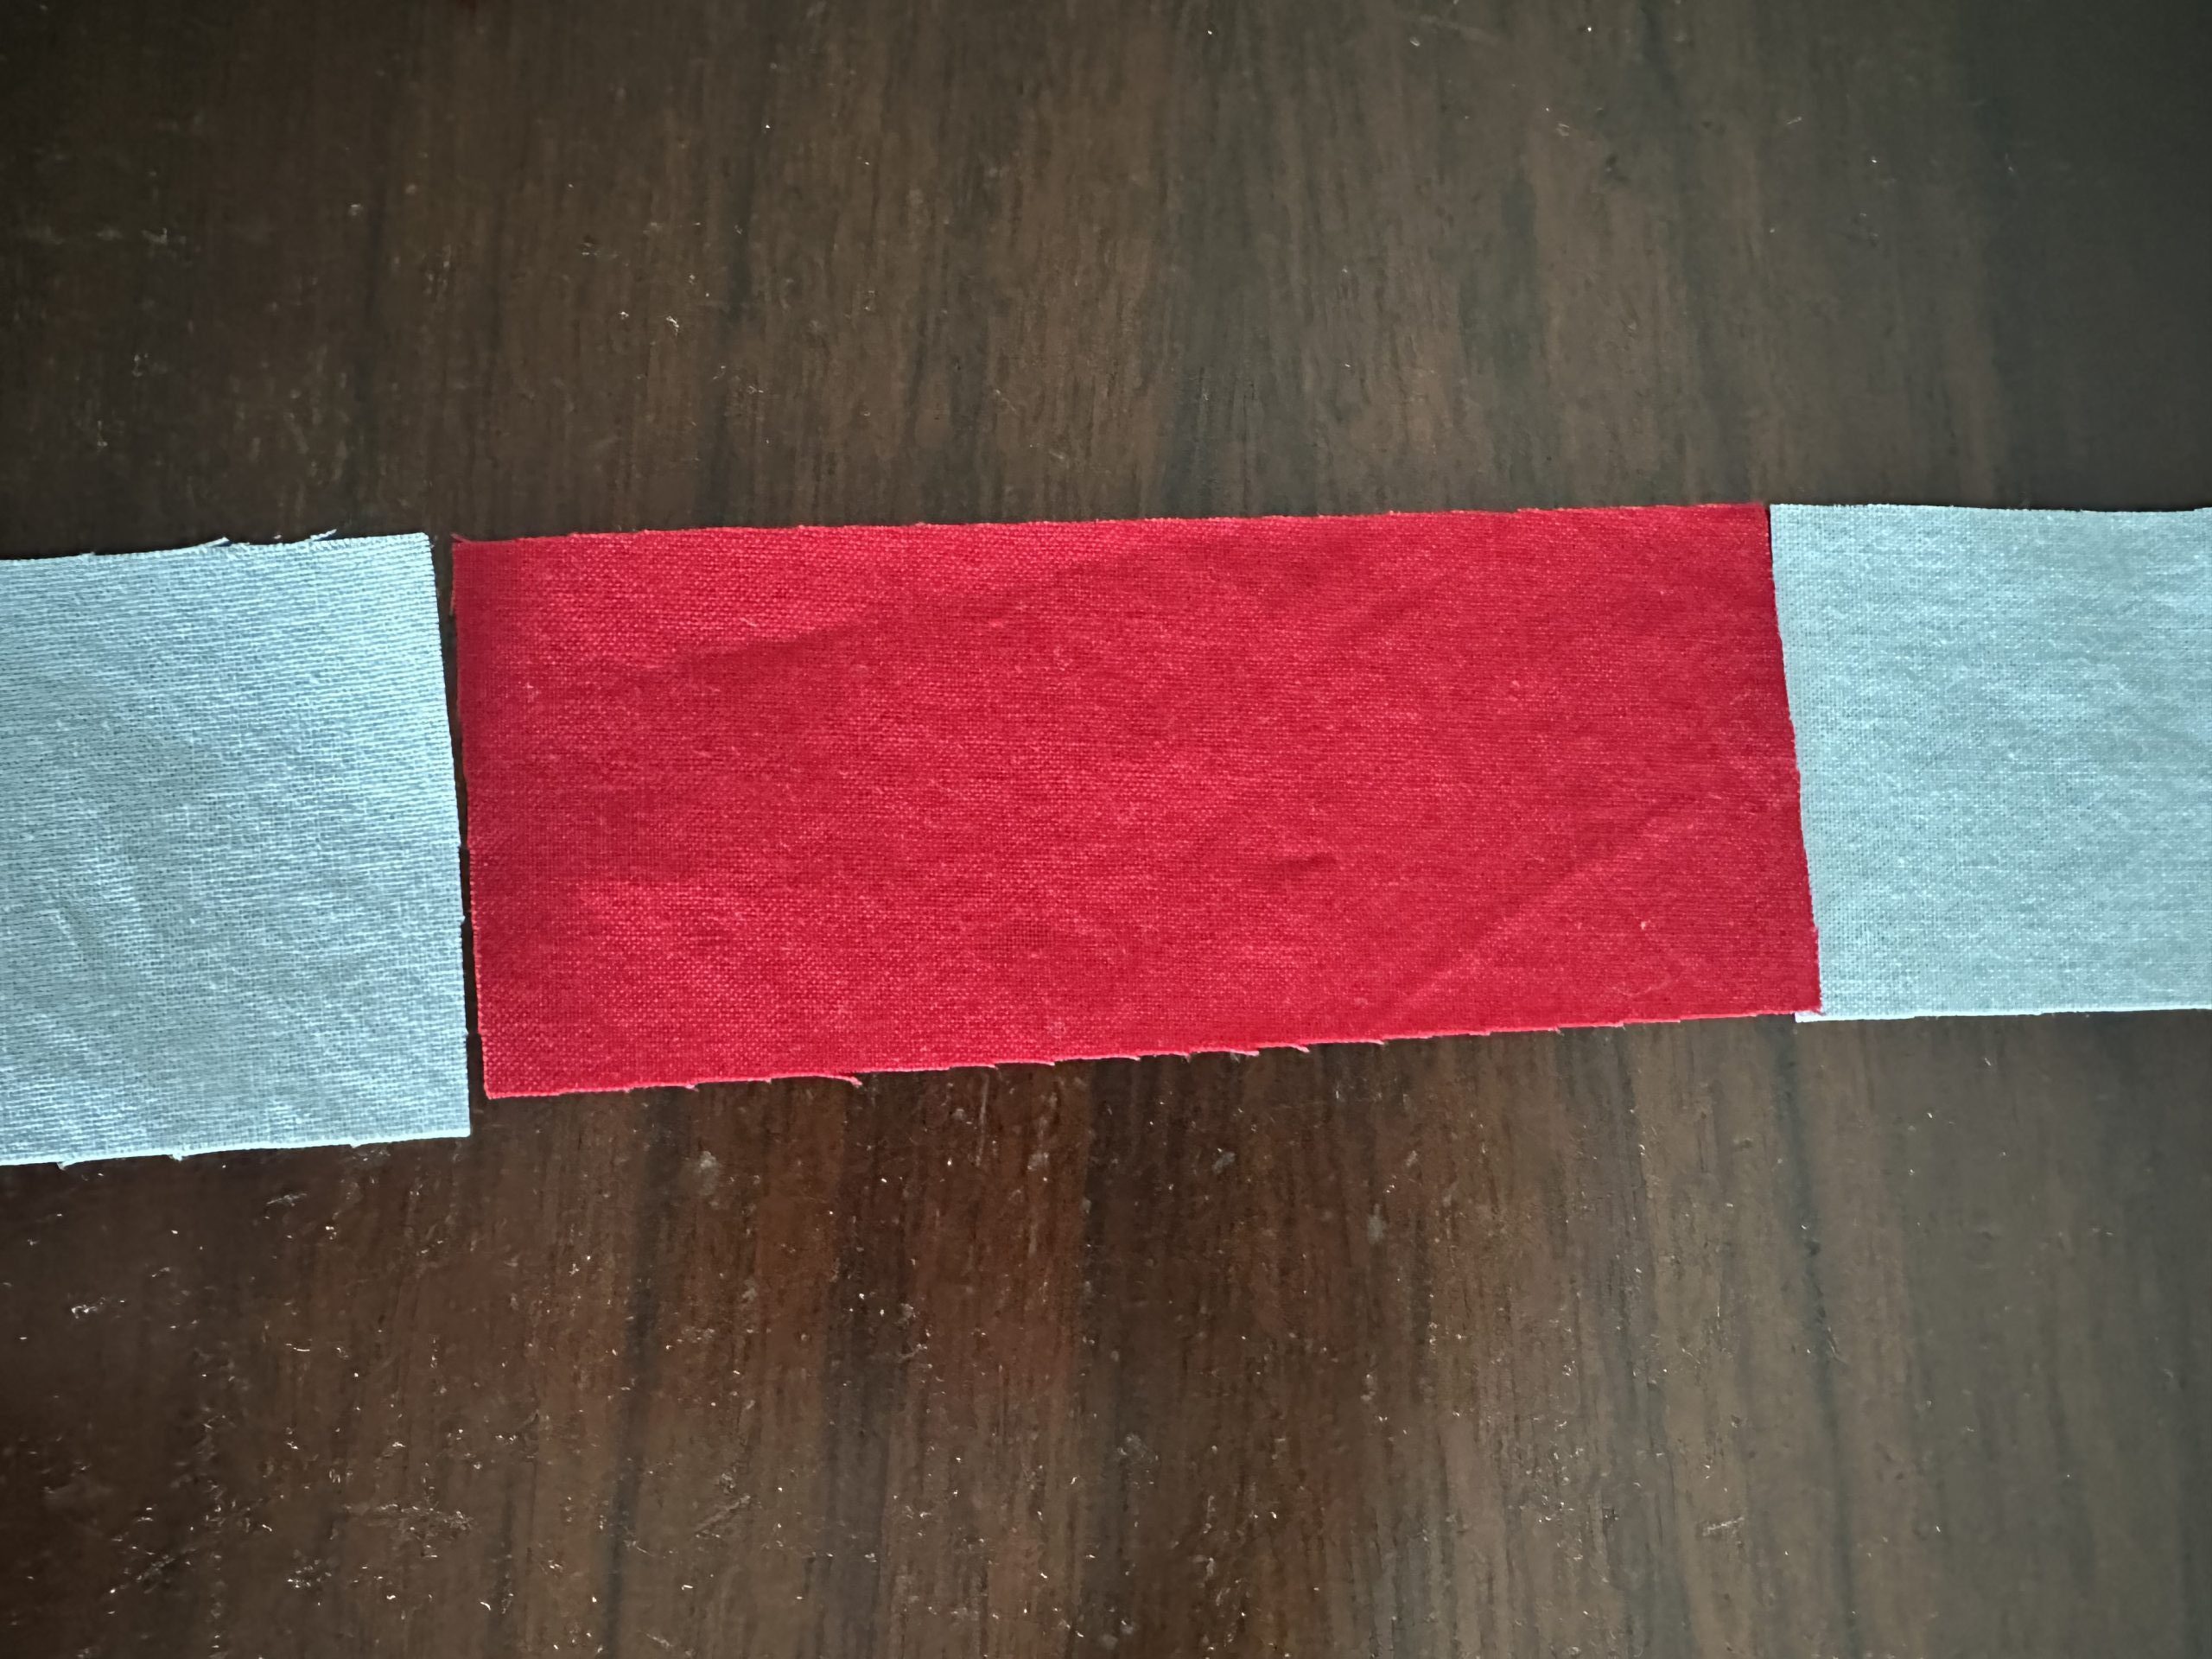
To each end of the 2″ x 5″ red strip sew a 2″ x 2″ white square. Please excuse the photo below, the white squares appear blue, they are supposed to be white.
Veterans Cross Quilt Block susies-scraps.com
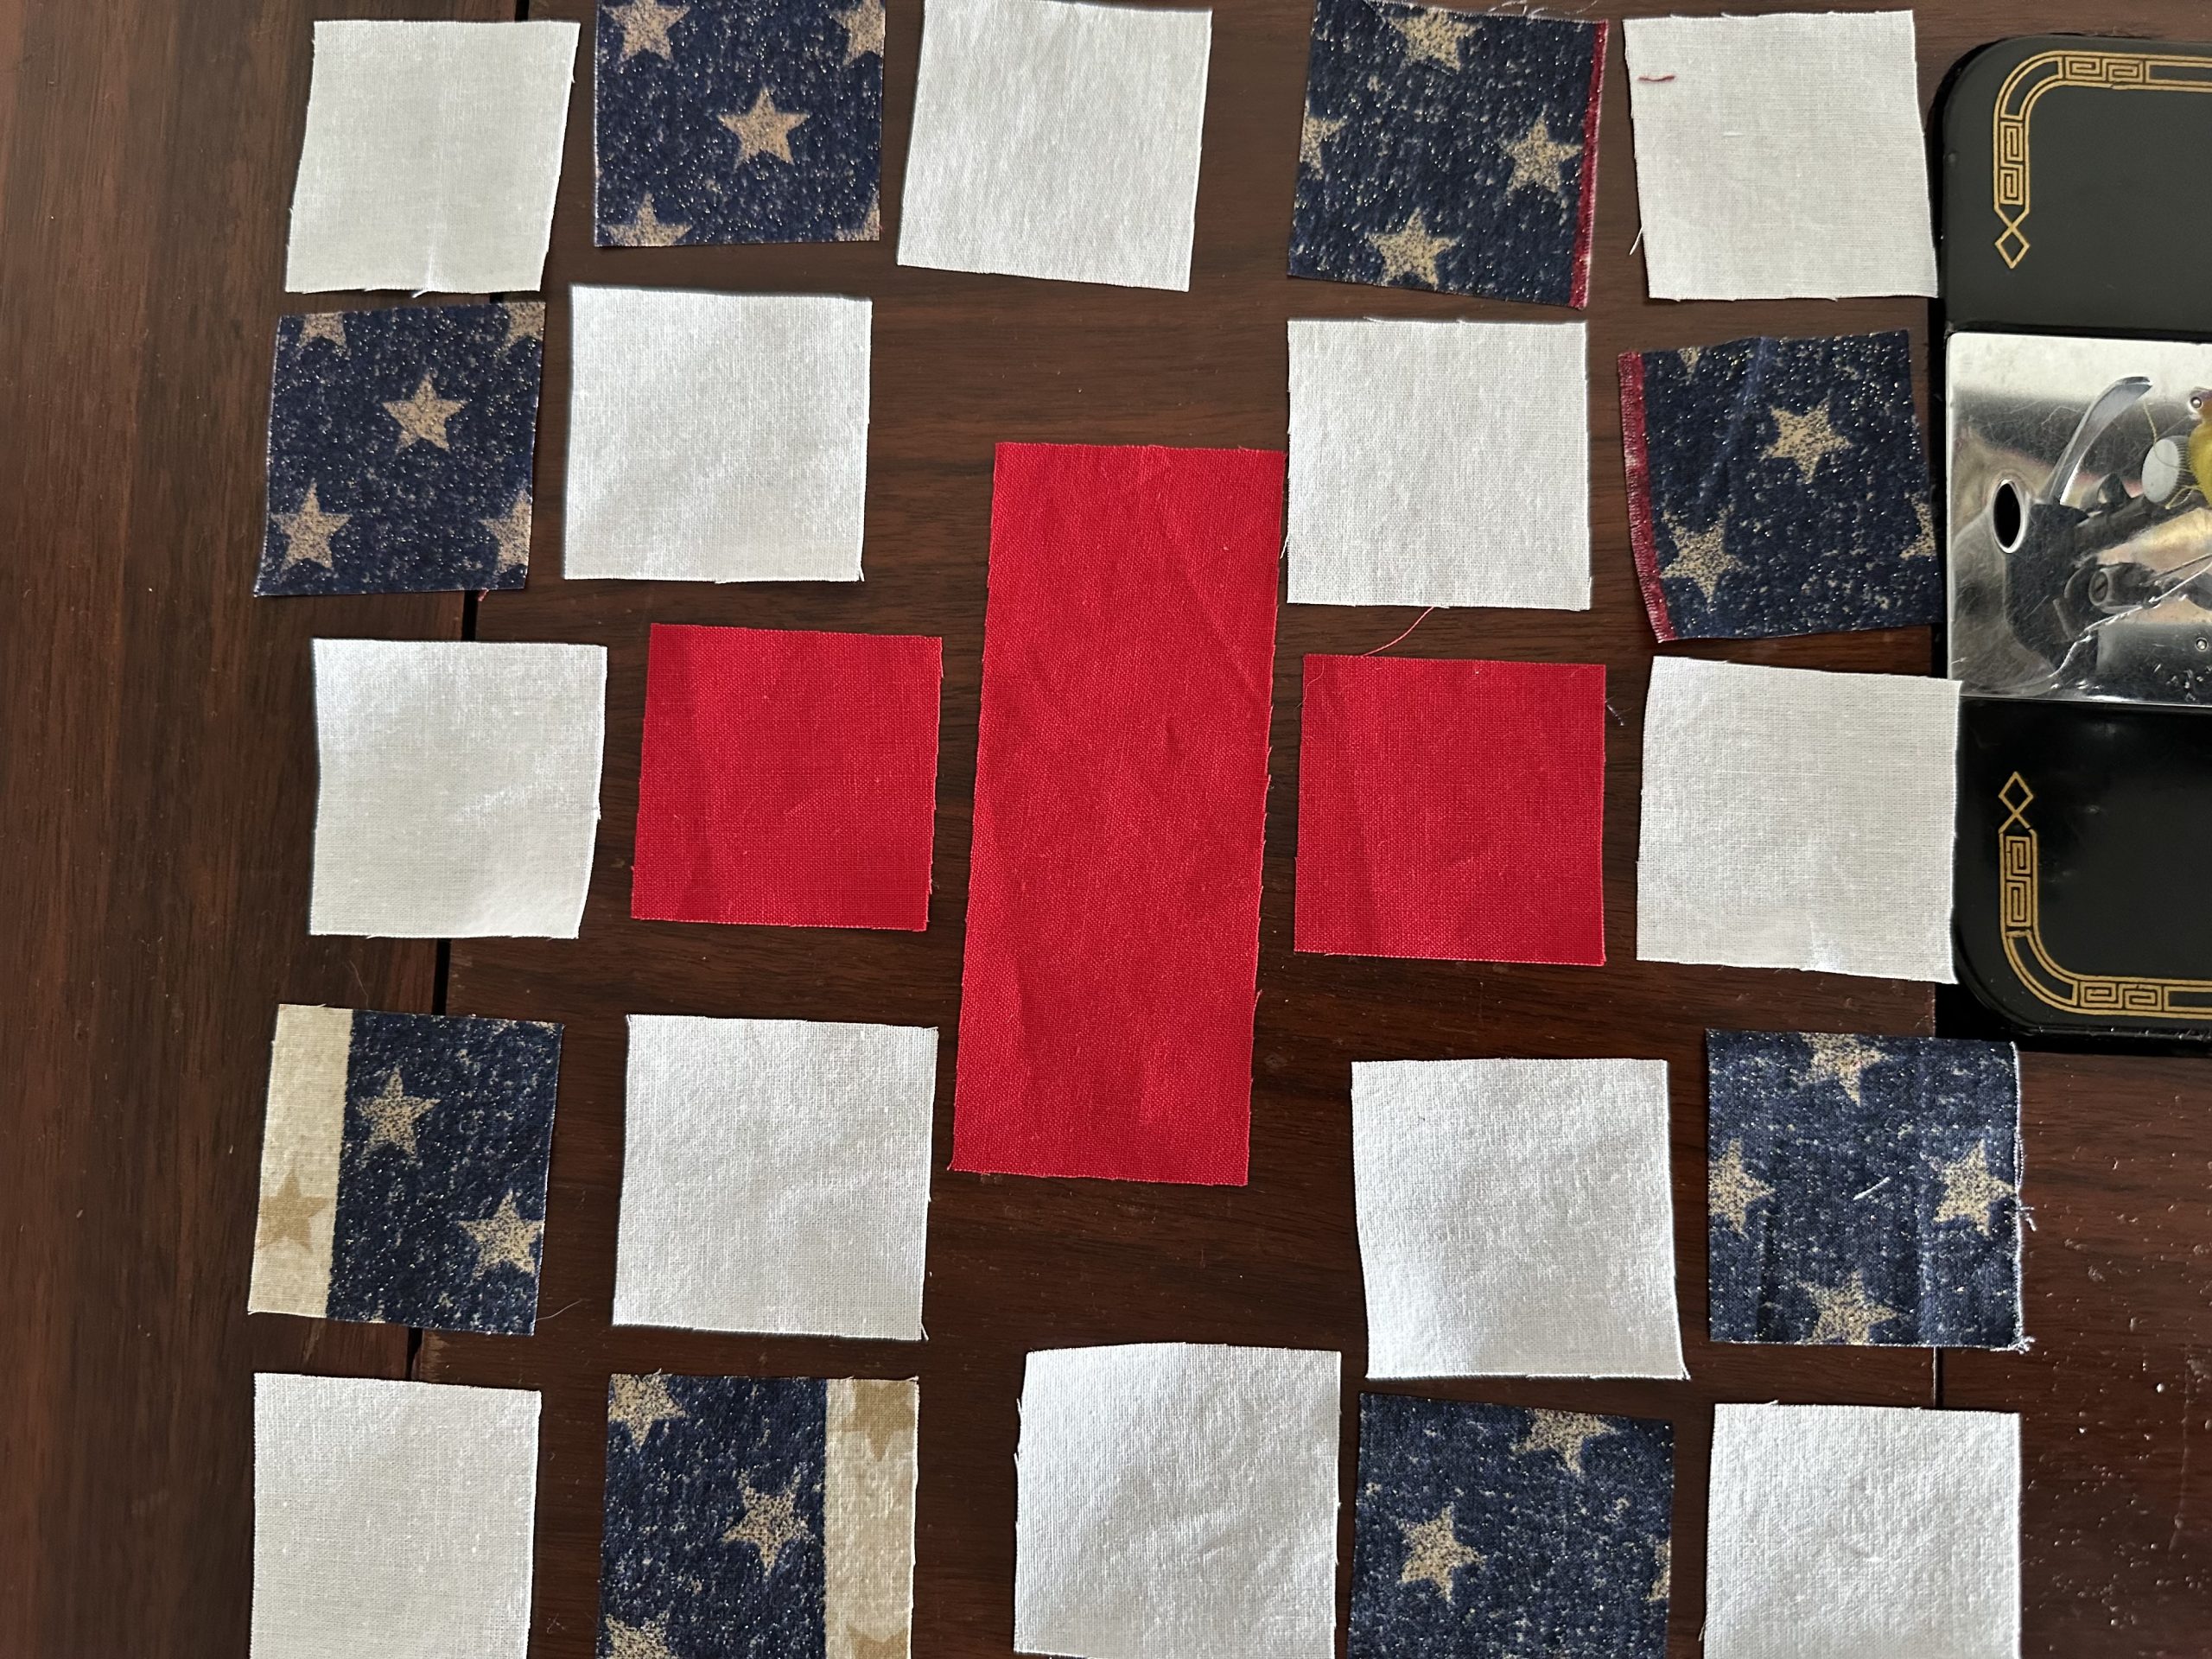
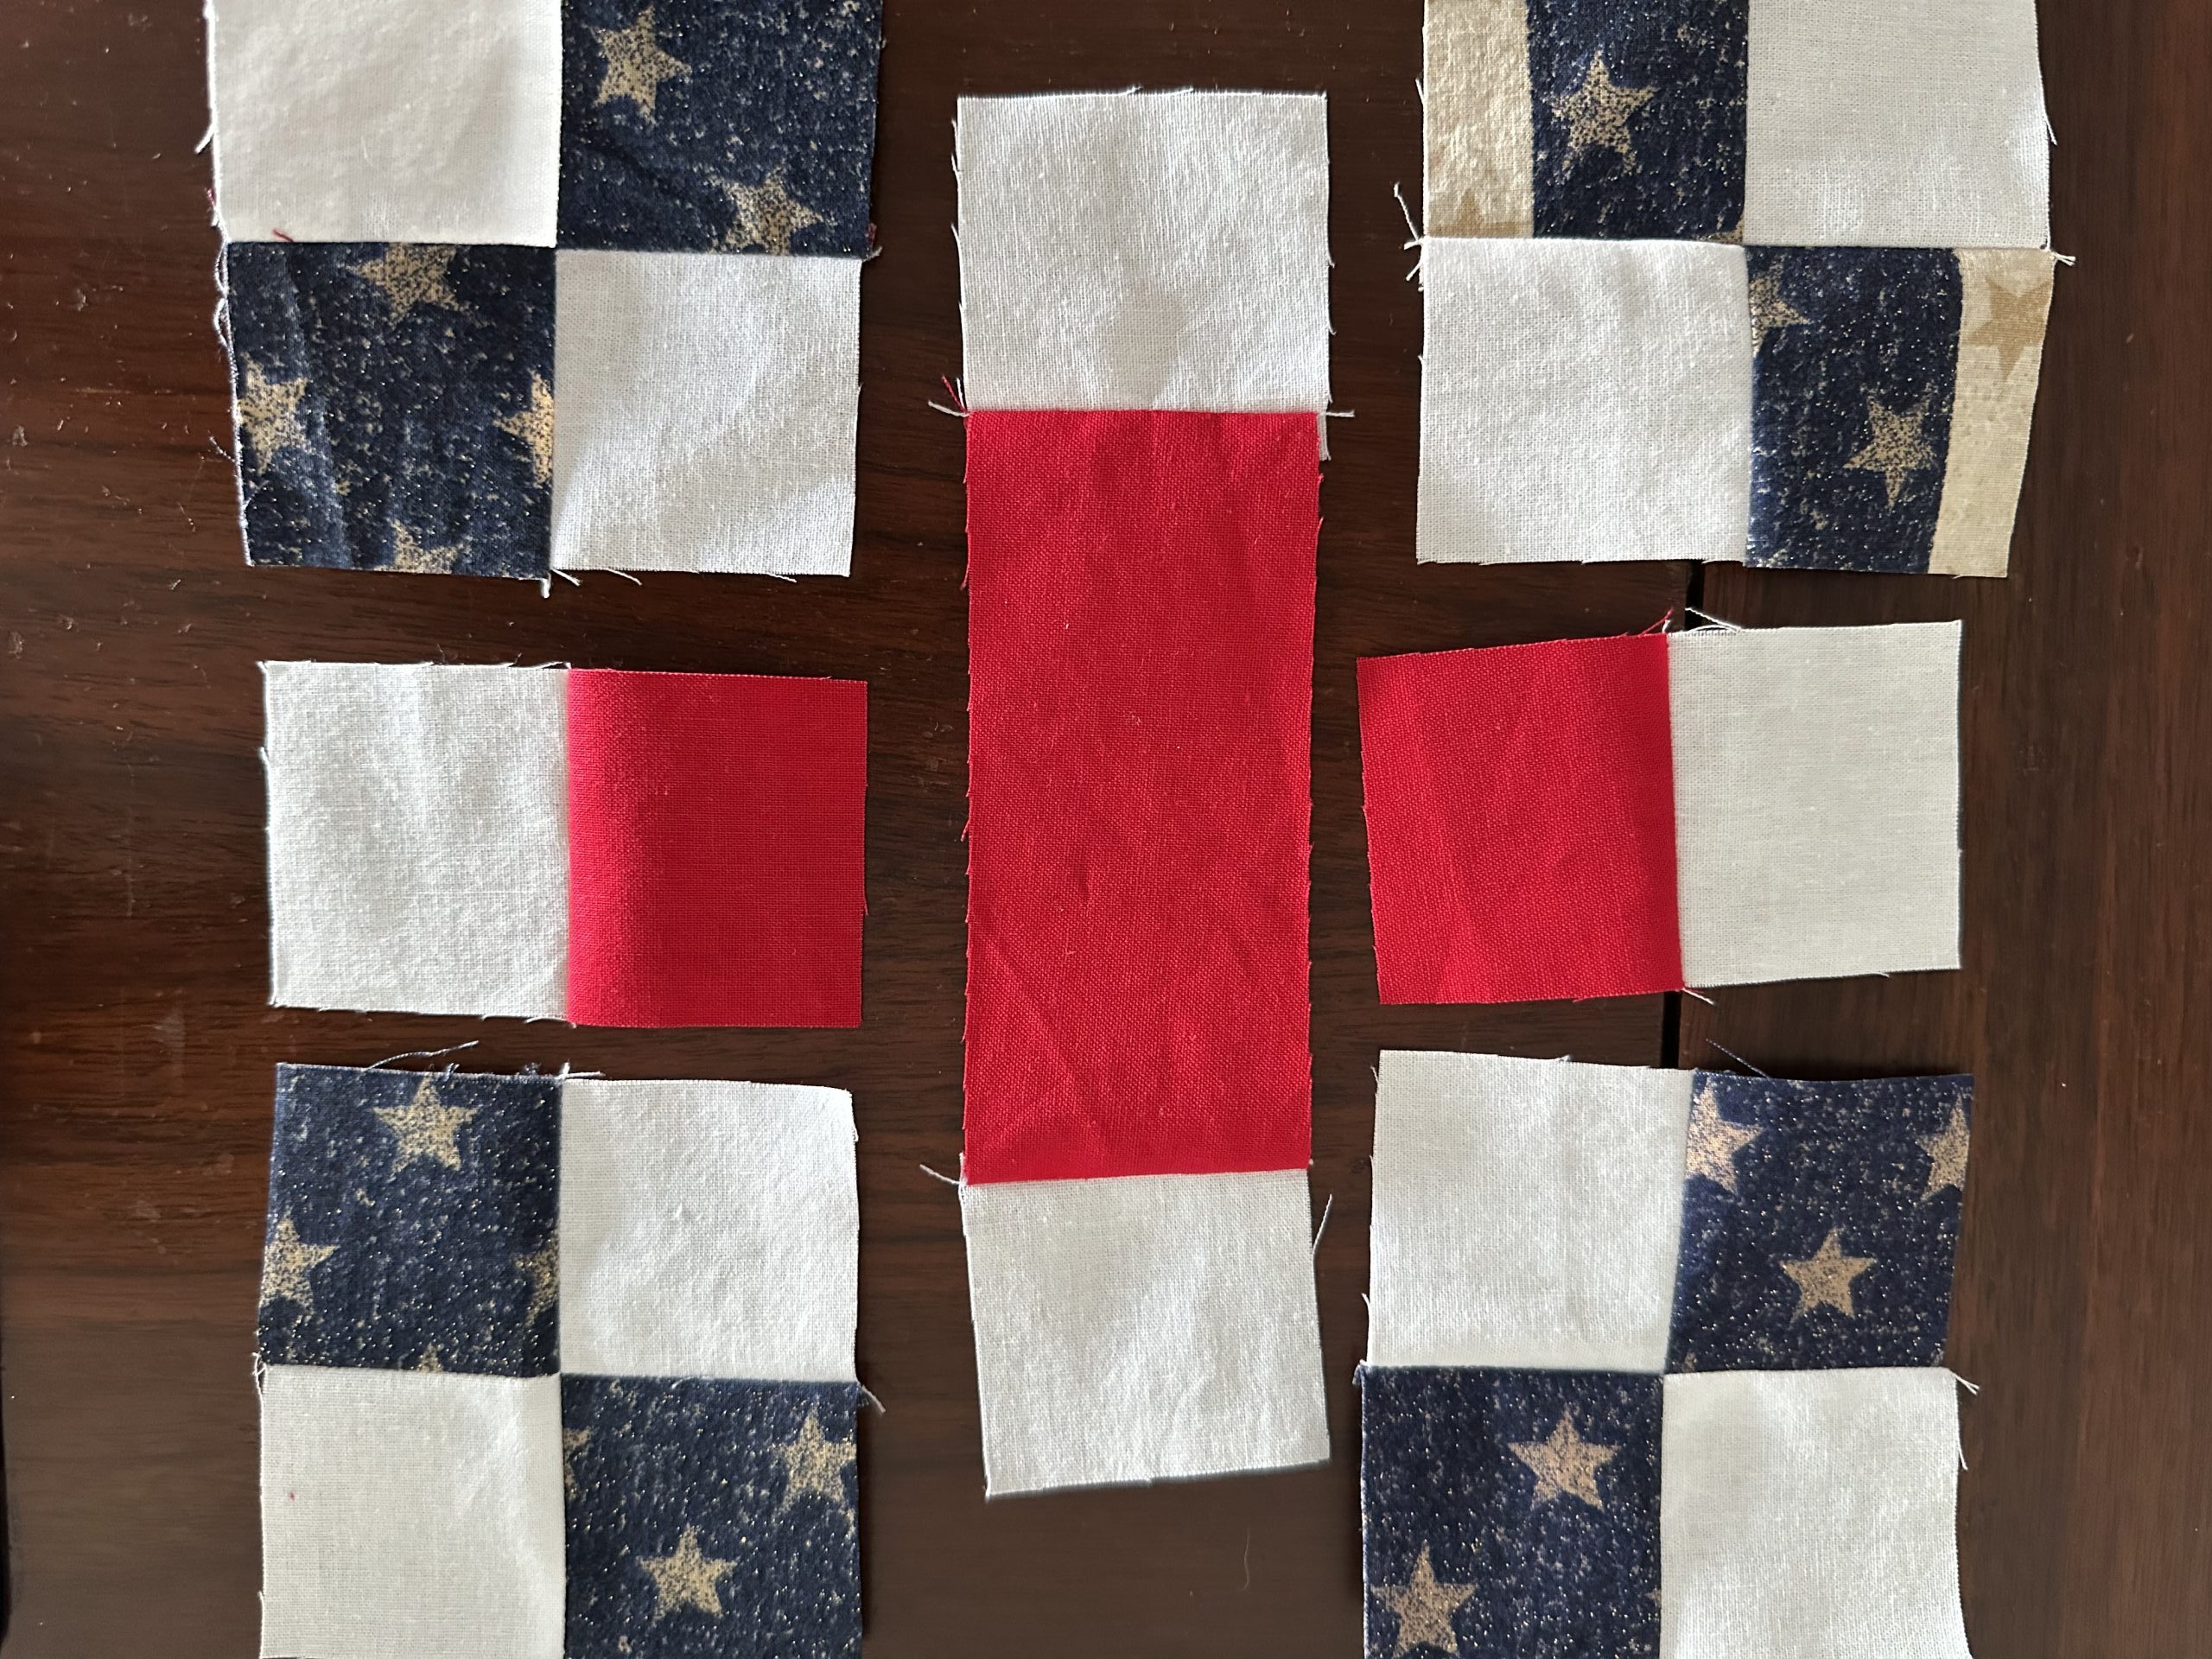
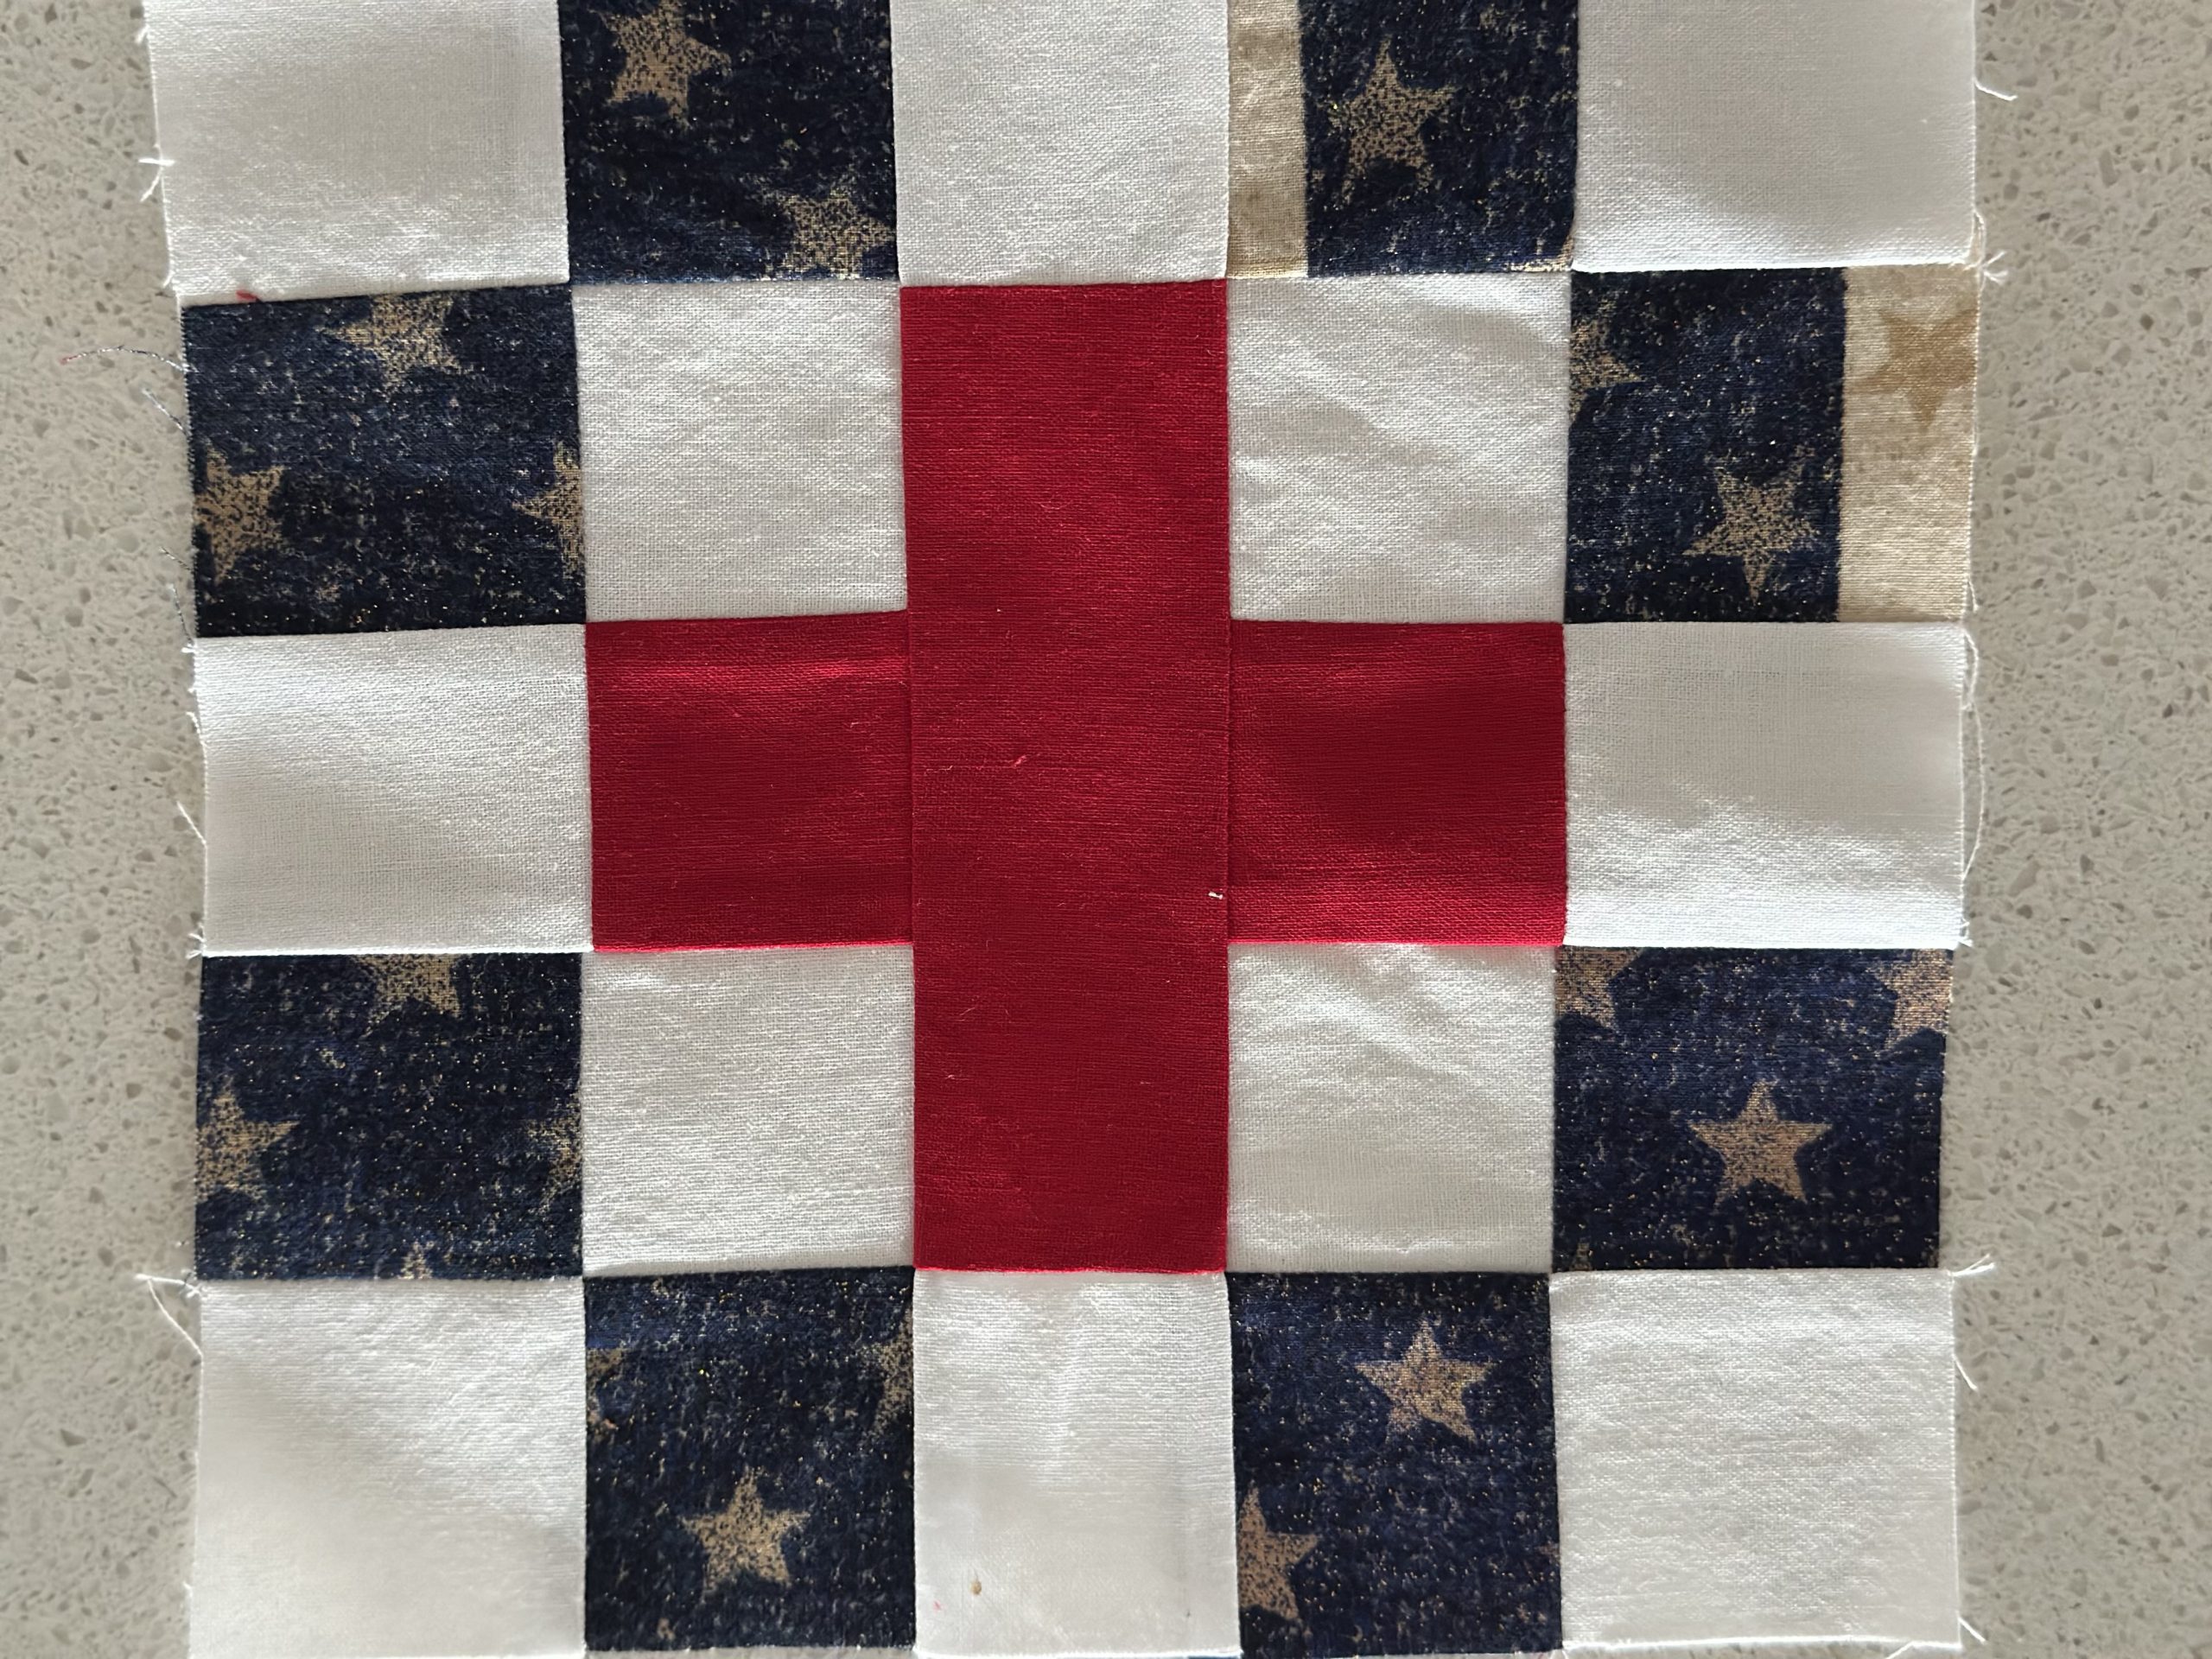
Position the four patch units so that the blue squares form a diagonal across each corner. Place the two red and white units between two of the four patch units opposing each other with the red pointing towards the centre. Place the long red and white strip through the centre. It should look like this.
Veterans Cross Quilt Block susies-scraps.com
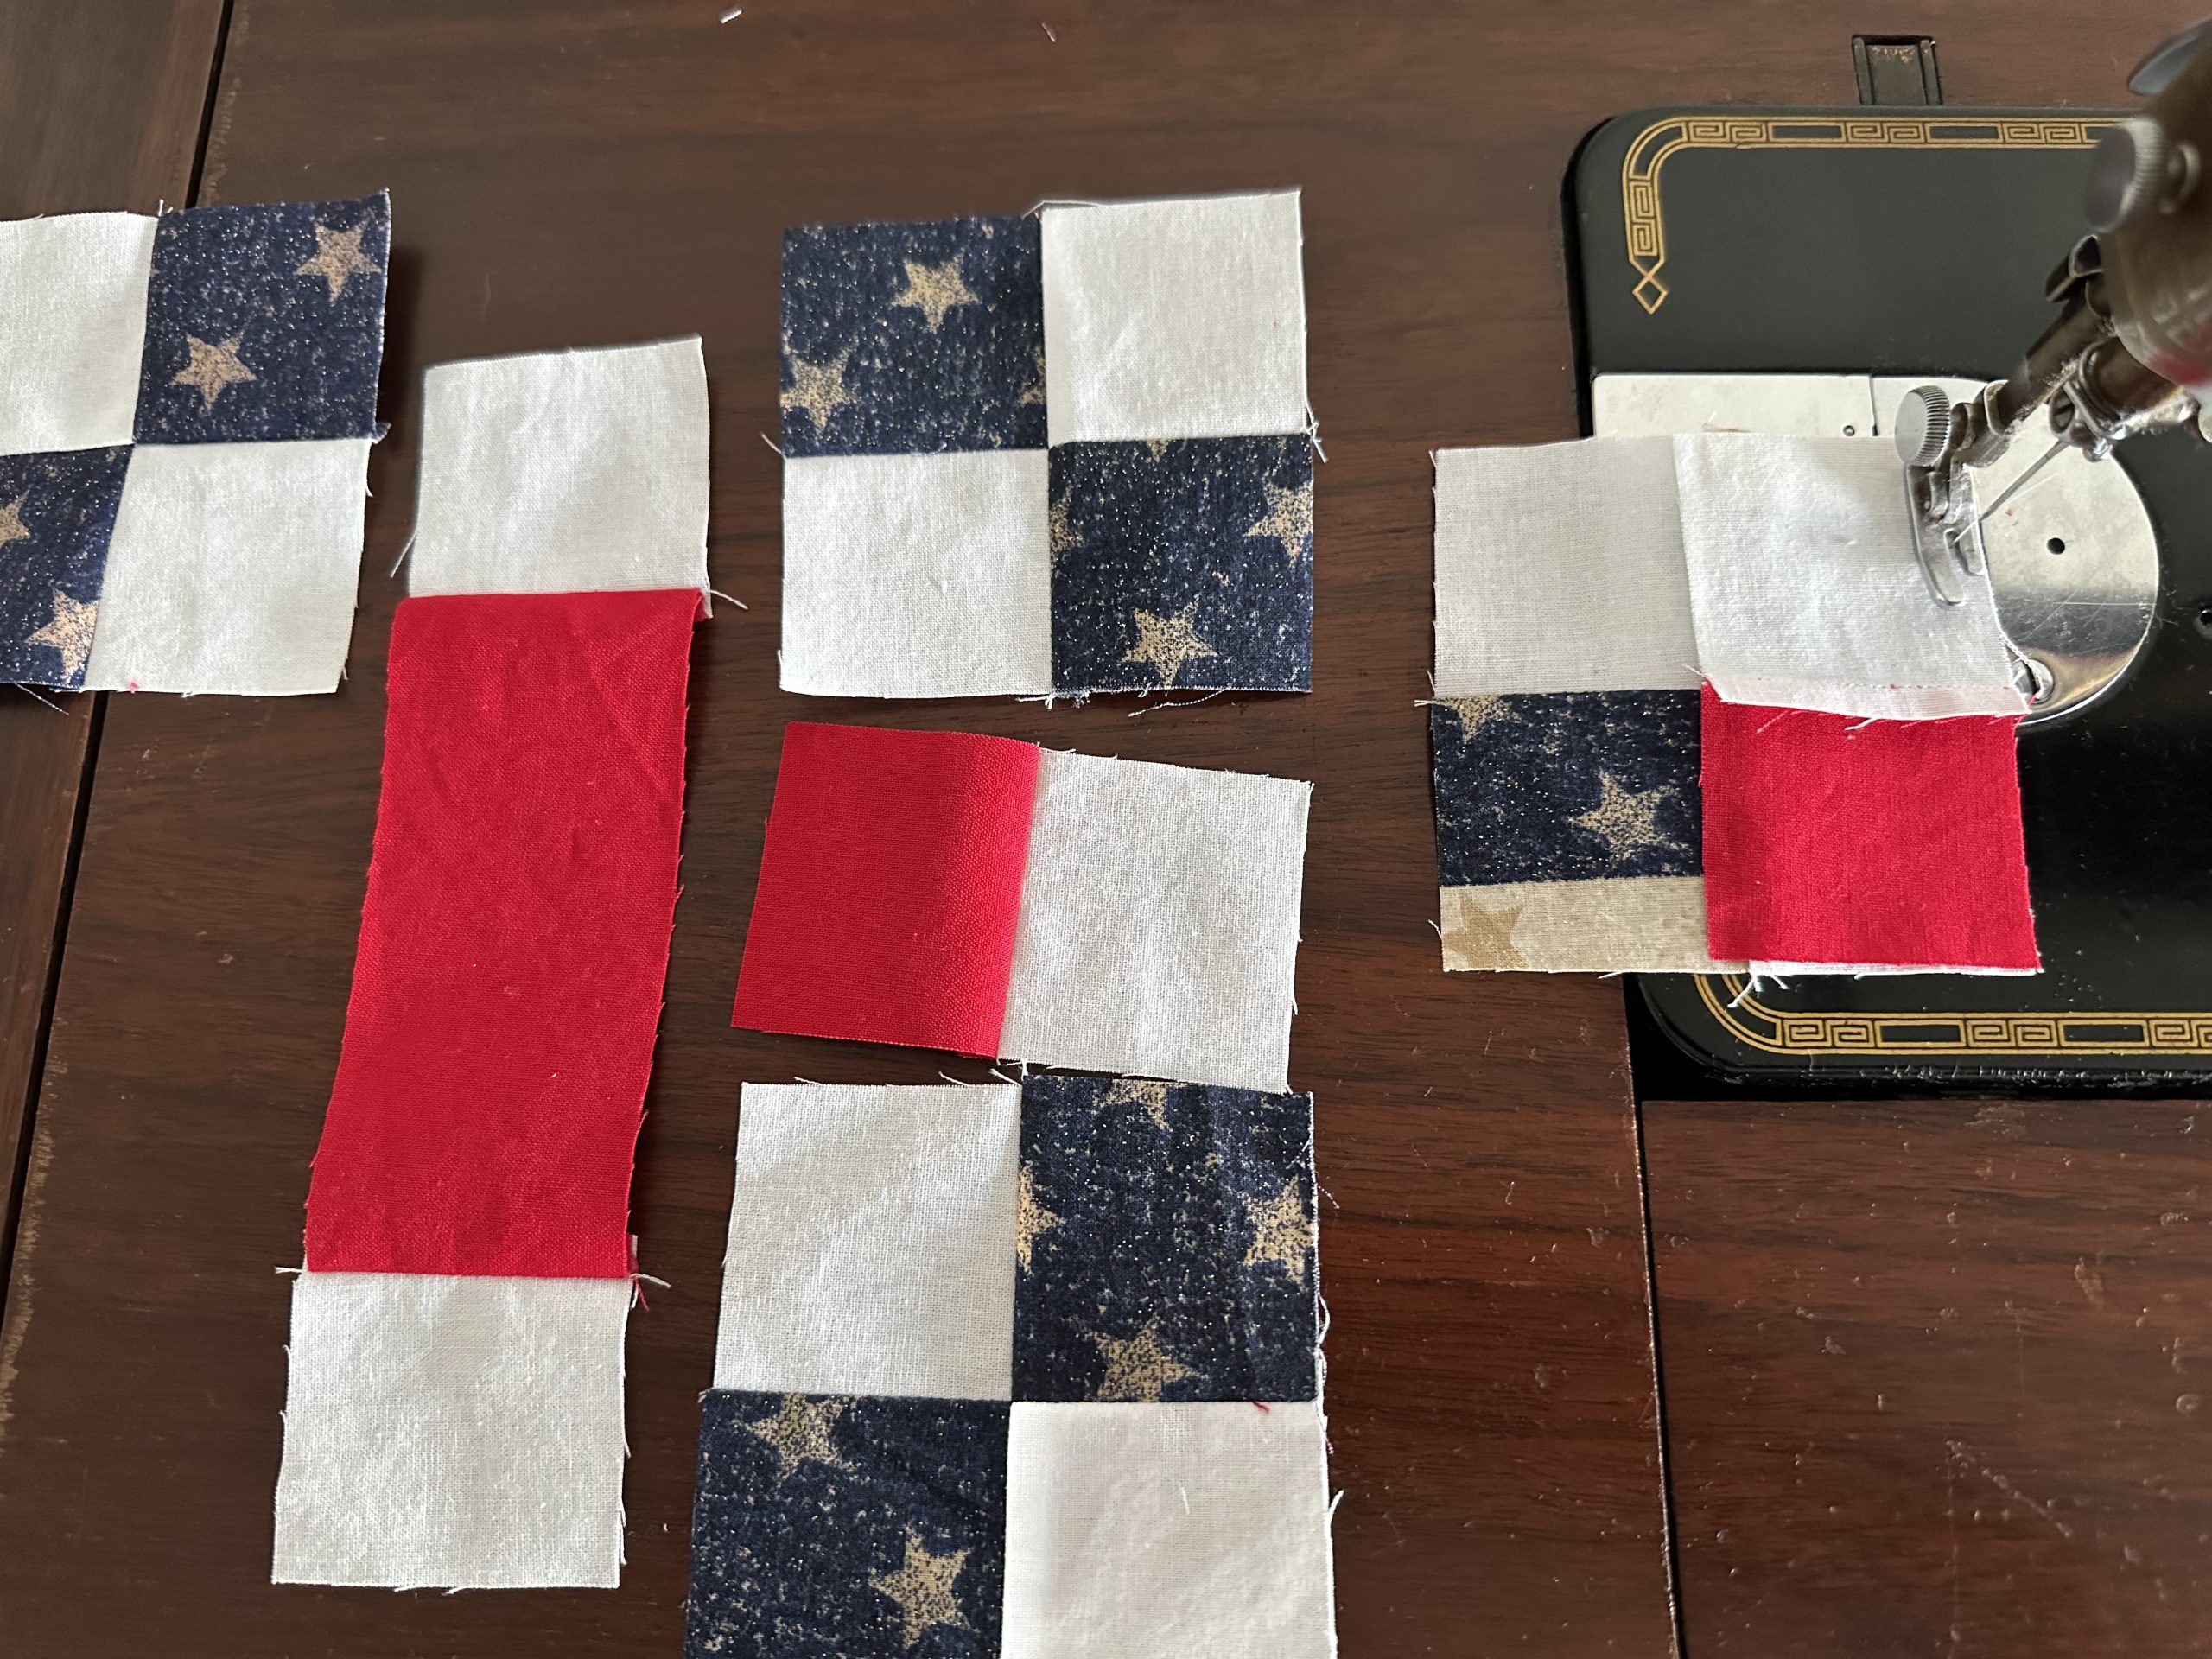
Now sew the the two short red and white units between two of the four patches repeat for the other side.
Veterans Cross Quilt Block susies-scraps.com
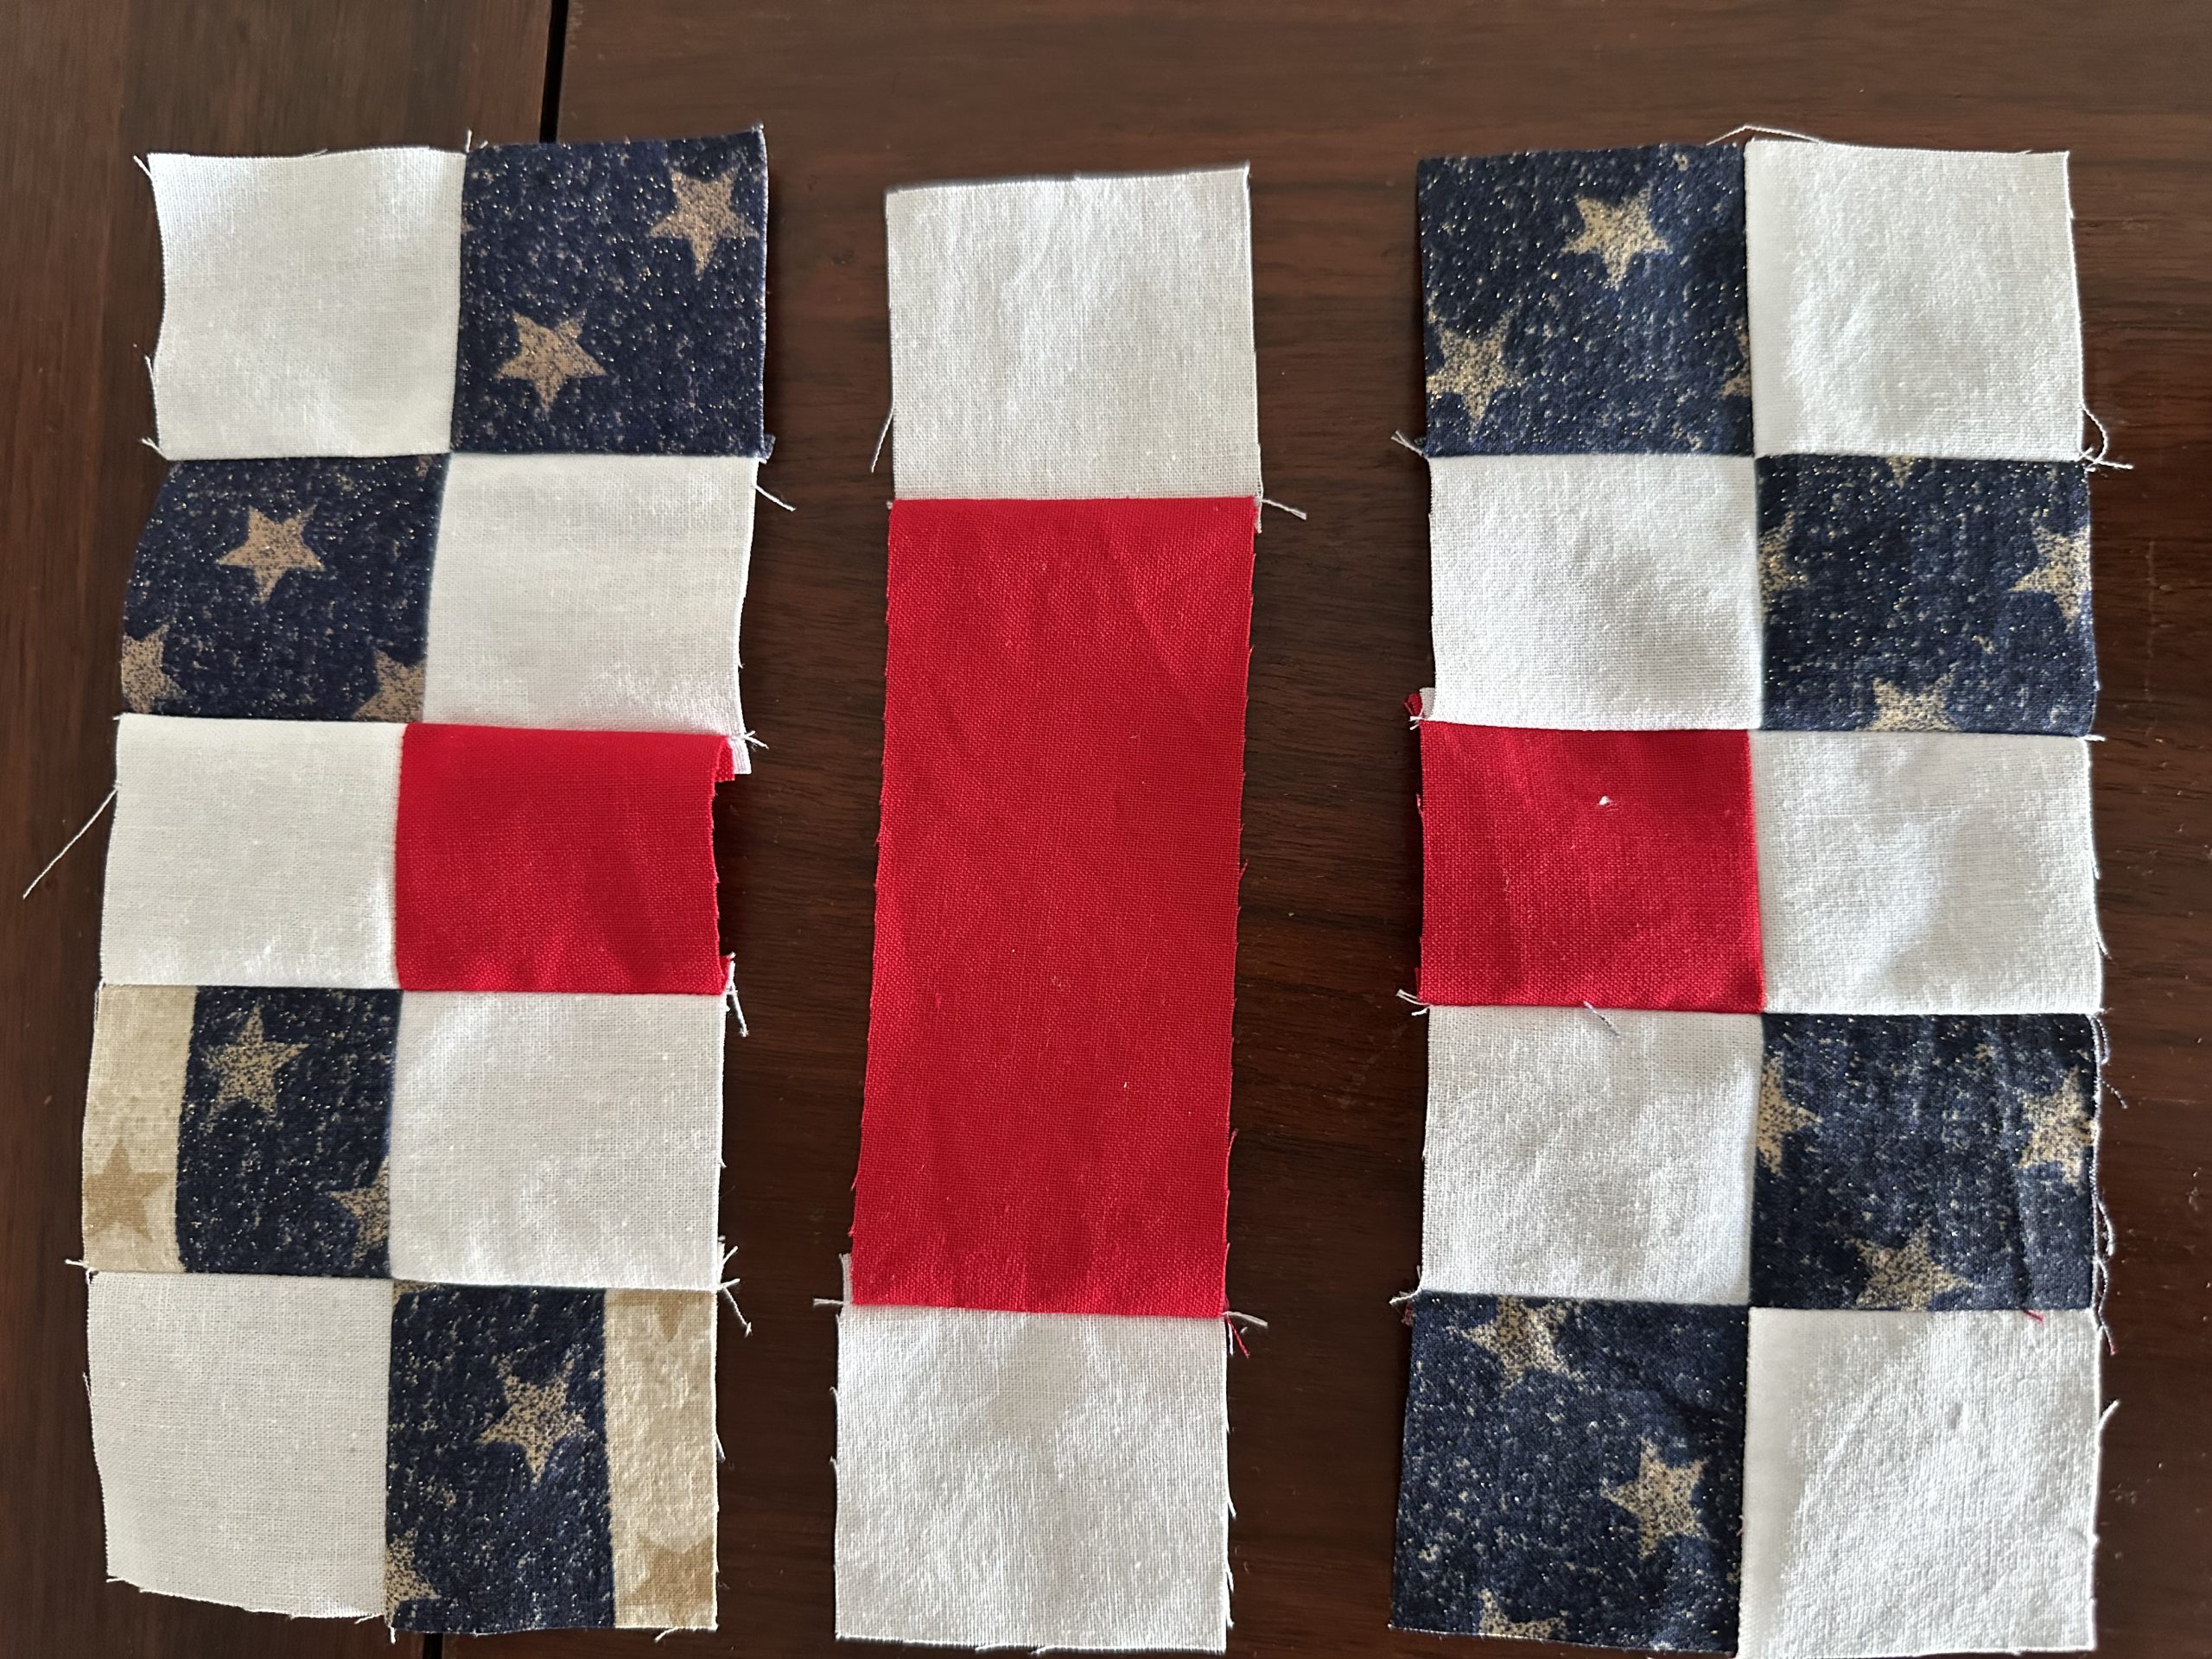
Now it looks like this.
Veterans Croiss Quilt Block susies-scraps.com
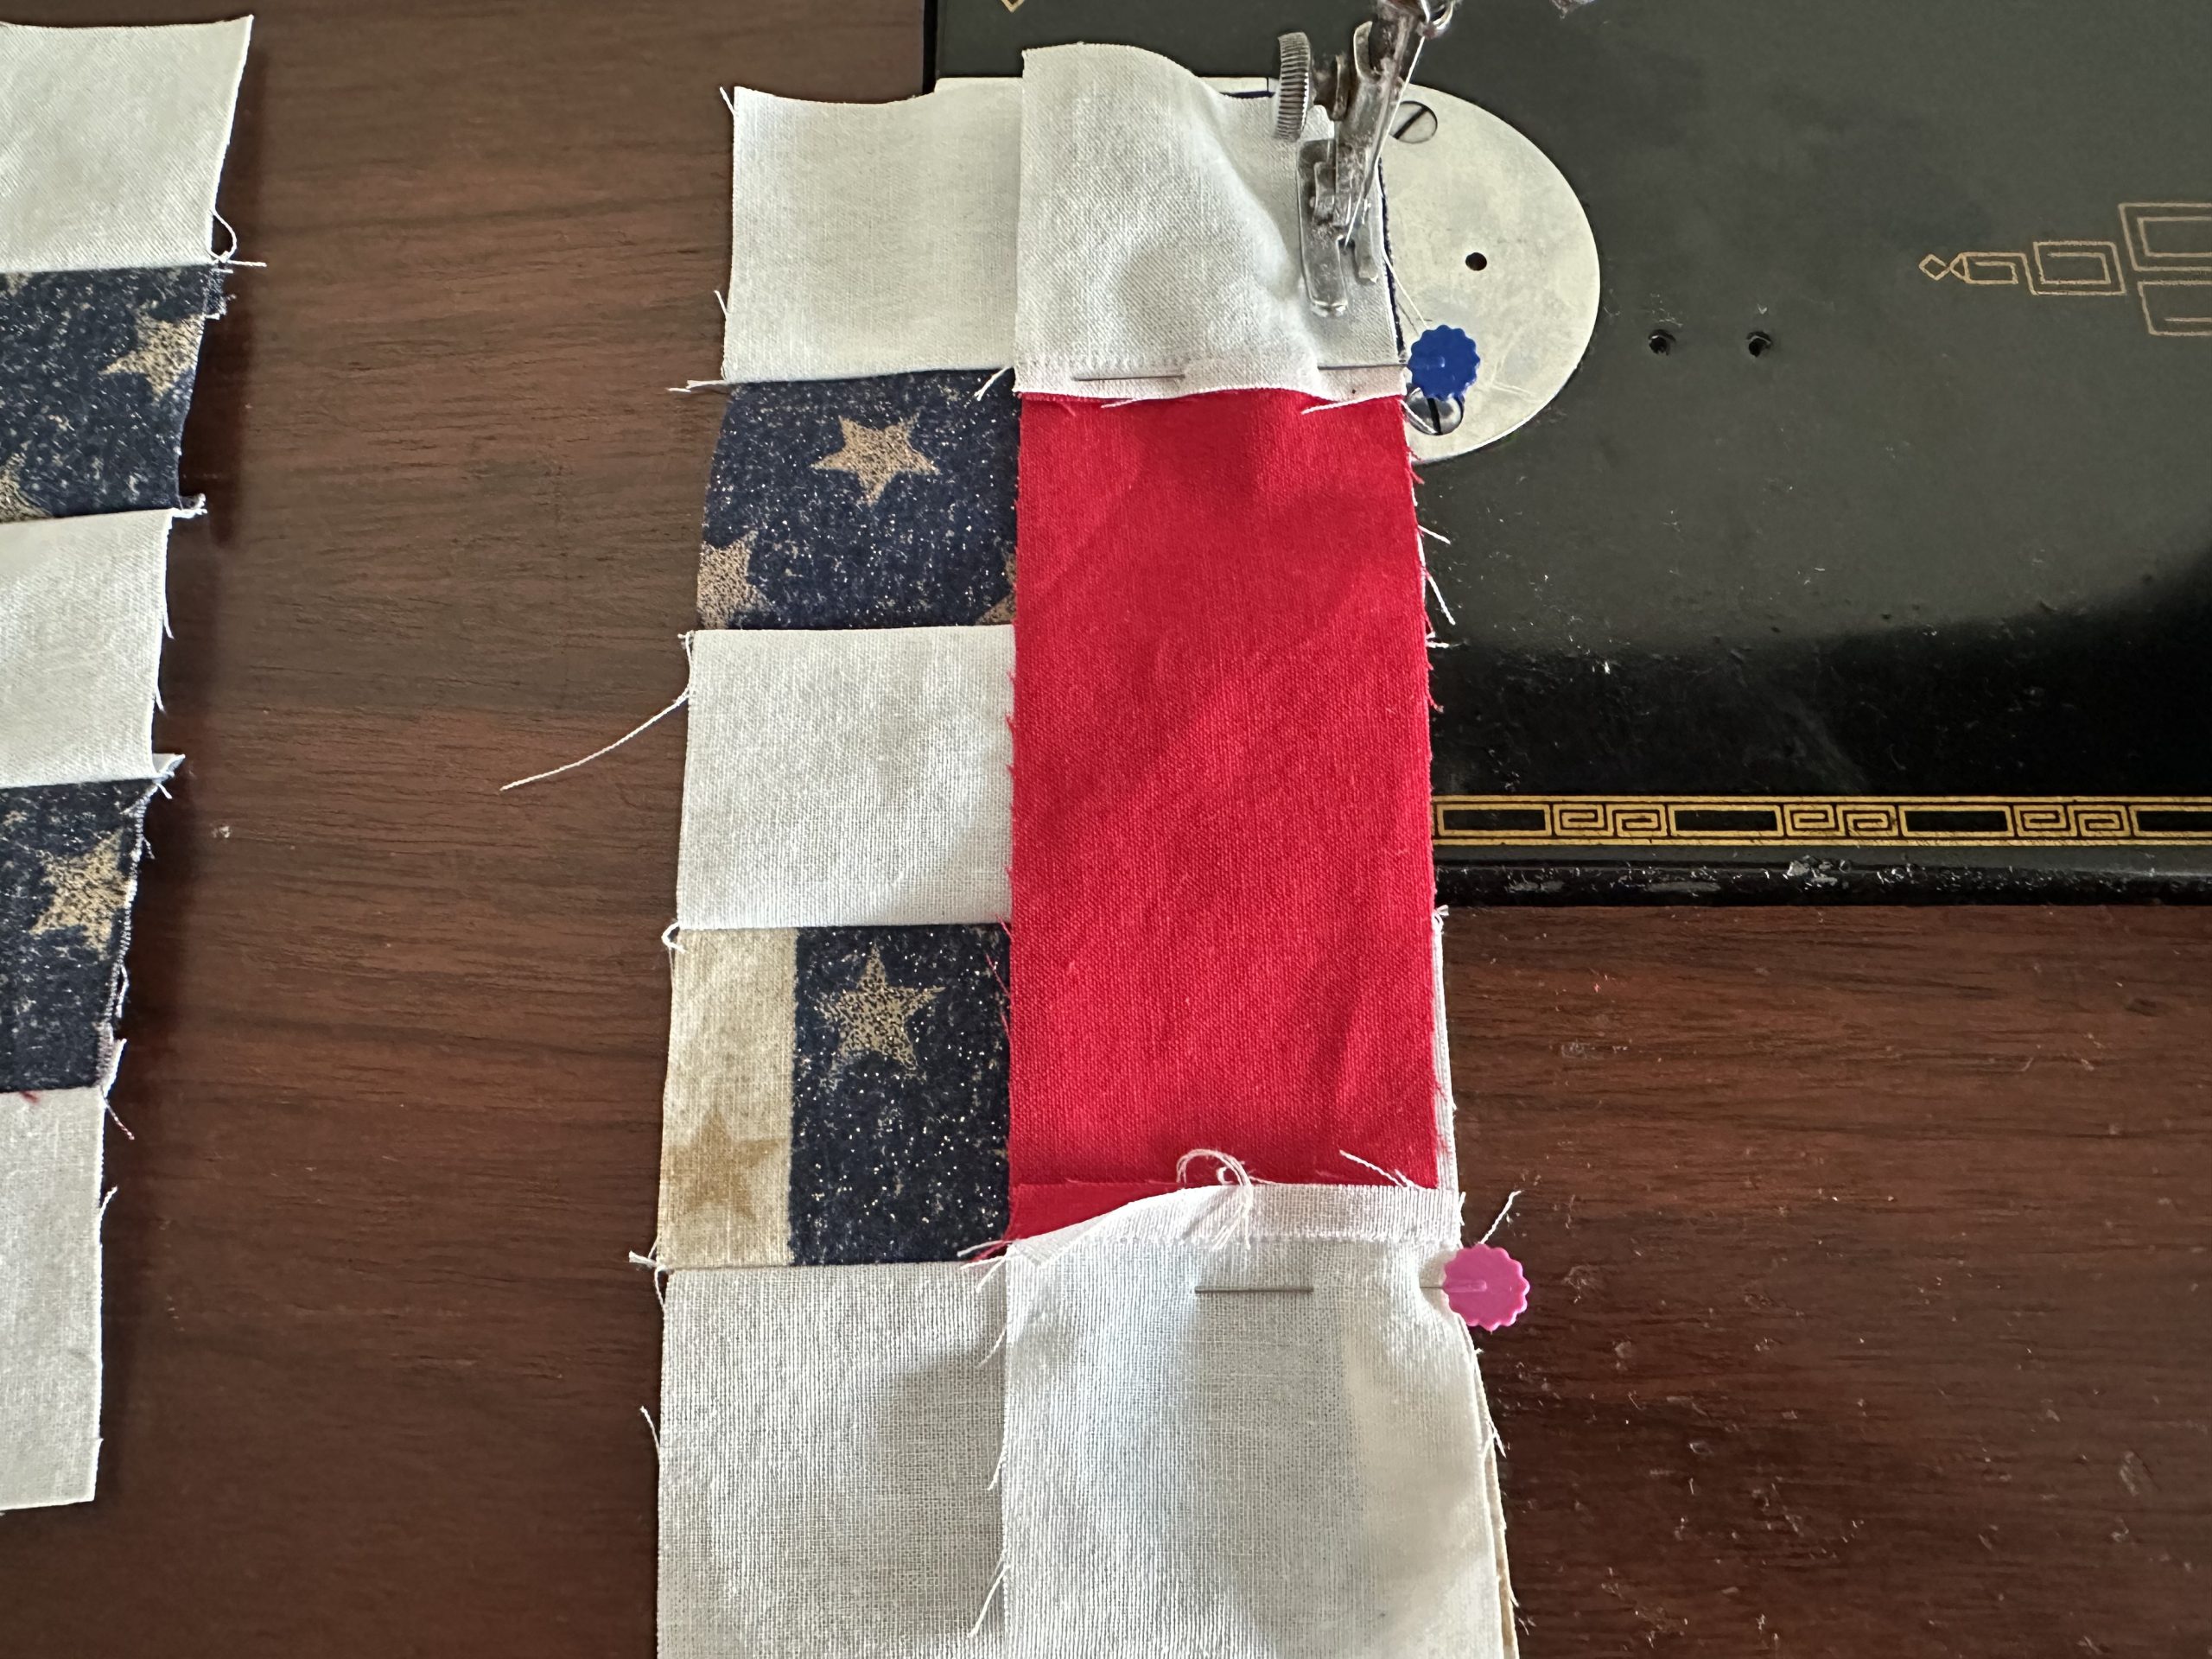
Then sew those two units to each long side of the long red and white centre strip to complete the block.
Veterans Cross Quilt Block susies-scraps.com
Here is the finished block. Today I am sewing this block on my trusty Singer 201K Treadle Singer 201K Treadle C1947
Veterans Cross Quilt Block susies-scraps.com
Press the whole block.
It can be used as it is or you can see how I put them together soon!
Hello Dear Friends and Readers and a warm welcome to today’s post. And for those of you who are new to this site welcome to susies-scraps.com.Welcome to susies-scraps.com
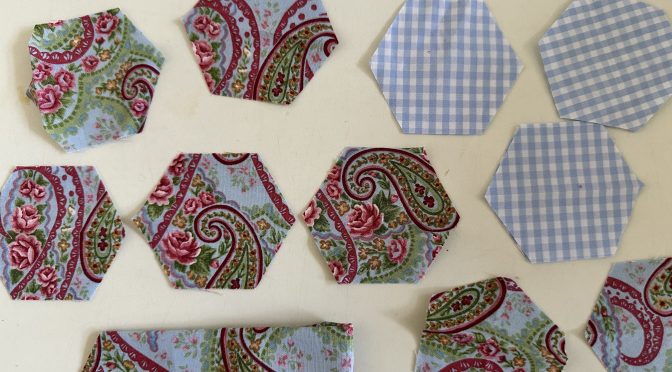
Today I had a fabulous idea of how to cut hexagons from strips. I think any of you who have cut hexagons in the past would know that it’s a little bit of a pain. I think that’s why I have enjoyed making the hexagons from circles. However, if you like to paper piece or just hand piece which is what I quite like to do as long as you can imagine your quarter inch seam. It is easy and quite quick to hand piece irregular shapes like hexagons. Another alternative is that you can buy stamps from I think it’s Stamps by Kate that you can stamp it onto the fabric and then cut them out.
Today I’d like to show you something which I think might be new, of cutting hexagons using your rotary cutter. On this occasion, I’m not going to go through every size, rather, I will give you a demonstration using 2 1/2 inch strips.
There will be a small amount of triangle waste.
Hexagon size 1 1/2 inches on each side.
Requirements for Cutting Hexagons from Strips
In order to achieve this, you will need:
Fabric to cut the strips or 2 ½” Width of Fabric strips
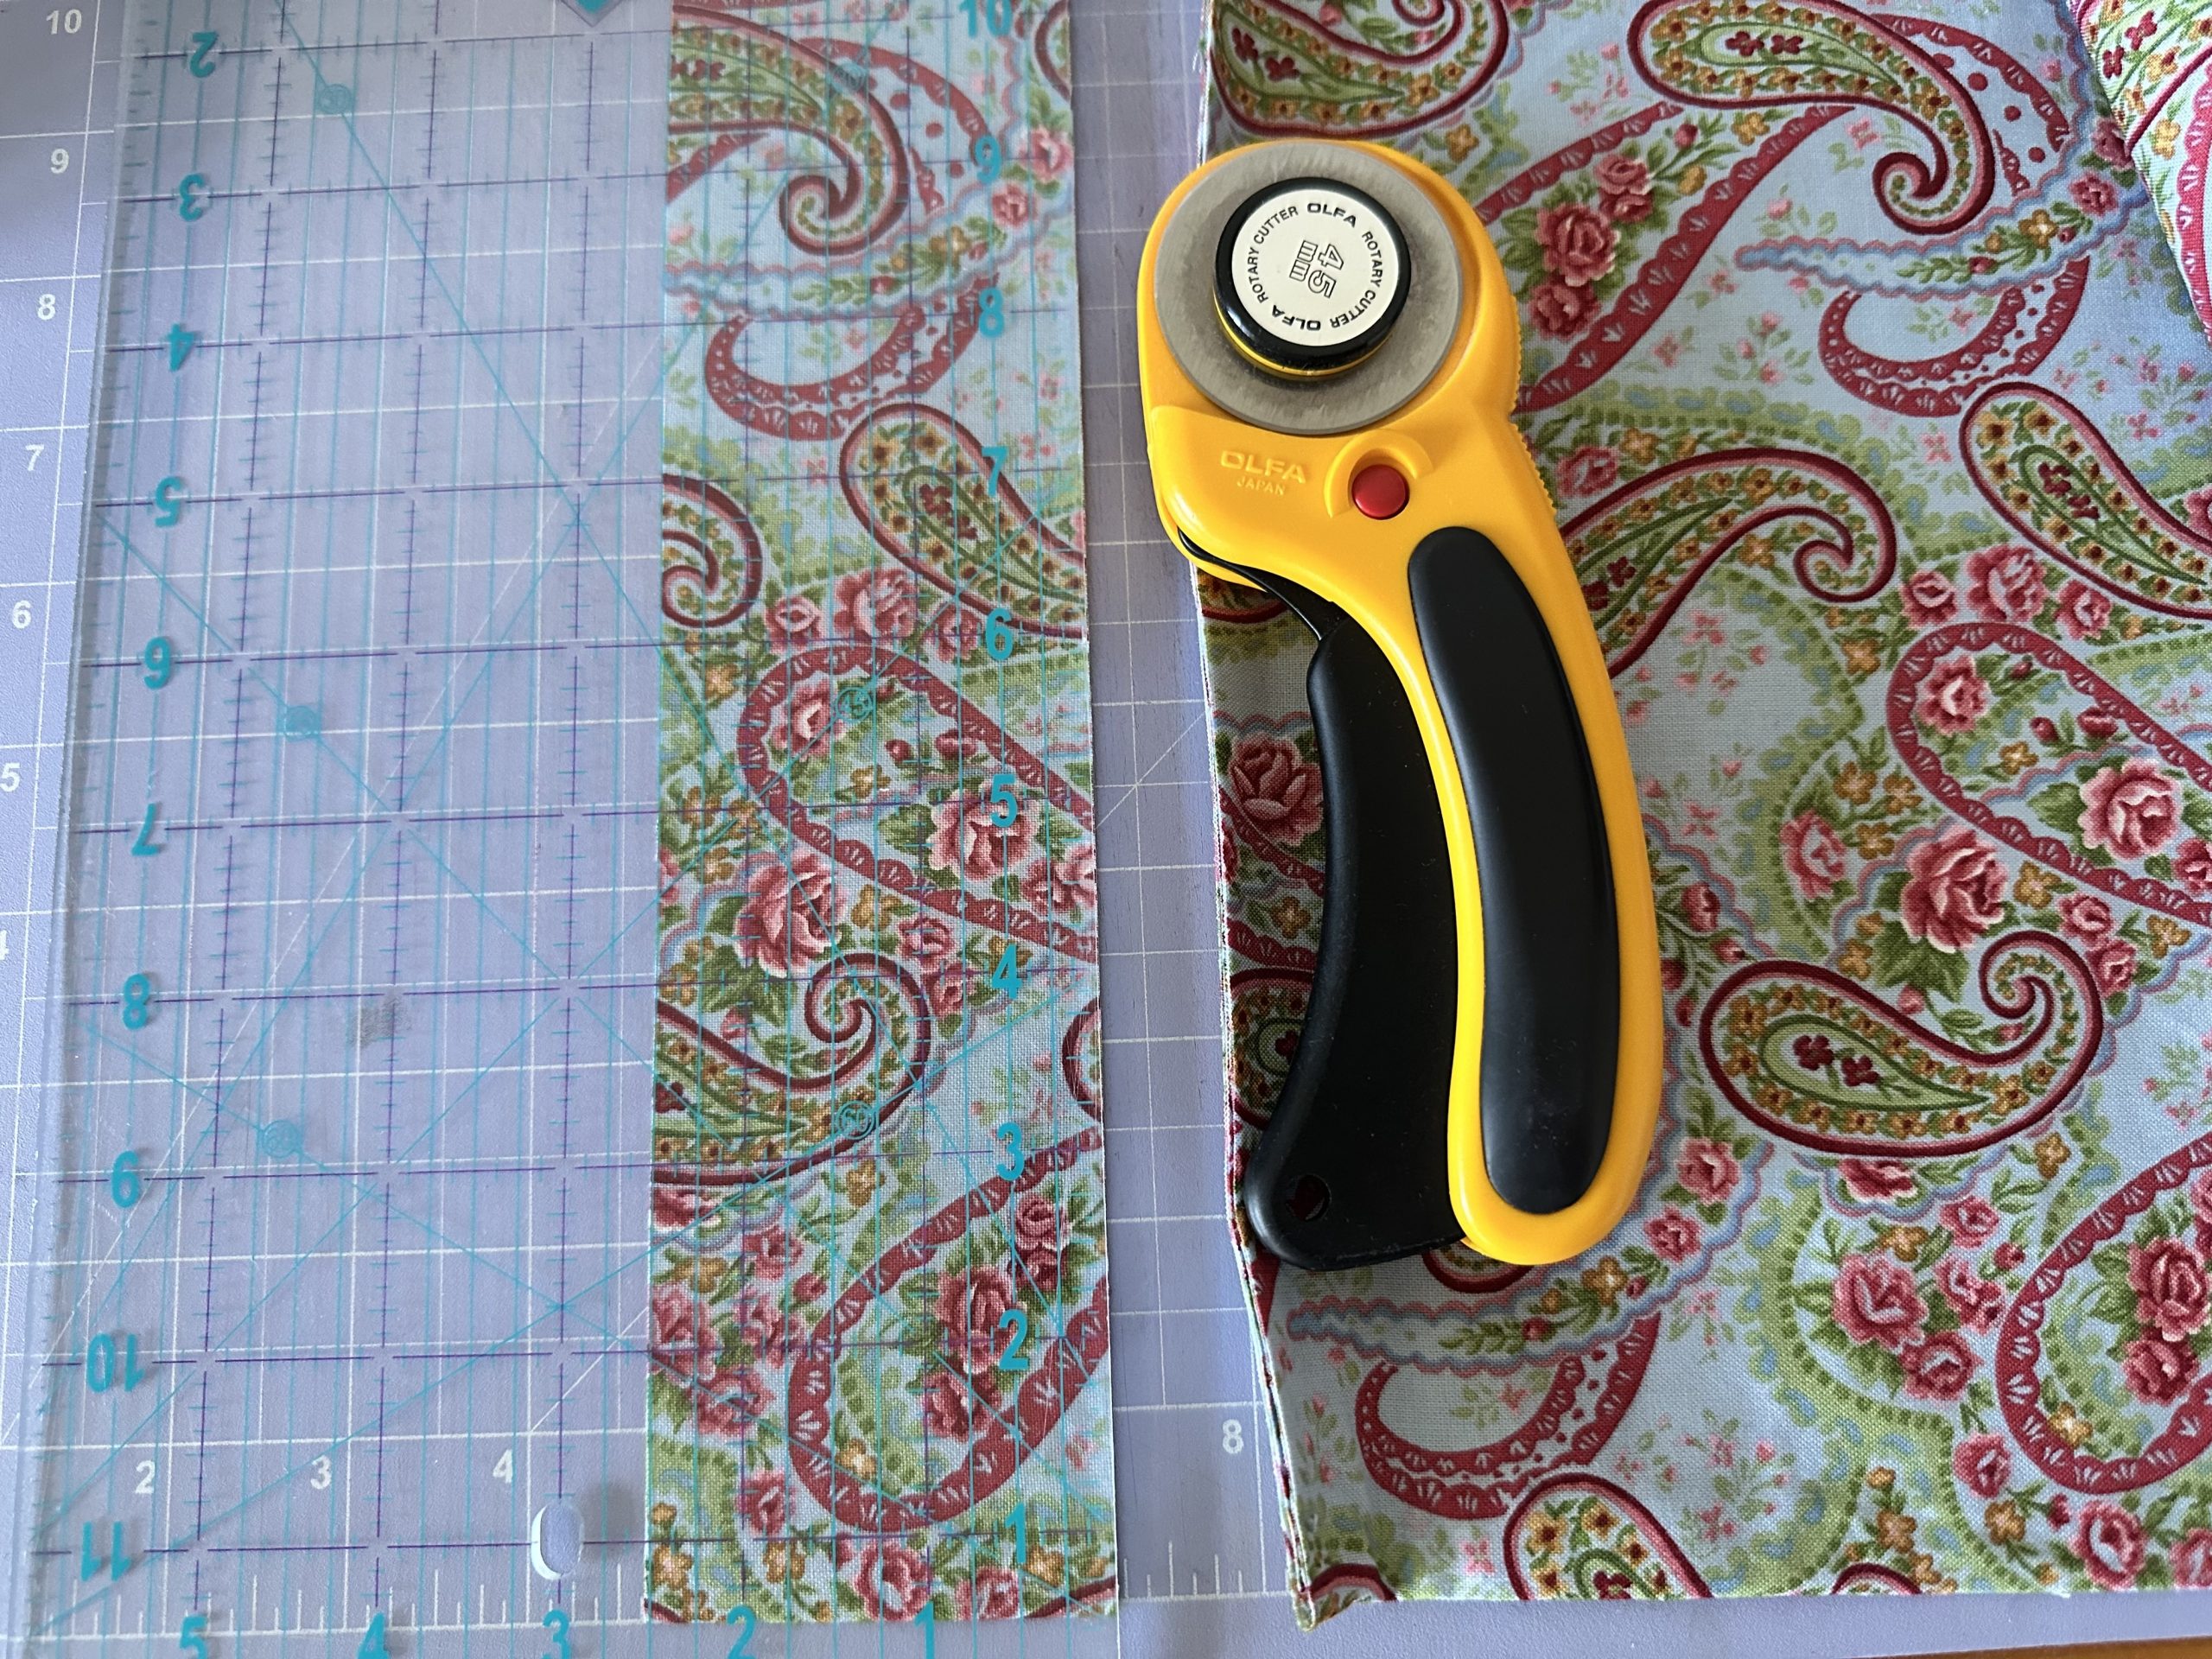
A quilting ruler, like a 12“ x 6“ in order to cut the strips if you don’t have them cut already. Please make these as accurate as possible.
Extra, but not essential, a smaller ruler or quilting square which has 60° lines marked on it.
A Rotary Cutter
That’s pretty much it.
Cut Hexagons from Strips susies-scraps.com
Cutting Hexagons from 2 1/2 inch Strips
Let’s get to it!
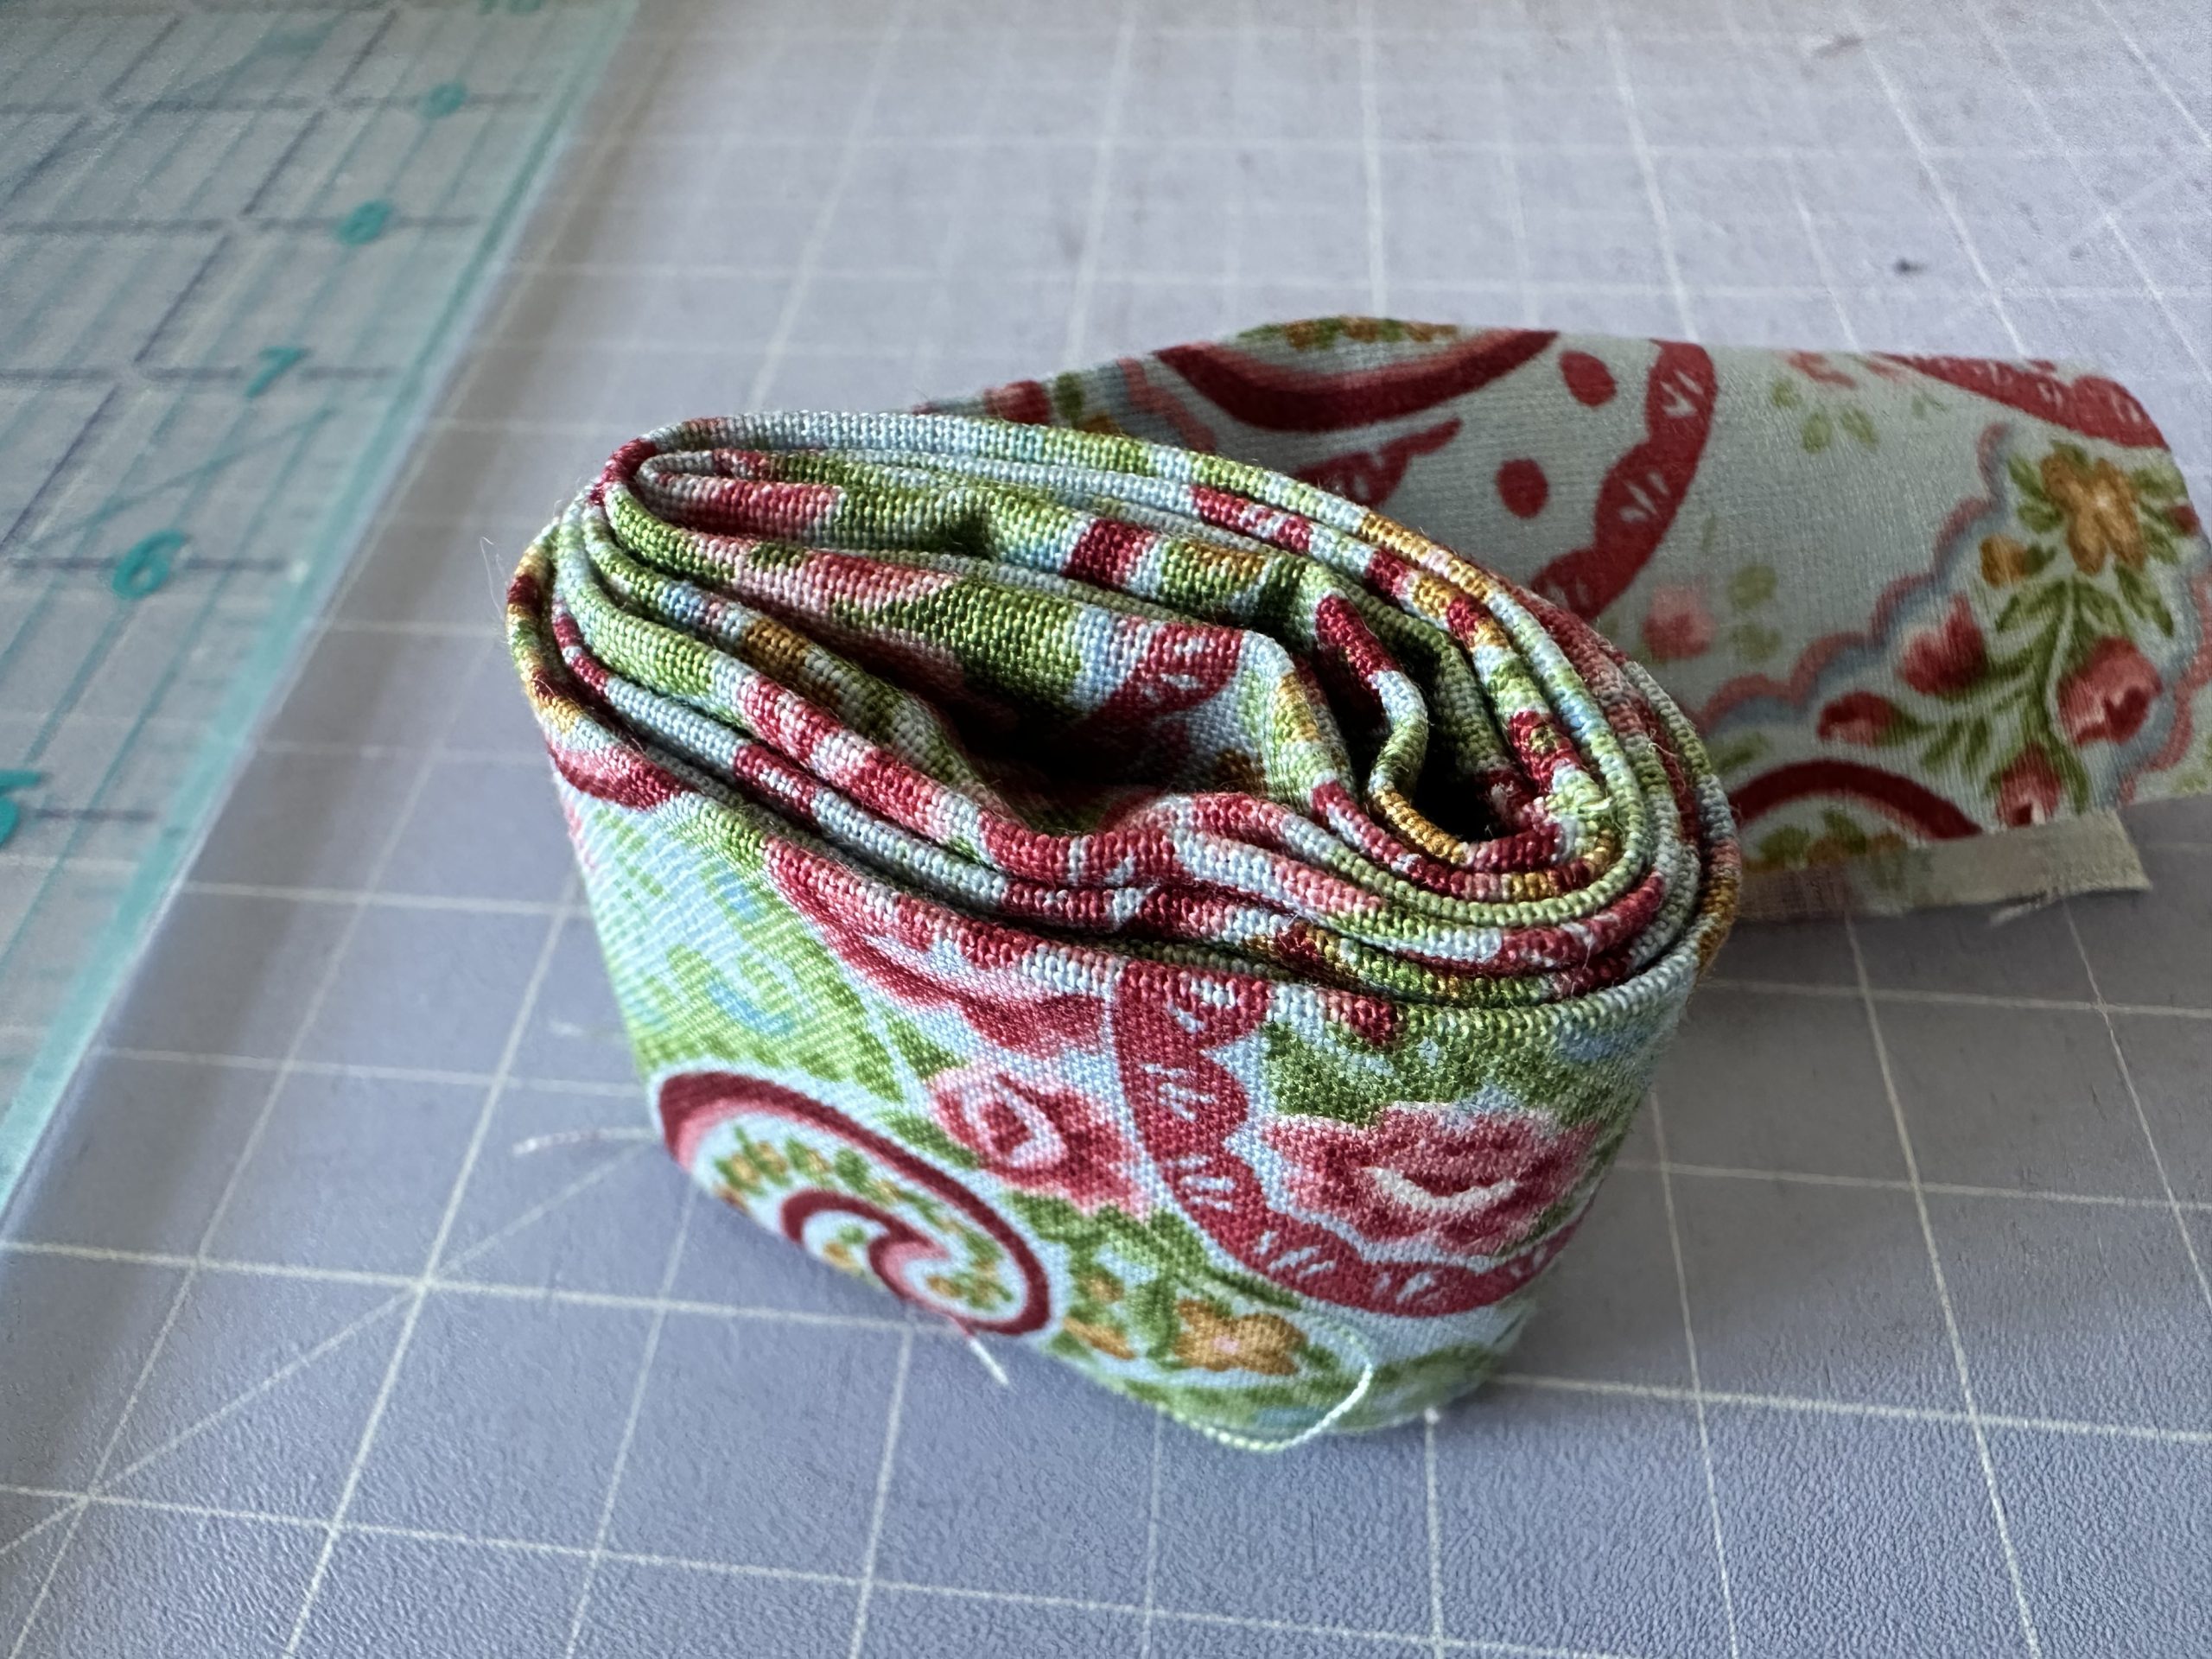
When I make my binding strips, Prepare binding strips for quilts – Tutorial. I like to fold the strip in half length ways, and then roll it into a round. Keep the long edges as closely aligned as possible. The idea is to create a fold in the centre, just with finger pressing. In other words, not a heat pressed center fold.
Cut Hexagons from Strips susies-scraps.com
Unroll the round, keeping the two long raw edges together.
Take the strip to the cutting mat. Place the strip on the mat with the fold at the top. Make sure the two long raw edges are at the bottom and aligned with one of the lines on the cutting mat.
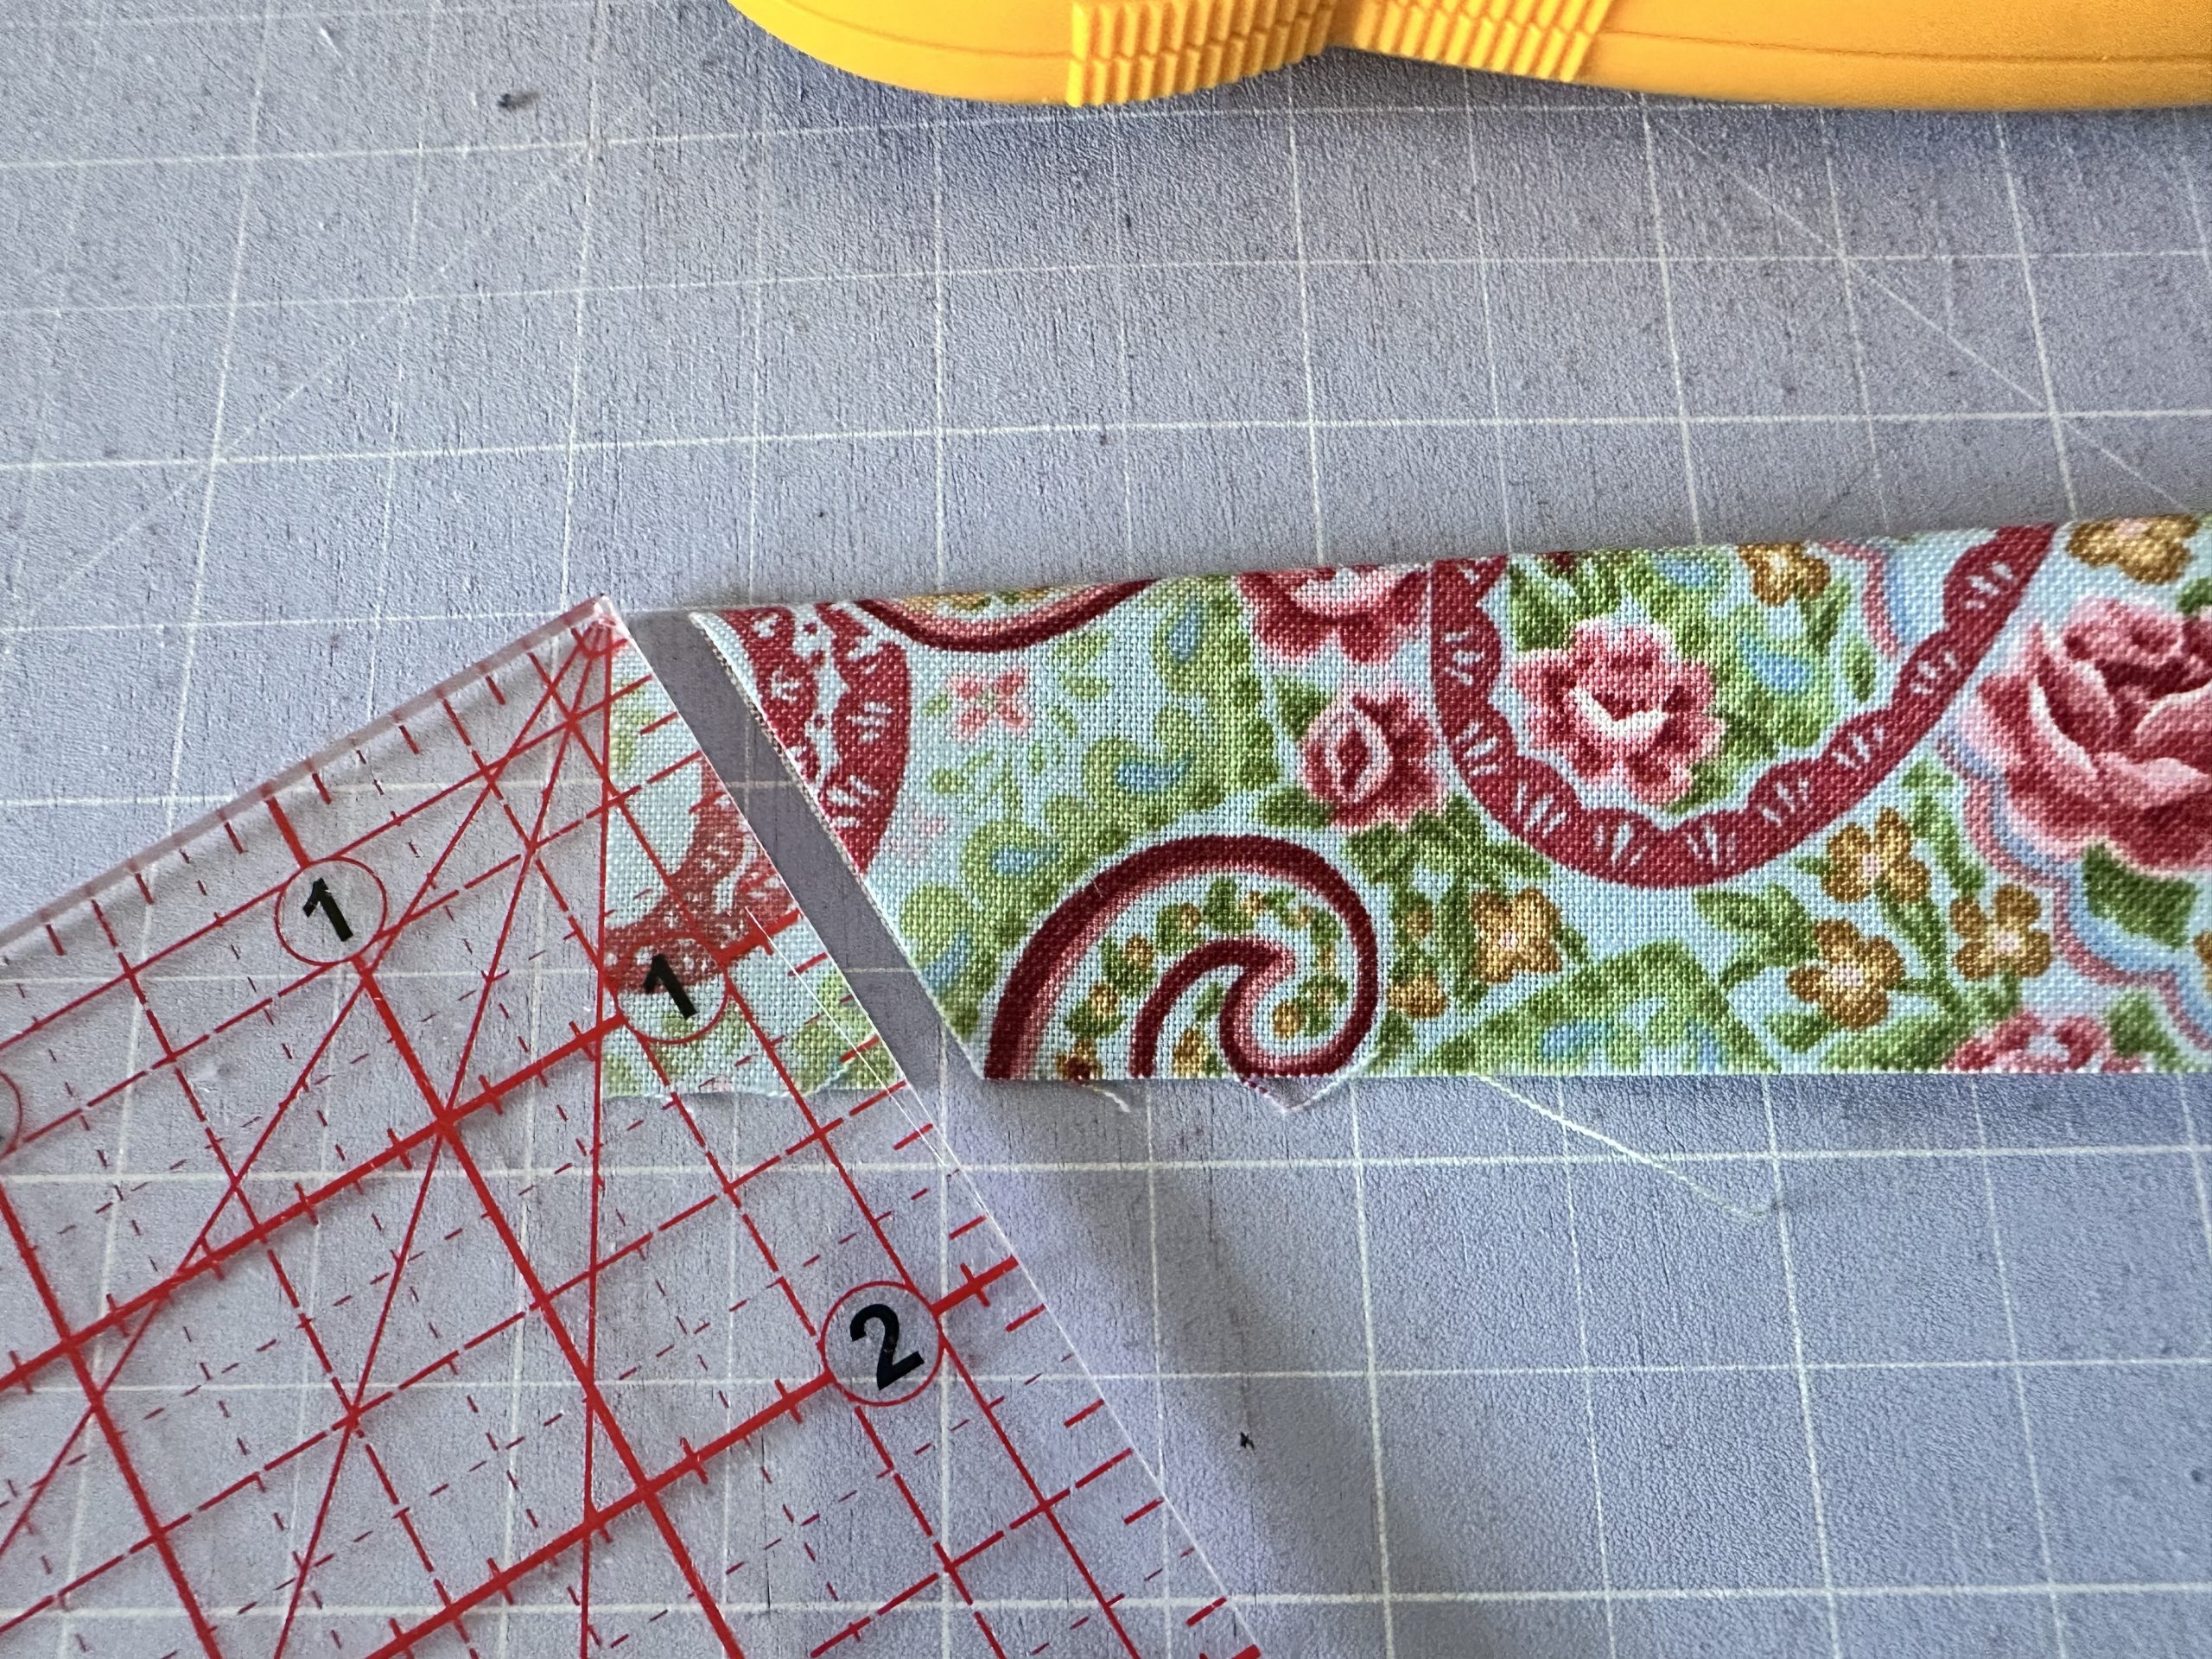
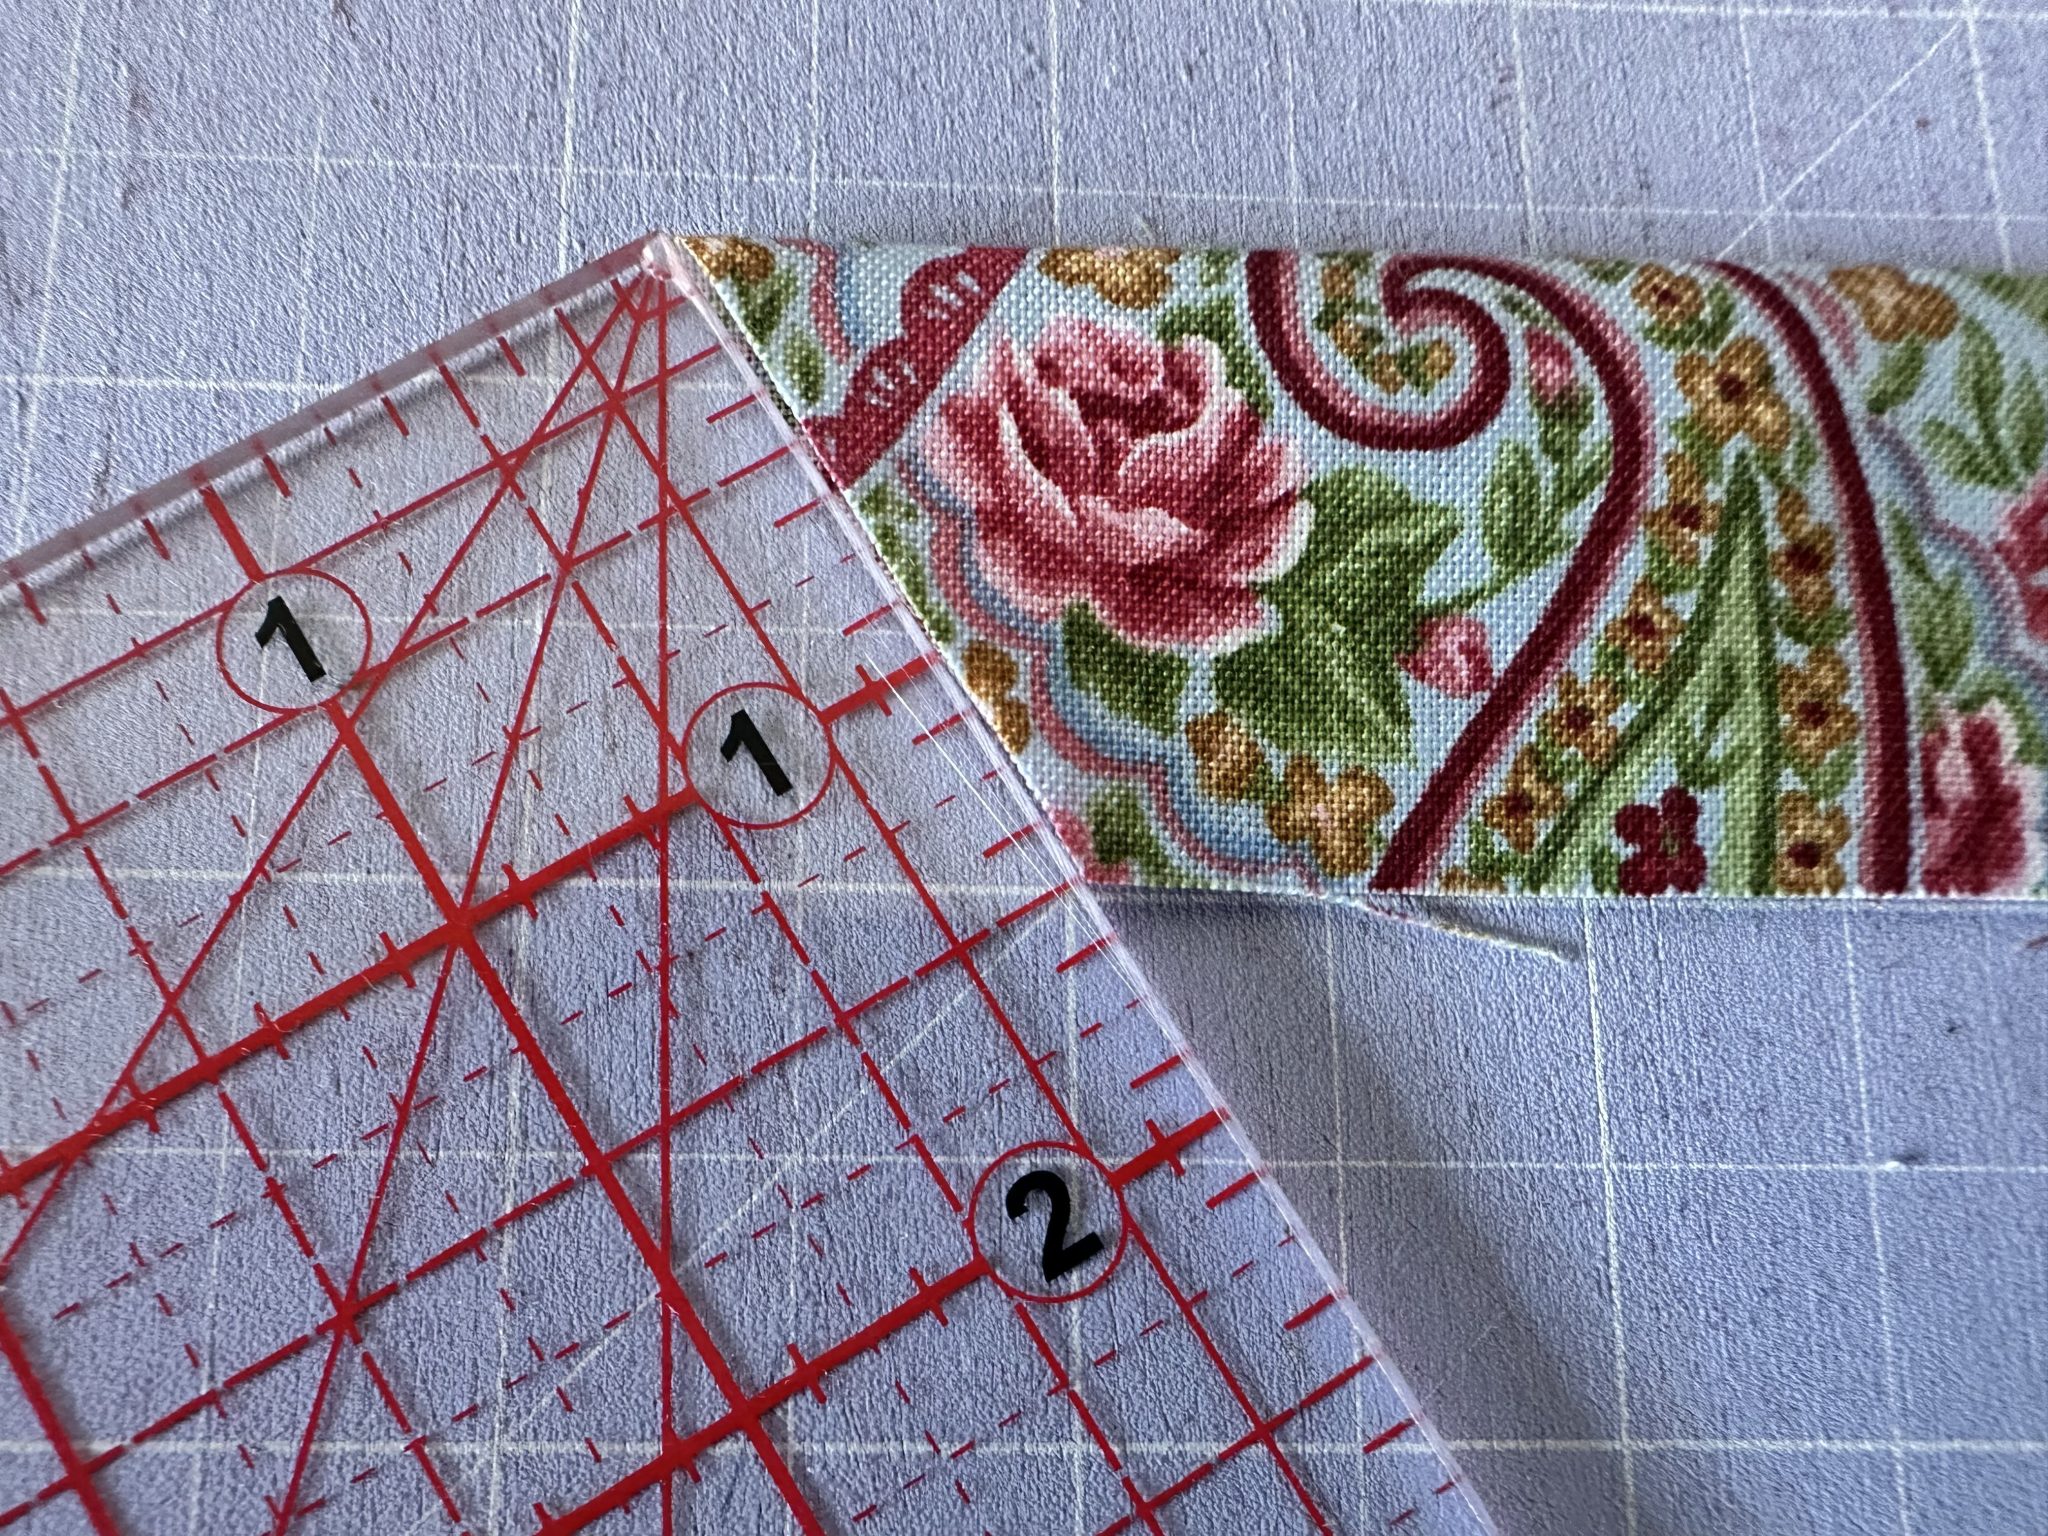
Use the smaller ruler. Place the 60° mark to lineup with the straight short end of the strip. Cut with your rotary cutter.
Cut Hexagons from Strips susies-scraps.com
At this stage you can measure this cut angle. It should measure 1 ½” as pictured.
Cut Hexagons from Strips susies-scraps.com
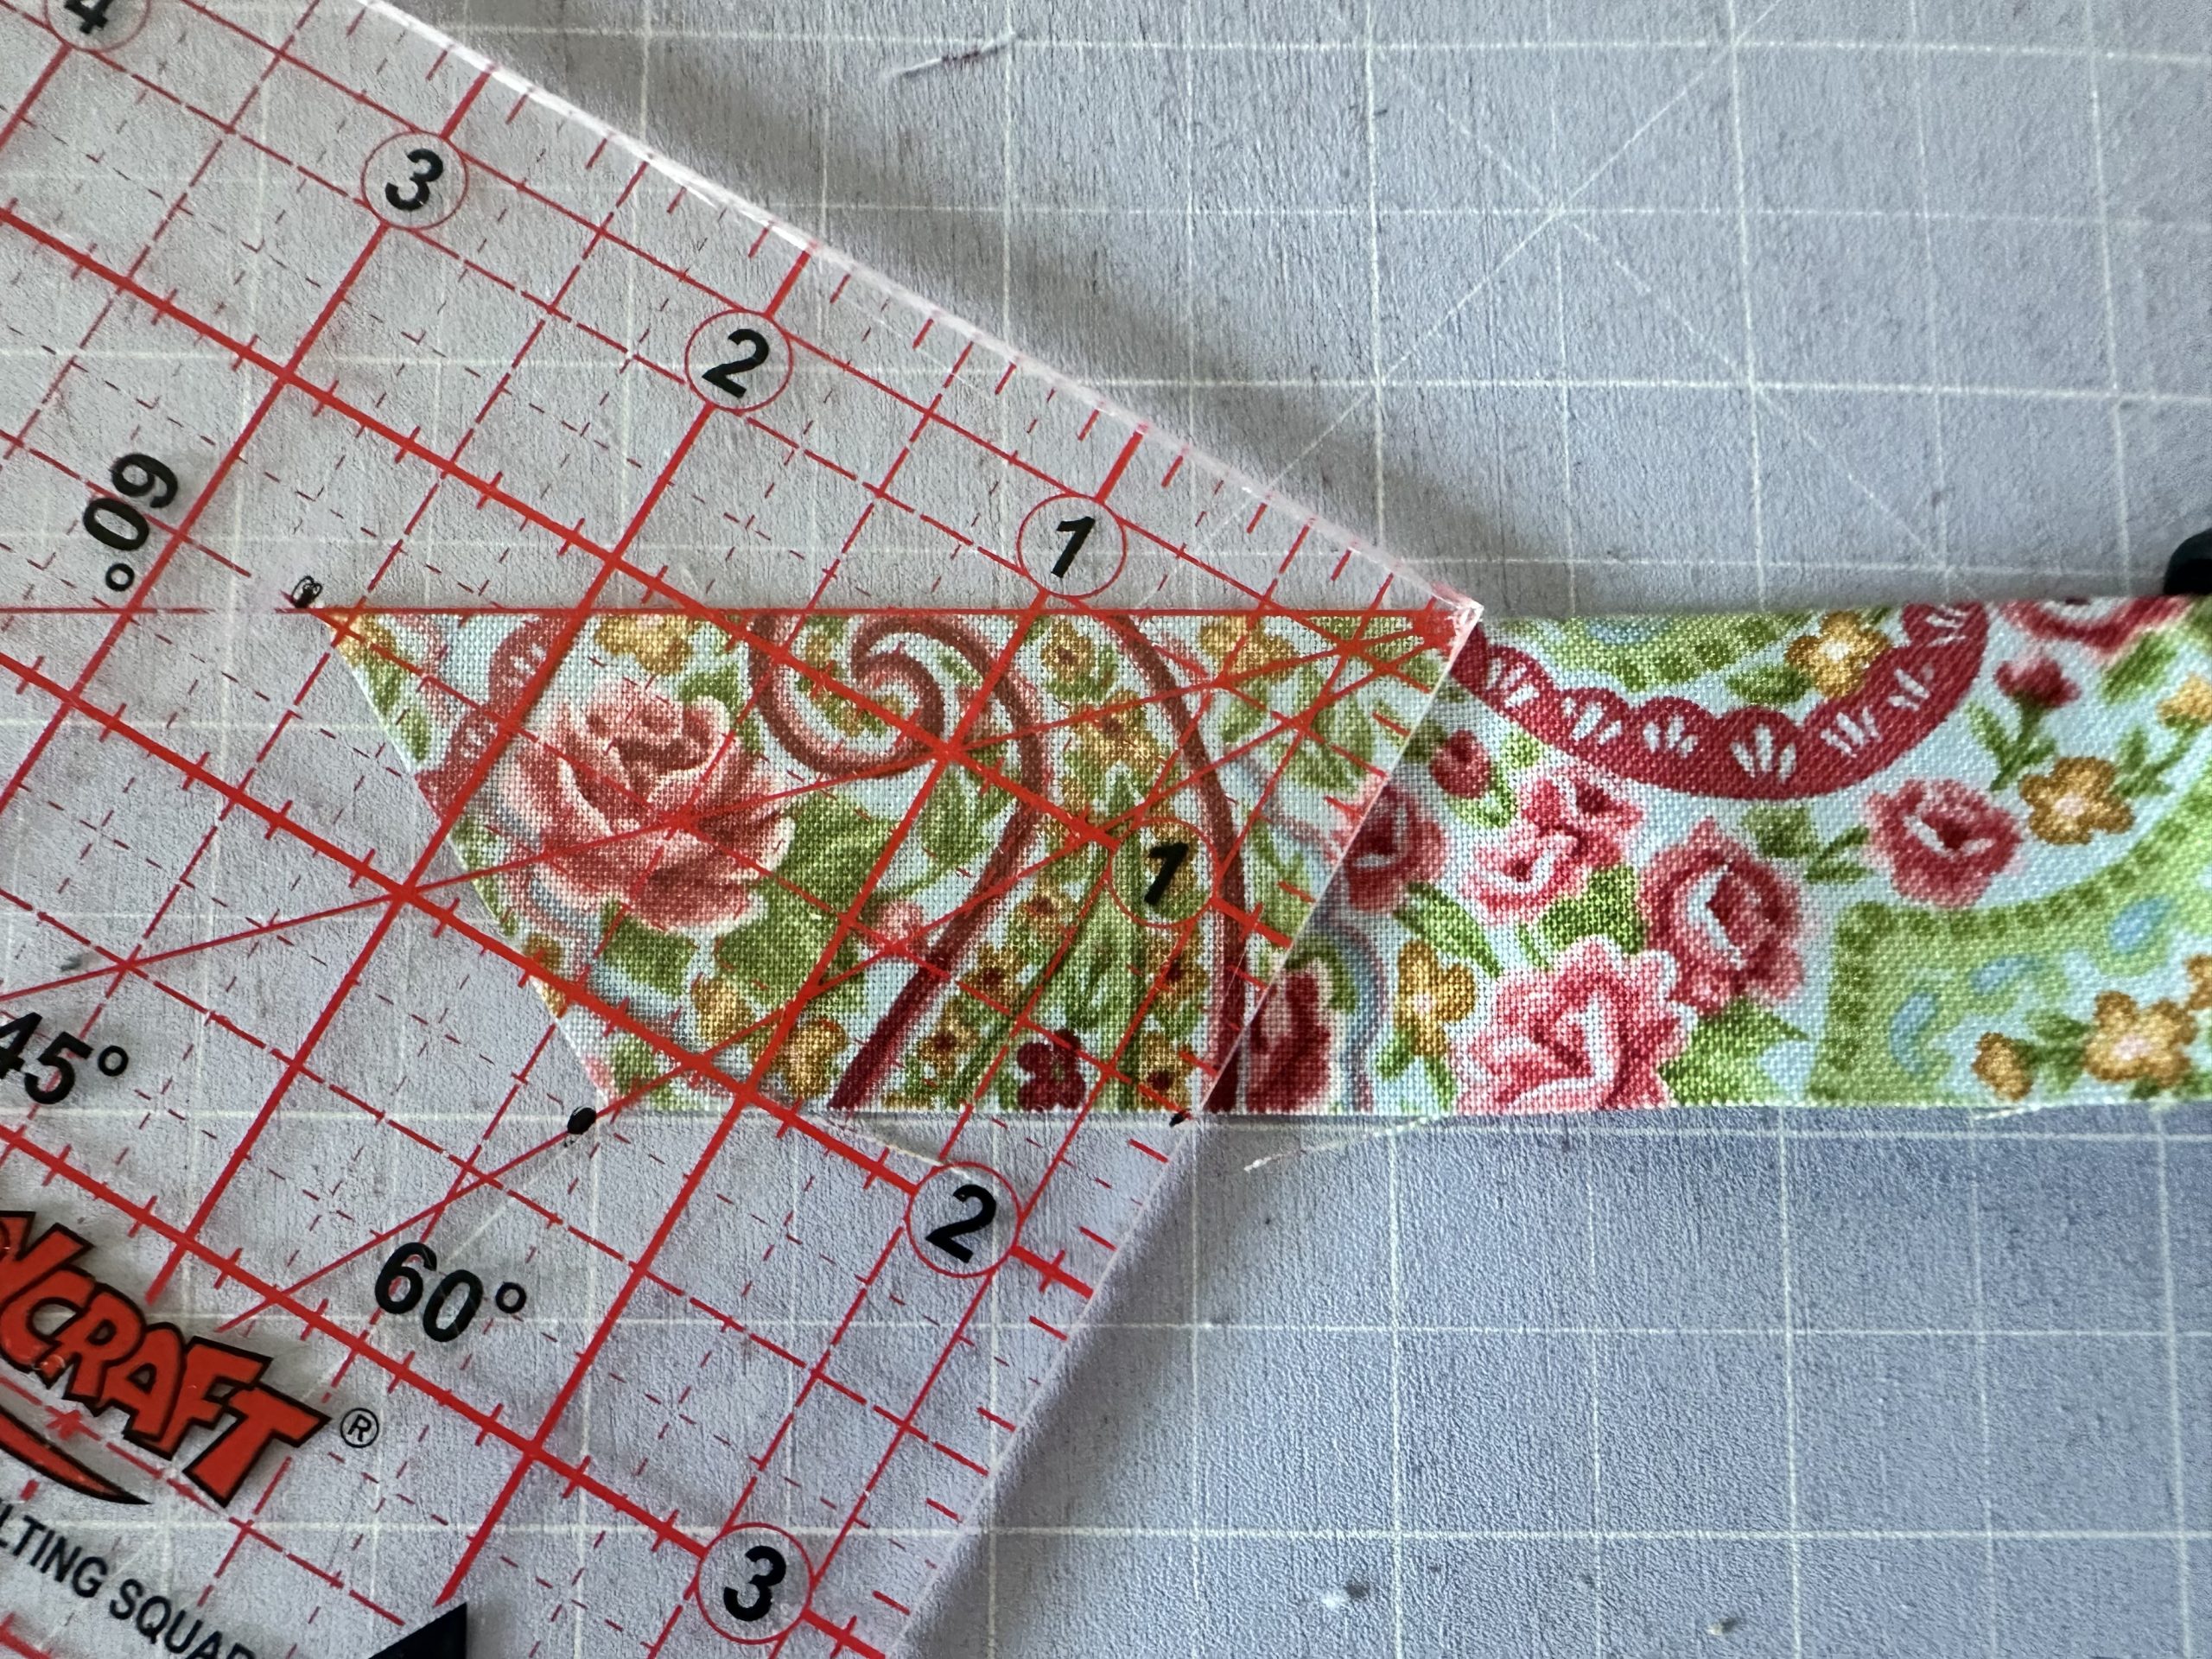
Now move the ruler so that the 60 degree line is at the top of the fold. Measure one and a half inches on the bottom raw edges. I have put two black spots on my ruler to make it easier to cut subsequent hexagons.
Cut Hexagons from Strips susies-scraps.com
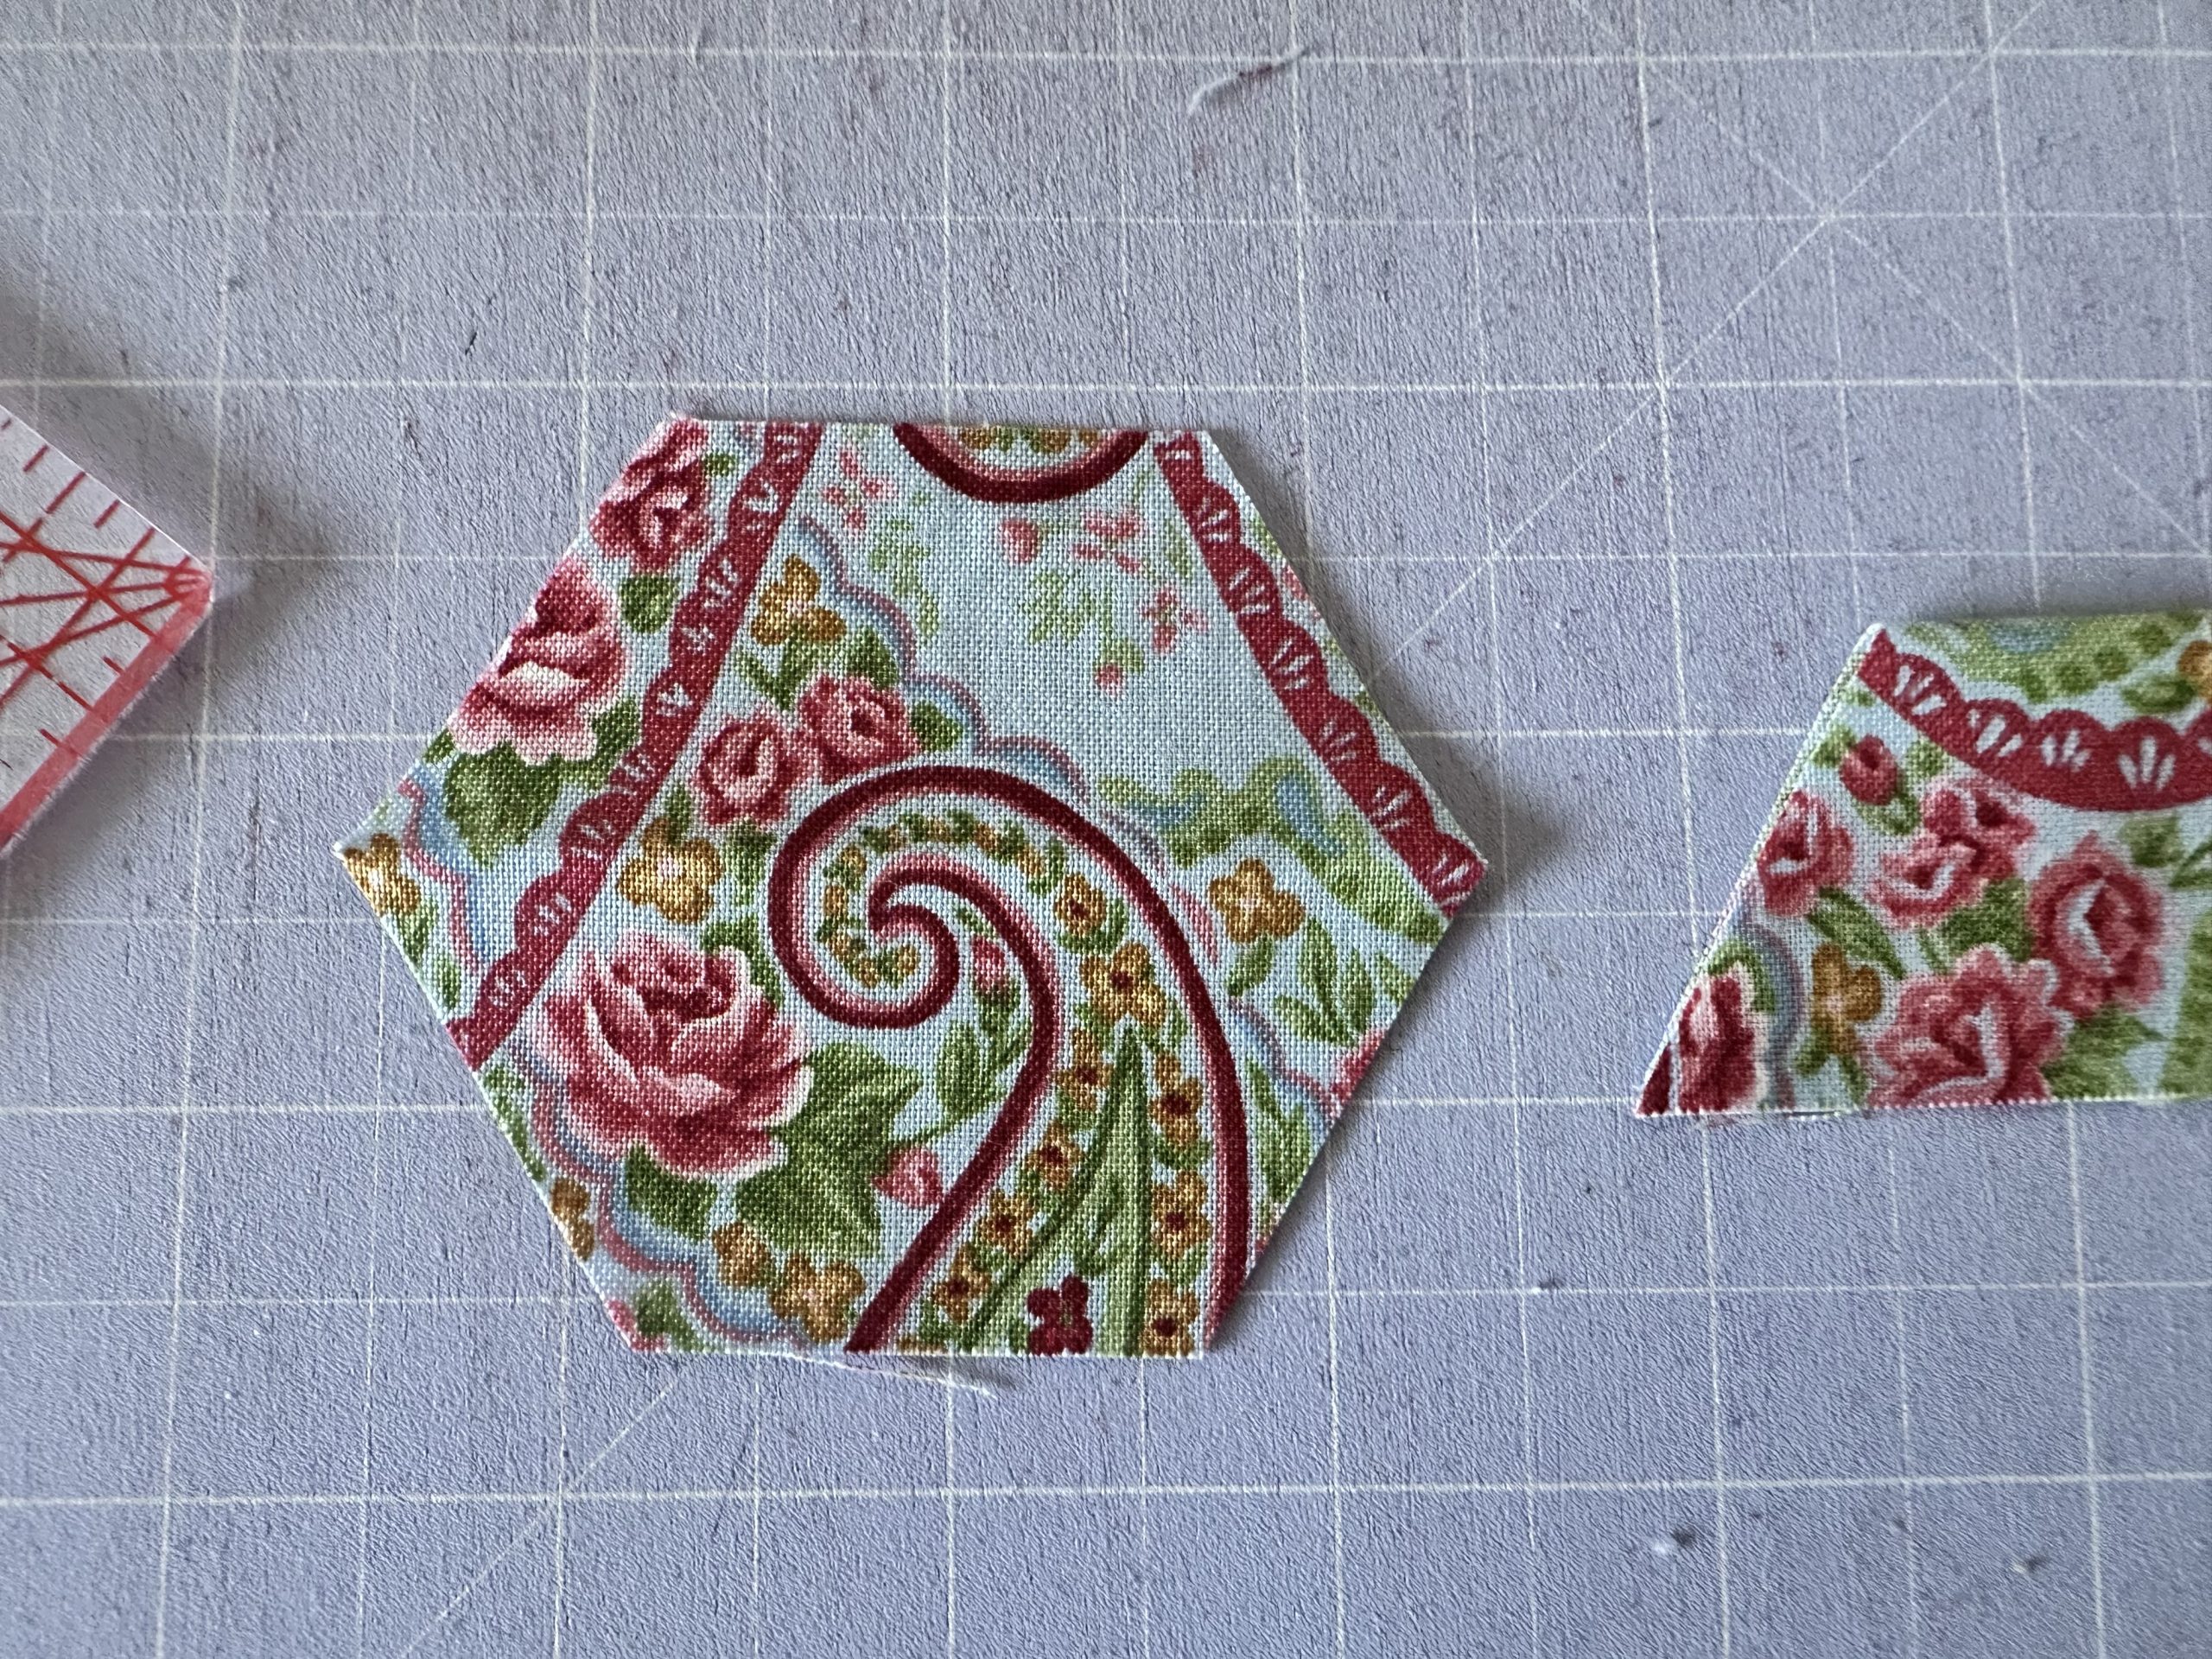
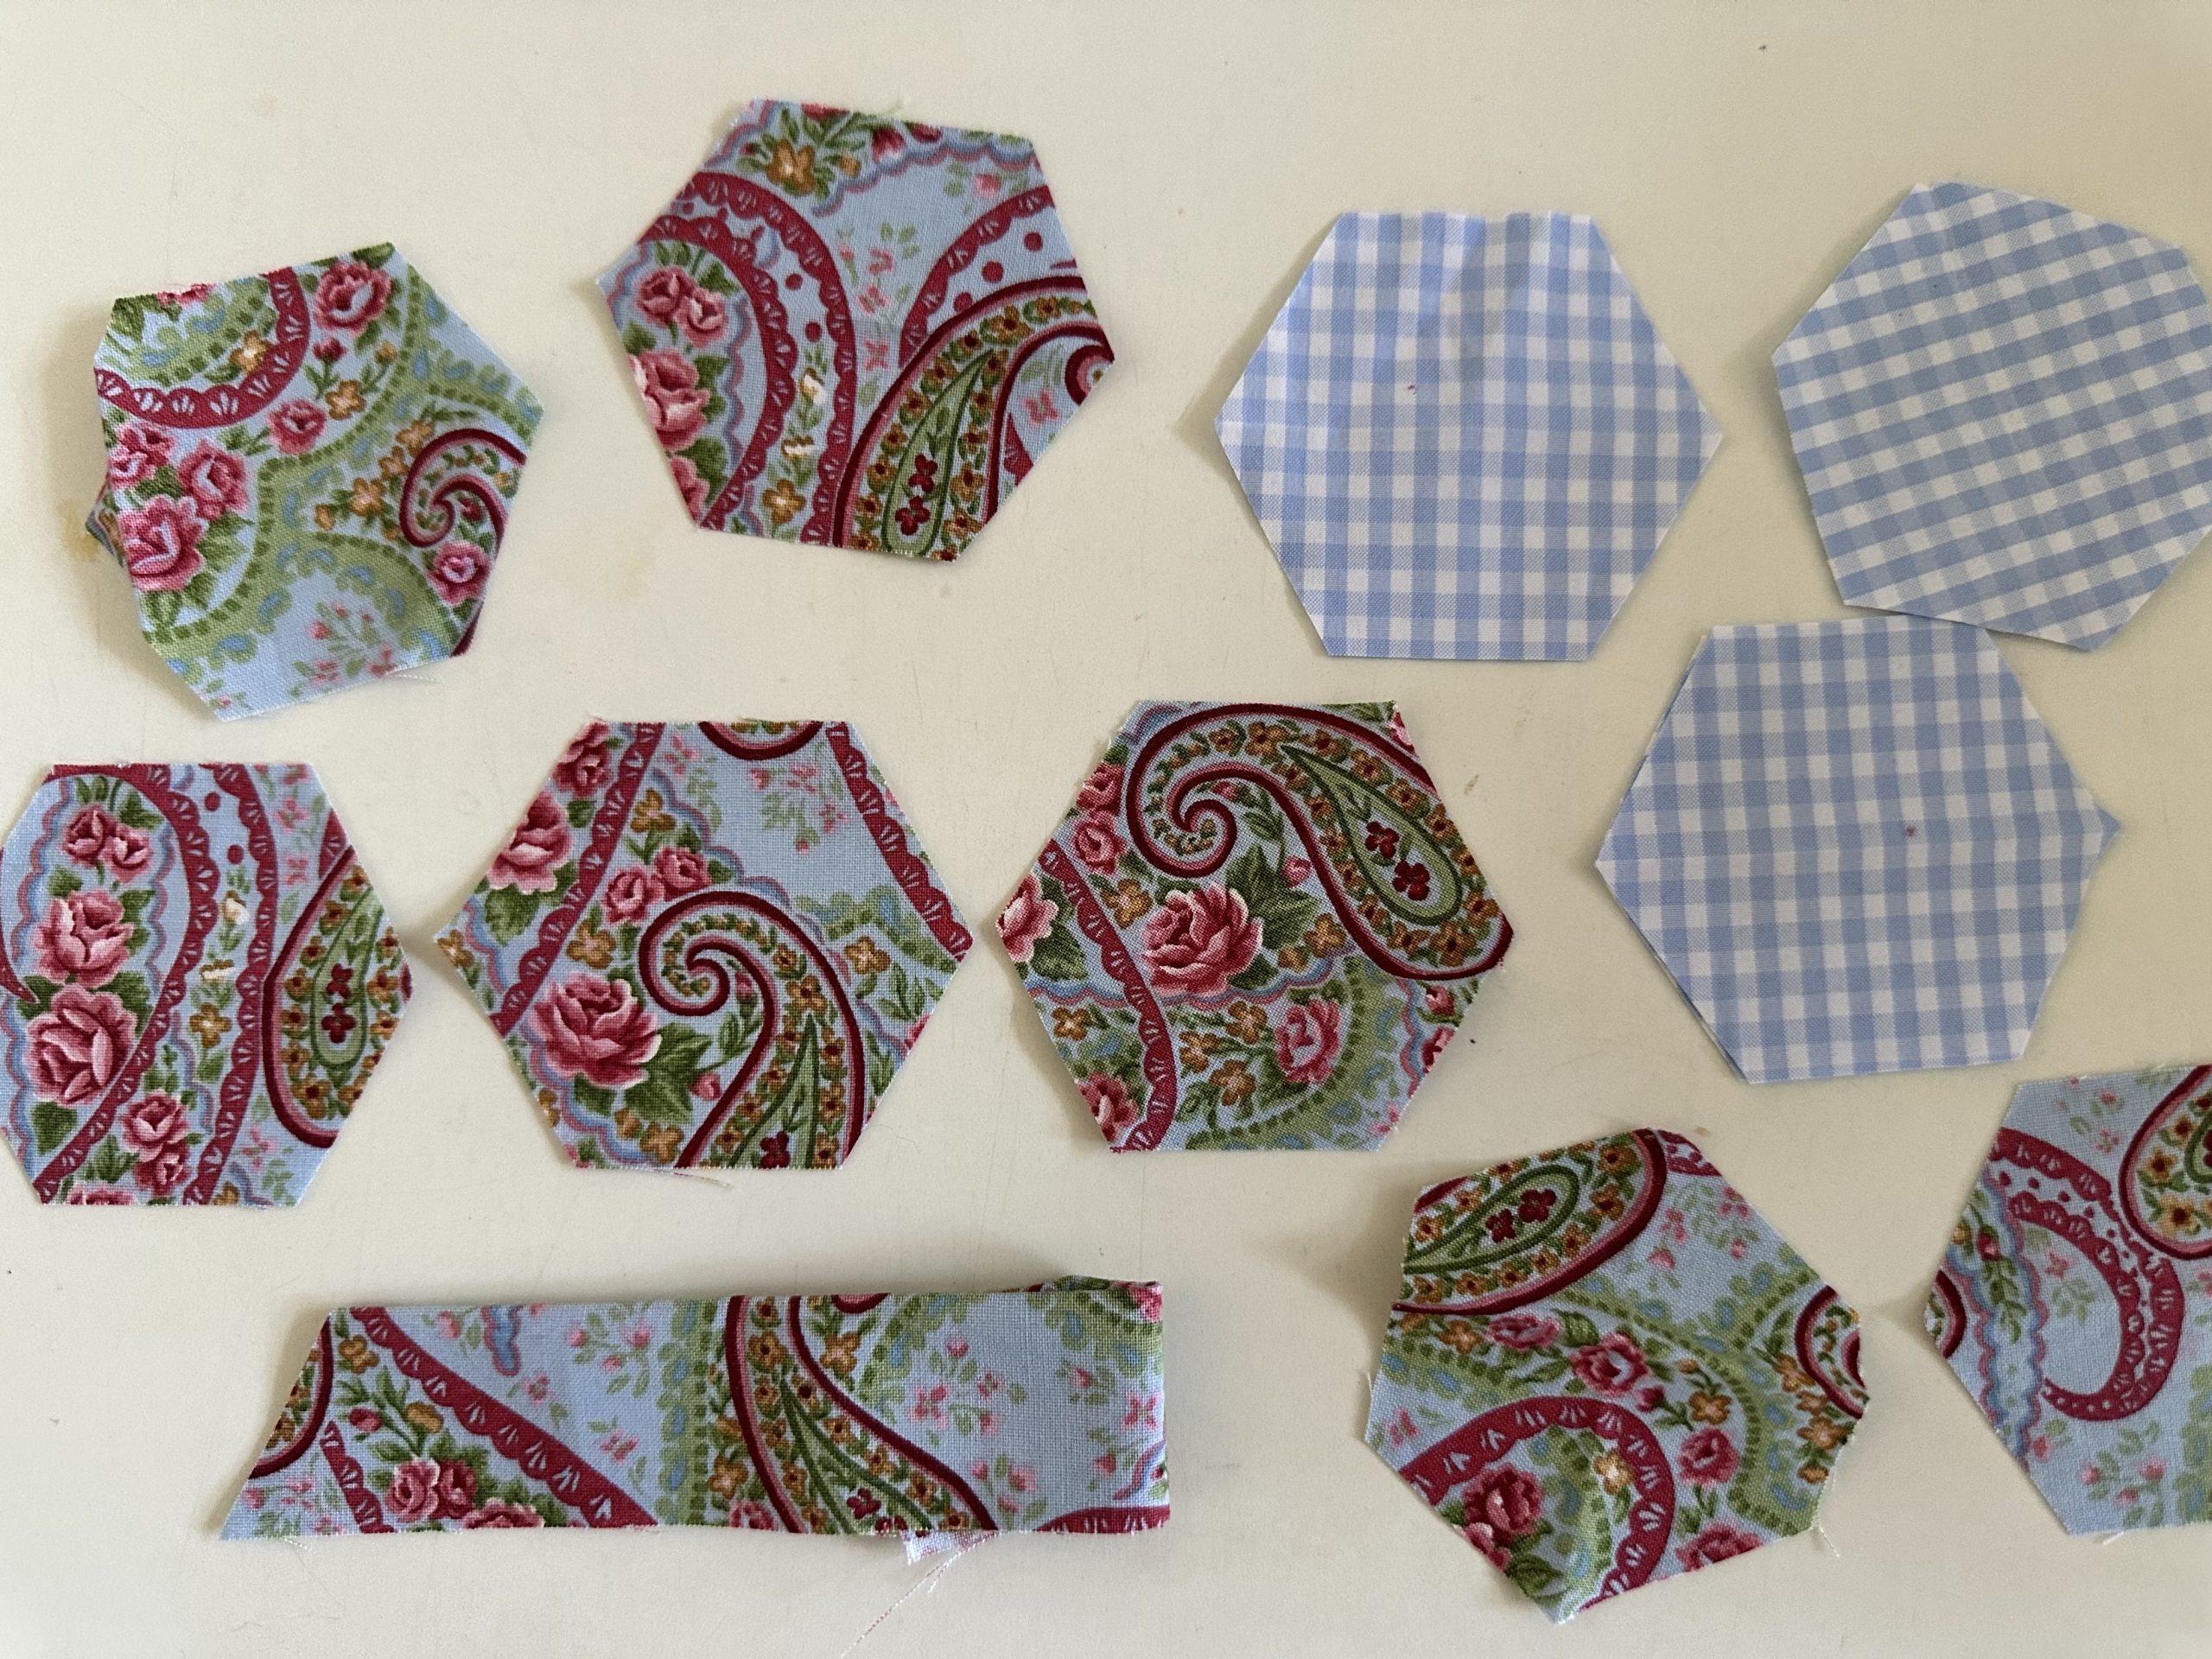
Cut at that point. Now you will have one hexagon measuring one and a half inch on each side.
Cut Hexagons from Strips susies-scraps.com
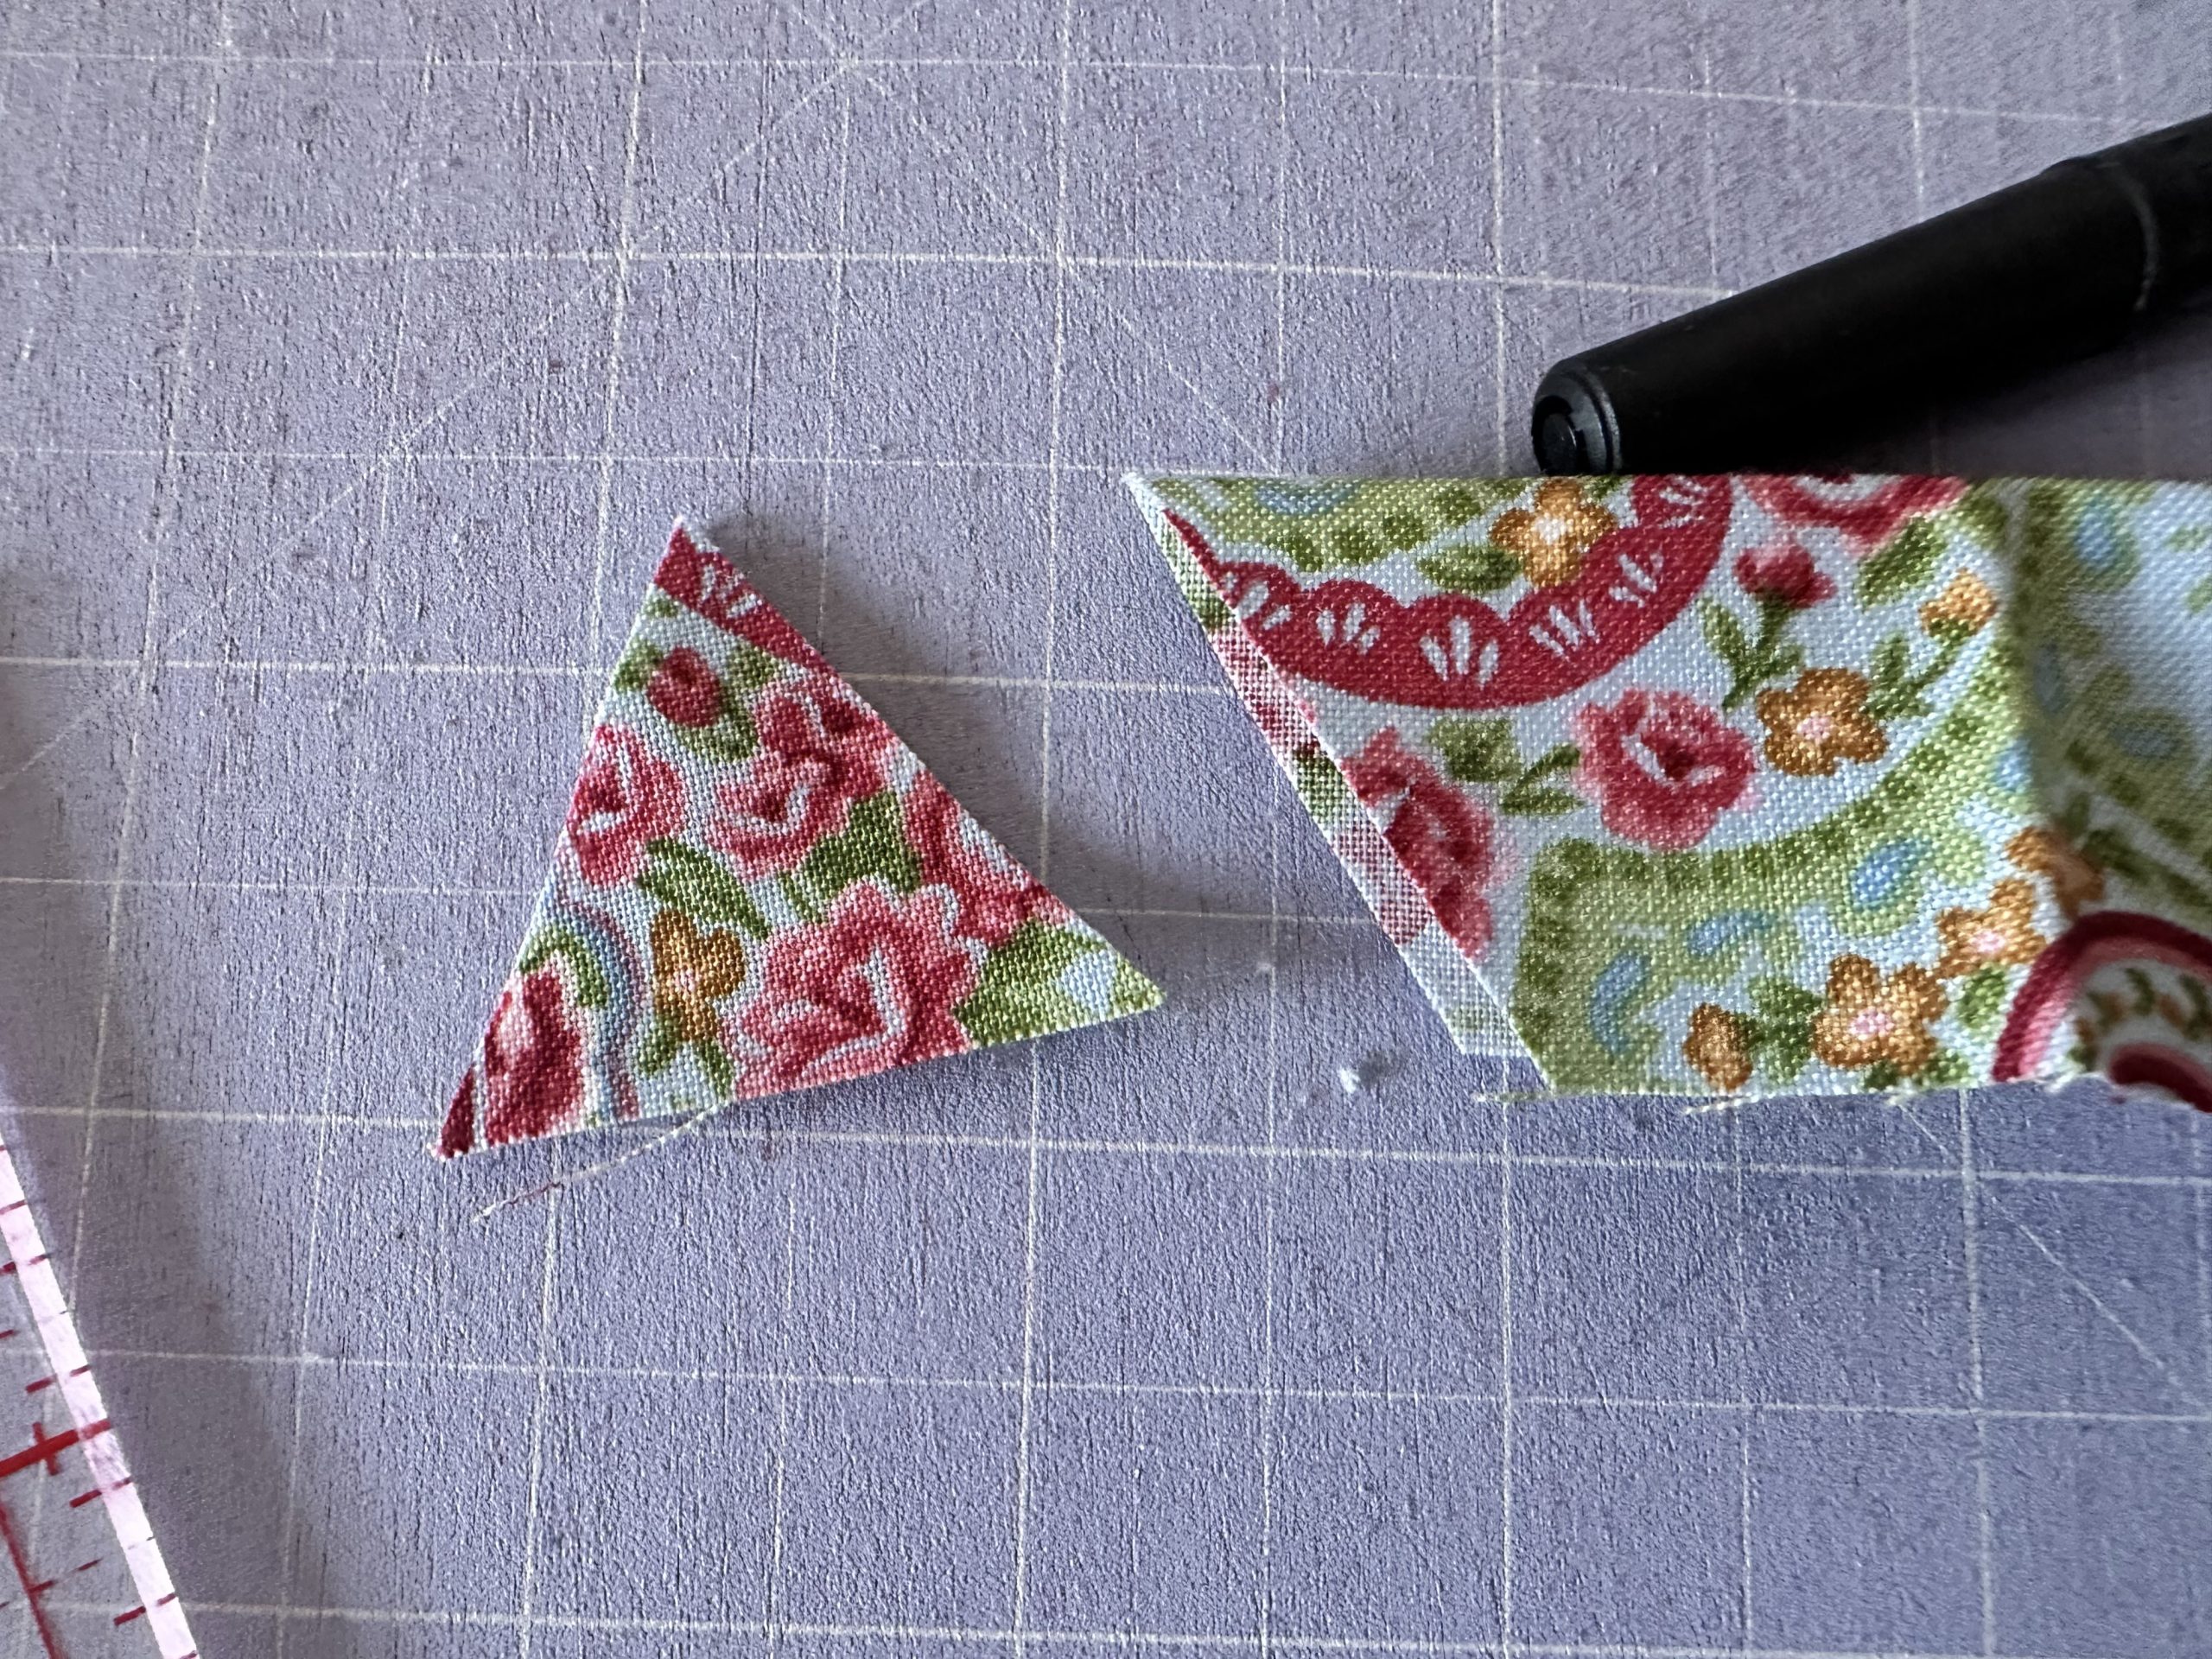
Turn the ruler so that the 60° mark is now on the edge of the cut strip. This makes a small 60° triangle, cut off that small triangle, And they will be waste.
Cut Hexagons from Strips susies-scraps.com
Now turn the ruler again so that the 60° line lines up with the top fold of the strip, position as before and cut the next hexagon as before.
Turn the ruler again to cut off the waste triangles. Then repeat as before, until your strip is all used up.
Cut Hexagons from Strips susies-scraps.com
You can experiment with different size strips according to what size hexagons are required.
I hope you enjoyed this tutorial on making hexagons from strips. I know I will be using this method again in the future for when I require hexagon shapes.
Please feel free to let me know what you think of this method and any other further questions.
I hope you all have a very happy Christmas and we will be doing lots more sewing in the new year. Best wishes for 2026 and thank you for coming on these sewing journeys with me.
Here are some other hexagon projects you may like;
Hello Dear Friends, Readers, Patchworkers and Quilters. I warmly welcome you to today’s post. It is mostly about patchwork and quilting on this site, however, I do think it is nice to have a small scrap project to make occasionally. There’s a lot of satisfaction in making a small project and also being able to use up some of those smaller scraps, which may not otherwise get a look in.
What is worse than having clove and lavender fish in your wardrobe? Having silverfish! And they are not a joke. They can certainly do a lot of damage to clothes very silently without you being aware, until one day, you pull something out, only to find it has little holes in it!
I have discussed this at some length in this post. Cupboard Keeps
Now, I am not saying that these are a complete panacea to the problem however, I do believe that they play a good role in prevention. Naptheline is really not nice and probably a last resort if there’s really a significant problem. Cloves are so much better and they last for years.
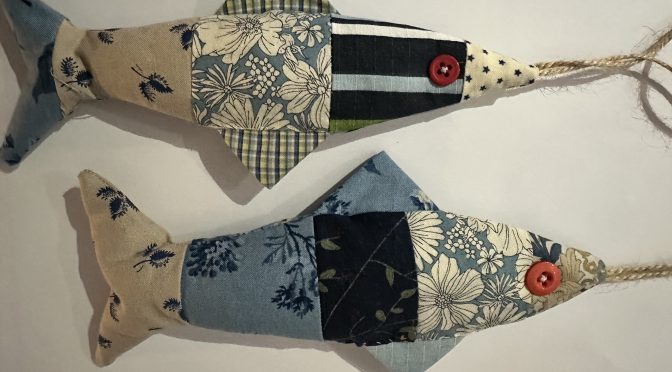
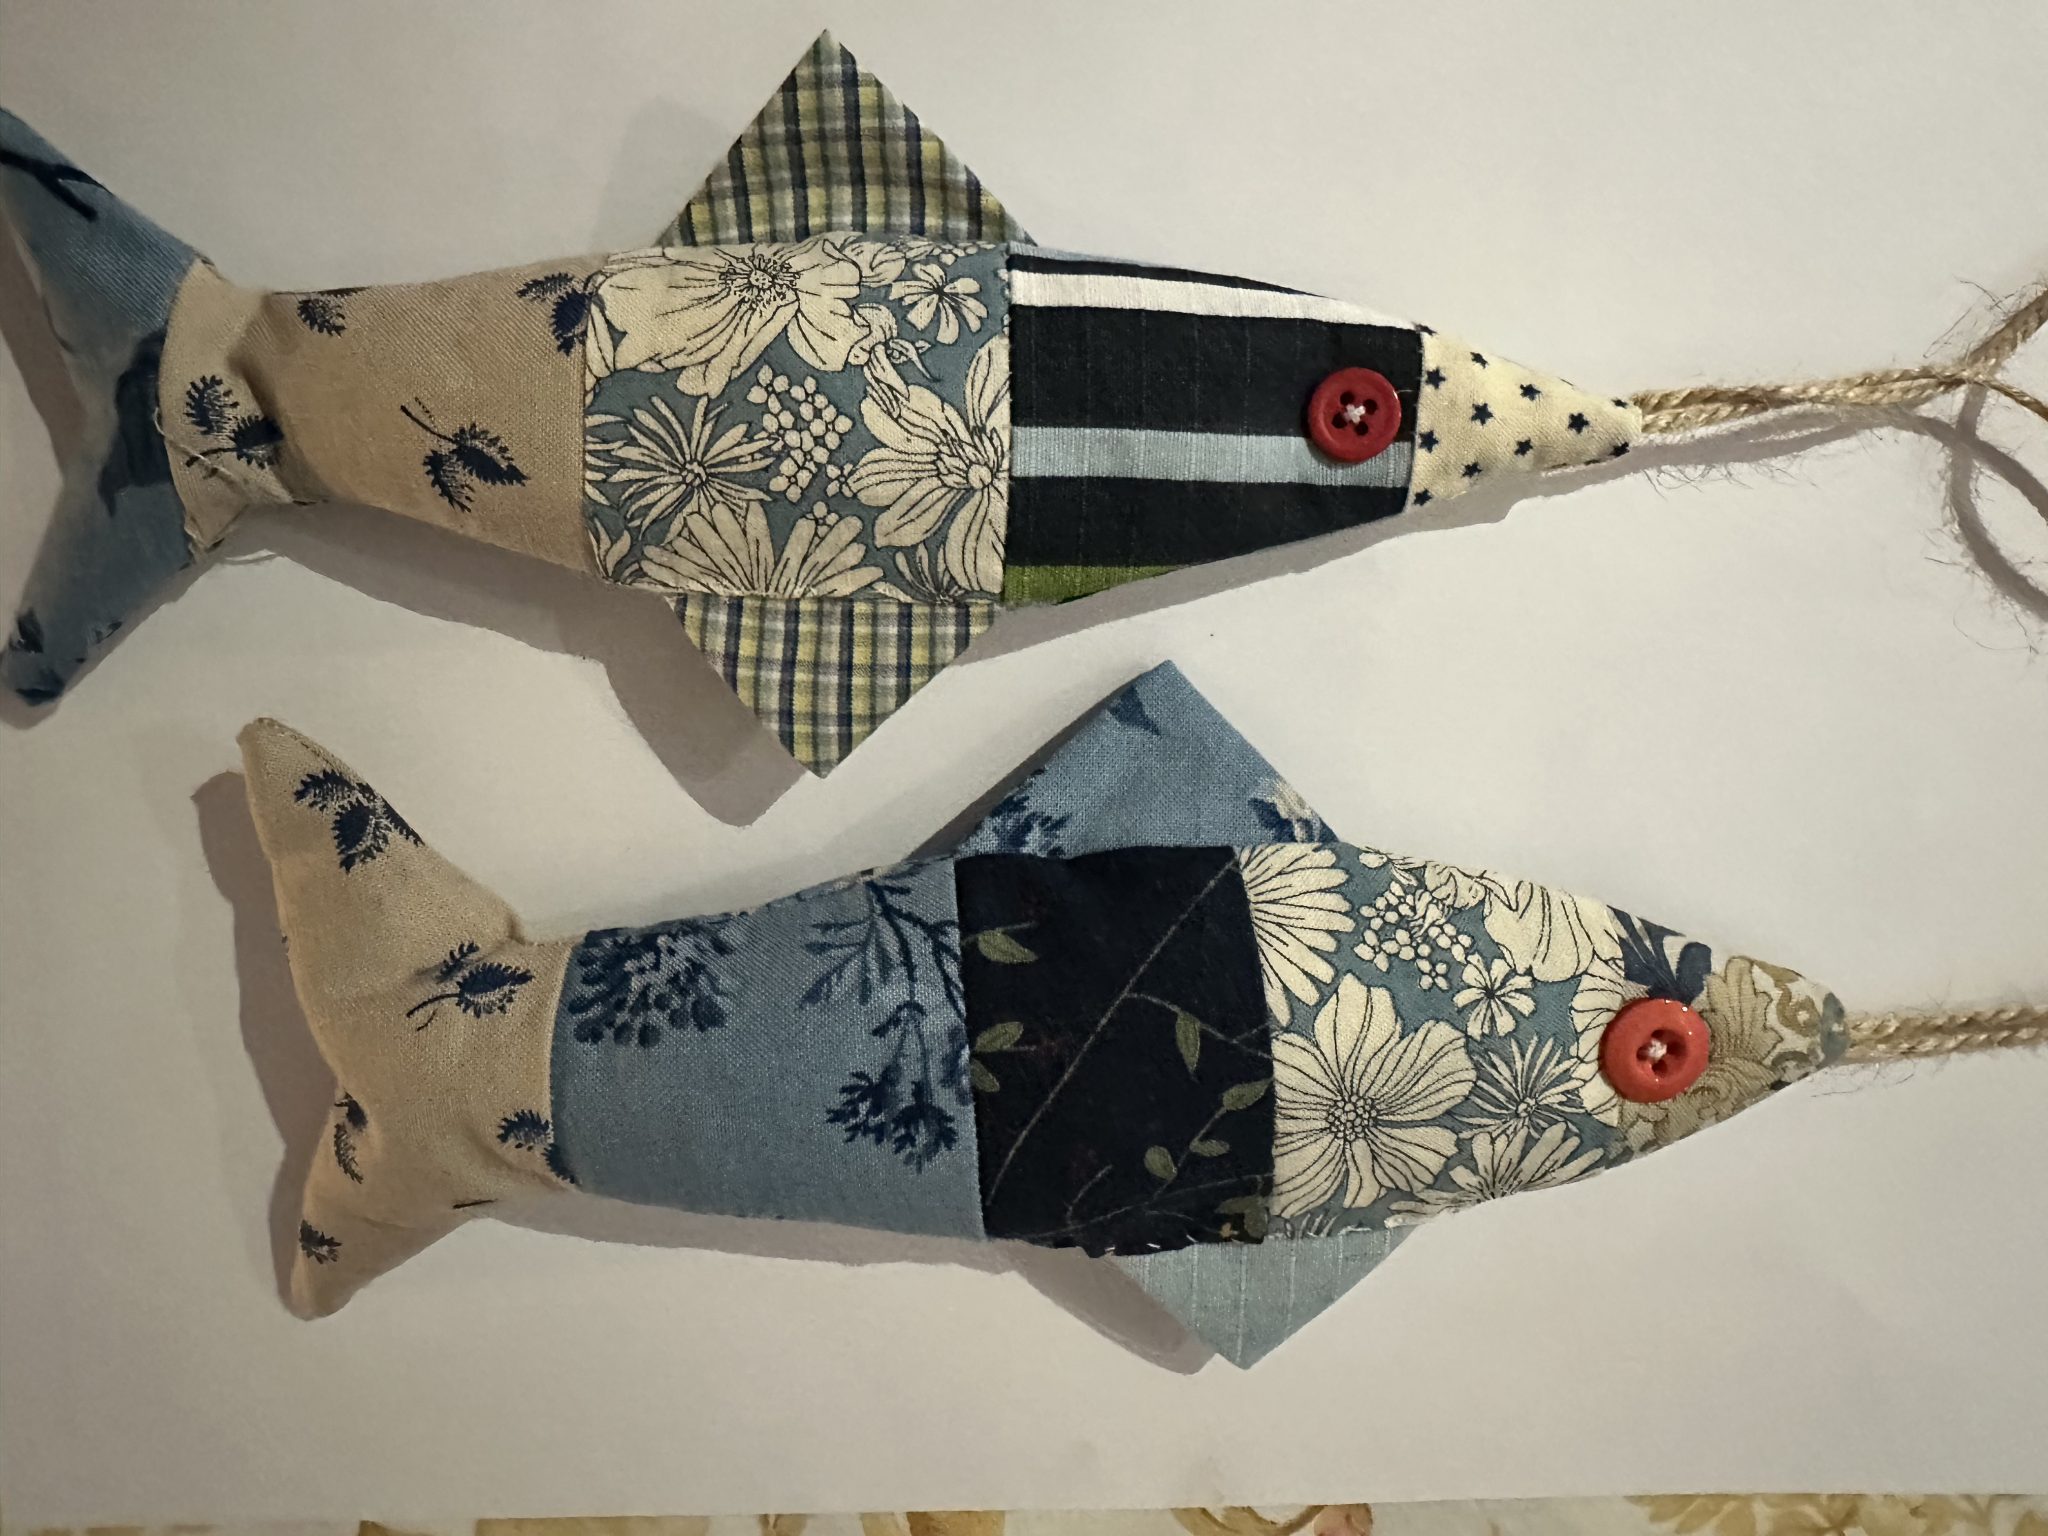
I was inspired to make some of these Lavender Fish as I have seen them on Pinterest. So I decided to make my own little pattern and whip up a few using scraps of course! The difference here is that I like to add cloves as well to my fish, to prevent the silverfish. The nice thing about these is you can put some little scraps together and make some very cute looking fish that you that you can hang in and around your wardrobes to help keep any unwanted critters away. You can also choose a theme if you prefer for instance a beach theme, or a country theme, or floral theme you could also recycle men’s shirts or denim would be lovely as well.
A young lady, I know, once told me that her family given up buying presents at Christmas time. Instead, everybody brings something that they have made themselves, whether that be jams, jellies pickles, ceramics, or in our case, we would perhaps make something that we stitched. As Christmas is never far away and these are a great little project, they would be a nice gift for anybody. They are a little bit different, sweet as anything and actually useful.
Given that fish come in so many different shapes, colours and sizes you can make yours as individual as you like.
Approximate finished size 9” x 3 ½”
Requirements for Making the Clove and Lavender Fish
Assorted scraps of fabric at least 4 inches wide
(Optional) Small squares of fabric folded twice on the diagonal like a prairie point if adding fins.
Paper to make your fish pattern
Paper scissors and sewing scissors
Dried lavender
Cloves
Polyester fibre fill
String or ribbons for the hanging loop
Buttons for the eyes
Hand sewing needle
Making the Clove and Lavender Fish Pattern
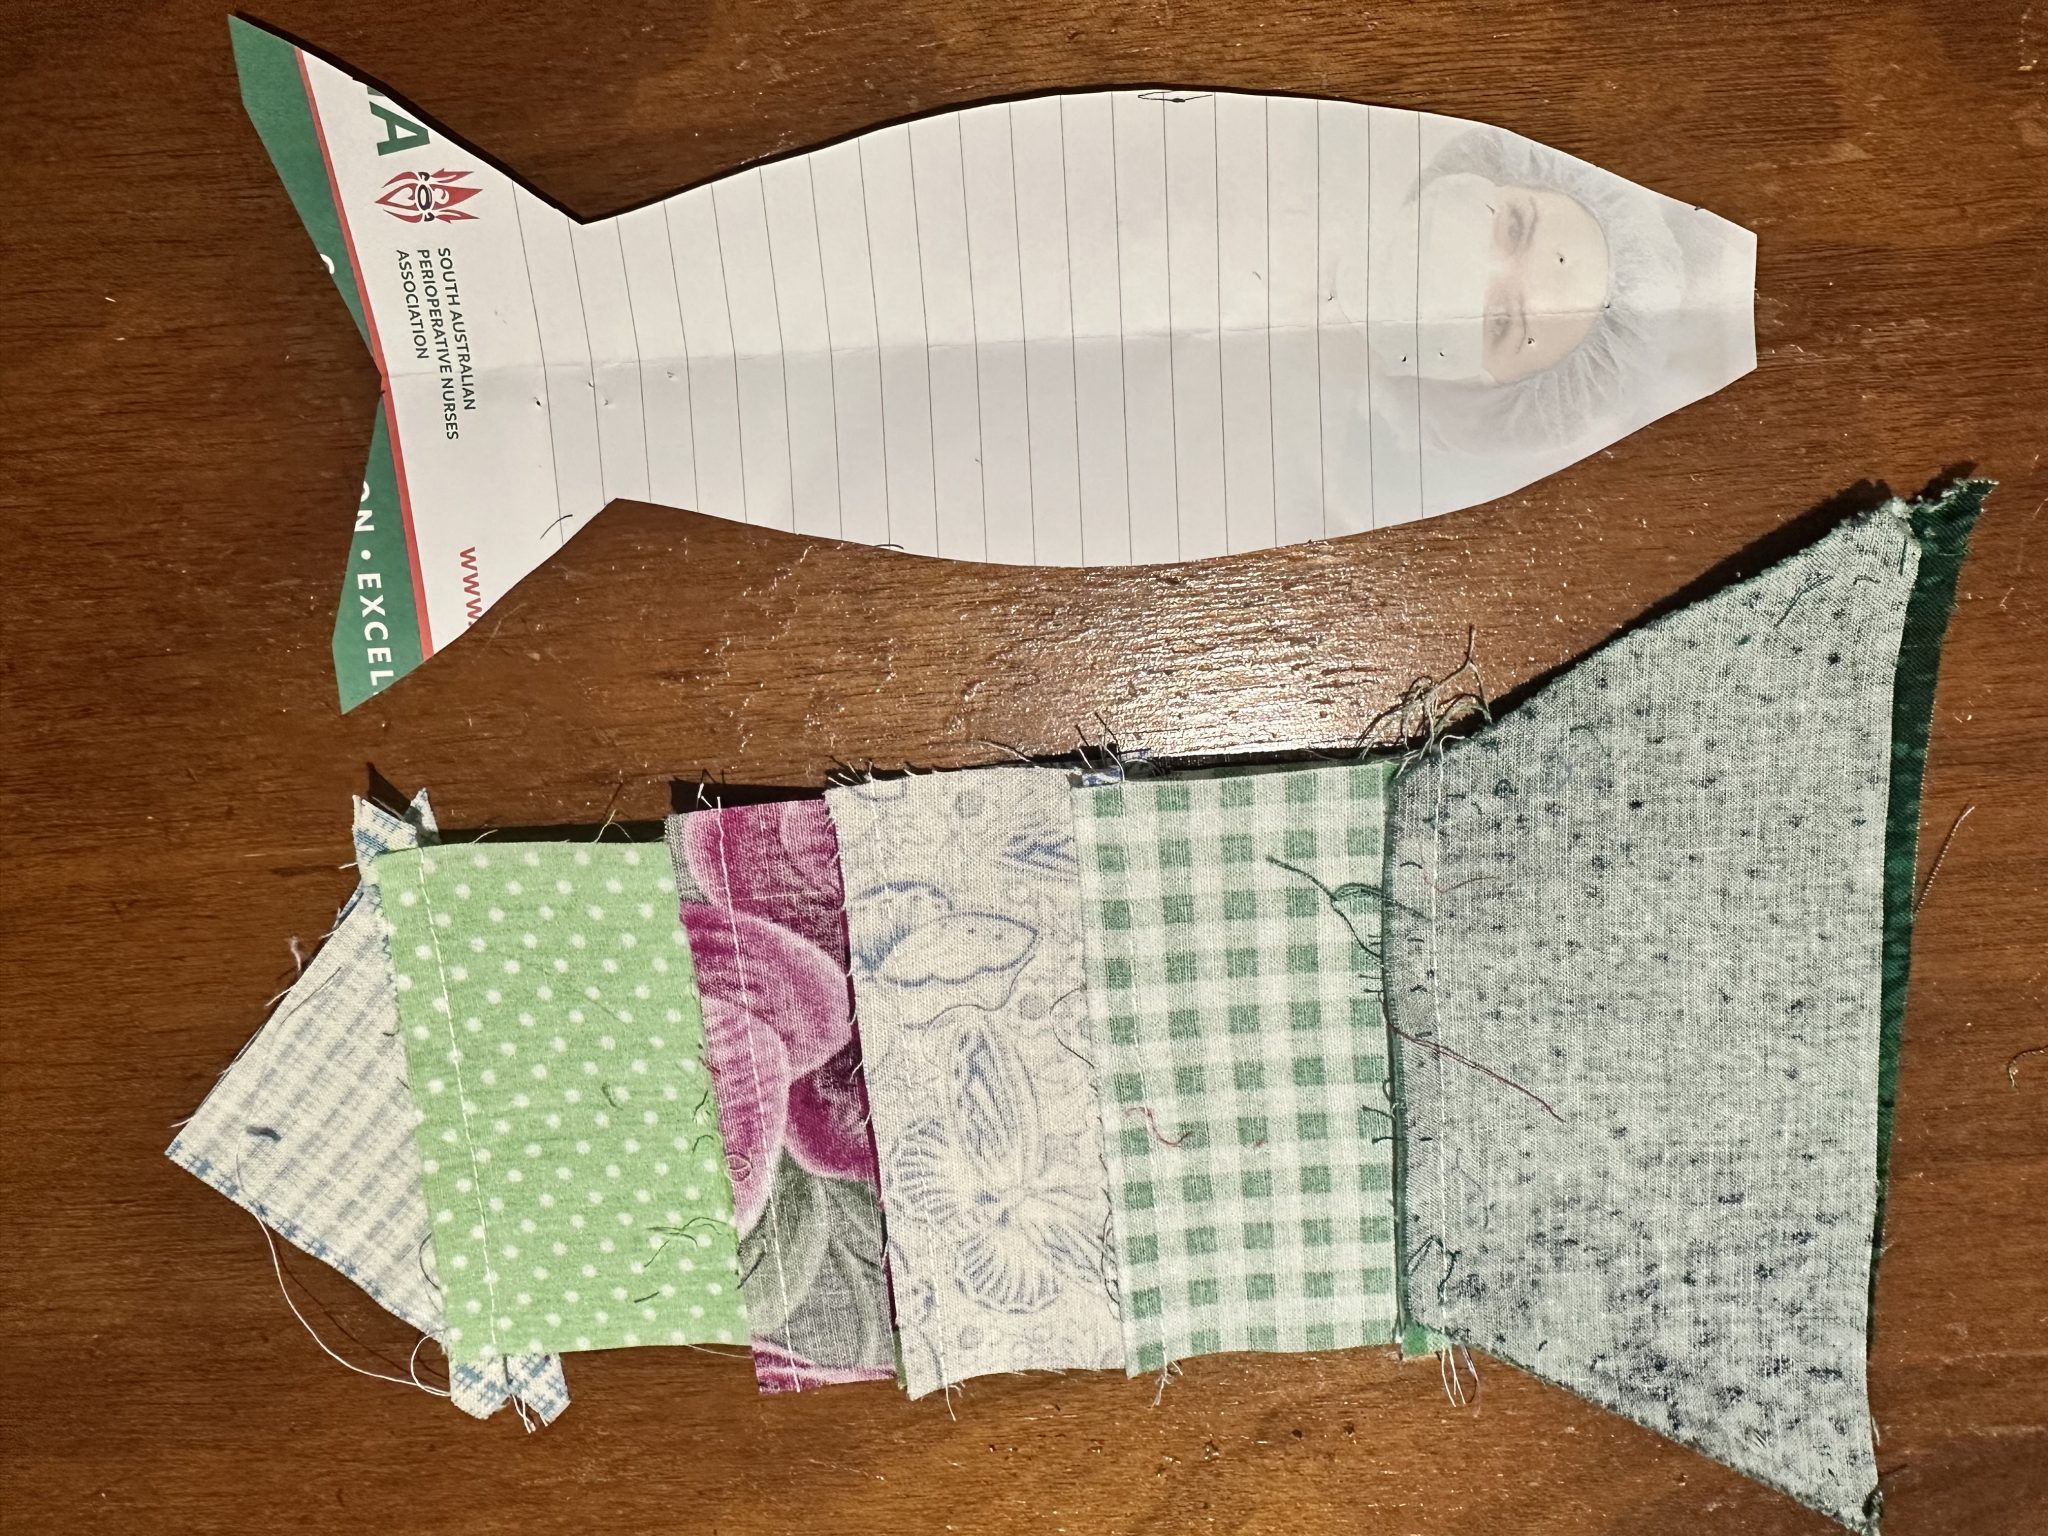
Fold your piece of paper in half length wise. Draw a half fish shape longitudinally along the fold. The fish I made is approximately 8.5“ x 3.5“.
Cut out the fish while the paper is still folded. Open out the fish pattern.
Clove and Lavender Fish susies-scraps.com
Making the Clove and Lavender Fish
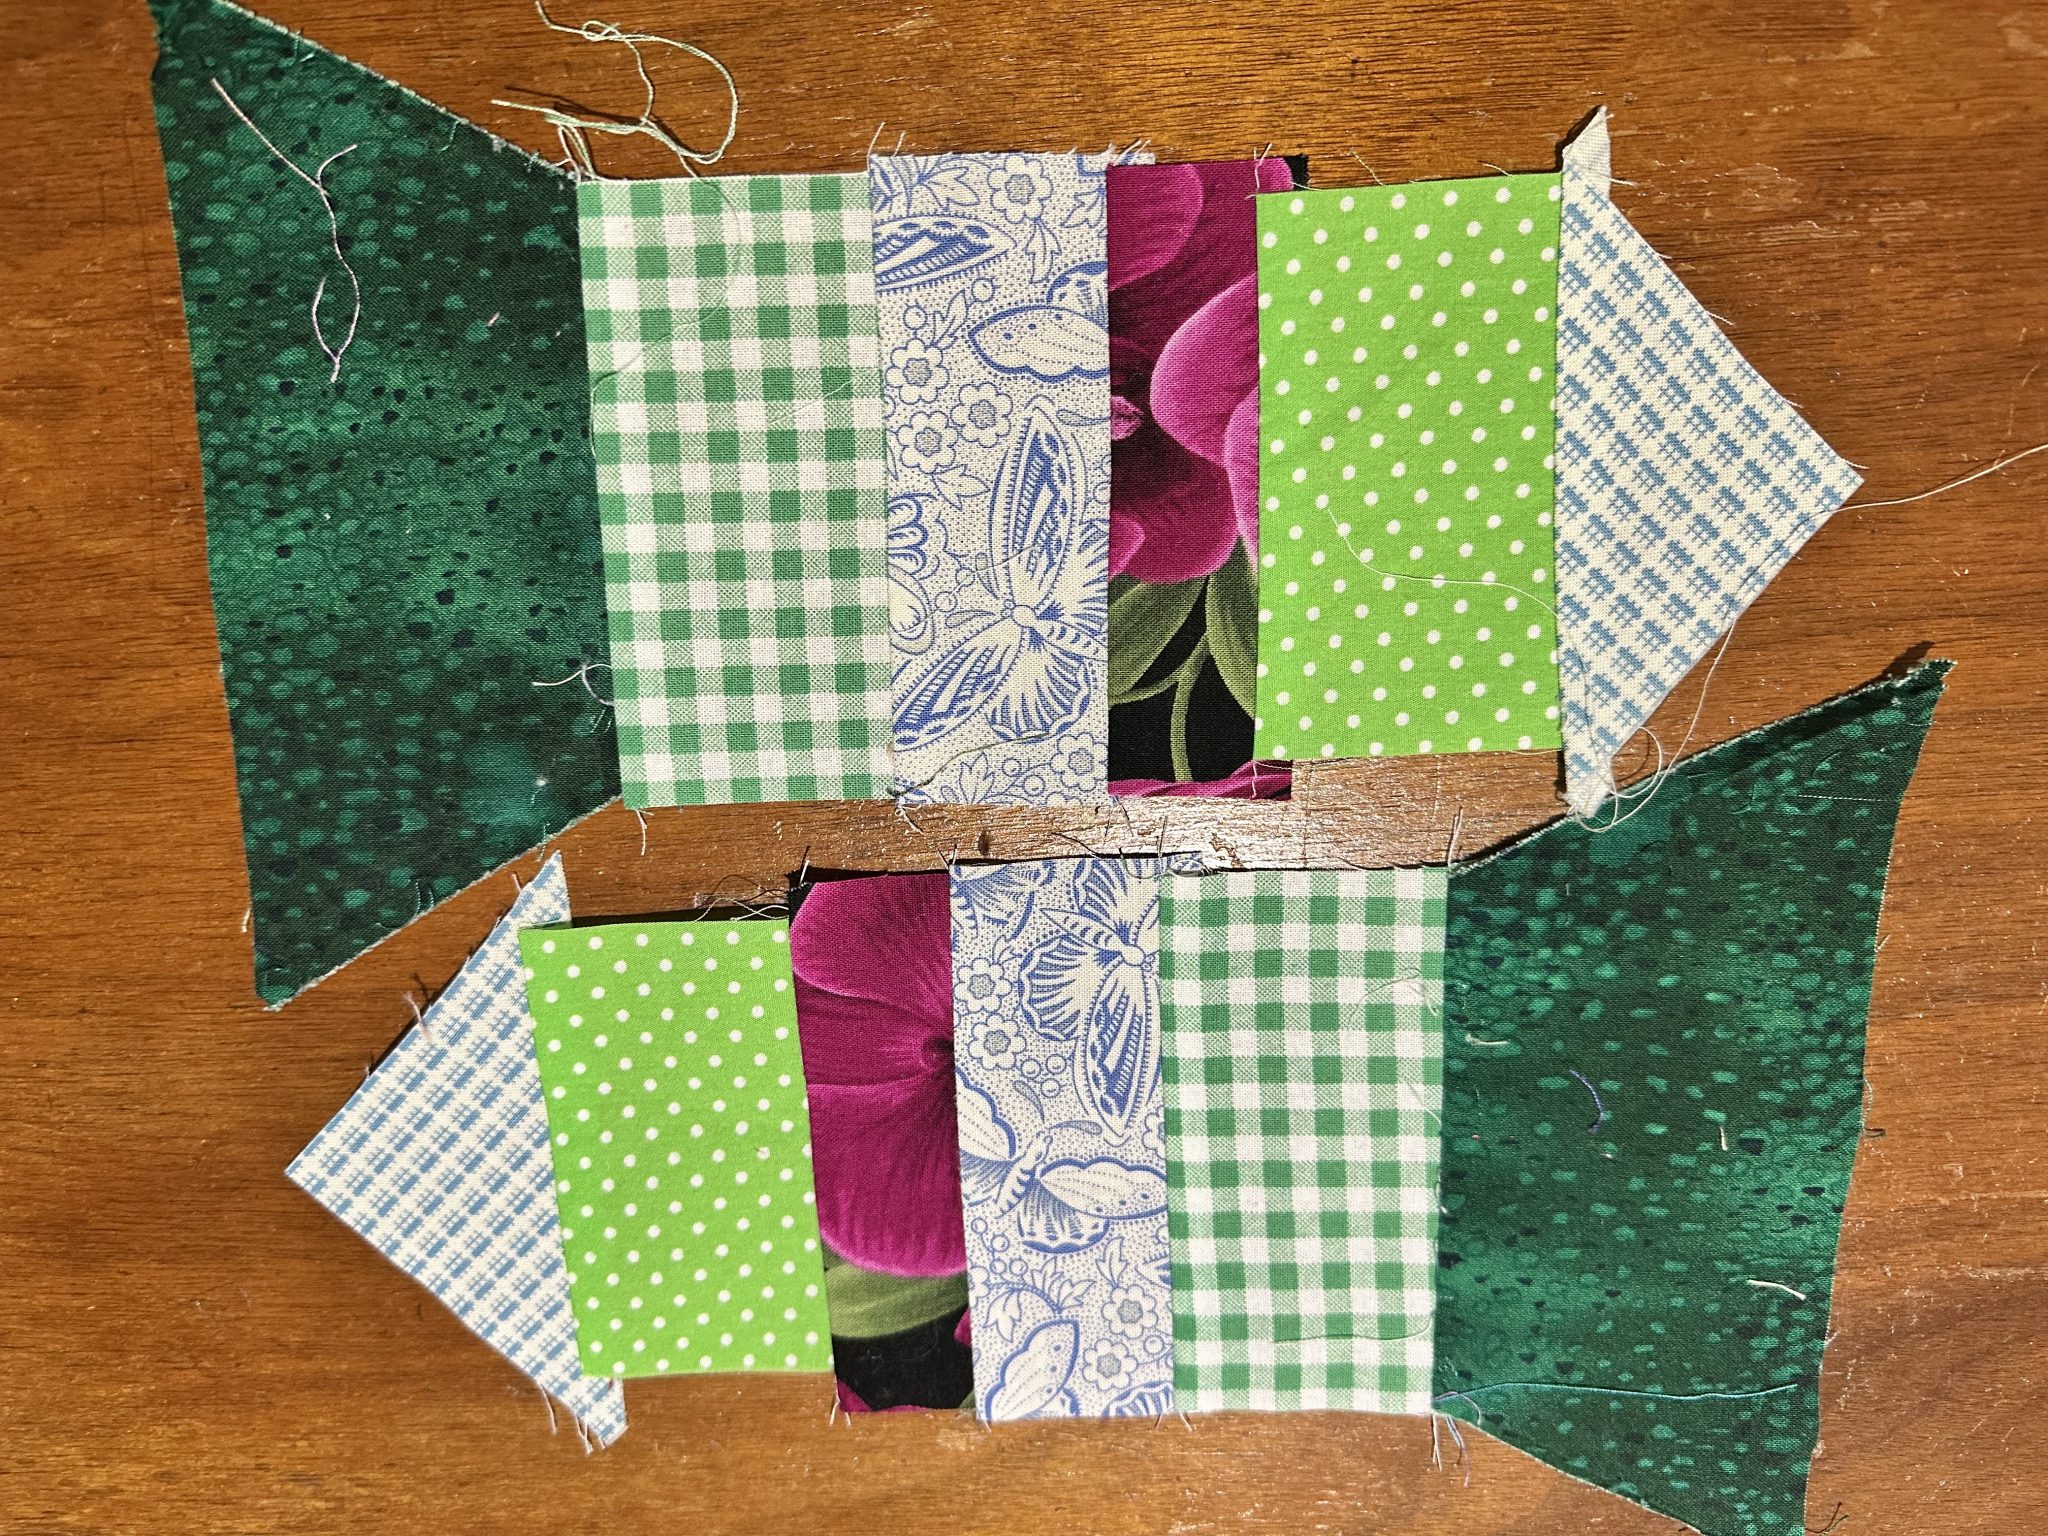
Sew various fabric pieces together which are at least 4 inches wide to make a piece which is at least 10 inches long. Be sure to make two that match for each fish so that their stripes can go right around the body.
Clove and Lavender Fish susies-scraps.com
Press these pieces. Make sure to press the seam allowances in opposite directions for each piece so that you will be able to nest the seams nicely together.
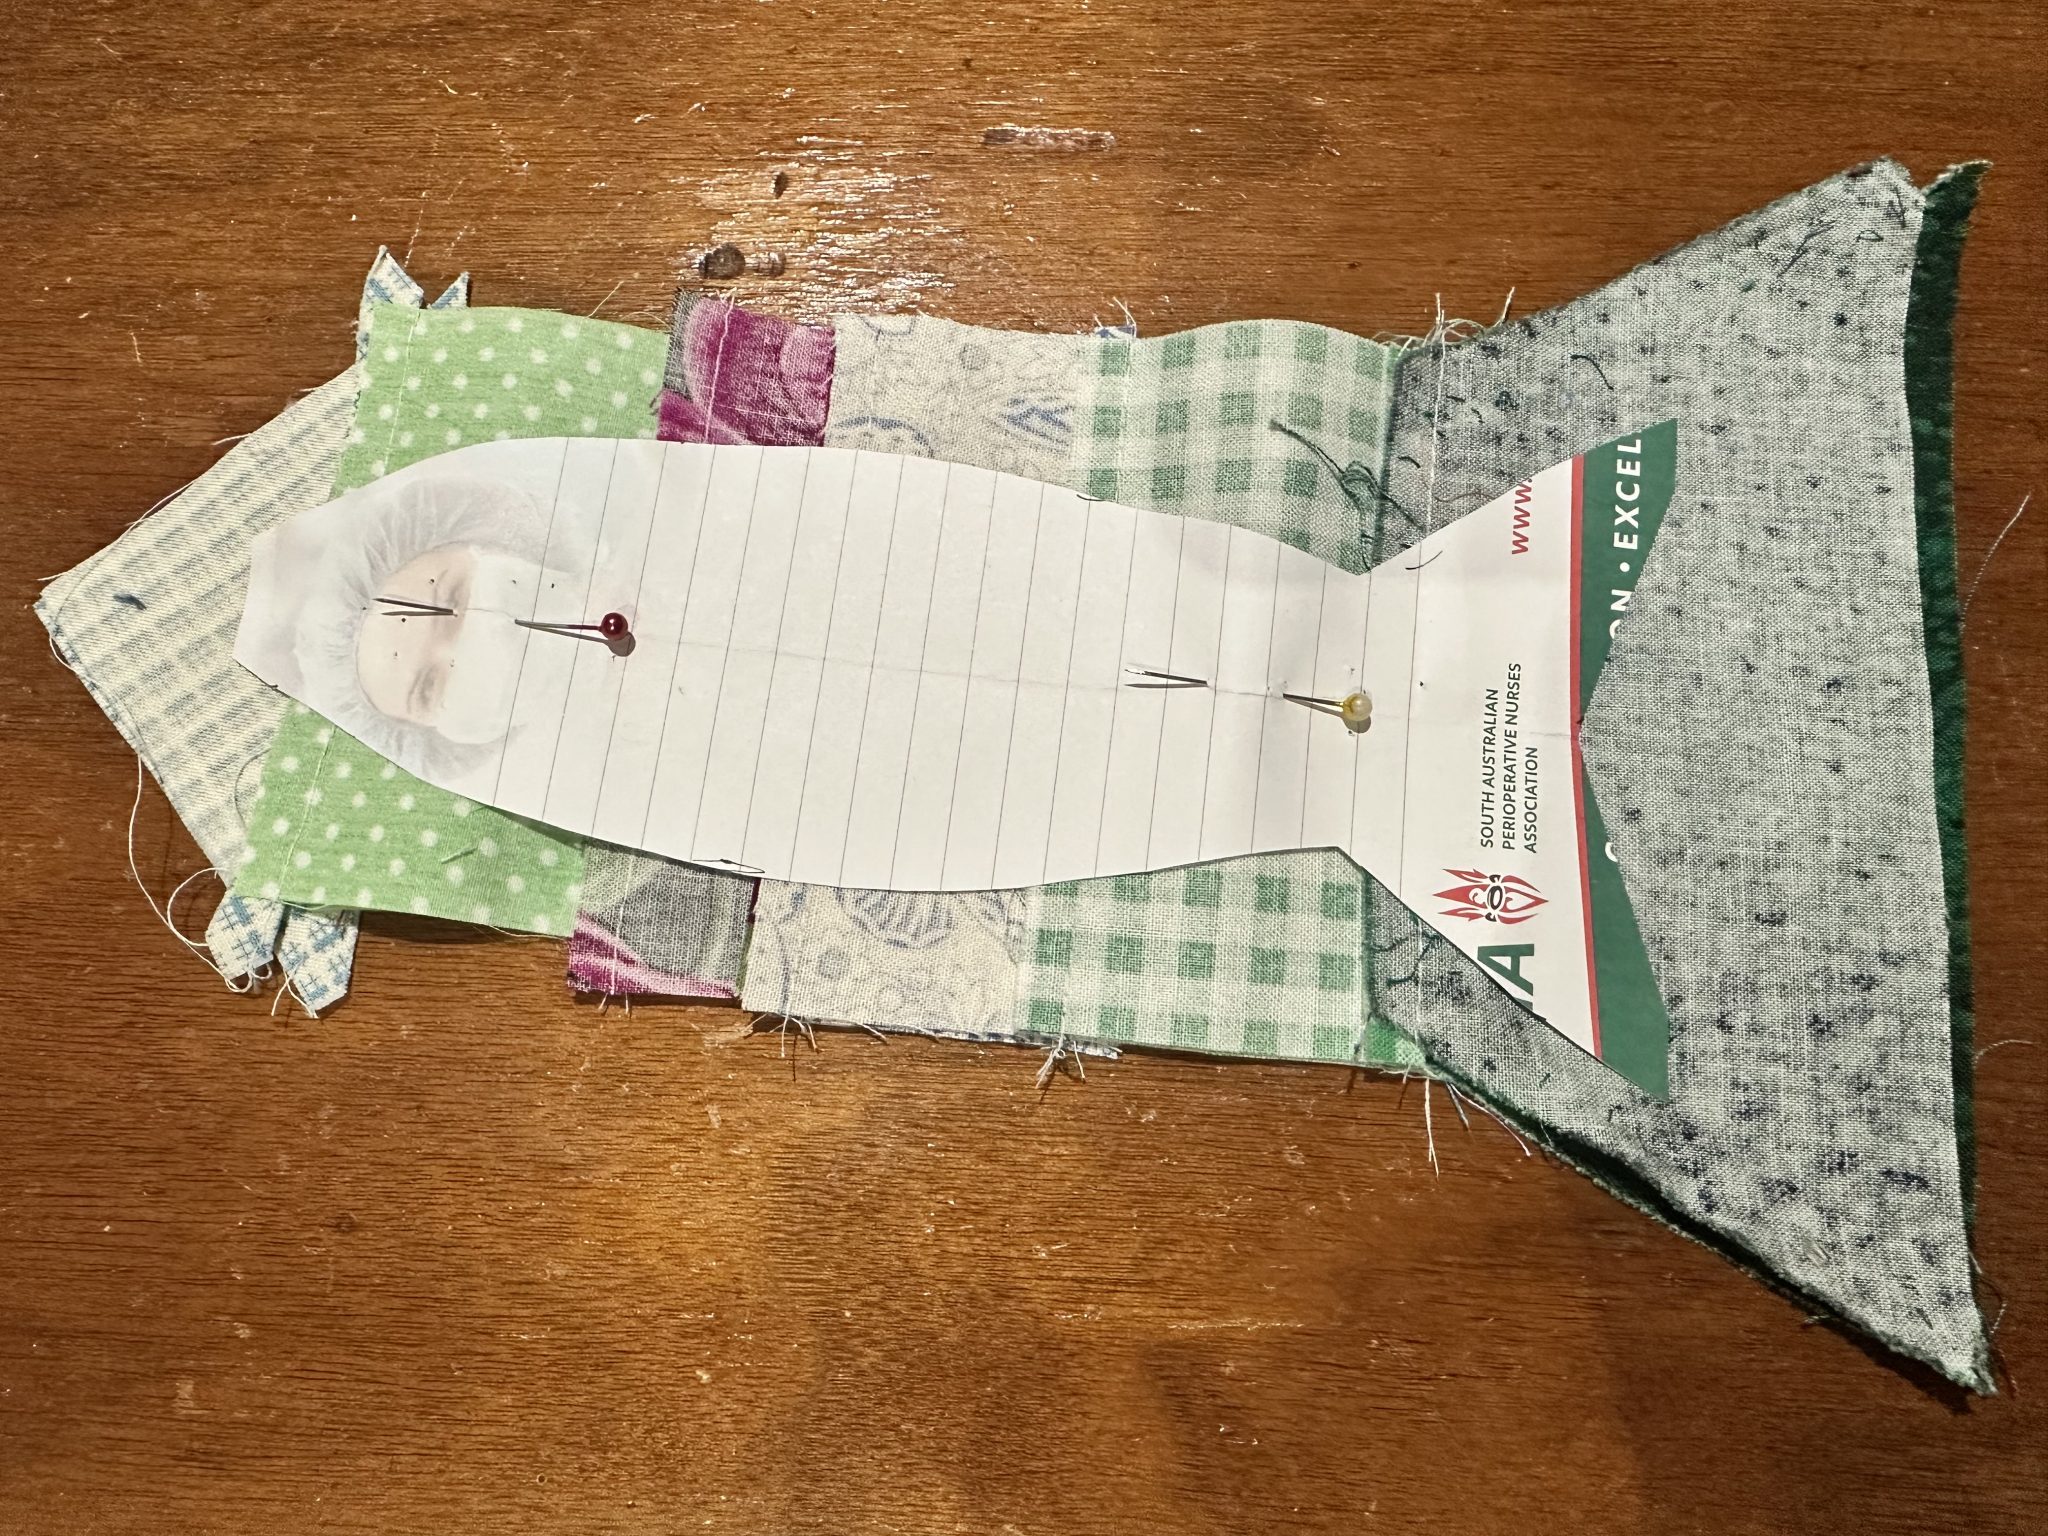
Align the two pieces of fabric right sides together. Make a loop from the string or ribbon whatever length you would like making different lengths is a good idea. Knot the two ends together. Lay this loop between the two pieces of fabric with the knot hanging out of the mouth end of the fish. Centre the pattern on the fabrics ensuring there is at least a quarter inch overhang of fabric all the way round pin the pattern to the fabrics.
(Optional) If adding fins do it now by placing a prairie point facing inside the fish with the raw edges aligned a quarter inch away from the paper pattern. Sew around the fish close to the paper pattern. Leave an opening for turning.
Clove and Lavender Fish susies-scraps.com
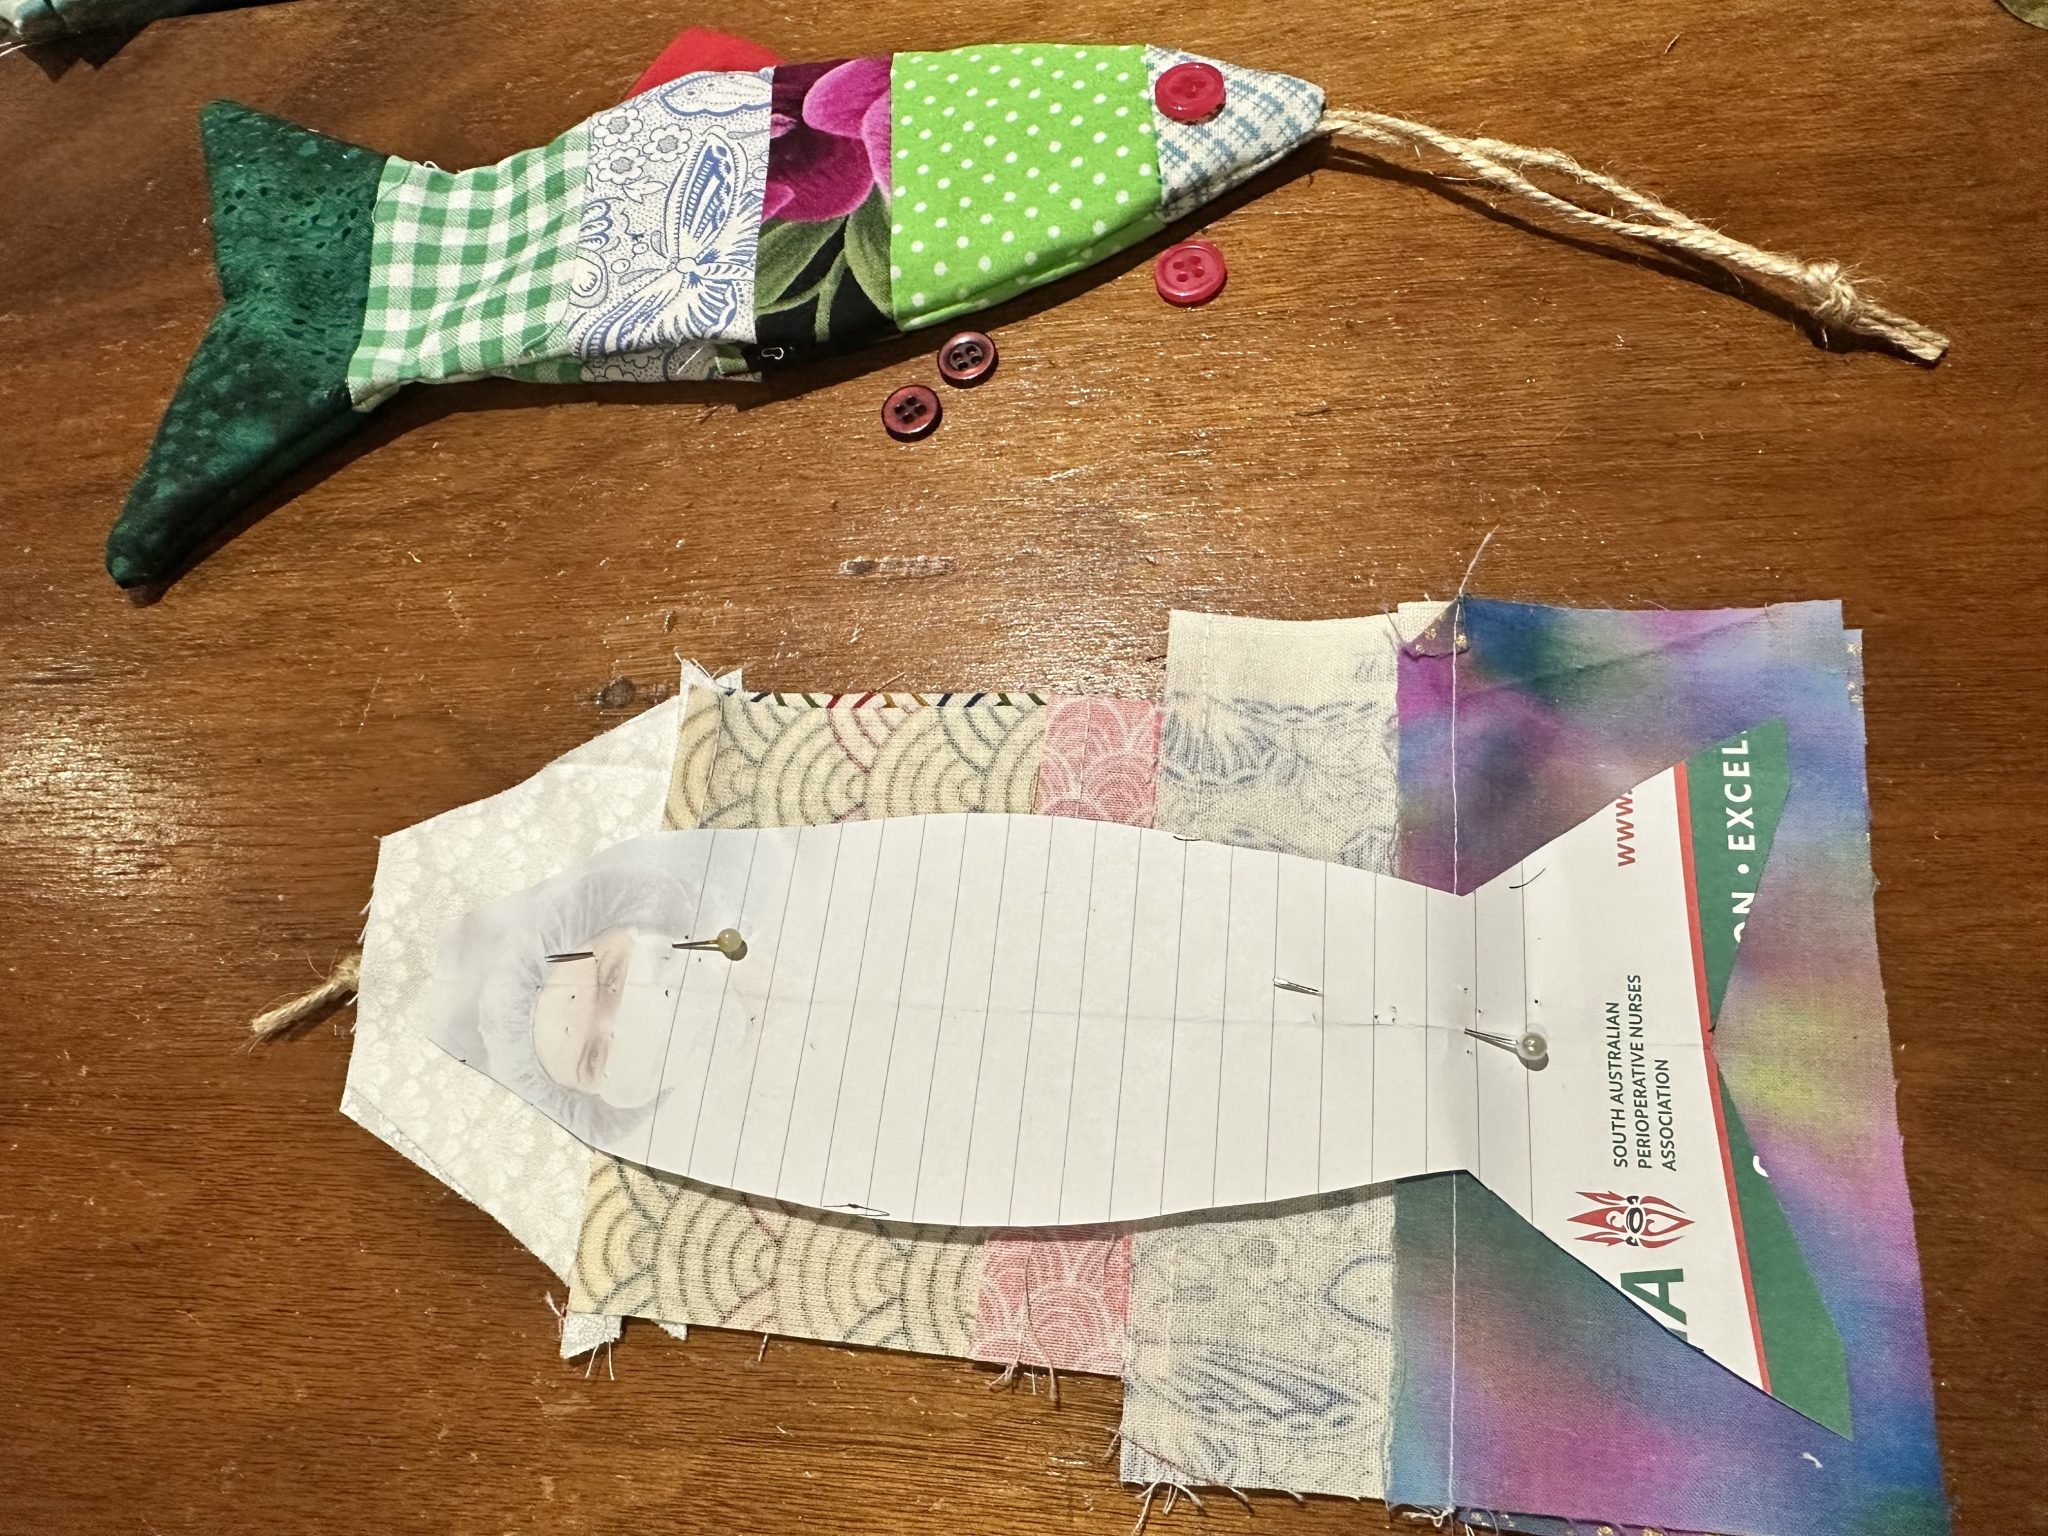
Trim the fish shape 1/4” away from the stitching line. Clip the corners and into the edges of the tail but not too close to the stitching line. Turn to the right side. Use the string or ribbon to help pull the fish to the right side. Fill the tail of the fish with the dried lavender. Add some fibre fill to the head end and some towards the tail. Finished by adding at least a tablespoon or two of cloves. Add a bit more fibre fill if necessary to make the fish the size that you would like.
Clove and Lavender Fish susies-scraps.com
Hand stitch the opening closed. Sew a button to each side of the fish head for the eyes. Enjoy the delicious scent. These will be the sweetest smelling fish you’ve ever met!
Thank you for joining me on this little fishy adventure today. I hope you enjoyed it as much as I have enjoyed making these and you may also like..
Hello Dear Friends, Readers, Patchworkers and Quilters, and warm welcome to today’s post.
Let’s launch right in!
I had a lovely comment from Lisa, one of my readers, who said she loved the block of the Crazy Little Strings Diamond Charms. Crazy Little Strings Diamond Charms Her question was….” could you make the same block but without the strings?”
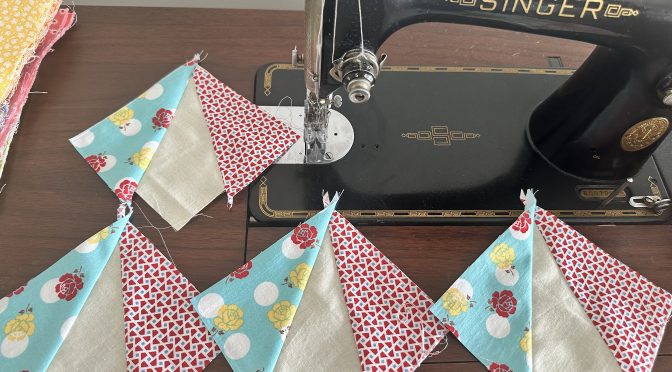
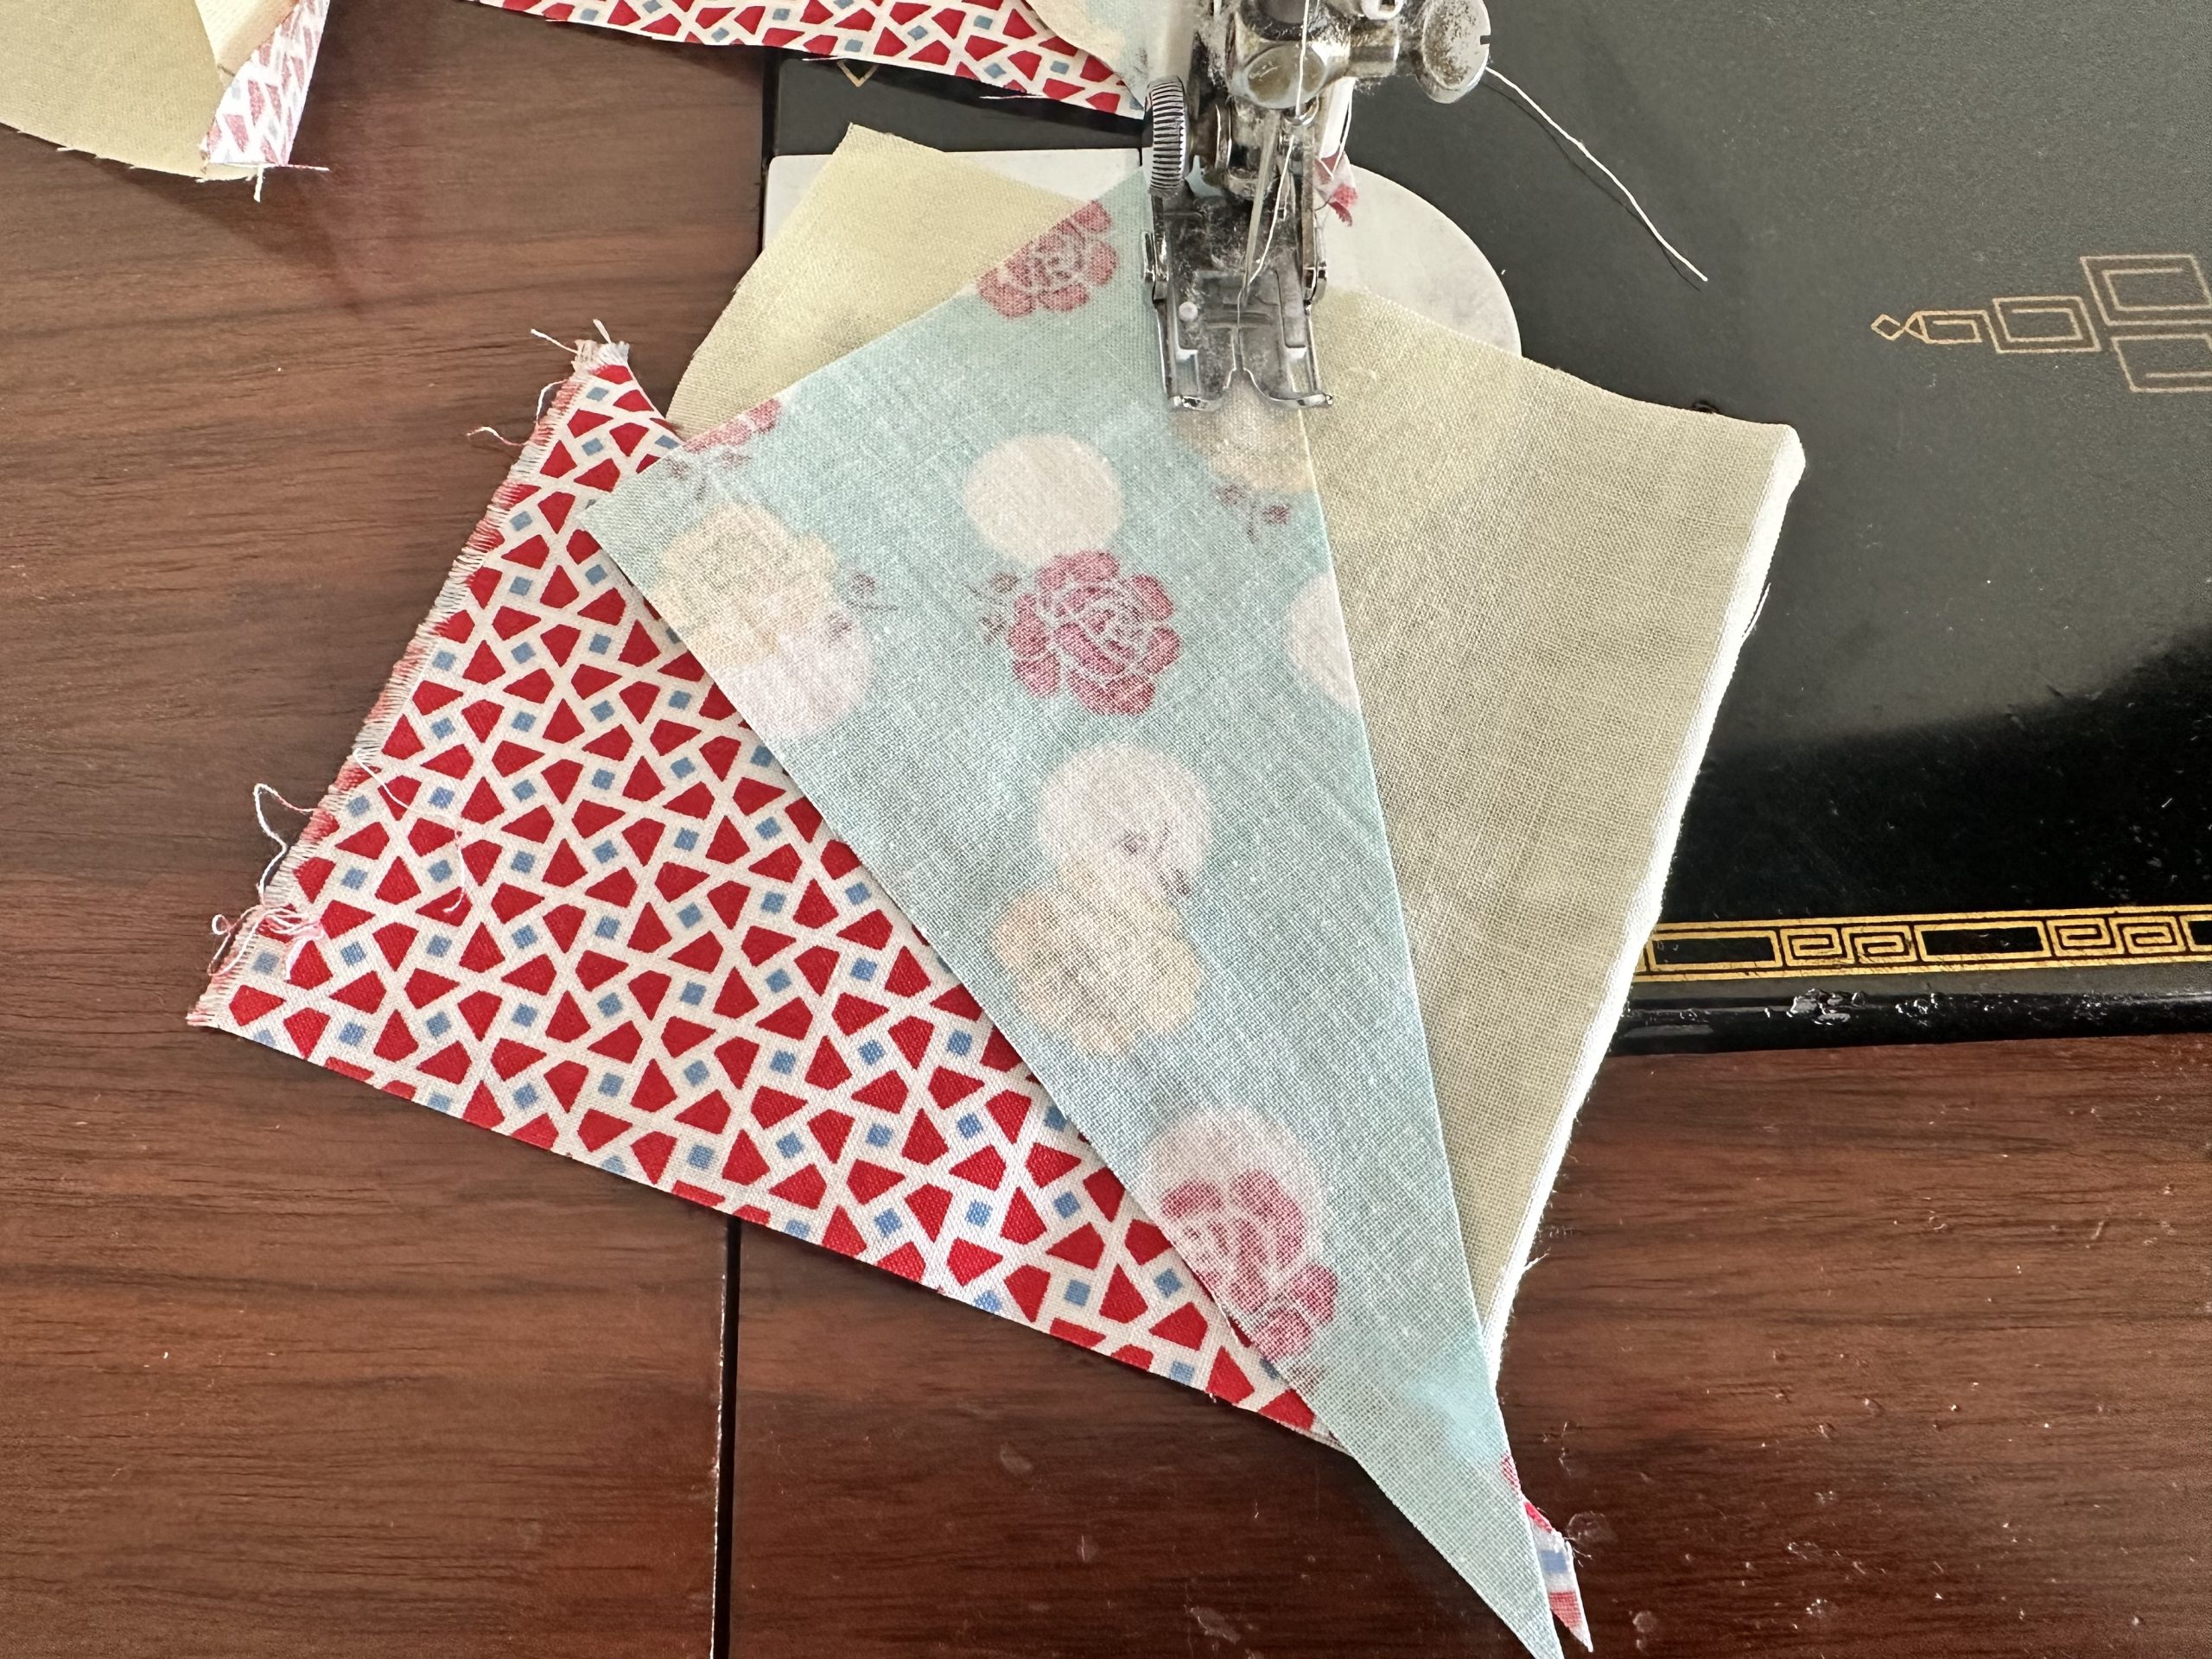
After some contemplation, I realized that it would be easy to make these blocks in the same kind of way. But in this case, it would be done with triangles. They are made by Foundation piecing.
As always, you could definitely use up a lot of scraps to make this into a quilt, a tabletop runner or even just a small mini quilt, which is a nice way to try something out and see if you like it . If you didn’t want to use scraps, this could also be achieved by cutting from strips.
If cutting from strips or yardage, one could choose more ordered colours rather than scraps of fabric, if that was the preference. I am choosing to make these blocks with some charming 1930’s style prints.
I should think that these blocks would be good for making charity quilts too as they would be much faster than the string version.
Choose your background fabric for make the Foundation squares. This could be any low volume fabrics, or even a bright stark contrasting coloured squares, cut int o 5″ Charm Squares. Depending on the size of the quilt you want to make, will dictate how many 5″ squares to cut. Four of the Foundation units sewn together create the block.
Fat quarters are ideal for these blocks.
Seam allowance 1/4”.
Block size 9 1/2″ x 9 1/2″.
Requirements and Cutting for the Crazy Little Triangles Block
Neutral or solid background fabric cut into 5″ width of fabric strips. Subcut into 5″ x 5″ units. Cut 4 to make one block. These will be the foundation squares.
Contrasting fabrics cut into 6″ width of fabric strips. Minimum of two fabrics for a more ordered design. Or many for a scrappy result.
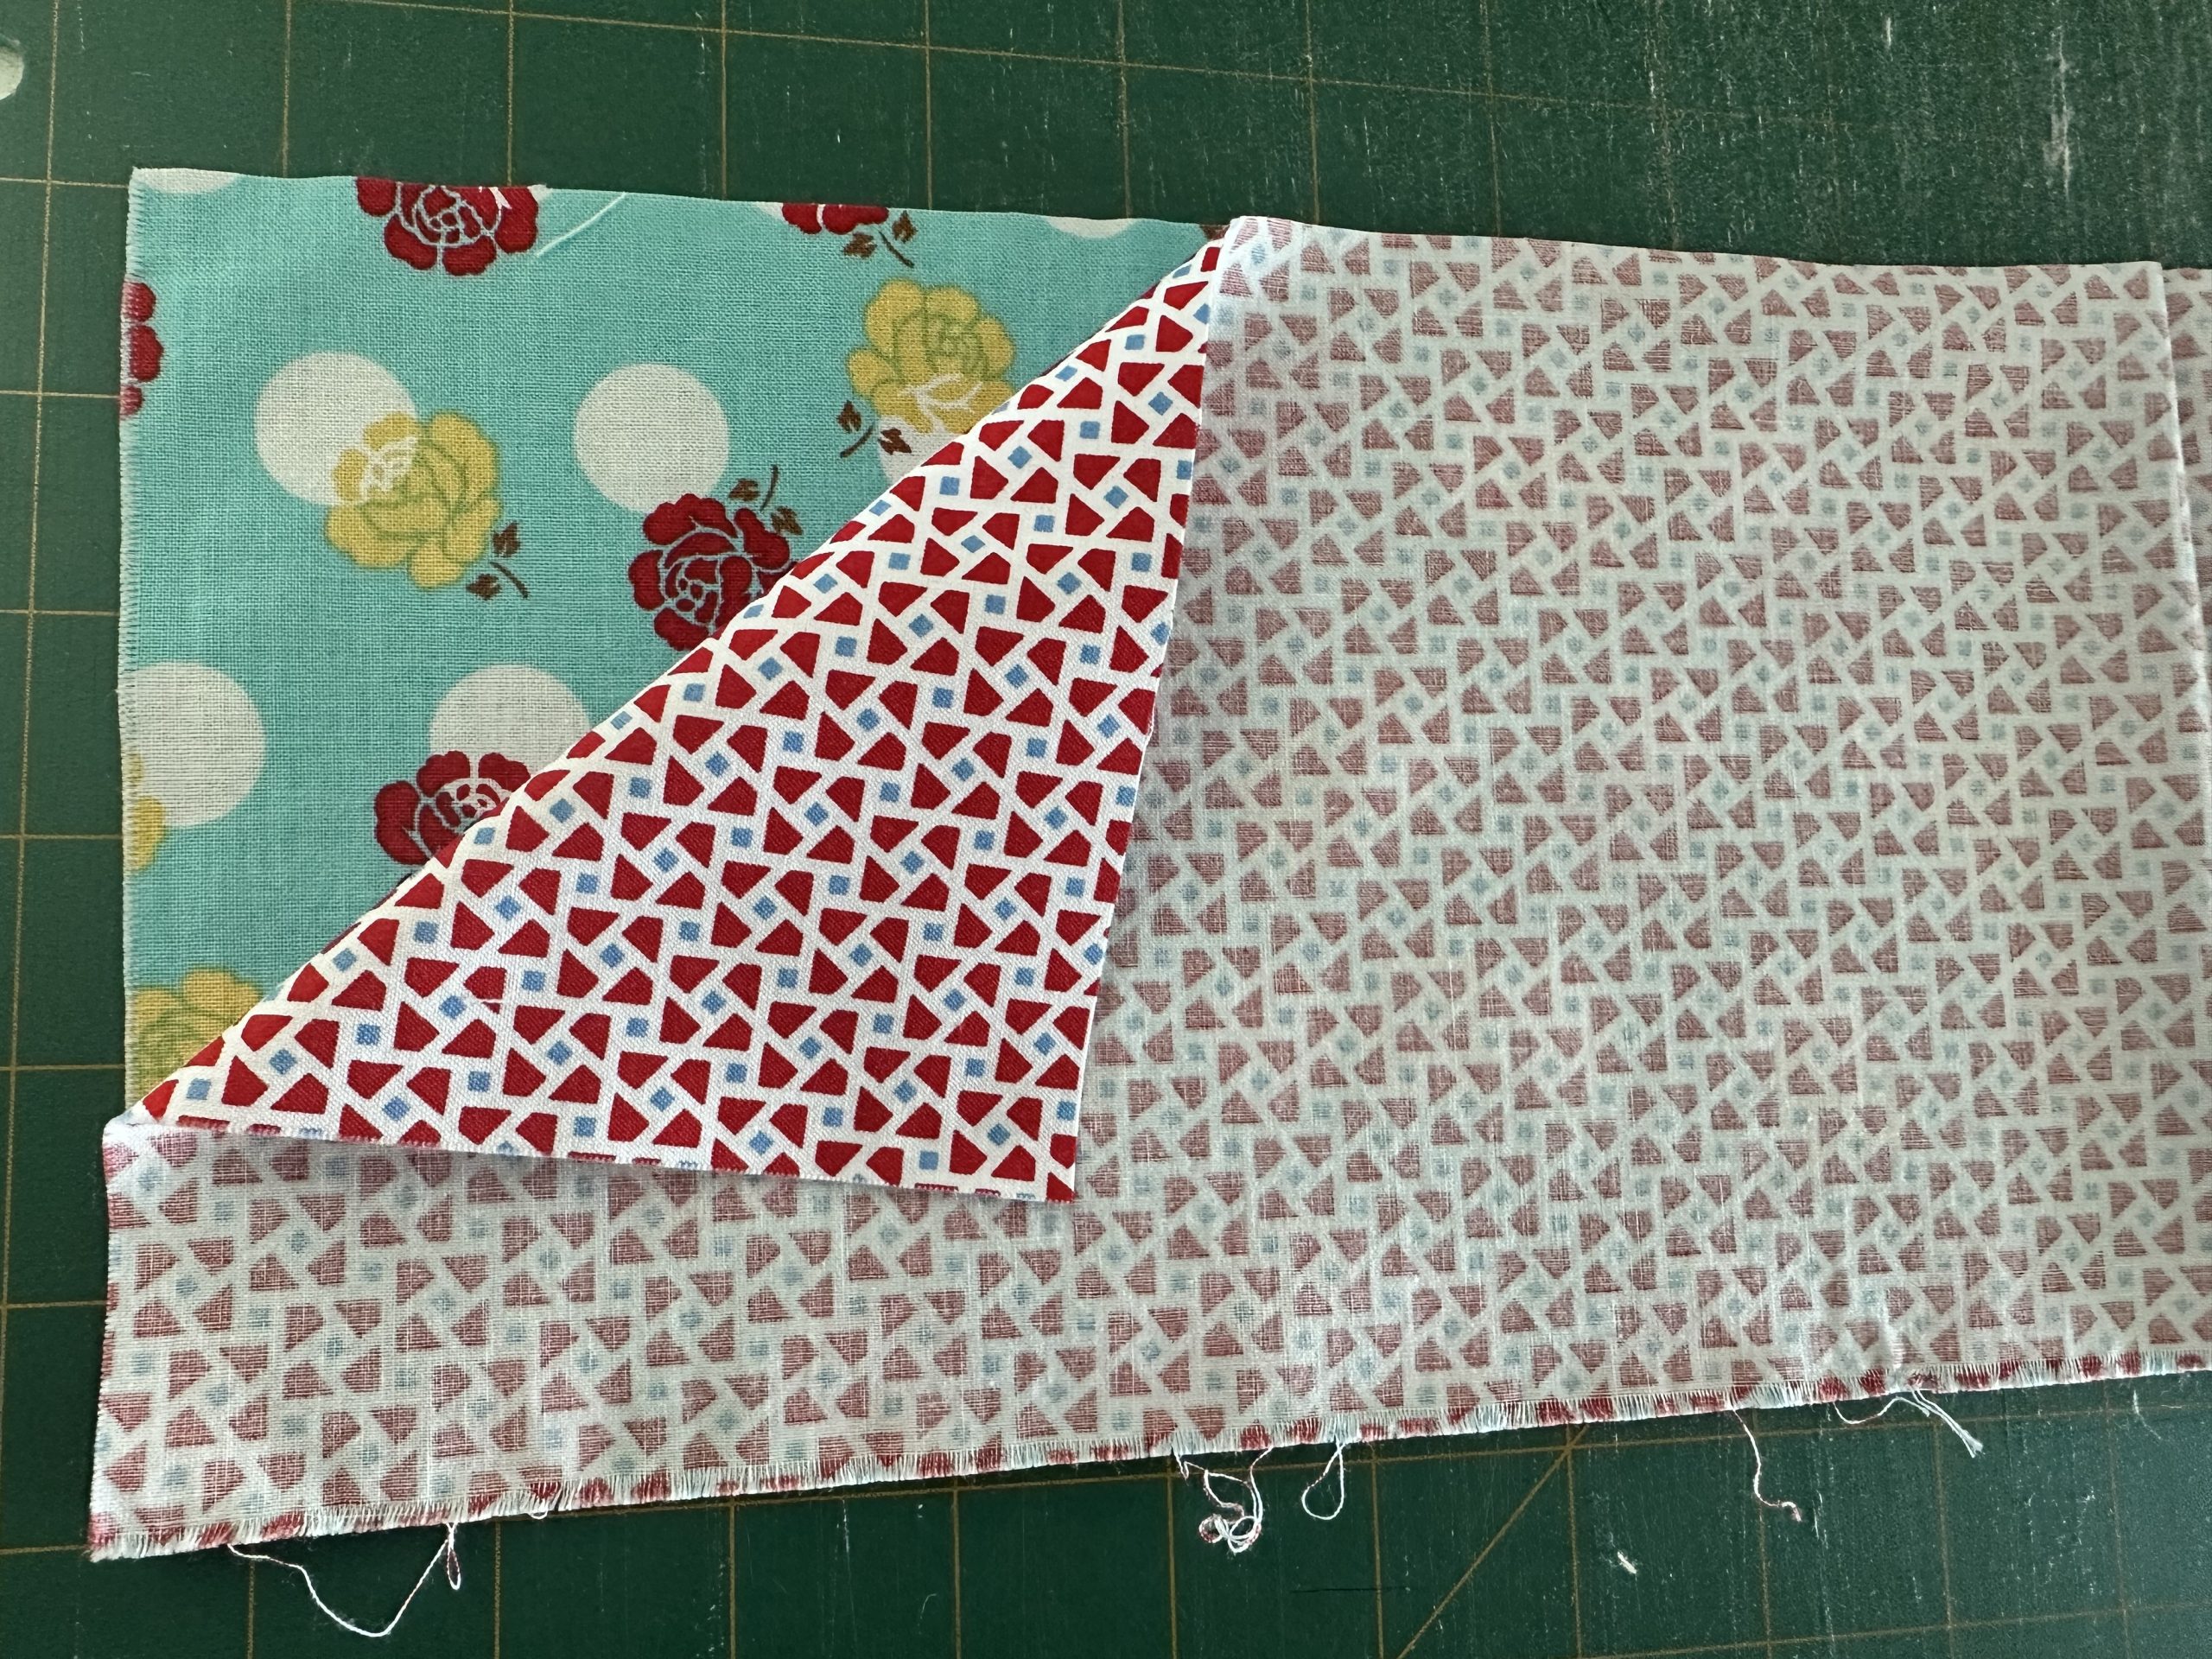
Important. Begin by putting the two 6″ Width of Fabric (WOF) strips right sides together.
Crazy Little Triangles Block susies-scraps.com
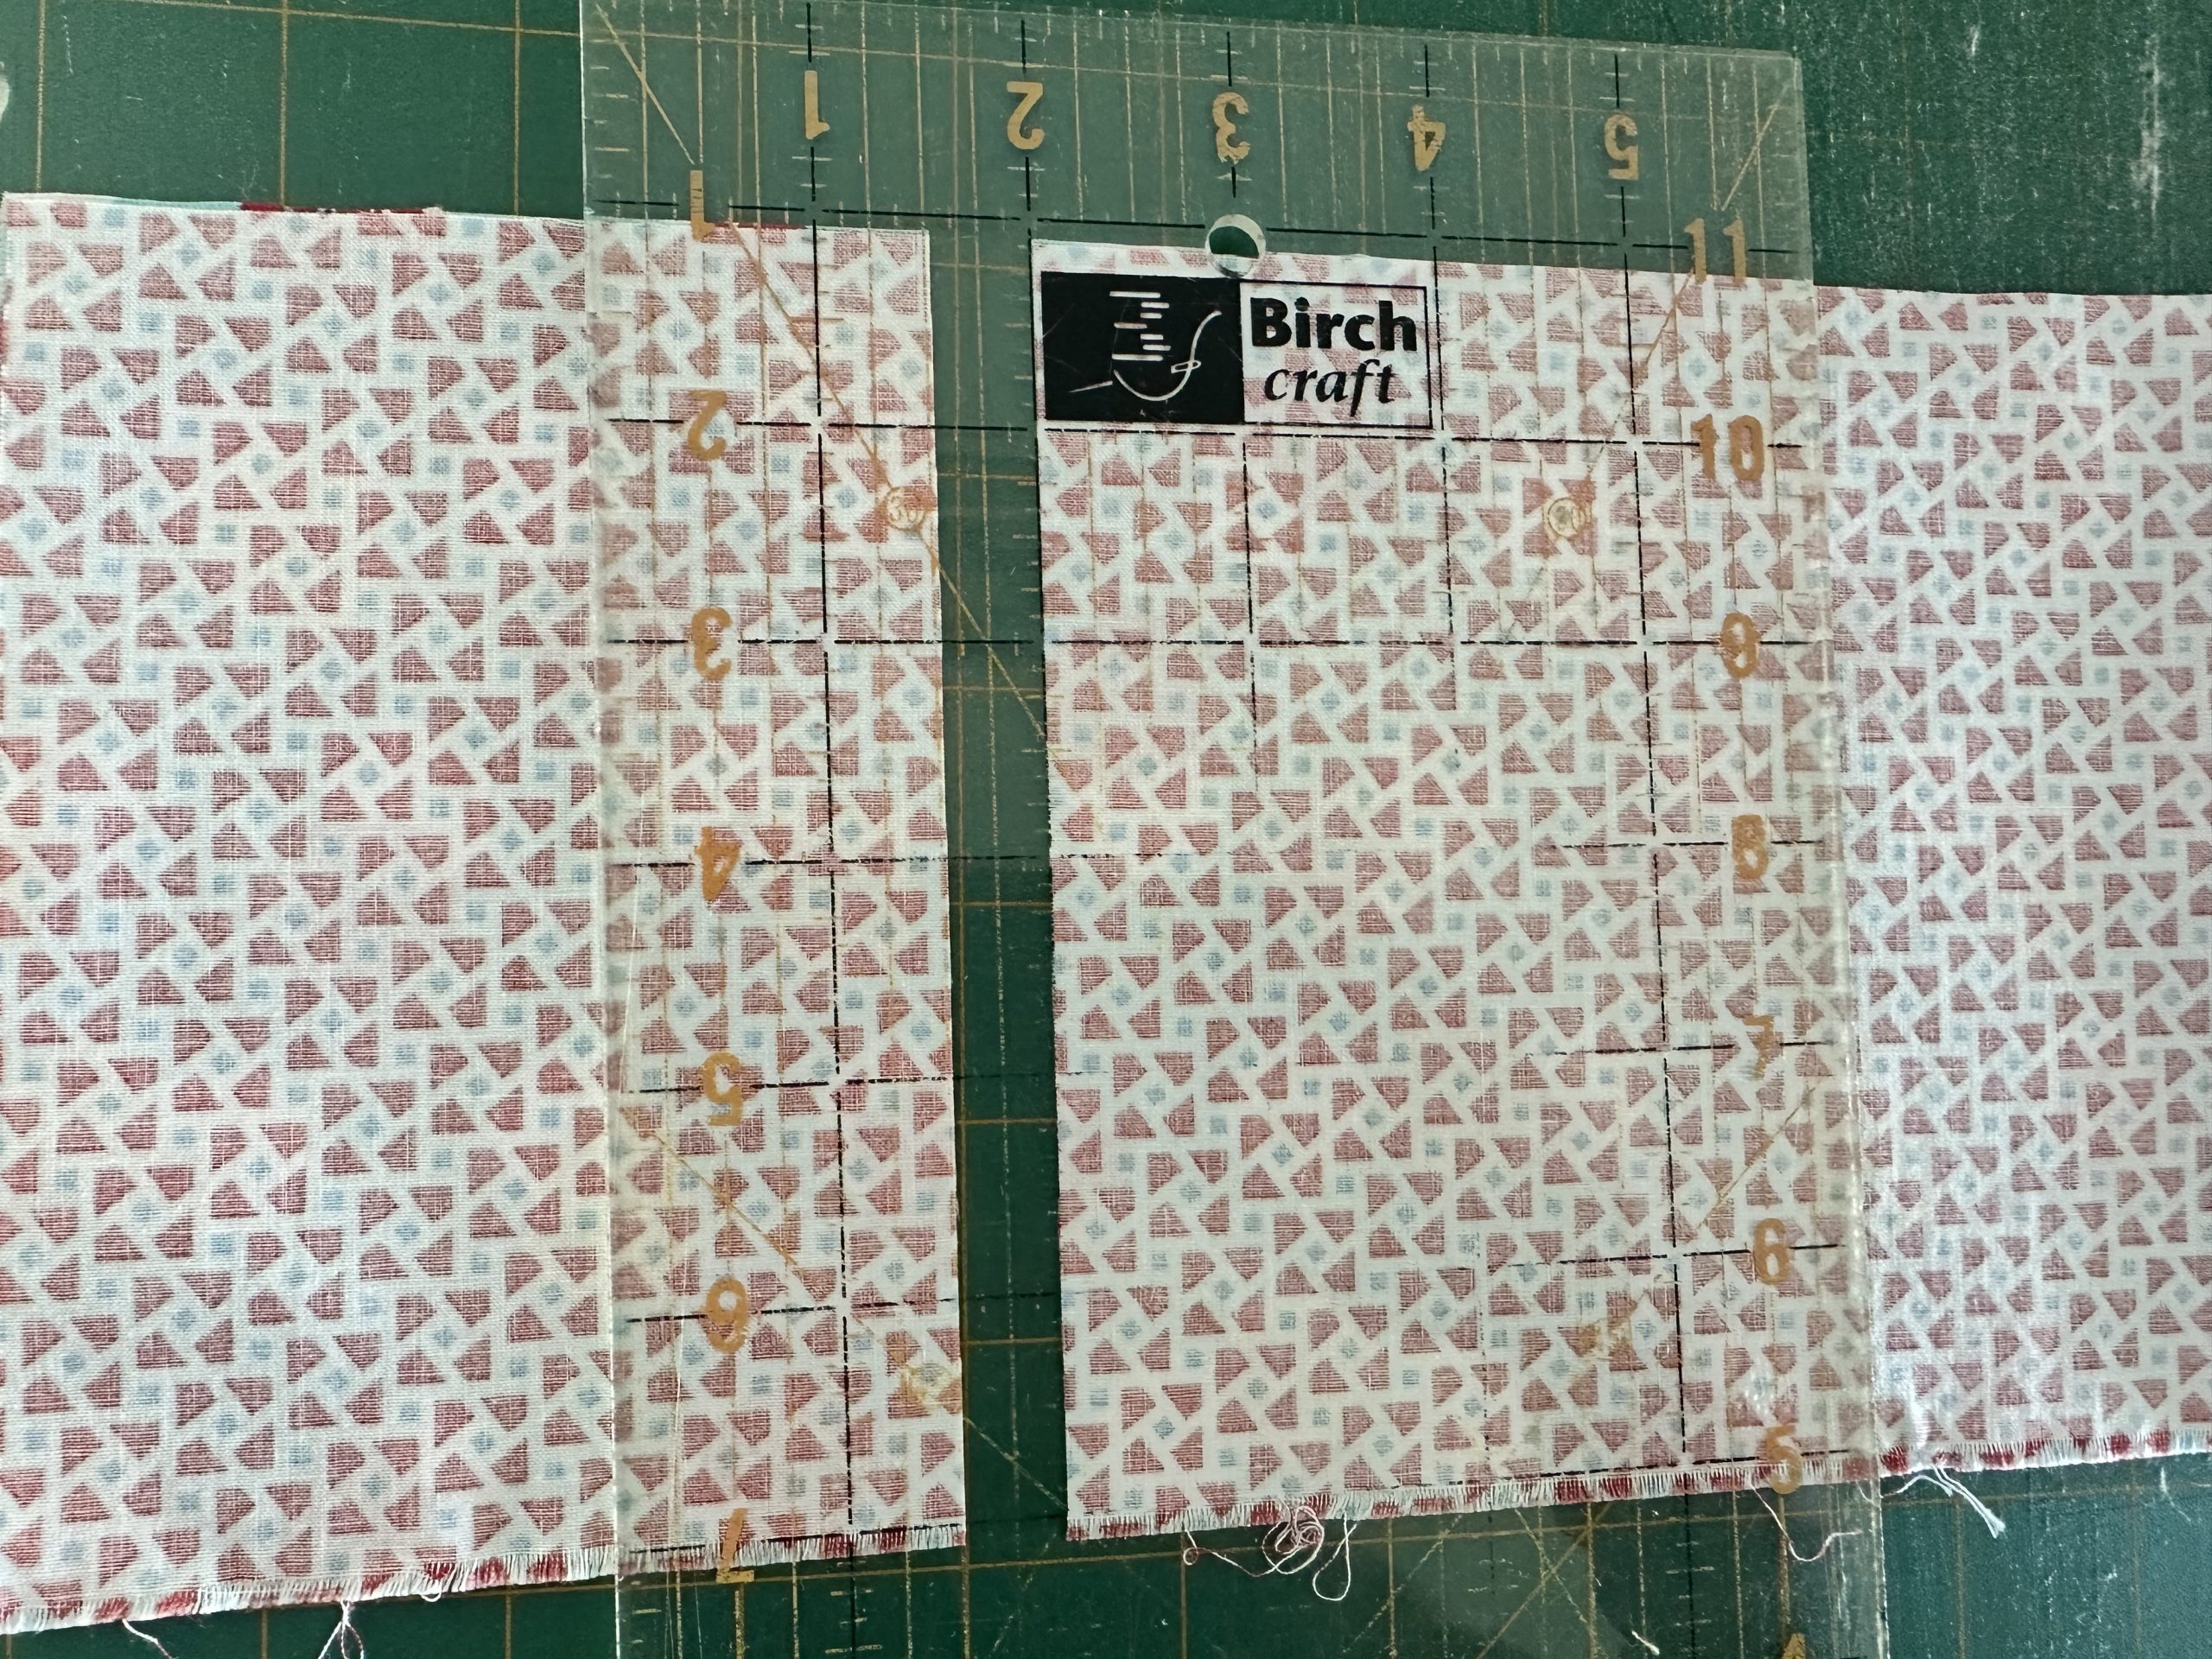
Sub cut into 4″ lengths. Making units 6″ x 4″. Cut 2.
Crazy Little Triangles Block susies-scraps.com
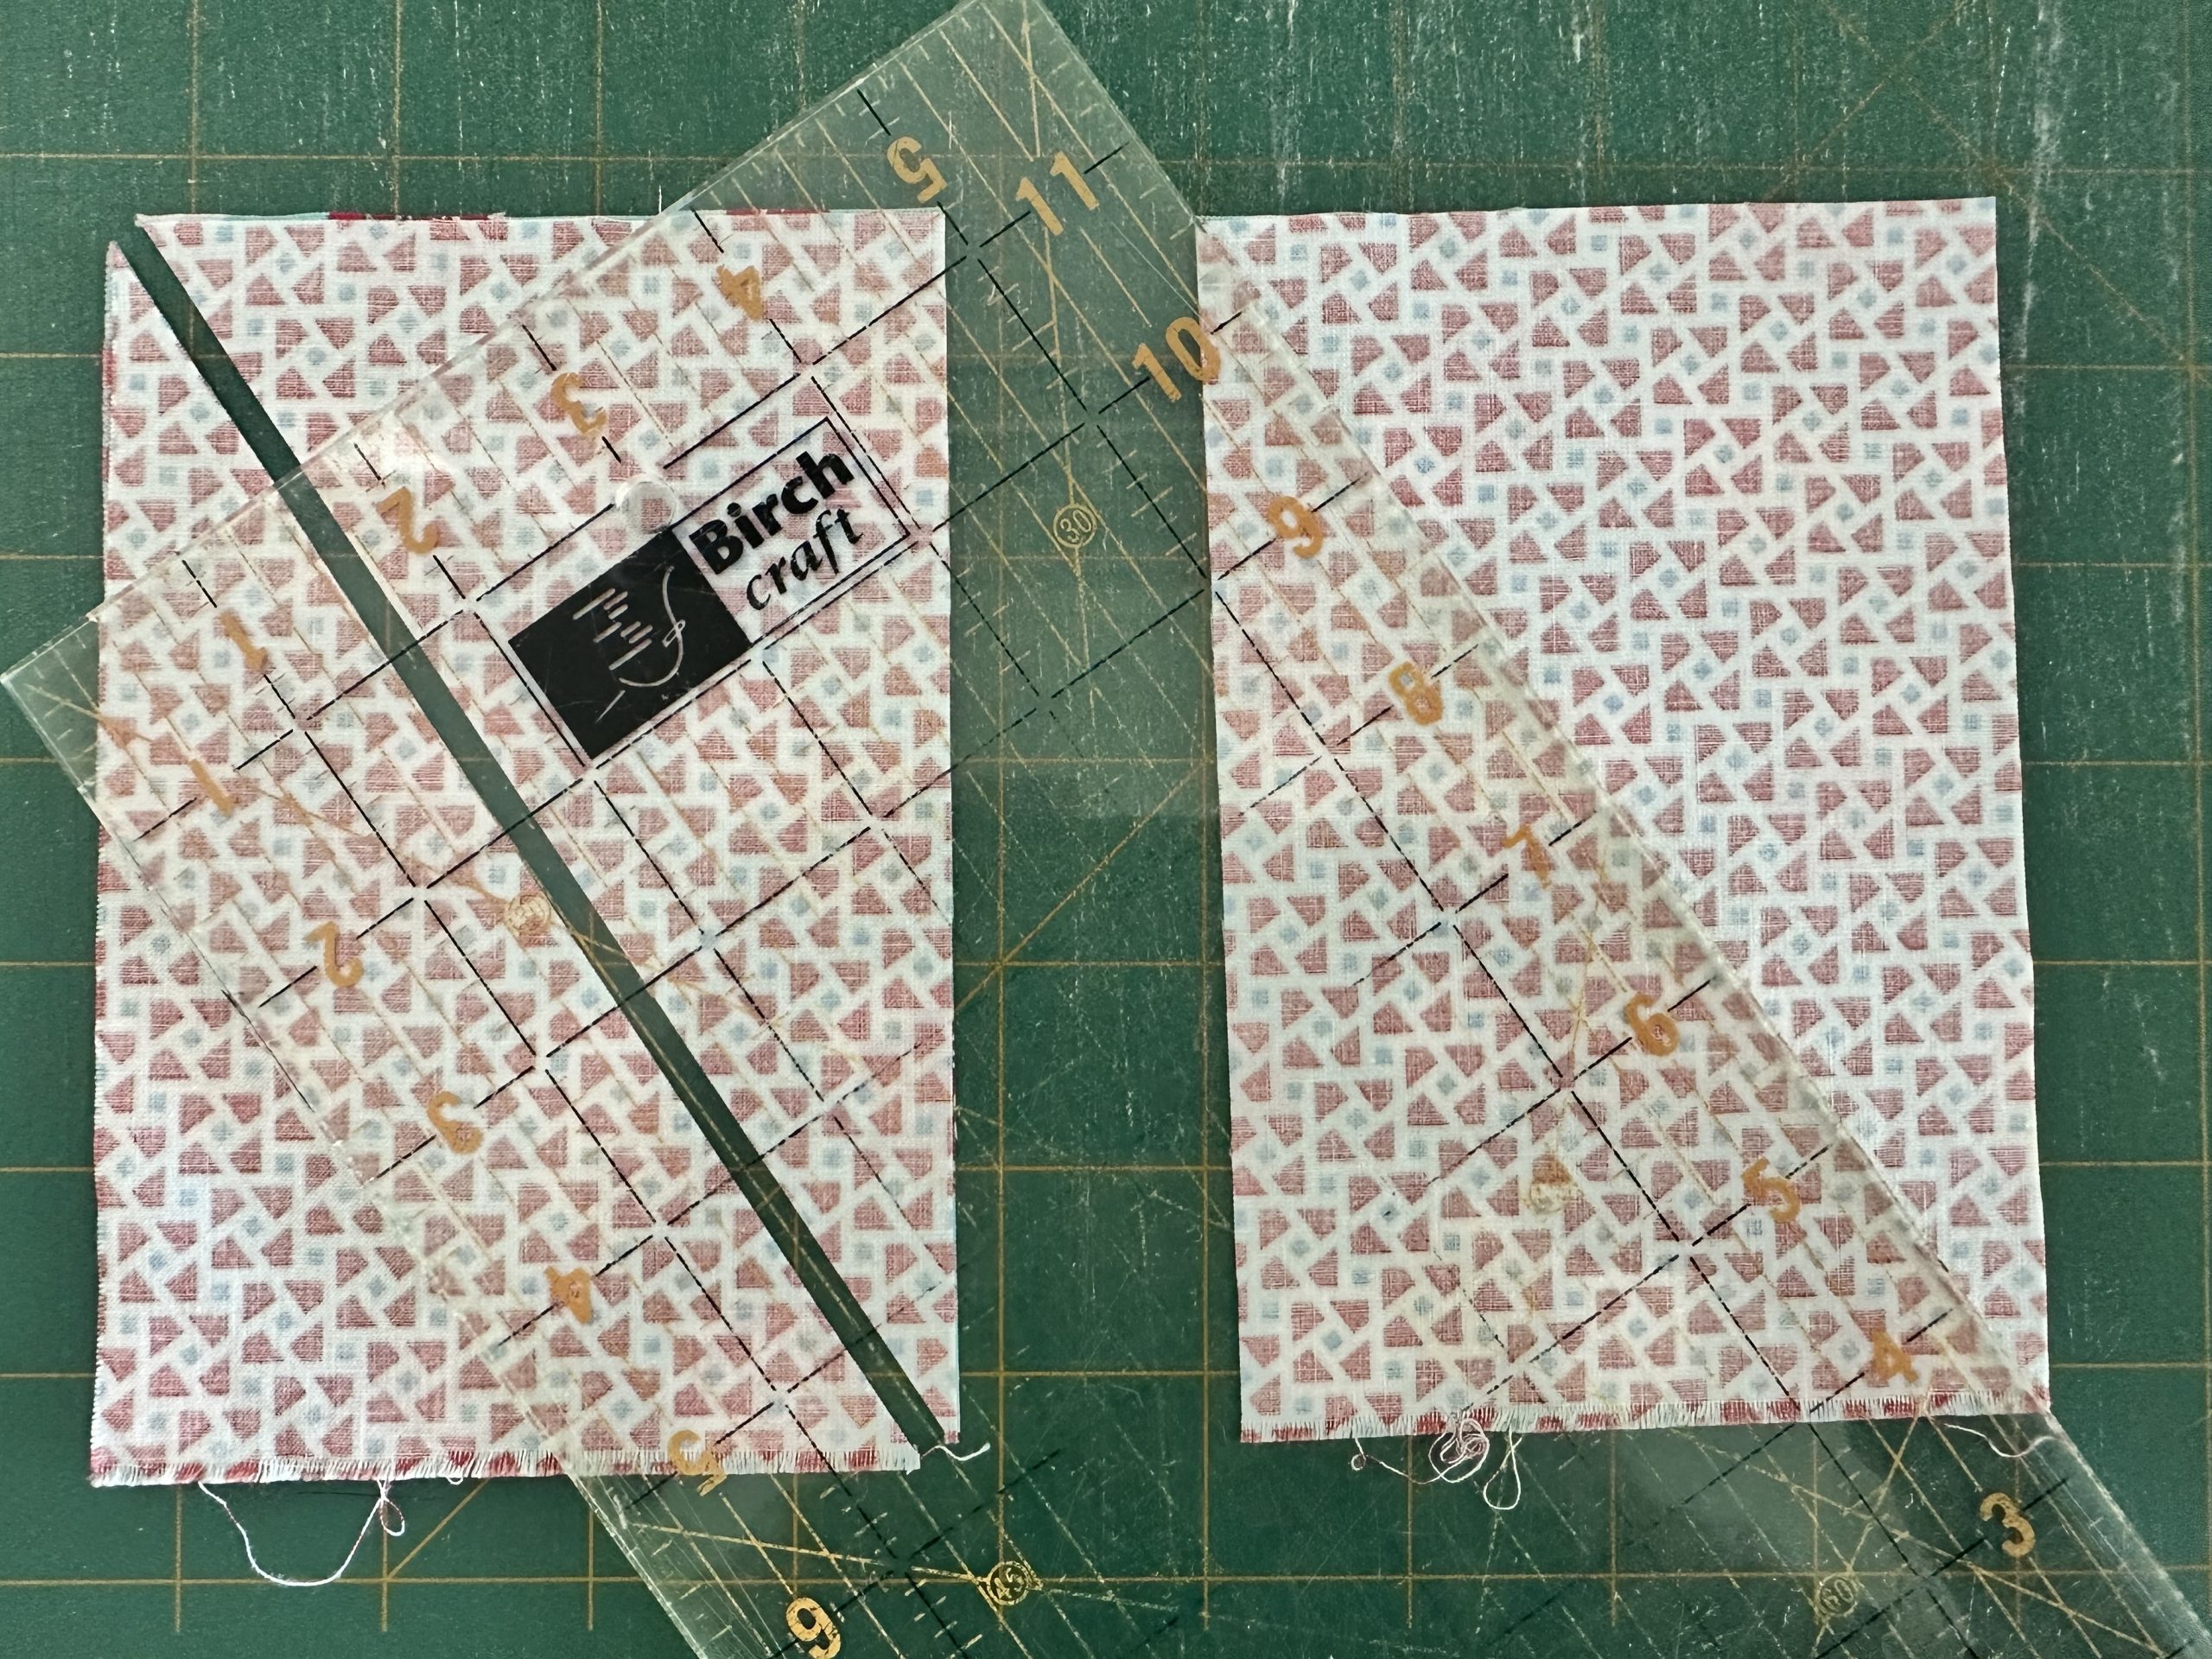
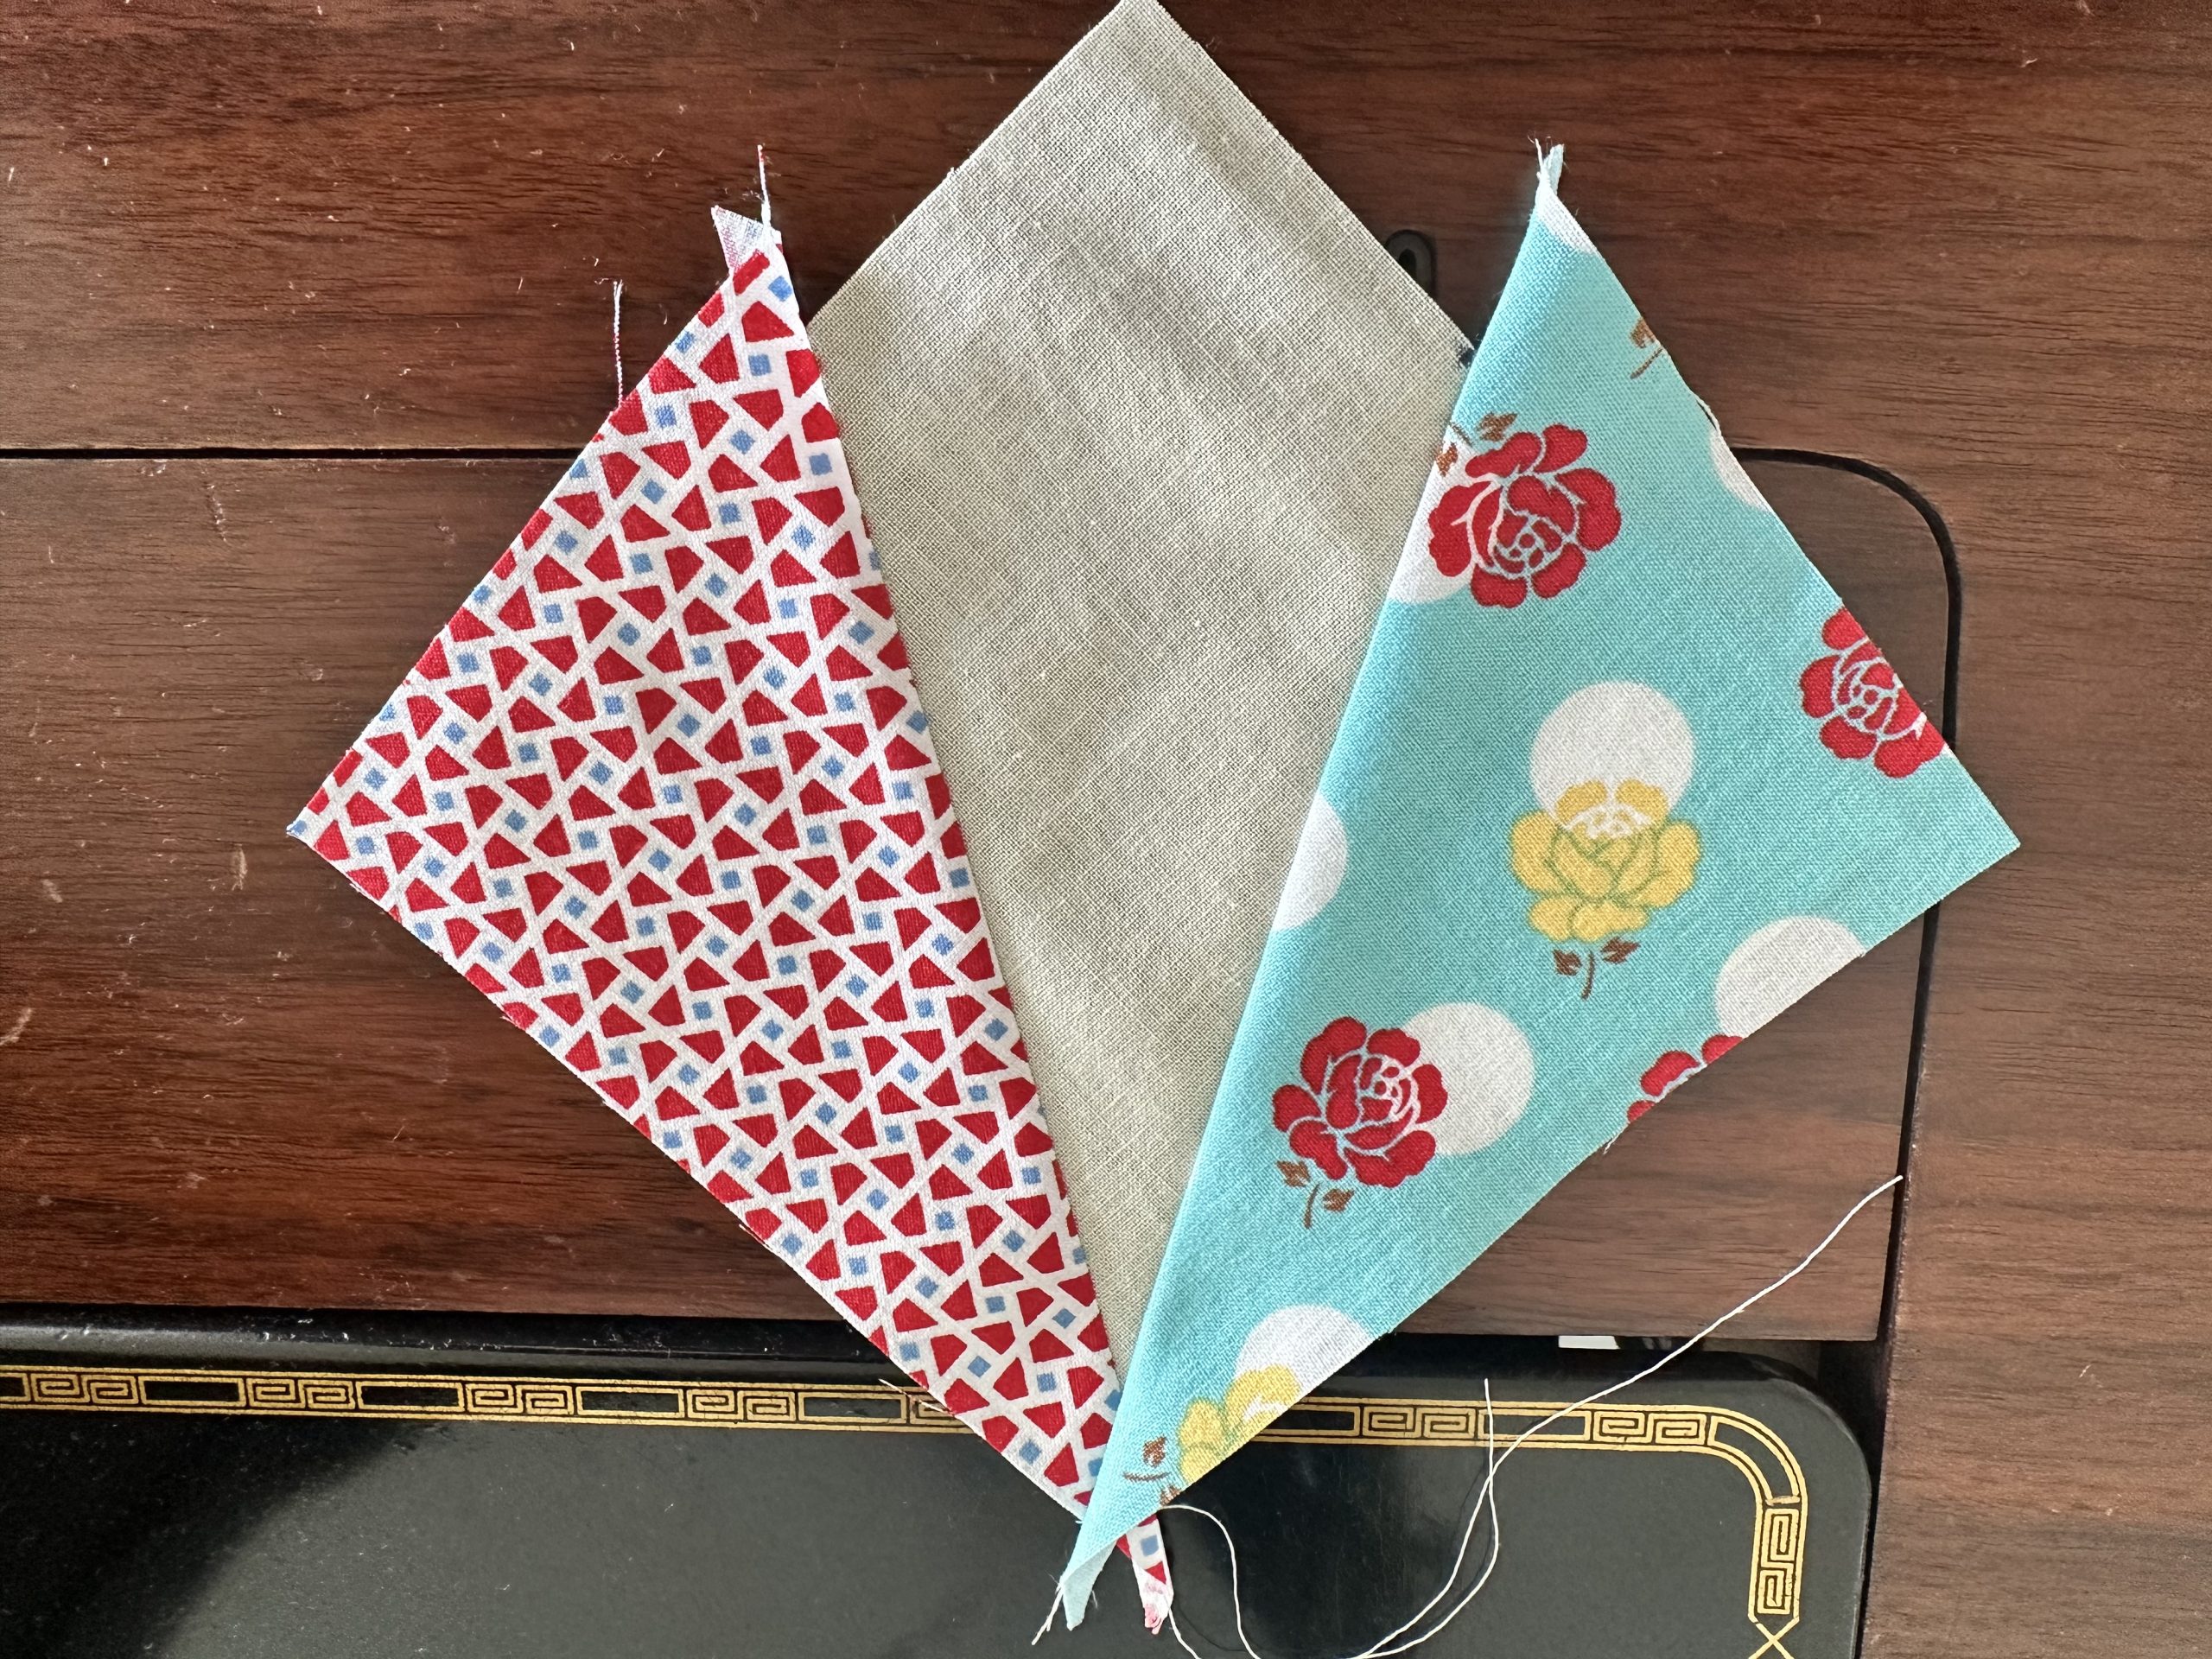
Cut these 2 units carefully once on the diagonal, revealing four sets of triangles.
Crazy Little Triangles Block susies-scraps.com
One set for each unit.
Crazy Little Triangles Block susies-scraps.com
Making the Crazy Little Triangles Units
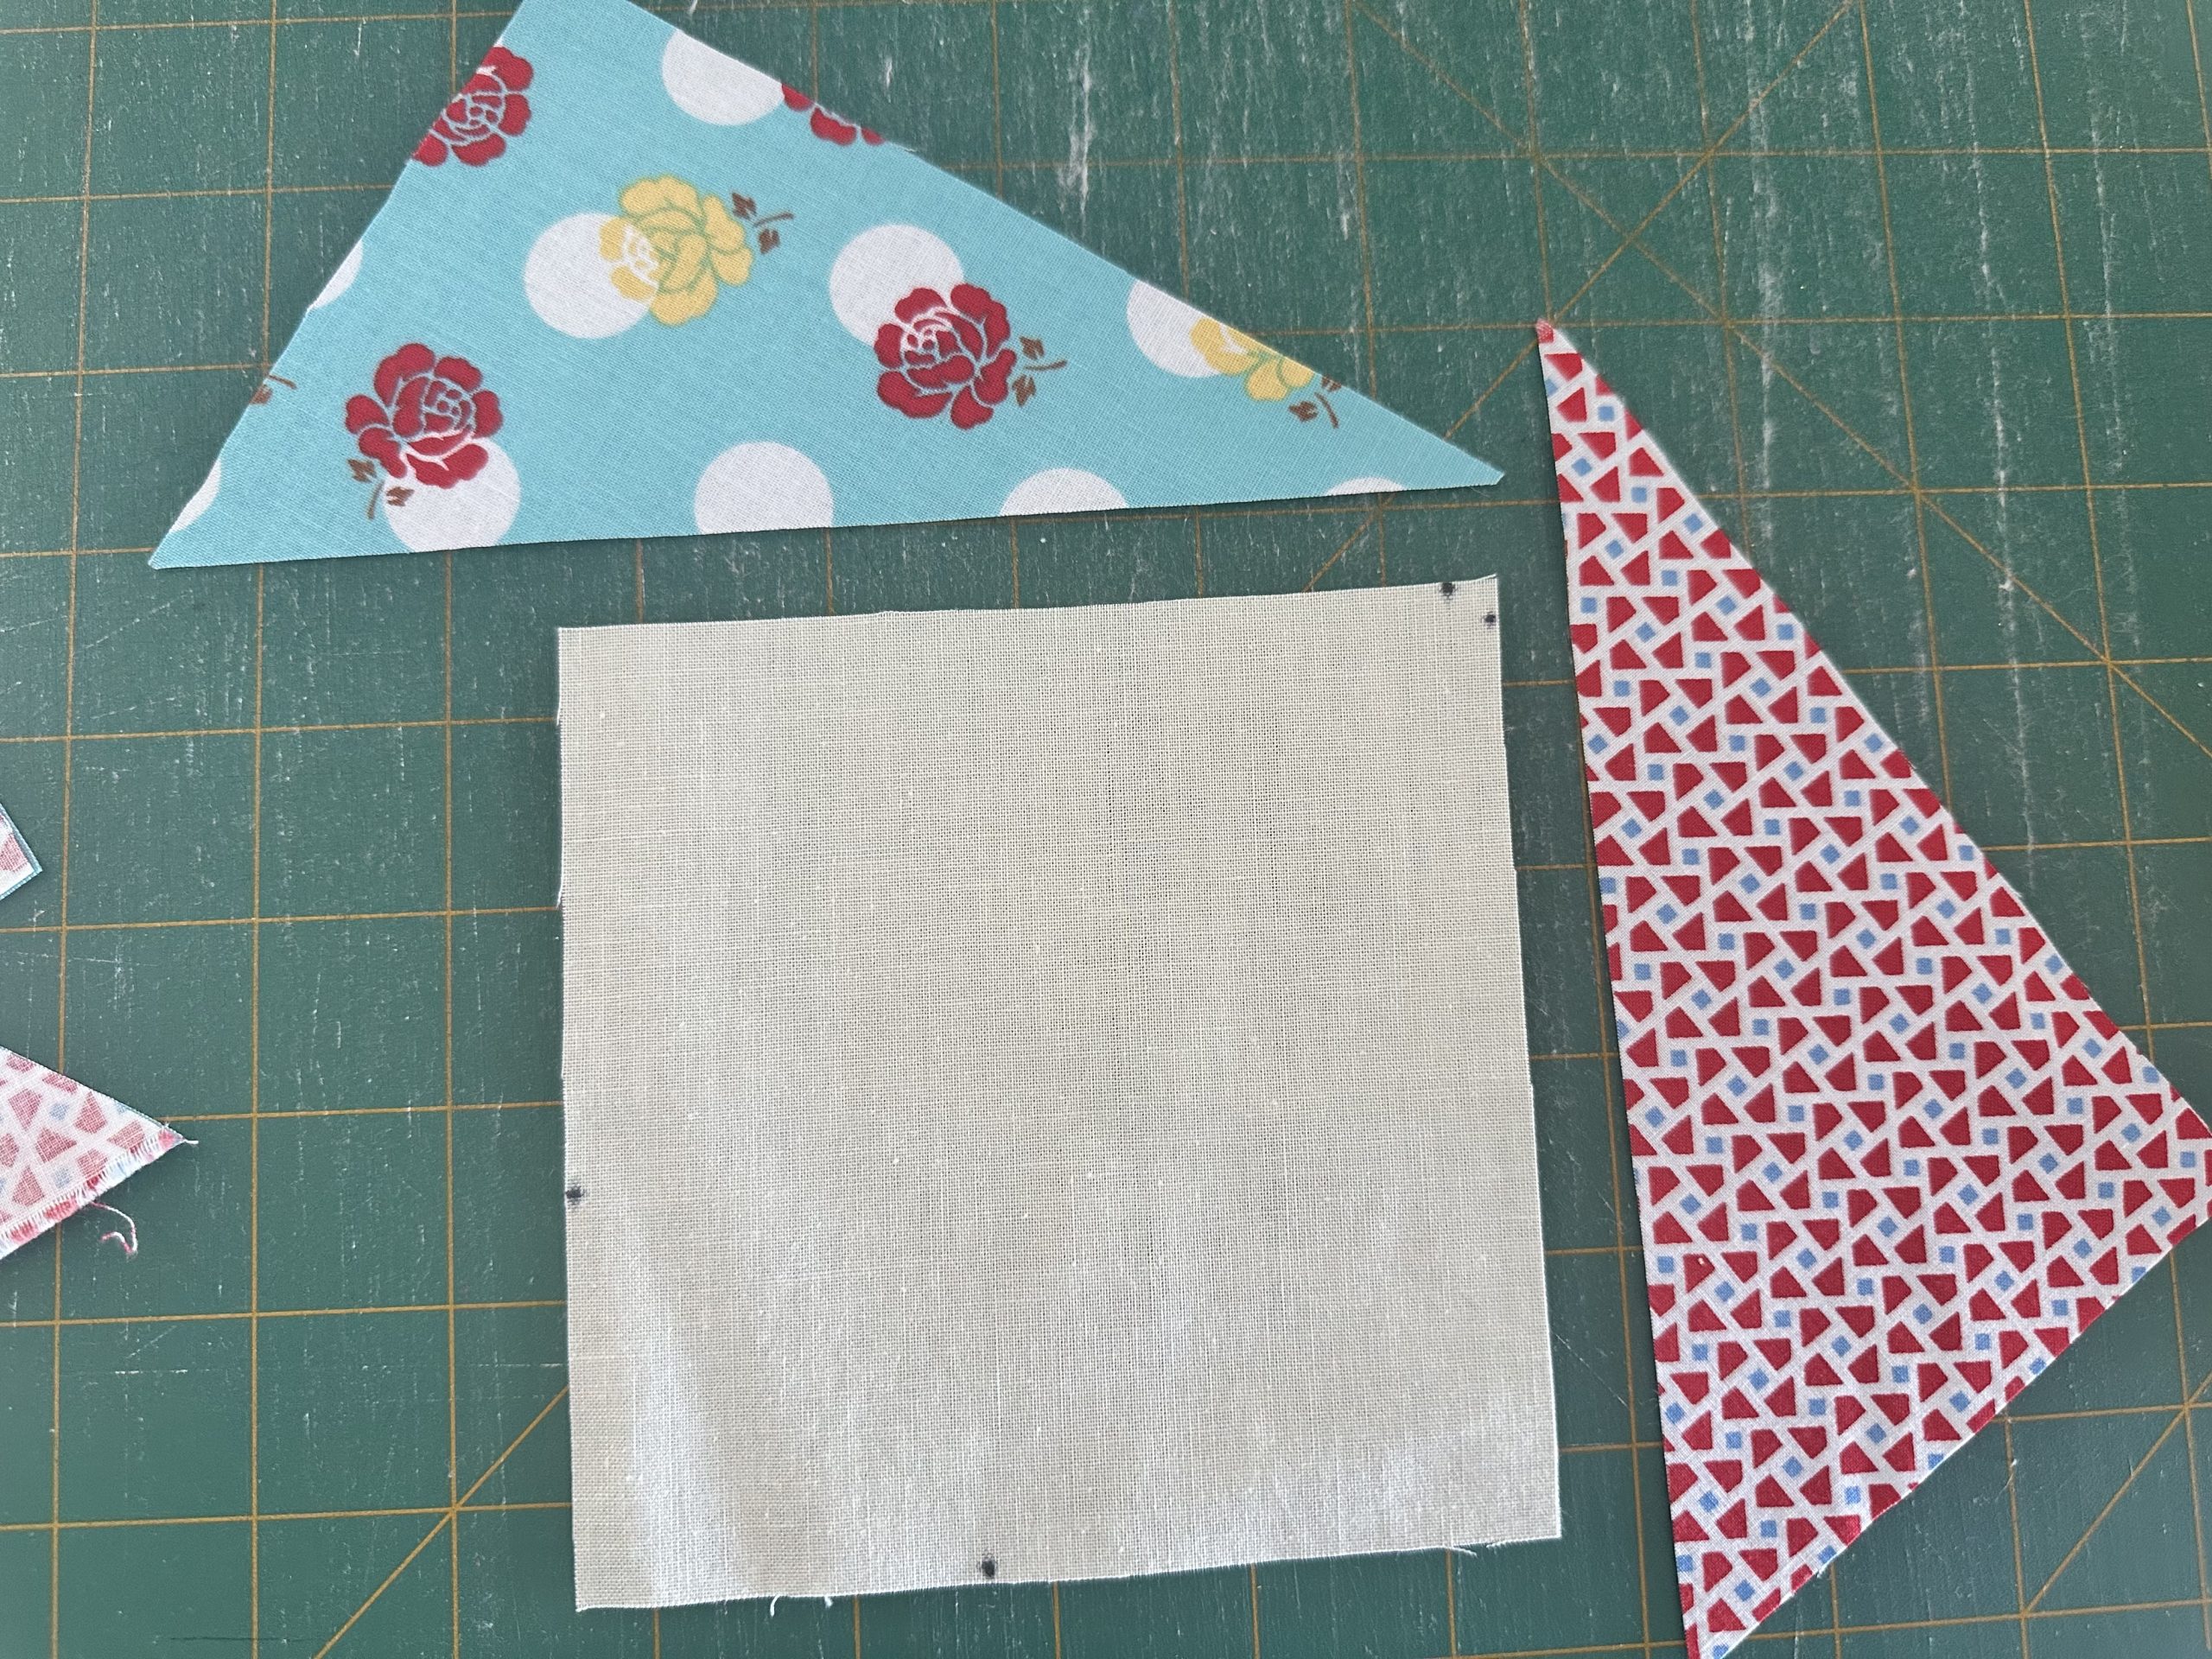
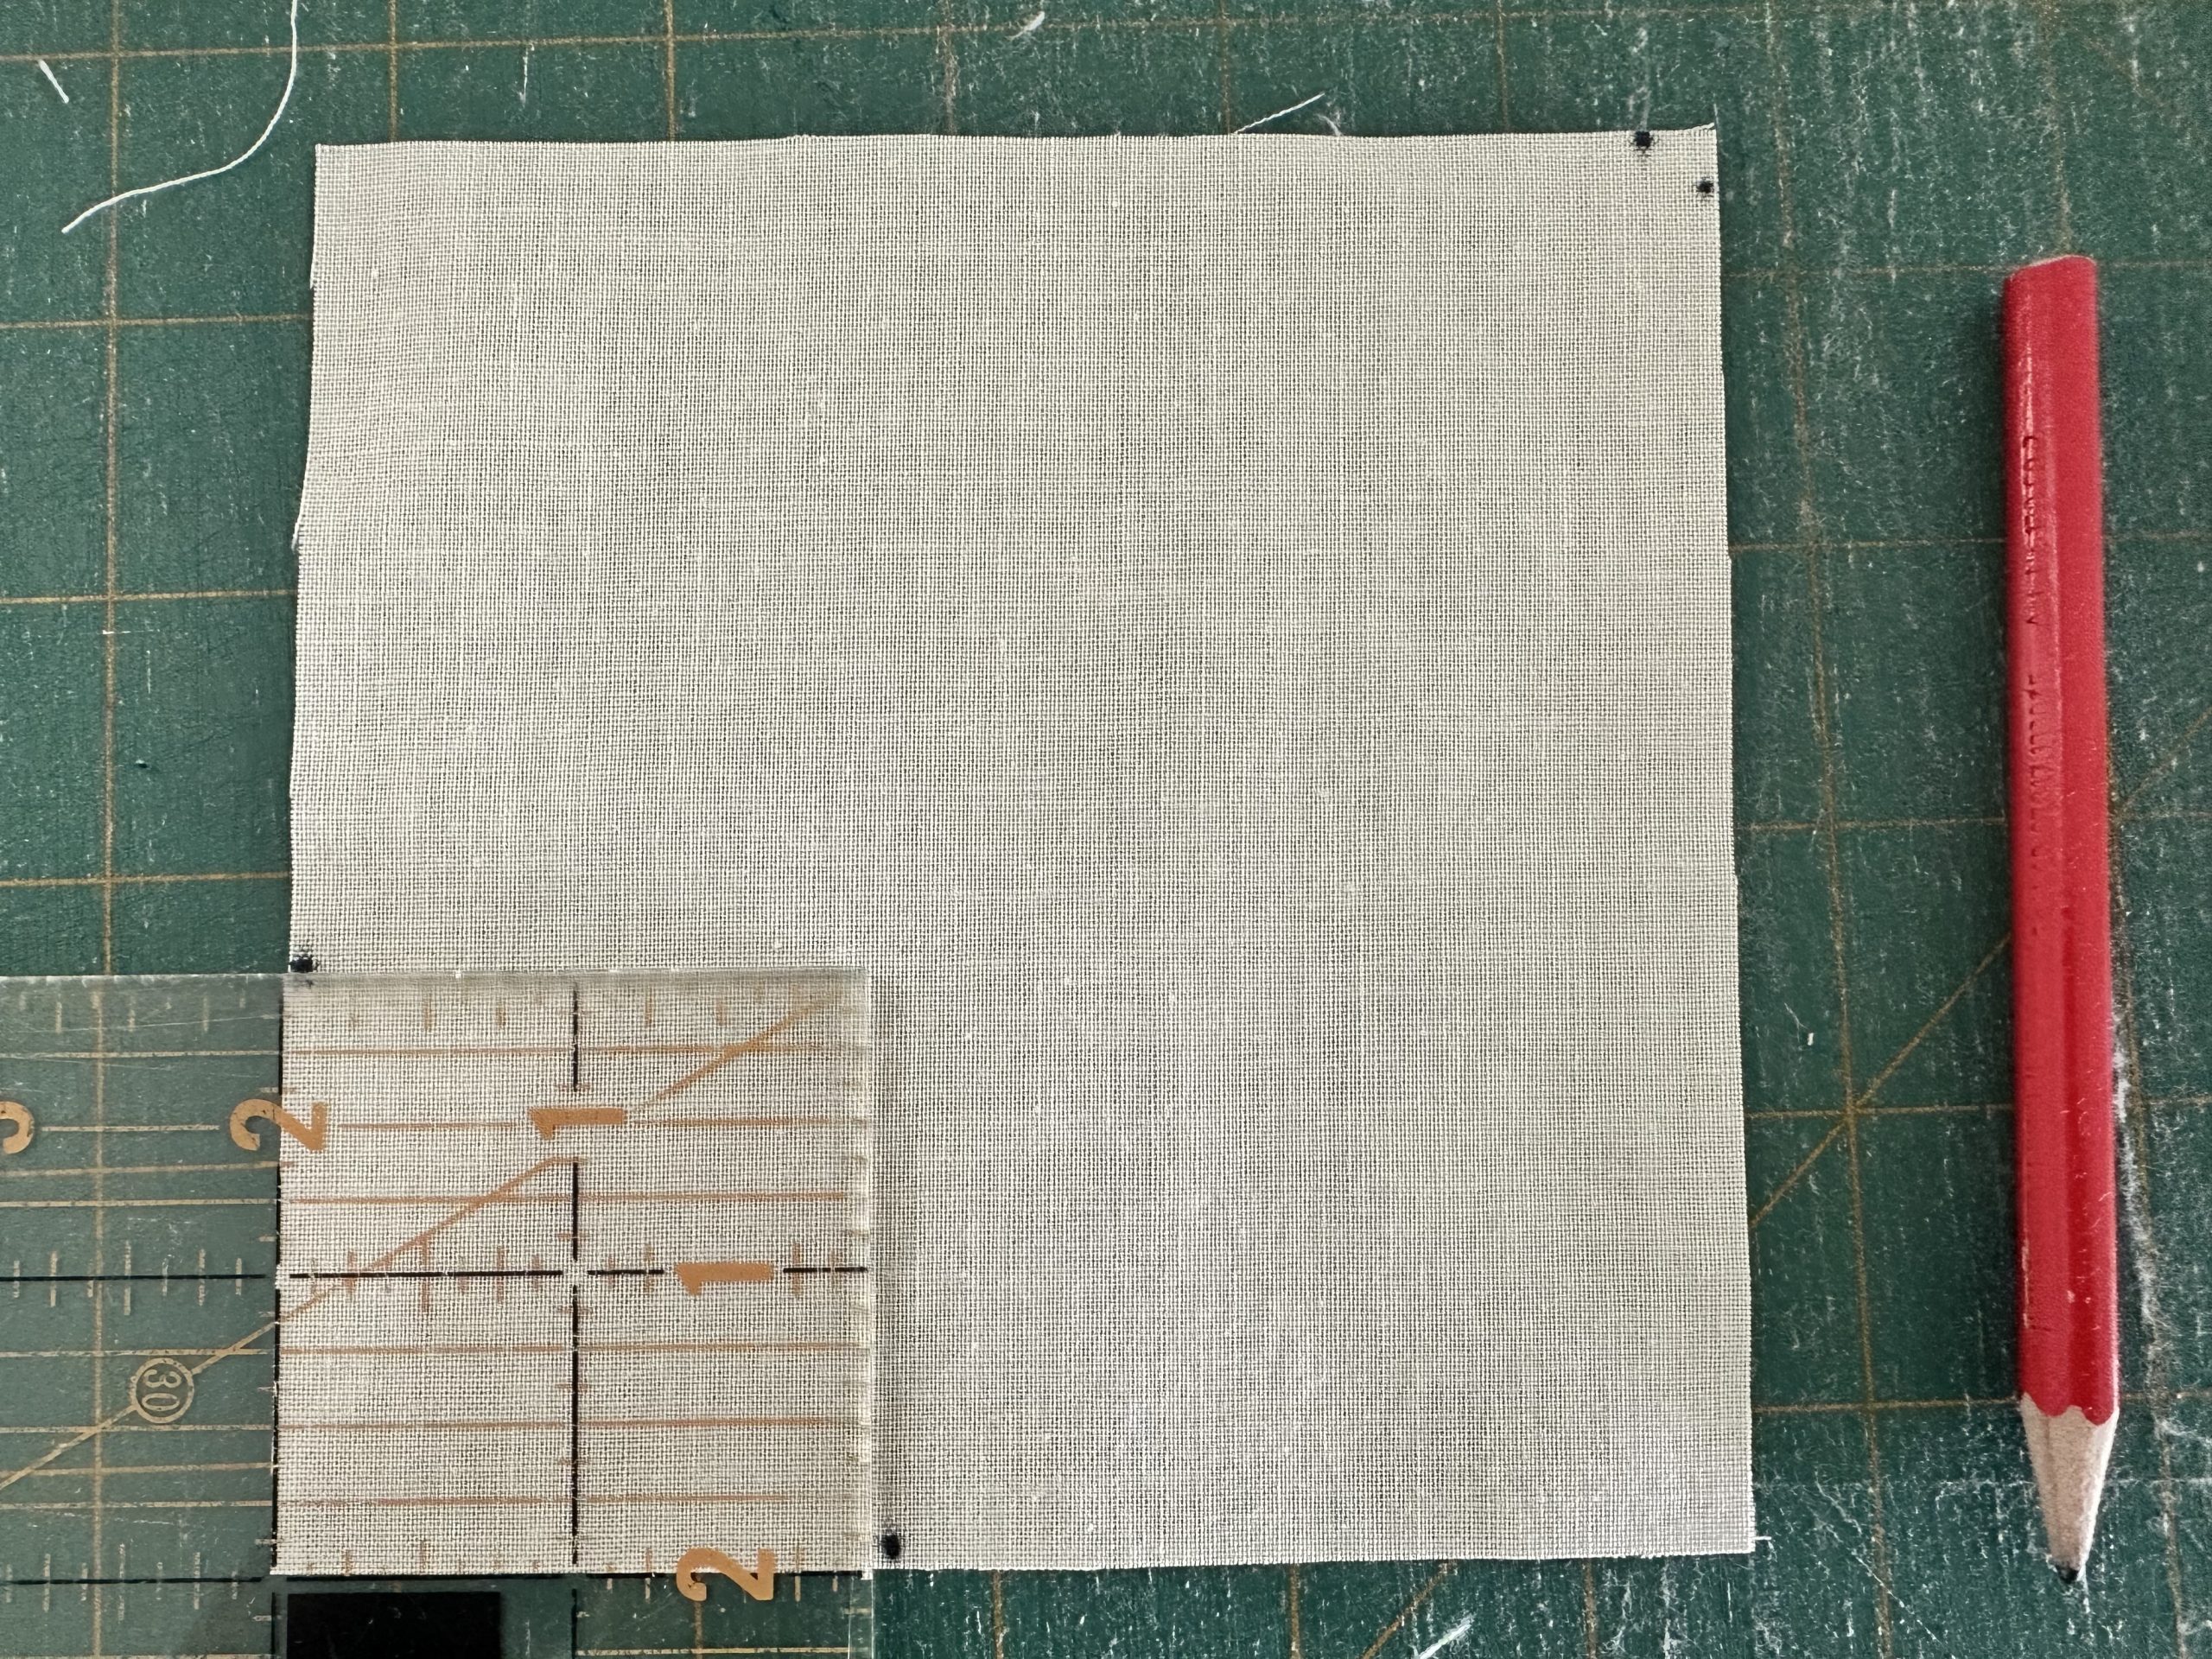
On one side of the square, measure 2″ exactly from the corner. Using a pencil, mark that point, then make another 2″ mark on the other side of the same corner. The area in between will stay blank down to the opposite corner point. On the diagonally opposite corner point, place two marks 1/4”from each side of the corner. The outside areas will be filled with the triangles.
Crazy Little Triangles Block susies-scraps.com
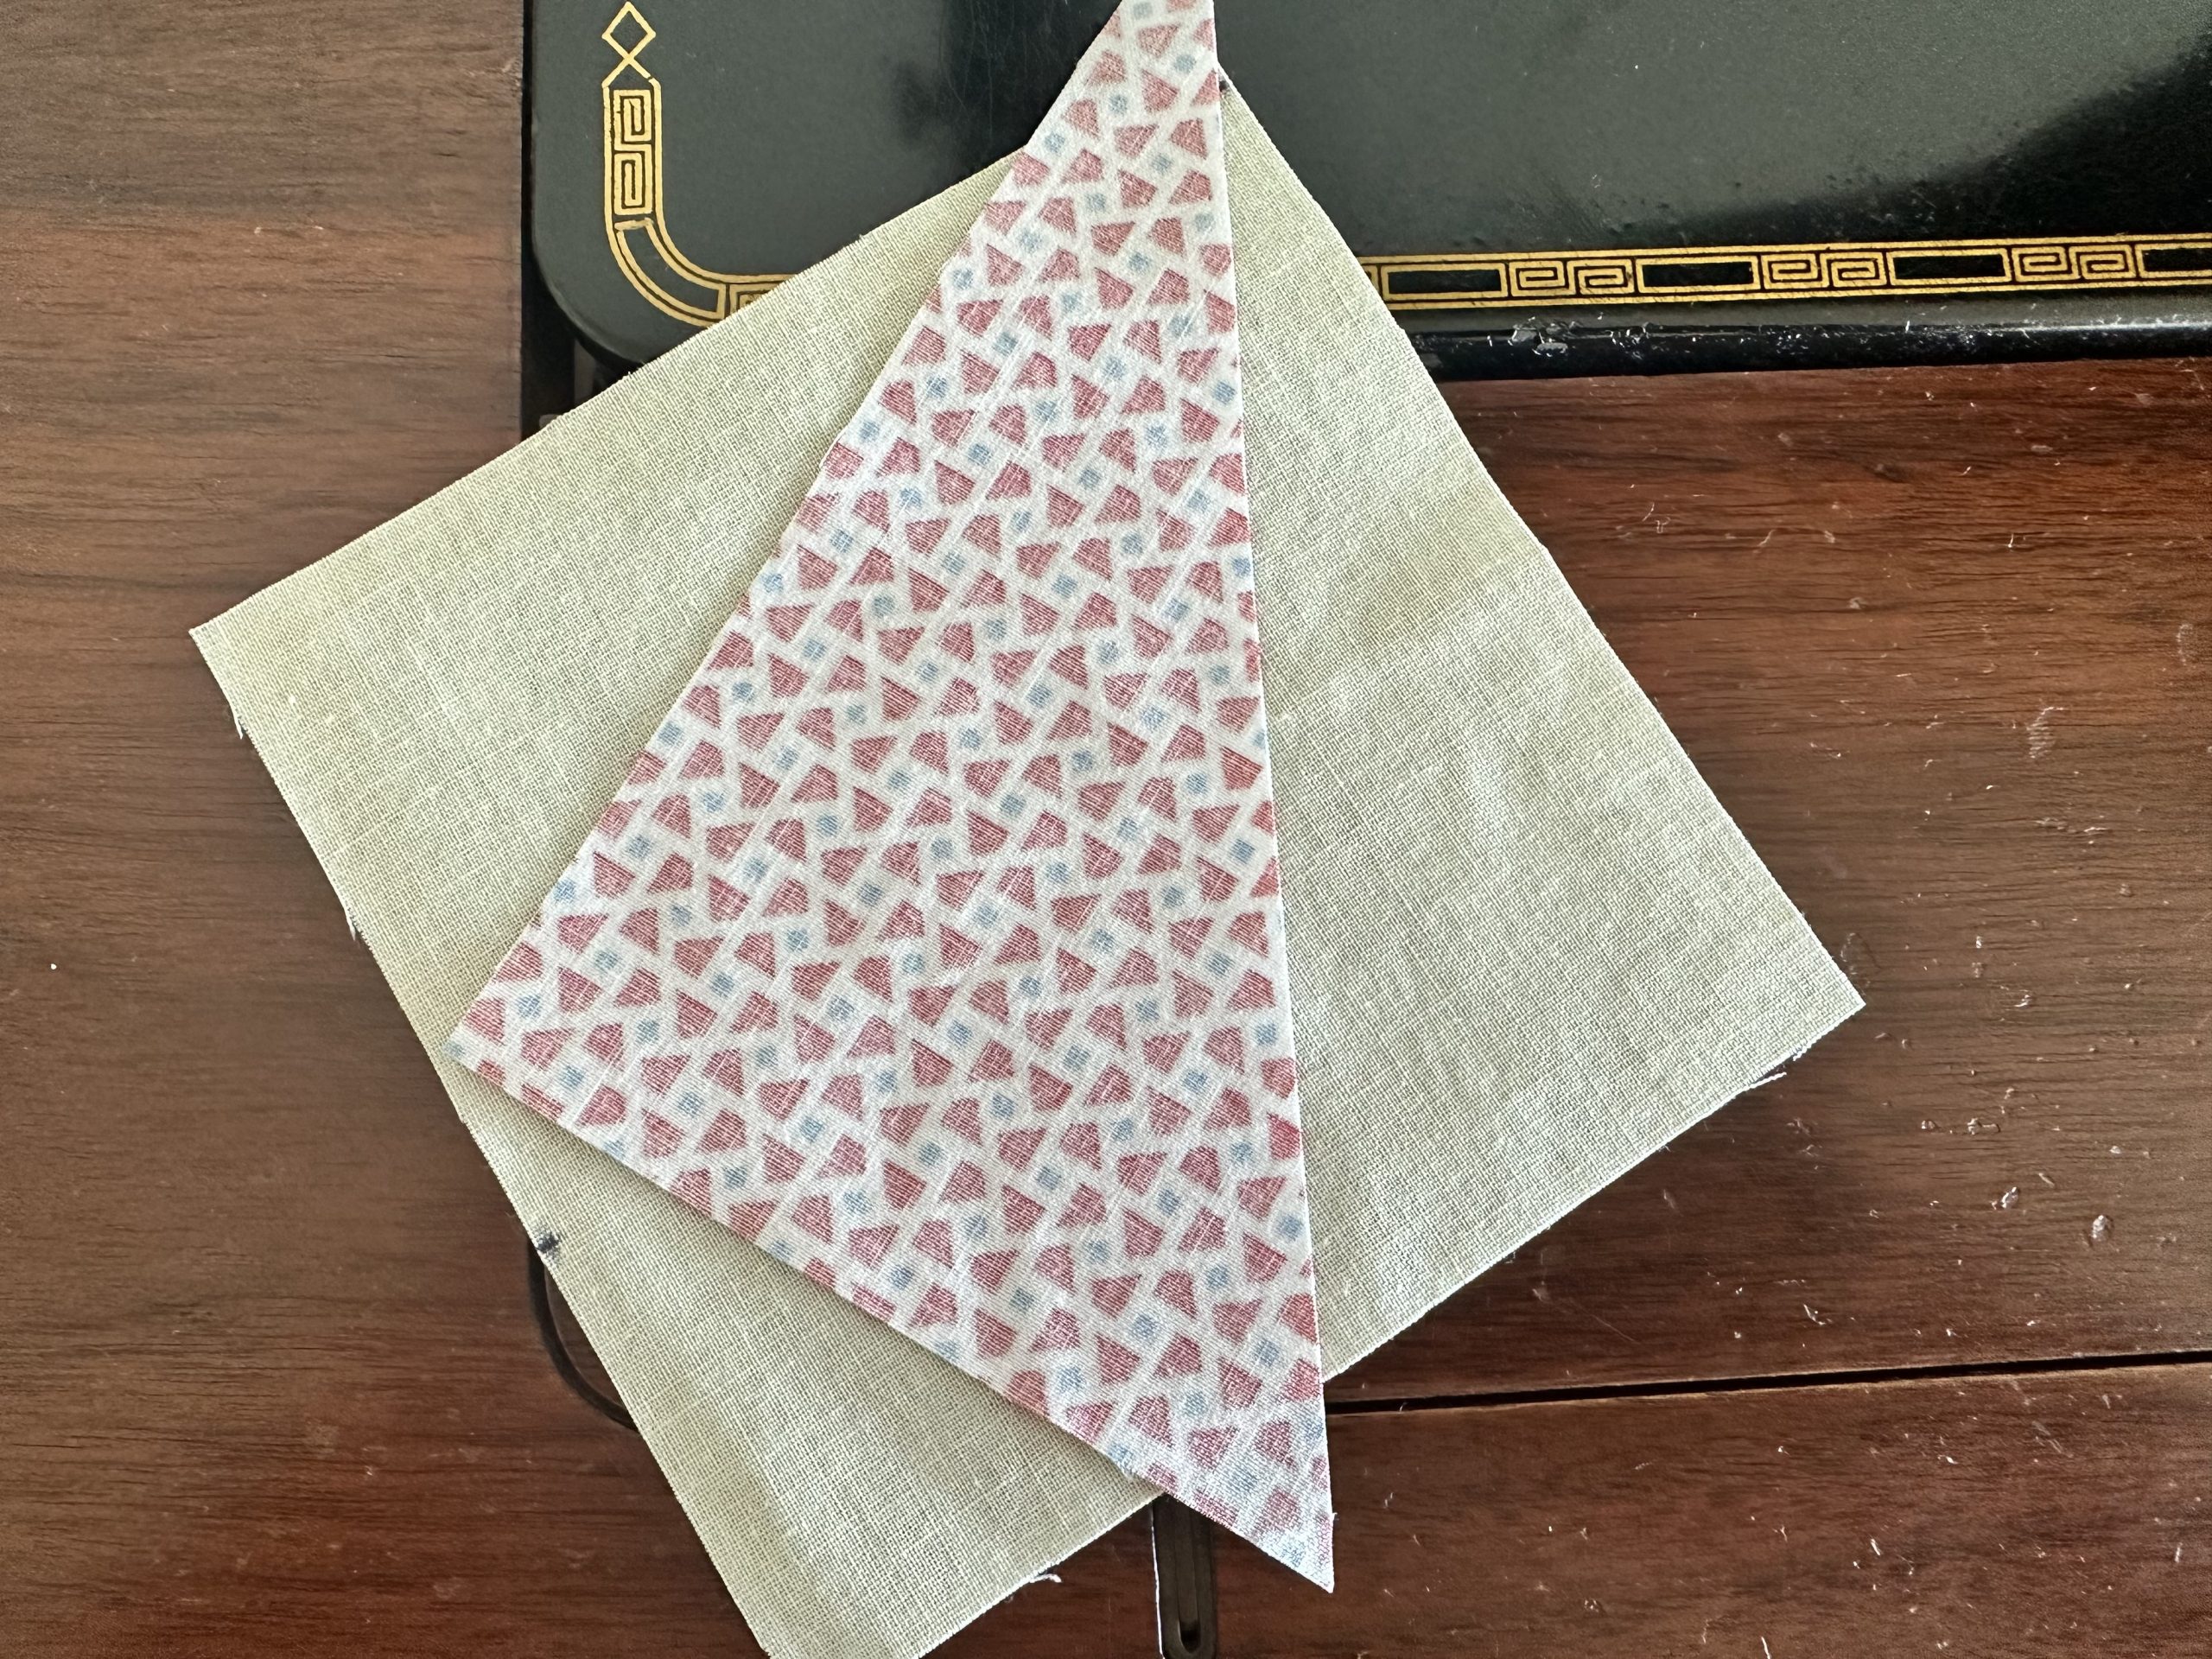
Begin by placing a triangle right side down on the right side of the 5″ square and overlapping the 2”pencil mark by 1/4 inch. Line up the same edge of the hypotenuse of the triangle with the 1/4” mark on the right side of the diagonal of the foundation square. Ensure that the tips of the triangle are overlapping by approximately the same length on each end. Sew down the hypotenuse of the triangle using a 1/4 inch seam.
Crazy Little Triangles Block susies-scraps.com
Lining up the outside edge of the triangle with the corner will ensure that there is at least a 1/4 inch overlap at the corner point where the fabrics meet. This will ensure the points are not lost when the blocks are sewn together.
Turn the triangle back. Finger press the triangle nice and flat.
Crazy Little Triangles Block susies-scraps.com
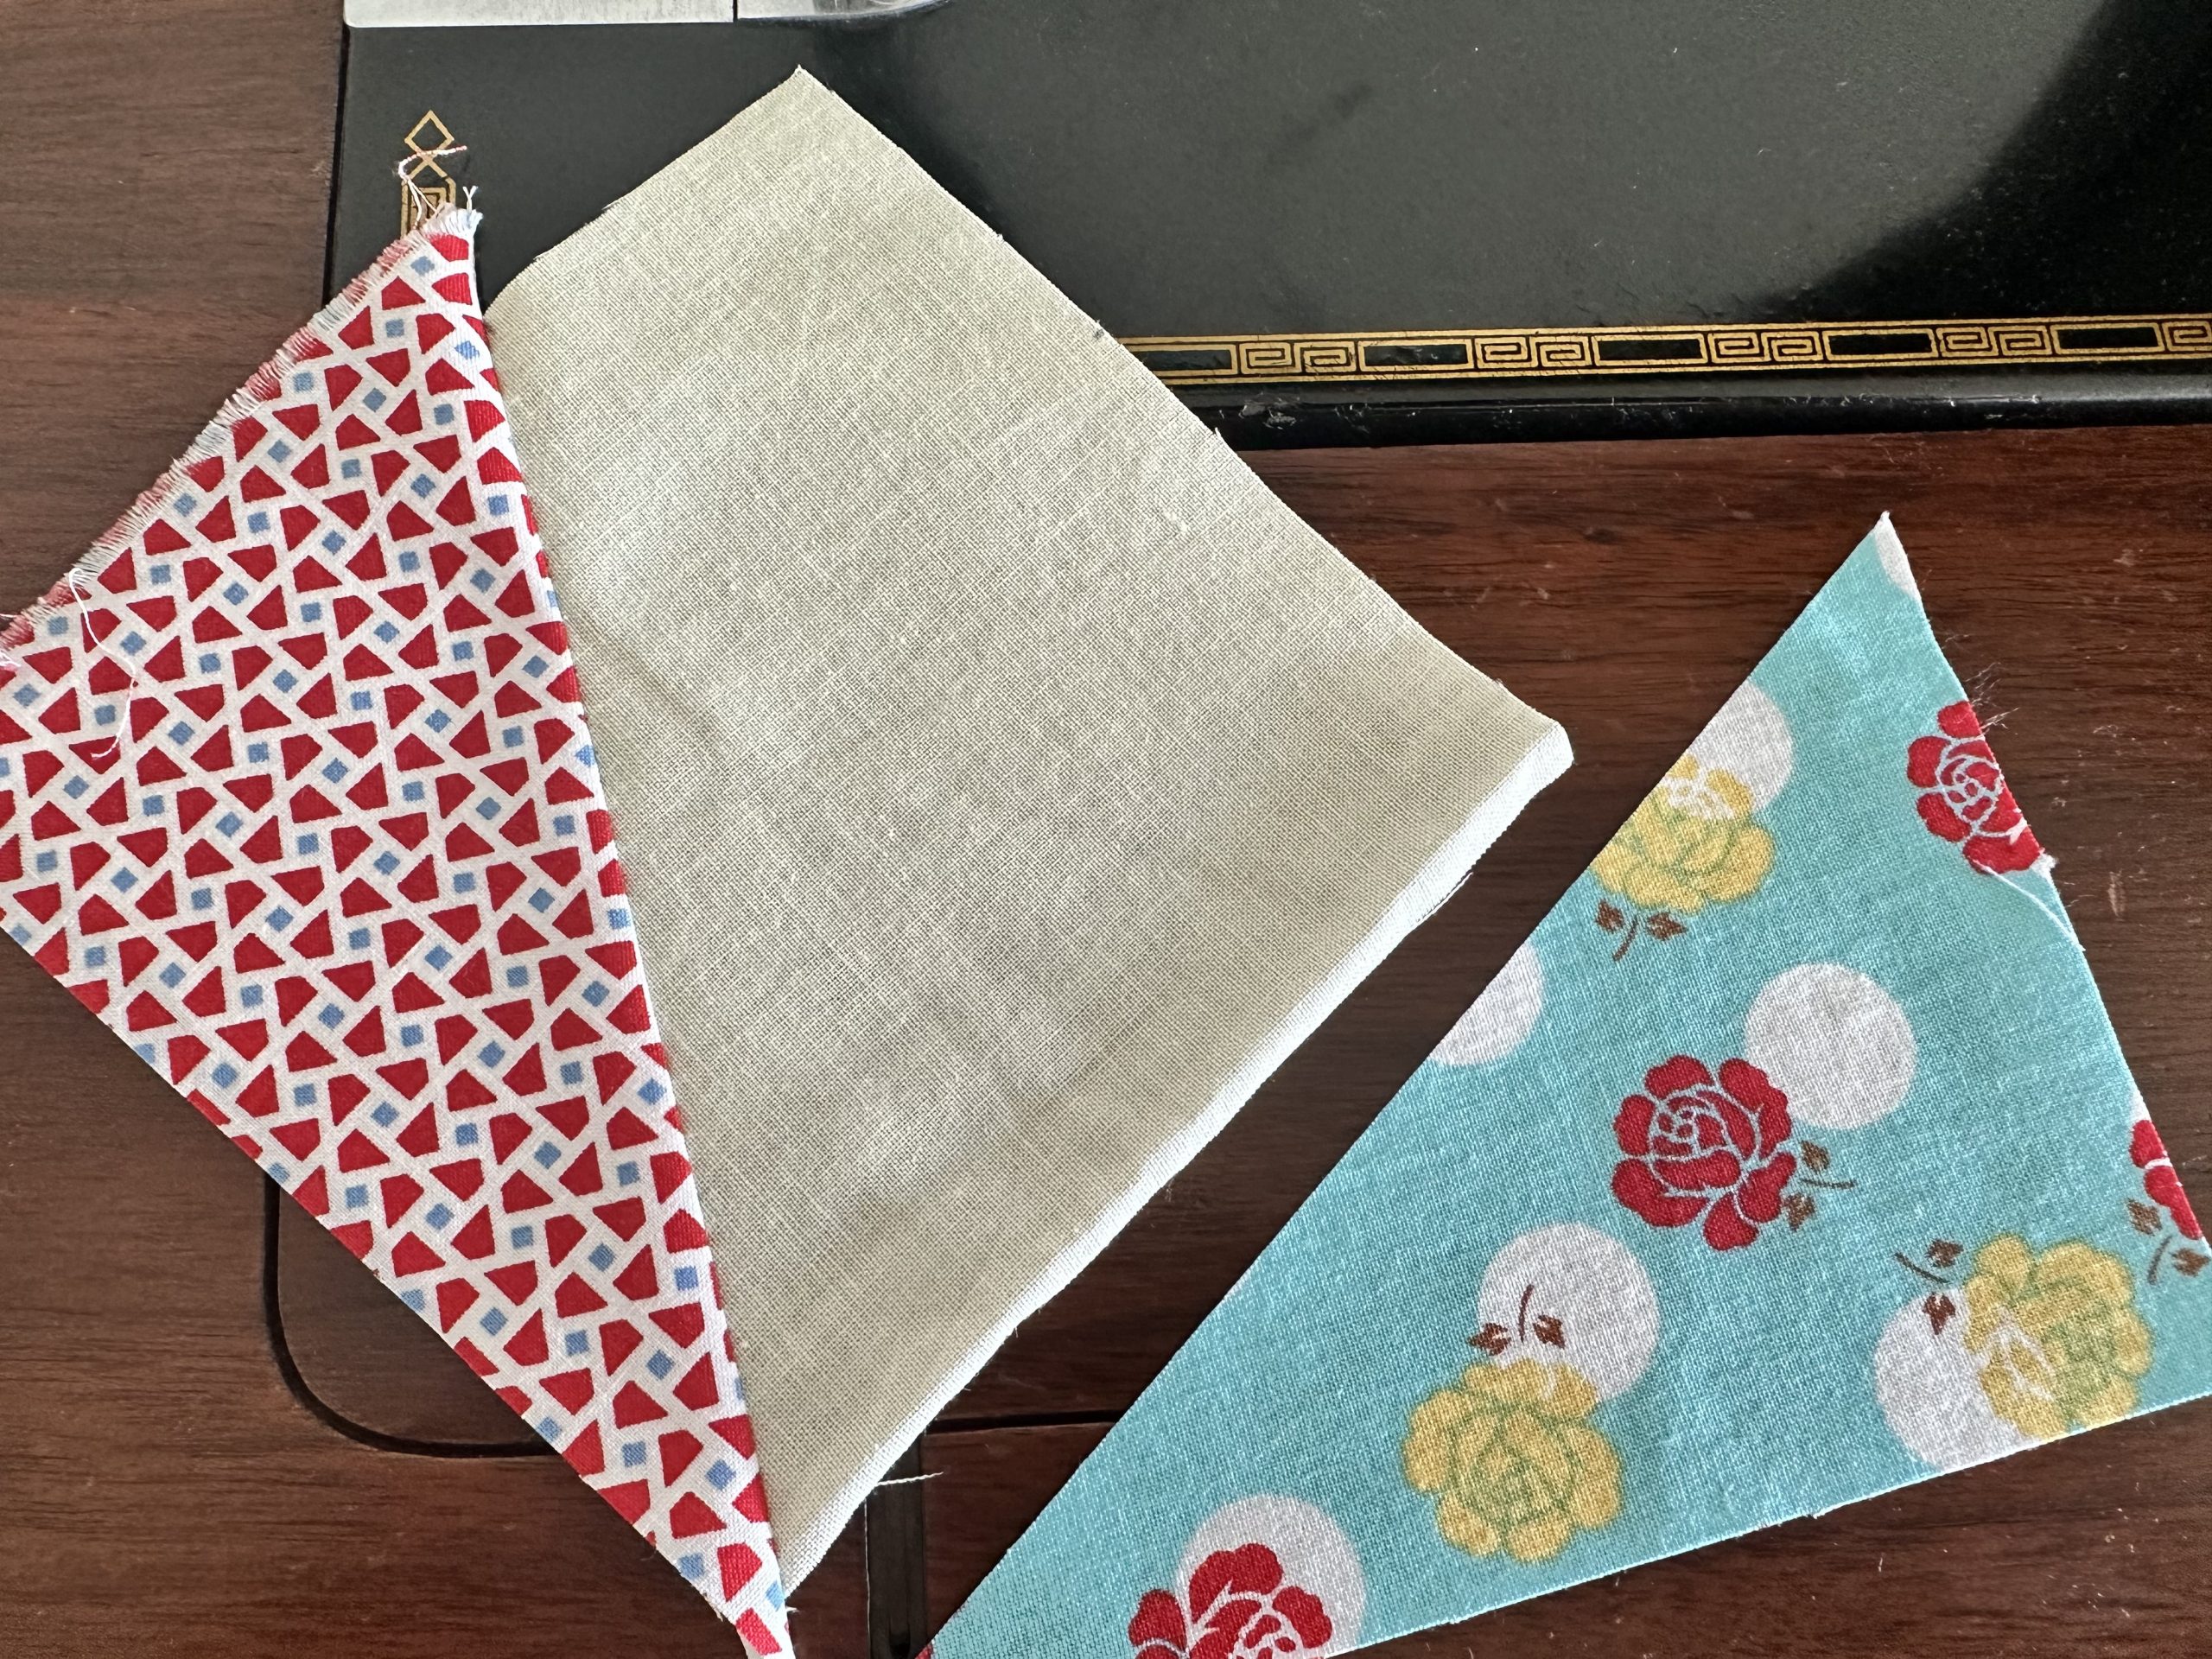
Put the next triangle right side down on the unit overlapping the corner 2″ pencil mark overlaying it by 1/4 inch. Line up the other end of the triangle with the 1/4” mark on the opposite diagonal. Sew down the along the hypotenuse of the triangle, using a 1/4 inch seam.
Crazy Little Triangles Block susies-scraps.com
Turn the triangle back towards the outside and finger press flat. Press the unit.
Crazy Little Triangles Block susies-scraps.com
Repeat to make three more units.
Crazy Little Triangles Block susies-scraps.com
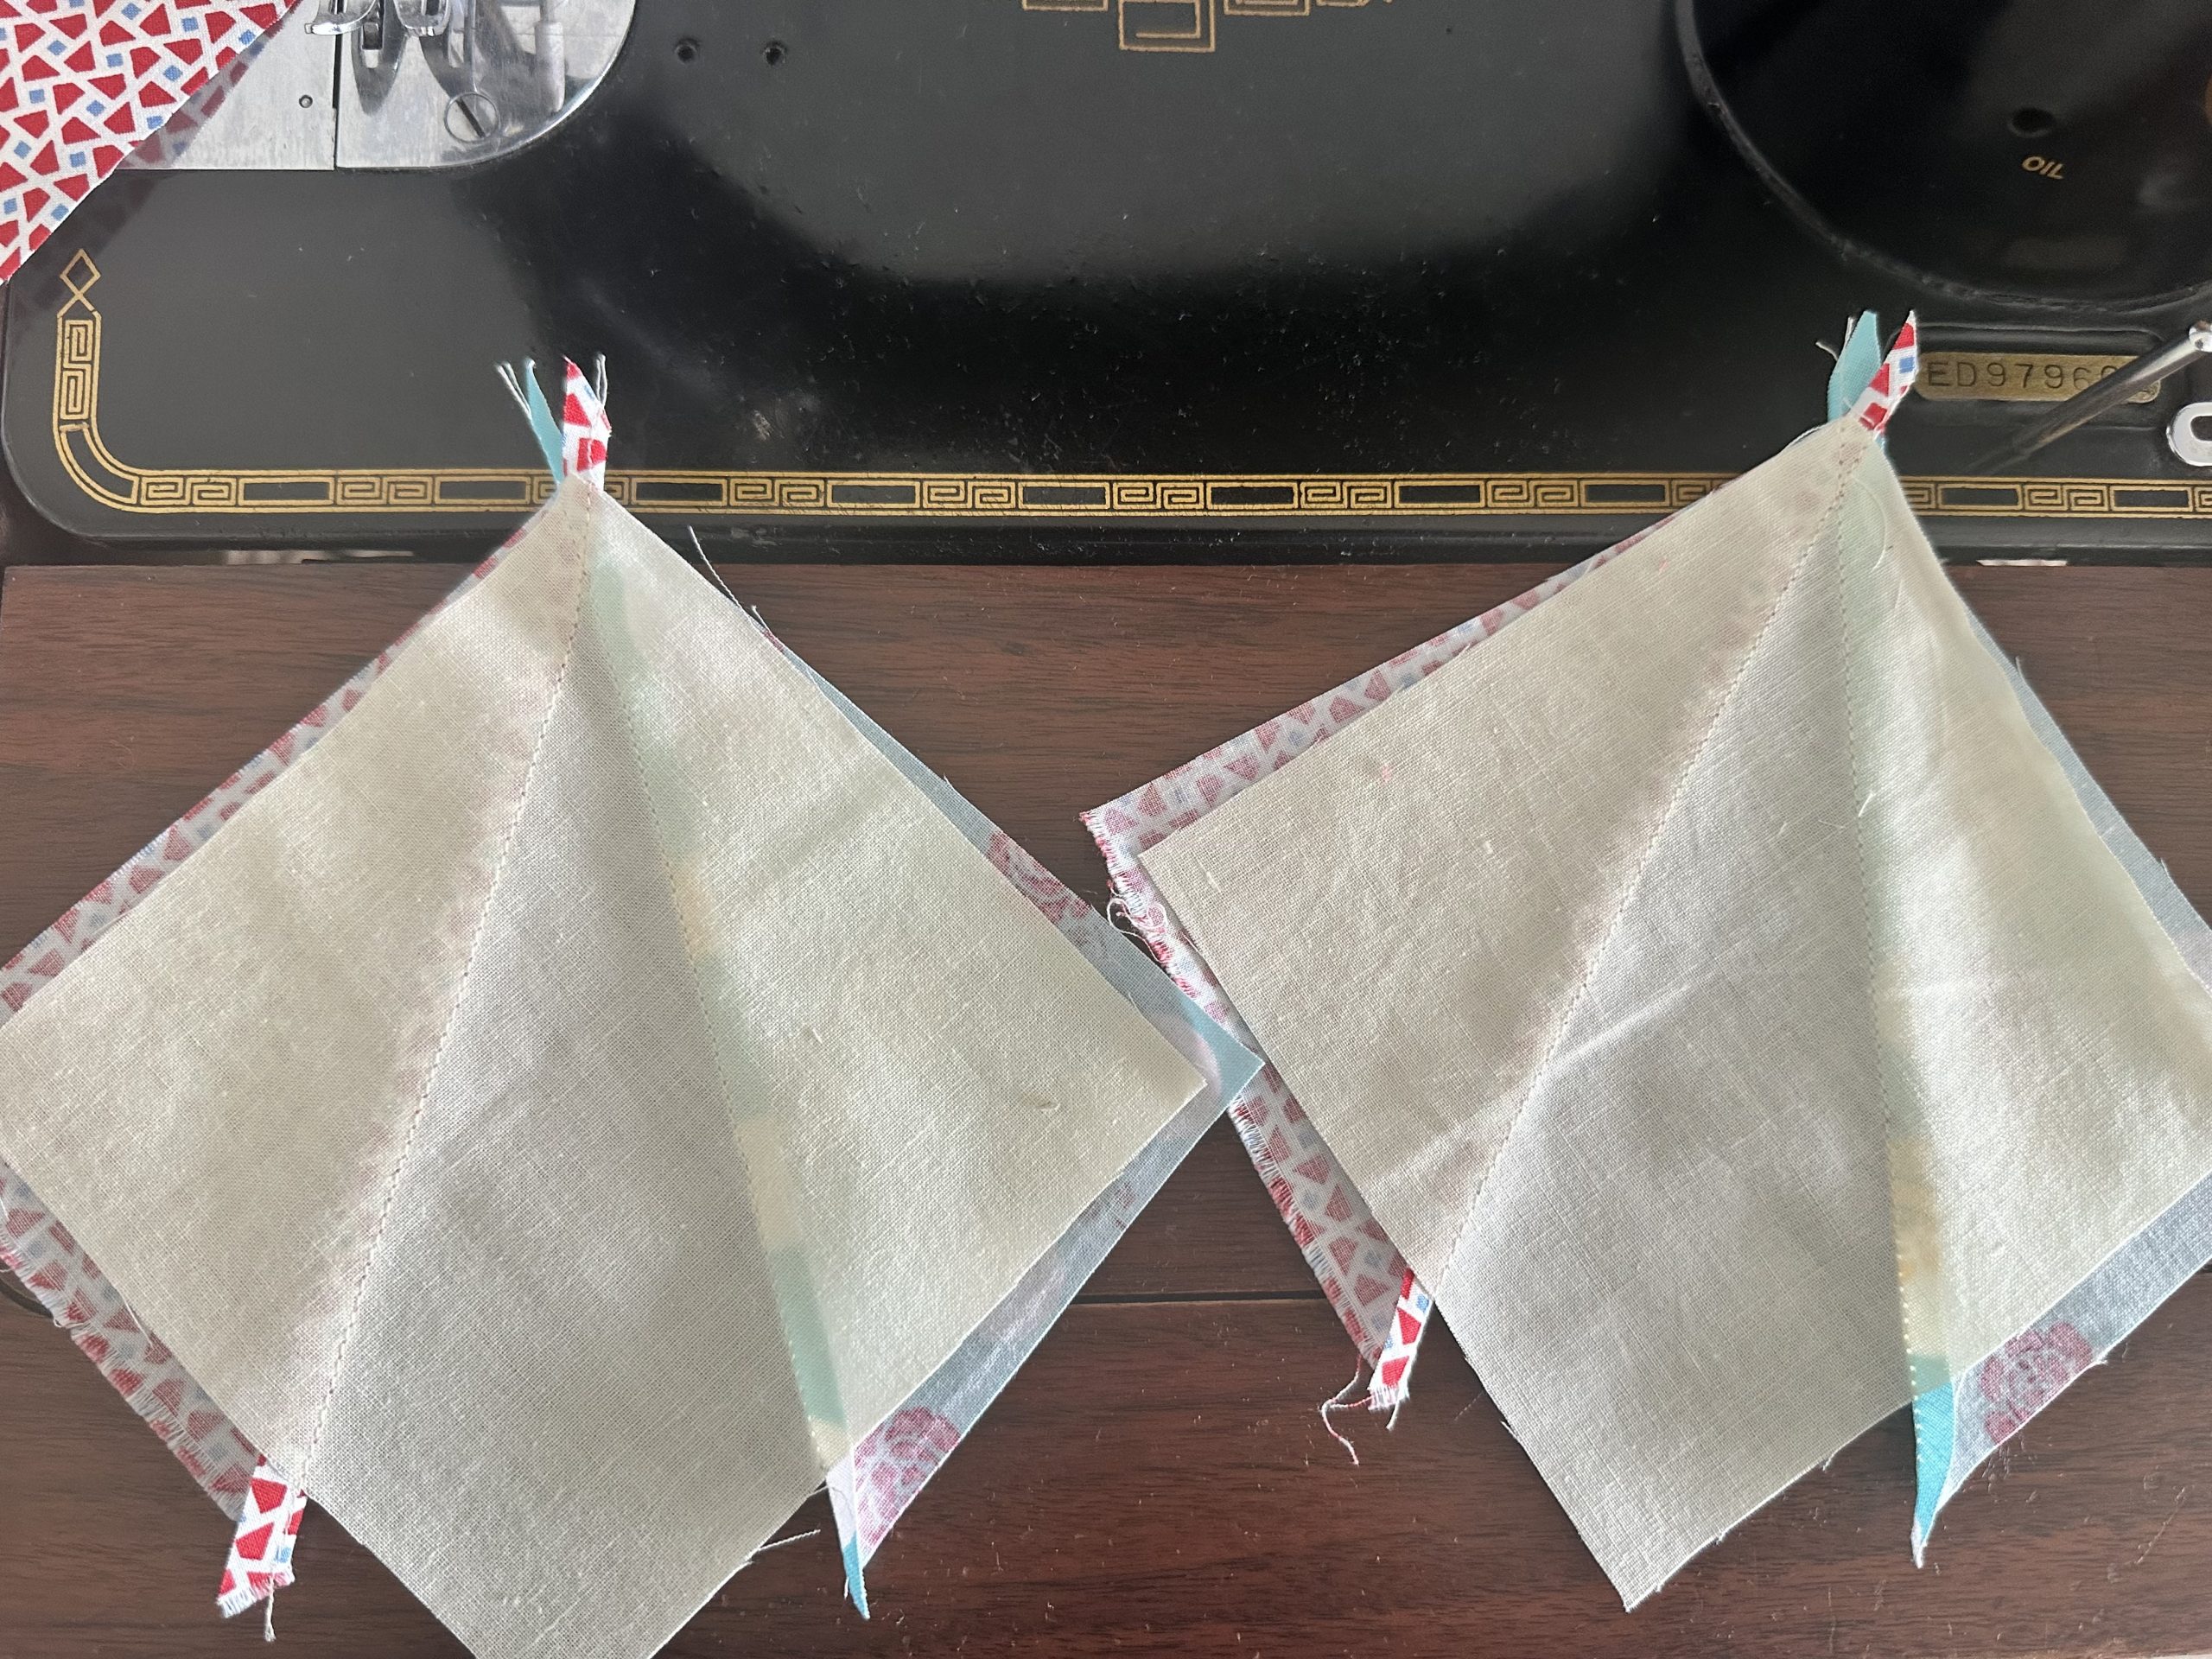
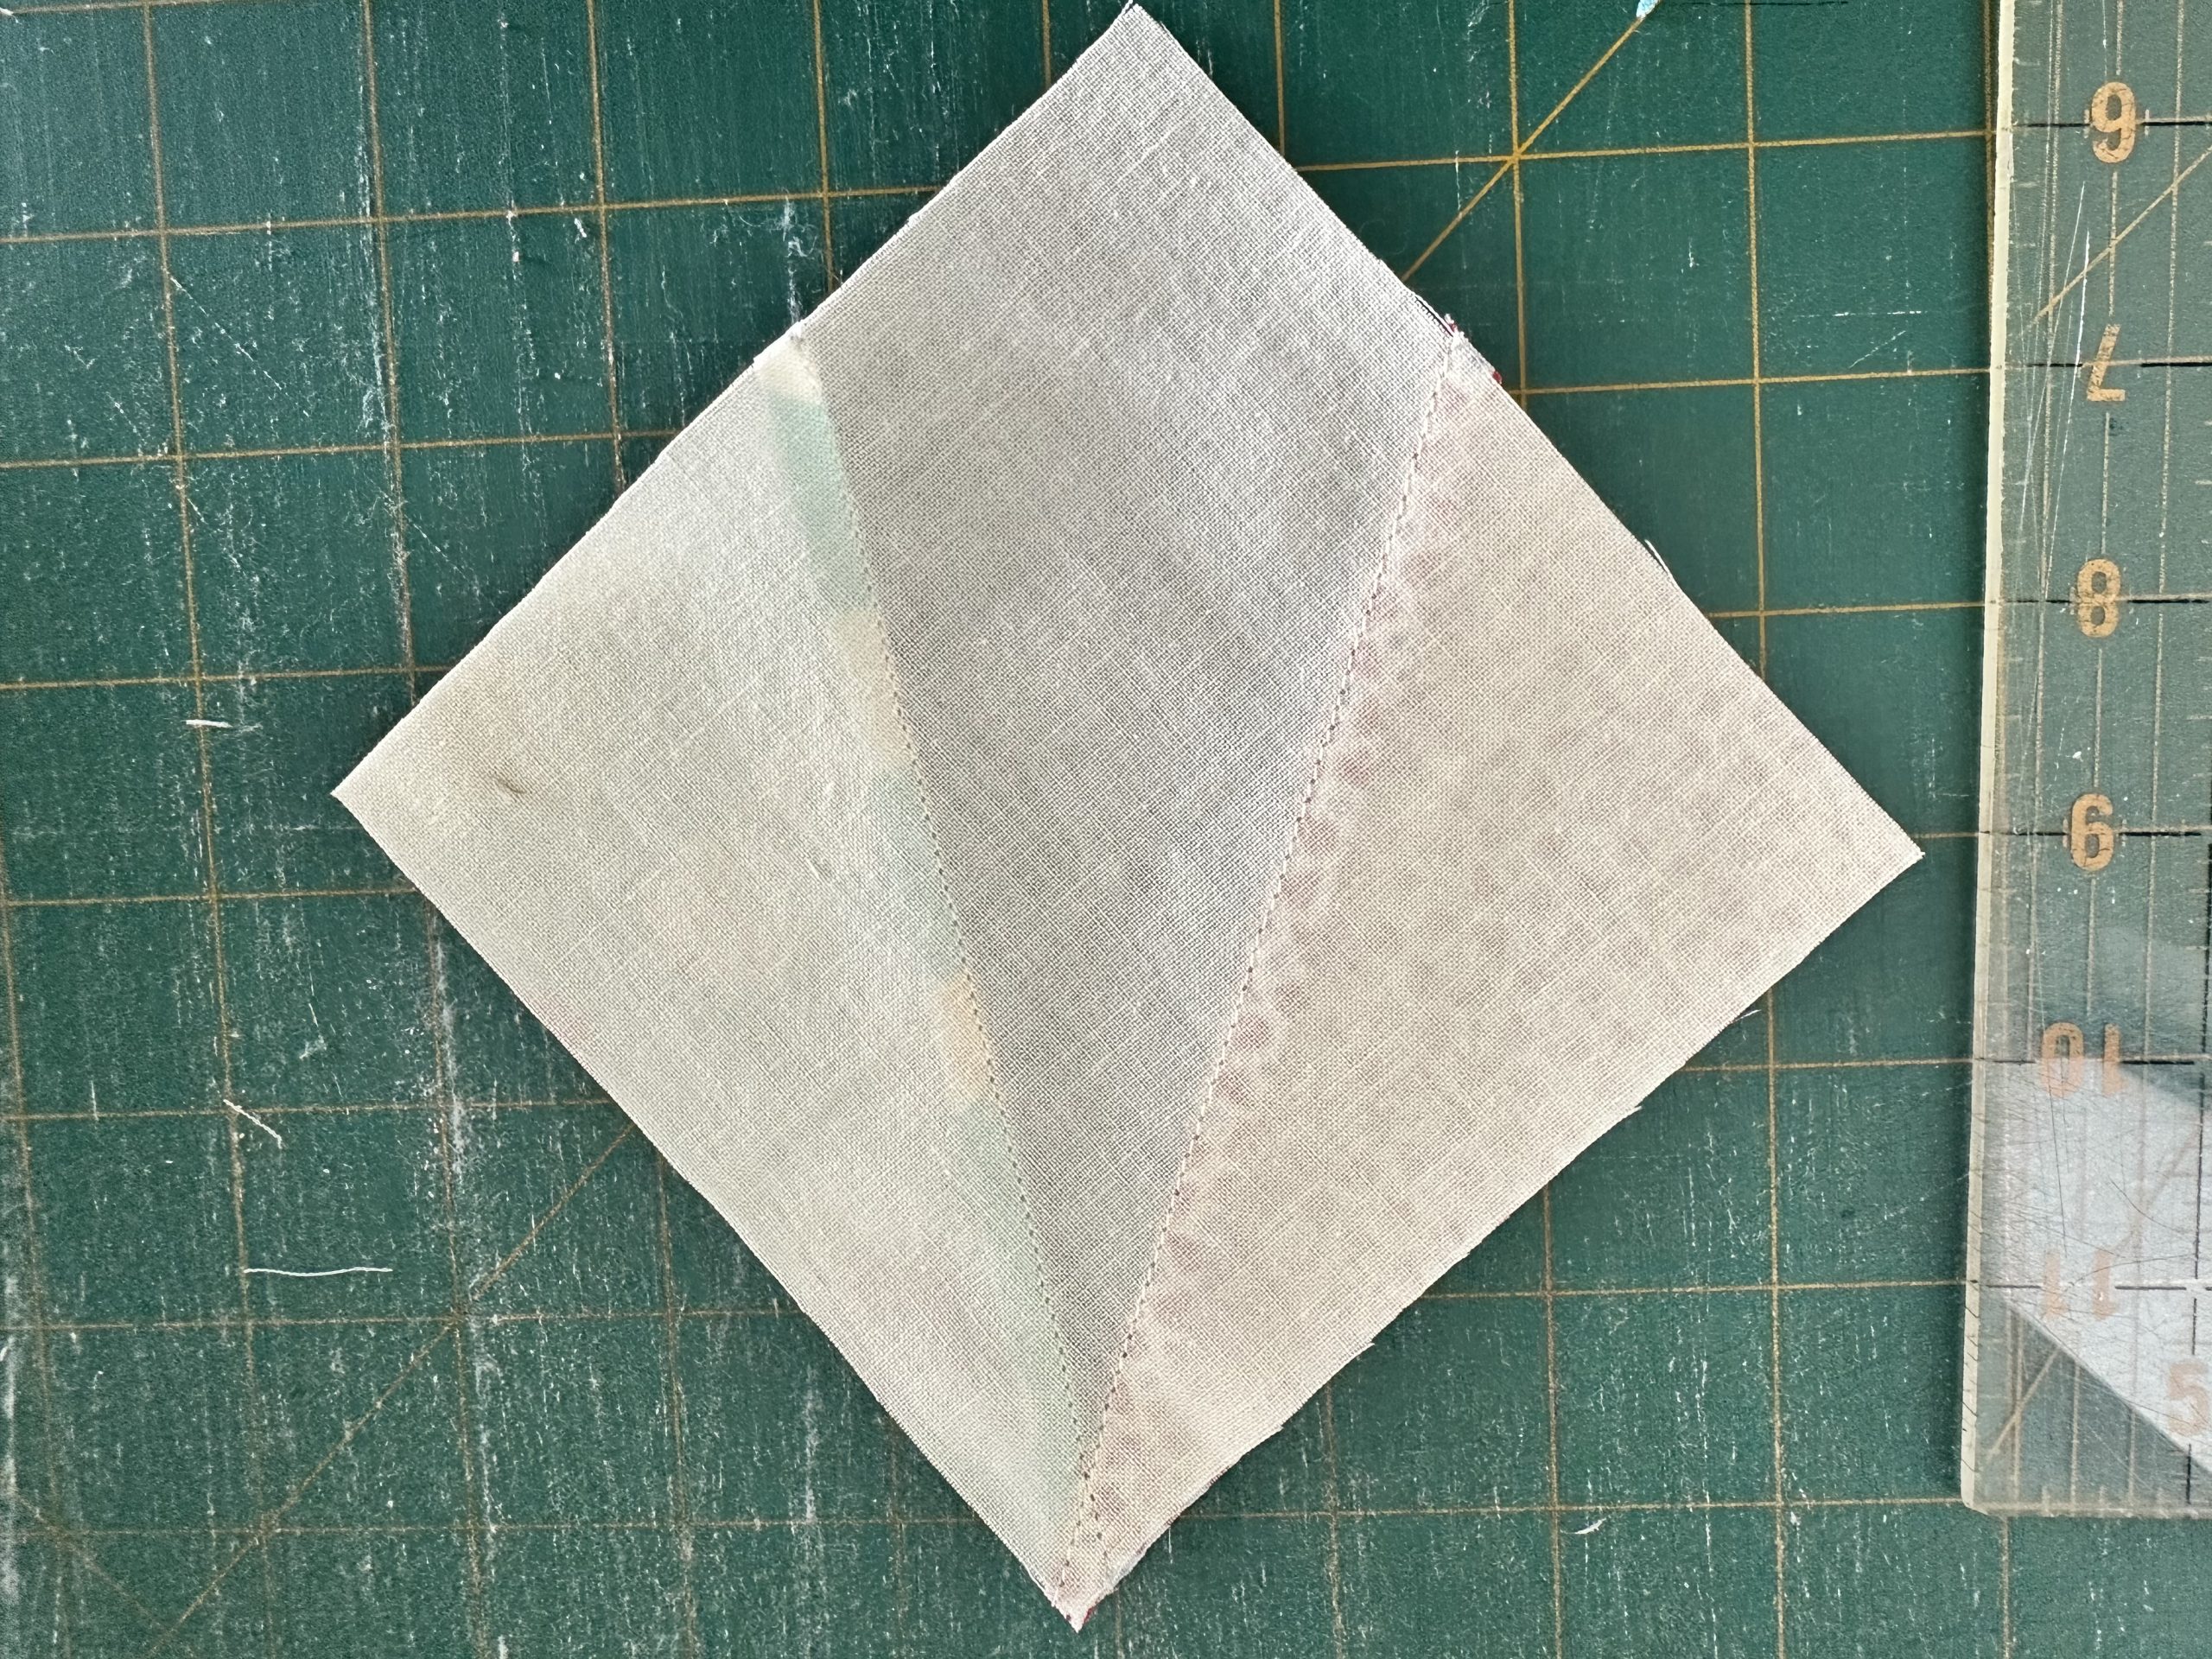
Turn the blocks over to the wrong side. Use the rotary cutter to trim the excess from the triangles to line up with the original neutral foundation square.
Crazy Little Triangles Block susies-scraps.com
Crazy Little Triangles Block susies-scraps.com
Optional. To remove bulk, trim with scissors the excess foundation fabric from the wrong side the neutral square to leave a single layer.
Assemble the Units to make the Crazy Little Triangles Block
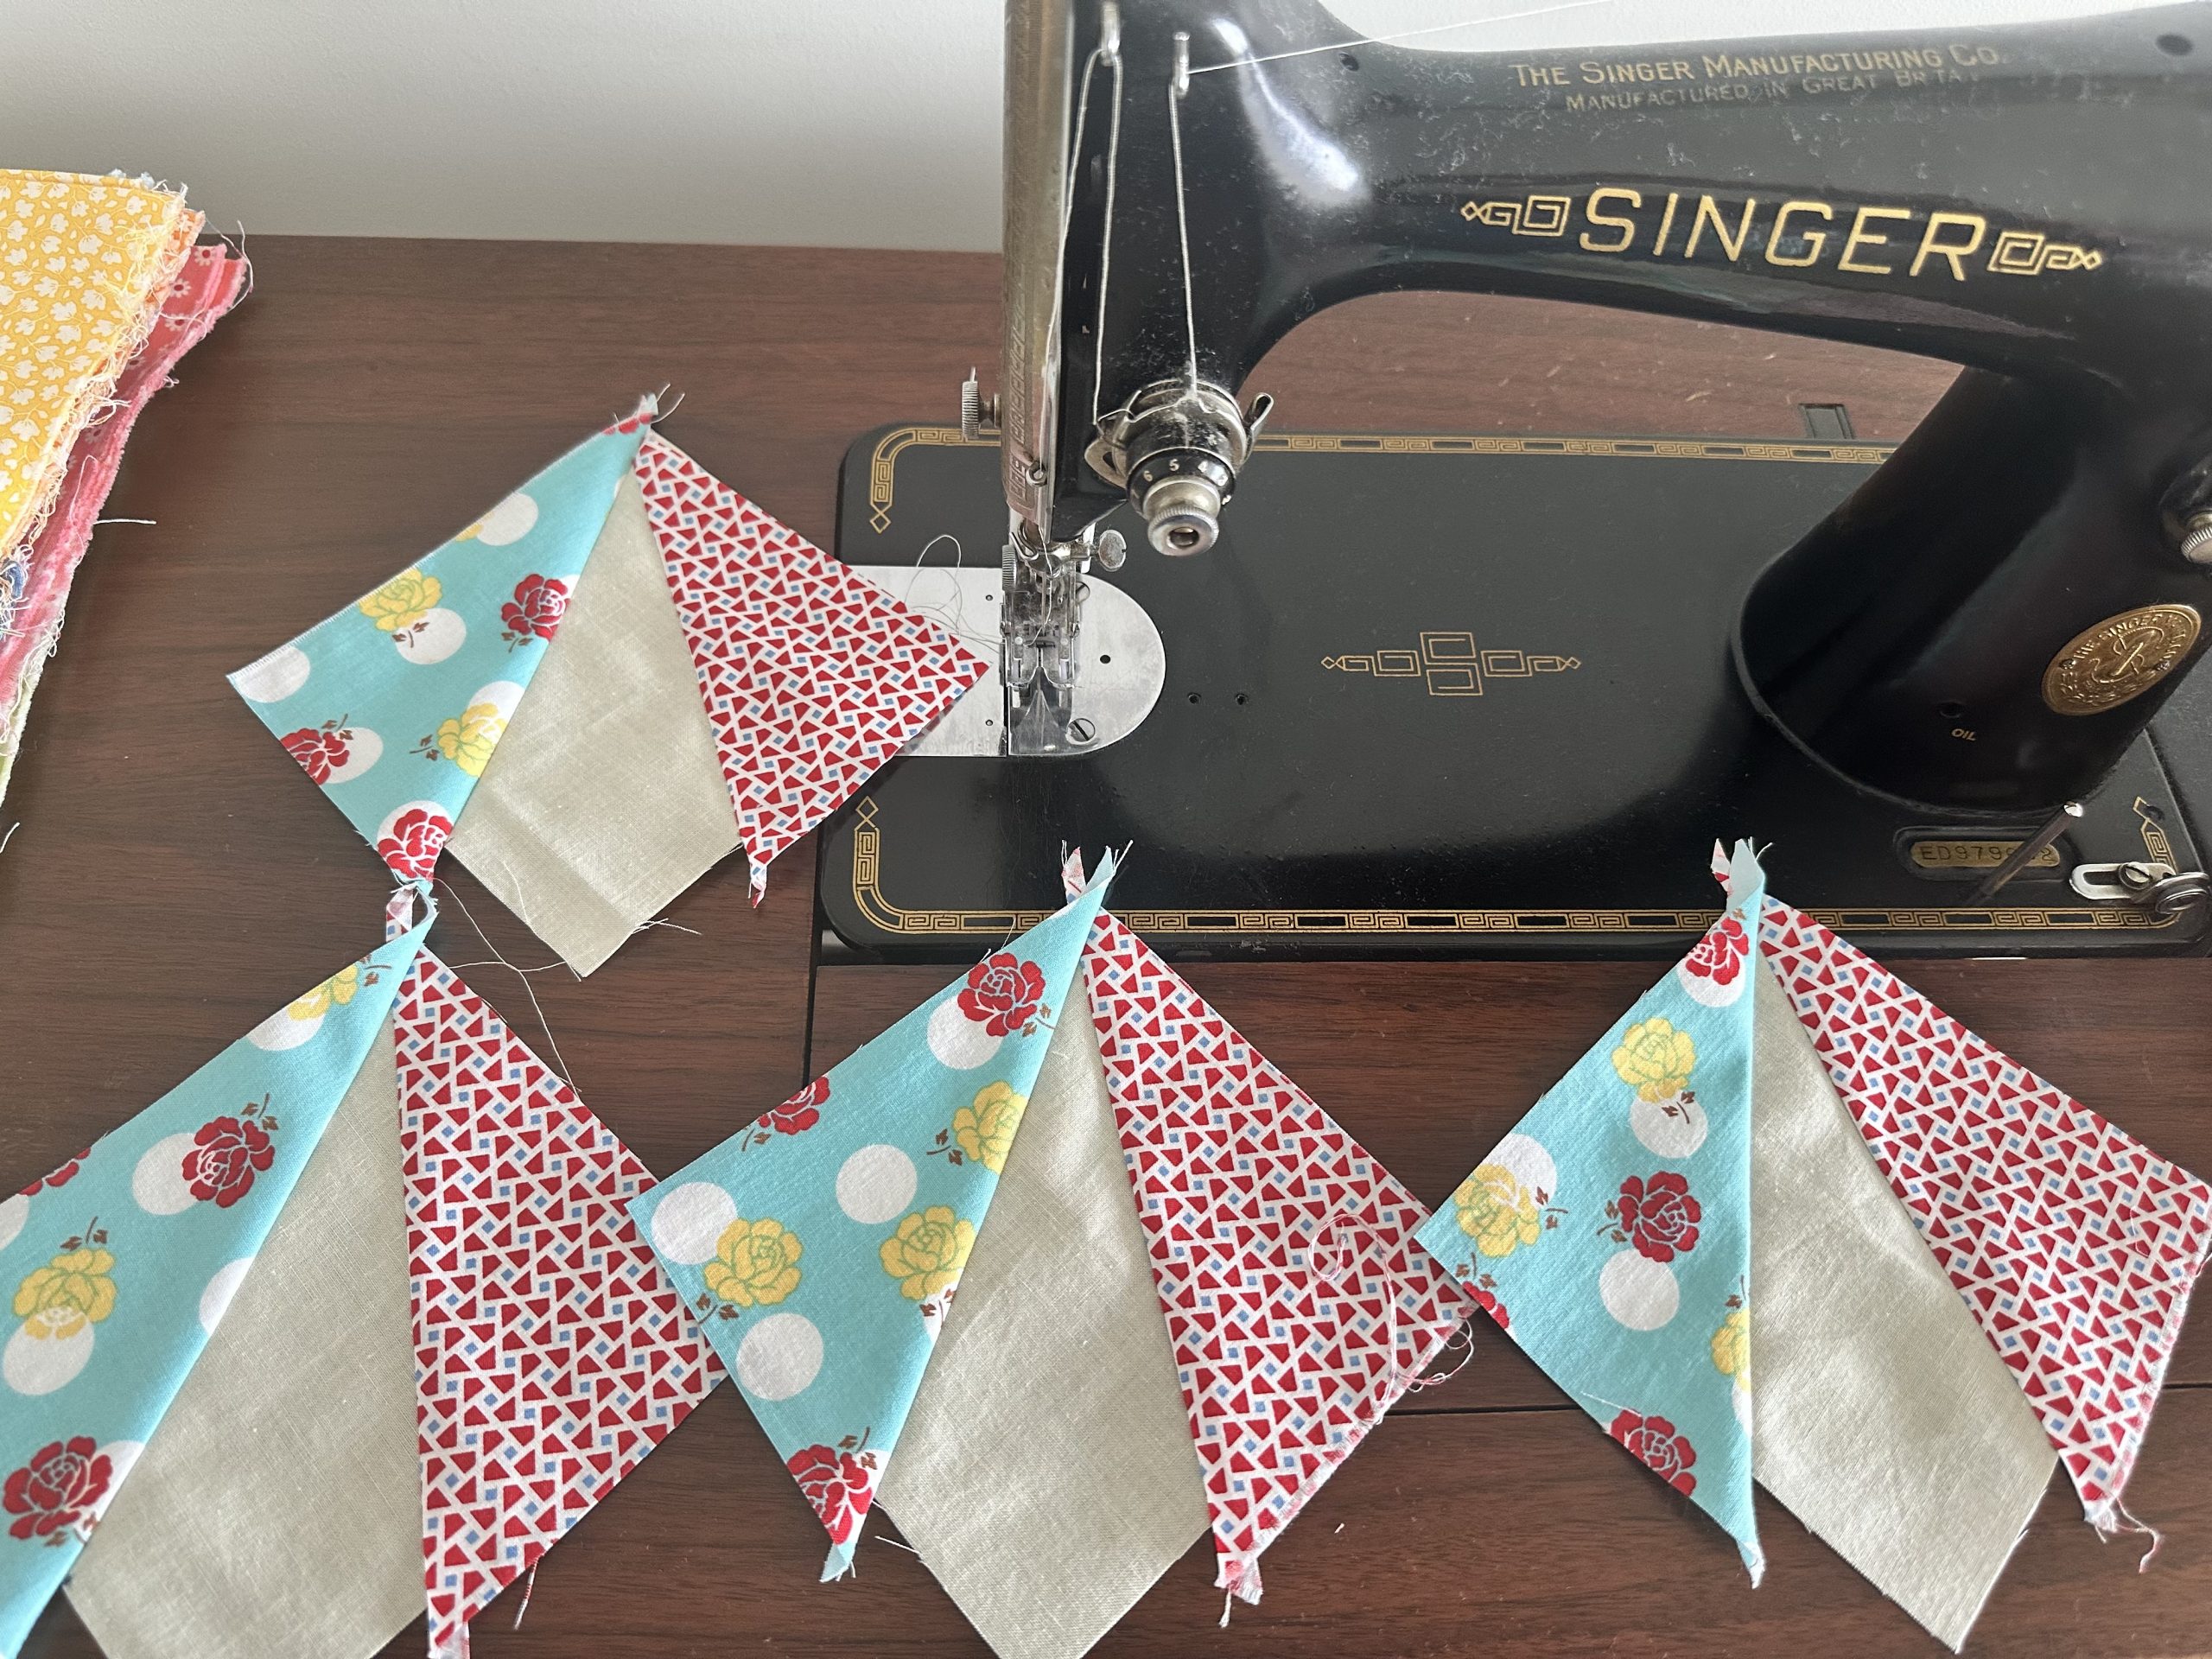
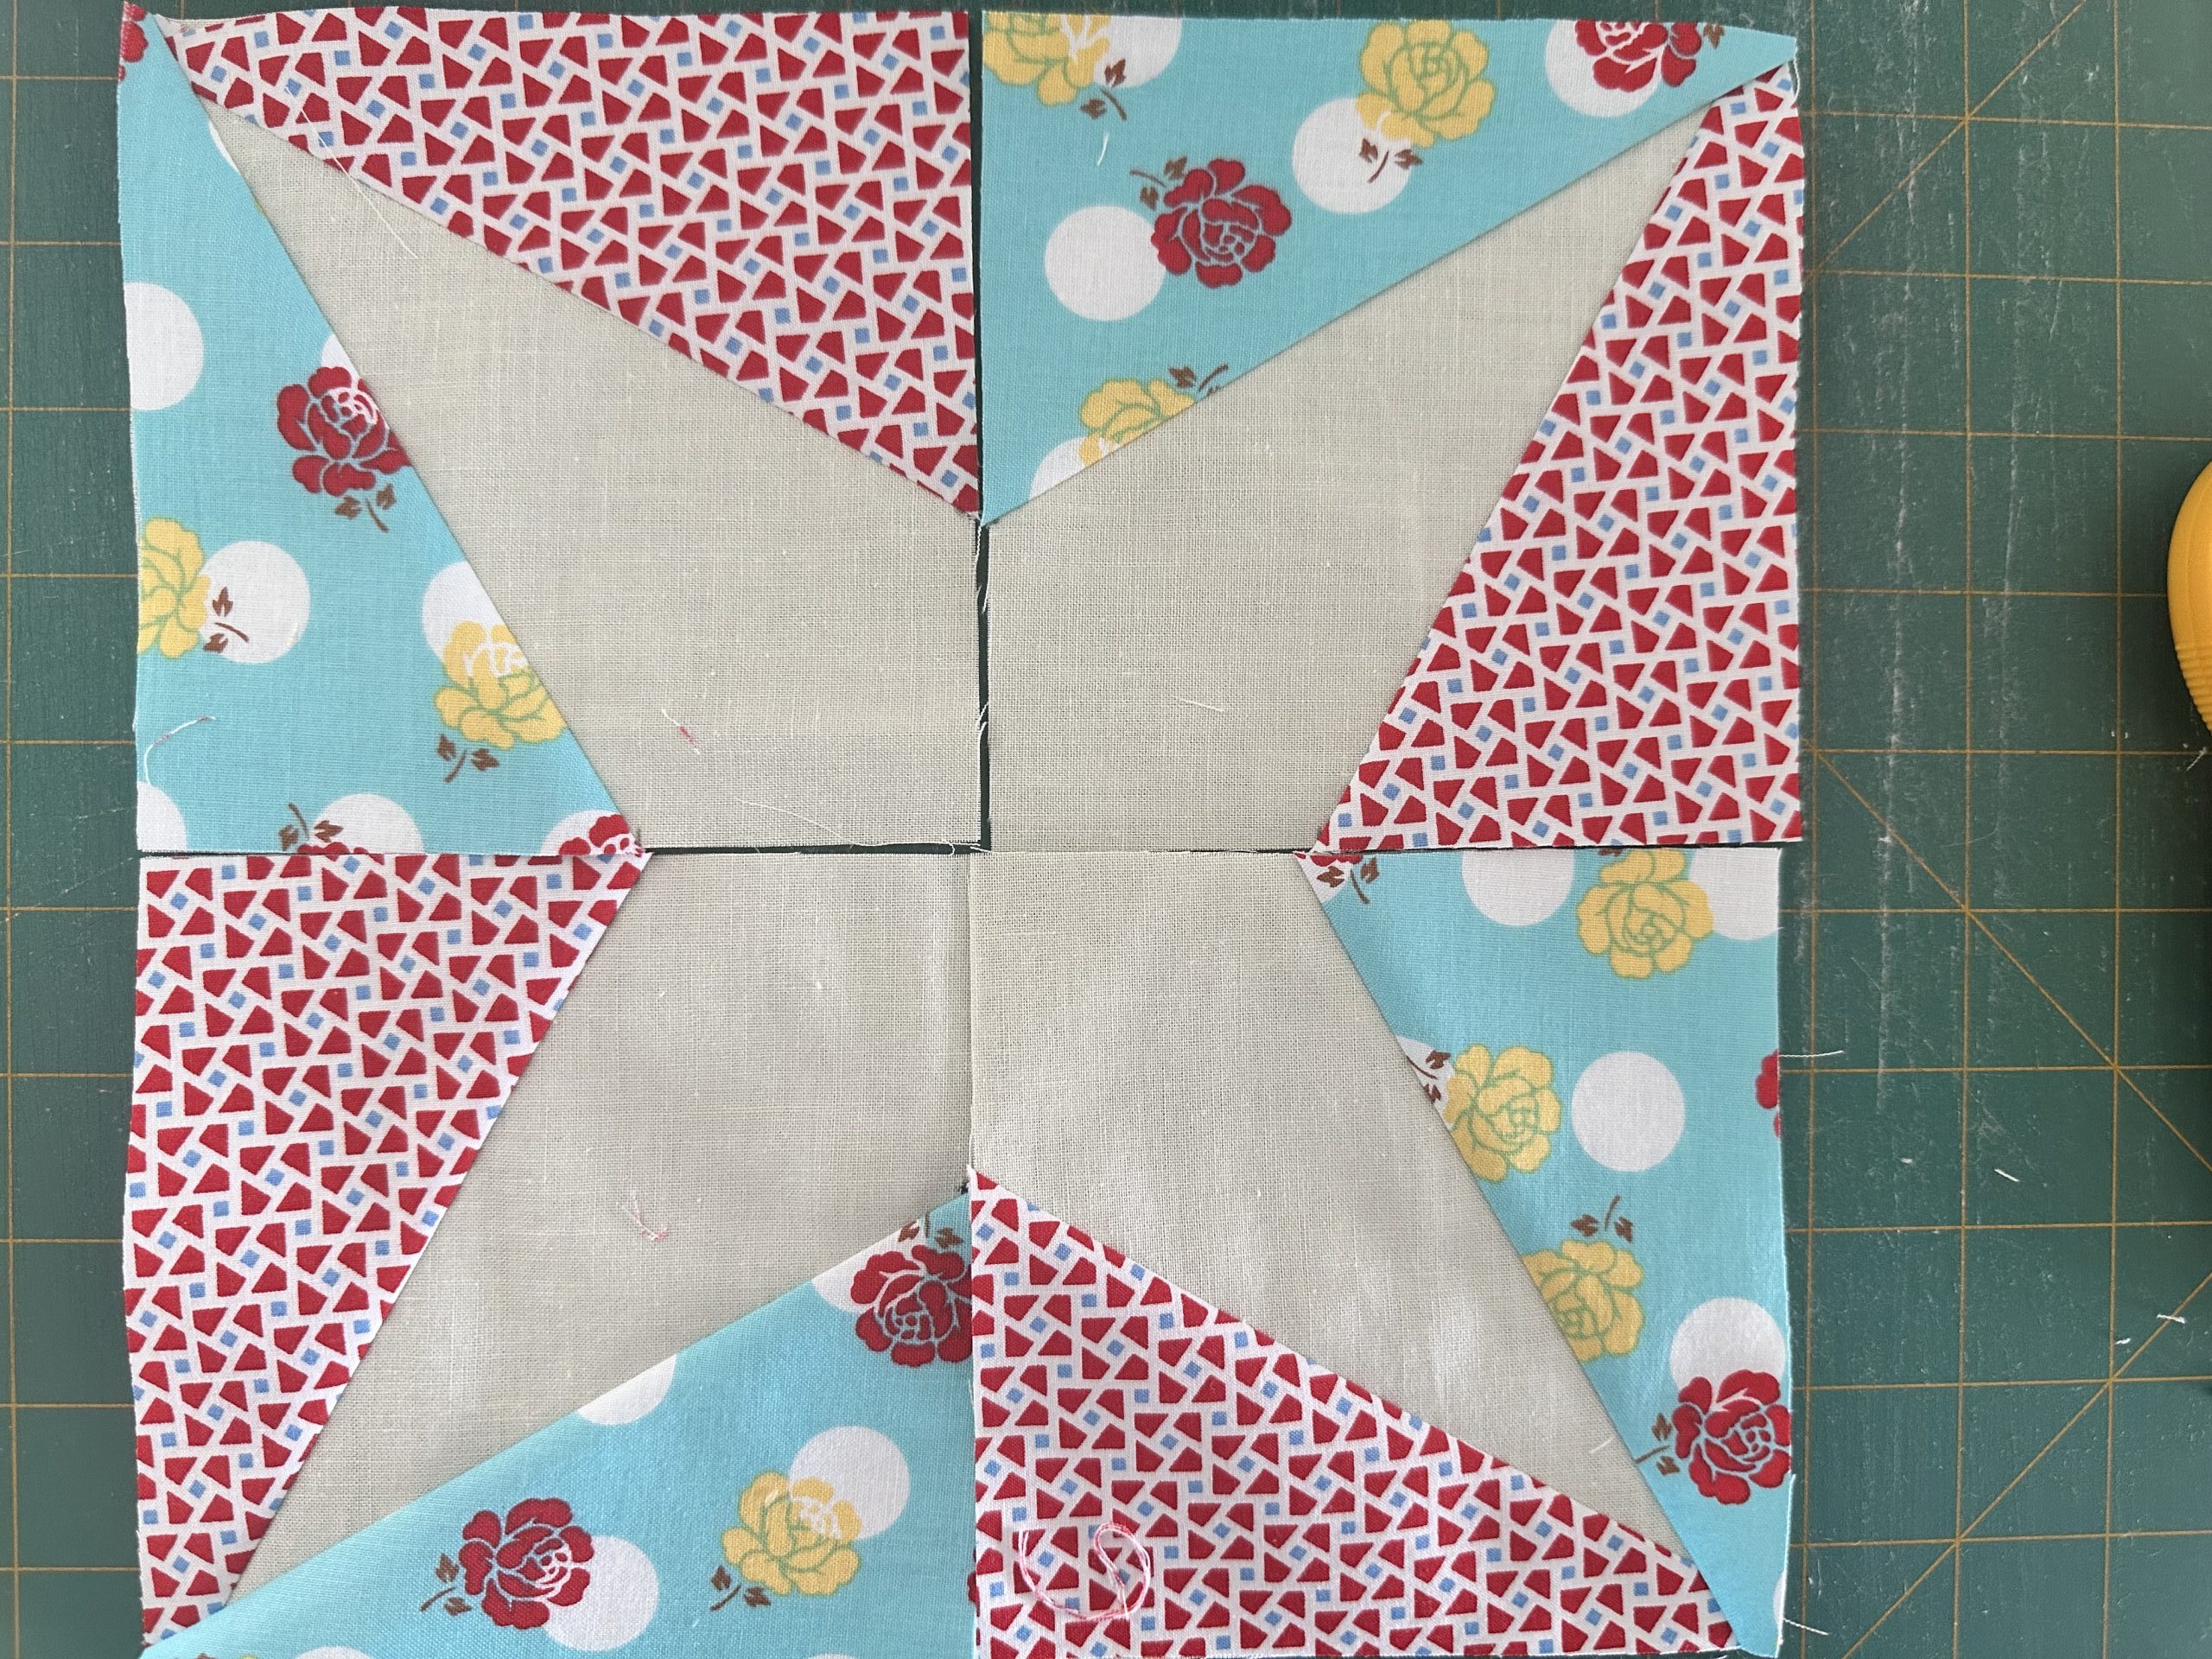
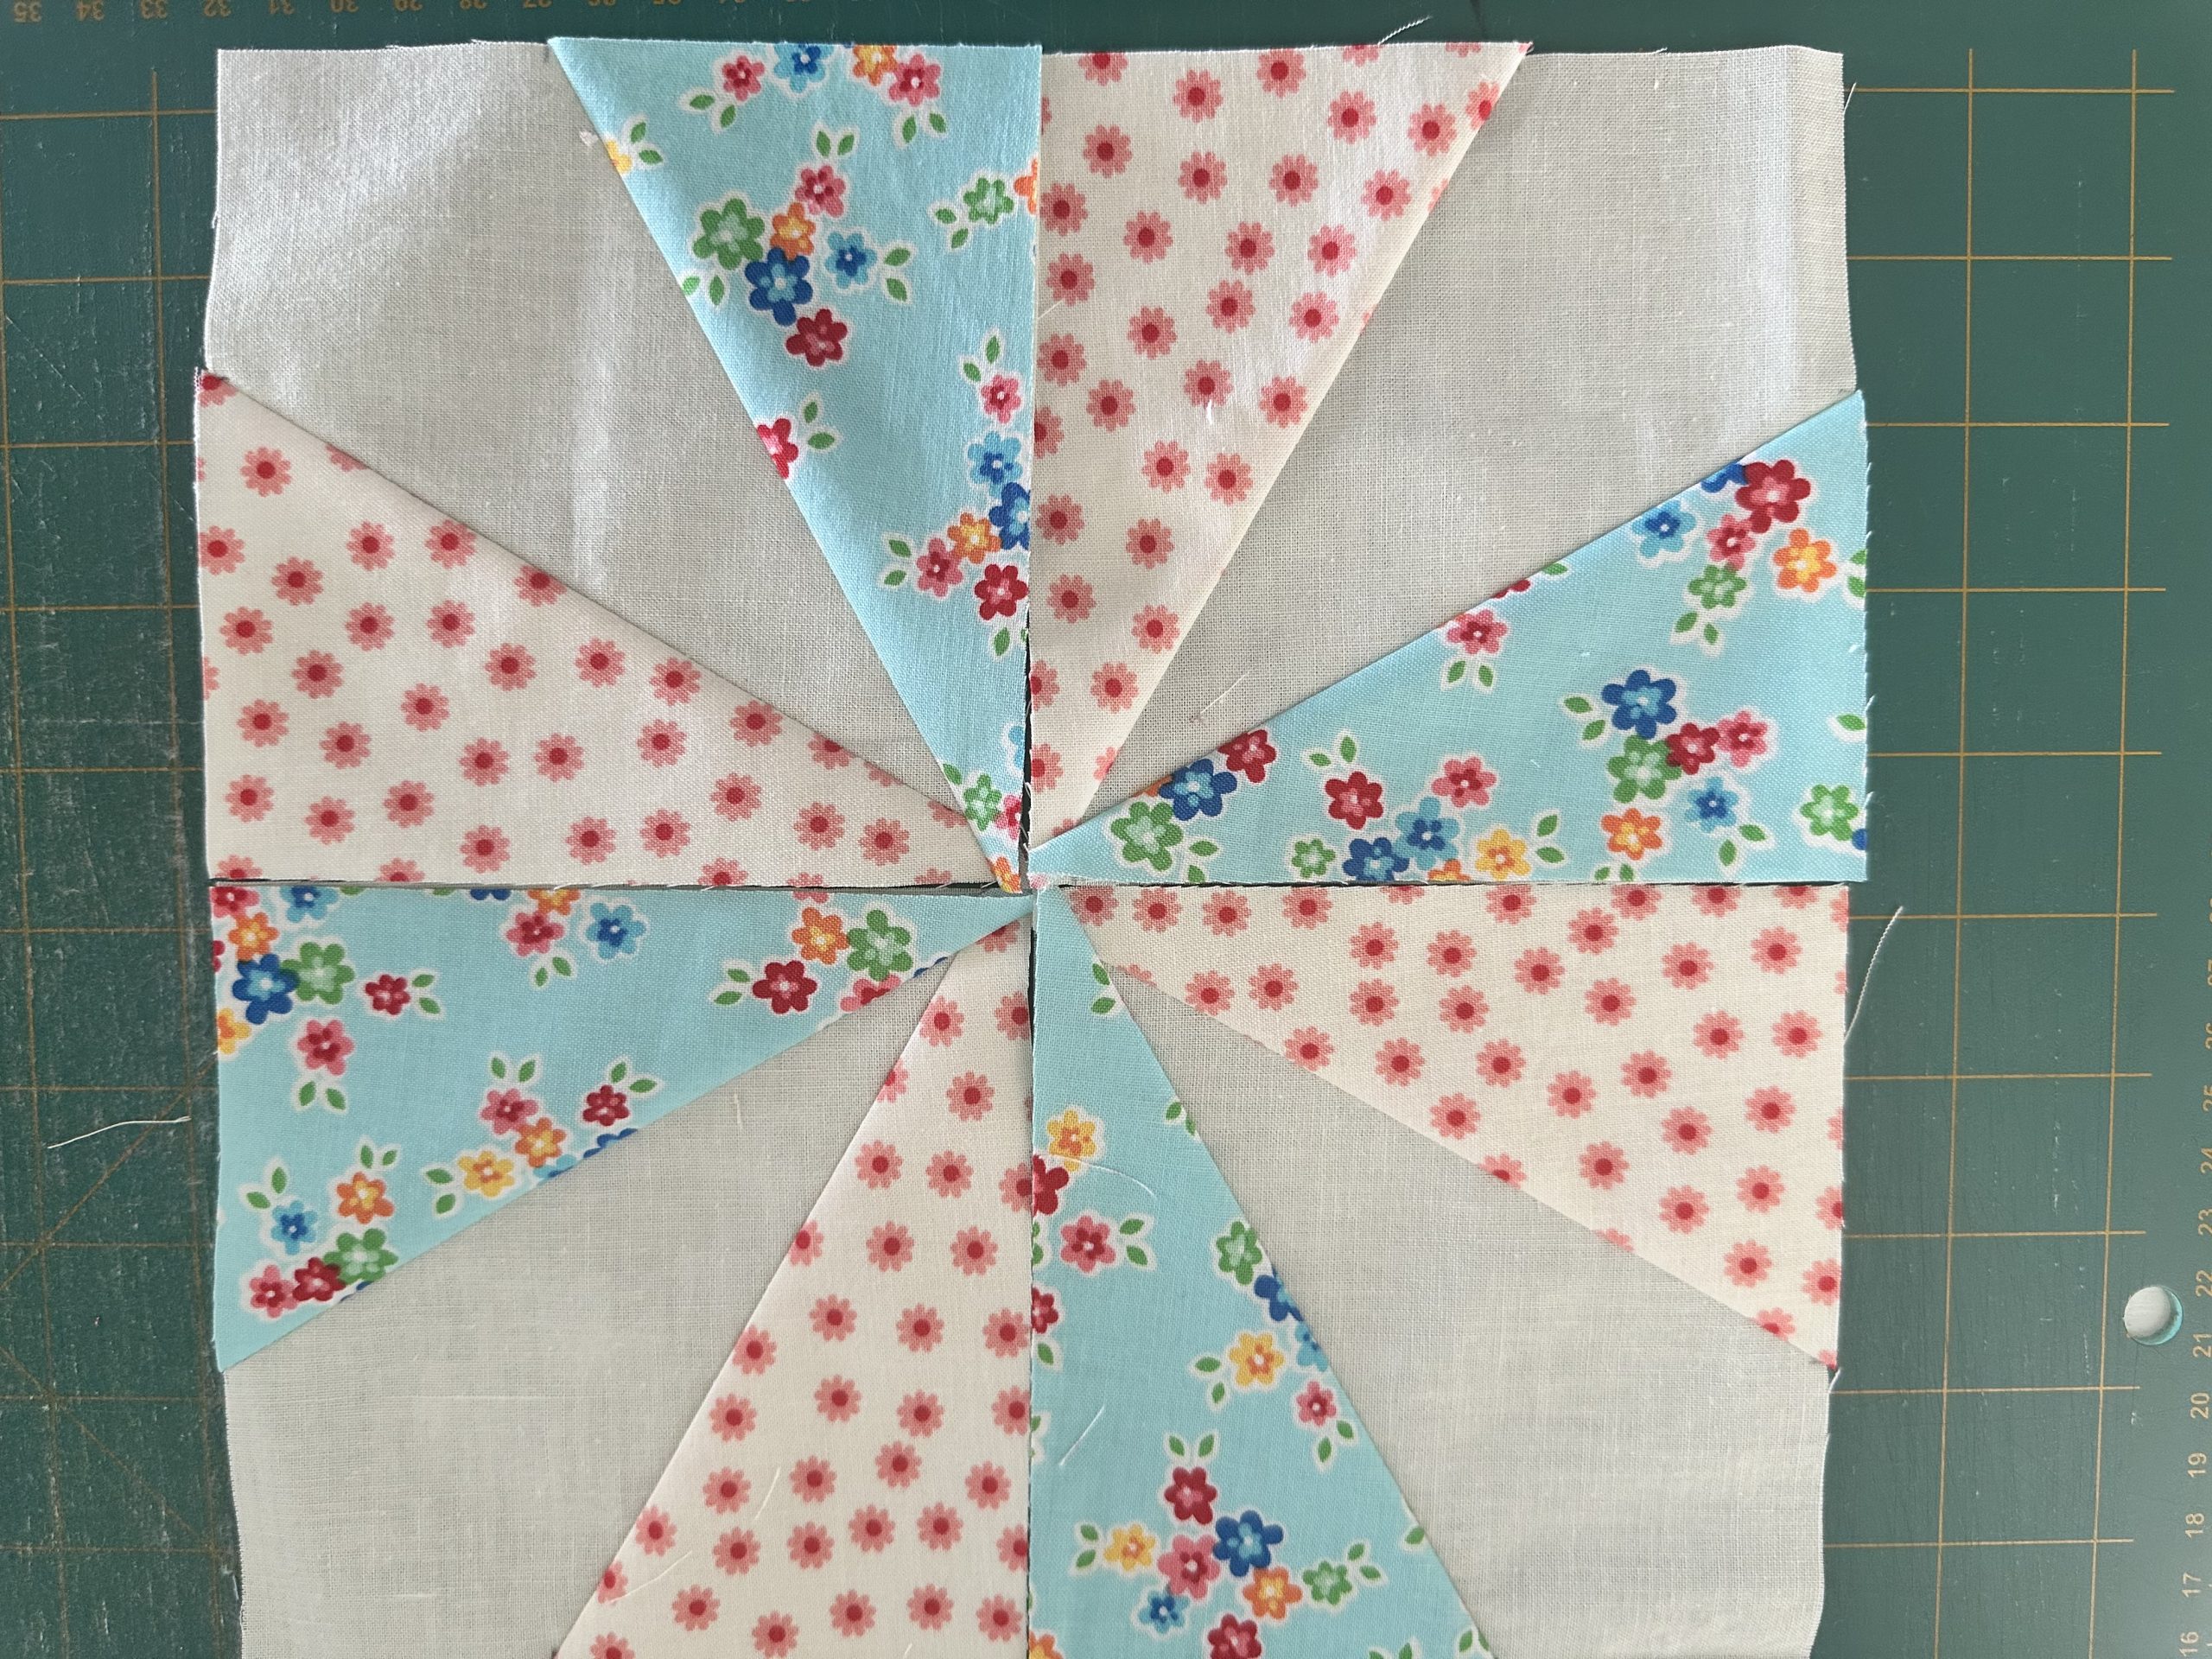
Position the four units so that the neutral corners of the units meet in the centre to make a star shape.
Crazy Little Triangles Block susies-scraps.com
OR…position the four units with the neutral areas facing each corner to make a block similar to a “Greek Cross”.
Crazy Little Triangles Block susies-scraps.com
Sew together to make a four patch.
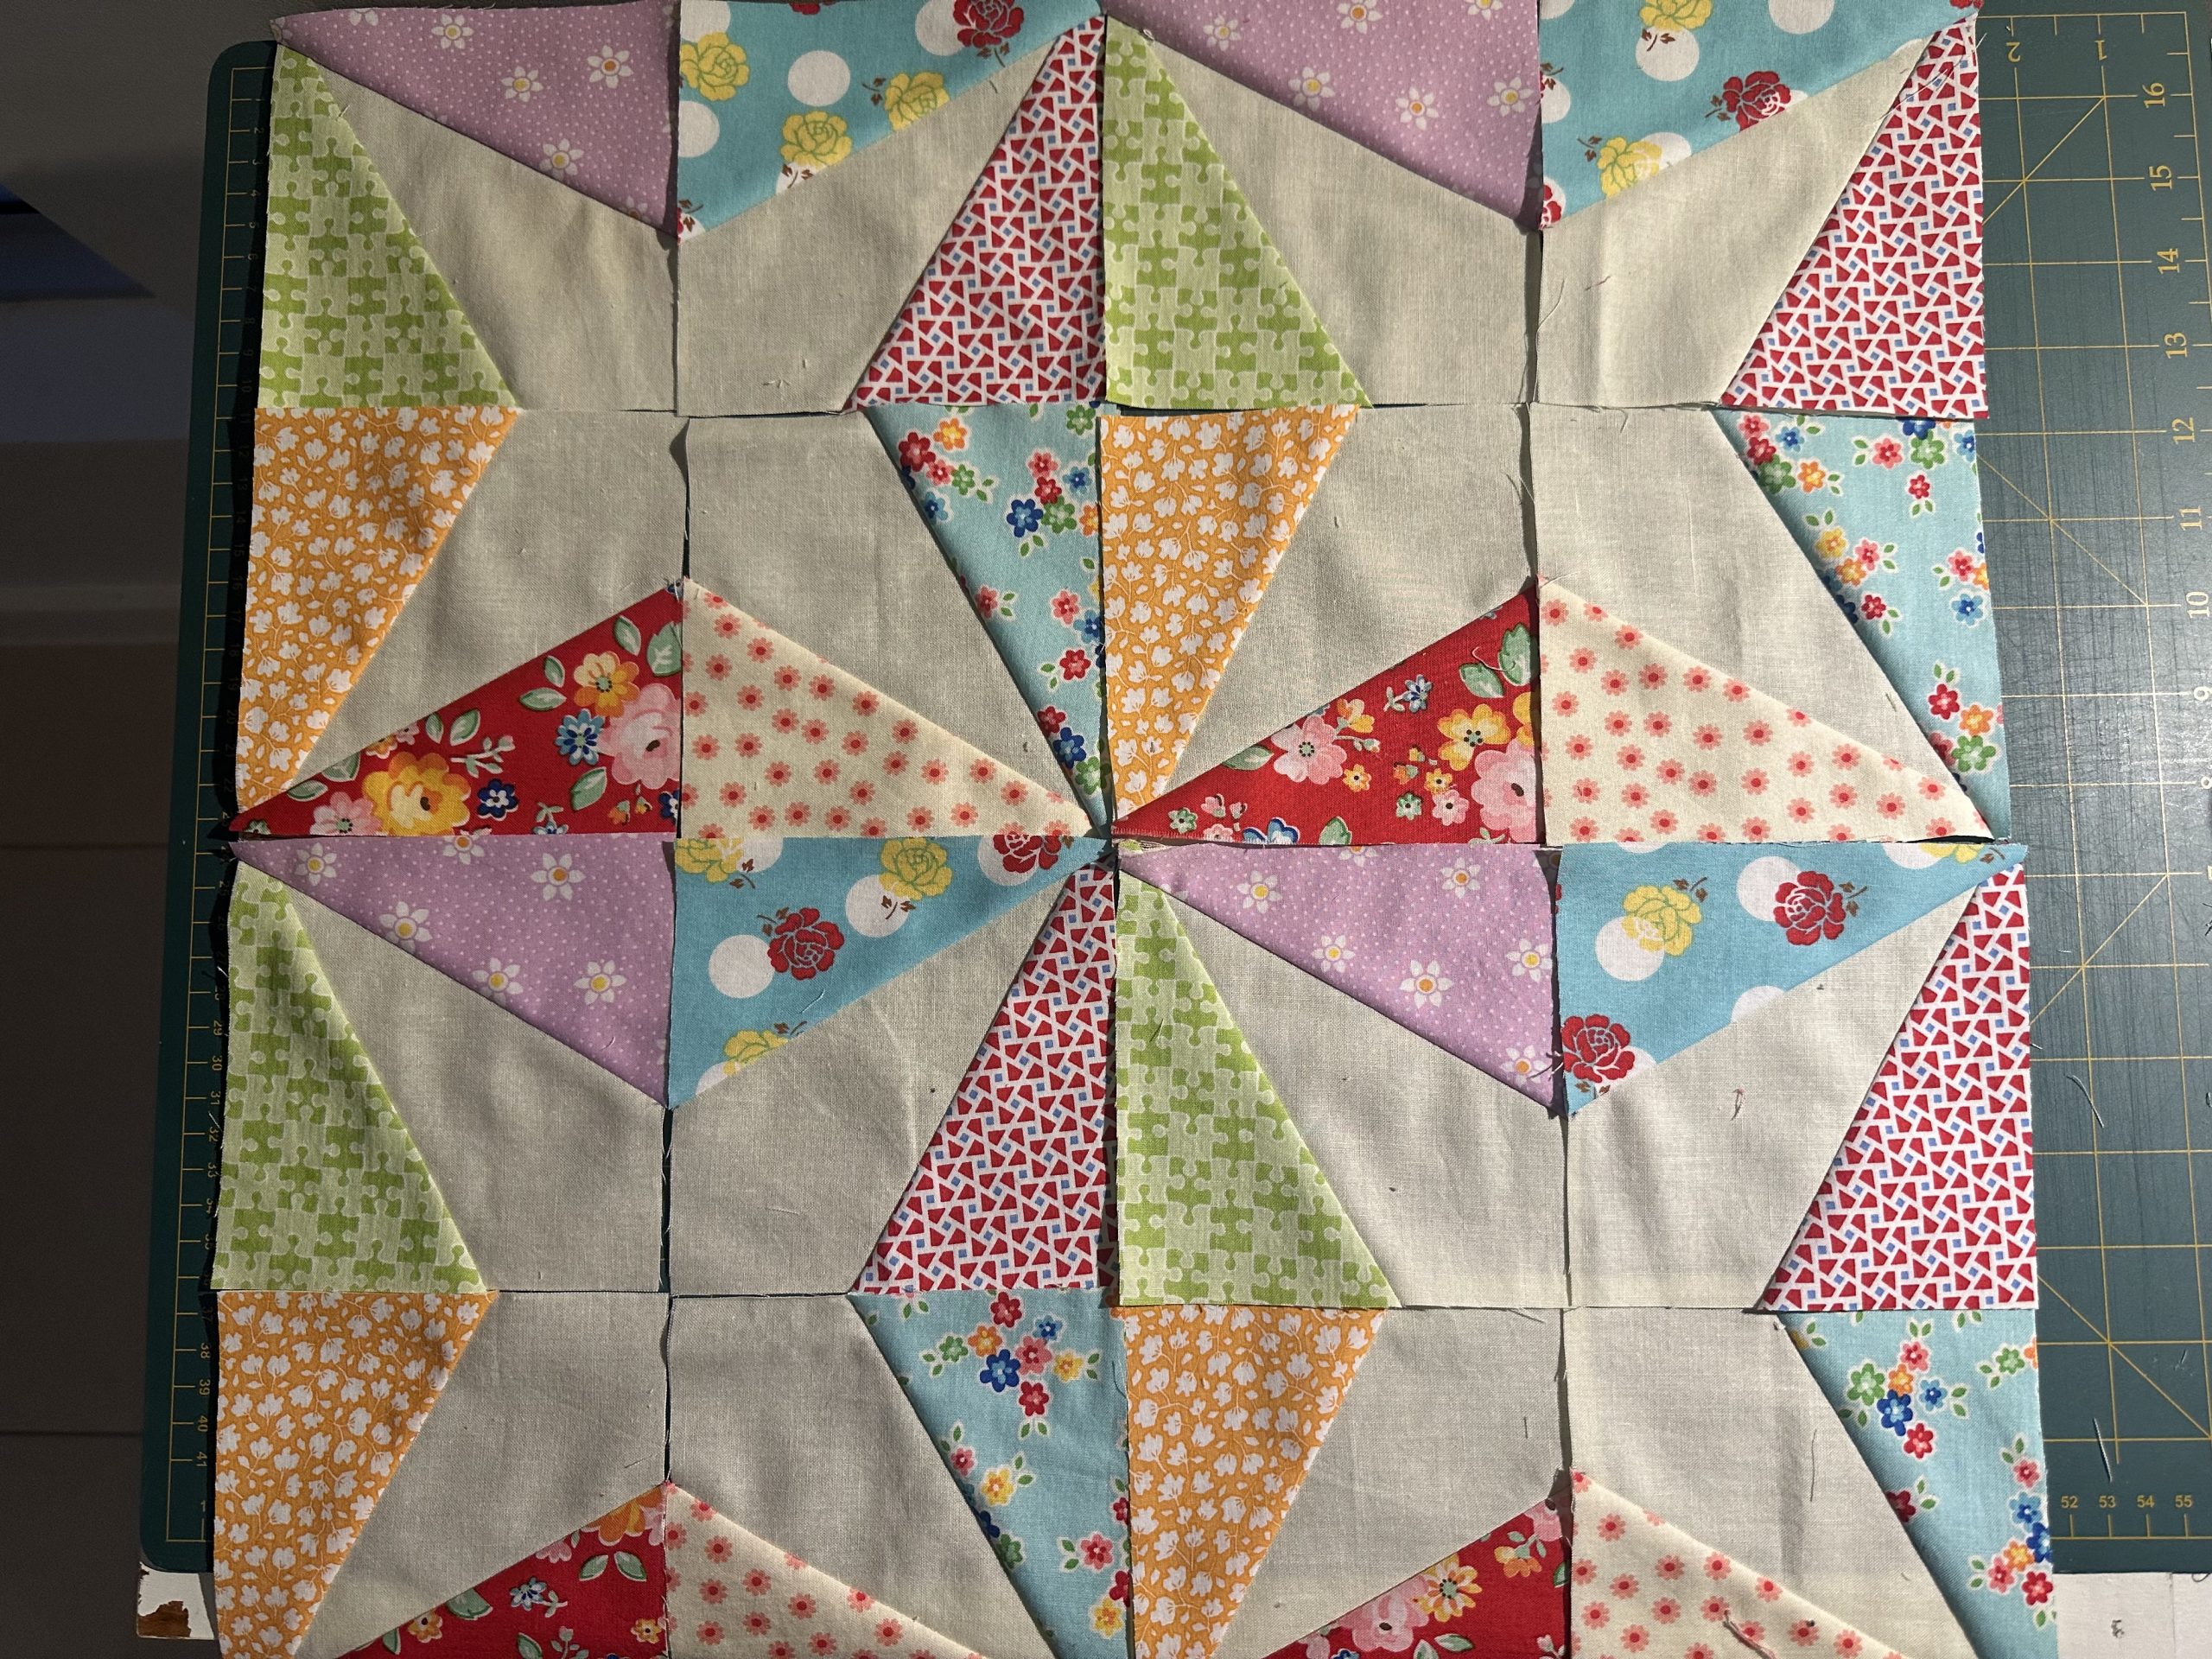
OR… you could mix them all up as pictured here.
Crazy Little Triangles Block susies-scraps.com
It is up to you. I have not sewn mine together yet as I am still deciding! Thank you Lisa for the great question!
I sure hope you enjoyed this post and if you have come this far then I hope it all makes sense. Please feel free to comment or email me with any questions or comments.