
Quilted Flower Bowl & Tutorial.
Hello Dear Friends and Readers.
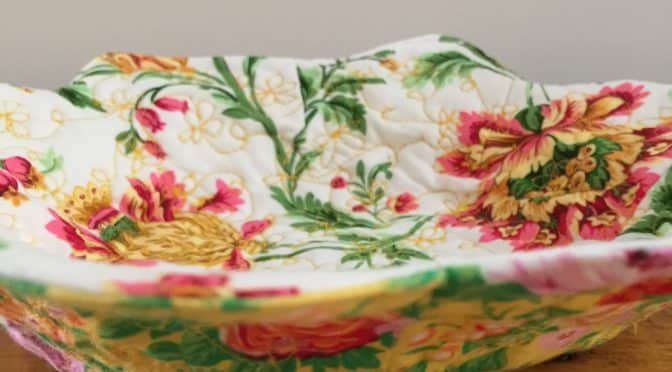
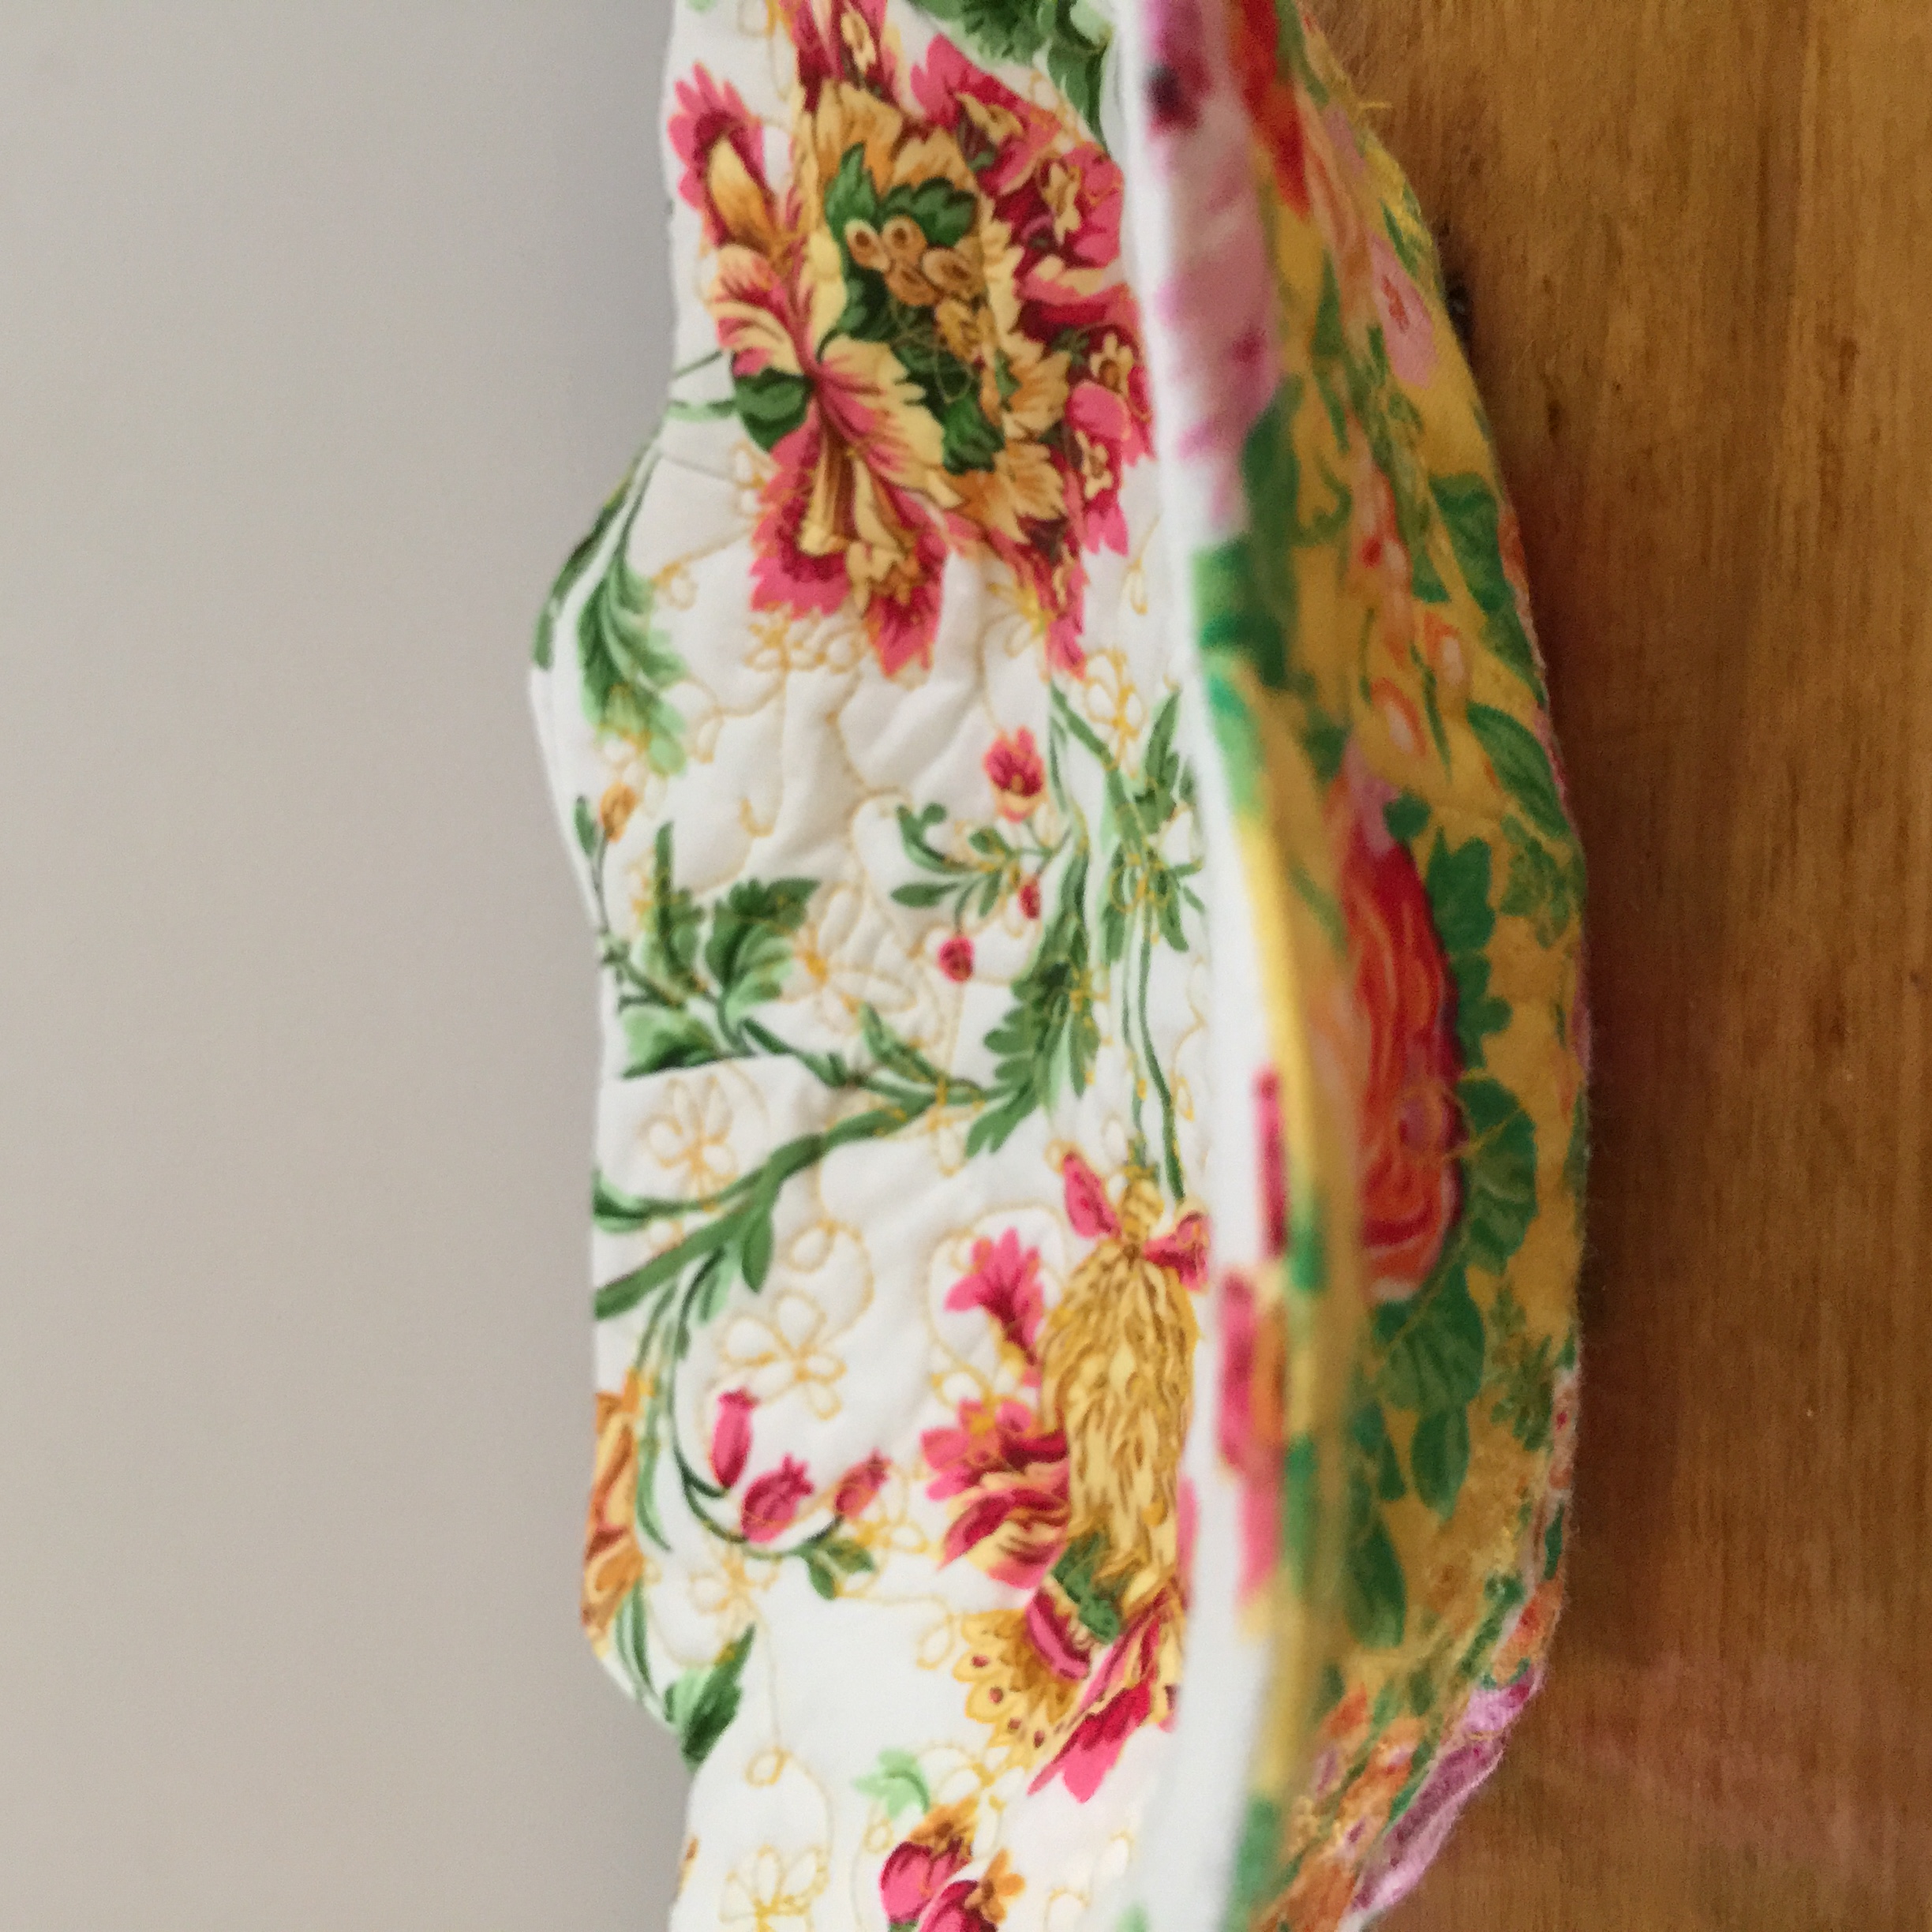
This lovely Flower Bowl is another great way to use up some leftover pieces of fabric. It will work well with large or small print fabric.
These little bowls are very handy to have around. They make very nice storage for delicate items, like glasses, or, also acts as a great surface protector for items like keys or coins. It’s a way of containing small items in a pretty and protective way. Would also make a delightful gift.
This is how I do it.
Quilted Flower Bowl Tutorial.
Make a templet. Take a piece of grease proof or baking paper. Very carefully fold in half, then quarters, then eights, then sixteenths. Put a mark at the 5 1/2″ point from the corner of the last fold. Put a mark at the 4 1/2″ point from the corner on the opening fold. Carefully cut from the 5 1/2″ mark to the 4 1/2″ mark making a nice round convex shape
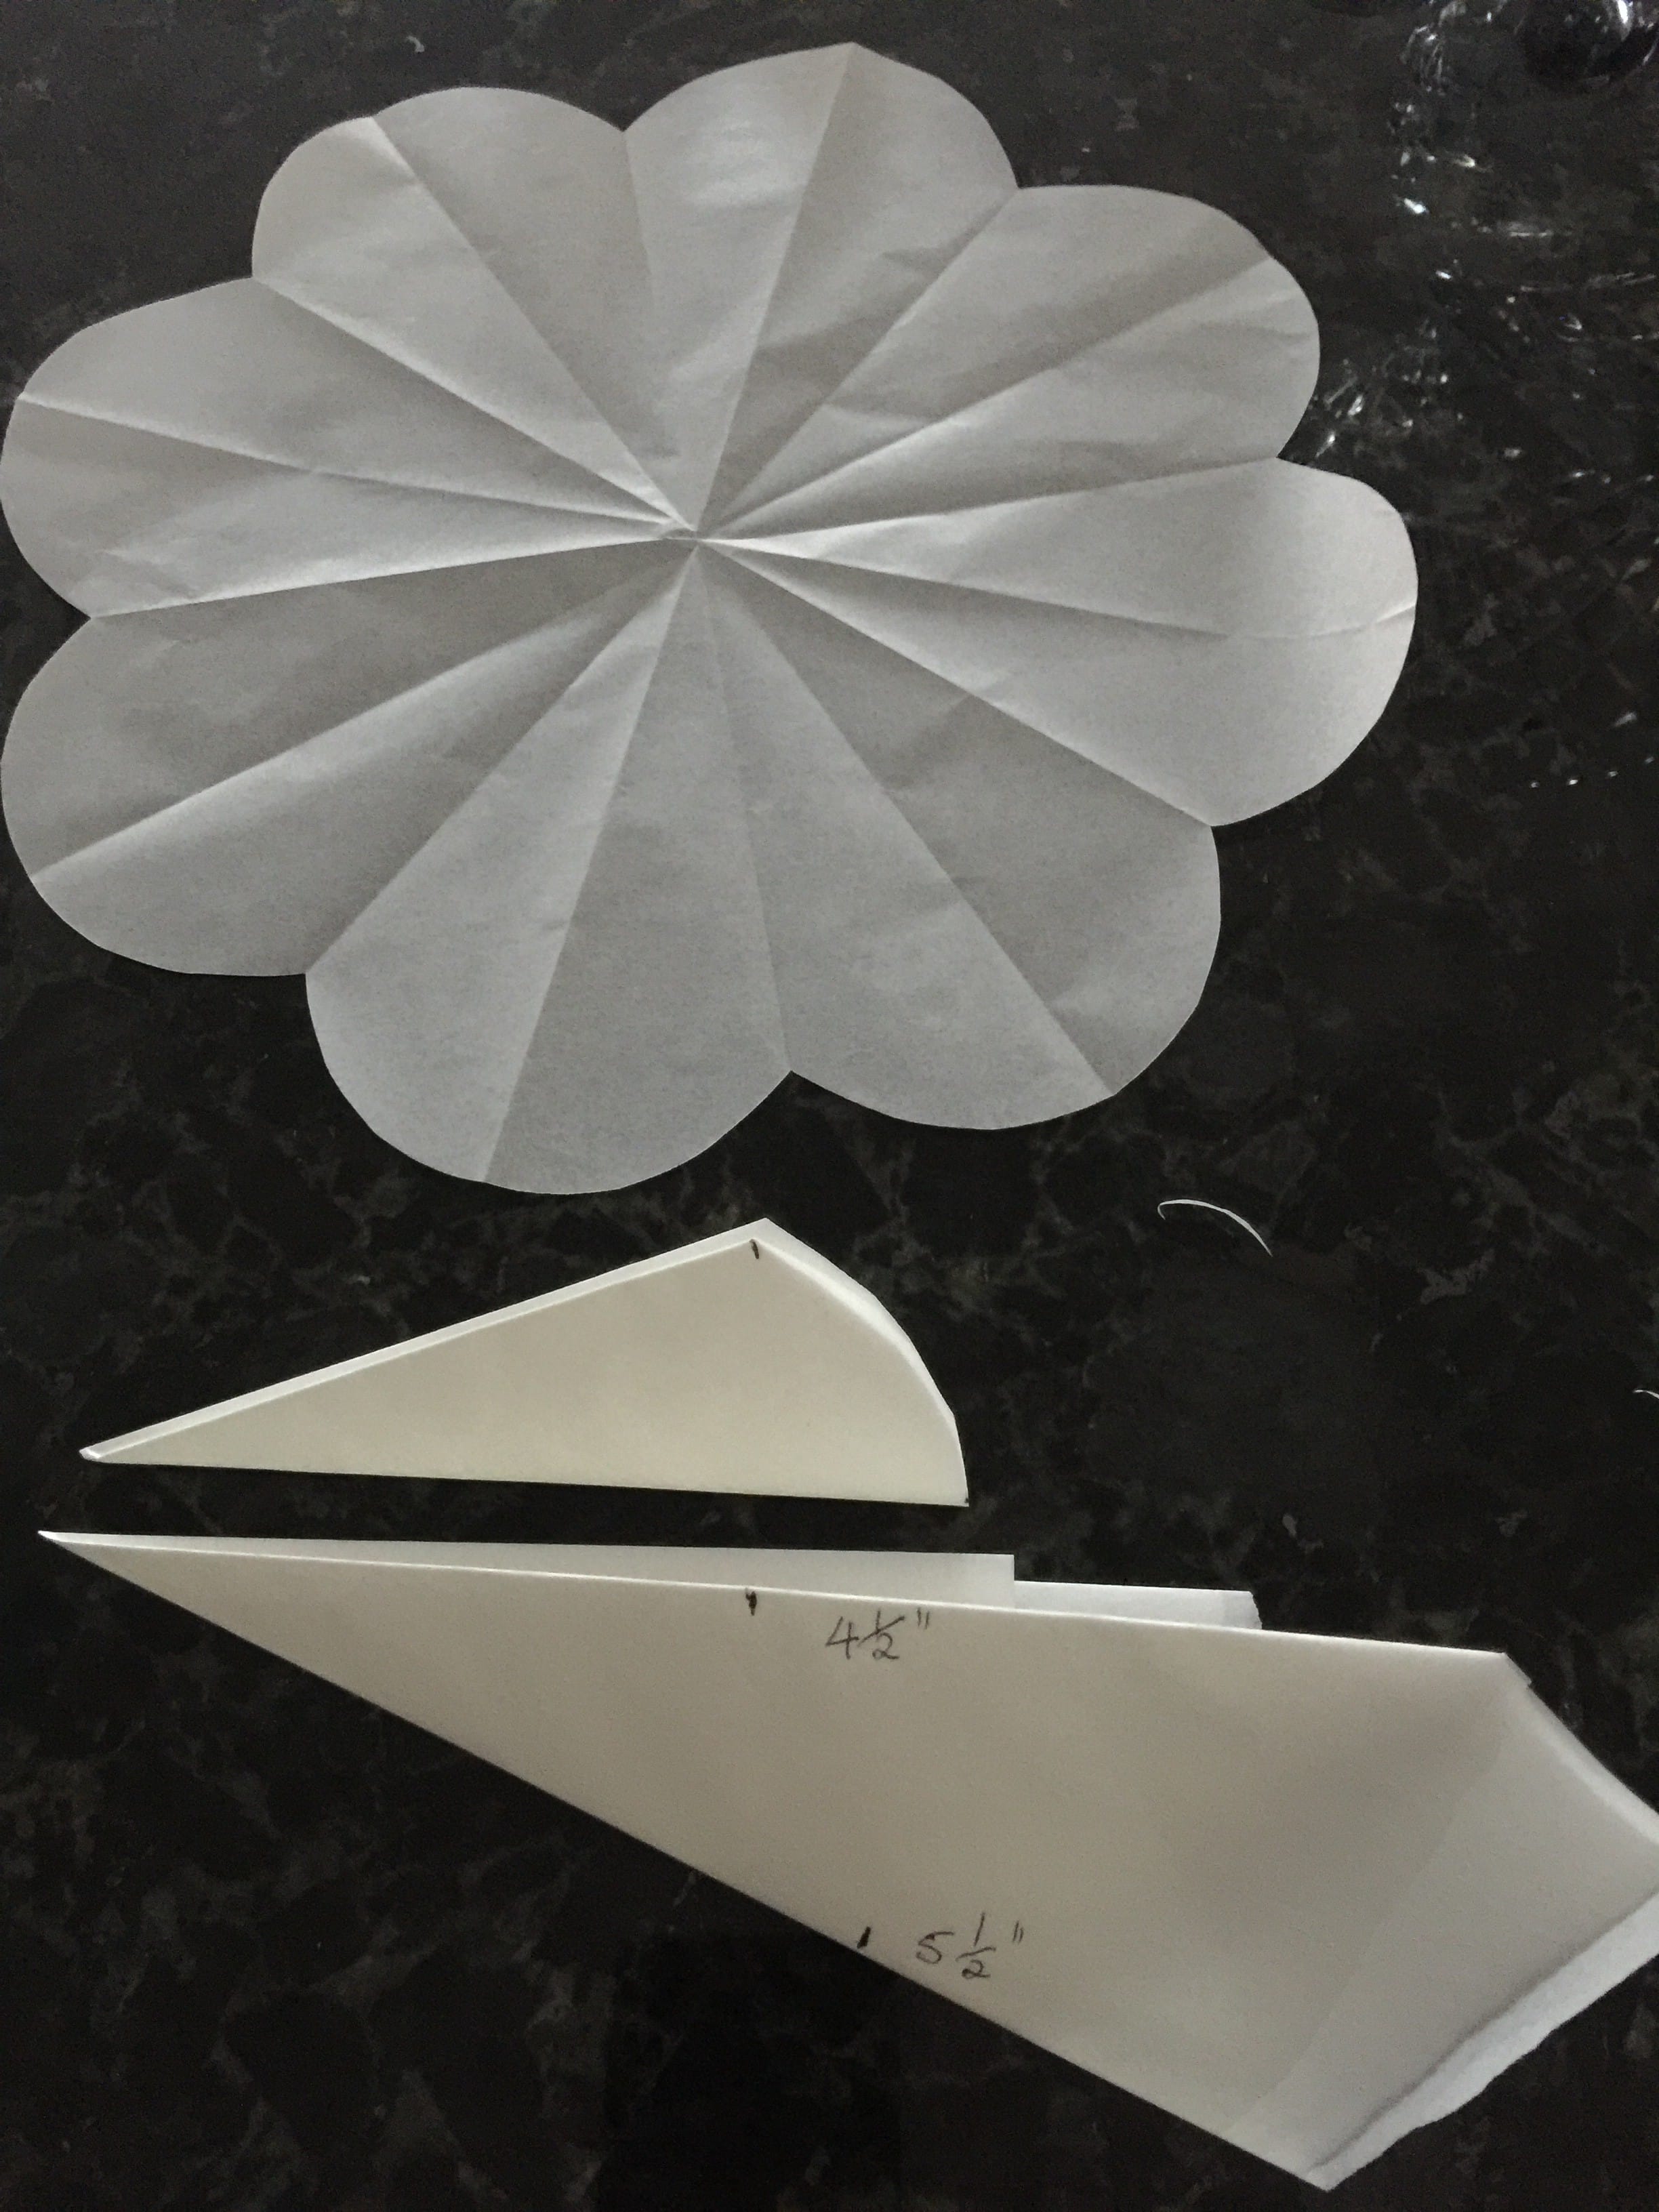
Requirements for the flower bowl
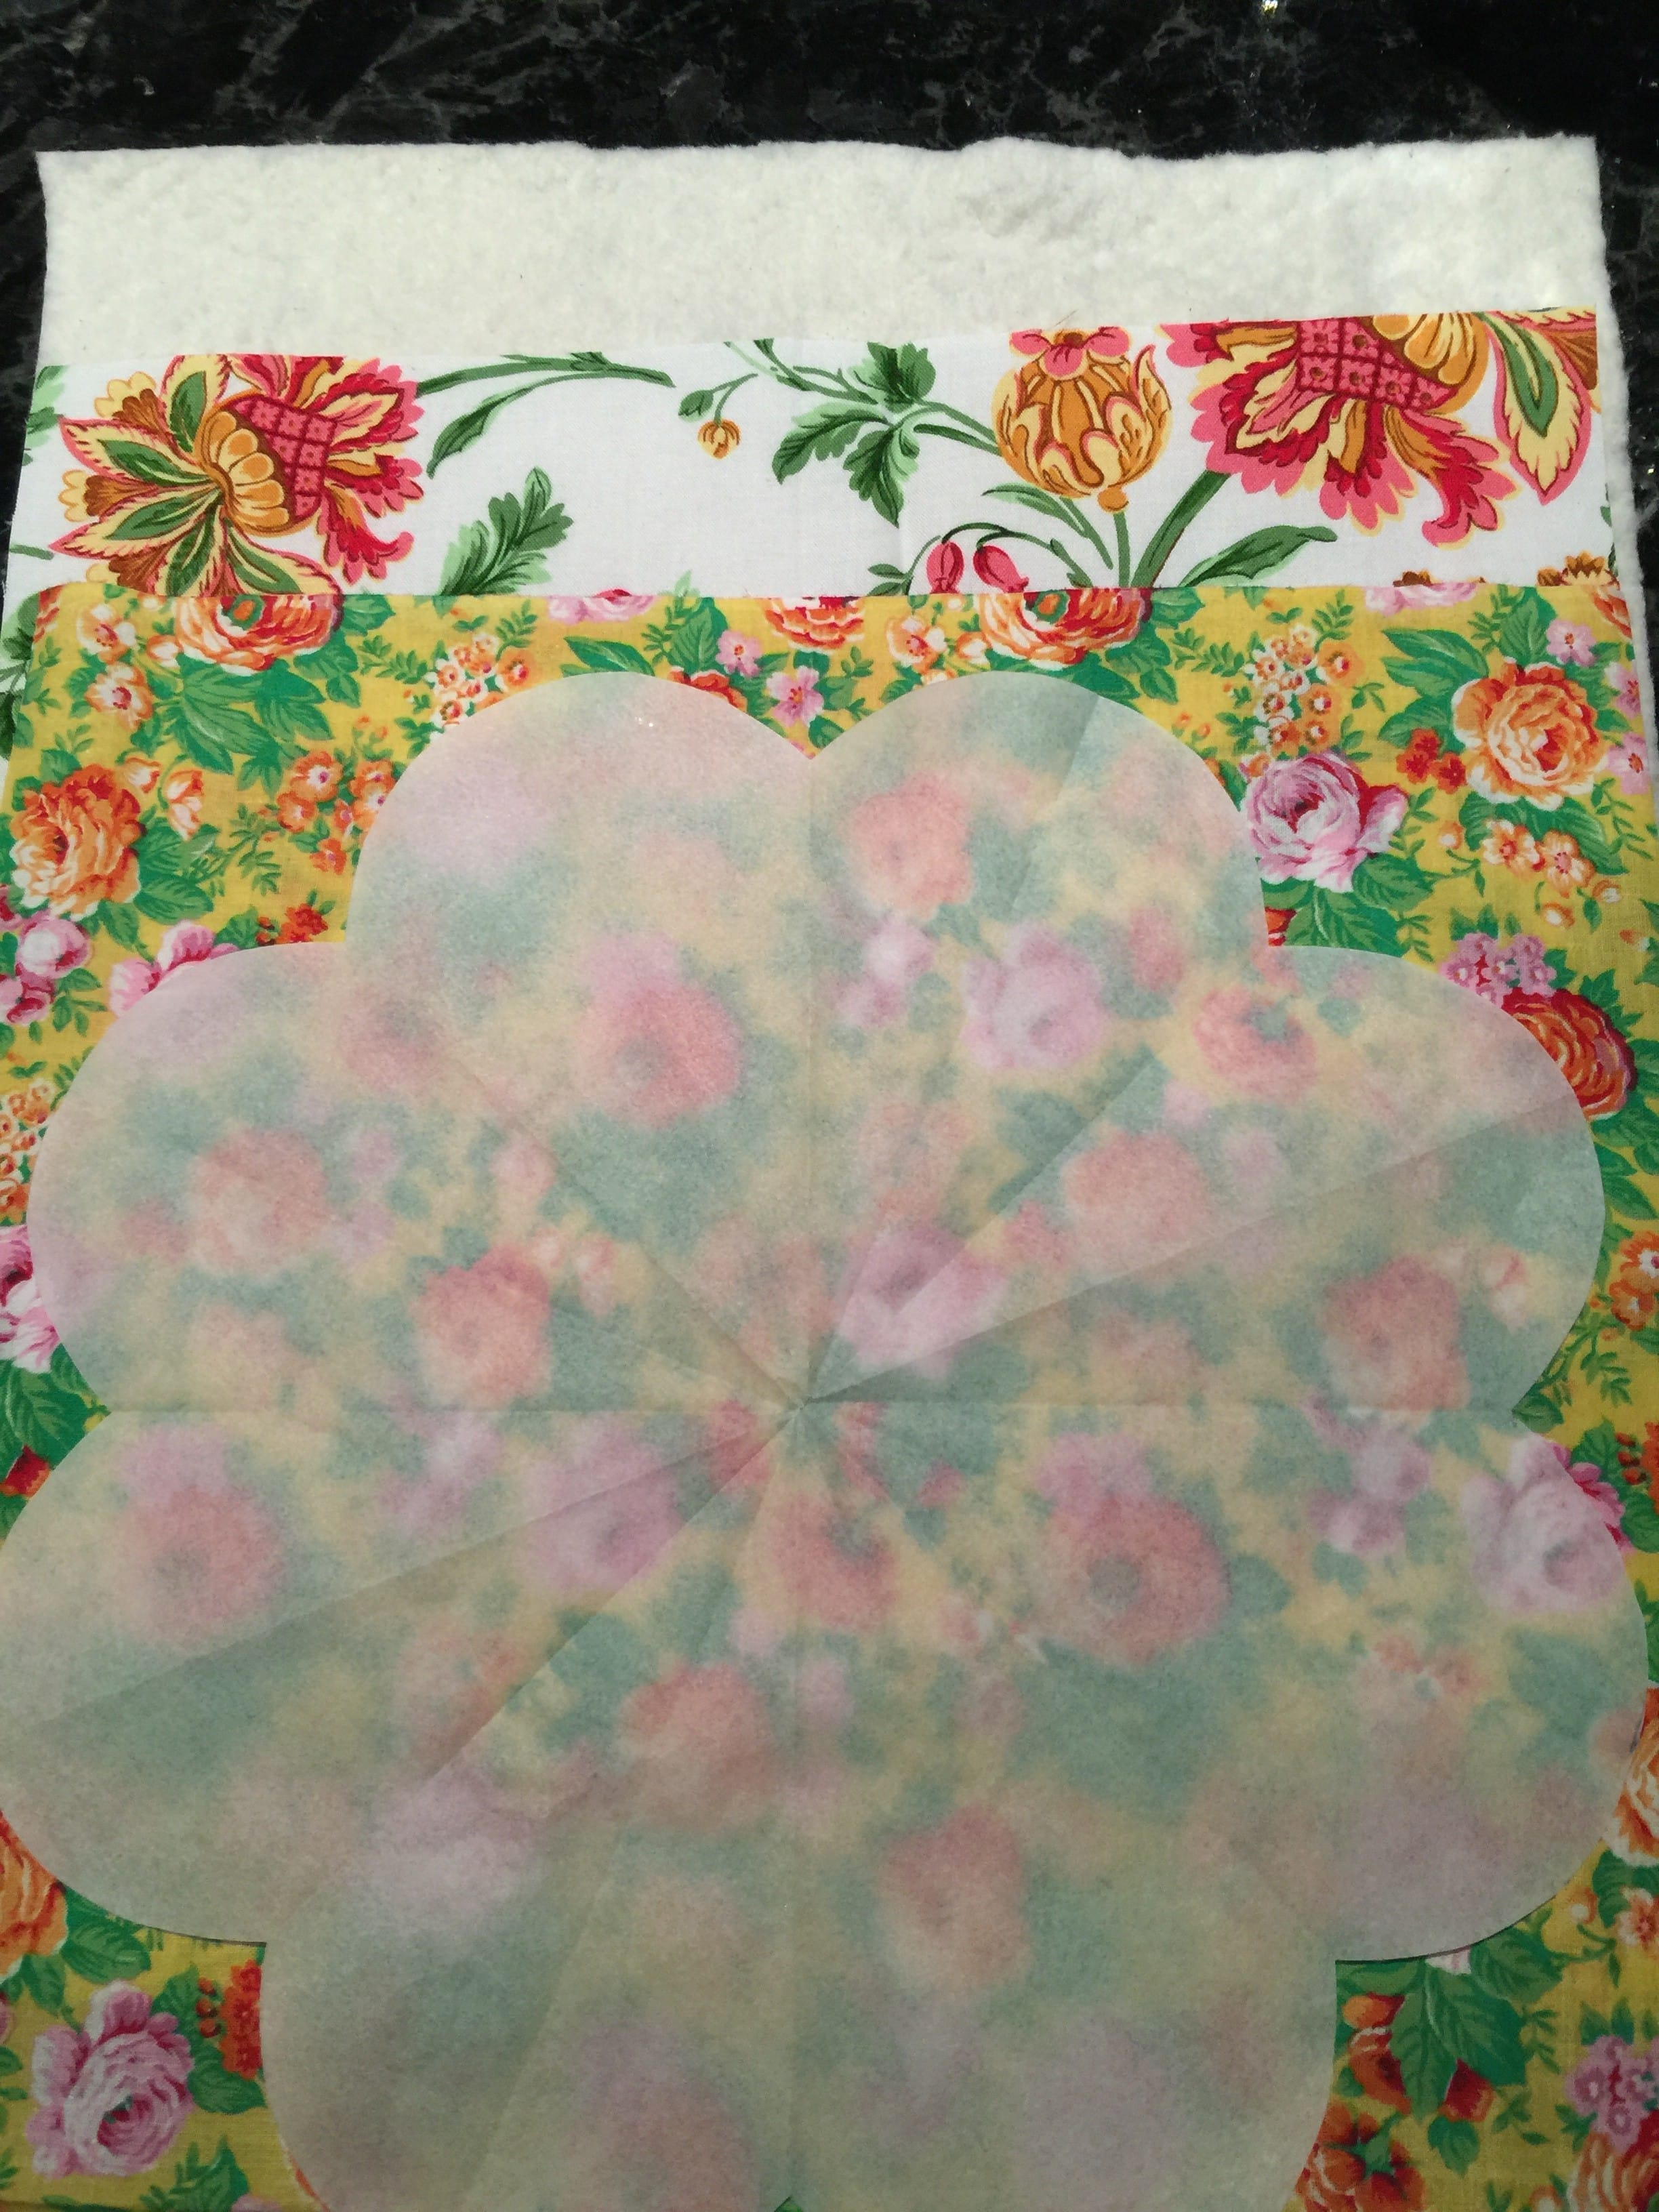
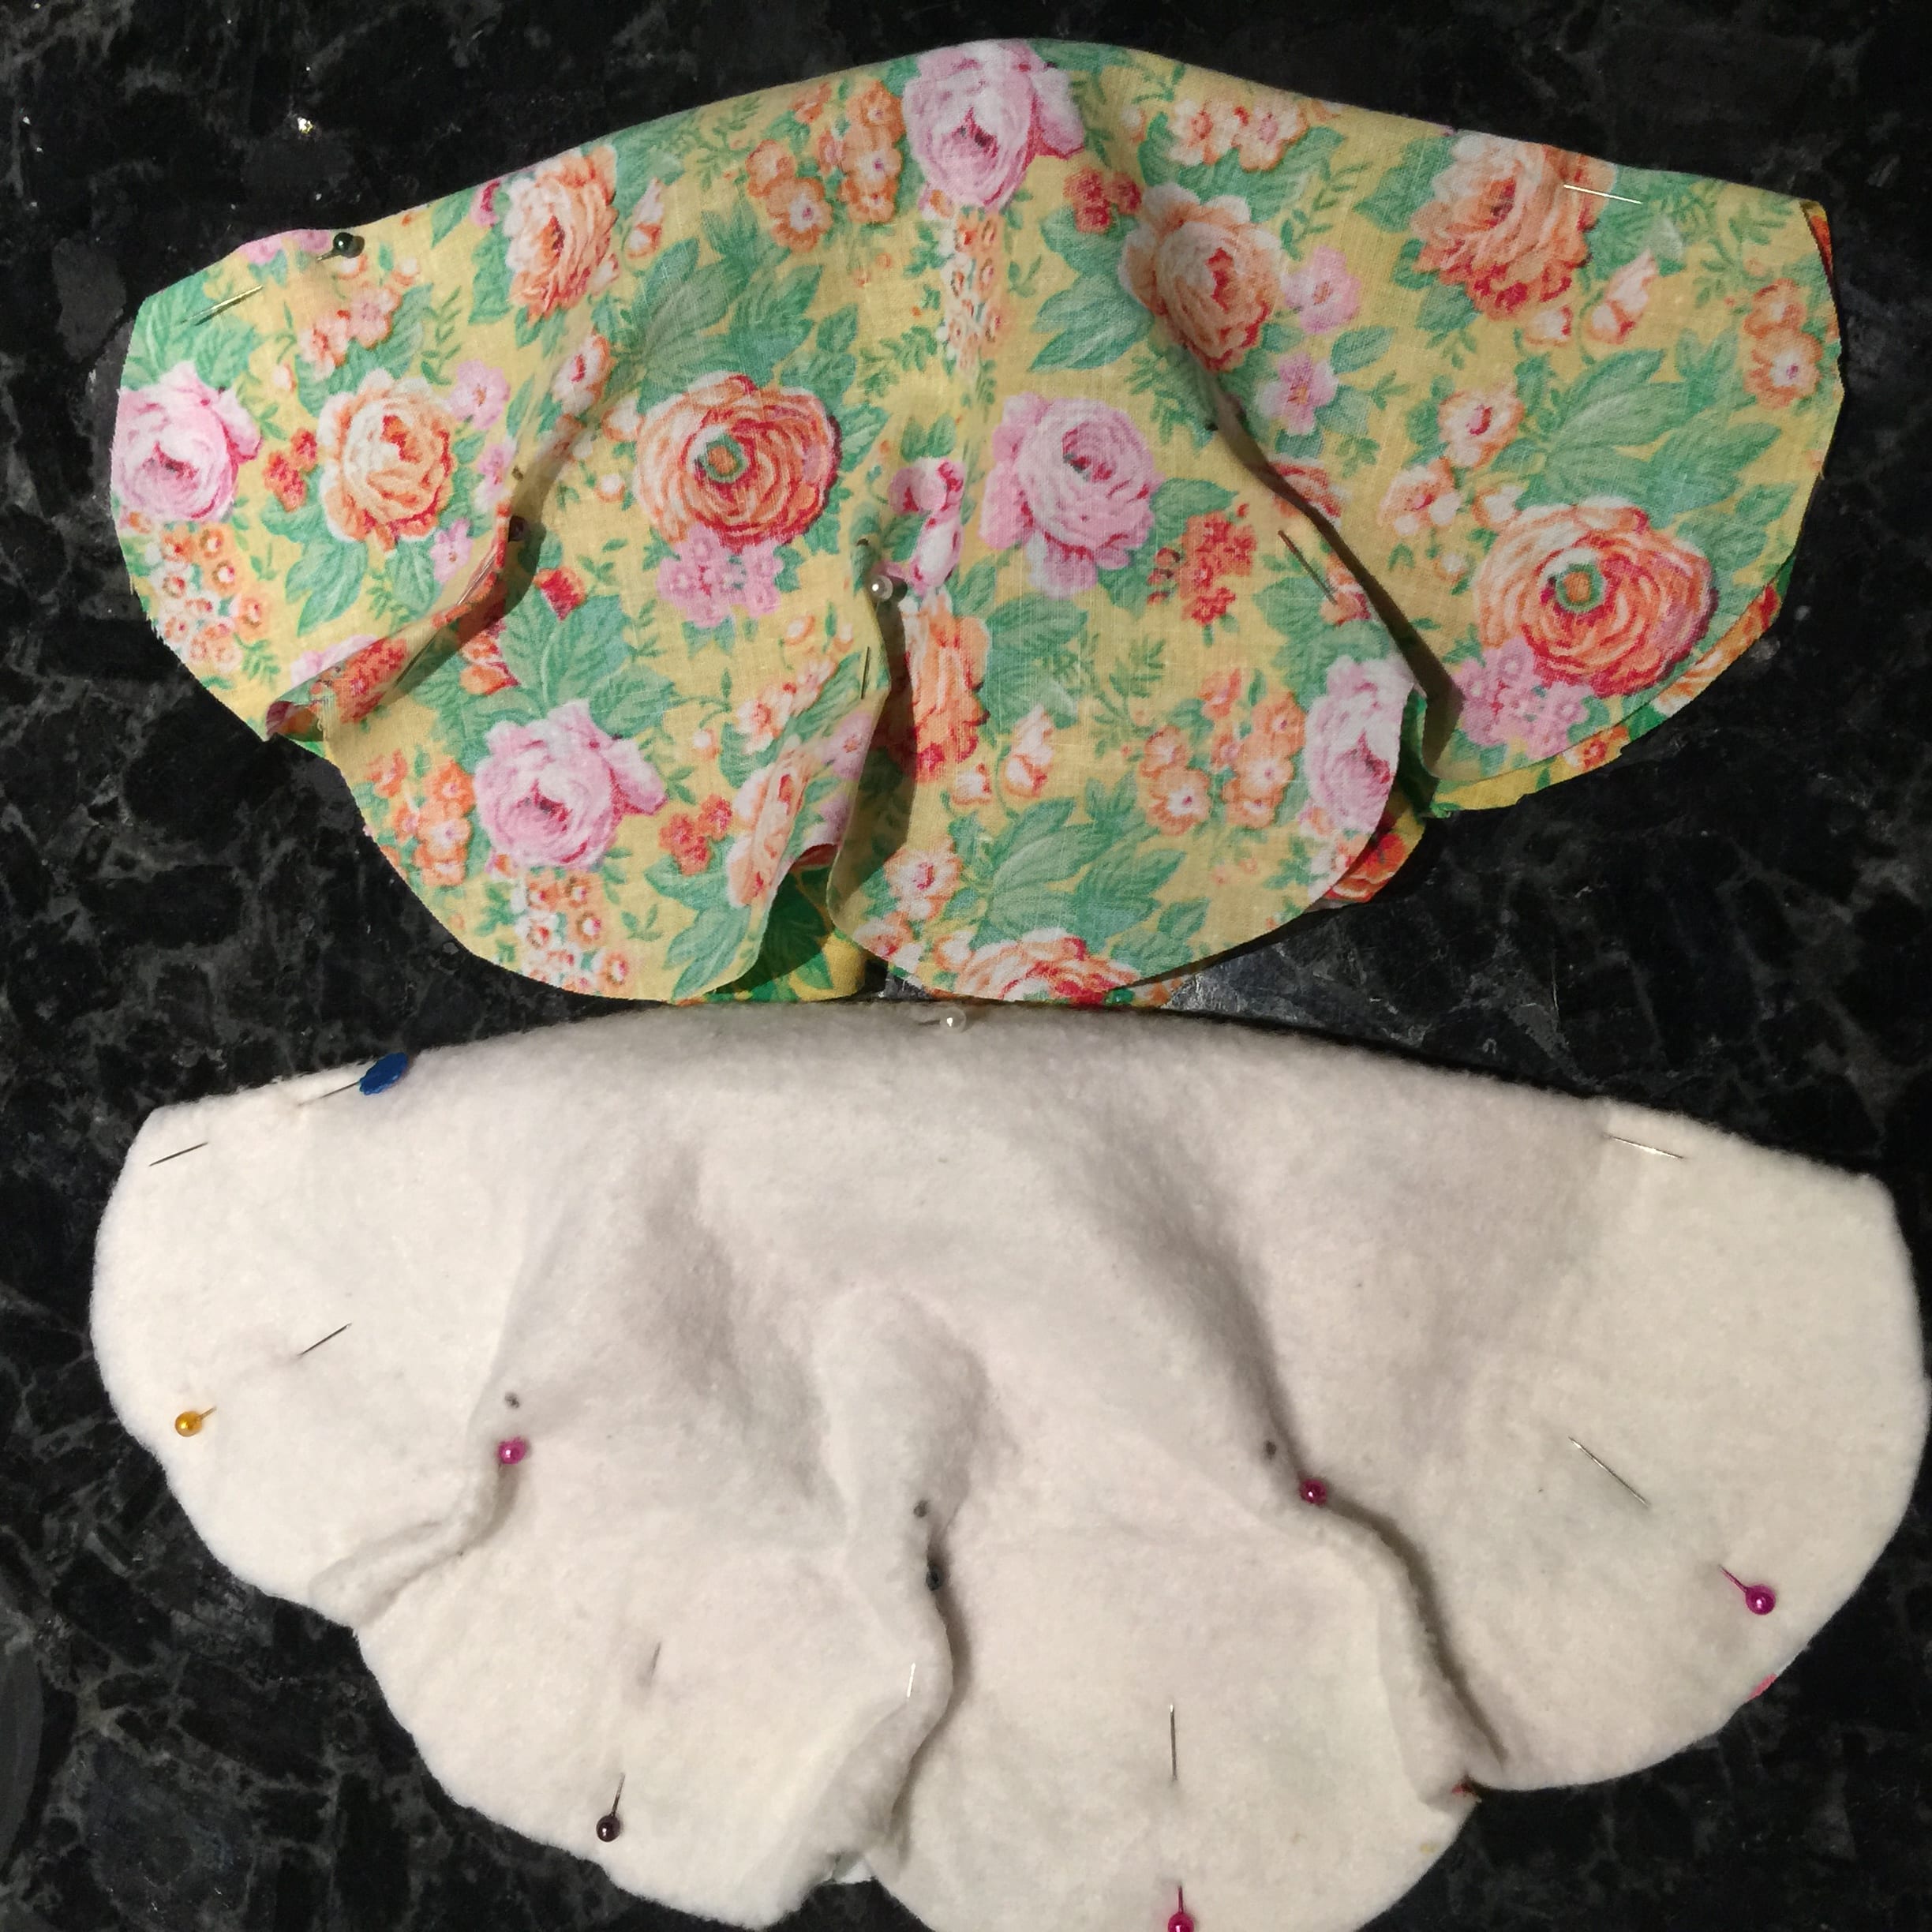
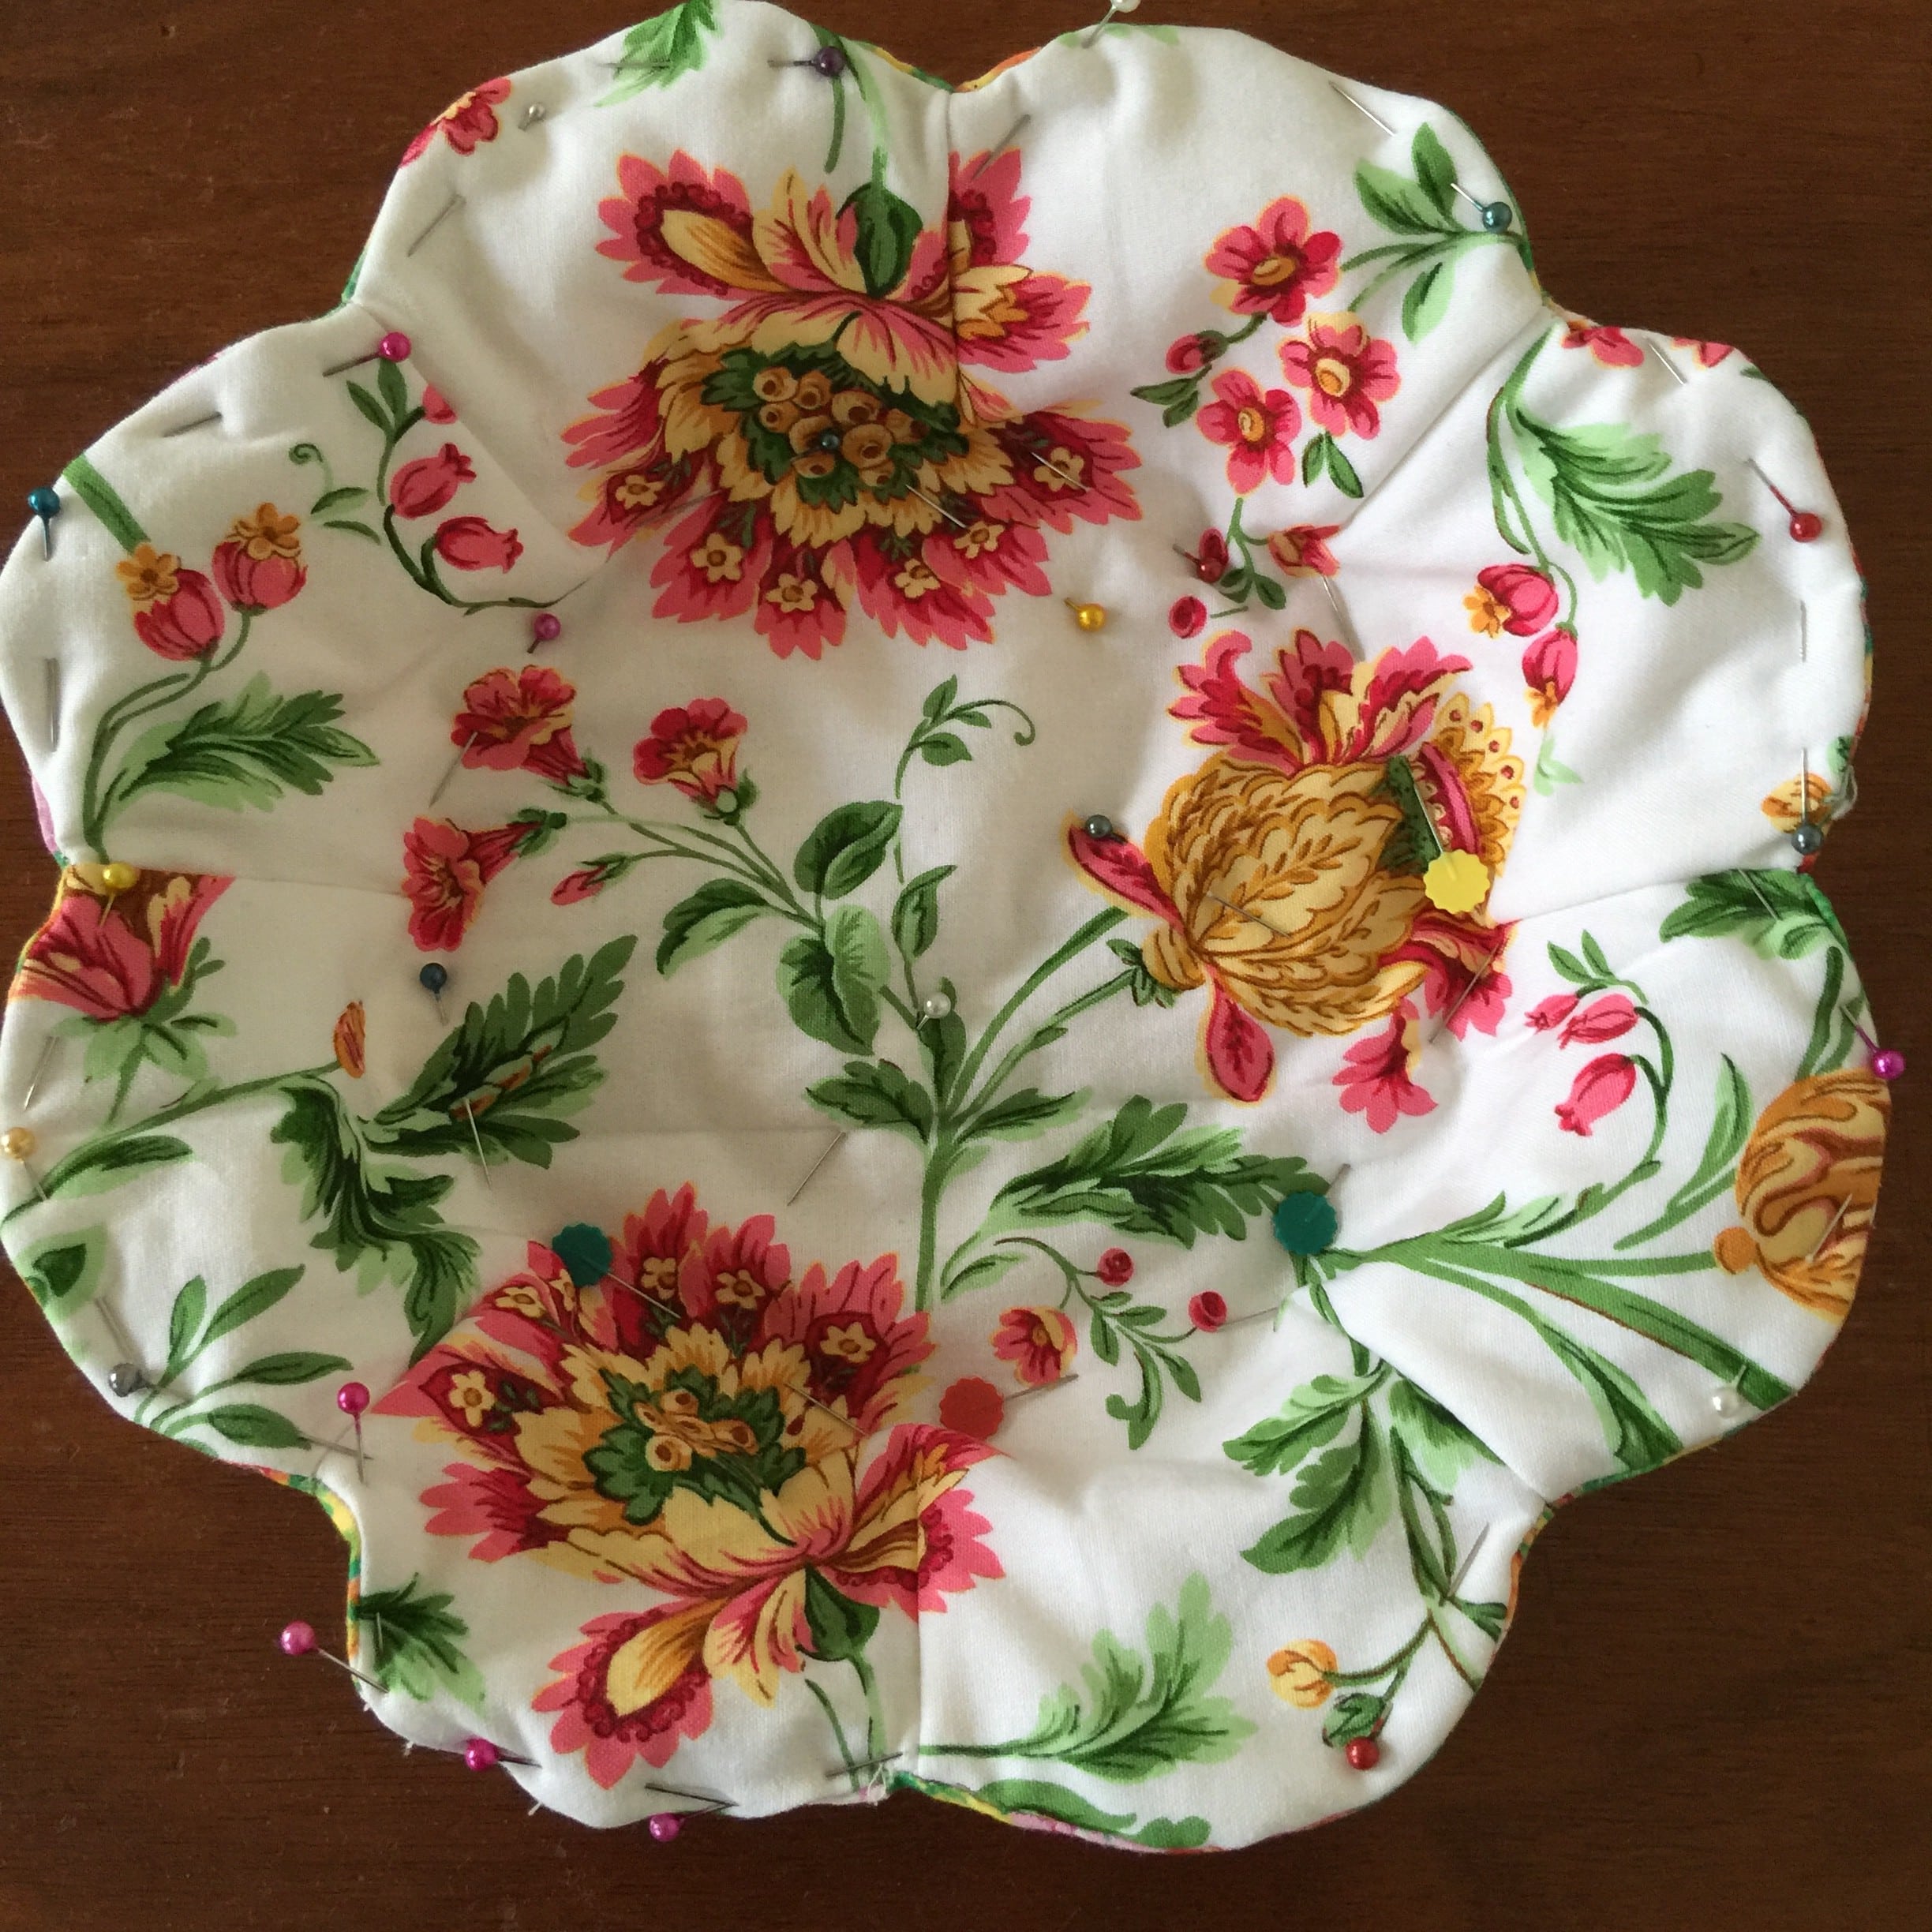
Unpin. Remove the templet and the top fabric layer. Working with one fabric and the batting, pin the layers together. put a pin or fabric marker 2″ down from each valley point between the petals of the flower. Do the same thing with the second piece of fabric.
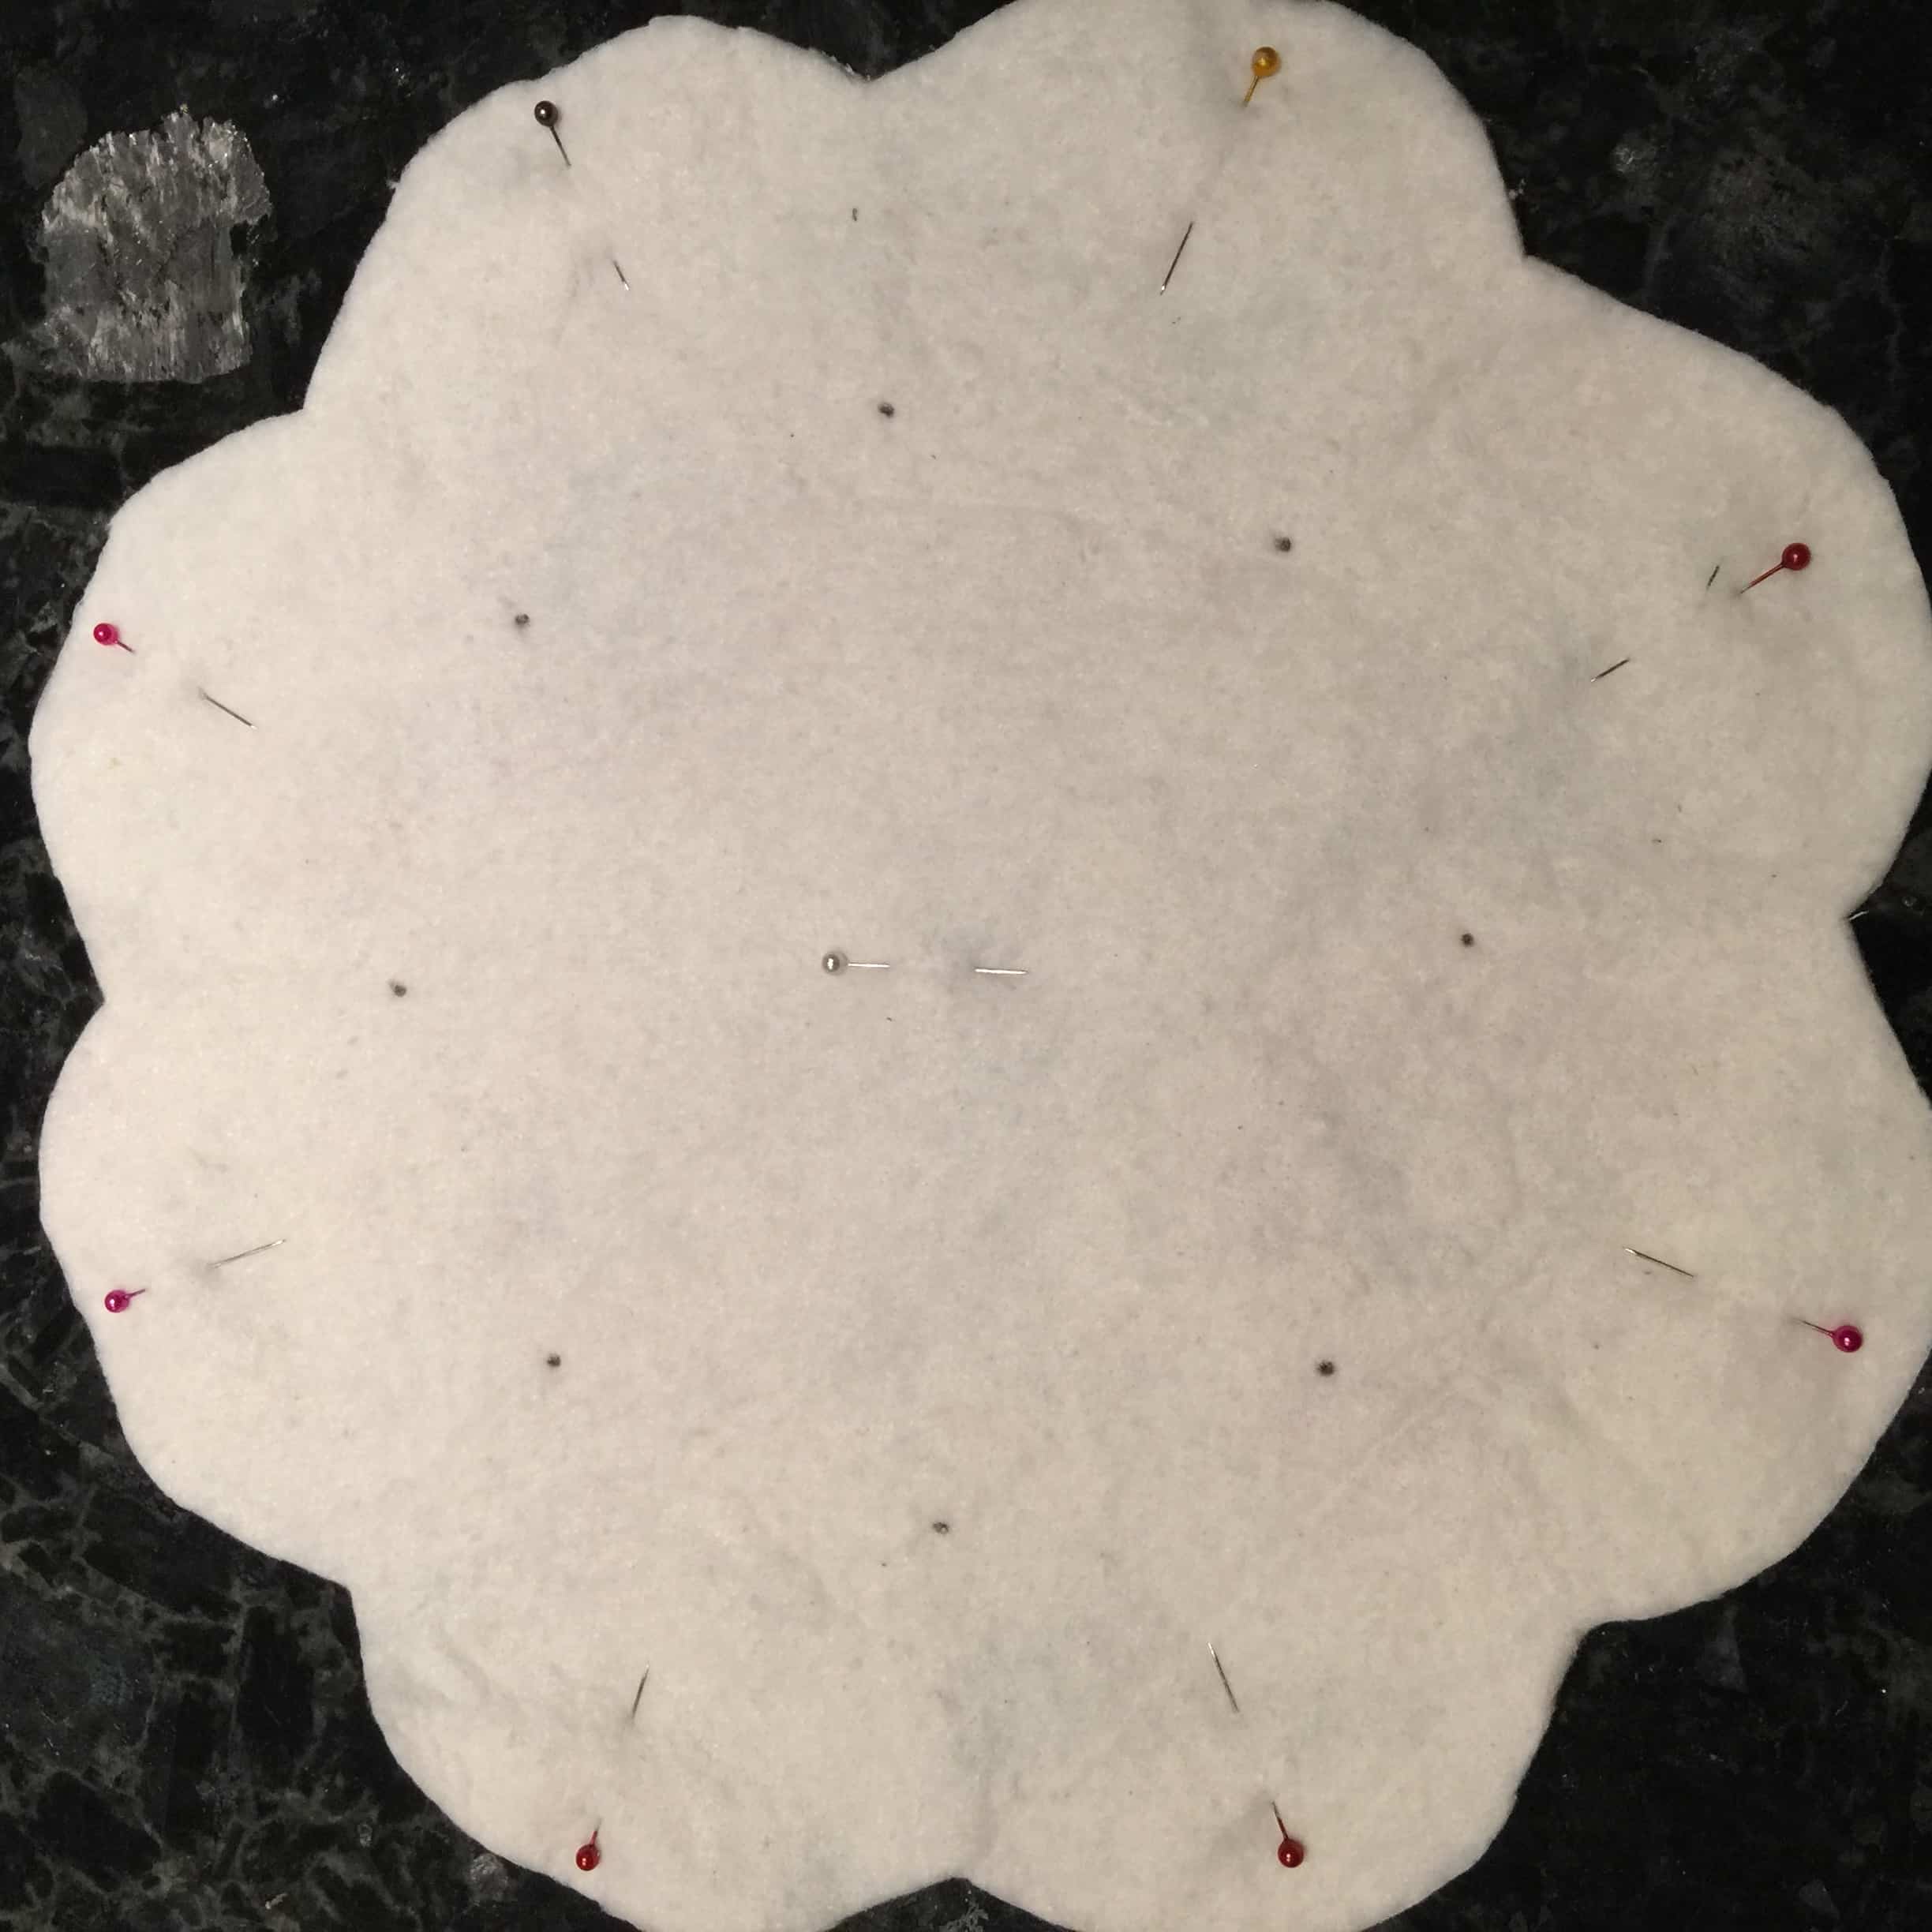
Fold right sides together matching two adjacent petals. Pin 1/4″ from the edge. Repeat all the way round. And do the same with the second piece of fabric.
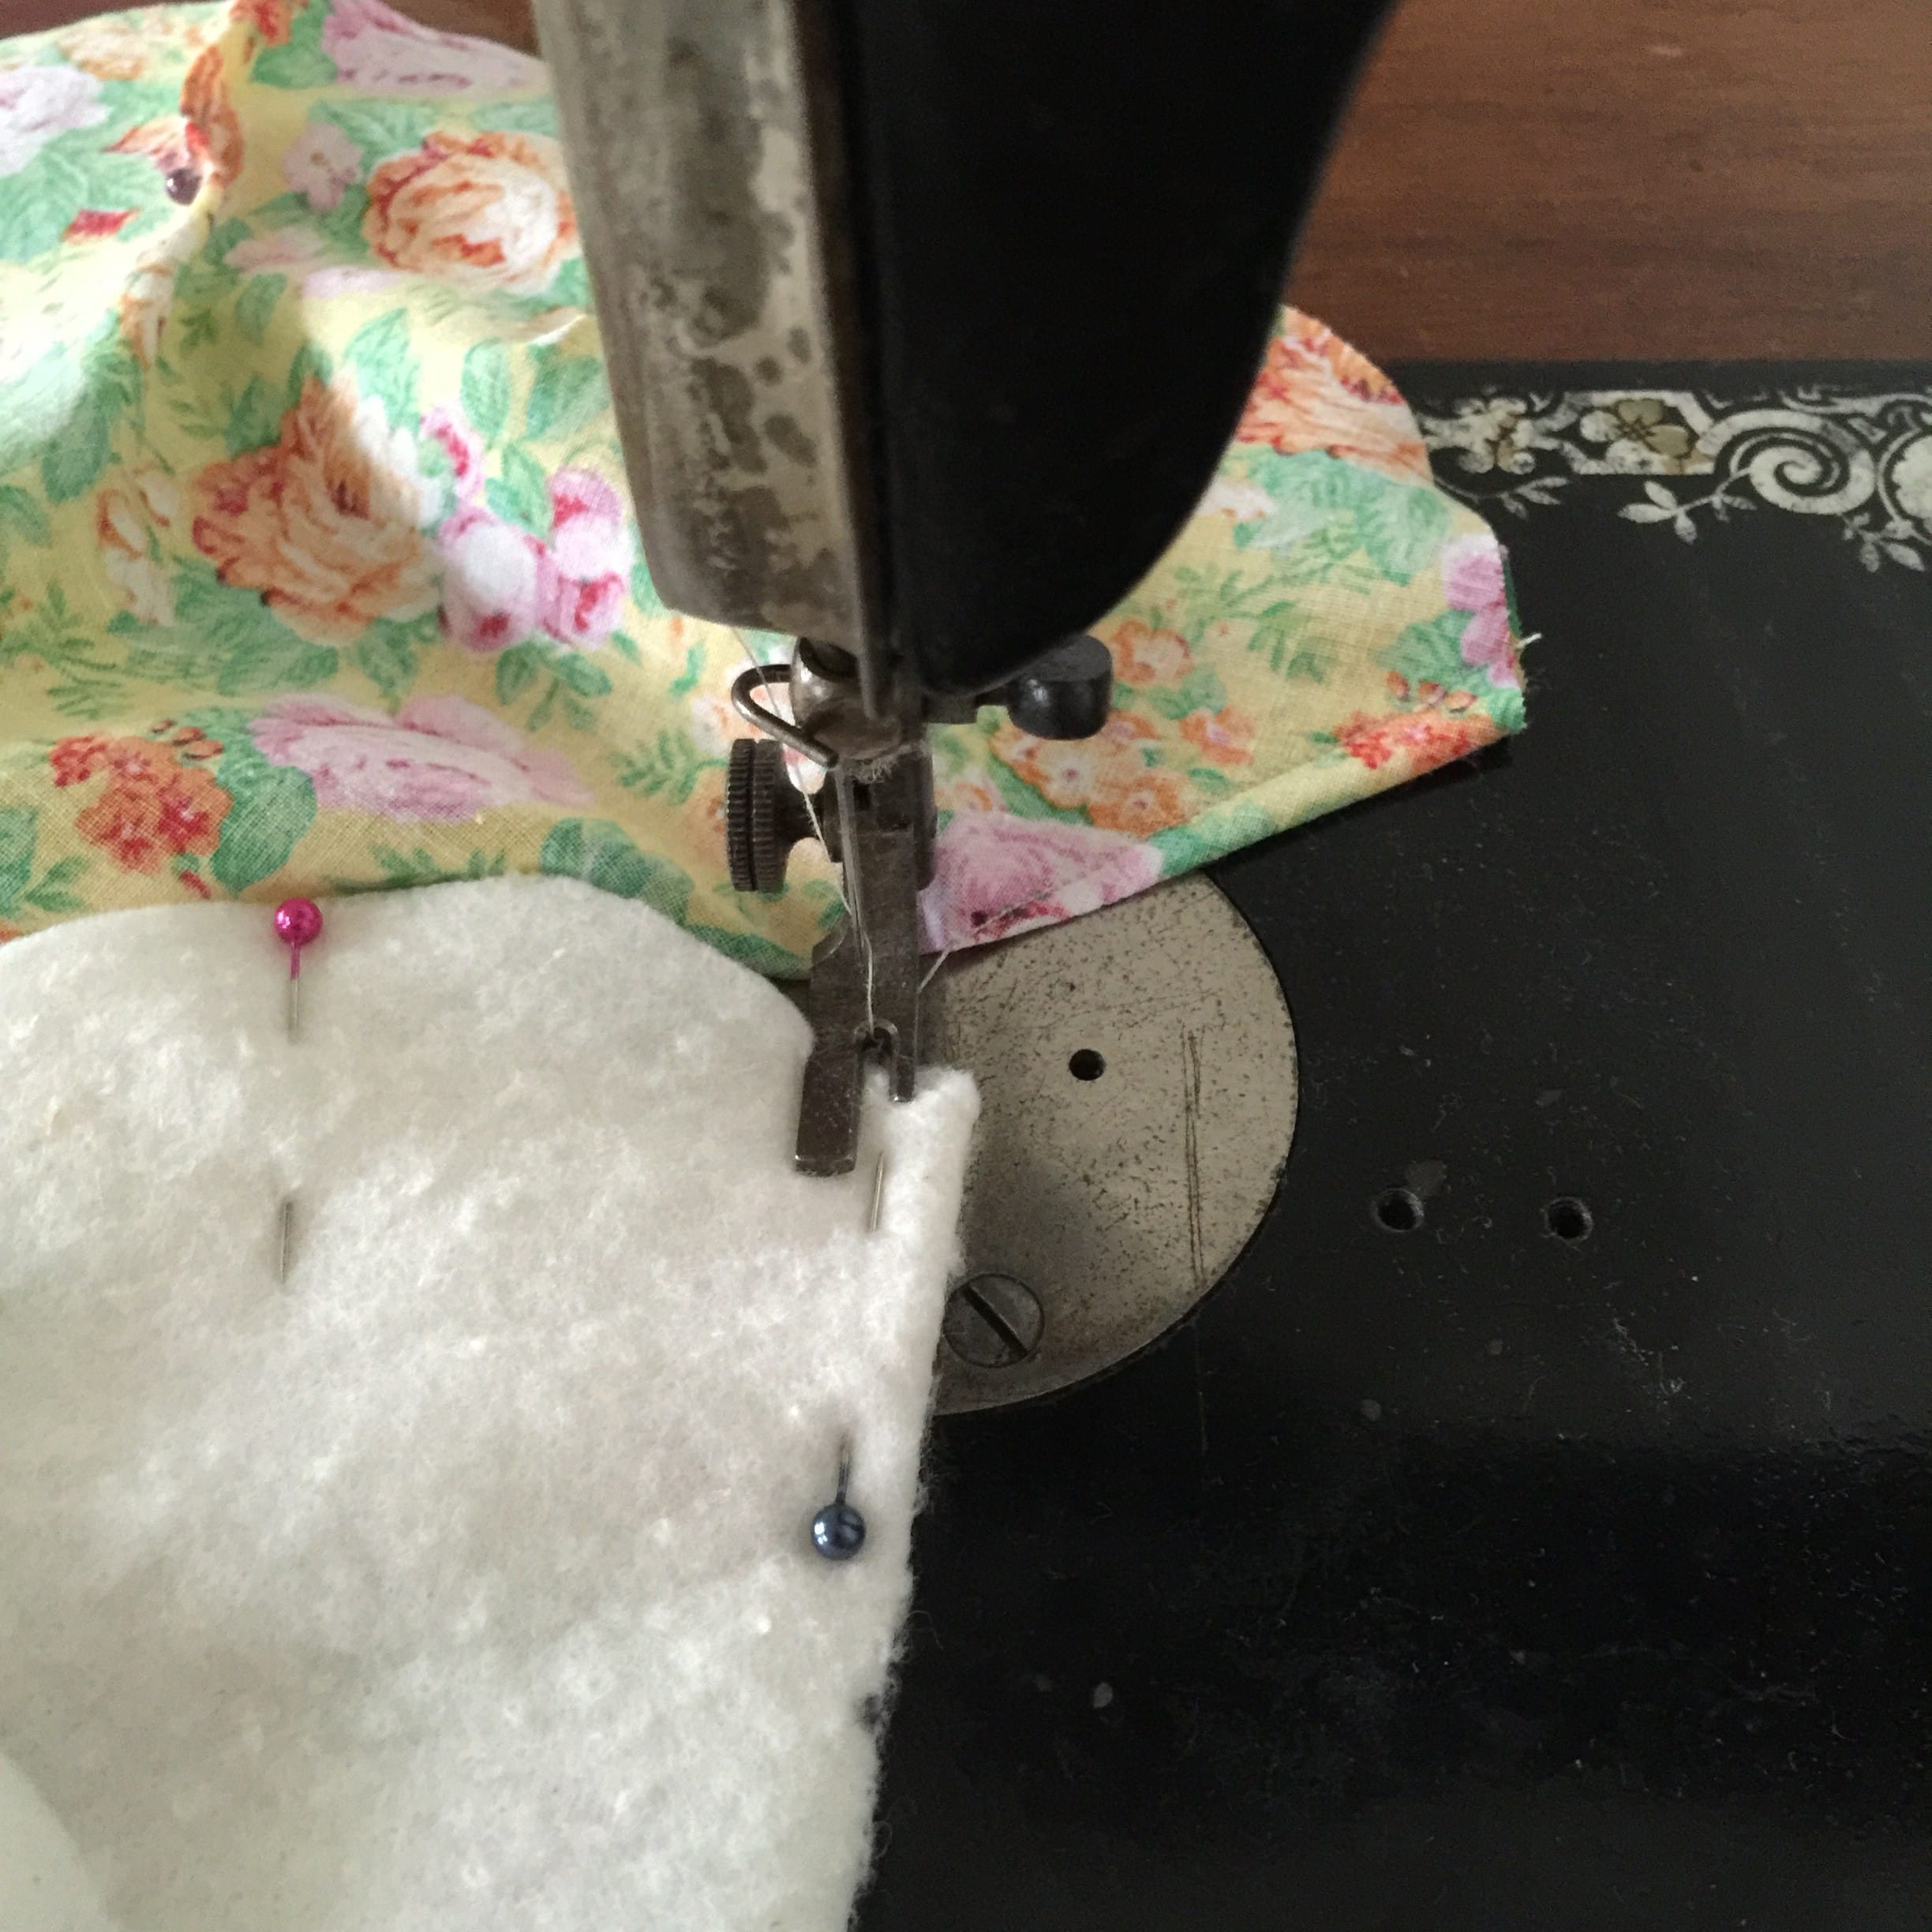
Now they should look like this. Sew the darts, beginning 1/4″ approximately from the top edge and sew down to the marked dot. You can chain sew these alternating with the second fabric piece.
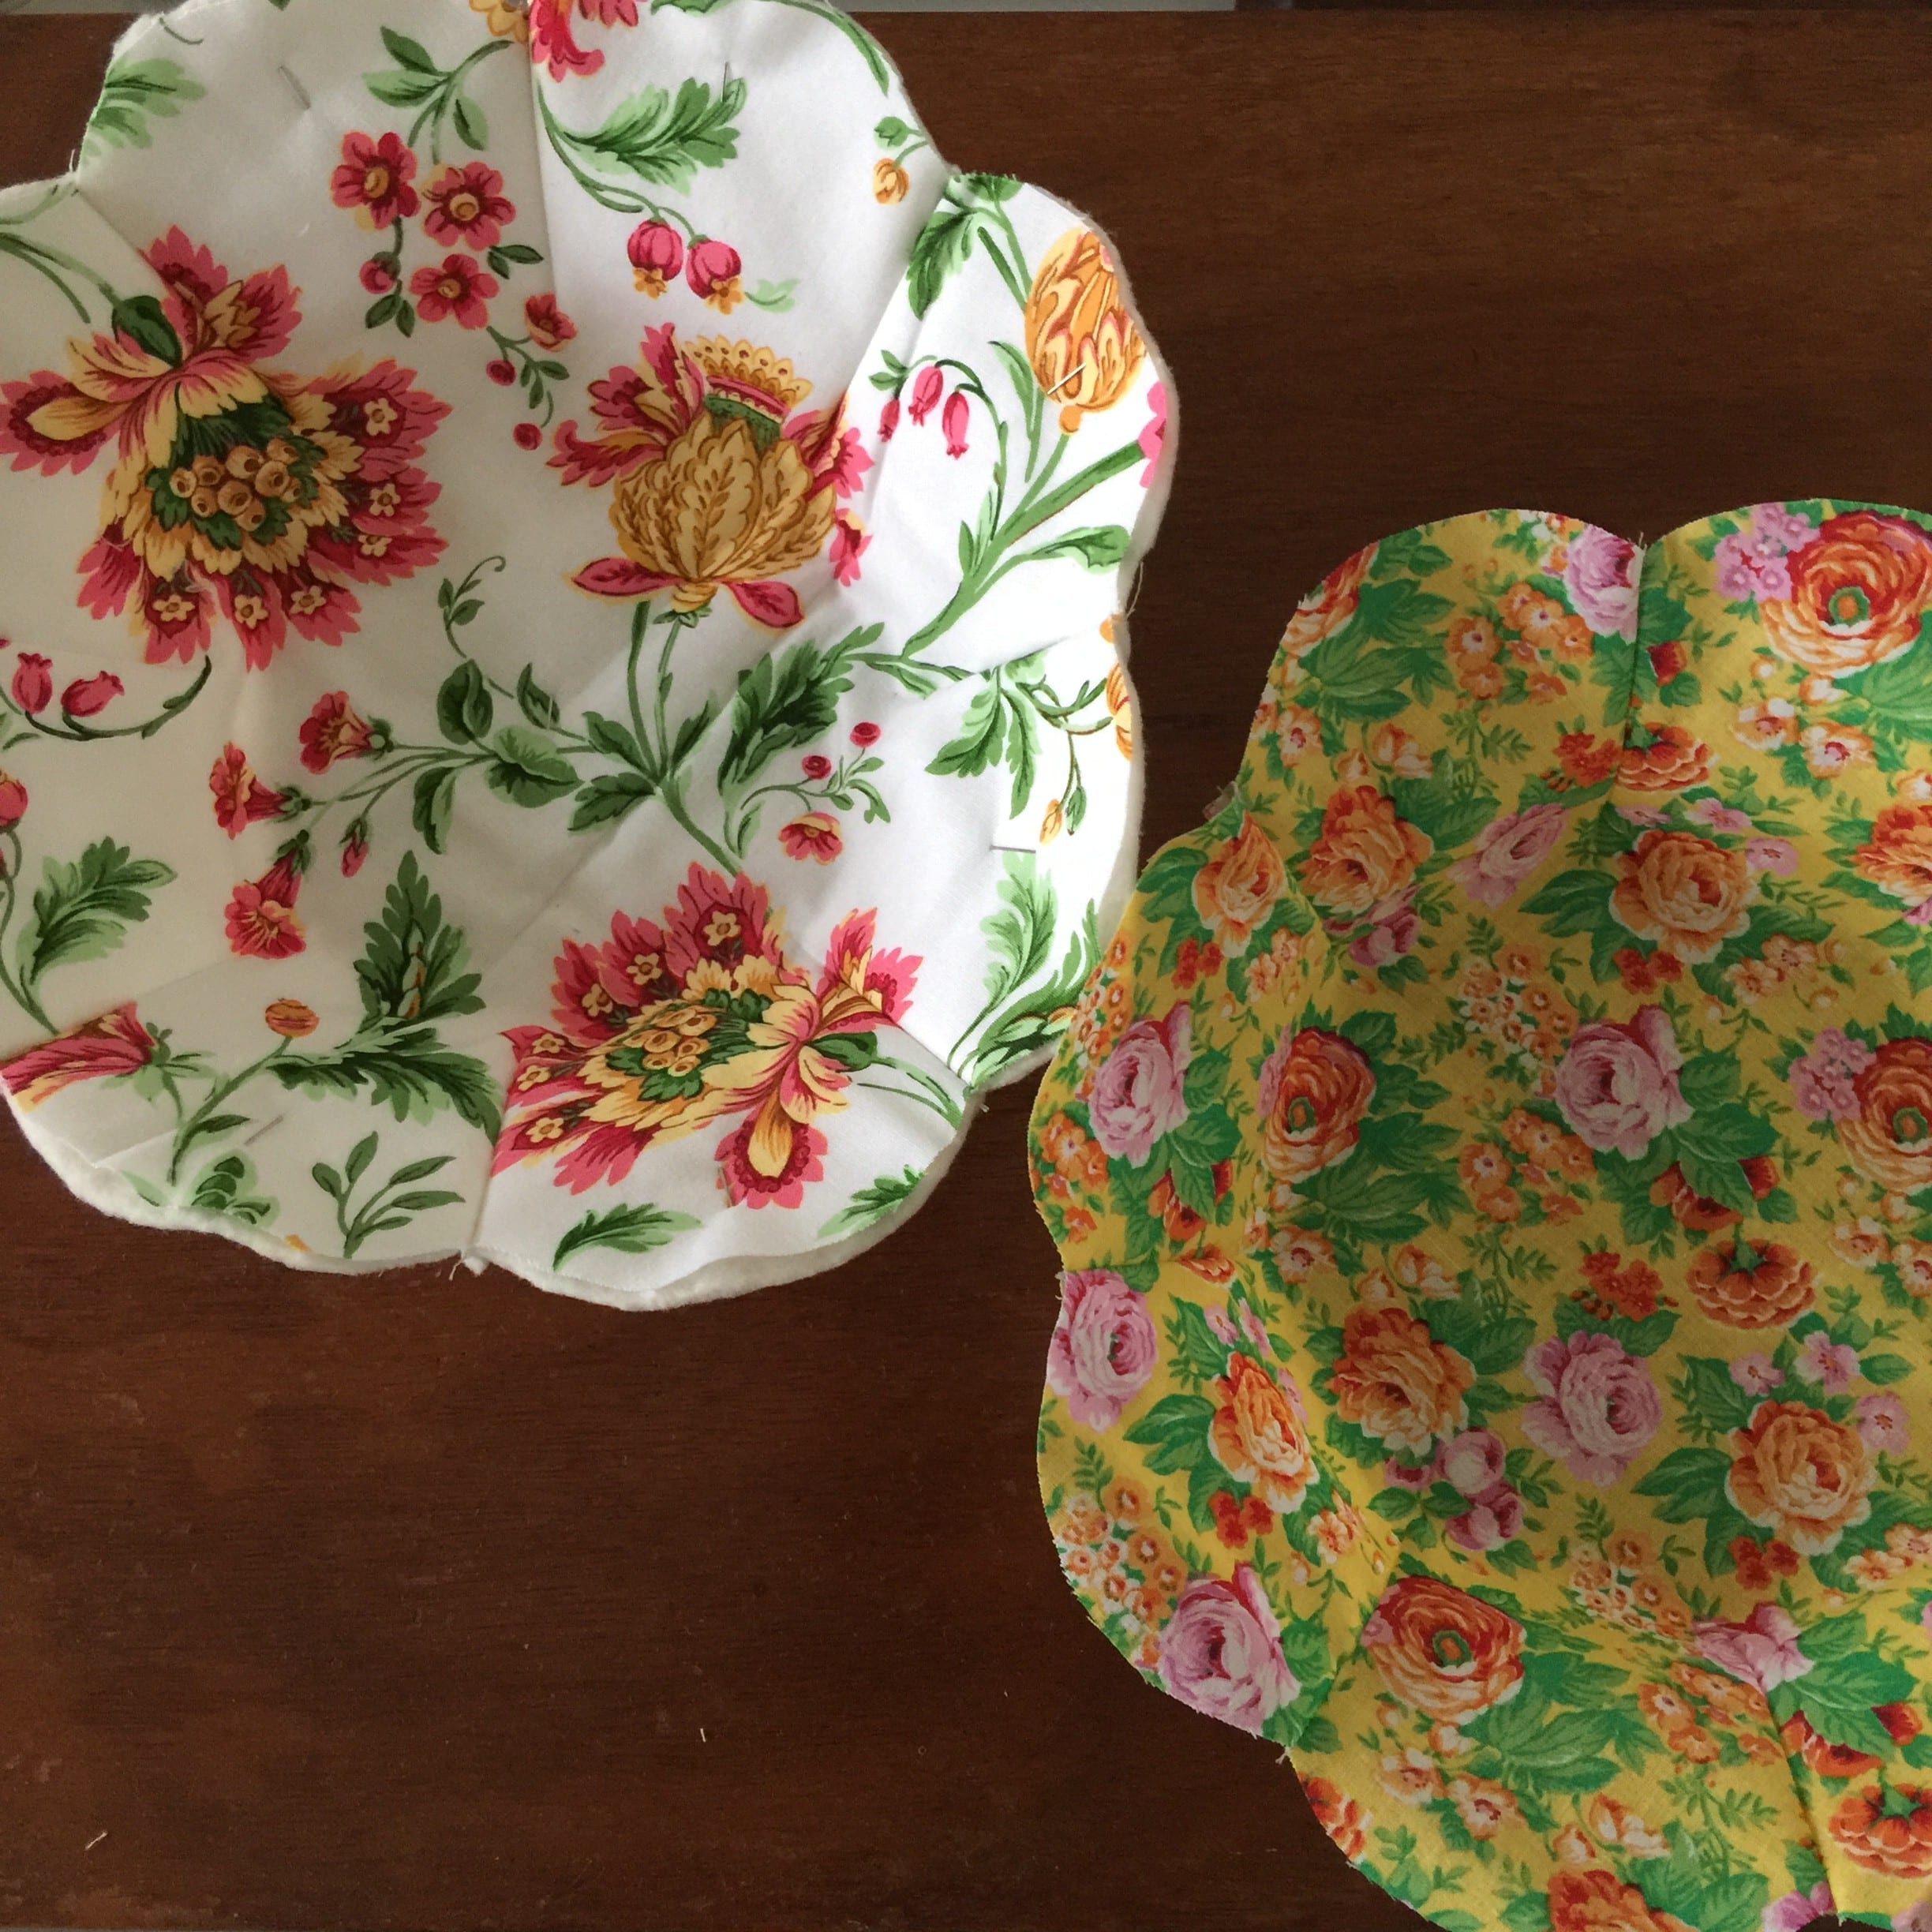
Once all the darts are completed they should look like this.
Today I’m using a Singer 15 from 1902.
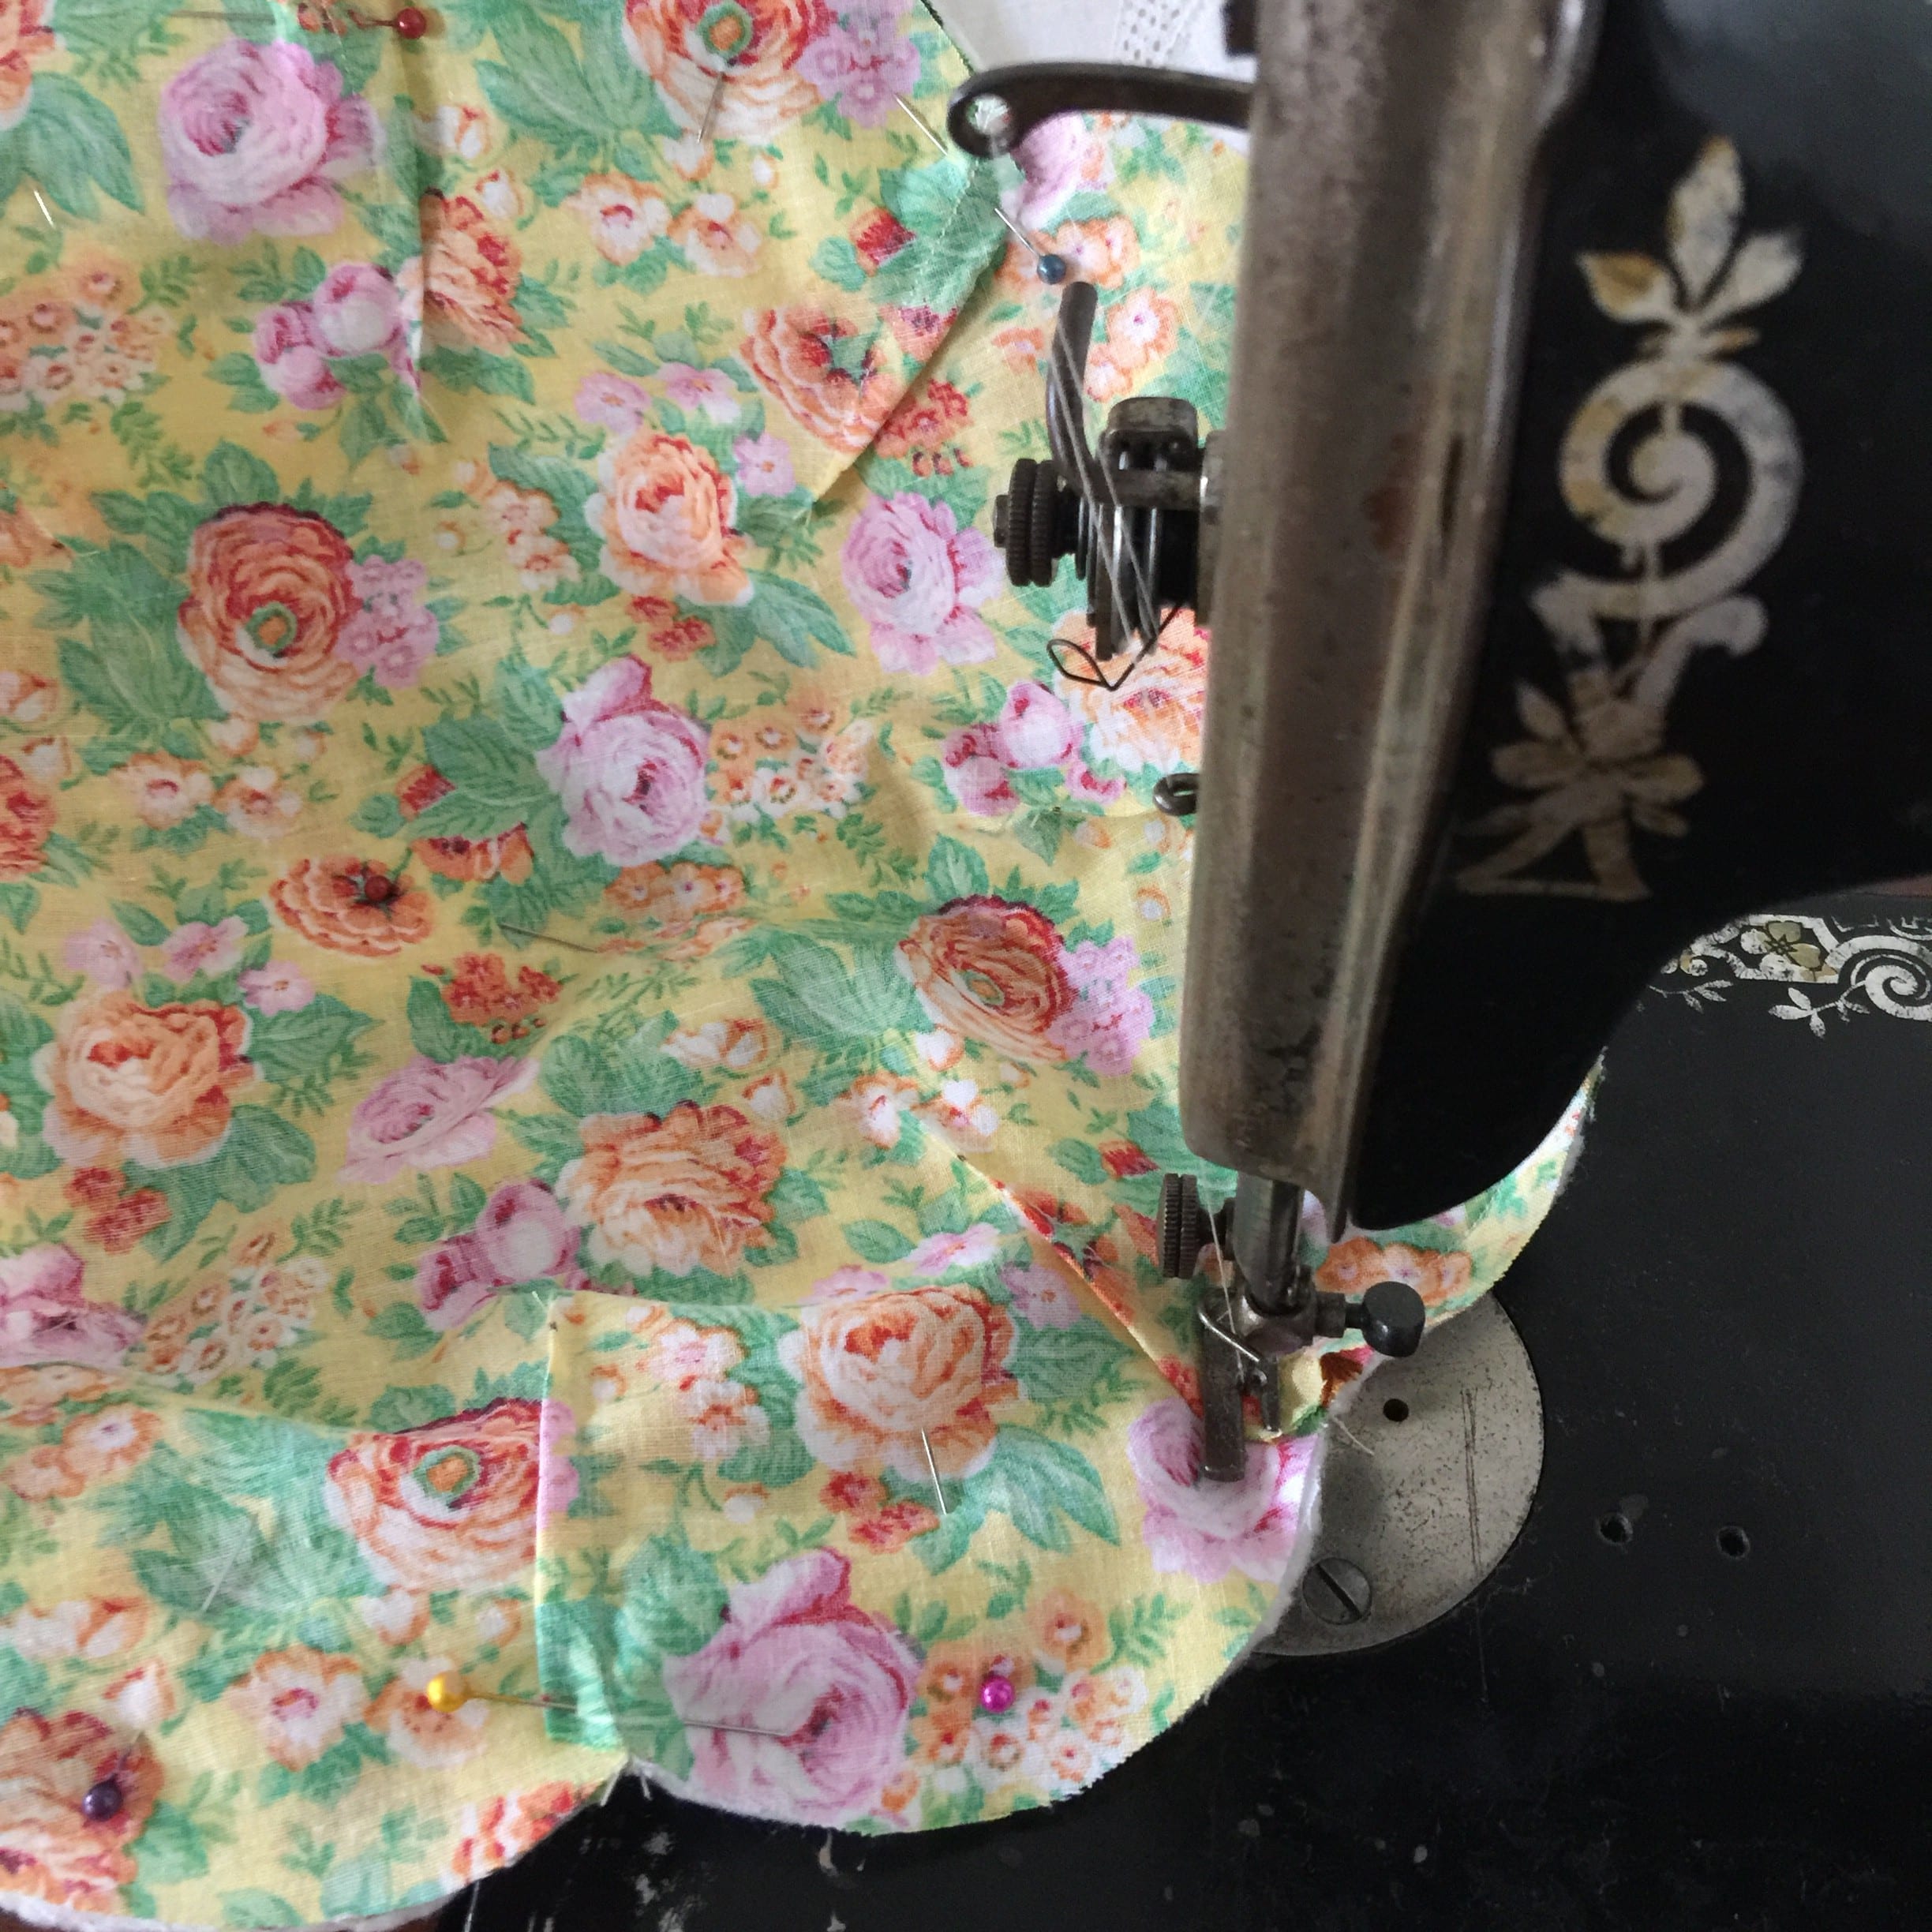
Insert the fabric bowl into the batting and fabric bowl, right sides together. Ensure that all the seams are nested and the petals match. Pin well. Sew carefully 1:4″ from the edge all the way around leaving one petal unsewn for turning. Clip around the seam carefully making sure that the seam is not cut.
Turn the whole piece through the opening. Use a chop stick or similar to smooth out the petals from the inside.
Pin all the edges very well and enclose the seam opening too. Pin through the base so that the seams are well aligned. Top stitch as close to the edge as possible.
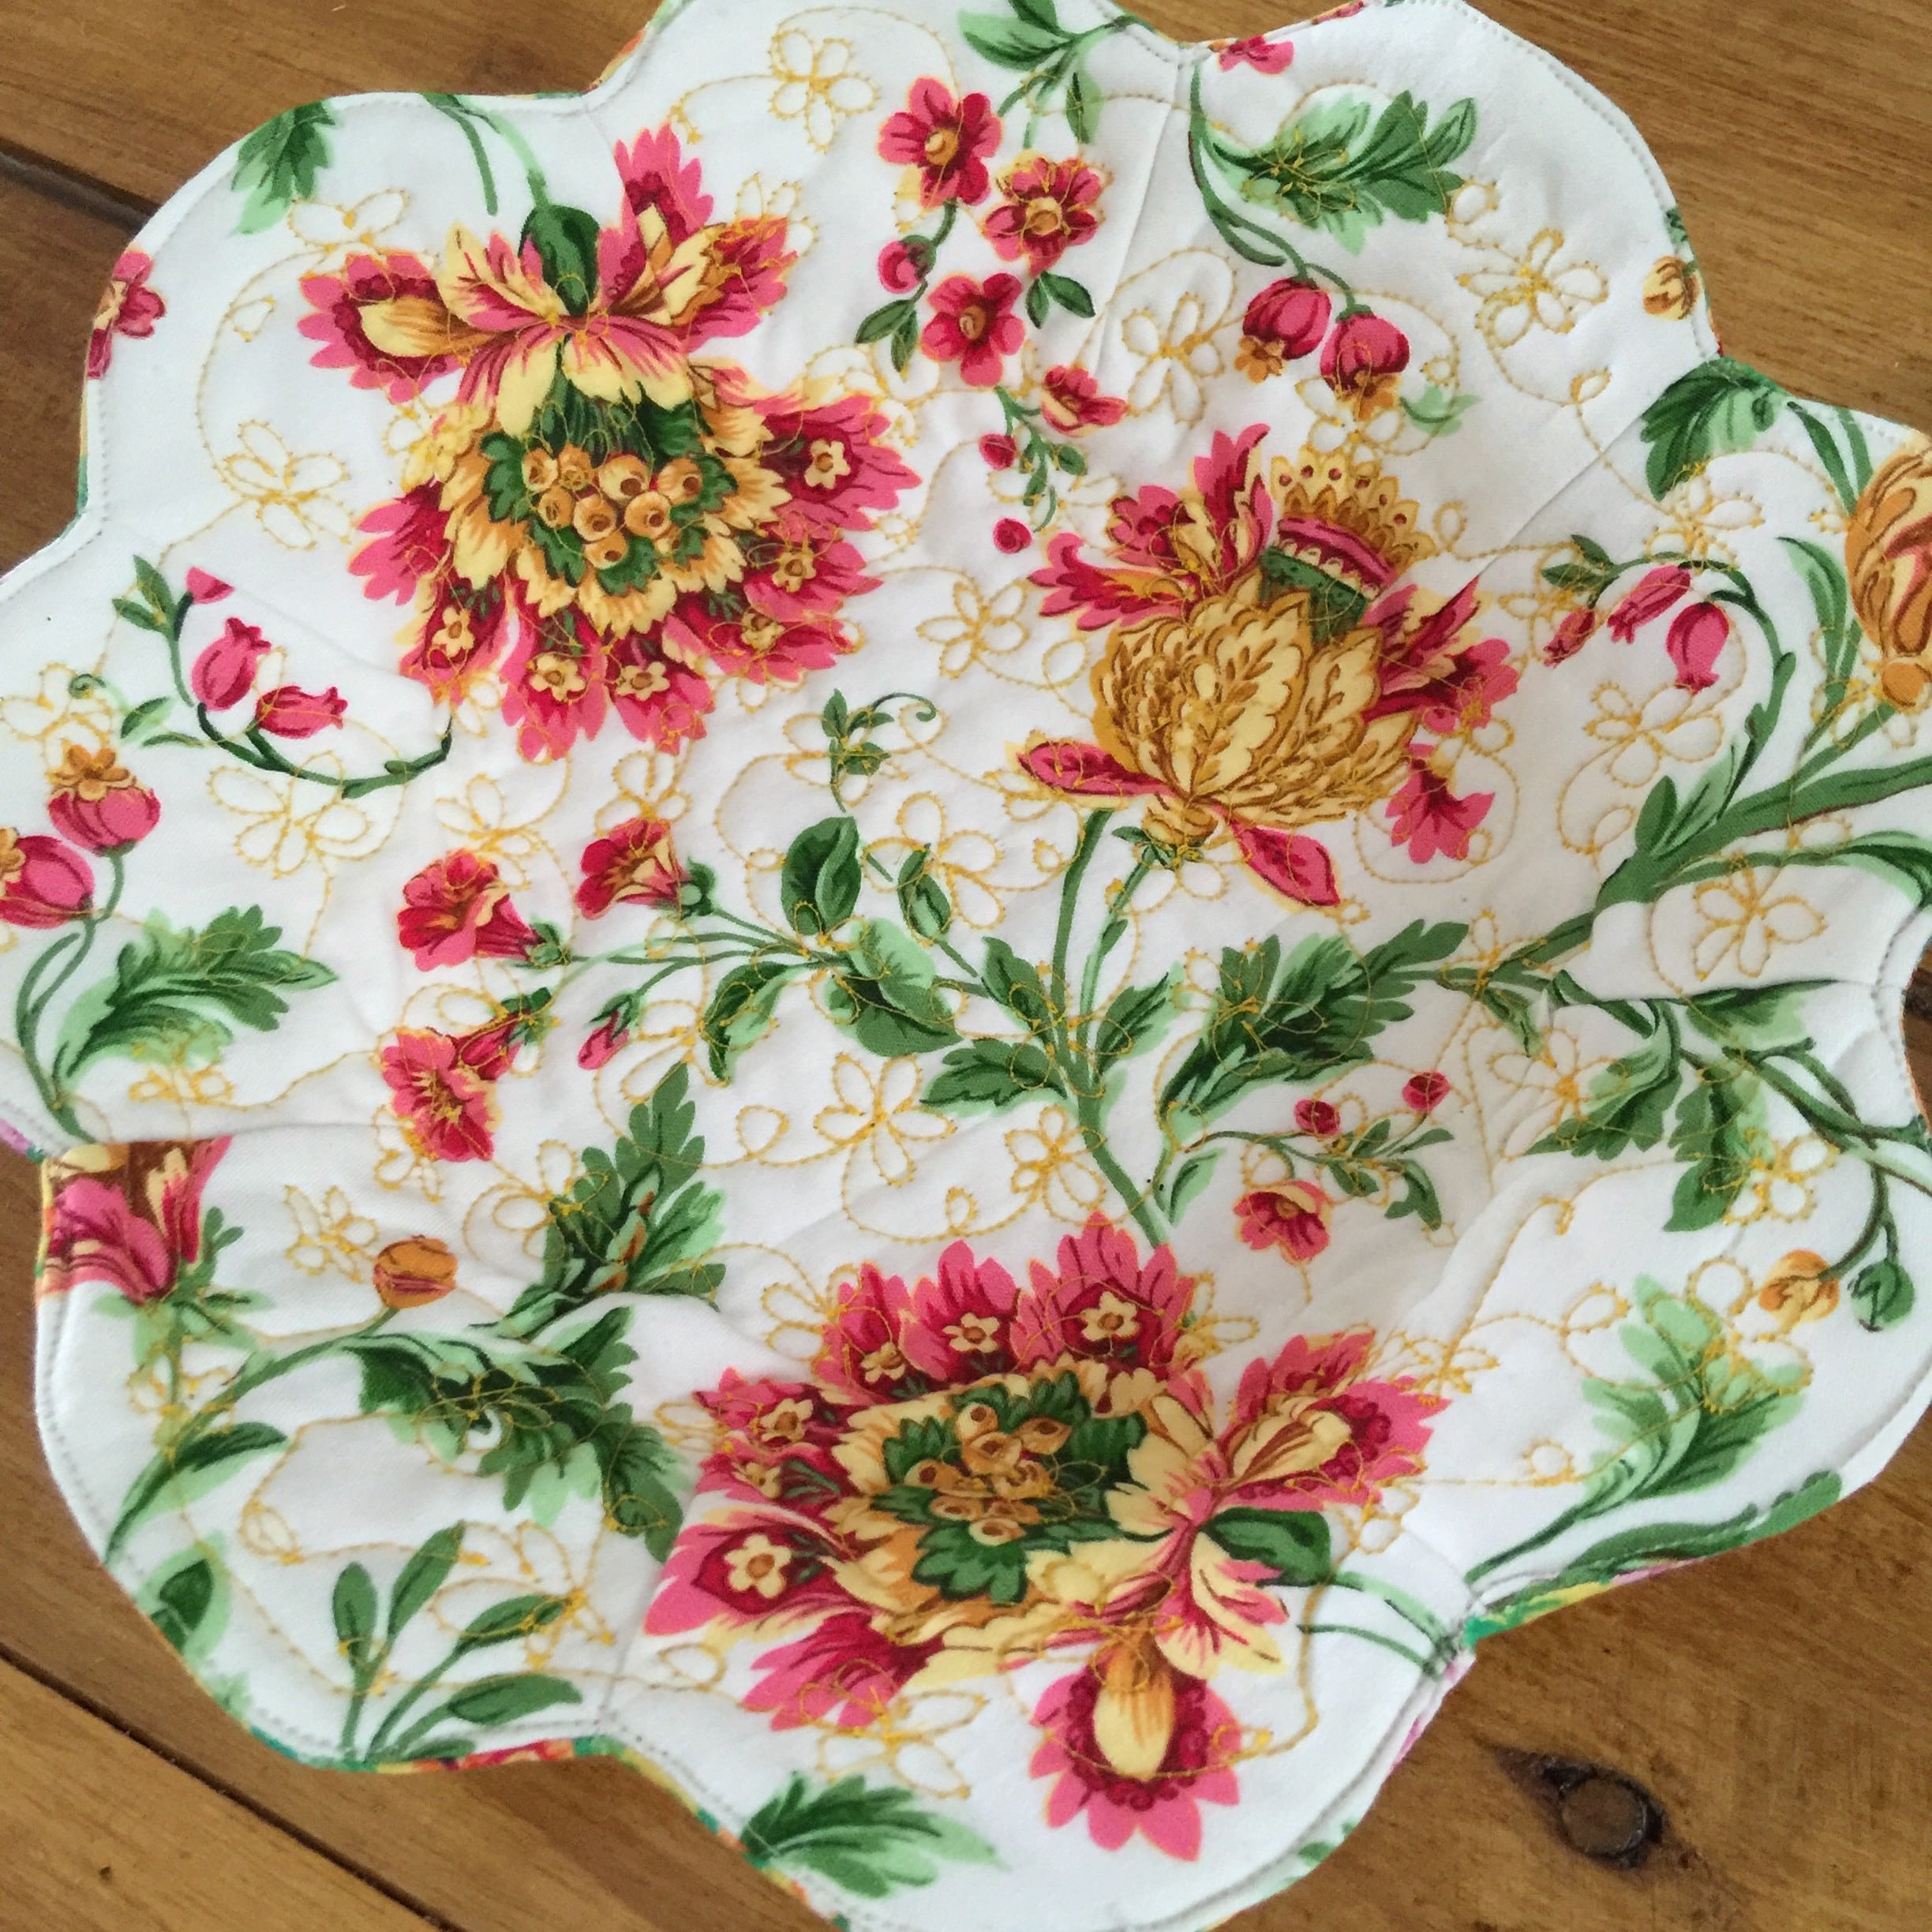
Now the bowl is ready for quilting. I have free motion quilted my bowl, but if you don’t like FMQ, just do some straight line quilting to give the bowl some shape.
If you enjoyed this post im pretty sure you will like this one too!
Happy Day Microwave Bowl Holder Pattern
or this one
Quilted Scrap Fabric Basket Upsize It Tutorial
Or…..
Orange Peel Quilt Blocks Pattern
Happy sewing.
Susie
© Susan Stuklis 2015
Do my eyes deceive me or are you using an antique sewing machine?
No wonder I couldn’t figure this out. Your instructions say 1 piece of batting. No where does it say 2. Yet, you’re supposed to end up with 2 bowls to tuck insude each other and sew together. Very confusing.
Dear Kimberly, I have updated the post, I hope it will yield a bit more clarity. Thank you so much for your comments.
I have something similar and I fold the fabric the way you folded the pattern, cut fabric while folded. So easy to cut this way. Nice tutorial!
Thank you, Susie for this great tutorial.
Very cute. How big is the paper you start with to make the flower template? TiA Becky
Hi Becky. I just used kitchen baking paper which is 12″ wide.
This looks delightful. Can’t wait to try it out💖❤️