
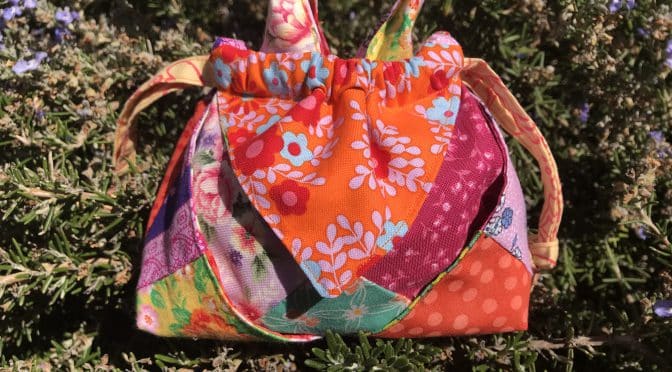
Little Origami Patchwork Bag Tutorial
Origami bags are delightful. They can be made from any size square of fabric. I had some spare patches and that inspired me to create a Patchwork Origami Bag. The more fabrics the merrier, as small amounts of the differing fabrics will peek through in the final construction as you will see.
On this occasion, I am making a handbag for a little girl. Having said that, by adding longer handles, it would make a terrific cross body mobile phone bag, for when you need hands free.
All fabrics have been washed and pressed before commencing. All seams based on 1/4″, unless otherwise specified.
Finished bag size approximately 6″ x 8″.
This is how I did it.
Requirements for the Little Origami Patchwork Bag
Method
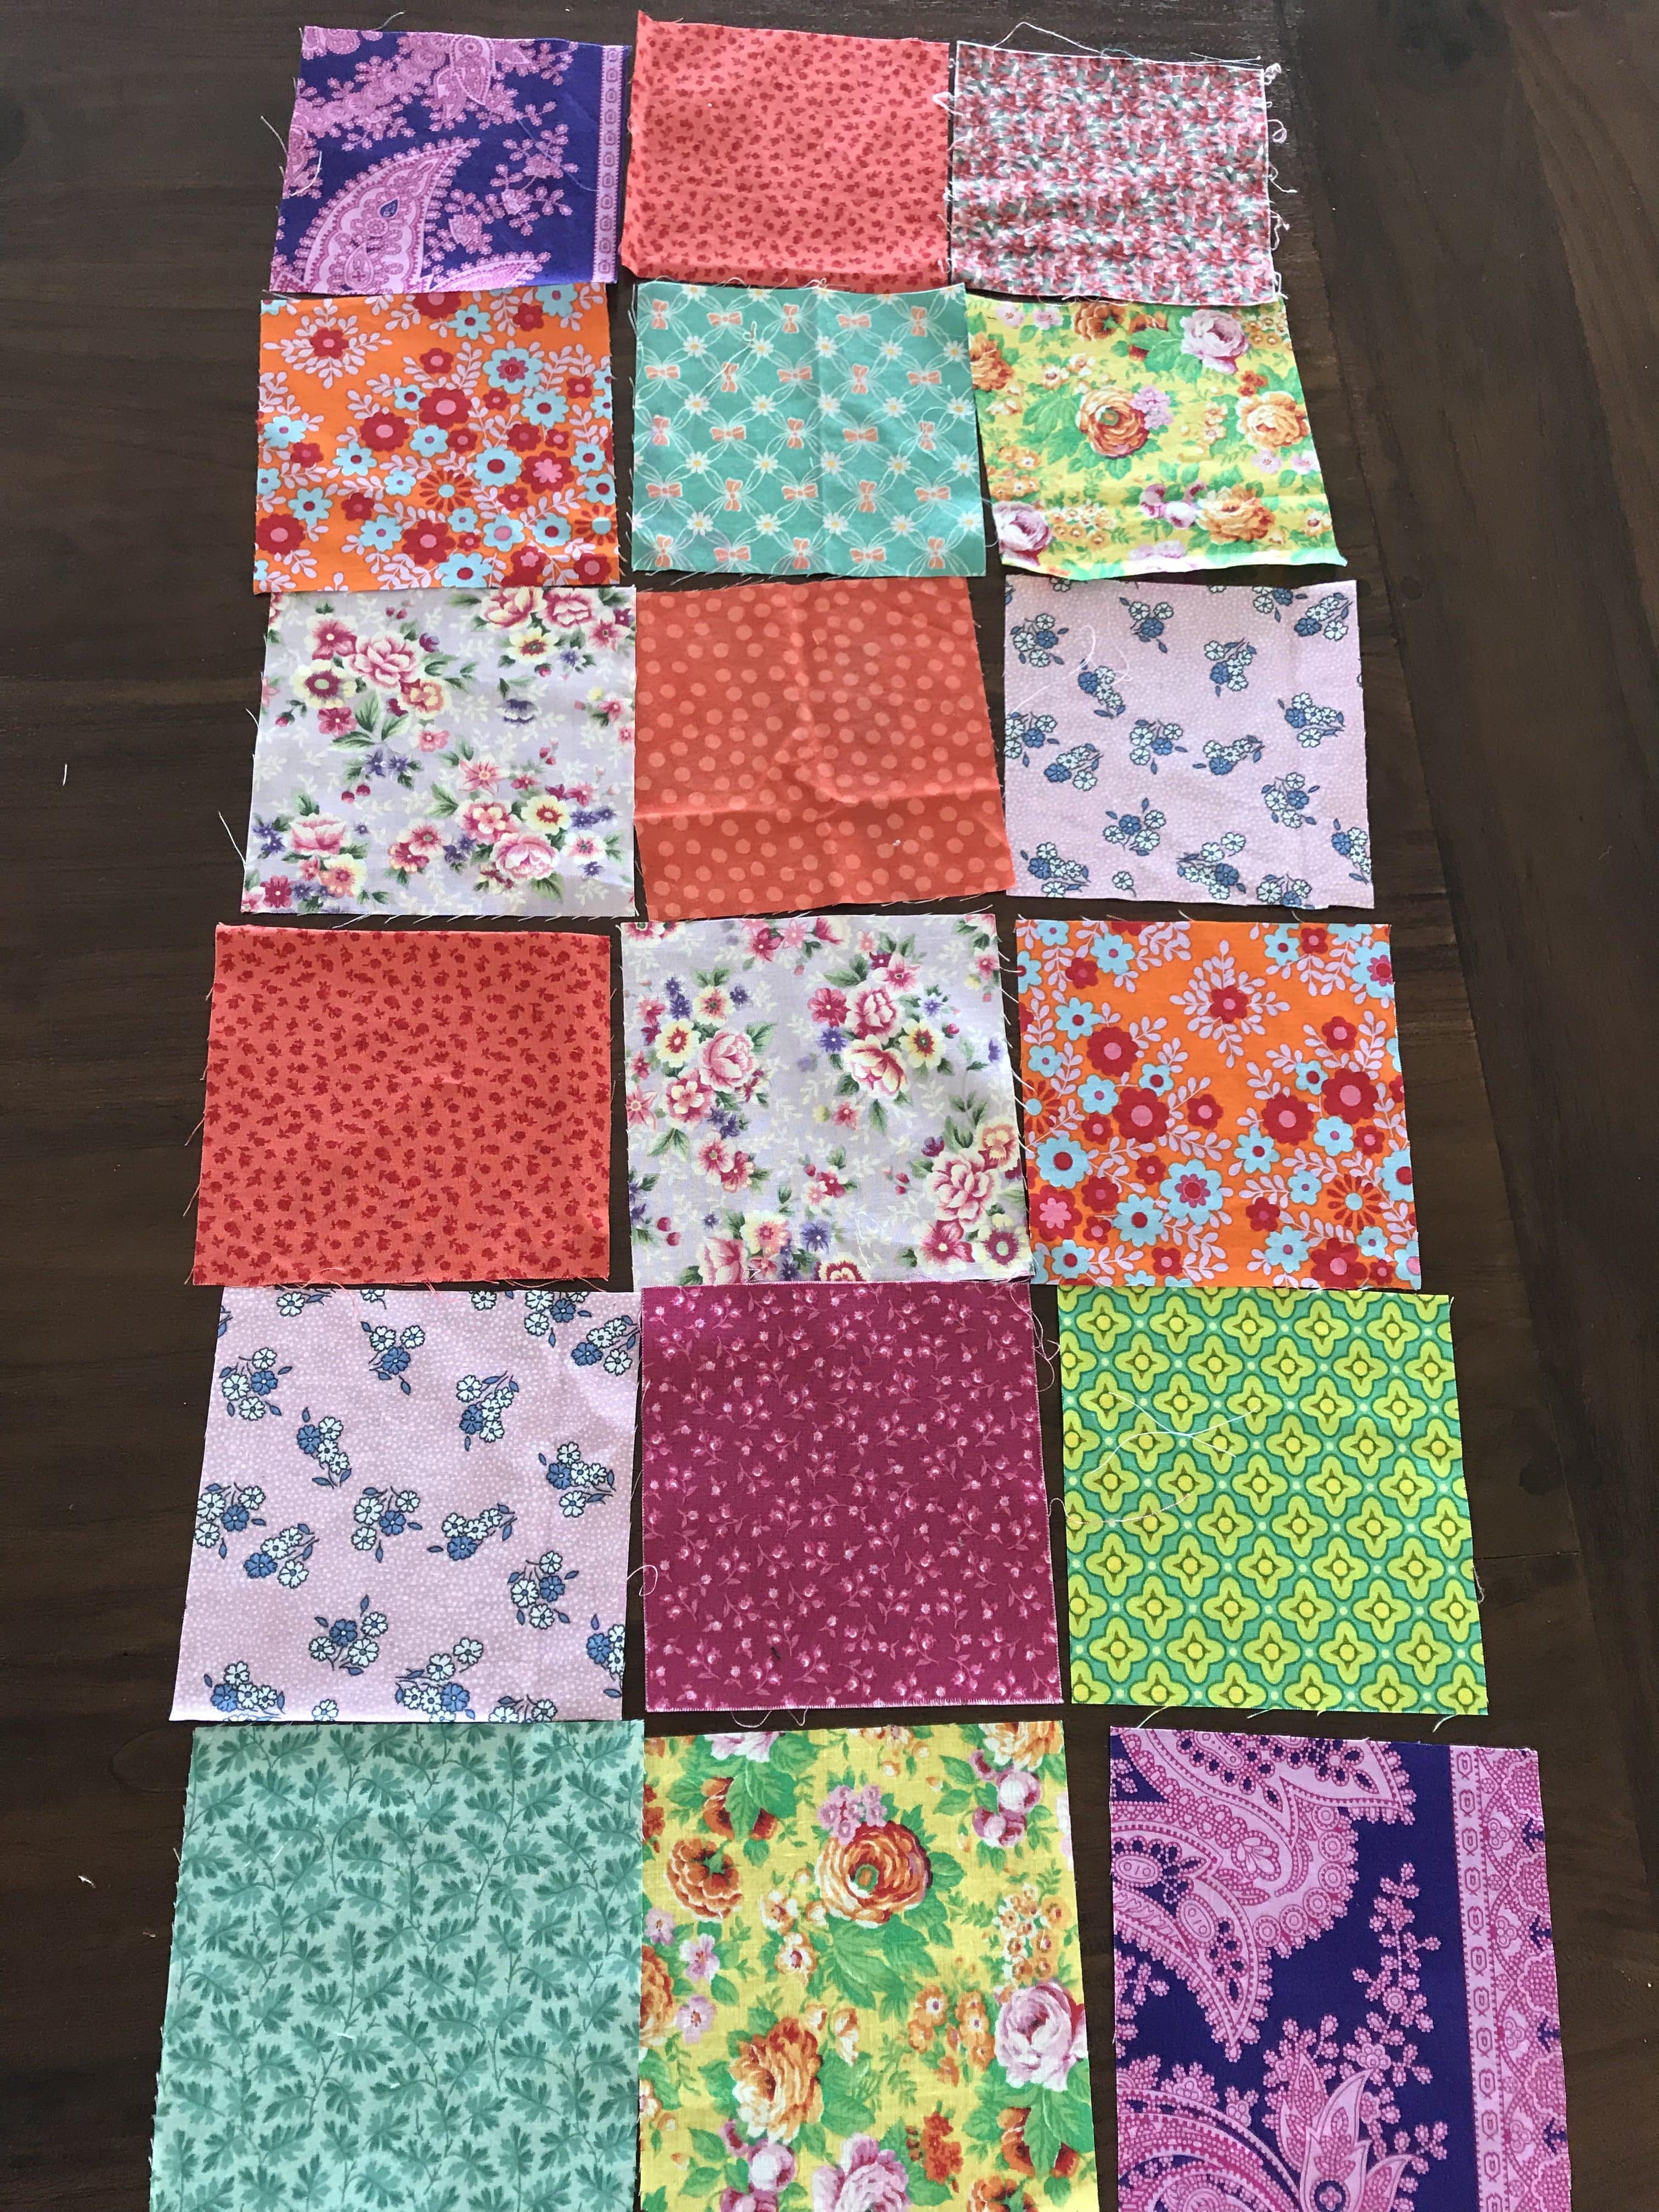
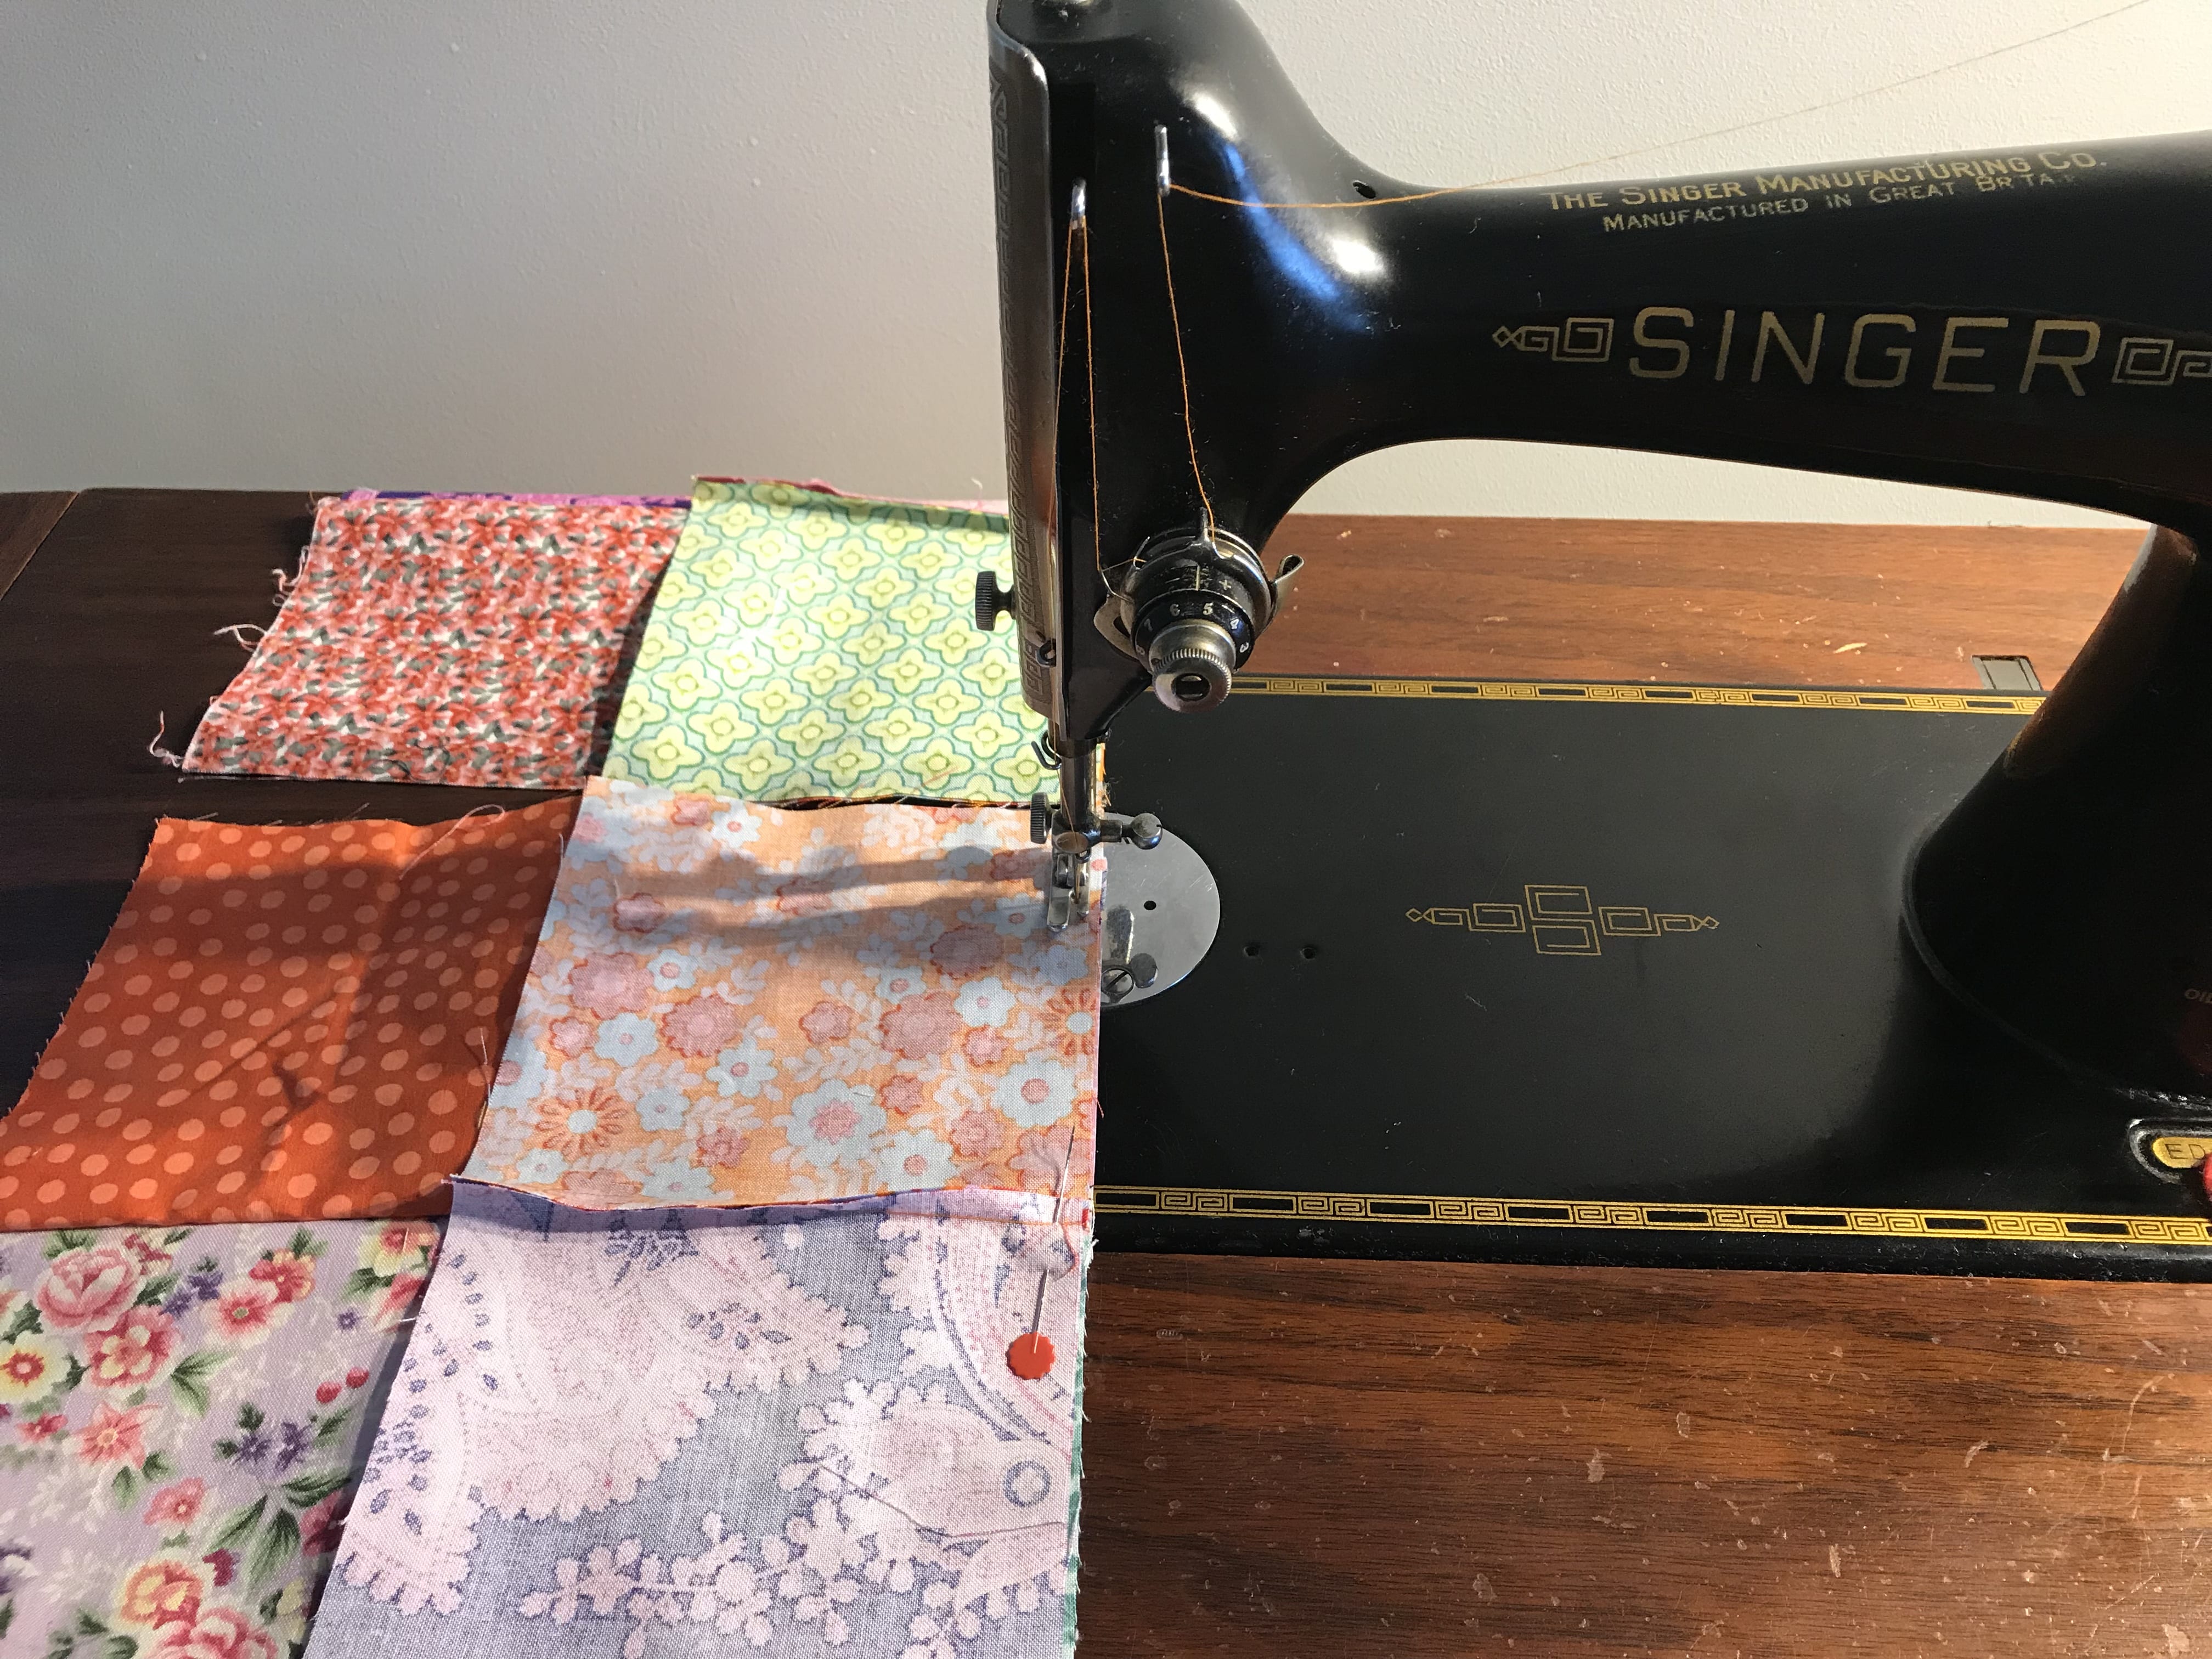
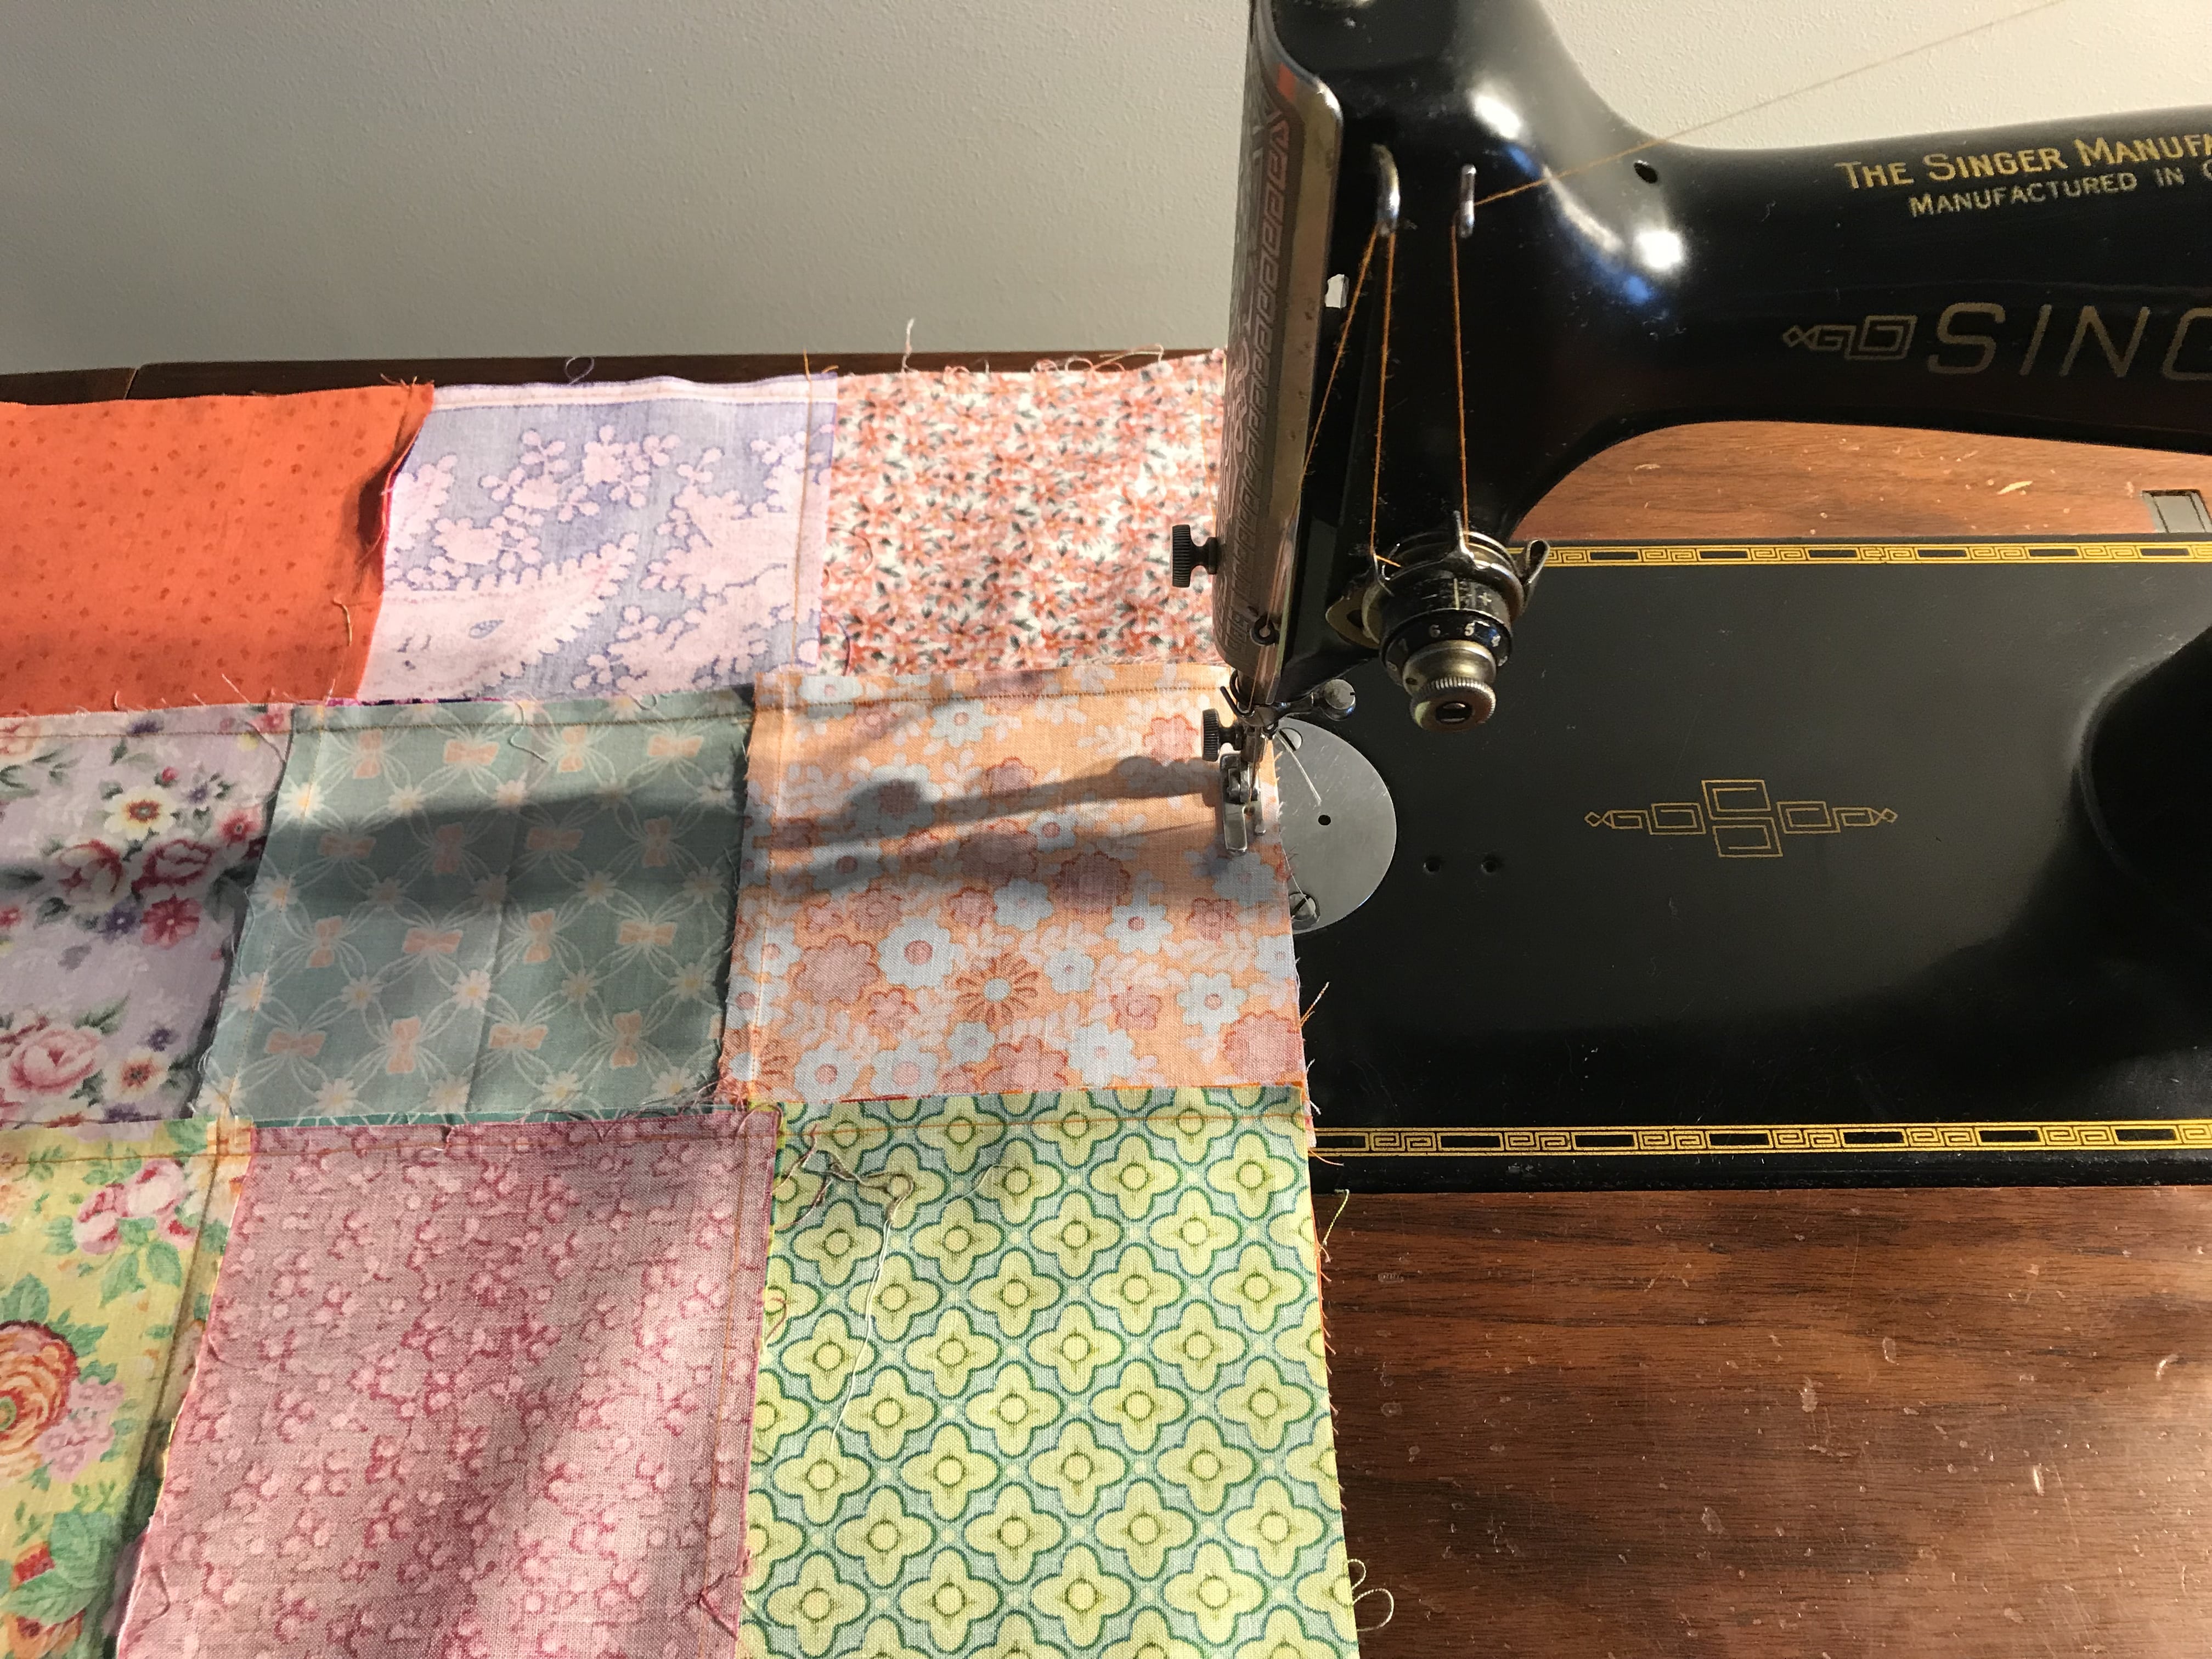
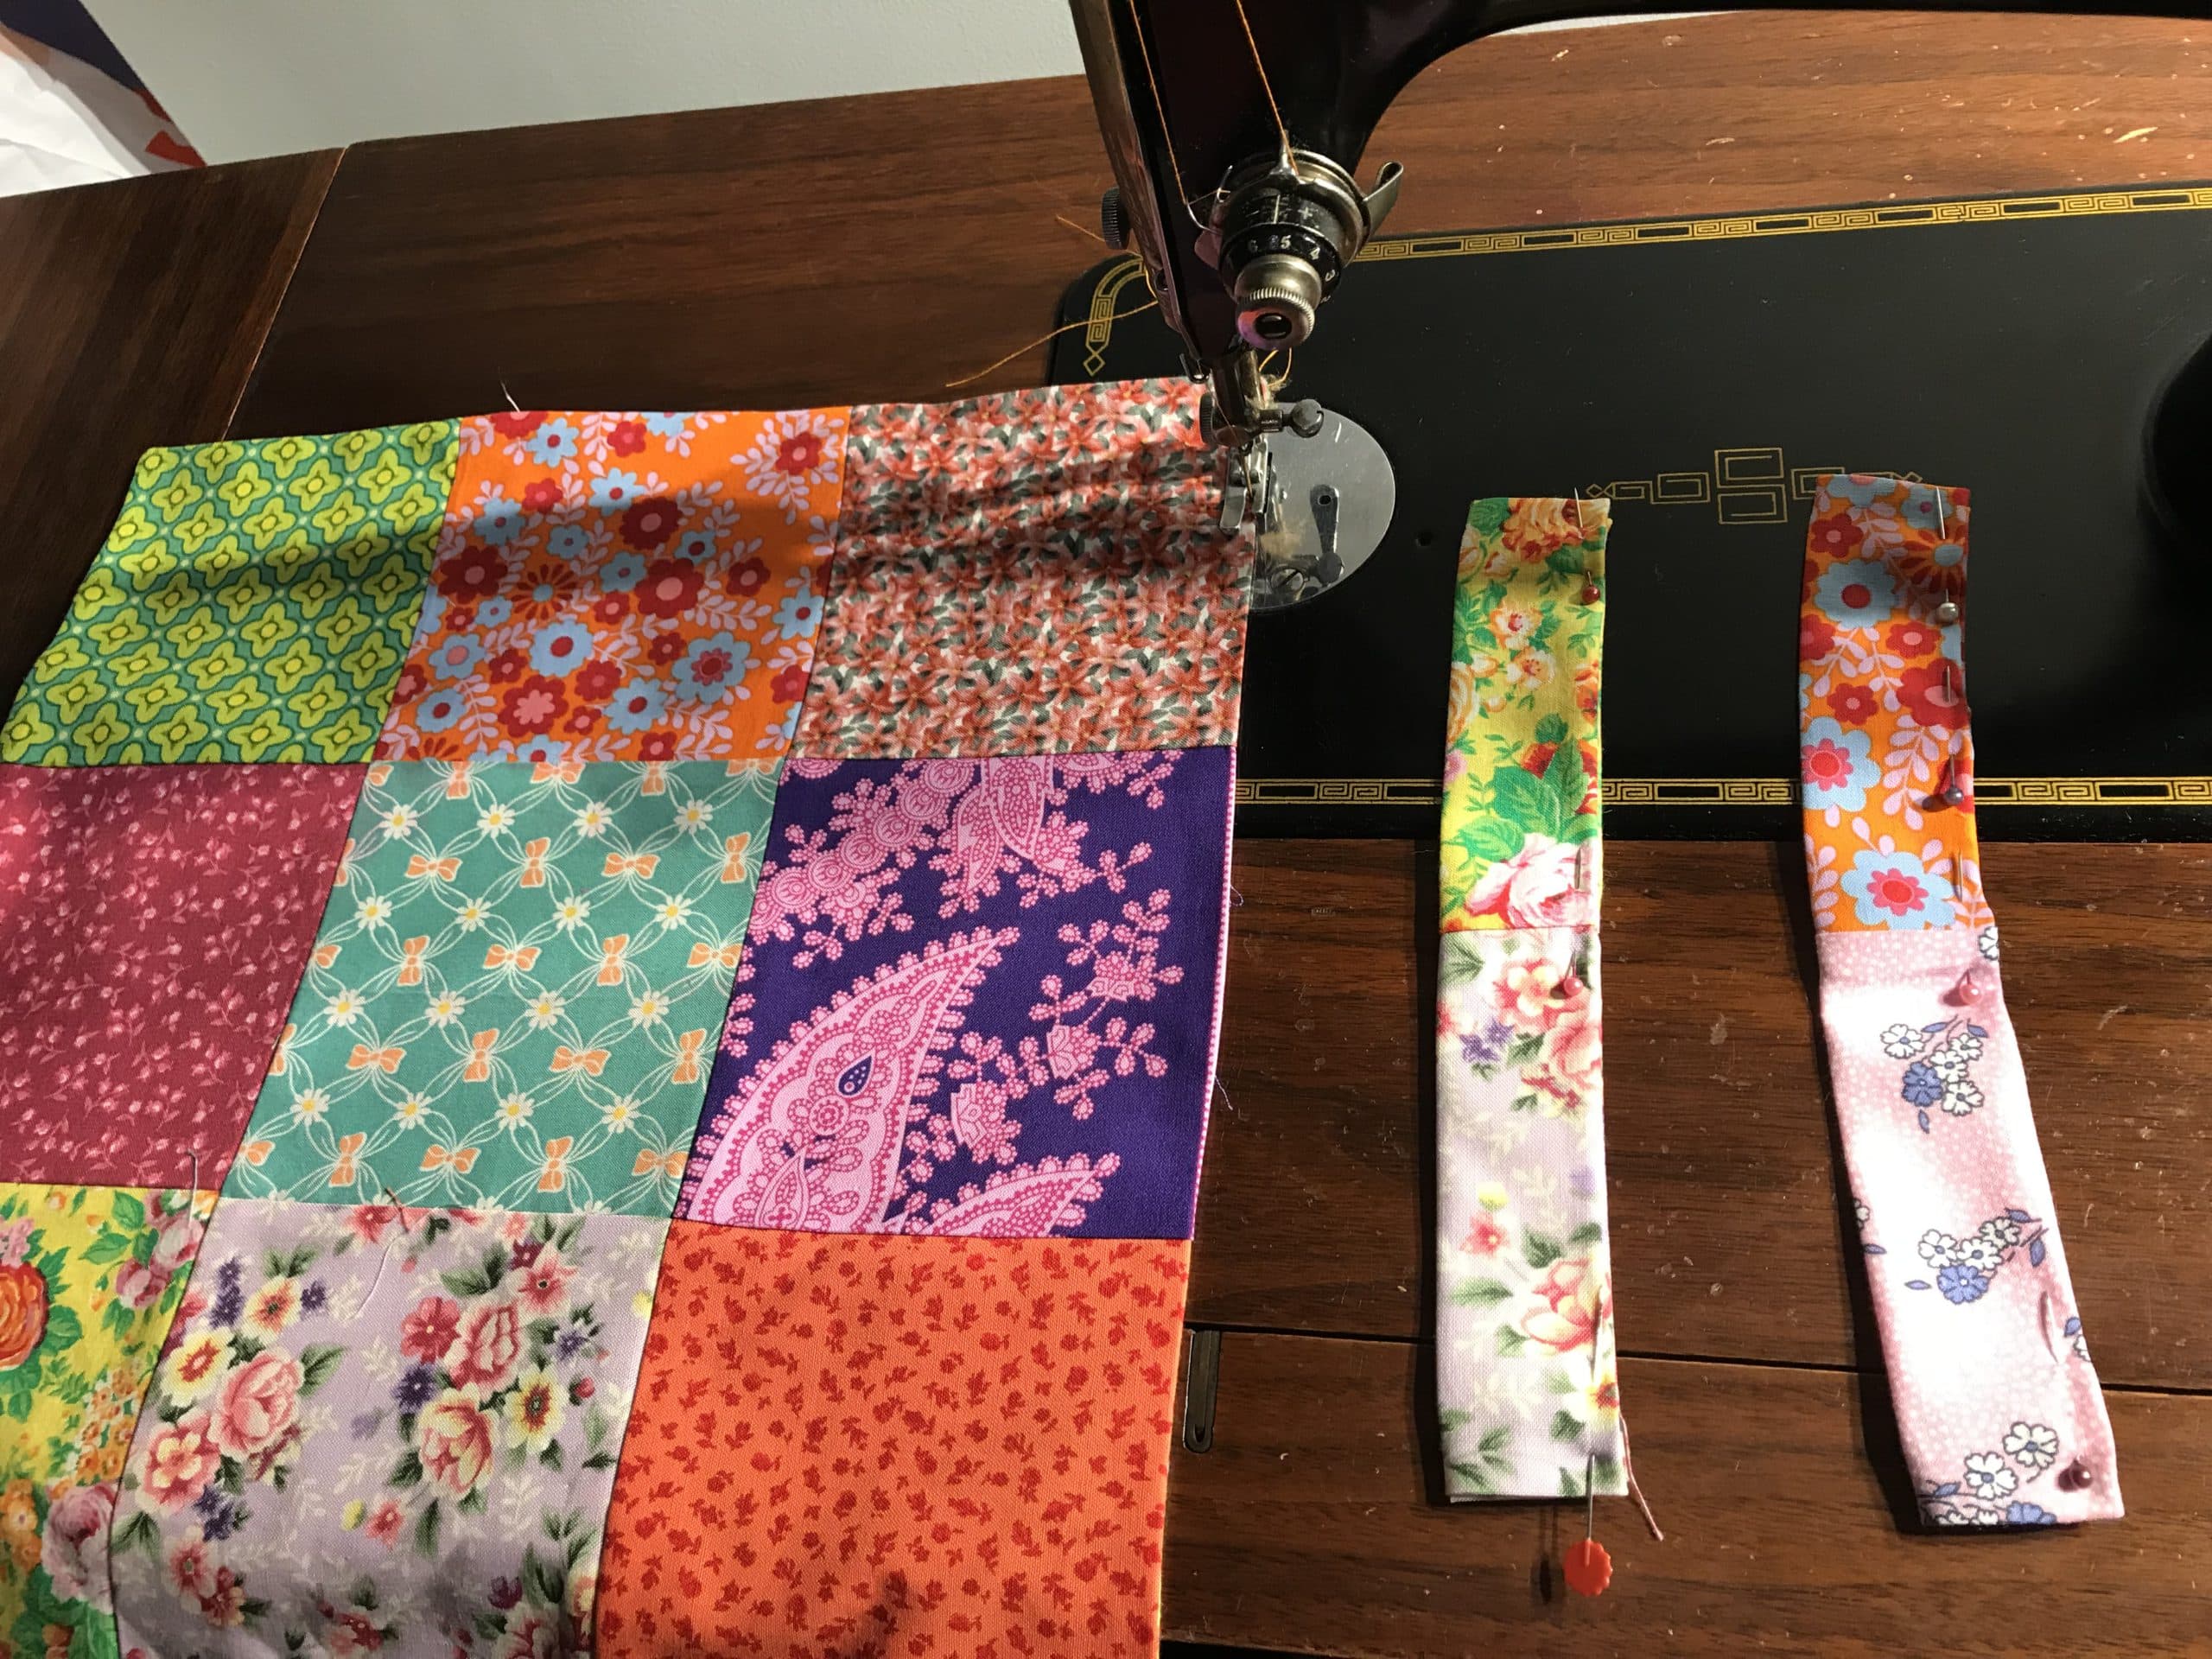
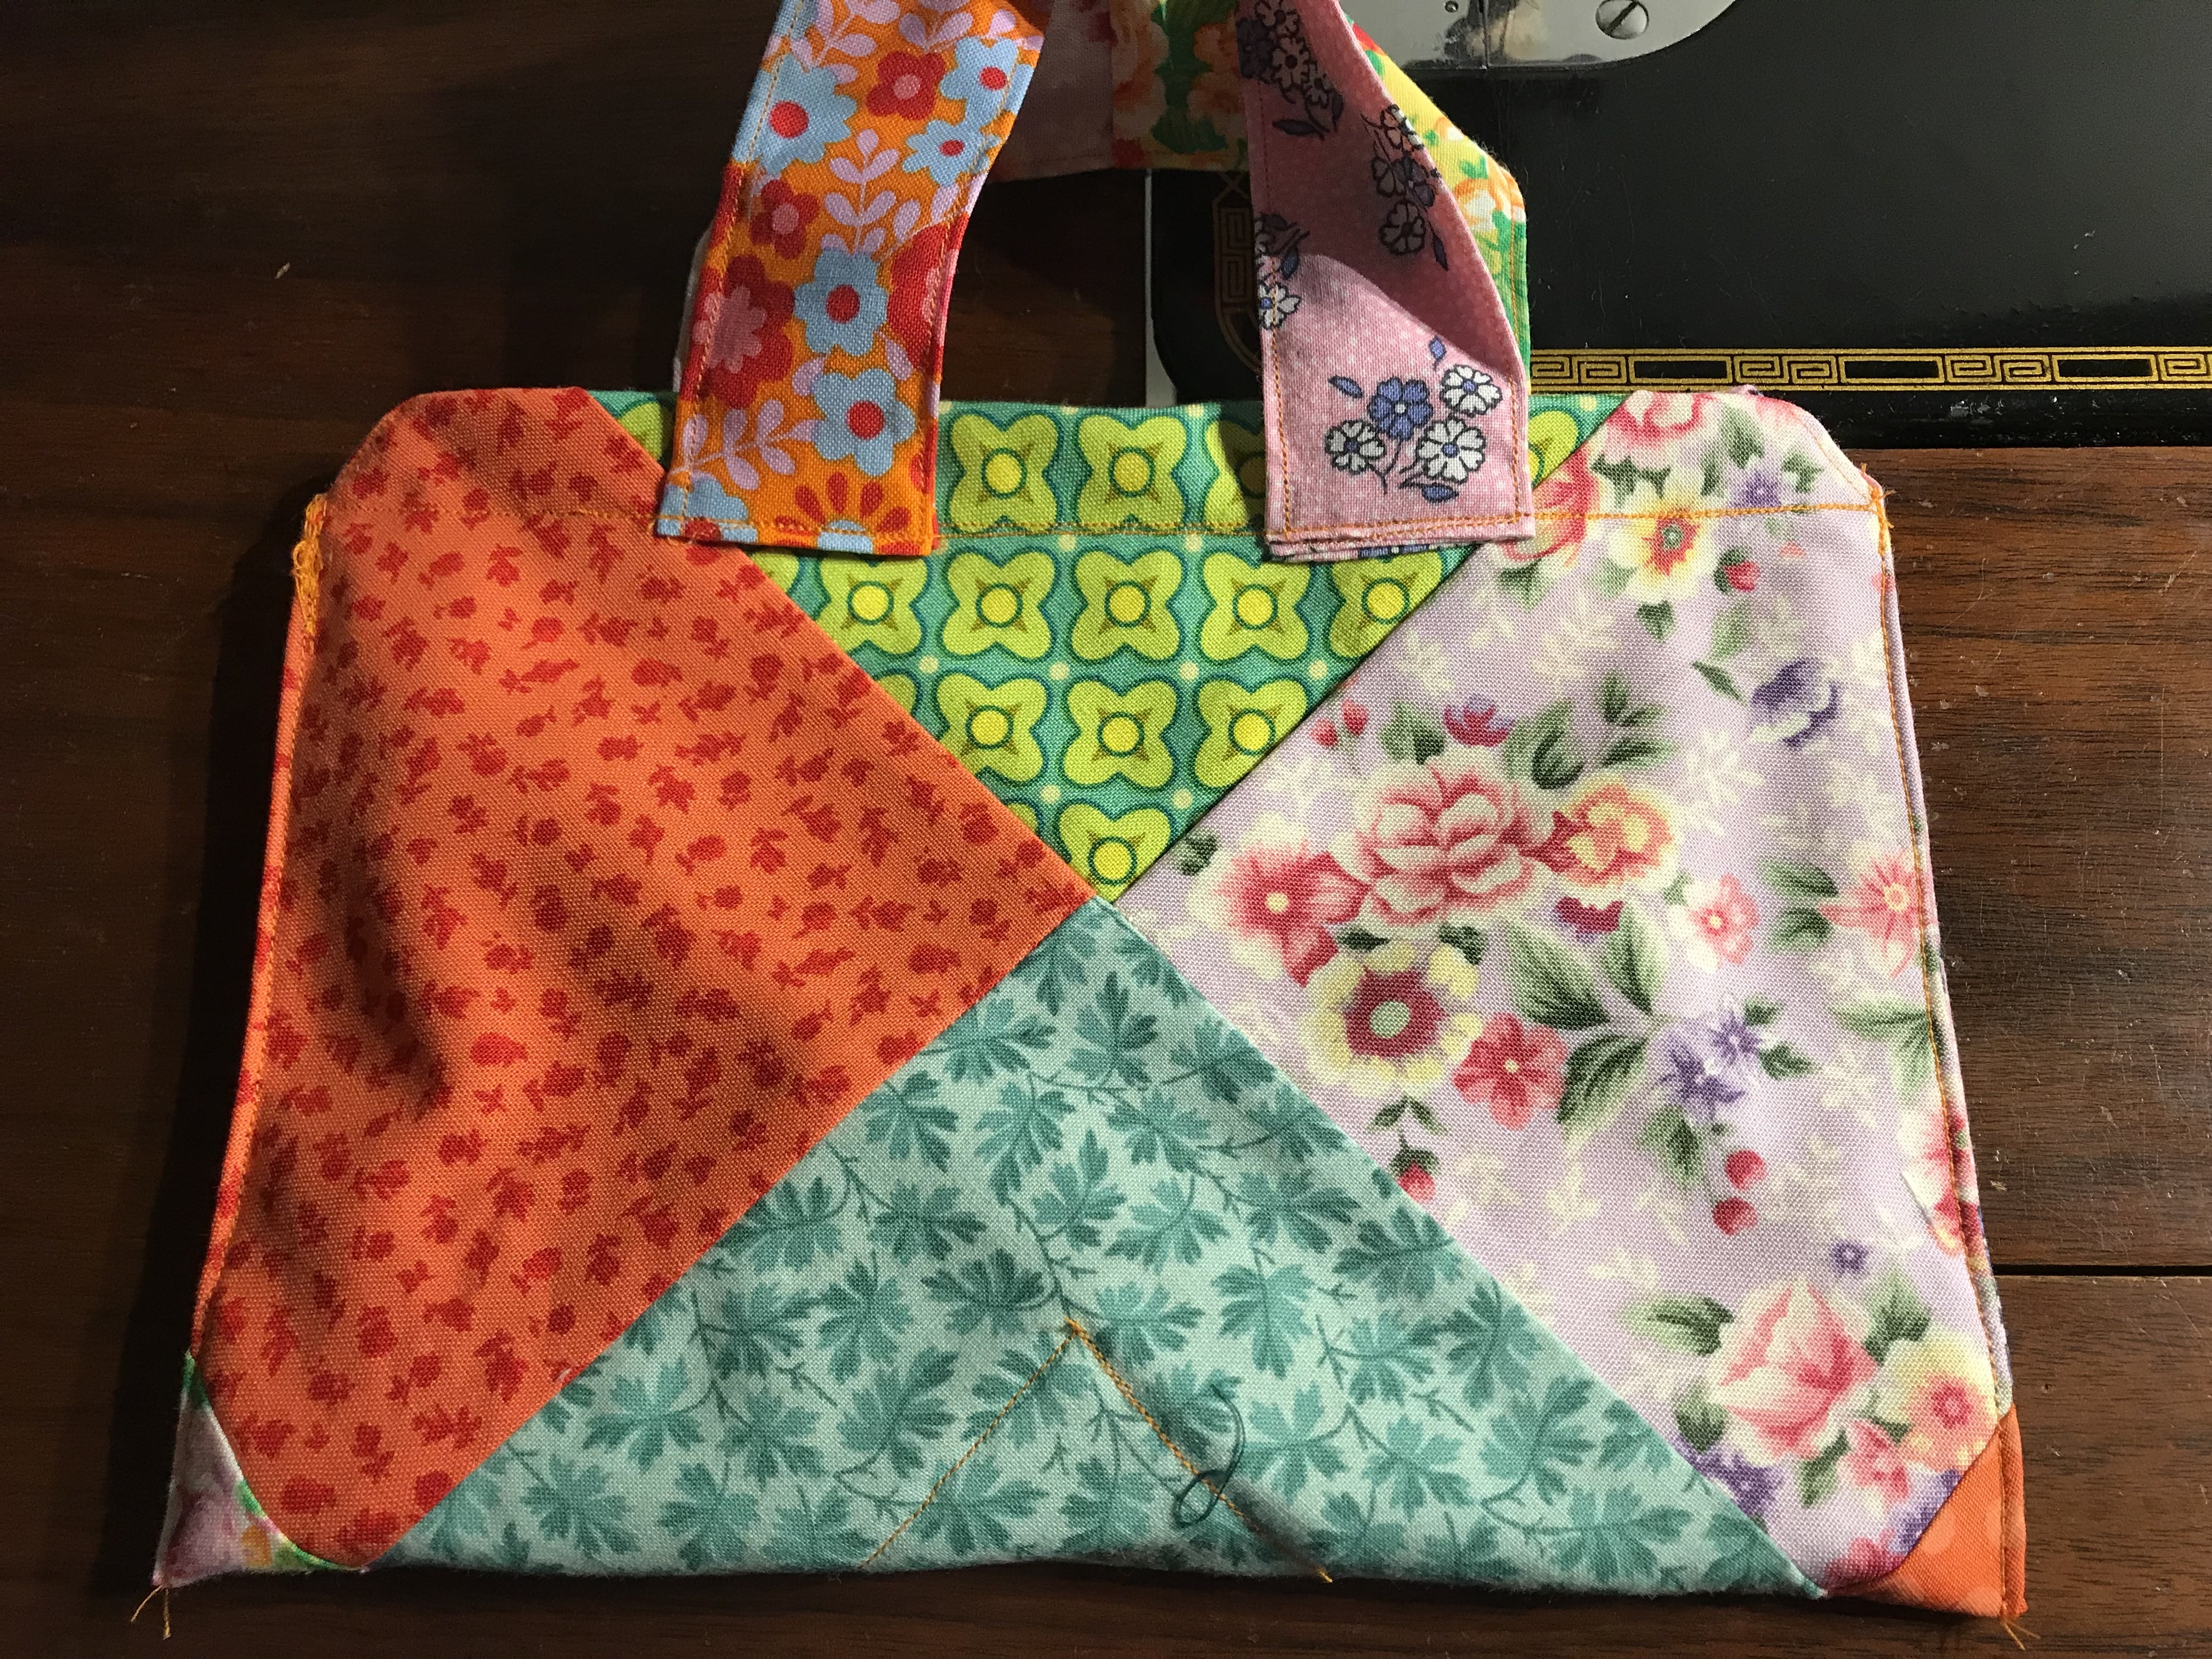
Lay out 18 squares in two sets of Nine Patches. Sew together into two Nine Patches. Press.
Today Im using a Singer 201k treadle, C1947.
Put the two Nine Patches right sides together. Sew a 1/4″ seam all around the edge leaving a 5″ opening. Clip the corners. Turn to the right side. Press. Turn under 1/4″ seam allowance at the remaining opening.
Top stitch very close to the edge around the outside.
To make the handles. With the remainder 4 of 5″ x 5″ squares, sew into two sets of two. Turn down a 1/4″ seam at each short end. Then fold each long side to the centre, then in half lengthwise. Top stitch all the way around each edge of both handles.
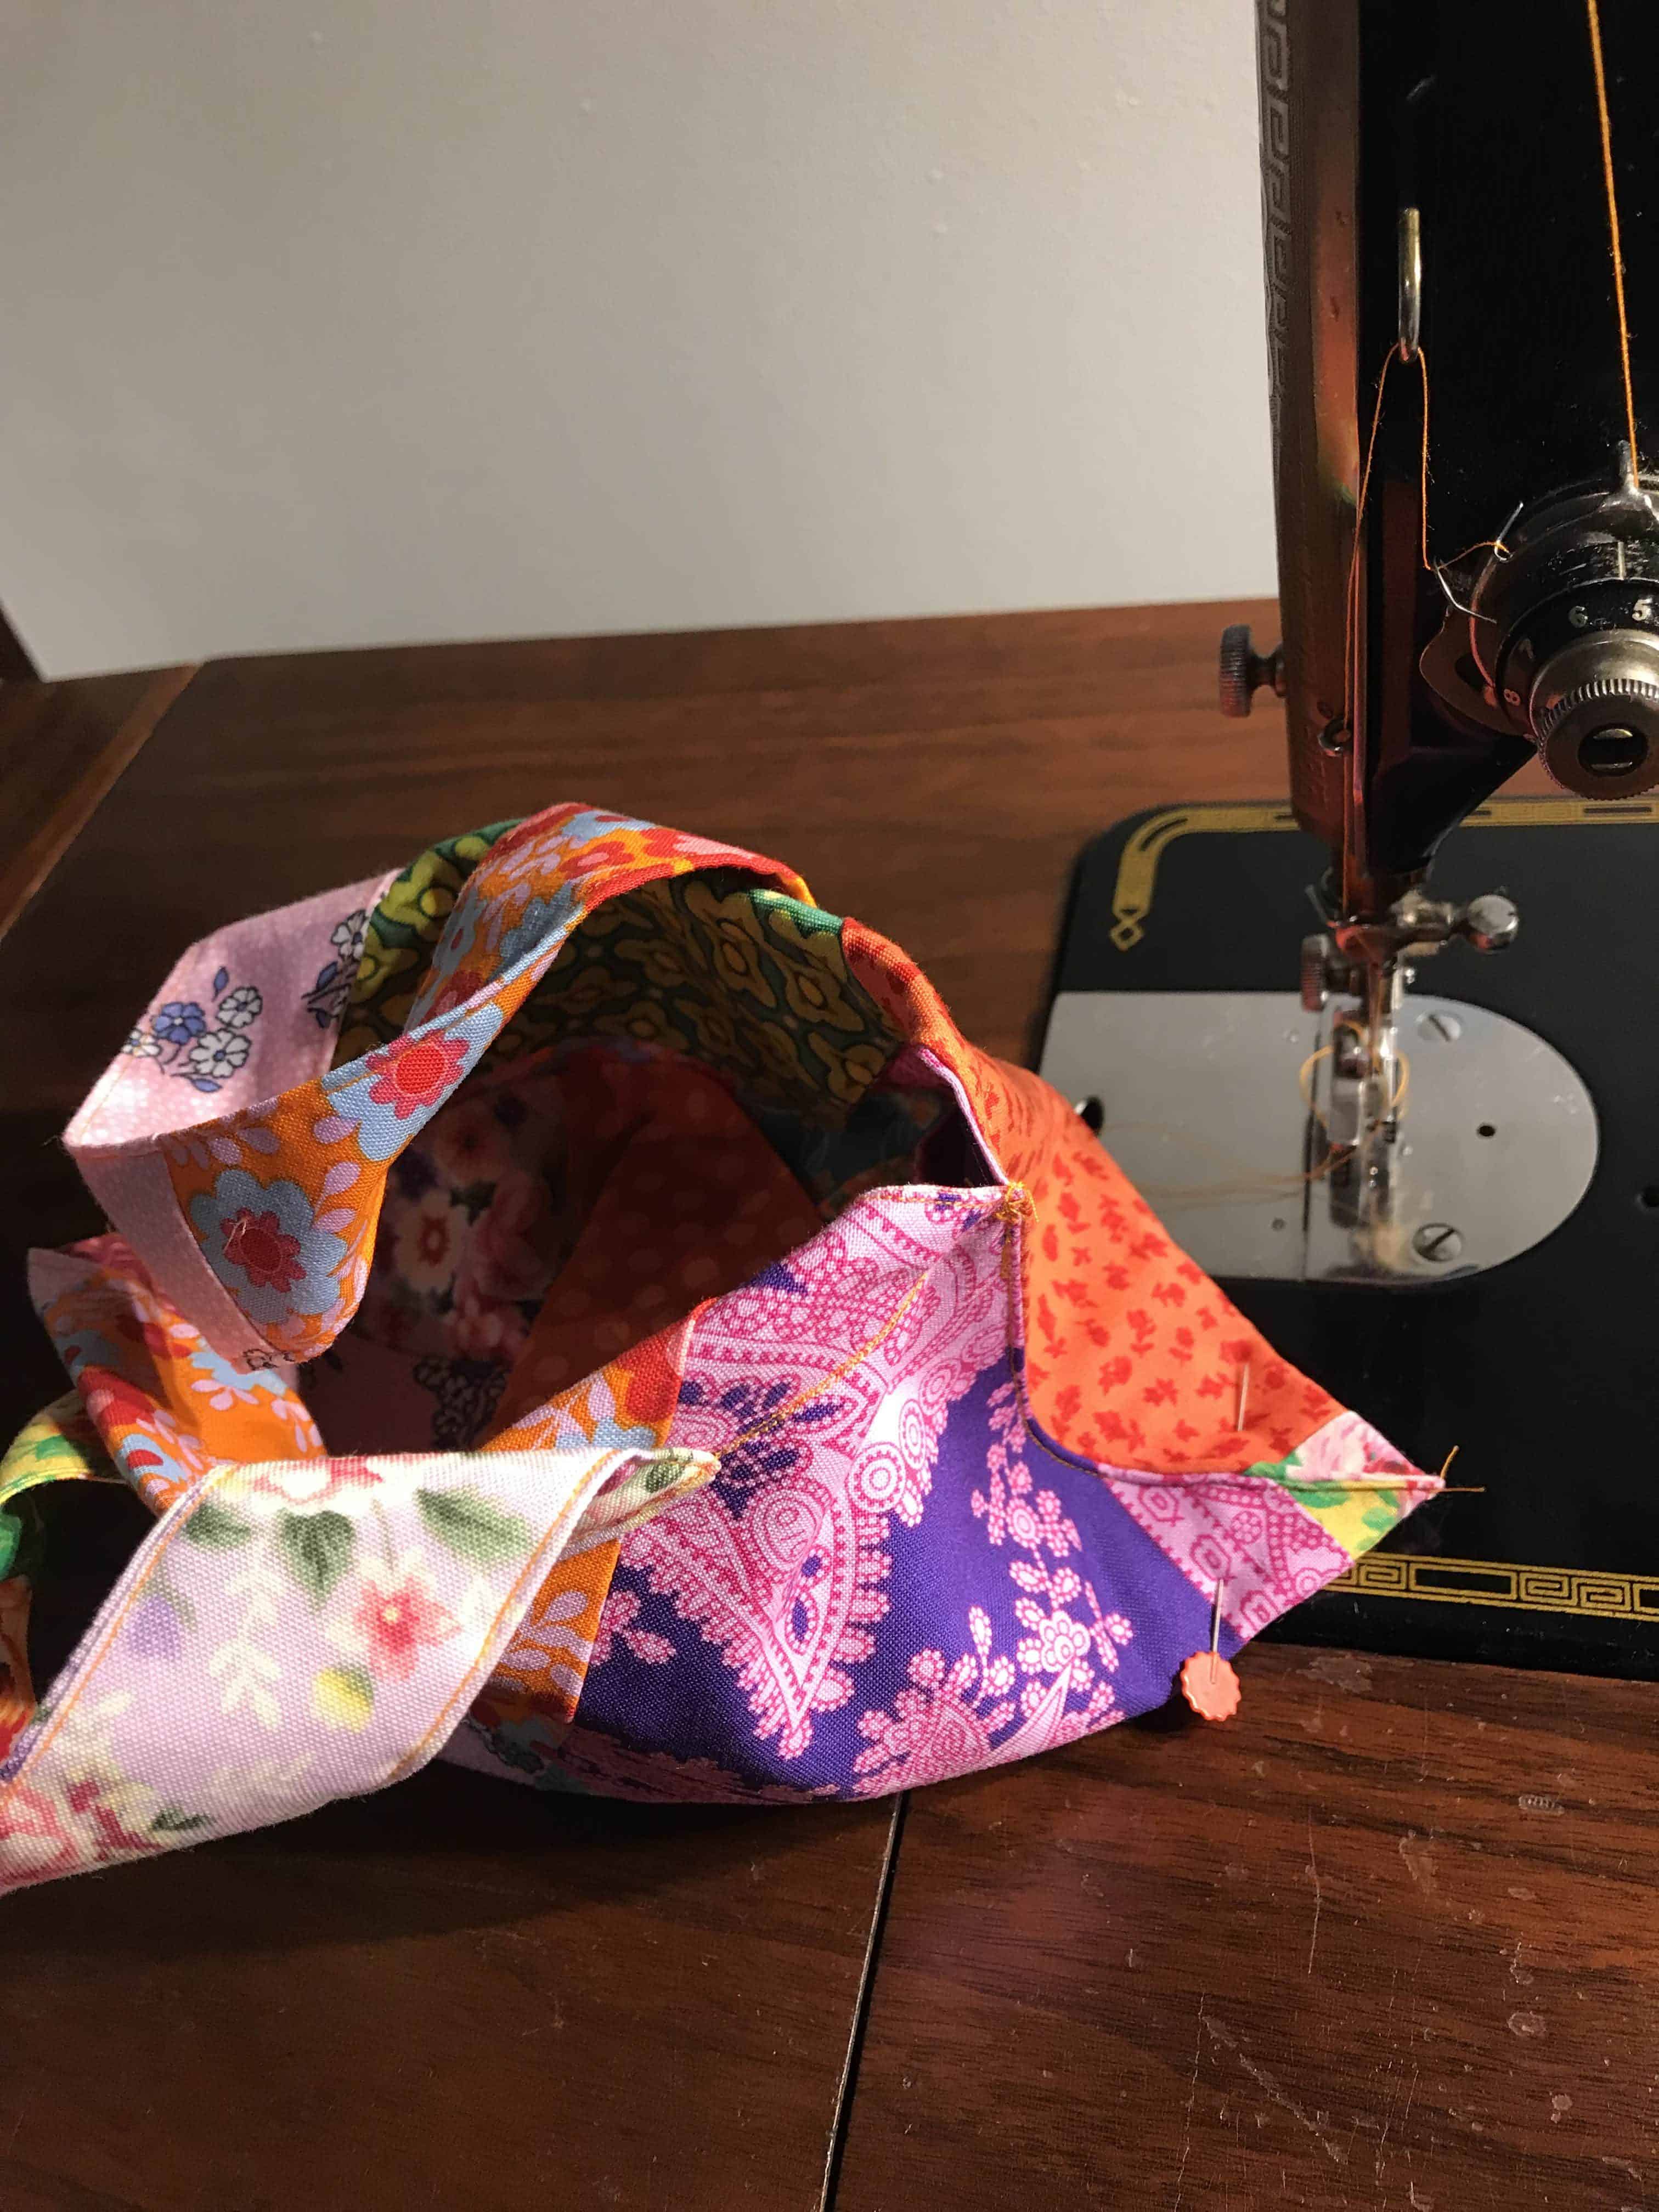
Turn the piece so that it is diagonal to you. Fold two opposite sides toward the centre so that they overlap a bit in the centre as pictured below. The overlap is approximately 1 1/4” square. Pin to secure.
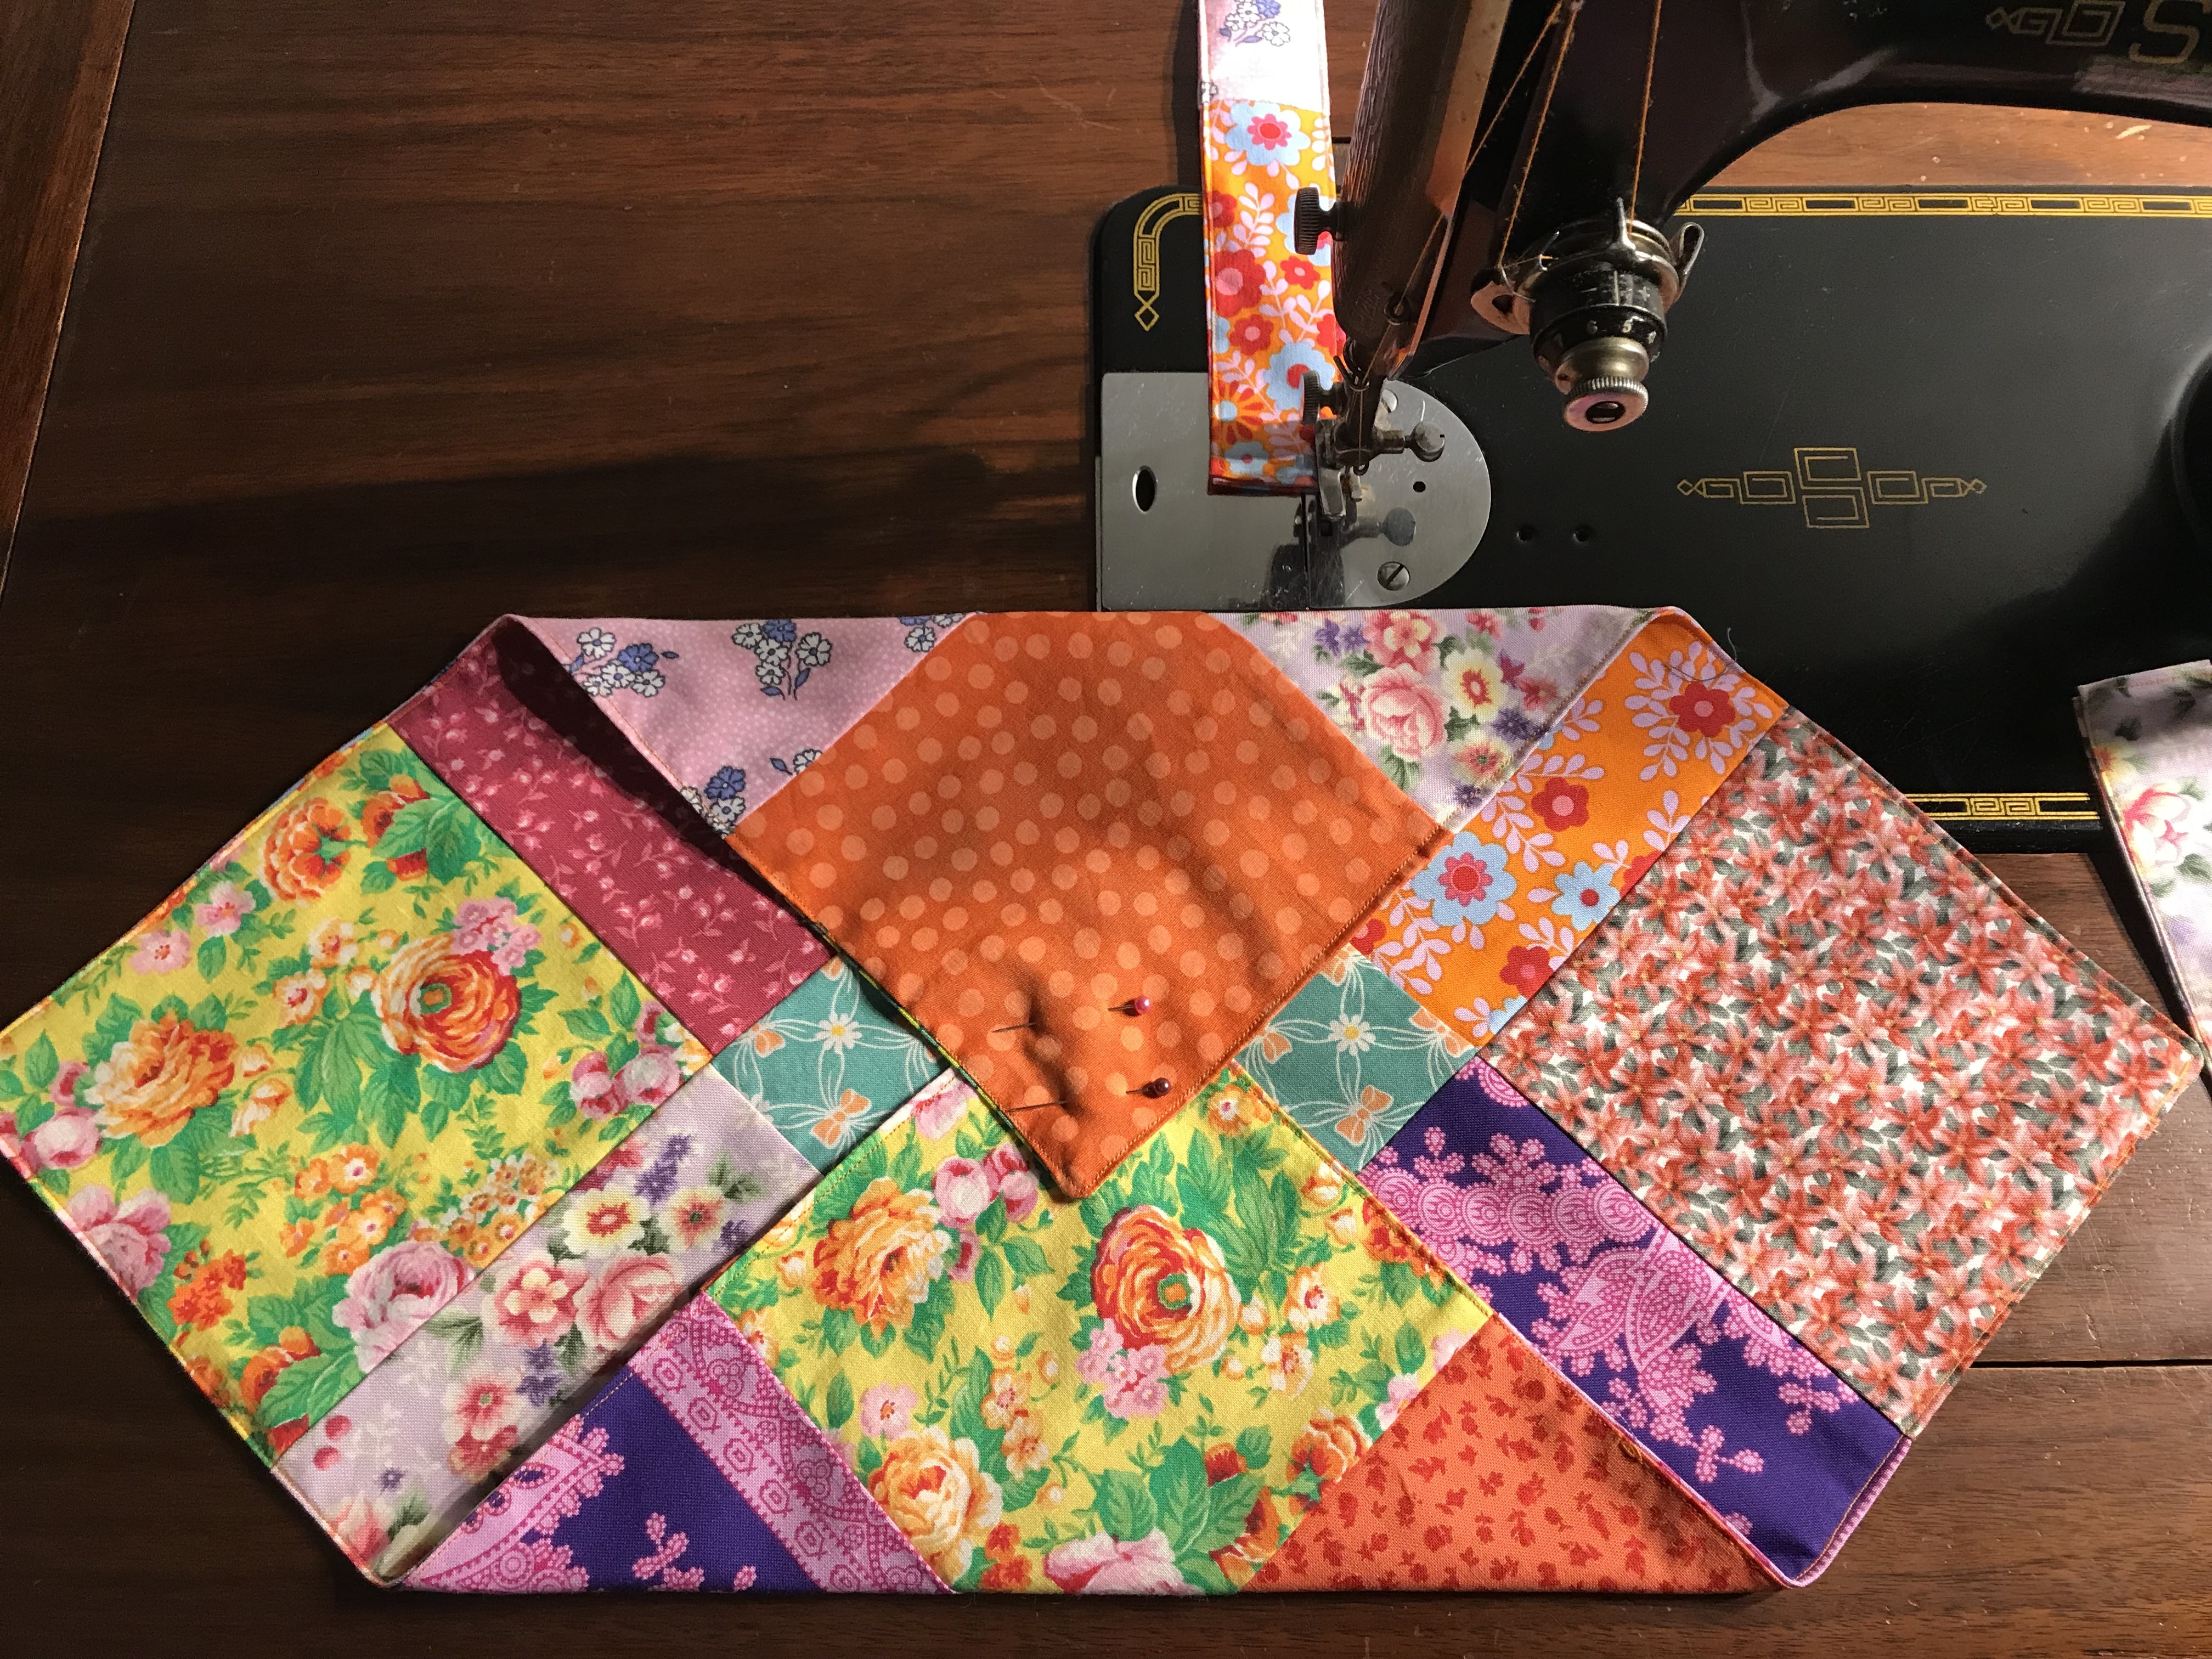
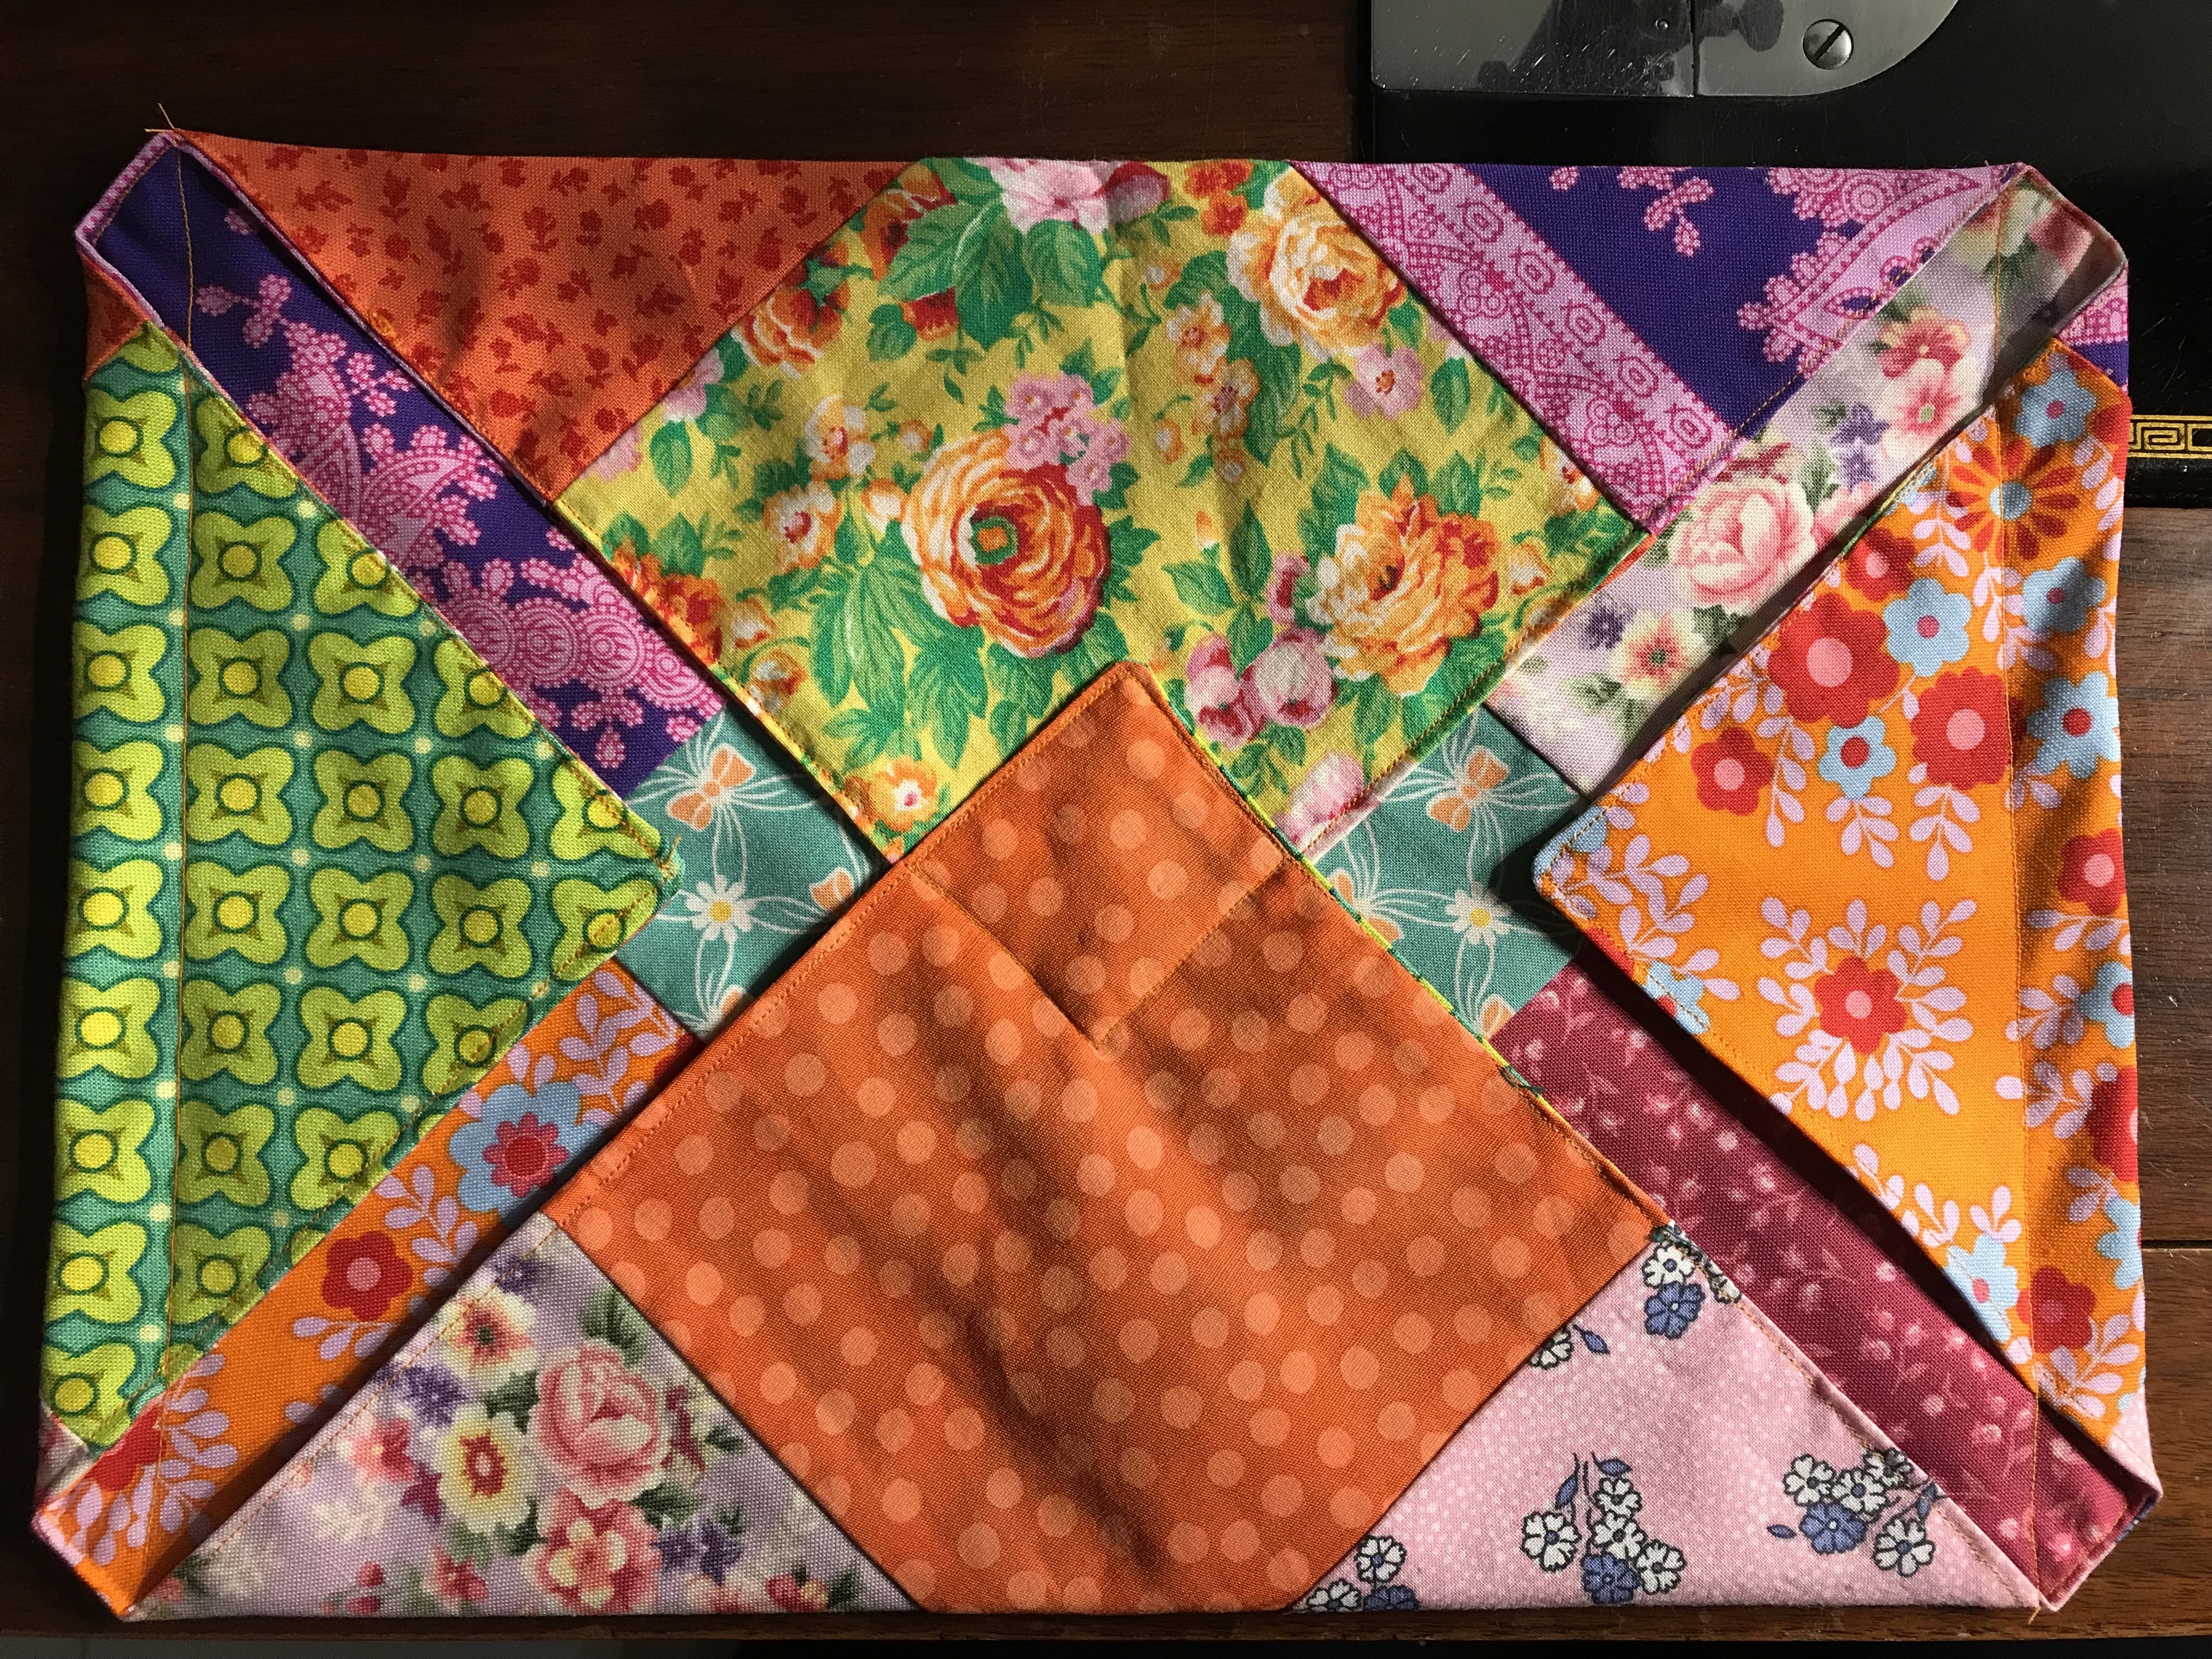
Carefully stitch down the square through all the layers. Fold the remaining two sides toward the centre. Leave a gap of about 1/2” from the edge of the opposite side. Stitch these two sides 1/2” from the edge. This will be the casing. This is the right side of the bag. See below.
Turn the whole piece over so that the wrong side is facing you. Position the handles, one on each side of the short ends of the bag. Line up the ends of the handles with the casing stitching lines and so that each end sits just inside the triangle on each end.
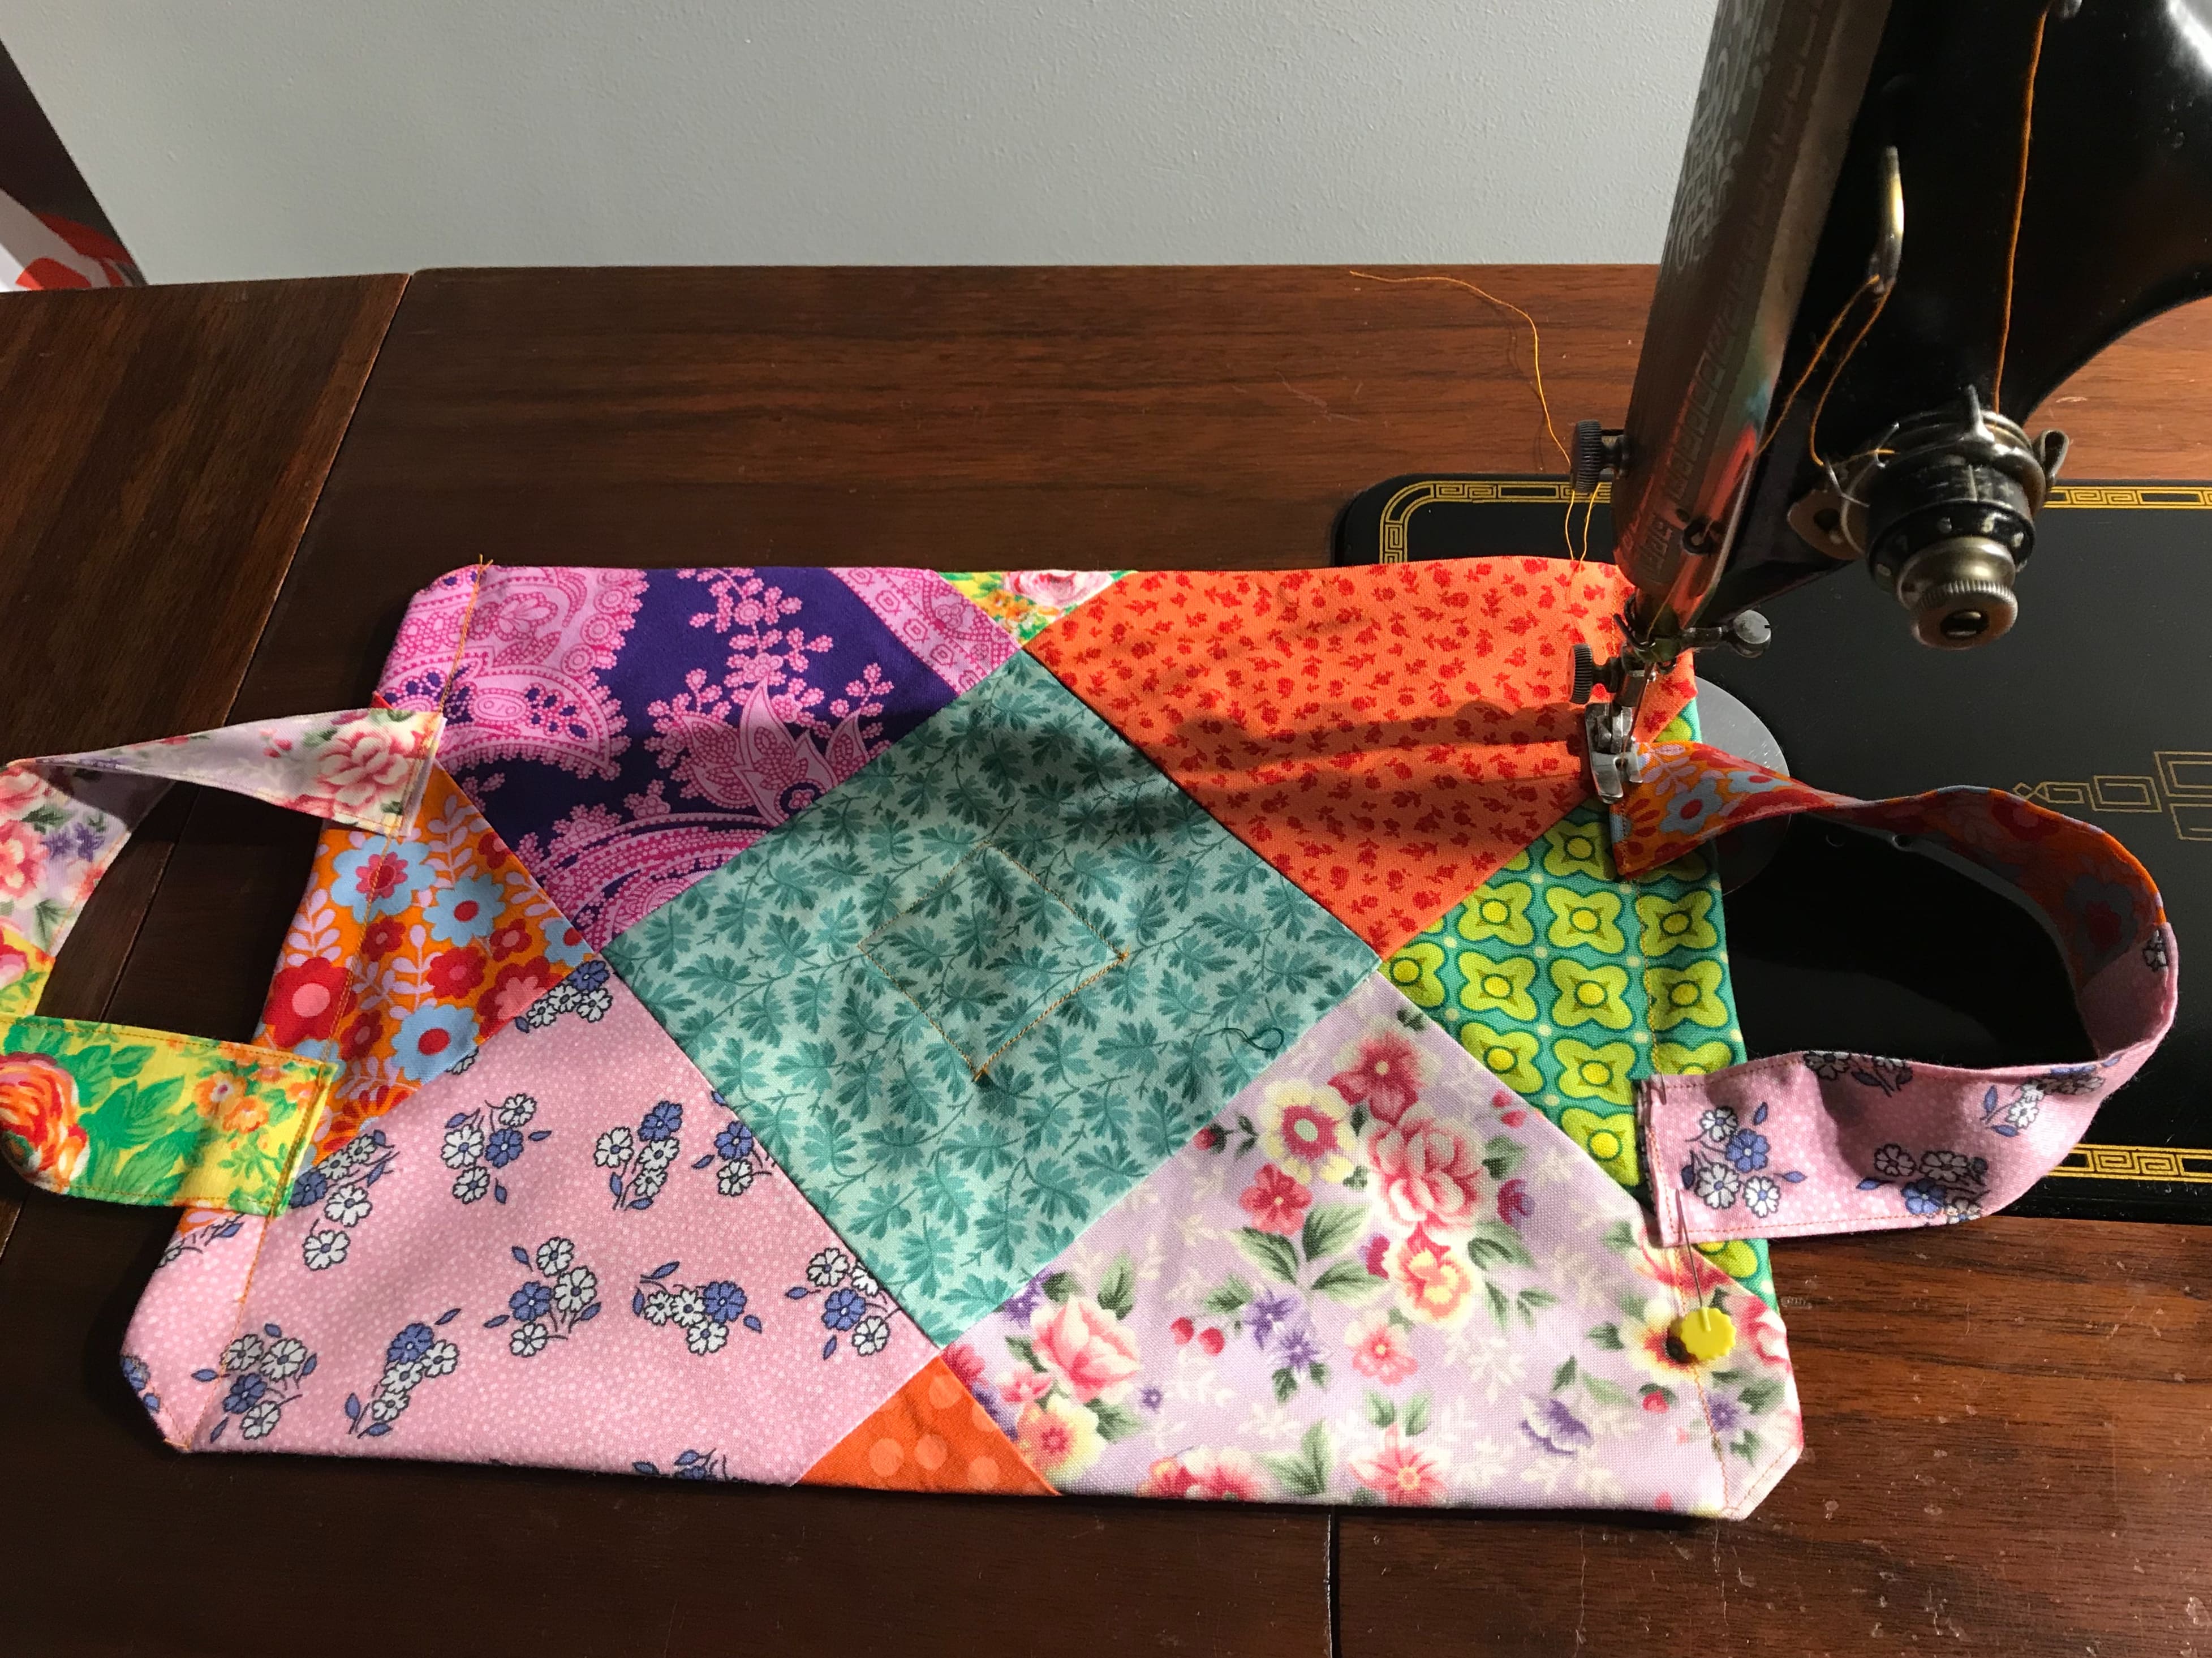
Stitch on the handles along the stitching line of the casing.
Fold the bag in half, right sides together, handles matching. Stitch down the sides as close to the edge as possible.
Open the bag, lay one side to the centre. Stitch across the corner approximately 1 1/2” from the corner tip. Do the same to the other side.
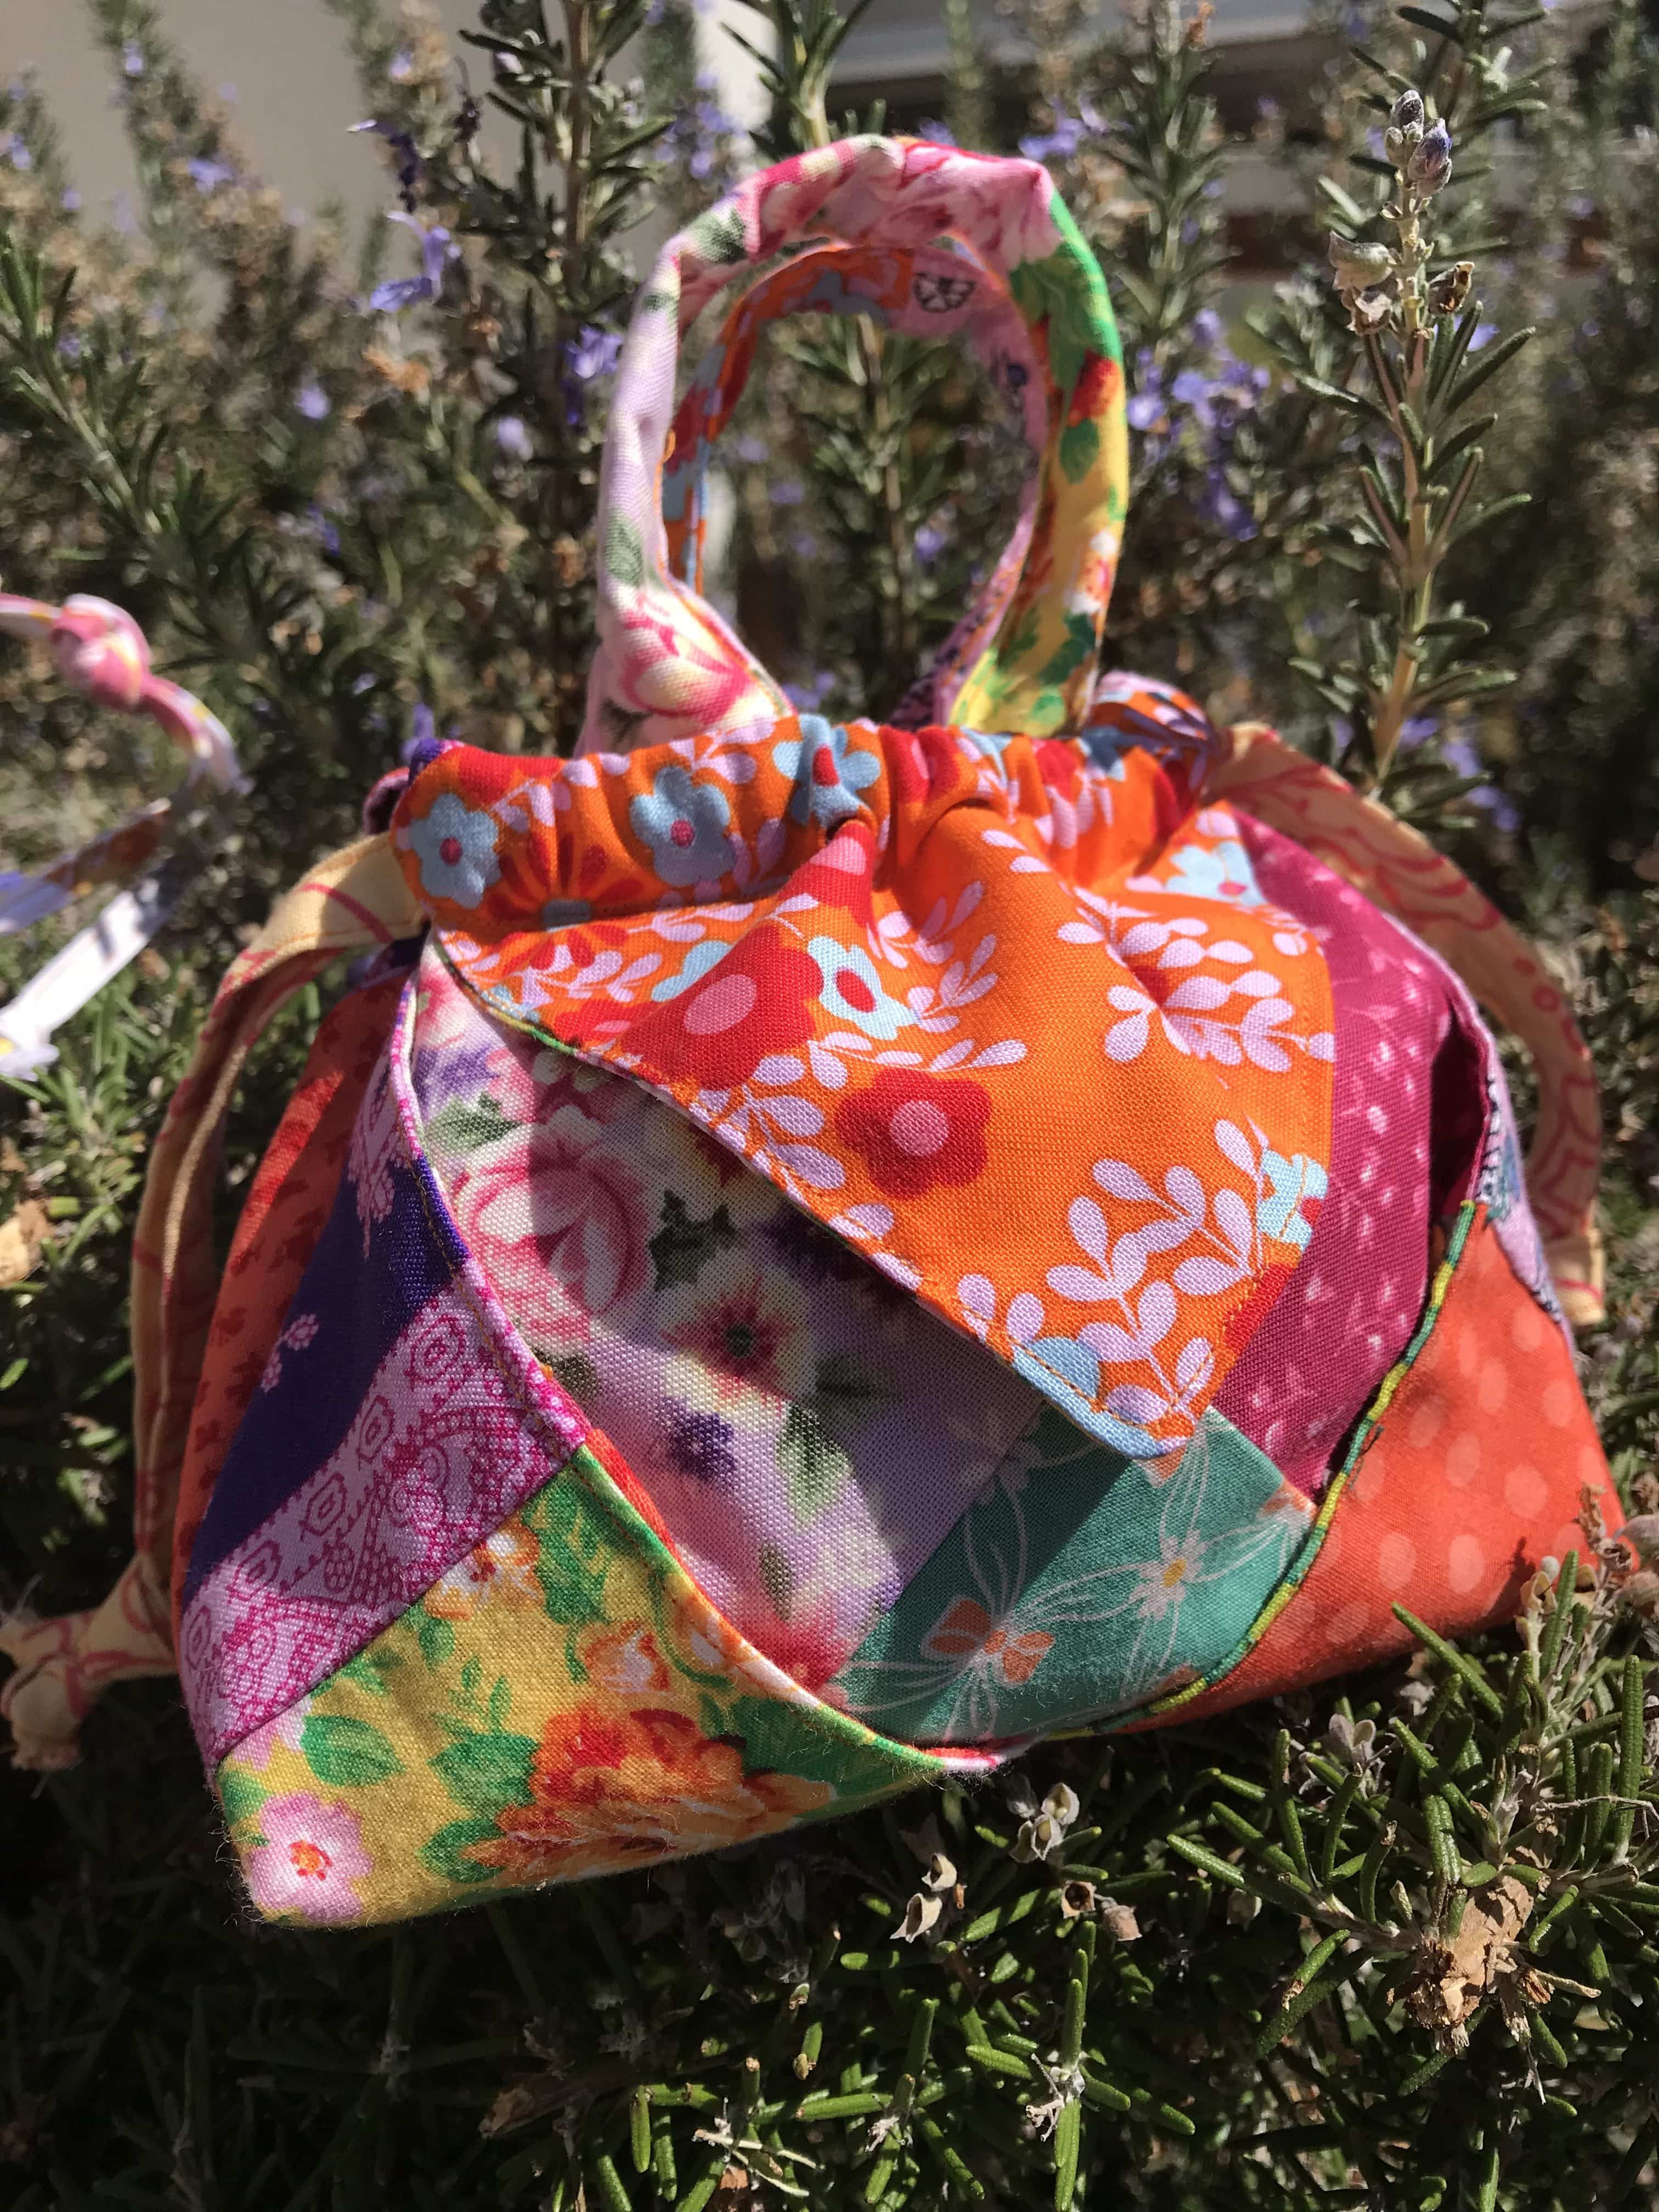
Turn the bag to the right side. Thread one 25” length of cord through the casing all the way around. Knot the ends together. Repeat, beginning from the other side of the casing.
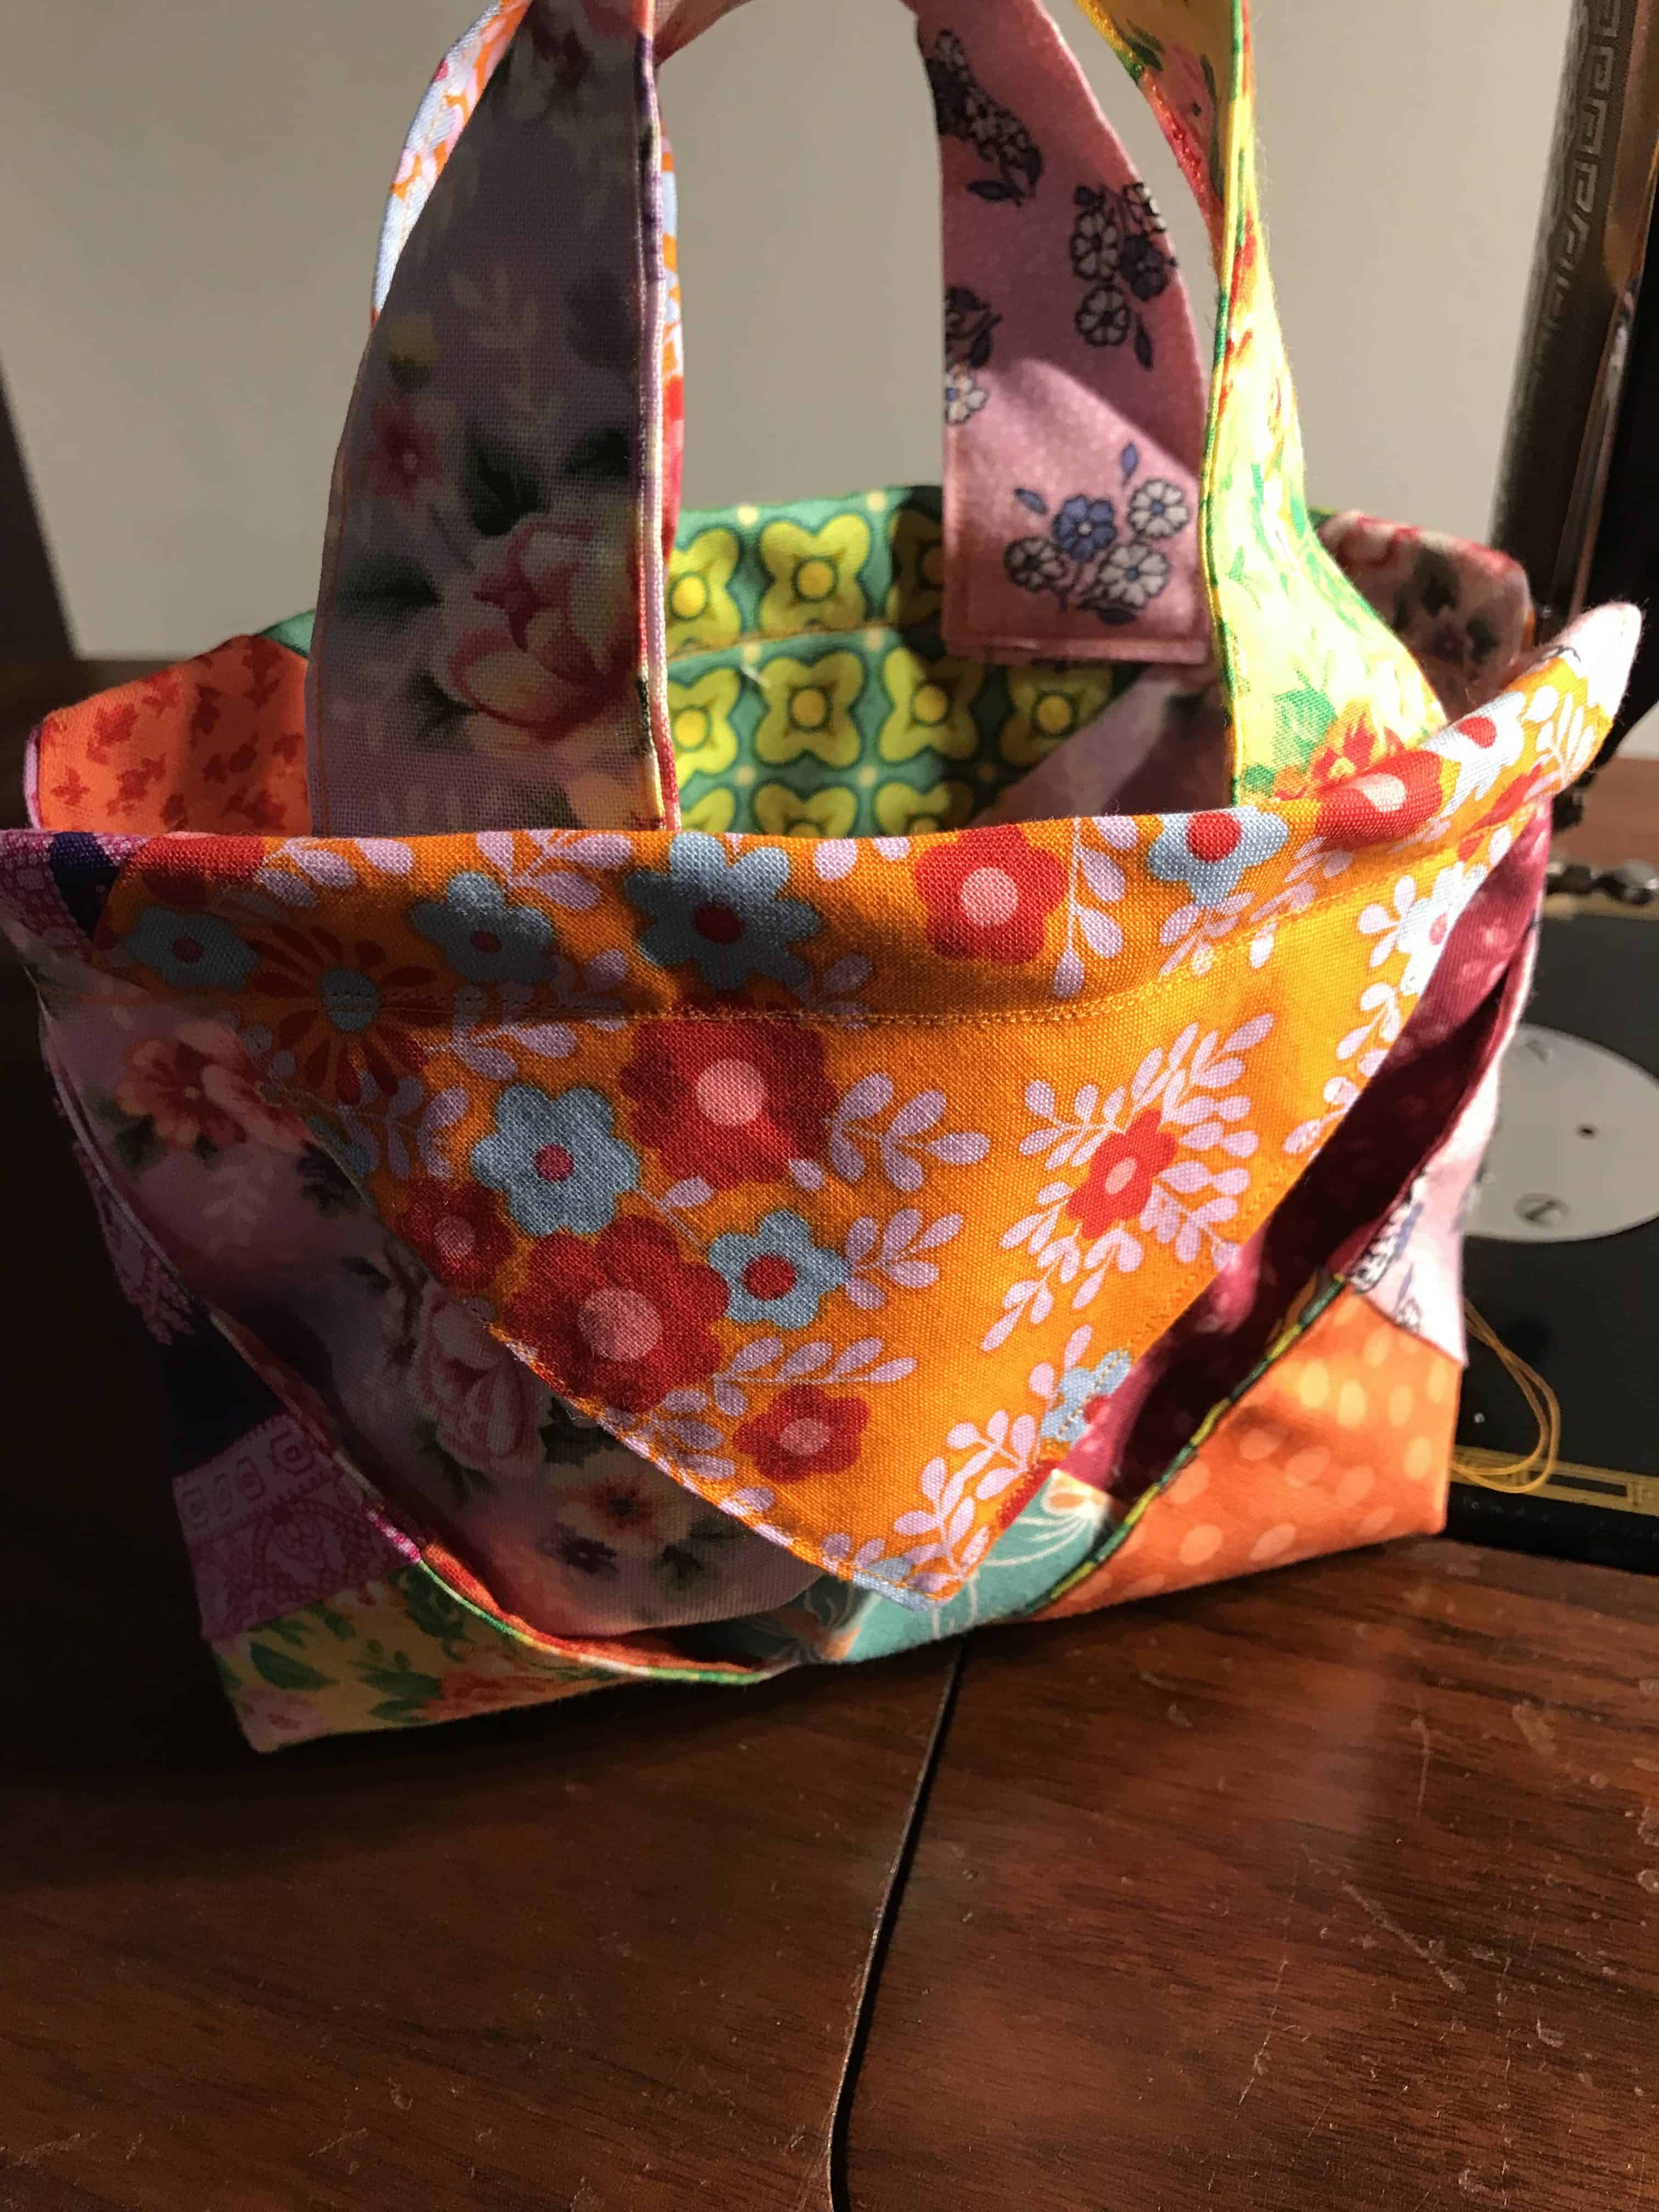
If desired, fold the handles in half, lengthways and stitch along the long edge for several inches to make a more rounded handle.
I have never made a quilt so this is the perfect beginner project for me.
If it turns out well-enough I will be giving this to my 3.5yrs granddaughter who is to be a big sister in a few weeks. Thank You for sharing this pattern. I think you will surprised at how many comments you will be having when “the word gets out” about this fun project.
Are the 25 inch pieces of cording made from strips of
fabric?
Yes they can be. Or any thin cord you have available.
Lovely little bag – thanks for the tutorial:)