Crazy Little Strings – Diamond Charms Quilt Block and Tutorial
Dear Quilters. As promised, a tutorial on how to create these diamond string blocks.
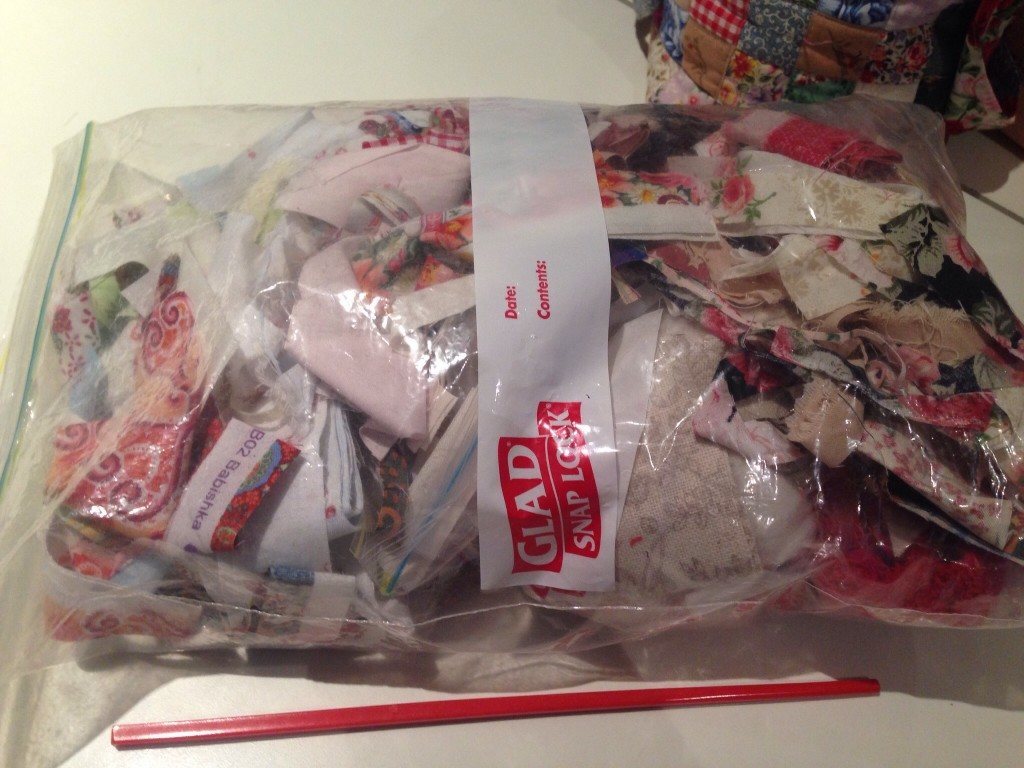
Don’t throw out your strings. Have you got a bag or two of strings of fabric lying around. If you don’t and you threw them out maybe you will reconsider keeping them. Would you be surprised to learn that a bag of strings like this one, by weight, is equal to about 3 metres of fabric. If you are paying $22- a metre for fabric, that bag could have $60- worth of fabric.
For me I love them because they are already cut. They are ready to put into a project, whatever that my be. In fact when I am cutting my fabric I have a bag on my cutting table just for the fabric strings. I put them directly into that bag. No need to sort again.
My inspiration for this block.
From the first time I saw quilts with this type of pattern, I really liked them. Sometimes, certain patterns just strike a chord and this is one of them. I’ve never tired of it. I’m happy to be corrected but I think the closest block description is Endless Chain. This is my adaptation of it. It is certainly not the original, which I believe may have been paper pieced. Mine is a string block. It works very well as a string block. A lot of dimension is created. I decided to use a bag of strings to make these blocks.
It’s good to remember that the fabrics you are using, are your fabrics. You already know that you like them. They may be all mixed up, but it doesn’t matter. Don’t worry about mixing styles of fabric either. It will add to the project and it also becomes a memento of fabrics you have used in other projects. It’s good to have some solids too. Mix up solids and prints. It will make the diamonds more lively and dimensional. You can use very thin strips of fabric, this will also improve the look of the blocks.
This is how I do it.
These quilt blocks are made by foundation piecing strings of scrap fabric onto 5″ foundation blocks. This keeps the block very stable and square, without distortion.
Just as a side… if you like foundation piecing, i think you might like this post too…
and this one.
Irregular Triangle Foundation & Tutorial
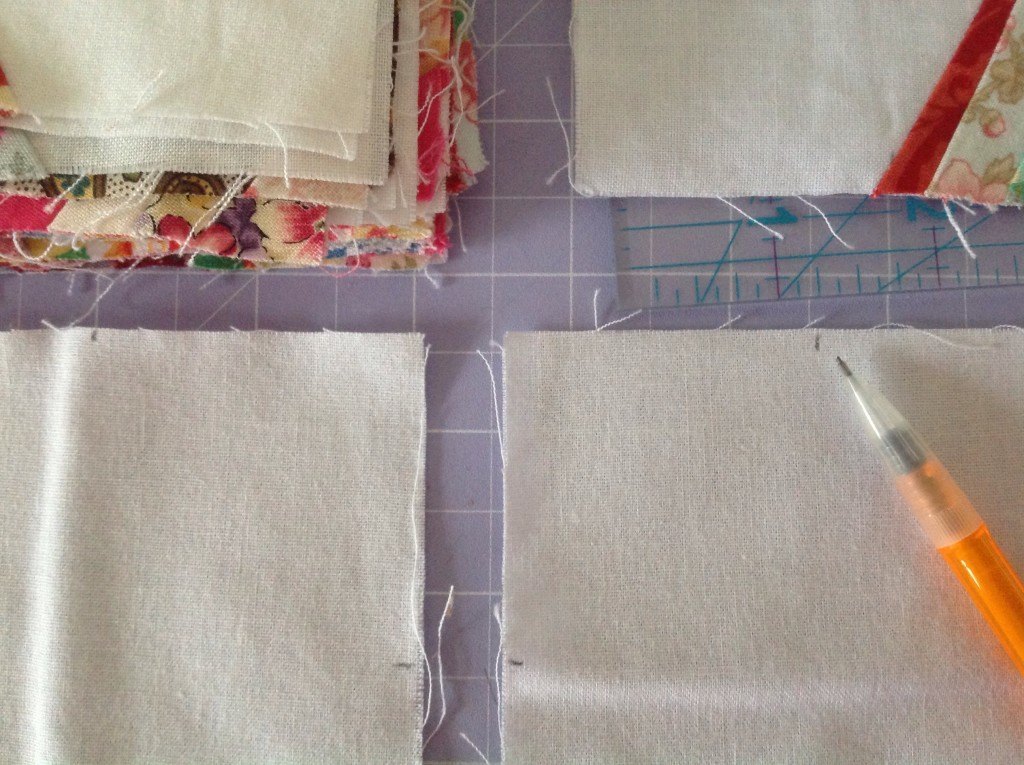
Choose your background fabric. Mine was just white homespun squares, cut int o 5″ Charm Squares. Depending on the size of the quilt you want to make, will dictate how many 5″ squares to cut. Four squares sewn together create the block.
On one side of the square, measure 2″ exactly from the corner. Using a pencil, mark that point, then make another 2″ mark on the other side of the same corner. The area in between will stay blank down to the opposite corner point. The outside areas will be filled with strings.
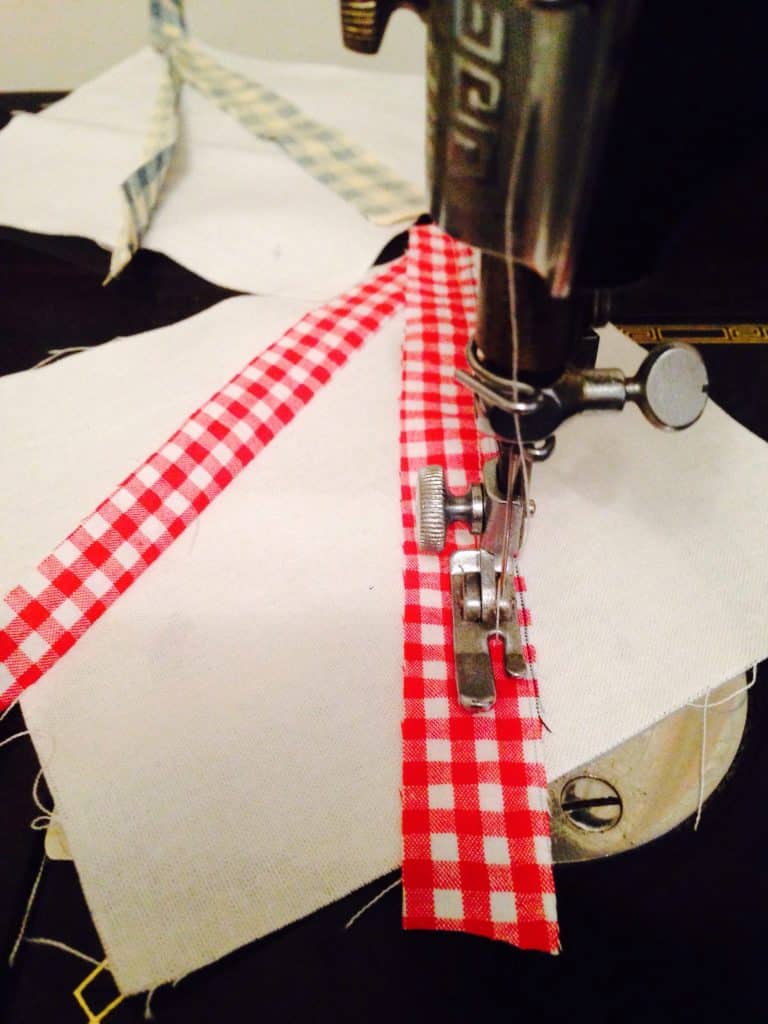
Begin by placing a string right side down on the right side of the 5″ square and overlapping the pencil mark by 1/4 inch. Line the same edge of the strip with the centre of the bottom corner of the block. Sew down the strip using a 1/4 inch seam.
Lining up the outside edge of the string with the corner will ensure that there is at least a 1/4 inch overlap at the bottom corner. This will ensure the points are not lost when the blocks are sewn together. Turn the string back. Finger press the string nice and flat. Choose your next string. Put the string right side down from the bottom corner of the block overlapping the 1st string and line it up to the opposite corner 2″ pencil mark overlaying it by 1/4 inch. Sew down the strip using a 1/4 inch seam. Turn the strip back towards the outside and finger press flat. Now you have the outline of the string block.
Always make sure that each string is longer than the distance to be spanned, as when it is turned back it needs to reach beyond the edge of the 5″ block.
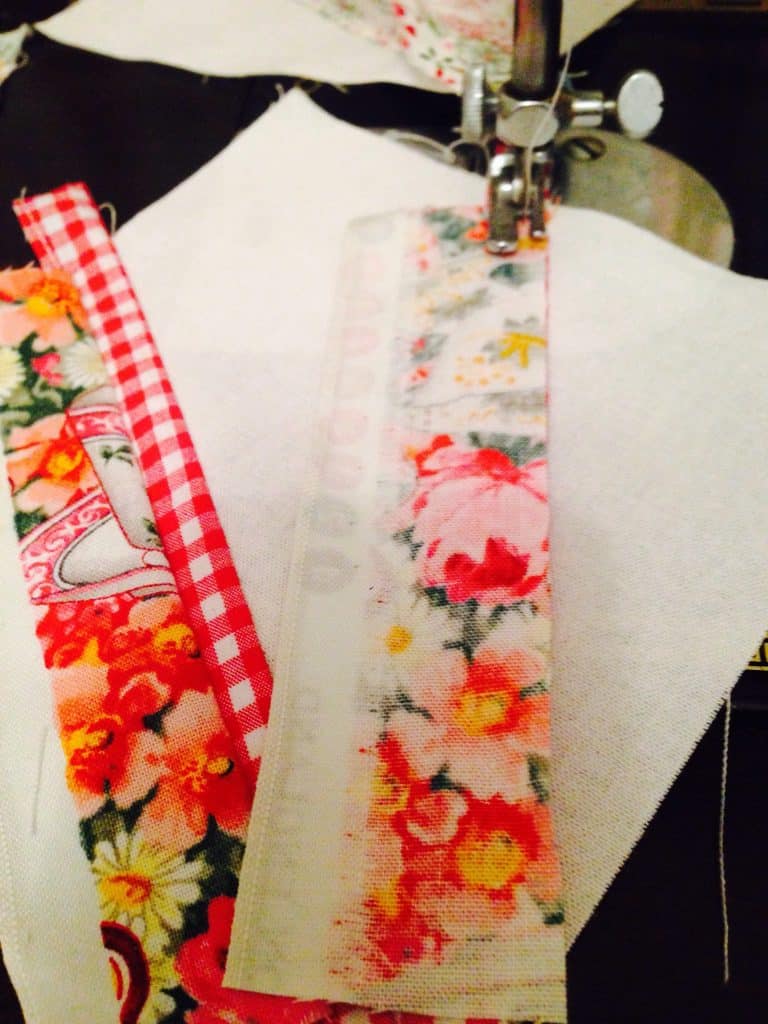
Choose the next string and place it right side down on the previous string, lining up the edges and sew down as before. Turn the string back. Finger press flat. Keep repeating until the side is full. Usually between 4-7 strings on each side.
Then repeat on the other side.
NB If you are using very wide strings it may pay to press them with an iron to make sure they sit nice and flat before adding the next string.
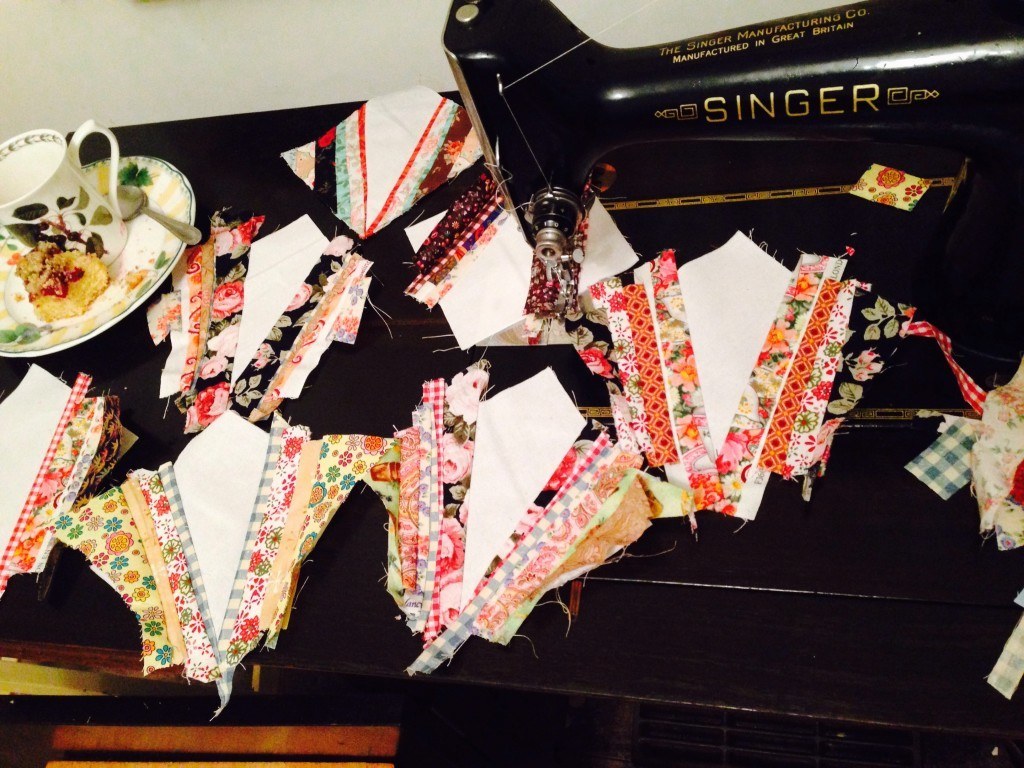
Of course you can have a few units going at once.
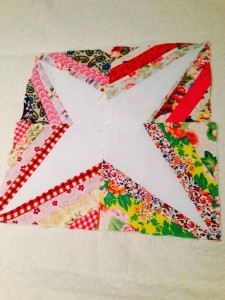
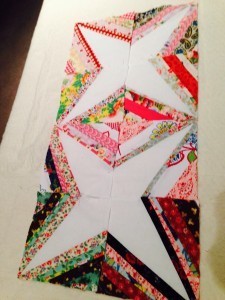
Once the unit is complete, press and trim to match the foundation fabric block underneath. Using a fabric foundation keeps the block very stable and square. Once each side of the block is filled with strings, the units will end up looking like this.
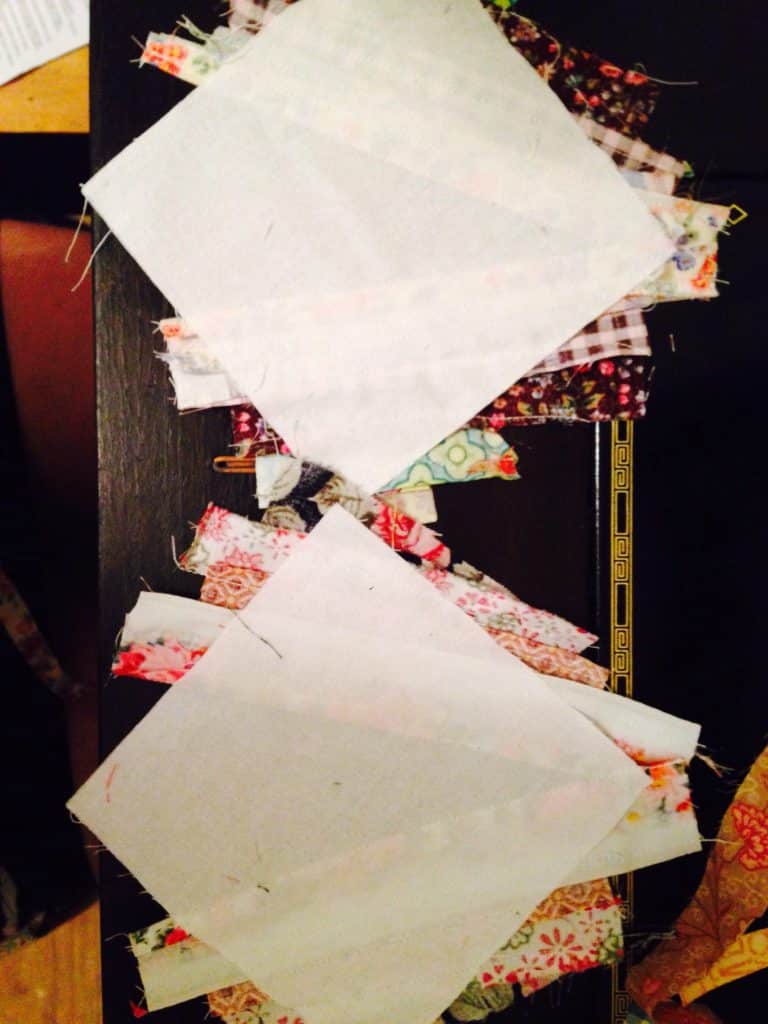
Once each block is pressed, it can be trimmed. This can be a good TV job. The blocks should be trimmed with sharp scissors to match the foundation block. (Or you can rotary cut if preferred.)
This is how the units look from the reverse side before they are trimmed. Sewing four units with the white star in the centre creates the block. Keep making units until you have enough to make the size of project you desire. Have fun using up all your strings.
Please leave a question or comment about this tutorial if you require any further information.
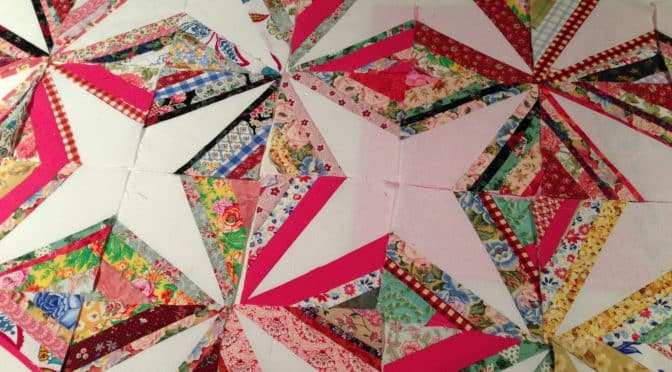
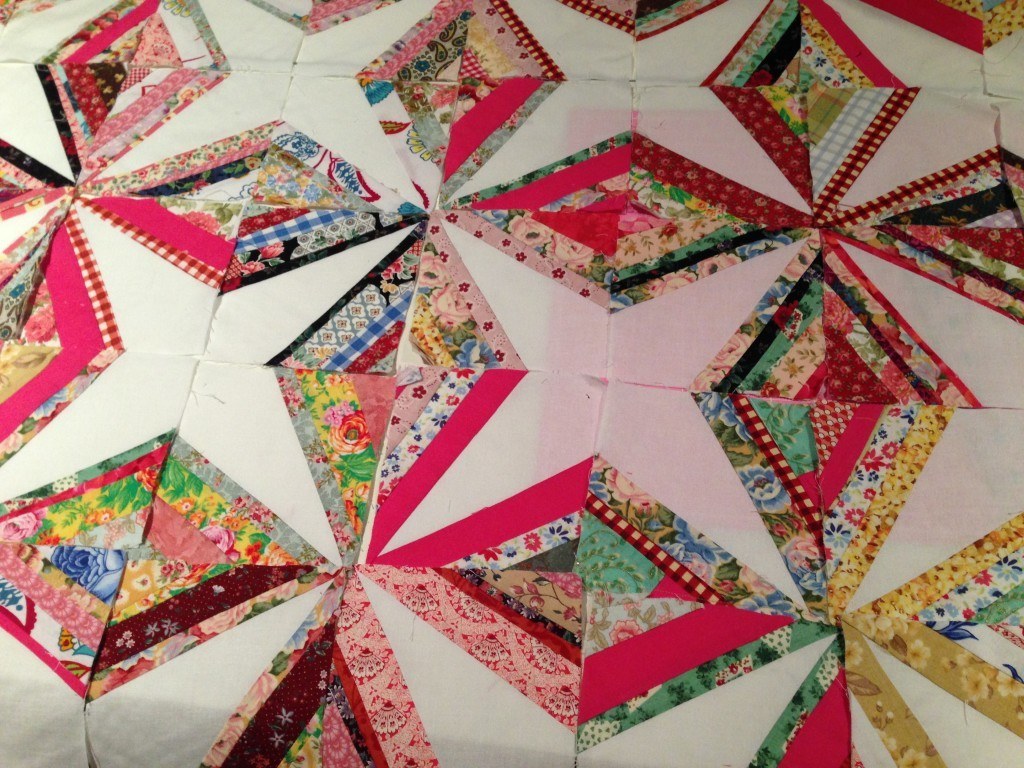
I do not plan to quilt over the top of the strings but rather in the remaining foundation, because the string areas will be quite dense with fabric.
 |
 |
If you enjoyed this post and you like working with strings, you may also enjoy,
ot this one
Happy sewing!
Susie

I love this quilt and thank you for sharing. Would it be possible to substitute one bigger piece of fabric instead of the strings and how big would you make it? Thank you!
Hi Lisa, thank you so much for taking the time to comment. As to your question, of course it will be possible. In order to make this, I will get back to you with a post on how it could be done. Thank you for your patience. Susie
Thank you Lisa for your lovely comments. Here is the result.
https://susies-scraps.com/2025/09/21/crazy-little-triangles-block/
Do you use a batting, and backing, too? Or, just the backing?
Hi Brenda,
Thank you for your question. I would use a very thin batting because of all the seam allowances. You could also complete it with just backing.
I’m in the middle of making this quilt and thought I should pass on a tip. The tutorial says to mark the sewing line on the foundation square and then overlap it by a quarter inch when you sew the first string on each side. It’s much much easier to draw the lines to show where to place the fabric, and then sew it down with a quarter-inch seam allowance. So, draw the lines at 2 1/4 inches from the corner, not 2 inches.
Hello Susie,
I have just found this gorgeous quilt and can’t wait to make one. Thank you so much for sharing this tutorial. I have only been quilting for a couple of years but would like to make this in a King size (90″x90″) with 100 x 9″ blocks (finished size).
I have 2 questions:
Do I cut my foundation squares 9 1/2″ x 9 1/2″ to add in the 1/4″ seam allowances?
And how far should I measure from the corner to mark for placing my first string? Is there some sort of formula for working out this measurement ?
Many thanks in advance,
Frances
Dear Frances,
Thank you for your lovely comment. Yes. Cut your foundation pieces 9 ½” x 9 ½”. Make your marks at 3 ½” I think will be prefect for that size. Wow! That will be a nice big quilt!
All the best for your project! It’s sounds fabulous.
Many thanks Susie for your very quick reply. Now I’m off to sort through my mountain of fabric scraps… Oh what fun!
I’m saving this pattern for a king too! Glad I didn’t start cutting the smaller blocks. 😀
I absolutely fell in love with this design. I finally decided to try this to begin to reduce my scraps. I have 24 blocks done and realized after doing about 16 that the 5 inch squares get a little wonky so I’m sewing on tissue paper. This helped a lot. But I do have a question, do you have any advice to reduce the bulk where all the seams come together at the star points?
Great pattern!! Would like to print it out tho. How do I do that. Am 80 and have a hard time remembering directions. Thanks
There is a grey Print button at the end of each post.
Can you restate in a different way or link to a place that I can visualize what you meant when you do scribed the 1/4 inch starting point and not losing the star point?
Dear Angela,
Lay your first string right side down so that the top edge goes 1/4″ beyond the pencil mark. Your stitching line will start at the pencil mark.
Line up the bottom edge of your string with the corner. As you sew your 1/4″ seam, the seam allowance will be offset 1/4″ as it will finish just off to the side of the bottom corner. Repeat this when you sew your strings on the other side. They will cross over a little at the base. This will bring up the star point away from the seam allowance at the edge of the block. I hope that helps.
All the best,
Susie
Sent from my iPhone
Hello Susie,
Have you a photo of the finished crazy diamonds quilt please?
This quilt is next on my list so would like to see how you finished it off.
Thank you for all the lovely tutorials, very generous of you to share so much.
Kind regards
Chris Webb
After you have made the blocks, How do put them together?
I do not want to use sashing, because that would change the finale look.
Thank you for explaining how to make these string quilt blocks, love the look of this quilt. I am currently making a 10.5 inch string block, using navy as the centre, then a variety of prints, have about 20 done so far. I am using muslin as the backing for the strips. Look forward to trying this.
How big are each block? I don’t see it listed on the pattern.
Dear Judy, the blocks are 5“ x 5“.
I think it said about 9 inches.
agréablement surprise et séduite ….. je lâche l’ordi et sors ma machine a coudre
Merci
Merci!
Love this block!!! Thank you for taking the time to share. This will really bust my scrap bin 🙂
wonderful blog!!
I LOVE this quilt and use of scraps. I have 31 of 35 blocks completed and have set a goal for myself of at least one block a day so this will be finished this month. (I’m ahead of schedule!) Do you have suggestions for finishing the edge of the quilt? Did you border at all or just bind it? Your pattern and tutorial are perfect! Thanks you so much.
Dear Janet, That’s a pleasure! I like your strategy! Just bind I thought.
Did you use batting and backing on your finished quilt?? And then just quilt the stars and not the diamonds with all the strips?? Just trying to figure how to put this altogether. Thanks
Exactly! Only Quilting the stars.
I just finished piecing my top. It’s been a good project. This is my first time string piecing and I really liked it. I wish I could share a picture
That is wonderful! I would love to see your quilt! Can you email it or post to my FB page?
Hello Susie I’ve really enjoyed using up my red white and blue scraps my other scraps I’m working on the 5 8 and 10 background and loving all three this was truly amazing thanks so much for this tutorial I will be looking for other Scrappy tutorials much appreciated Flo
❤️
Just wondered if the extra foundation material under strips want their seams too bulky for auikting?
Thanks great tutorial.
Depends on the with of the strings. The smaller the strings the stiffer it will be. I am planning to quilt the negative space.
I have never saved strings. What size should I cut some?
Hi Cathy, 3/4” to 1 1/2” strings should work well. Just save your off cuts when you are cutting fabric or straightening edges.
Hi,
Just wondering how the block/quilt sits with the two different thickness…….i.e. ….. the base and the strings ?
cheers
Dear Gwen. It is very stable. Obviously it is much thicker because its on a foundation. Also depend on how thin the strings are. There will be physically more fabric with more strings. The best thing to do is just make a test block. Nothing to lose, just a few strings. 😊
I made this with red background fabric and I absolutely love it! I also made a scrappy inner border. Thanks for the pattern.
Sounds marvelous! 💕
Thank you so much for sharing the beauty and joy of how to make this magnificent quilt. I have 2 great nieces who want to learn to quilt, and this will be a fantastic start! Just can’t get this one out of my mind!
Susie, I was soooo happy to find this pattern. I am 70, my husband 76…His grandmother made him this quilt and now I have it. It is hand stitched. My friend and I have been trying to figure out where and how to start…now we know!!! Thanks again!!!
Great info for using scrap stash. You explained technique so anyone can follow. Thanks for sharing this pattern. I definitely will try it soon.
Does the 2” measure change if you want to start with an 8 or 10” foundation?
Dear Peggy, yes. If you are using 10″ x 10″ squares change the measurement to 4″. If you are using 8″ x 8″ squares use a 3″ measurement. Thank you for asking. All the best! Susie
This looks amazing. Thankyou for the easy to follow tutorial, Another for my bucket list
I read your post in pintress this morning, all I could think of all day was getting home to try this. What a great idea I hate throwing away my strings, but could never think of anything to do with them. Thanks for sharing.
Christie
Lovely! I can’t wait to use up my strings. Is there some reason why I shouldn’t just measure 1 3/4″ and put my fabric on the mark lines instead of trying to overlap the marks 1/4″?
I am wondering if you ever got an answer because I wondered the same thing. Thanks
Hi Susie,
Just wondering when you mention ‘strings’ is this the same as the strips one cuts off with the selvedge? I was told you can’t use those but me being mean or tight wad I couldn’t throw those away.. I have slowly been reading all your blog lots to learn
Dear Carolyn,
The “strings” I have used for these blocks are quilting fabric without the selvages. However the selvages can be used if you like. I’ve seen some ladies have made them into beautiful quilts or bags with a whole unique look. The selvage fabric is a bit thicker so would be great for bags. Google selvage quilts / bags. You should find some nice images. 🌻
Susie
Saw your string baskets and wondered if you also made string blocks. Love these pretty stars, I have a string star top that needs quilting. Did not have string scraps so cut from yardage in my stash. BTW- found you via FB link you shared on Treadlers.
That’s great. Love to see your finised product too!
Thank you. Your tutorial is so easy to understand.I look forward to having more scraps that I can use. I’v just started quilting.
Thank you Brenda. I’m glad you like it. Hope your projects go well!