
Scrappy Pinwheel in a Square – Part 2
Hello Dear Friends and Readers and welcome to today’s post.
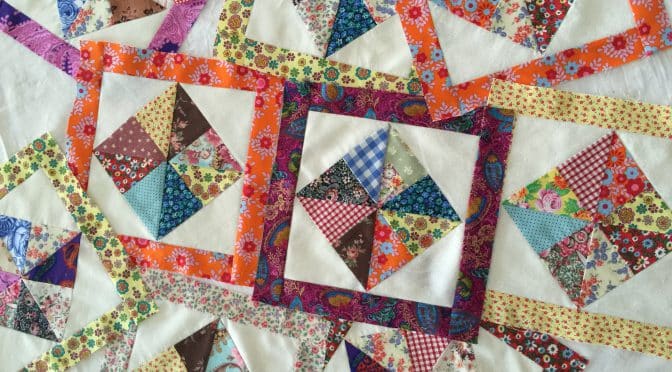
Just a short time ago I showed you my new block idea of Scrappy Pinwheel in a Square. No triangles to cut and no squaring up! I’ve been having a lot of fun making these blocks. It’s really quite satisfying to make such a pretty block from scraps. Actually I think they are quite addictive and not at all boring. Read more about that here.

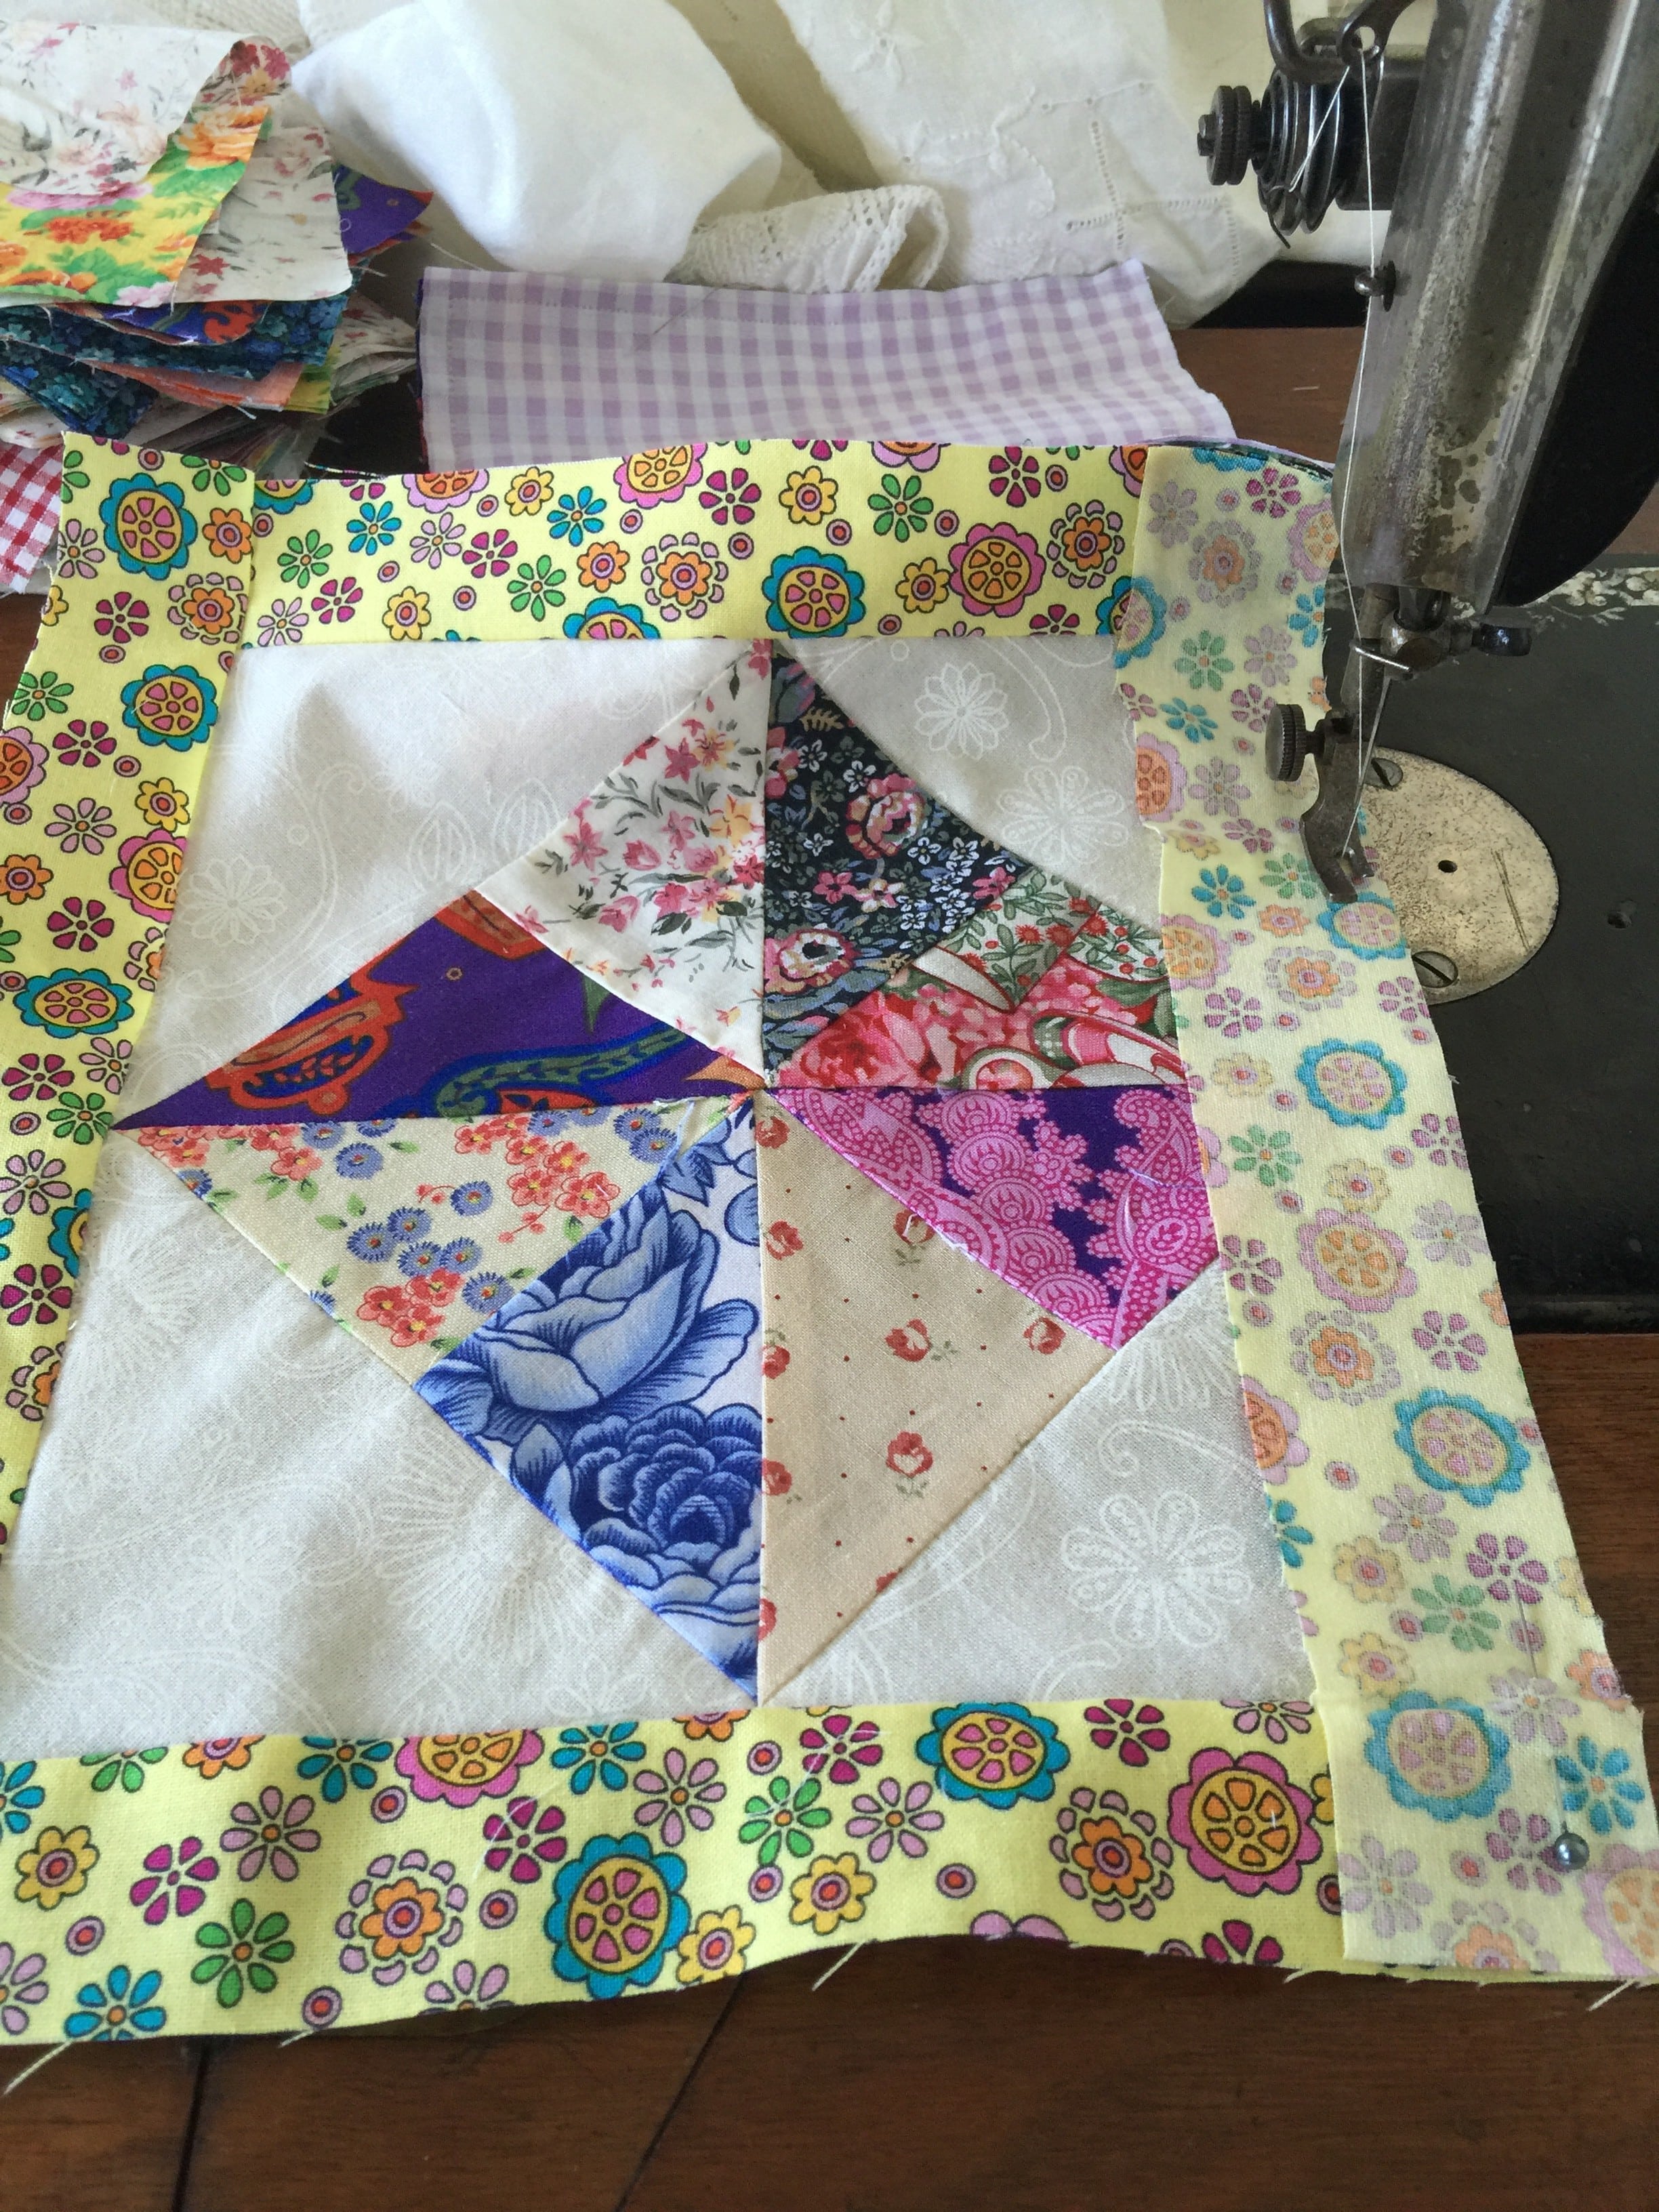
Today I’m showing how I am finishing those blocks ready to go into a new baby quilt. I thought the blocks needed something extra. I decided in order to overcome the bias edges of the block and finish them ready to go into the quilt. To do that I thought they would look and behave beautifully with a frame.
This is how I do it.
Ingredients for the framed Scrappy Pinwheel in a Square Block
1 x a 1 1/2″ Width of Fabric (WOF) strip for each block
Method
Gently press your blocks without stretching. From each 1 1/2″ WOF strip, sub cut the strip into;
2 x 10″ strips

Pin a 8″ strip evenly to two opposite side of a finished block. Sew them on, being careful to observe your 1/4″ seam so that the points are not lost. Finger press.

Pin a 10″ strip evenly to each of the remainder unfinished sides and then sew on.
Scrappy Pinwheel in a Square – Part 2 susies-scraps.com
There you have it a framed scrappy pinwheel in a square. No more bias edges and I think it looks more finished.

Press to finish the block. Make some more!

Finishing the Scrappy Pinwheel in a Square Quilt
If you have read this far, you might be interested to know how these blocks finished up.
I put them together in a quilt for my niece. I think it turned out quite nicely, however I will let you be the judge of that. Here is the link to the finished quilt.
Framing Pinwheels Quilt and Pattern
If you enjoyed this post, you may also like
I Spy Pinwheels Quilt and Pattern
Baby Love Quilt and Pattern Part 2
Glowing Pinwheels Quilt and Pattern (not quite Amish)
Happy stitching!
Susie
© Susan Stuklis 2016