Crossed Canoes Quilt Block Antique Inspired Made Easy
Hello Dear Friends and Readers, and a very warm welcome to all my new subscribers to susies-scraps.com. Oh boy, am I excited to show you this great new way of constructing this old block! Are you ready? And guess what? No templets. No paper piecing! Just some simple cuts!
Now for a little bit of a preamble. You do not have to read this bit if you don’t want to. We will get straight into the method in a moment. However, I do like to document and explain how I arrive at these methods. From the reseach I have done, it would appear that usually this block is made by using templets, or by paper piecing, where the lines are pre printed on paper, and pieces of fabric are stitched onto each of the lines.
So, the other day I was studying some antique quilts which included one with the “Crossed Canoes” blocks. Suddenly looking at the colour placement I realised that maybe, just maybe, with some simple cuts and interchanging of the pieces it just might be possible to construct this block with much more ease.
So of course that is what I did. Straight to the cutting board and I was super pleased with the results. I did make several iterations of it to get it as perfect as I could. You will also note that using this method, there is absolutely minimal waste. Also there will be no bias edges on the outside of the block which is an advantage, although not essential. It just depends on how traditional you are. I know there are “rules” for everything, and sometimes its good to challenge them. But in this case it is not necessary. It is actually a simple block with only three seams for each unit of the block.
So are you ready? Let’s get to it!
And just before we start, a little reminder……To Wash or Not to Wash?….This is the Question
Please note that for best results chose colours that are opposing on the colour wheel or light and dark for good contrast. Here are some tips on using a colour wheel.
dulux how to use a colour wheel
All seams based on 1/4”
Block size 7 1/2” x 7 1/2”
If you would like to know more about this antique block you can read a bit of history here.
http://www.earlywomenmasters.net/quilts/c/crossed_canoes/index.html
Requirements for making the Crossed Canoes Quilt Block Antique Inspired Made Easy
4 of 5” x 5” squares of two opposing colours or light and dark. For example two green and two orange or brown. Here I have used two brown and two cream.
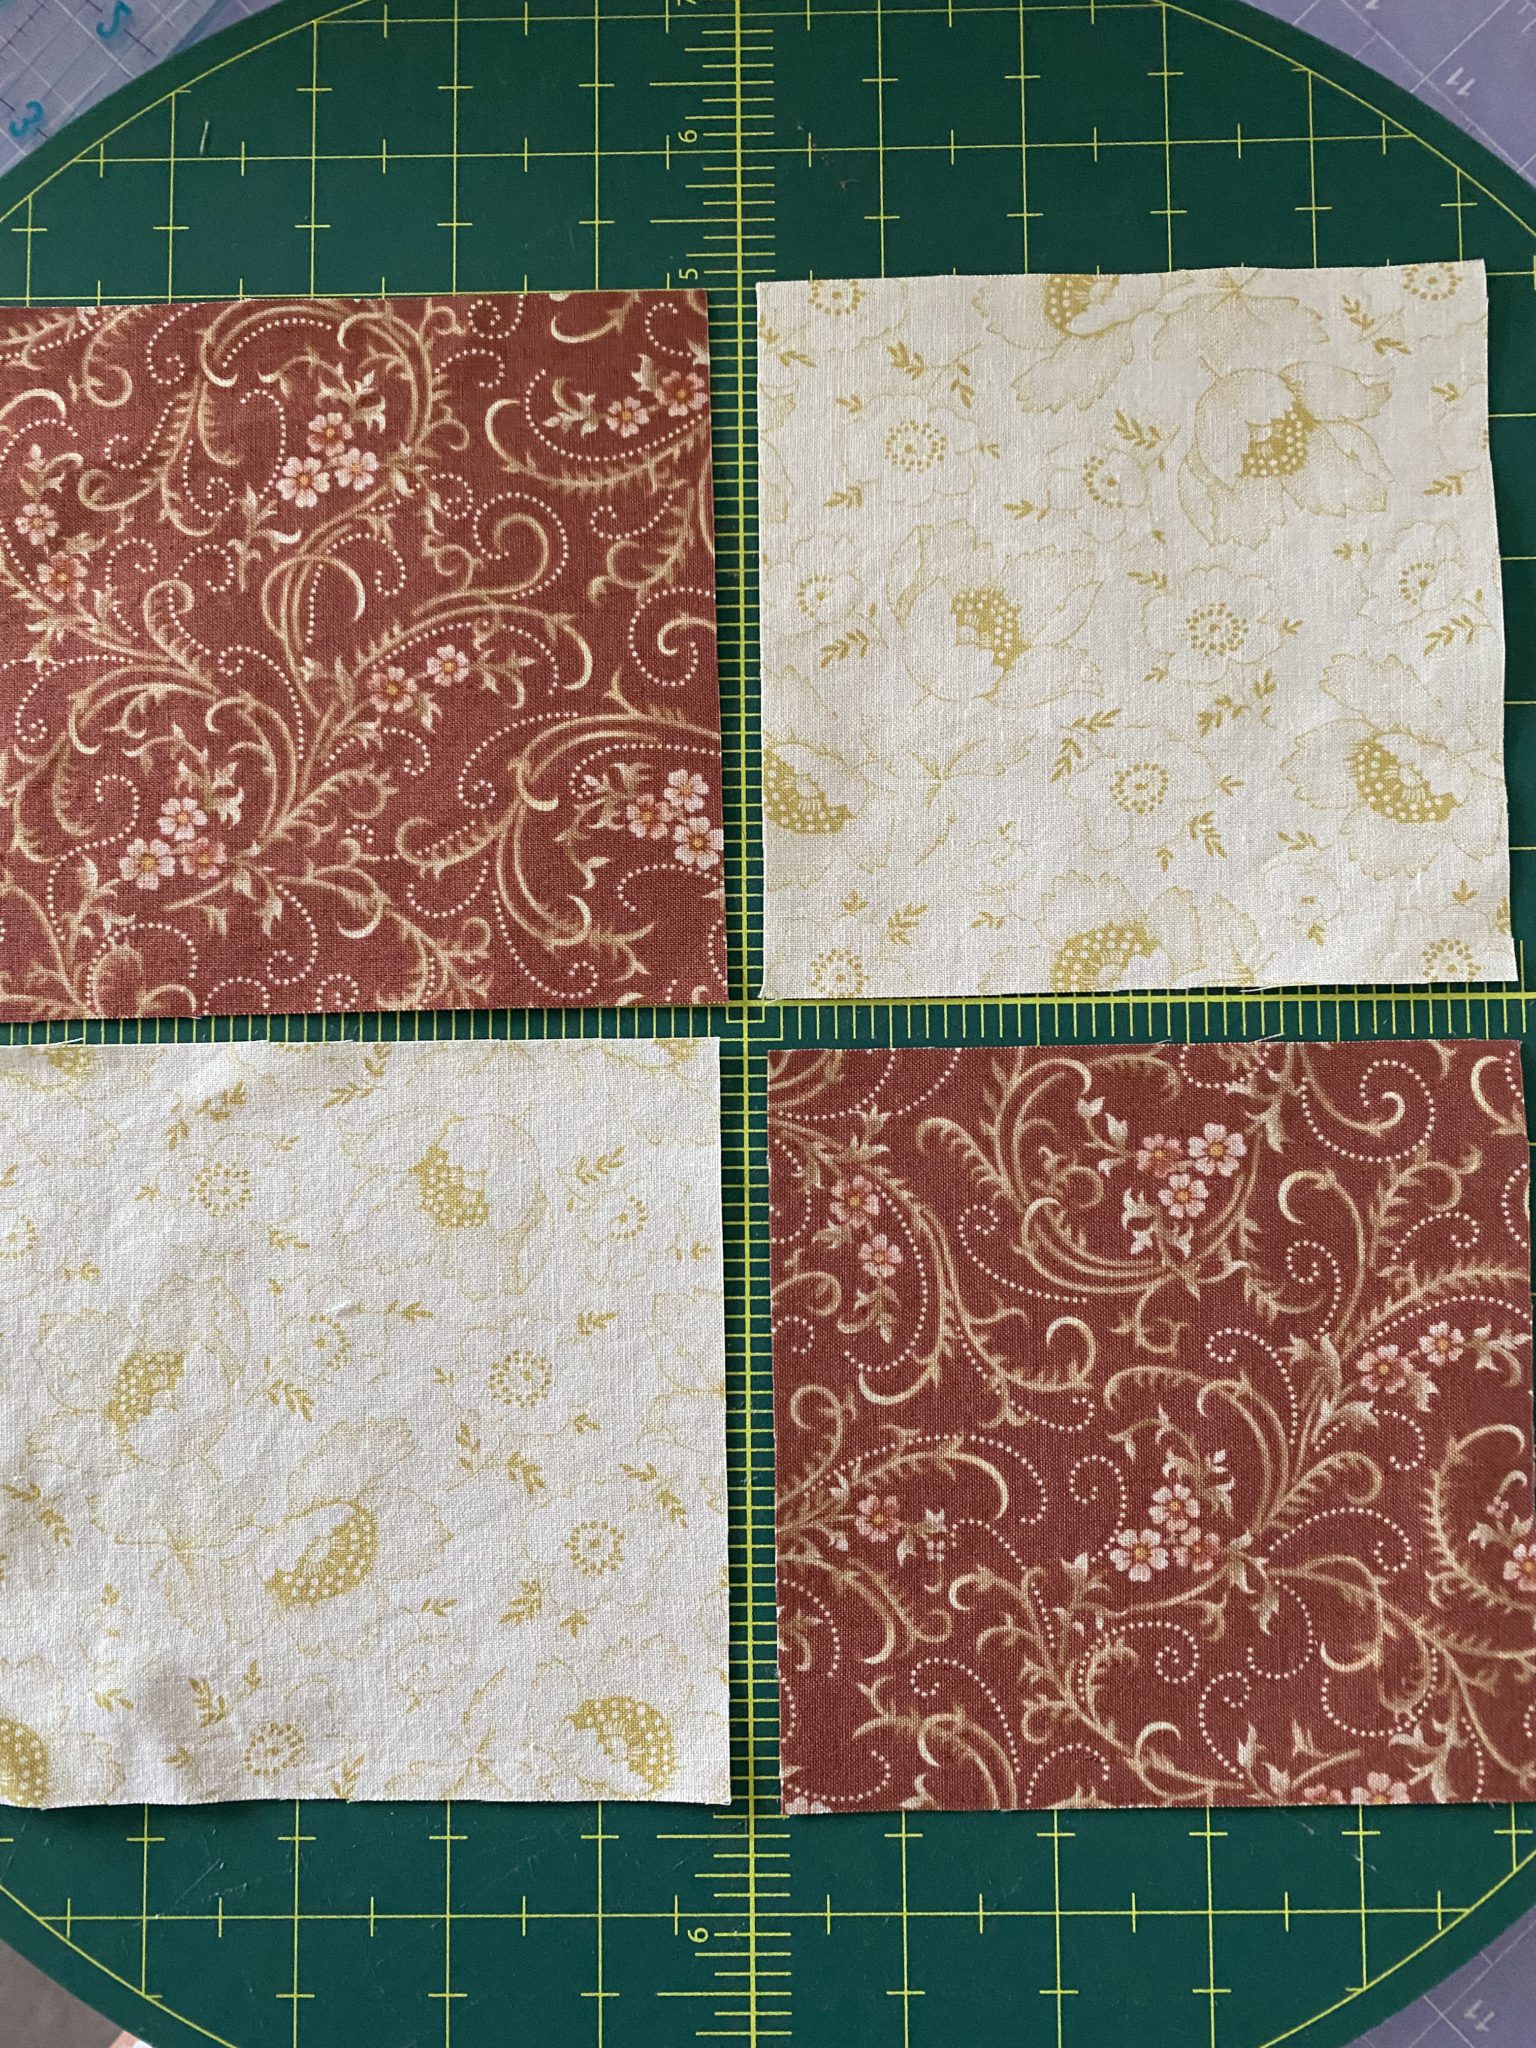
Marking the fabric for the Crossed Canoes Quilt Block Antique Inspired Made Easy
You can choose to stack the fabrics or mark them individually, that is up to you. Just bear in mind that more accurate cuts will yield a better result. I have stacked the four squares.
In order to cteate the pieces for each unit of the block, 5 marks need to be made on the fabric. I have placed the squares on the diagonal for ease of explanation. Make a mark on the side, 1 1/2” from bottom corner. Make a mark 1 1/2” from the other side of this same corner. On the diagonally opposing top corner, make a mark 3/4” from each side of the edge of that corner. Now centring the ruler along the diagonal of the square make a mark 1 1/2” from the bottom corner as pictured below.
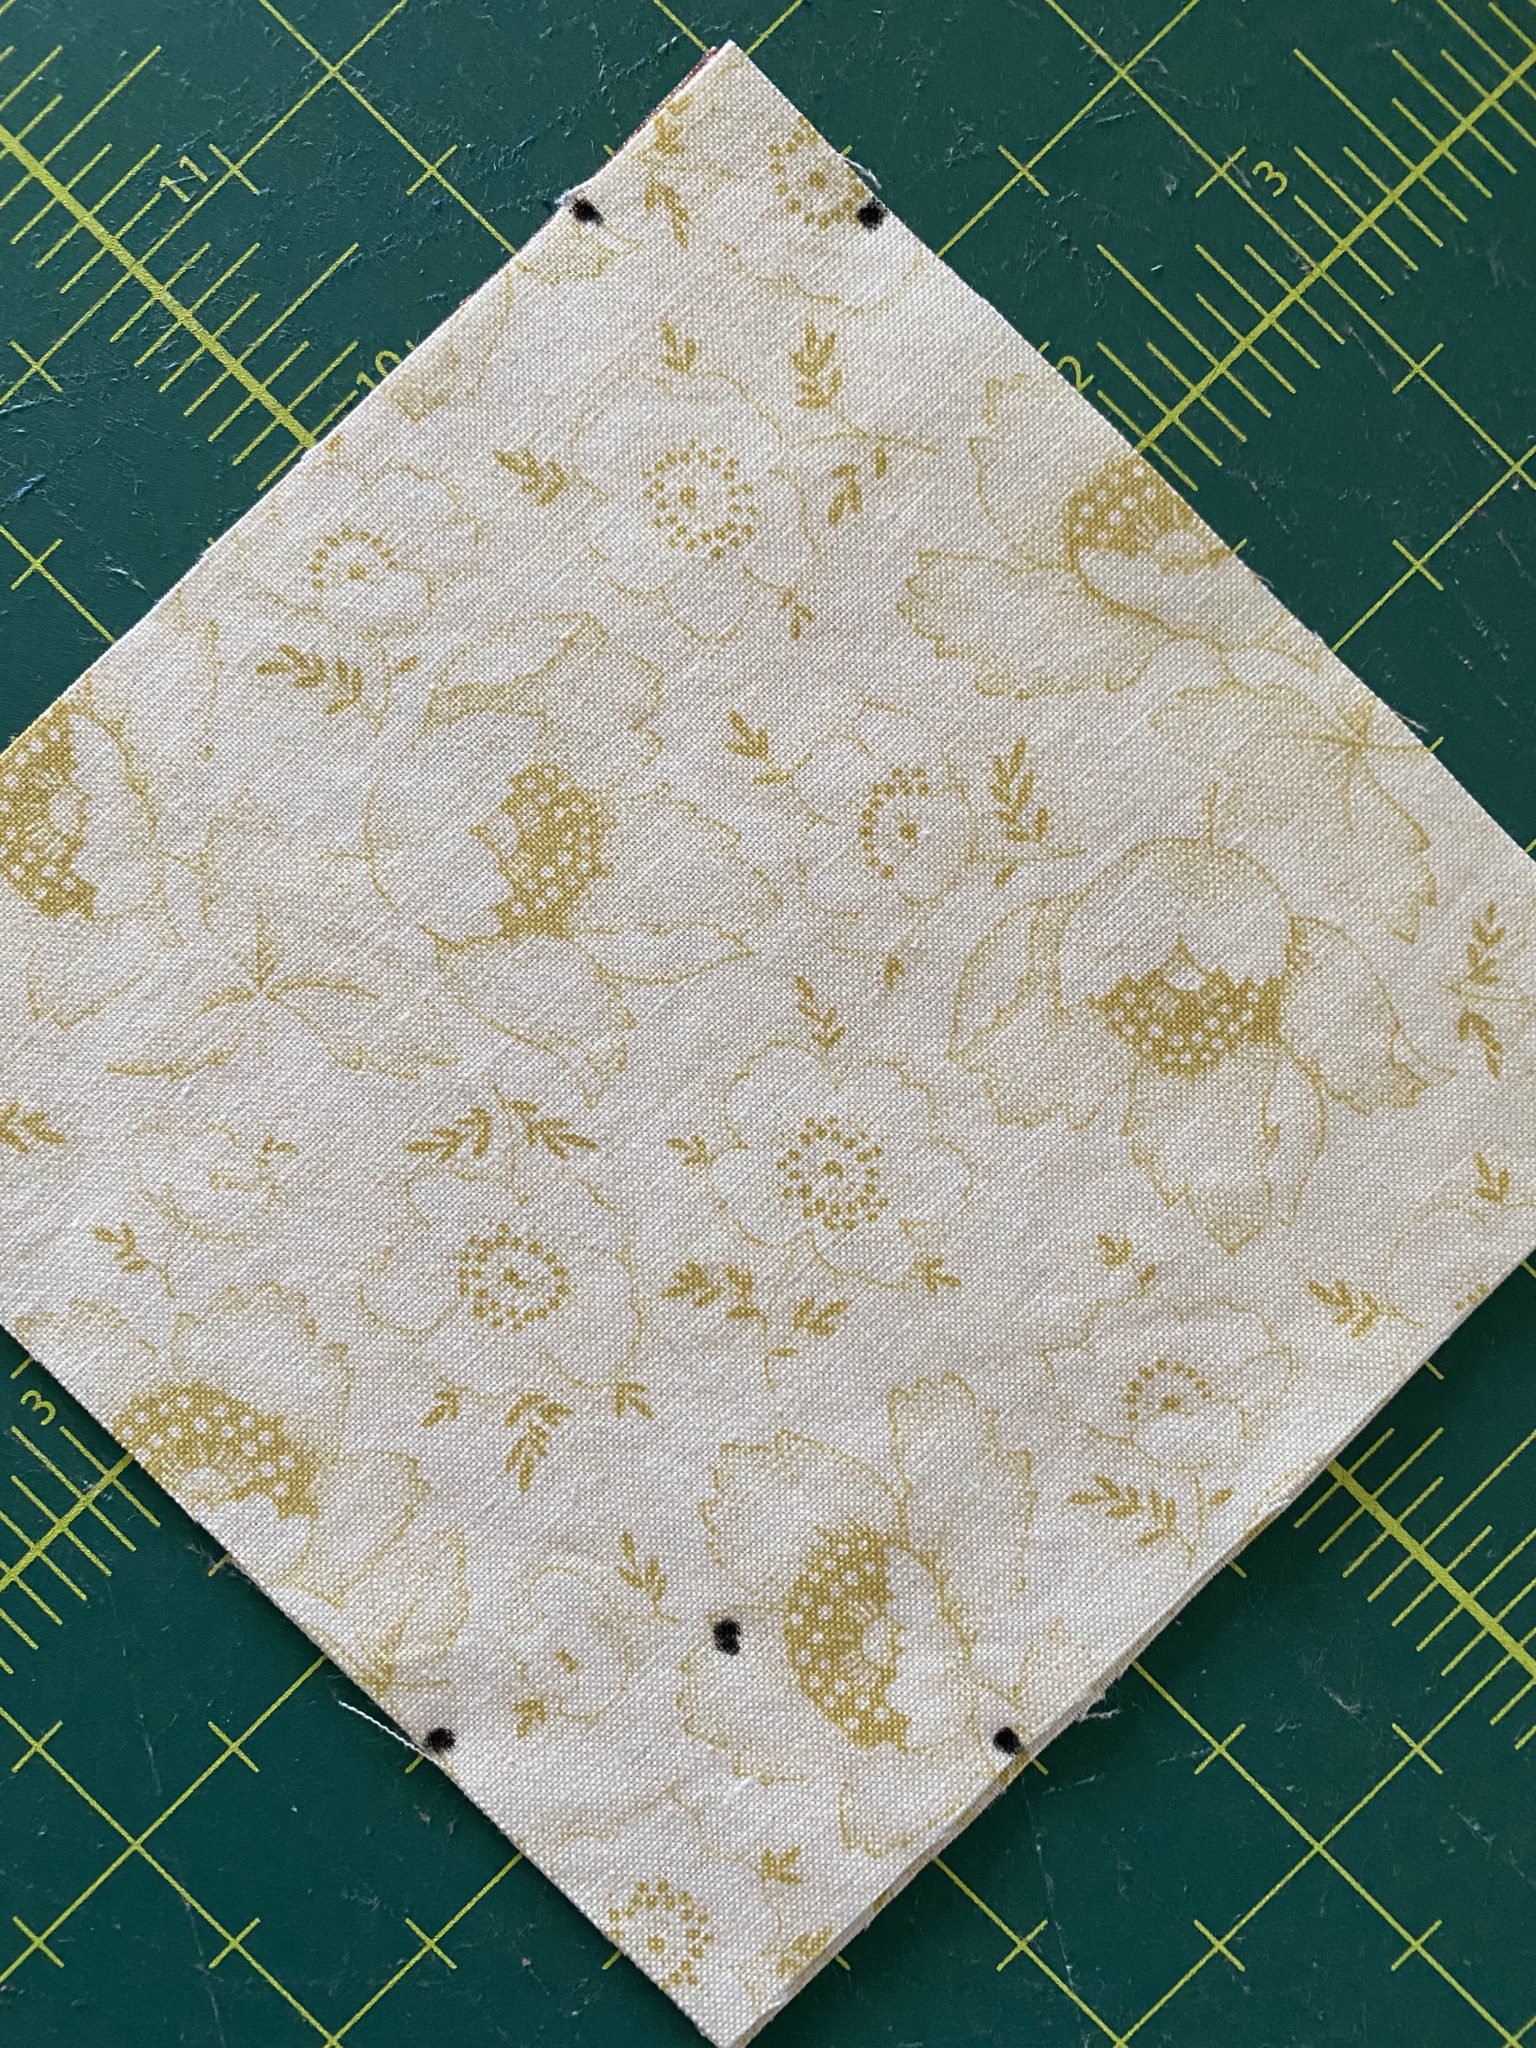
Cutting the fabric for the Crossed Canoes Quilt Block Antique Inspired Made Easy
Using your rotary cutter, cut diagonally from the first two marks on each side of the bottom corner to the top corner.
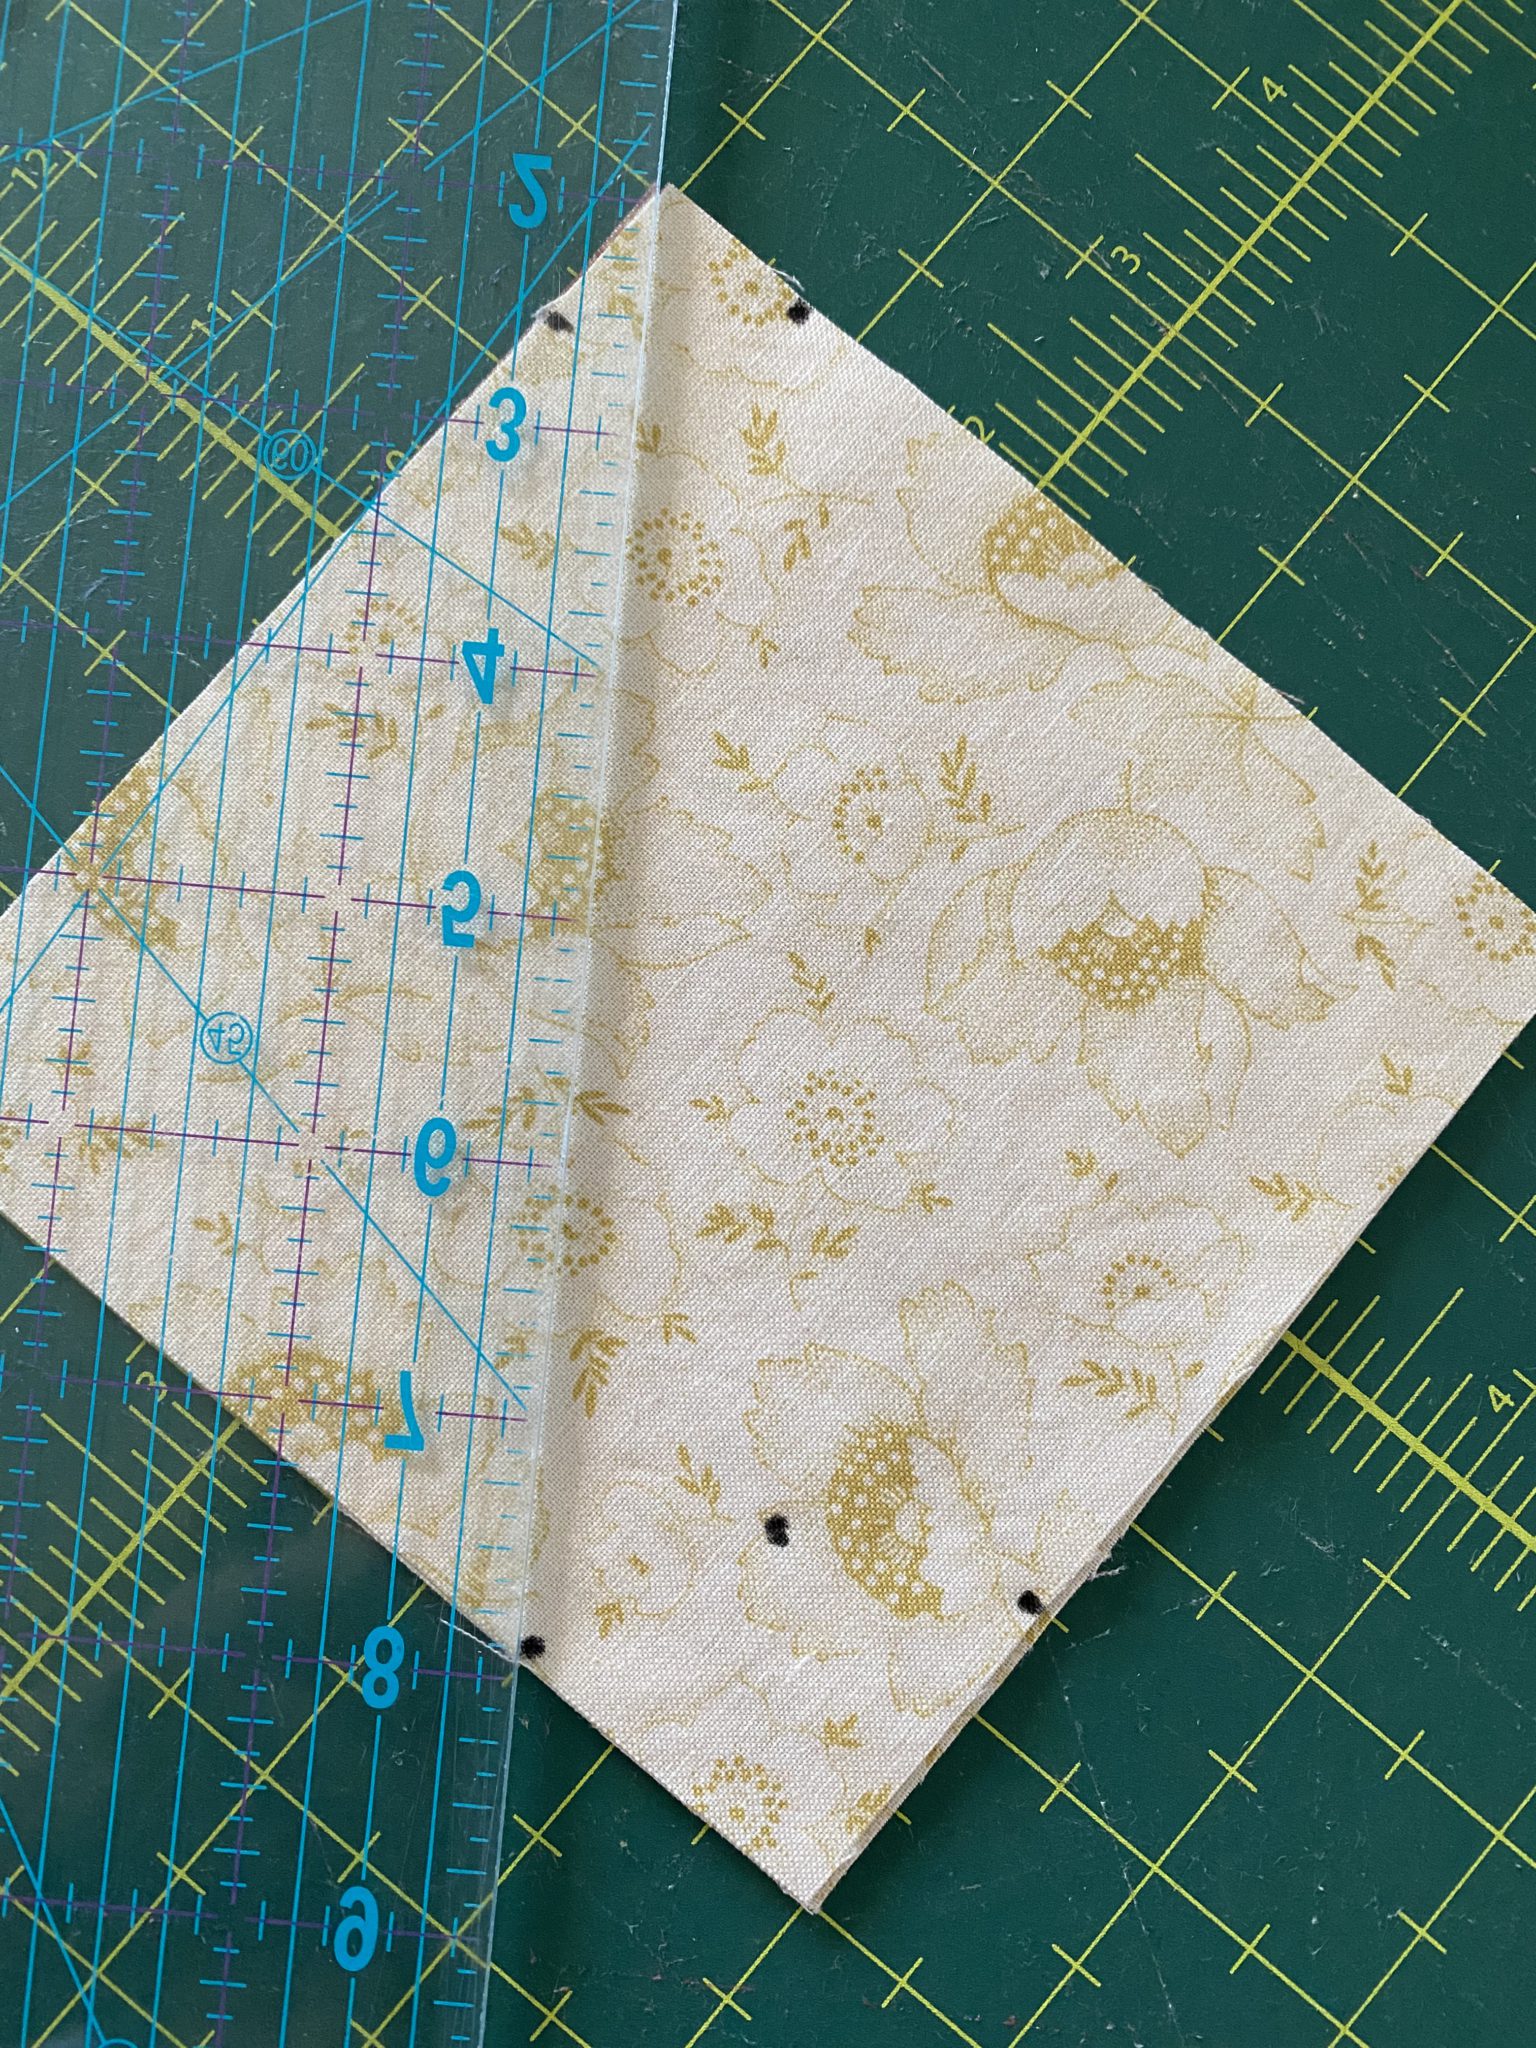
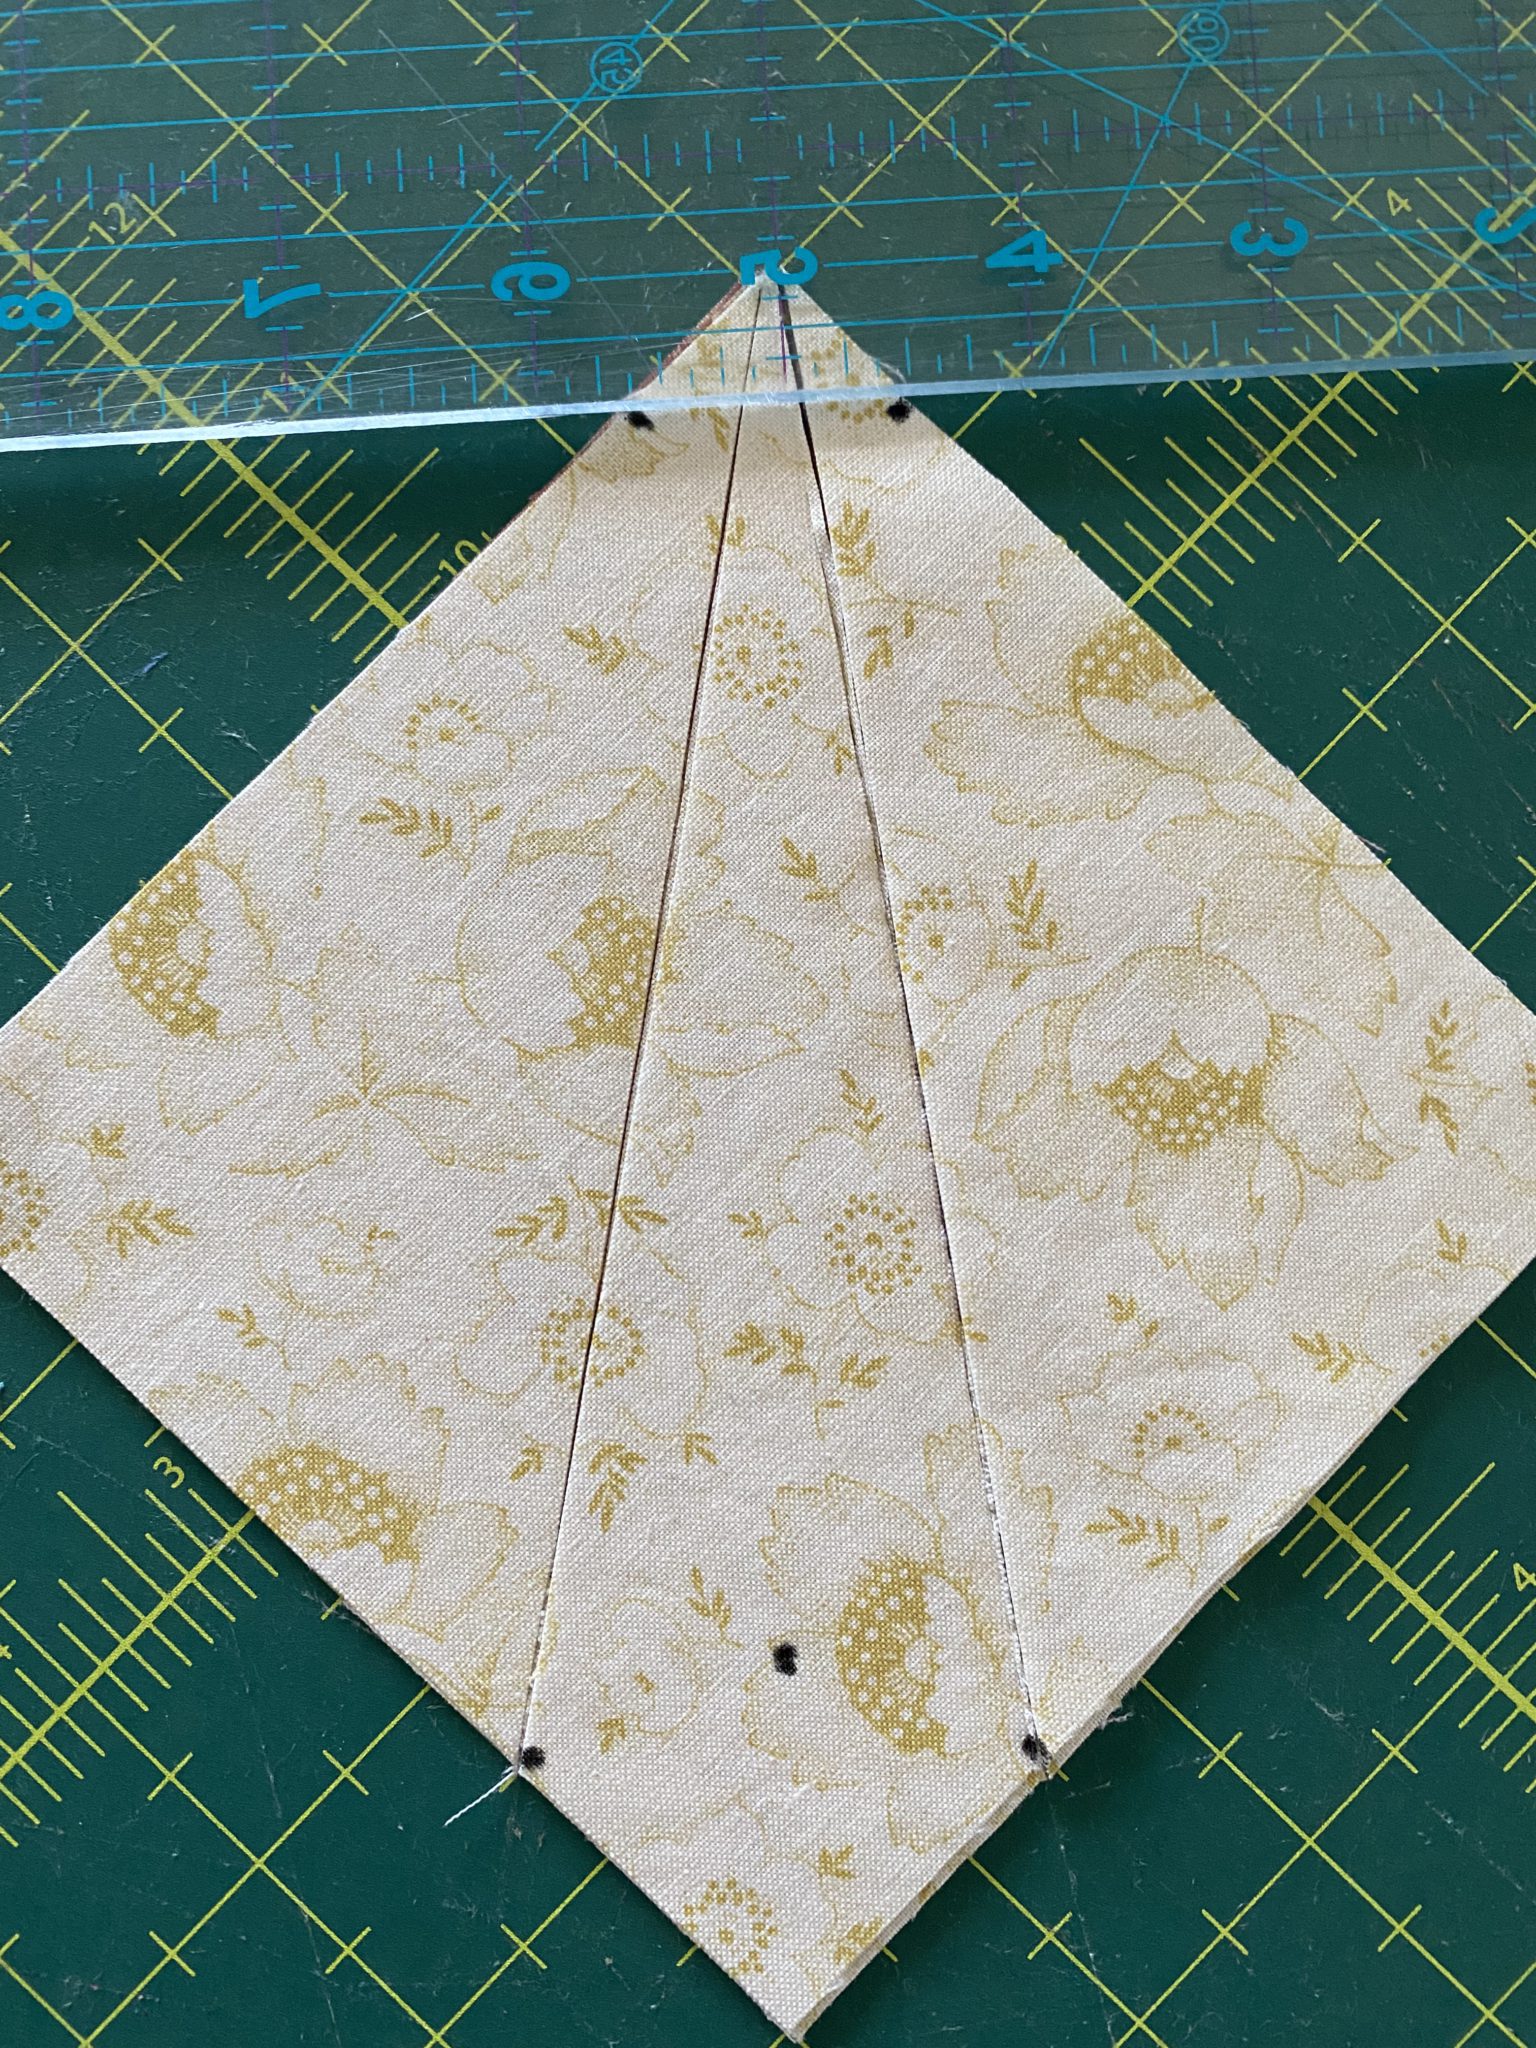
Leaving everything in place now cut off the top corner between the two marks which are 3/4” from the top corner.
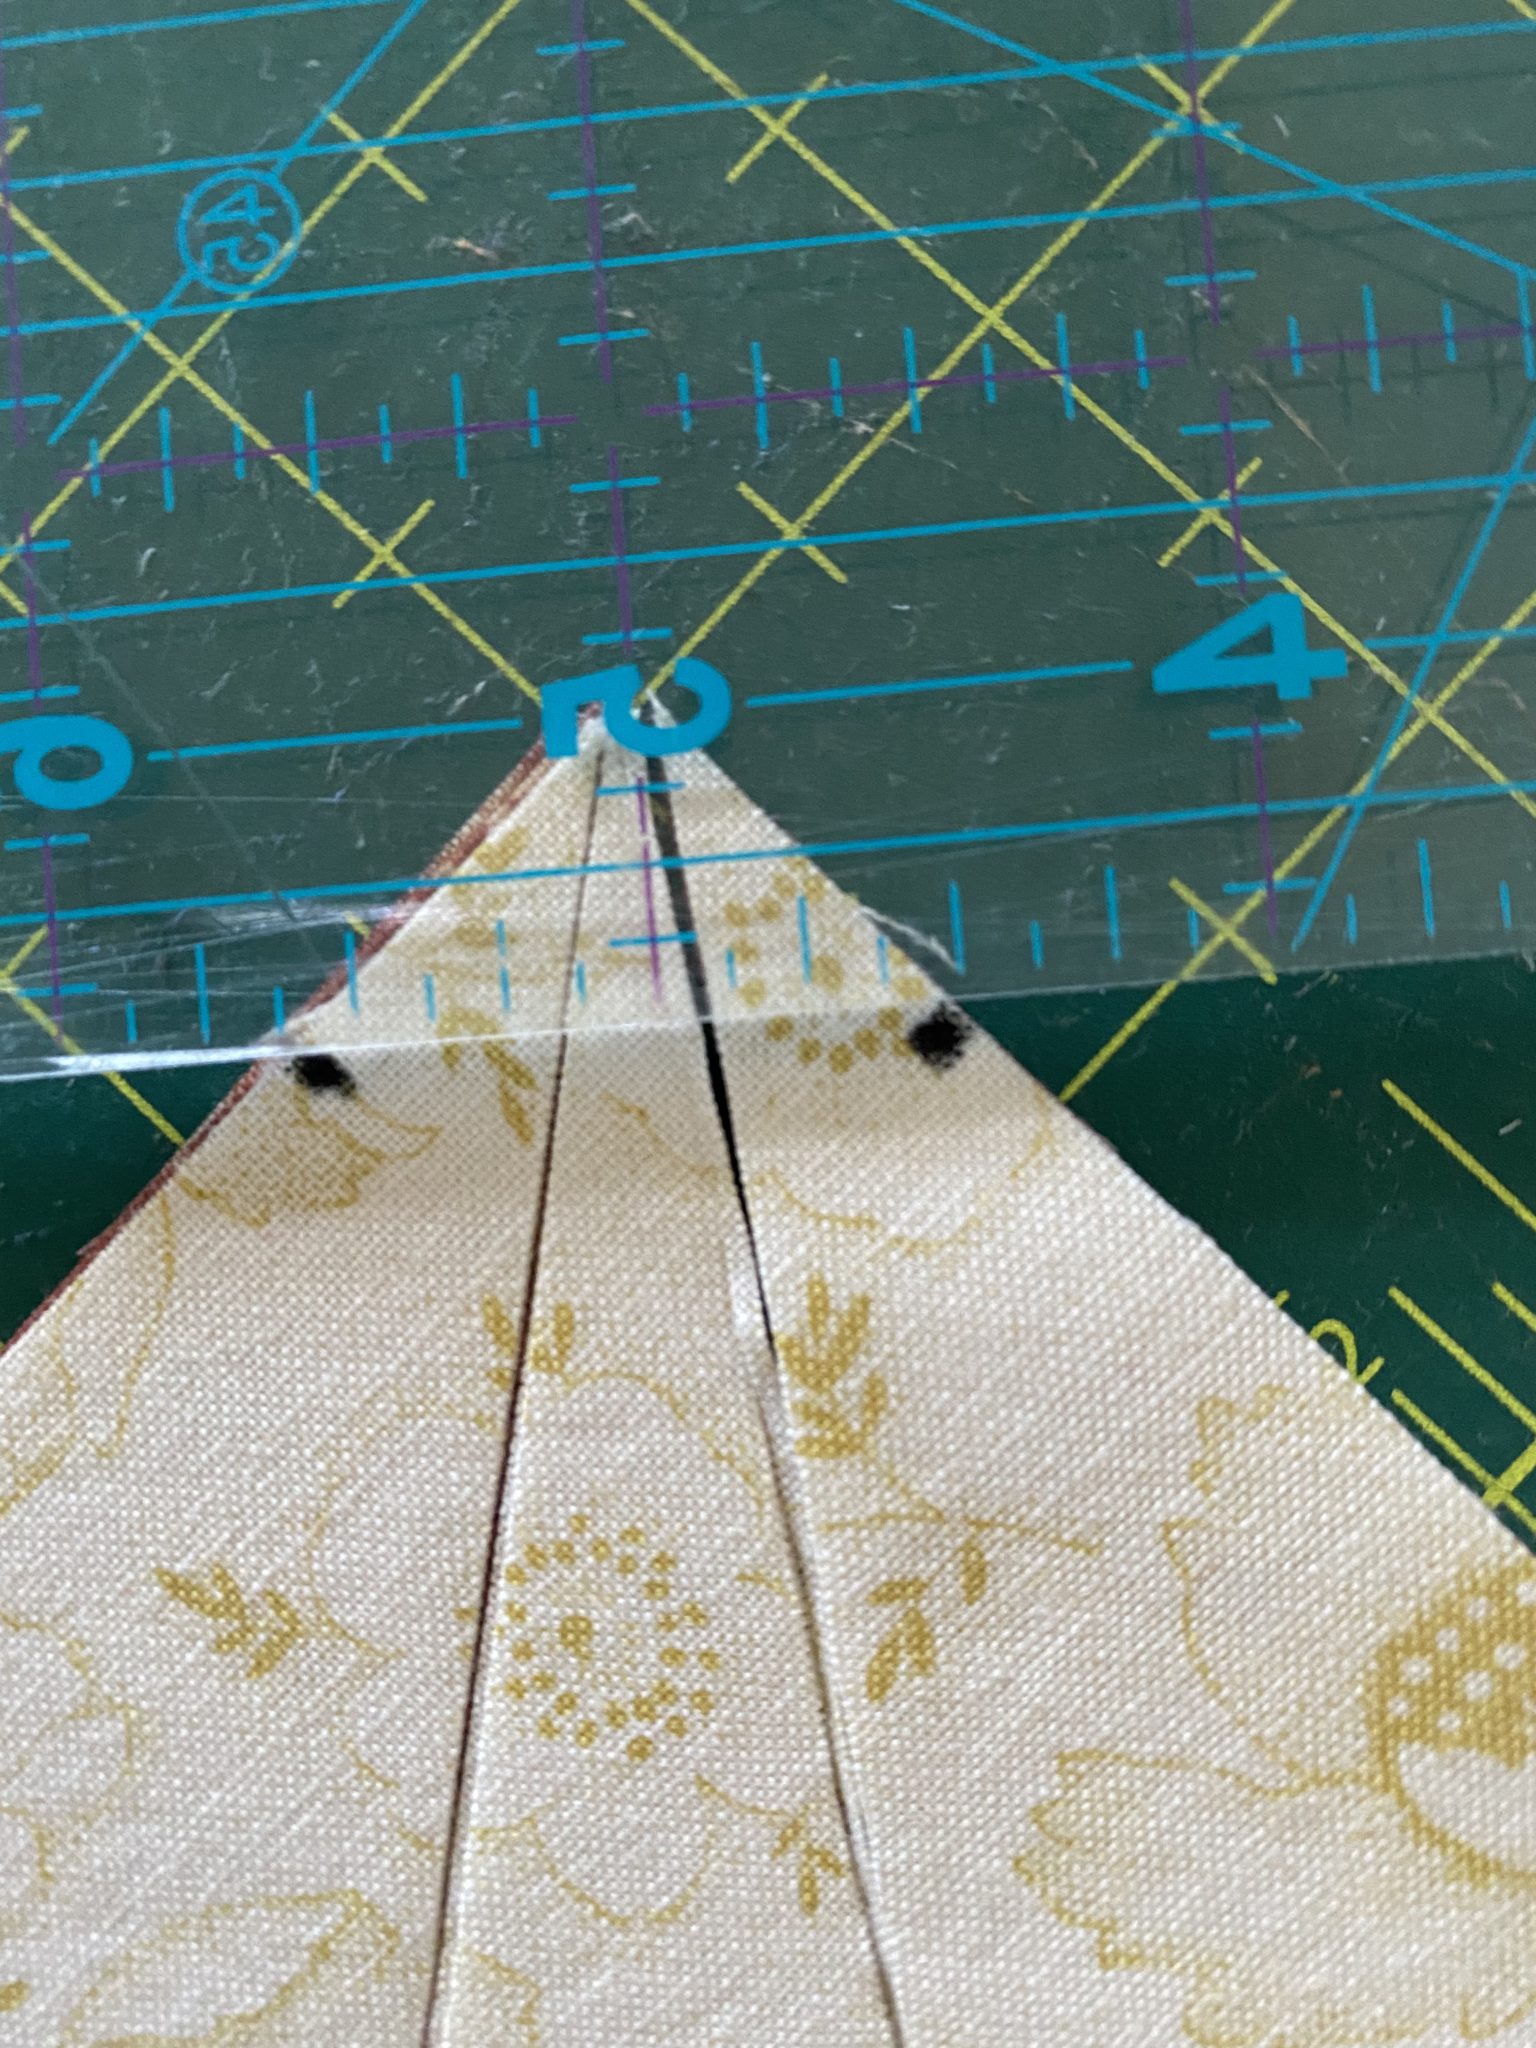
Moving the side pieces away, place the ruler along the centre diagonal of the centre piece (which now looks like a tie) Cut across the bottom corner off the centre, at the 5th mark which is 1/½” up from the bottom corner.
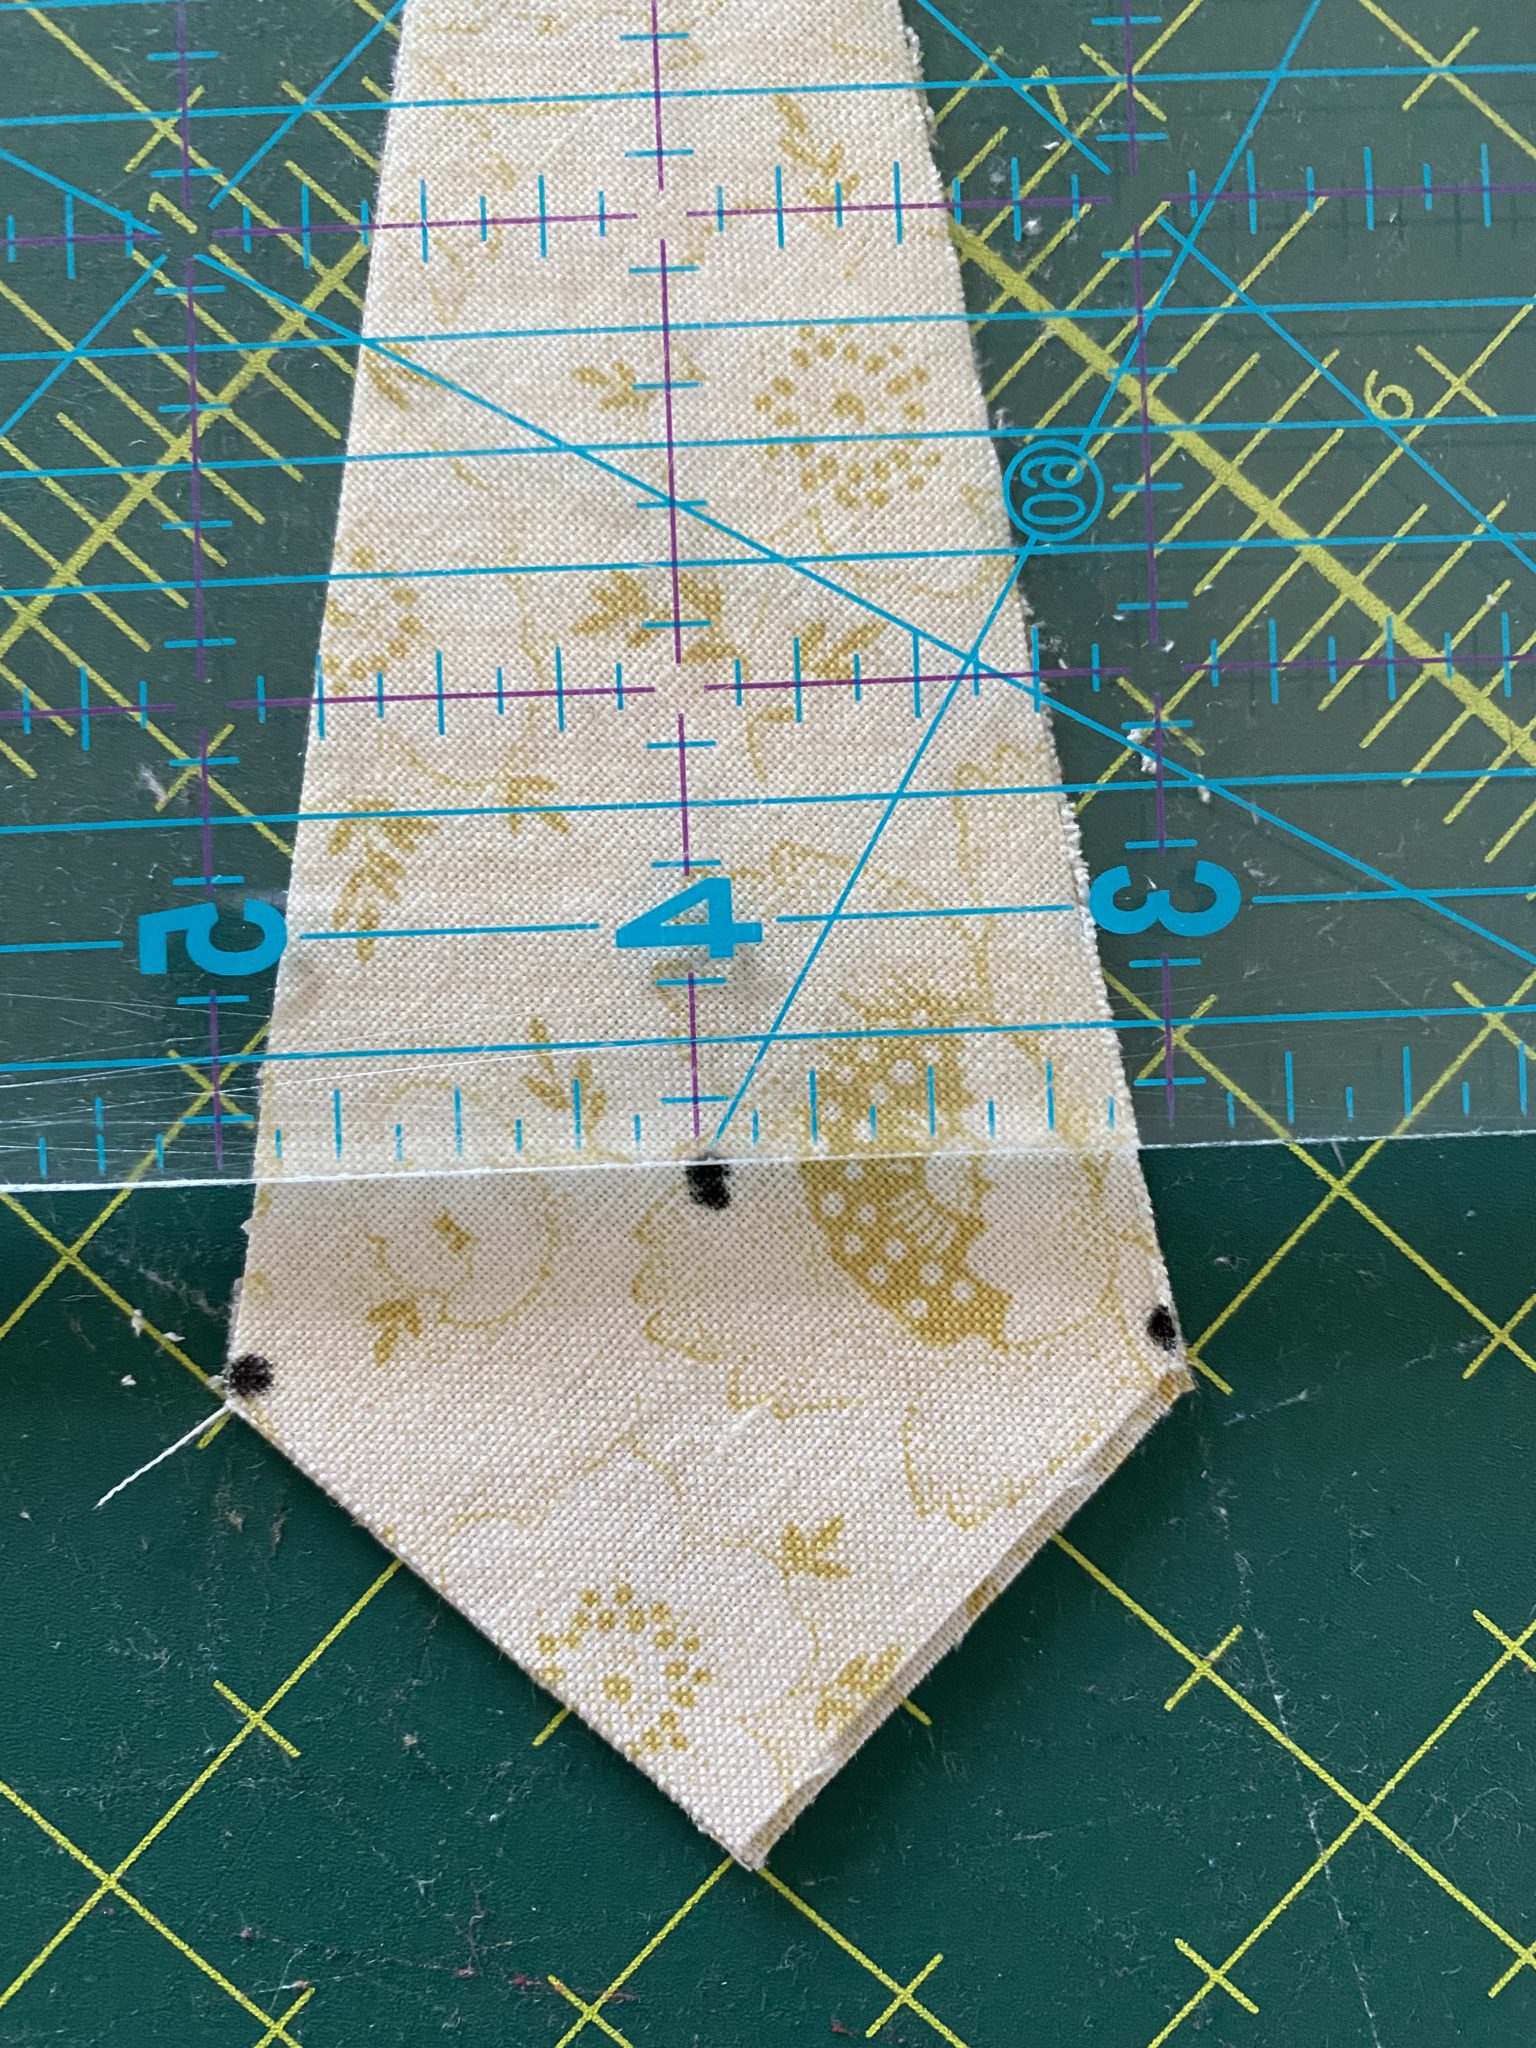
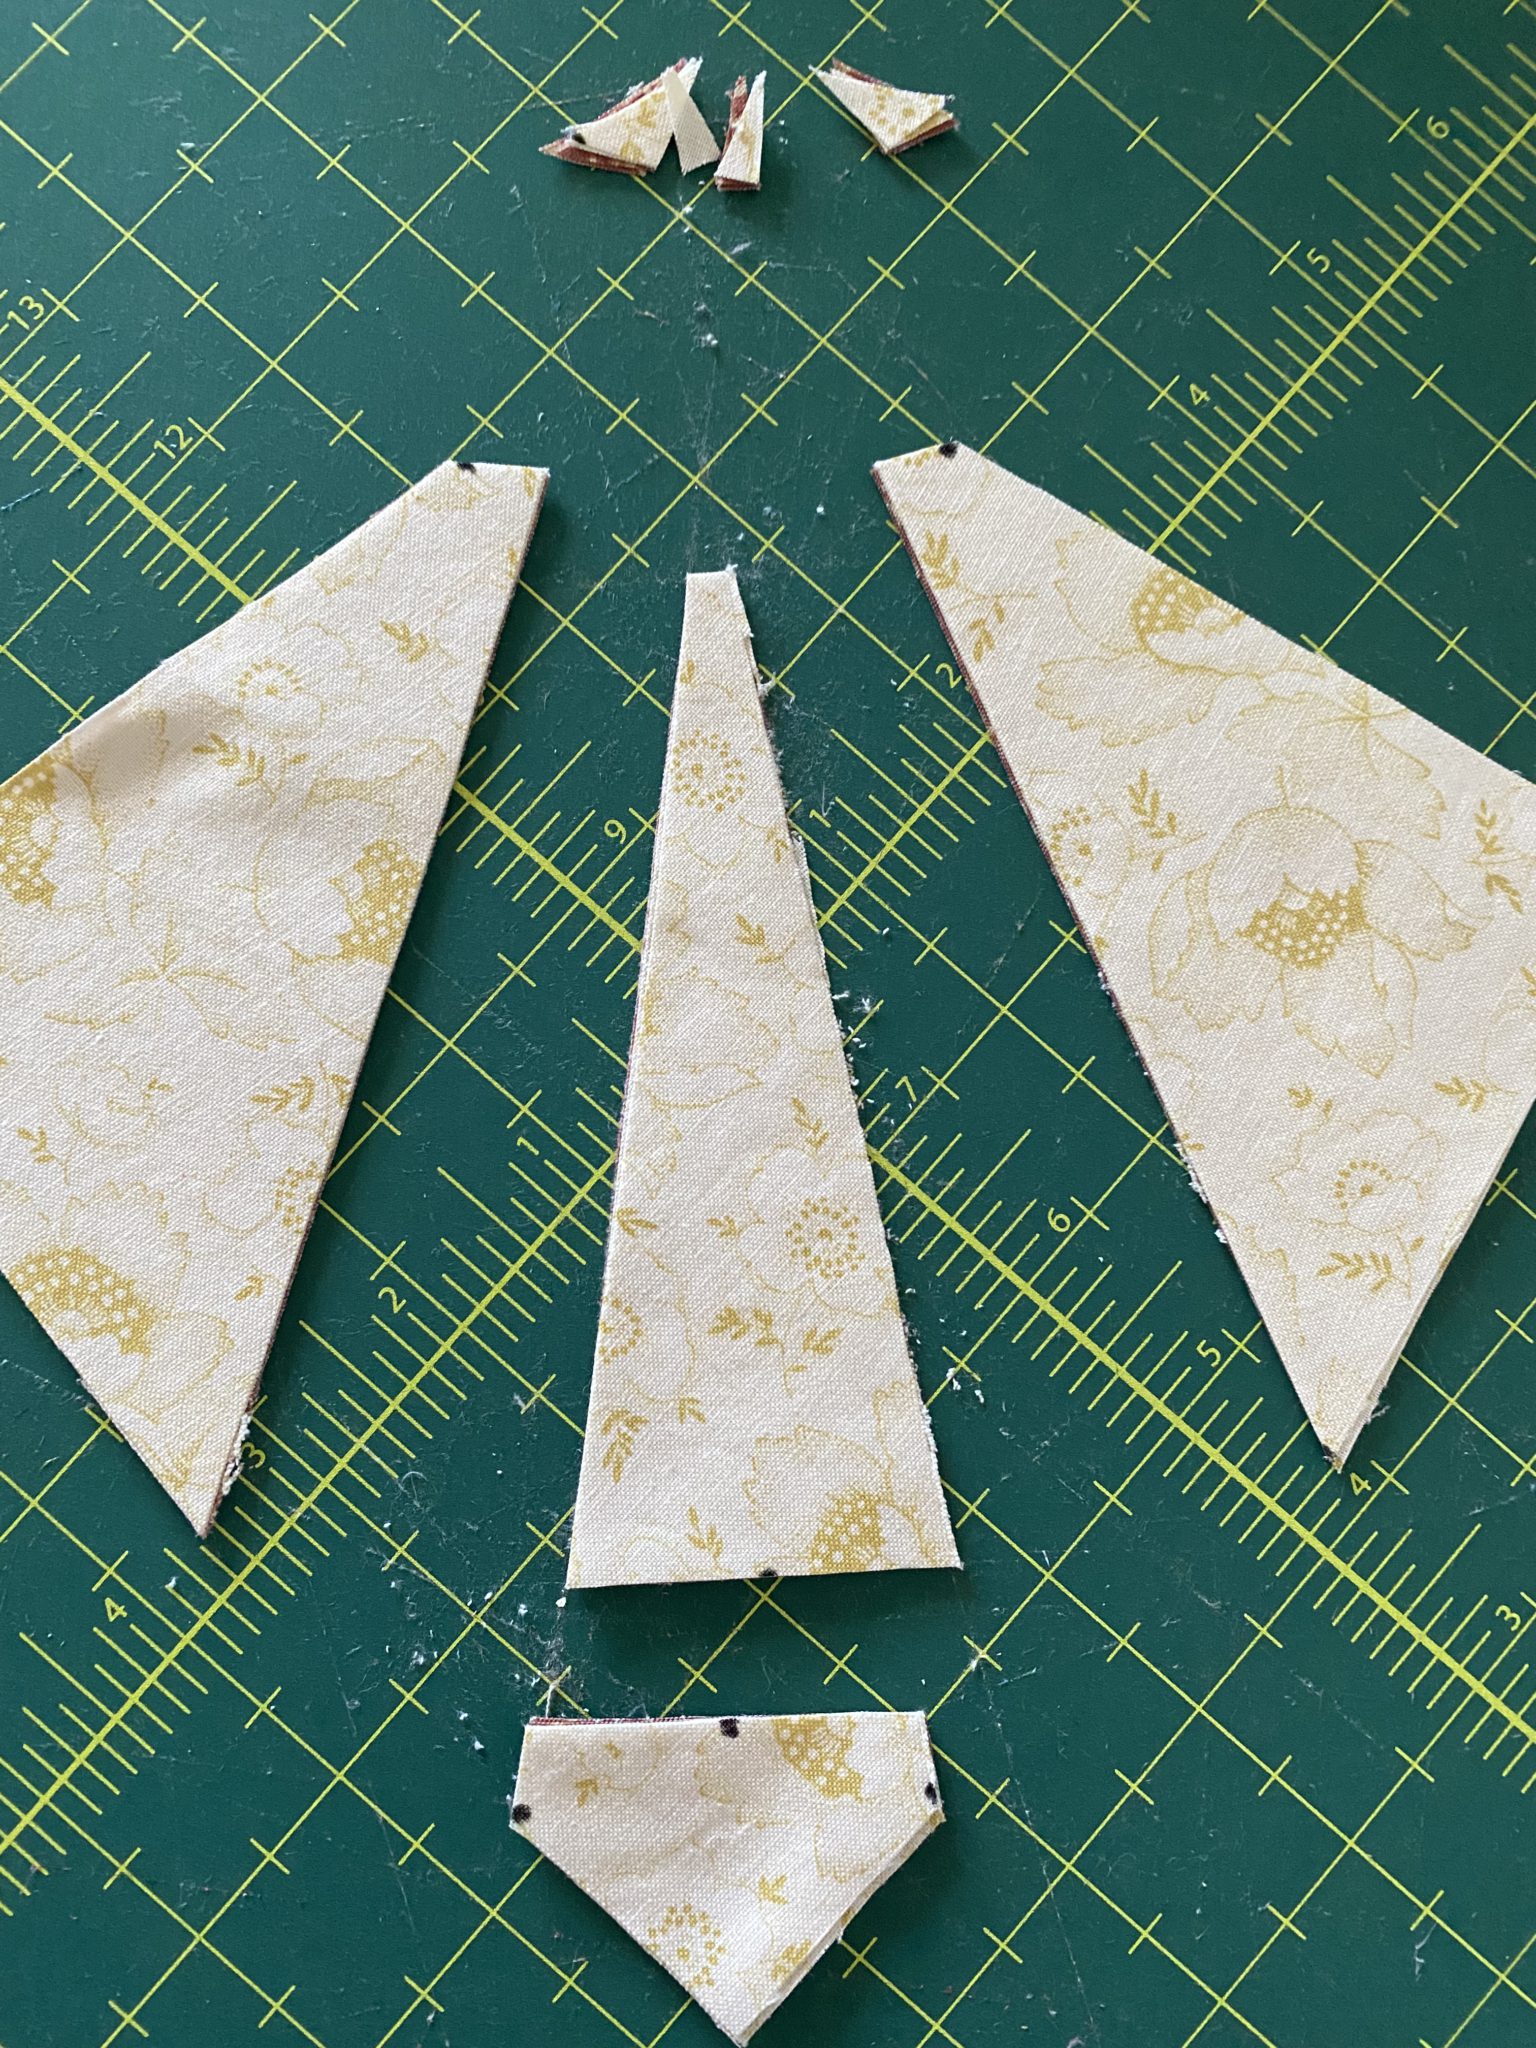
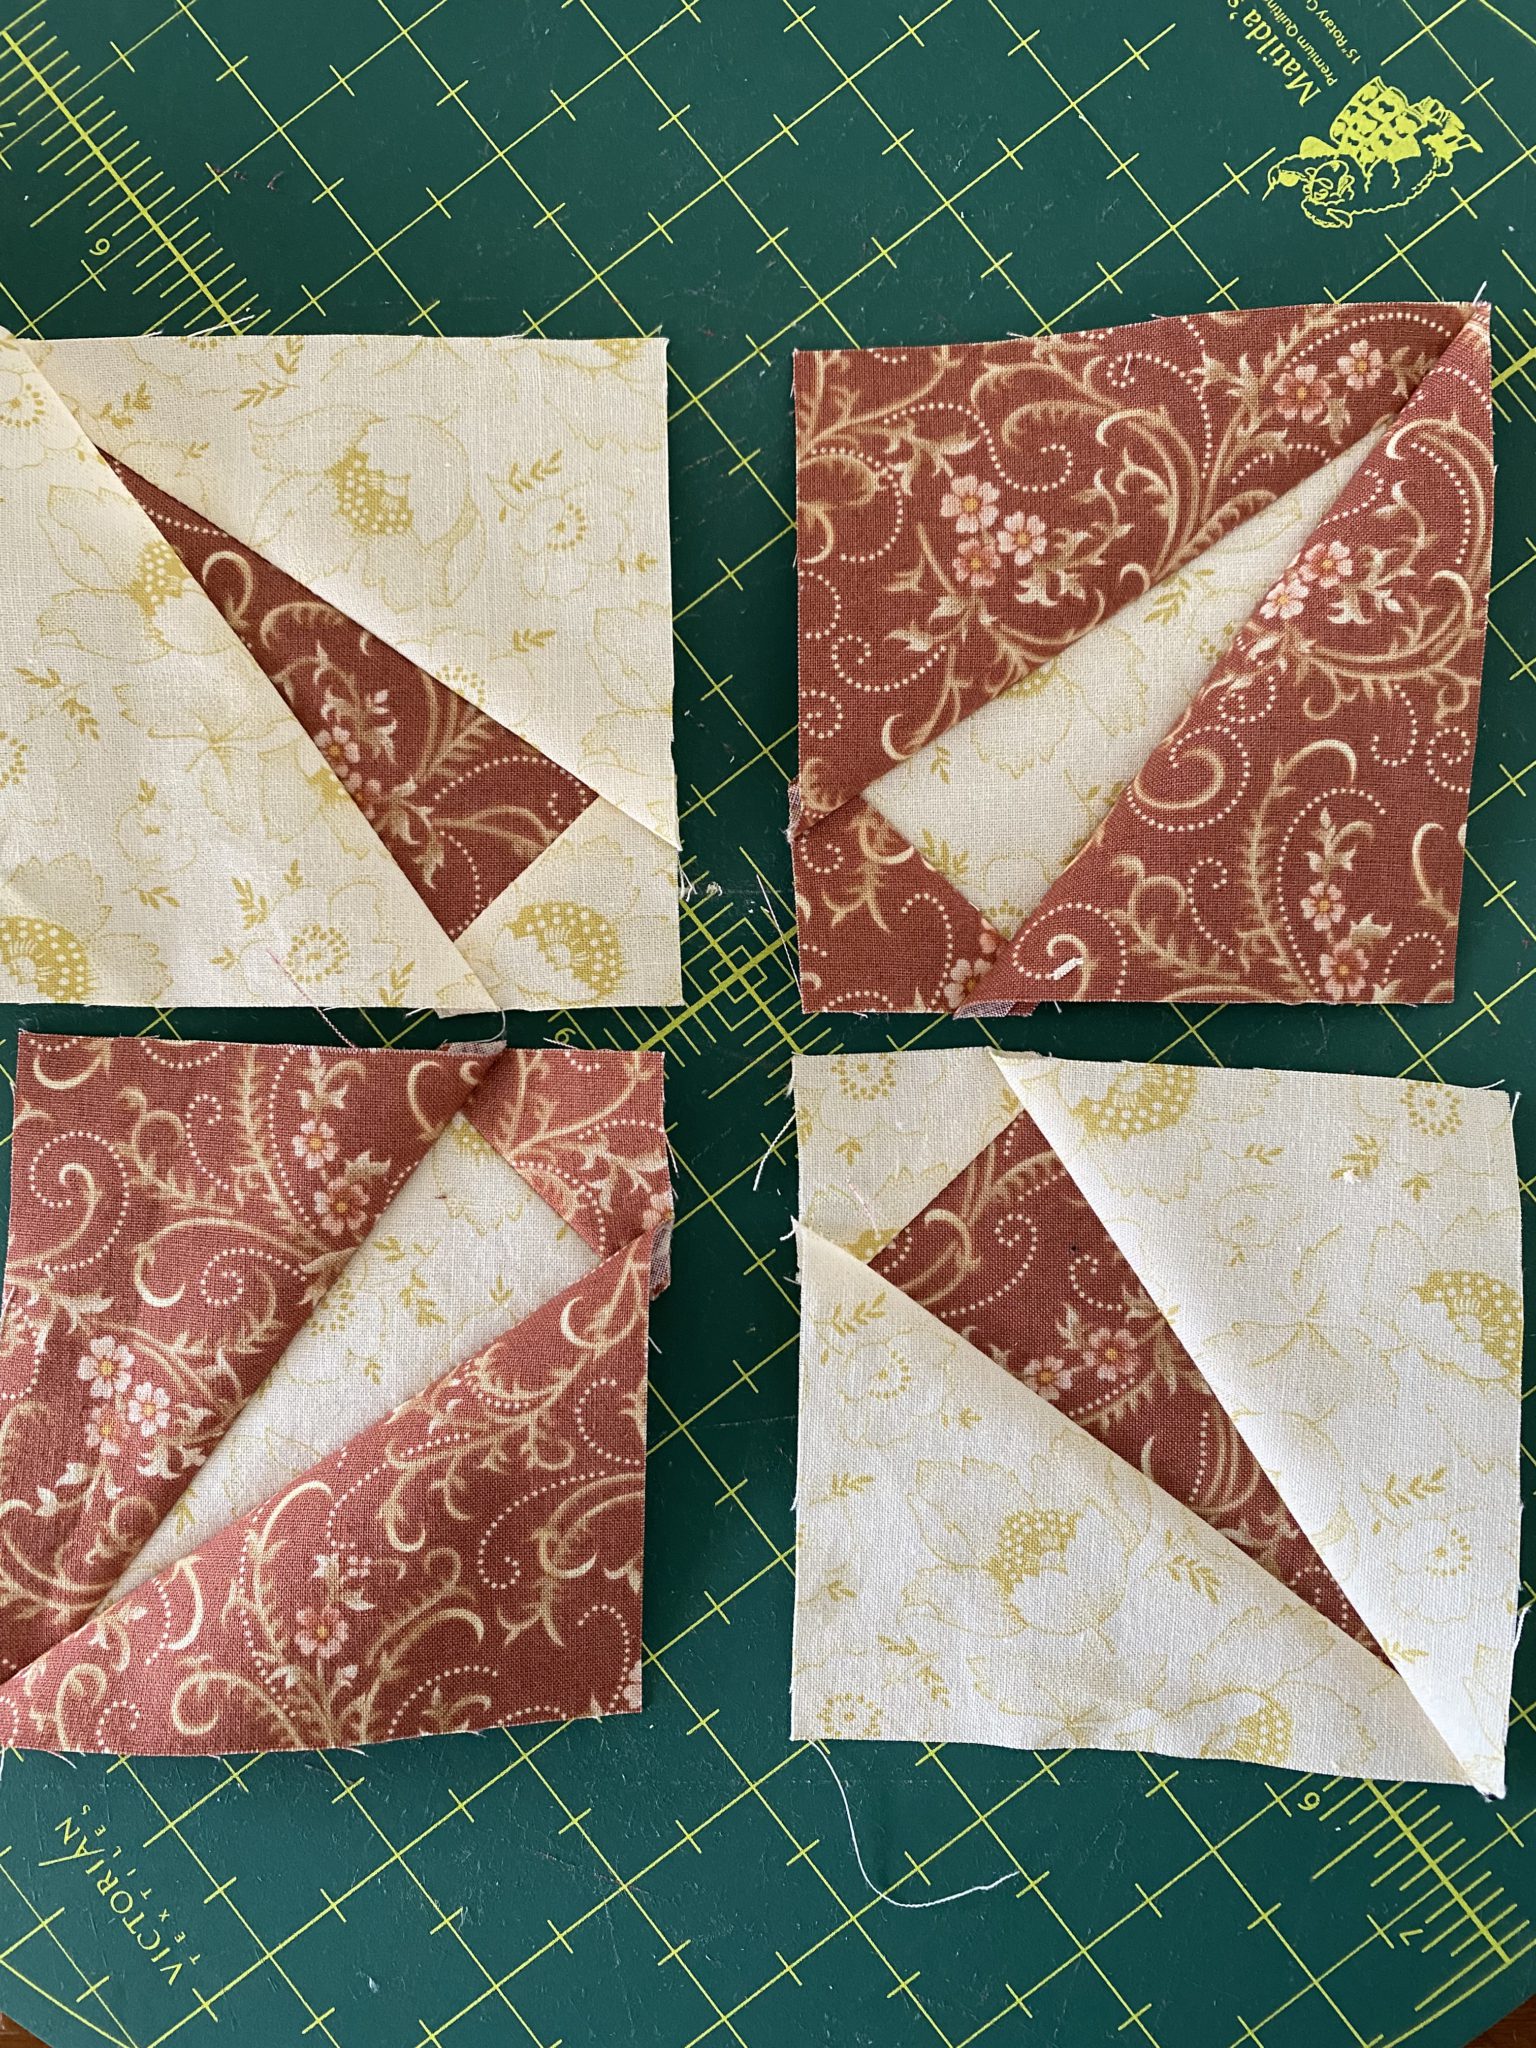
Now you should have four pieces which look like this. And a tiny bit of waste which you can see at the top.
Seperate the pieces and lay them out being mindful of their position, but interchanging only the centre piece to an opposing colour, like this.
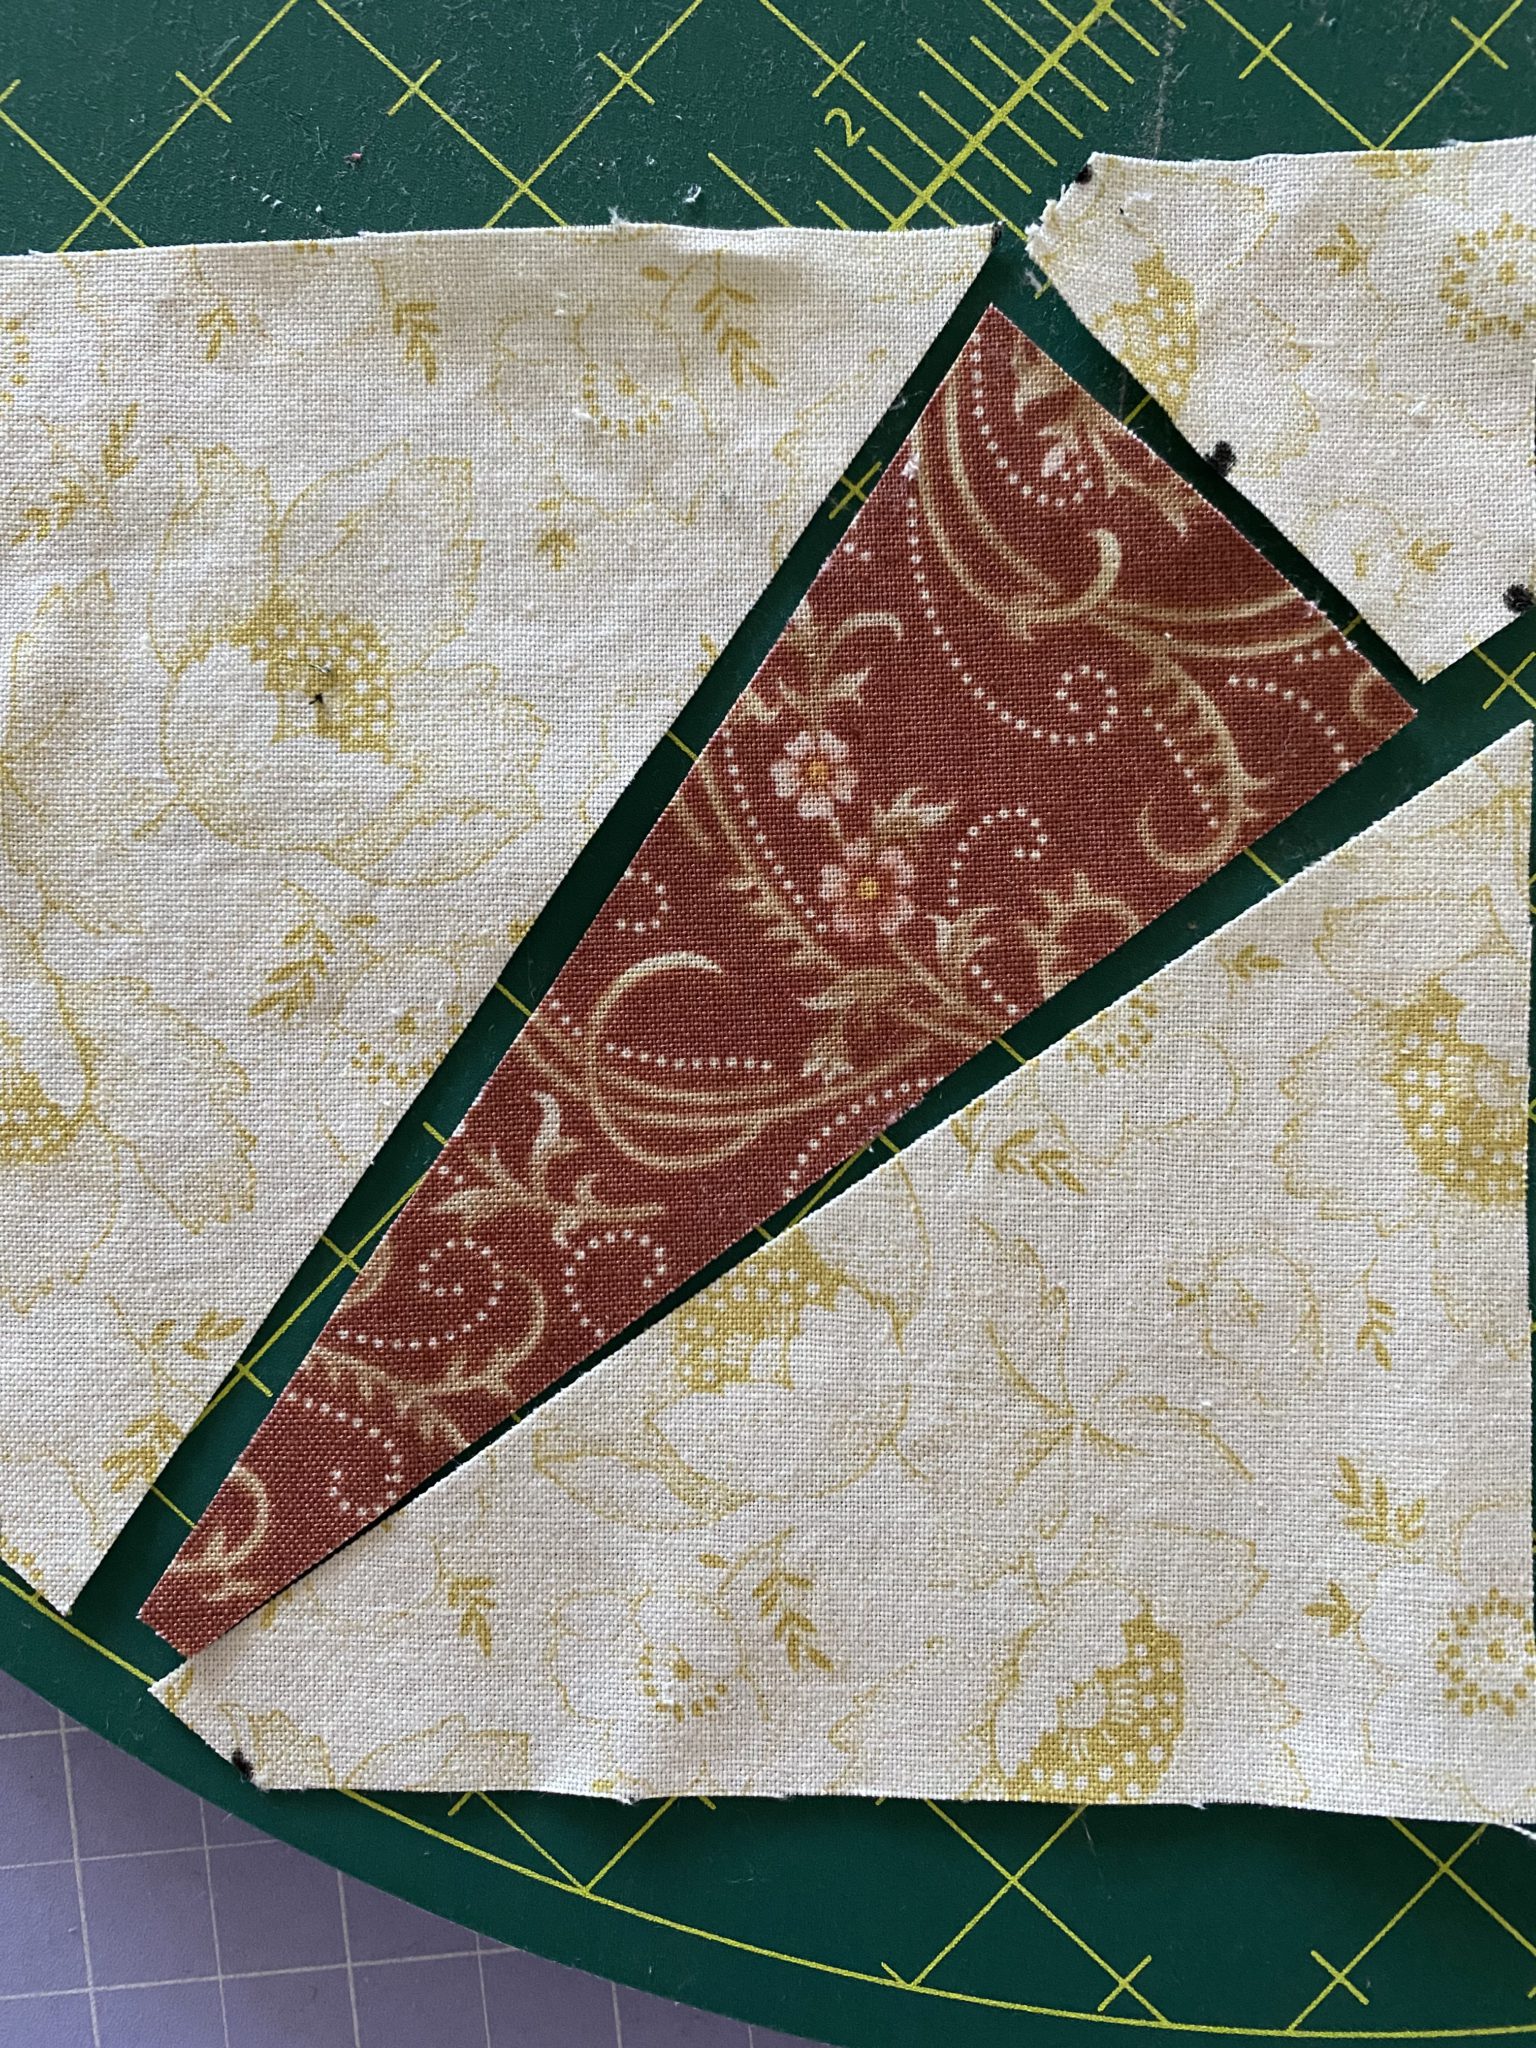
Position the four units, so that the smallest units are facing toward the centre.
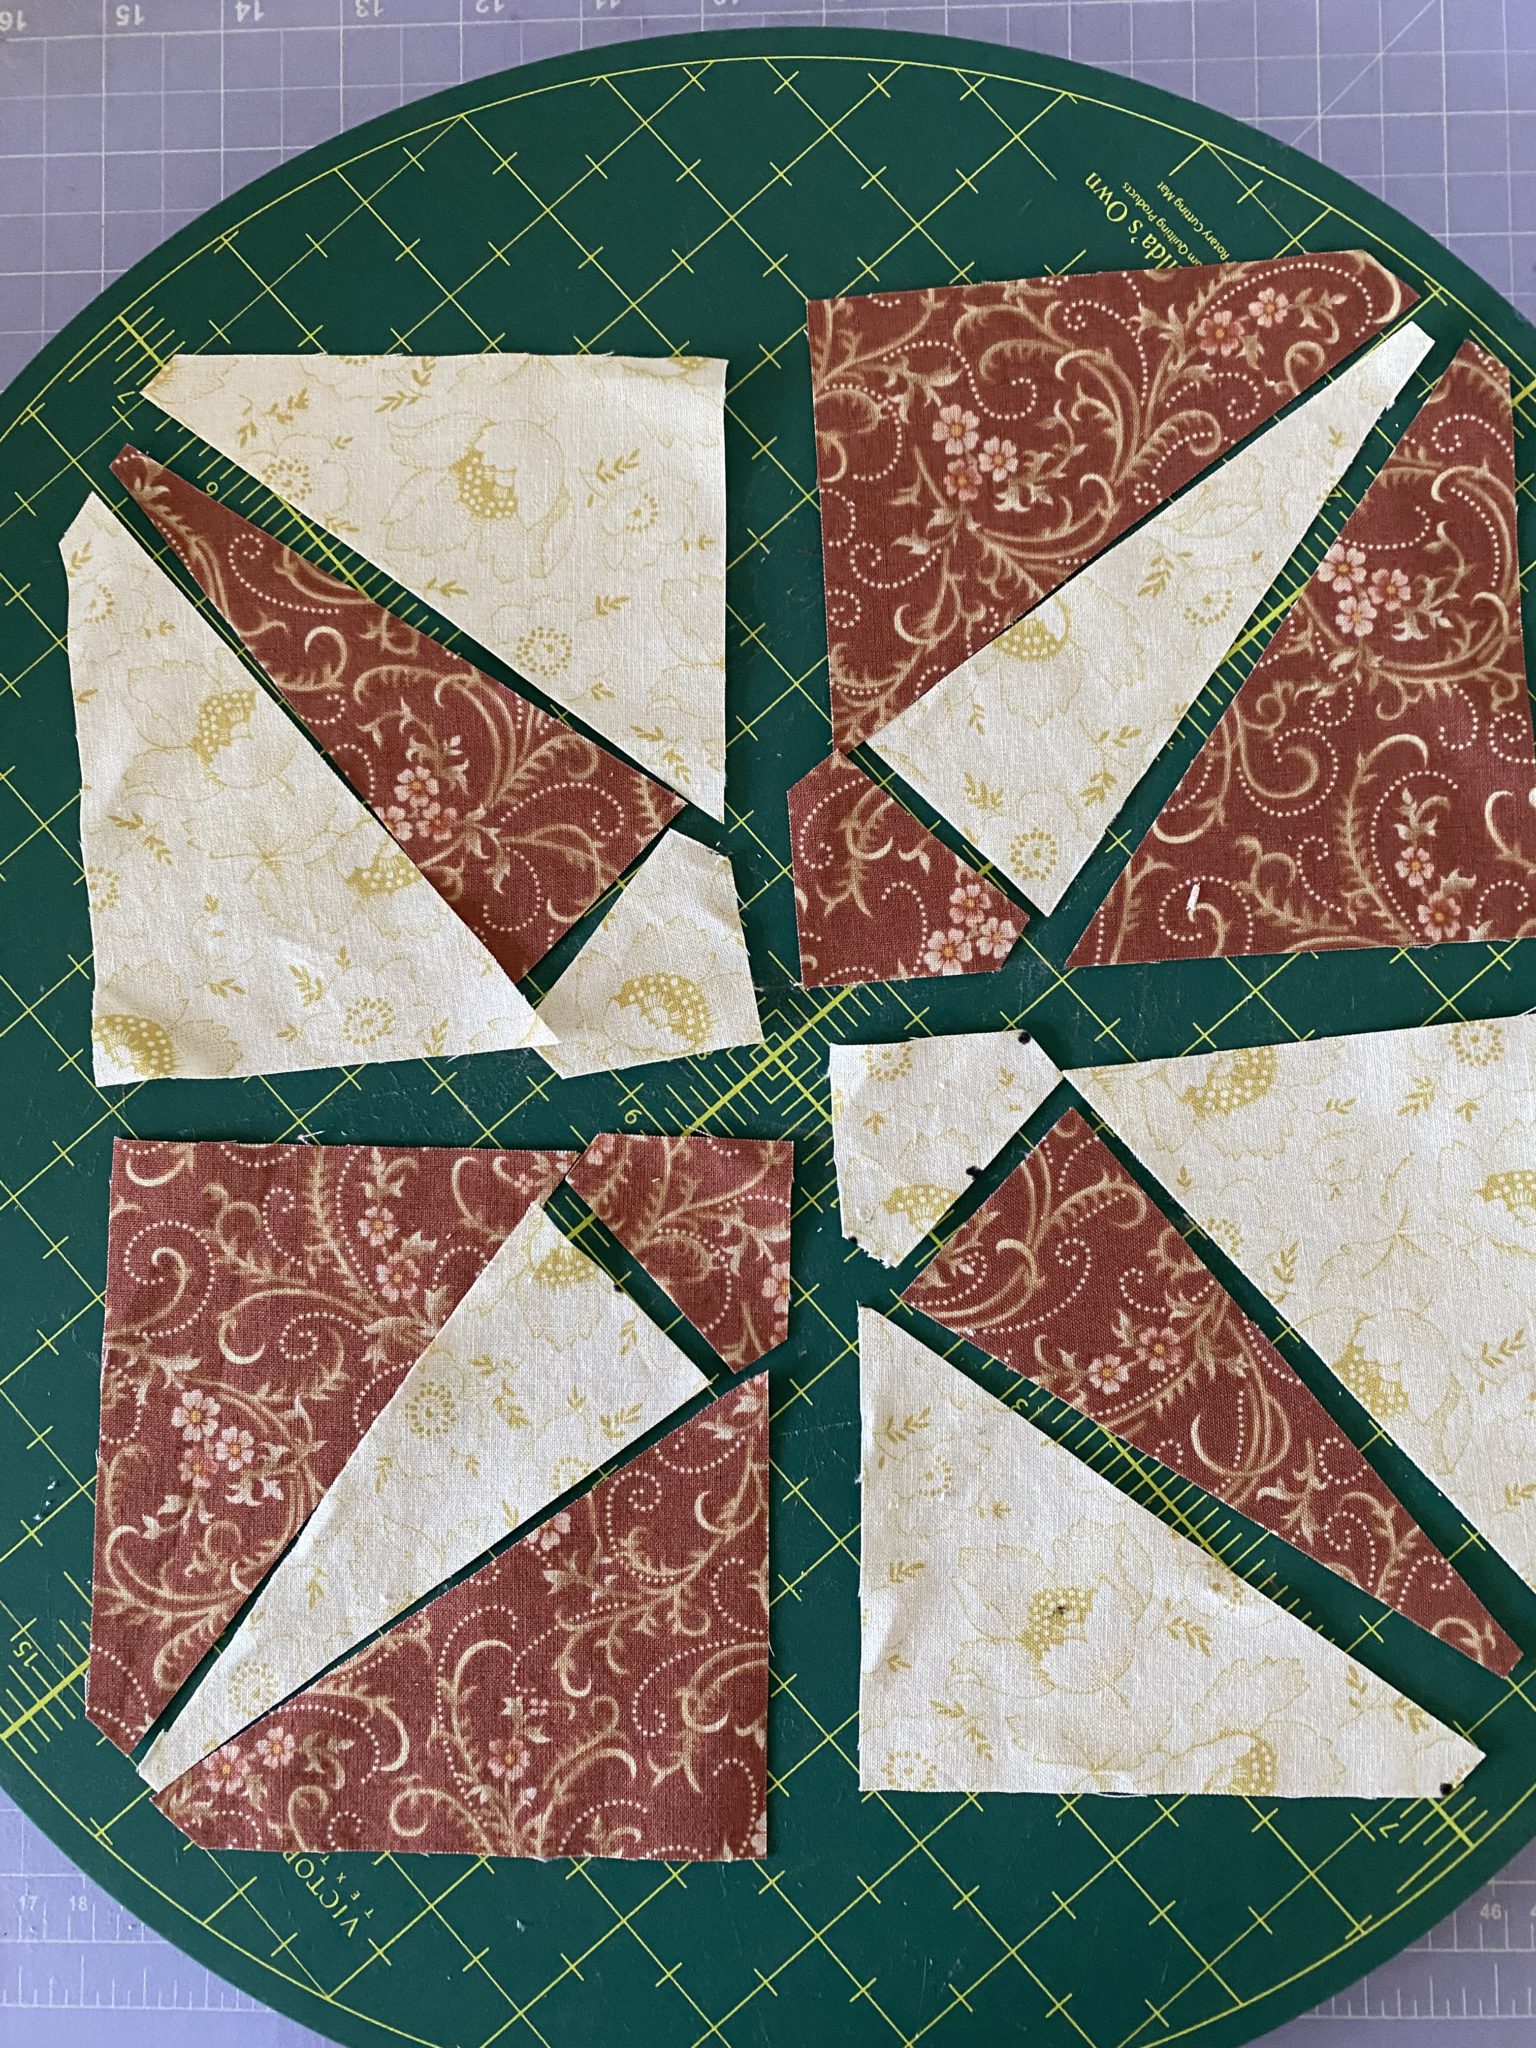
Sewing the Crossed Canoes Block Antique Inspired Made Easy
Now, just so you know, at this stage, you can choose to machine piece or hand piece these blocks. I am just mentioning this, because it would be a delightful hand piecing project, if you are looking for a portable project.
Working backwards, now attach the the bottom pentagon shape to the centre piece. Finger press.
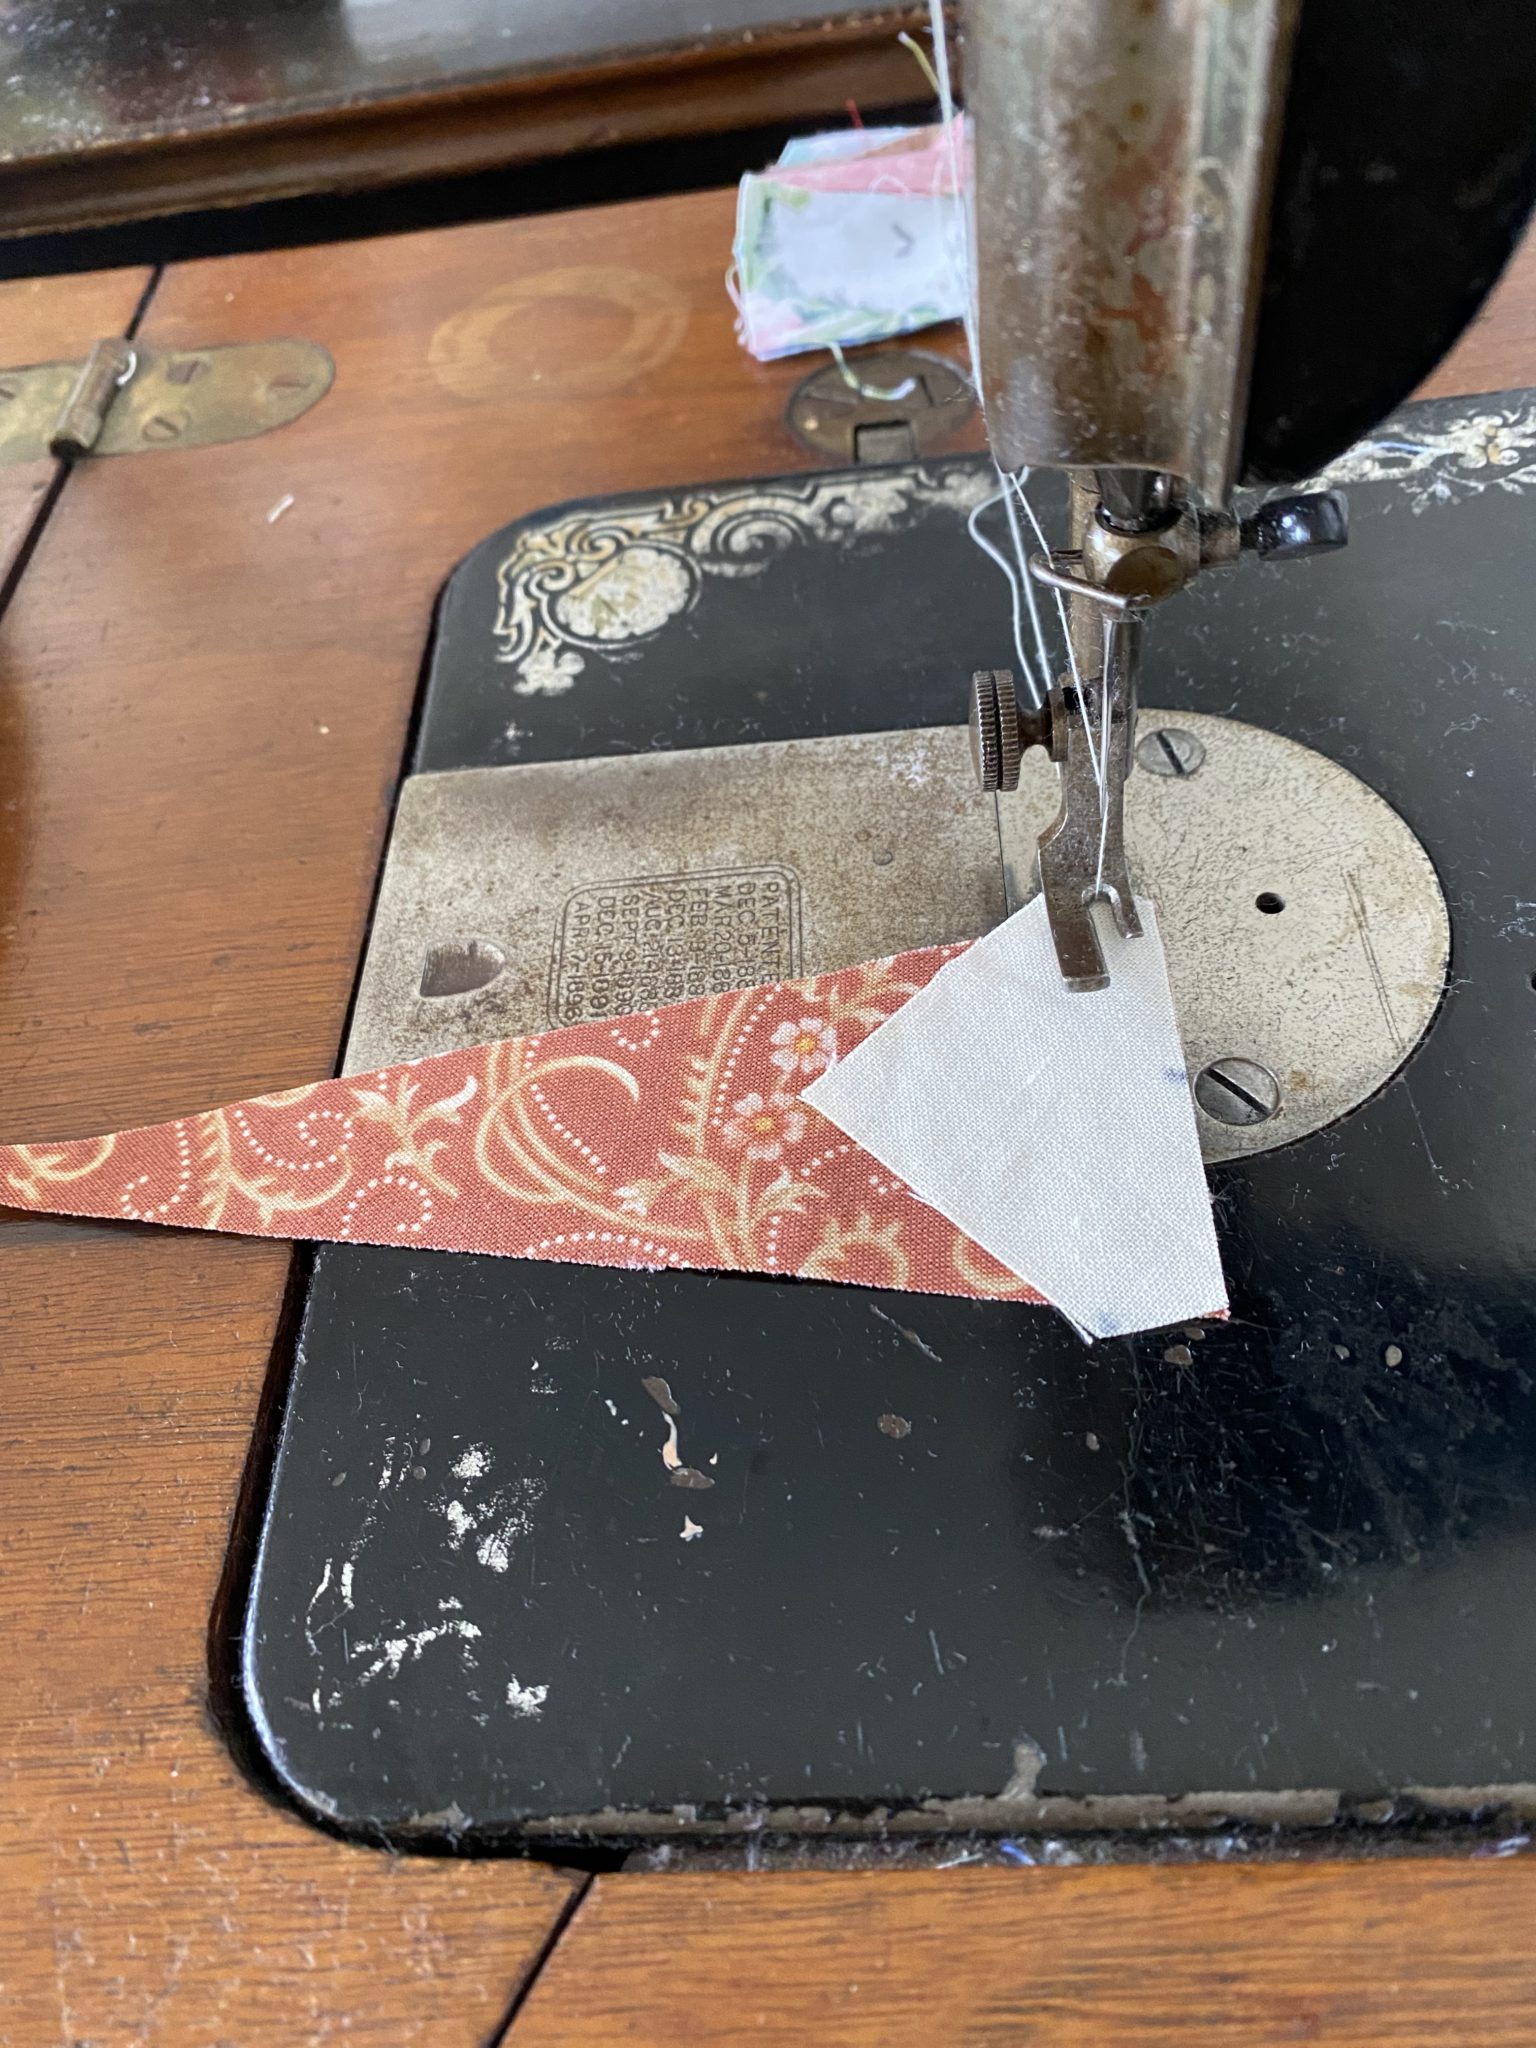
Carefully position a side piece to the centre unit matching the top corners and sew together. TIP Make sure that when you open it, the block will be square. Finger press.
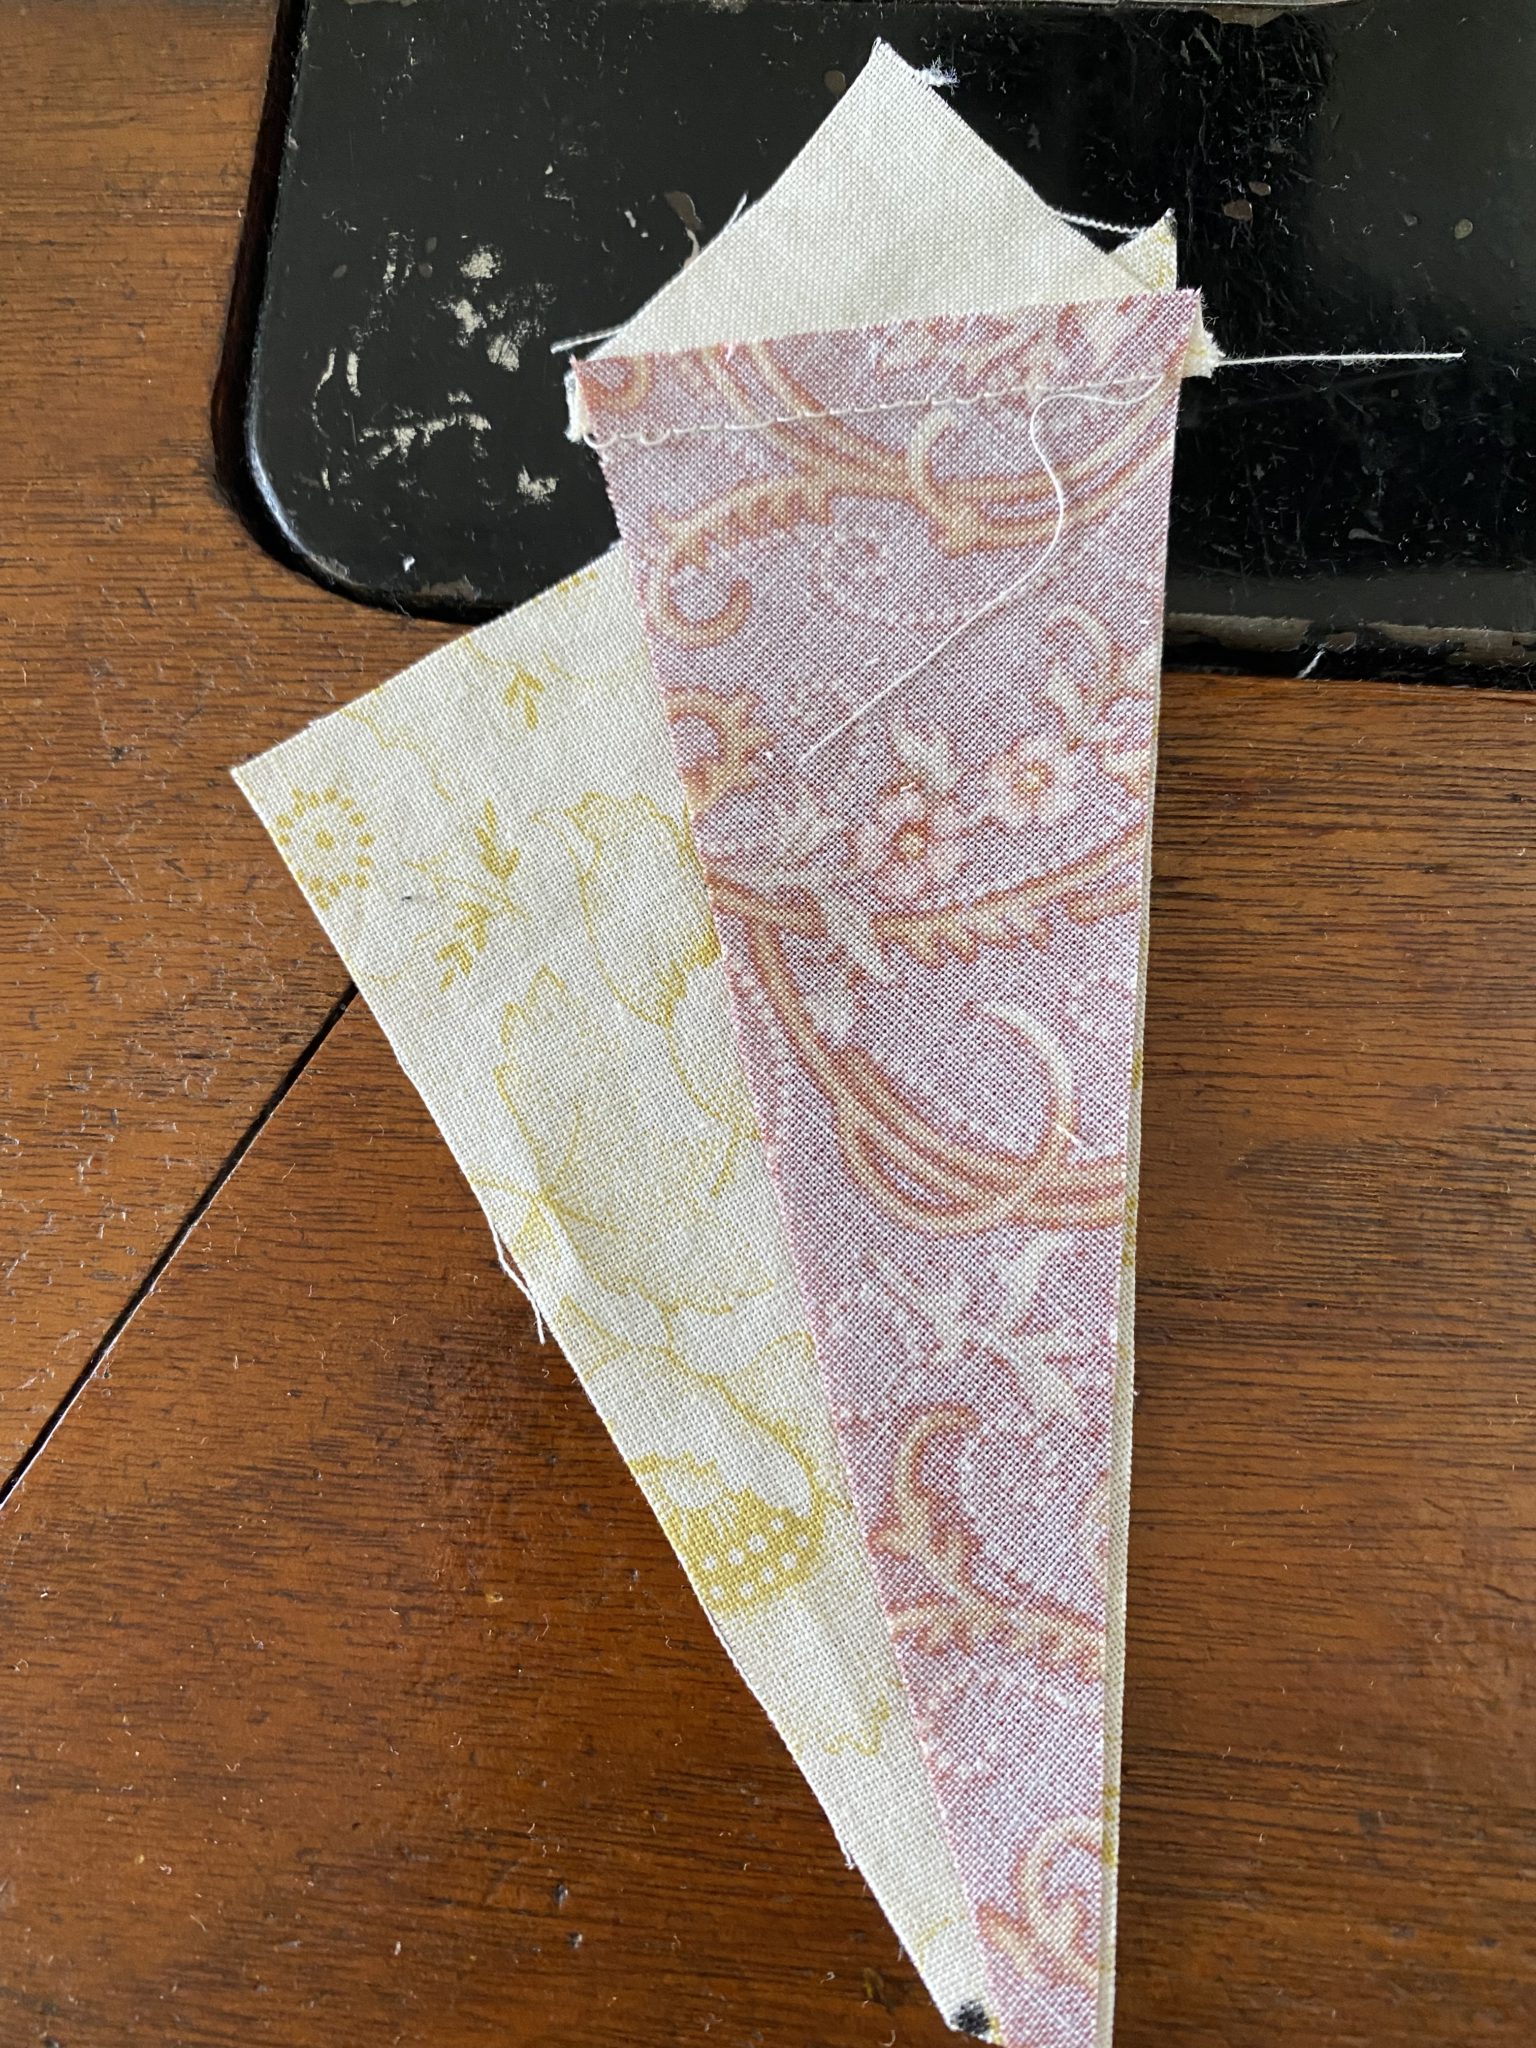
Repeat for the other side. Open the unit. Press.
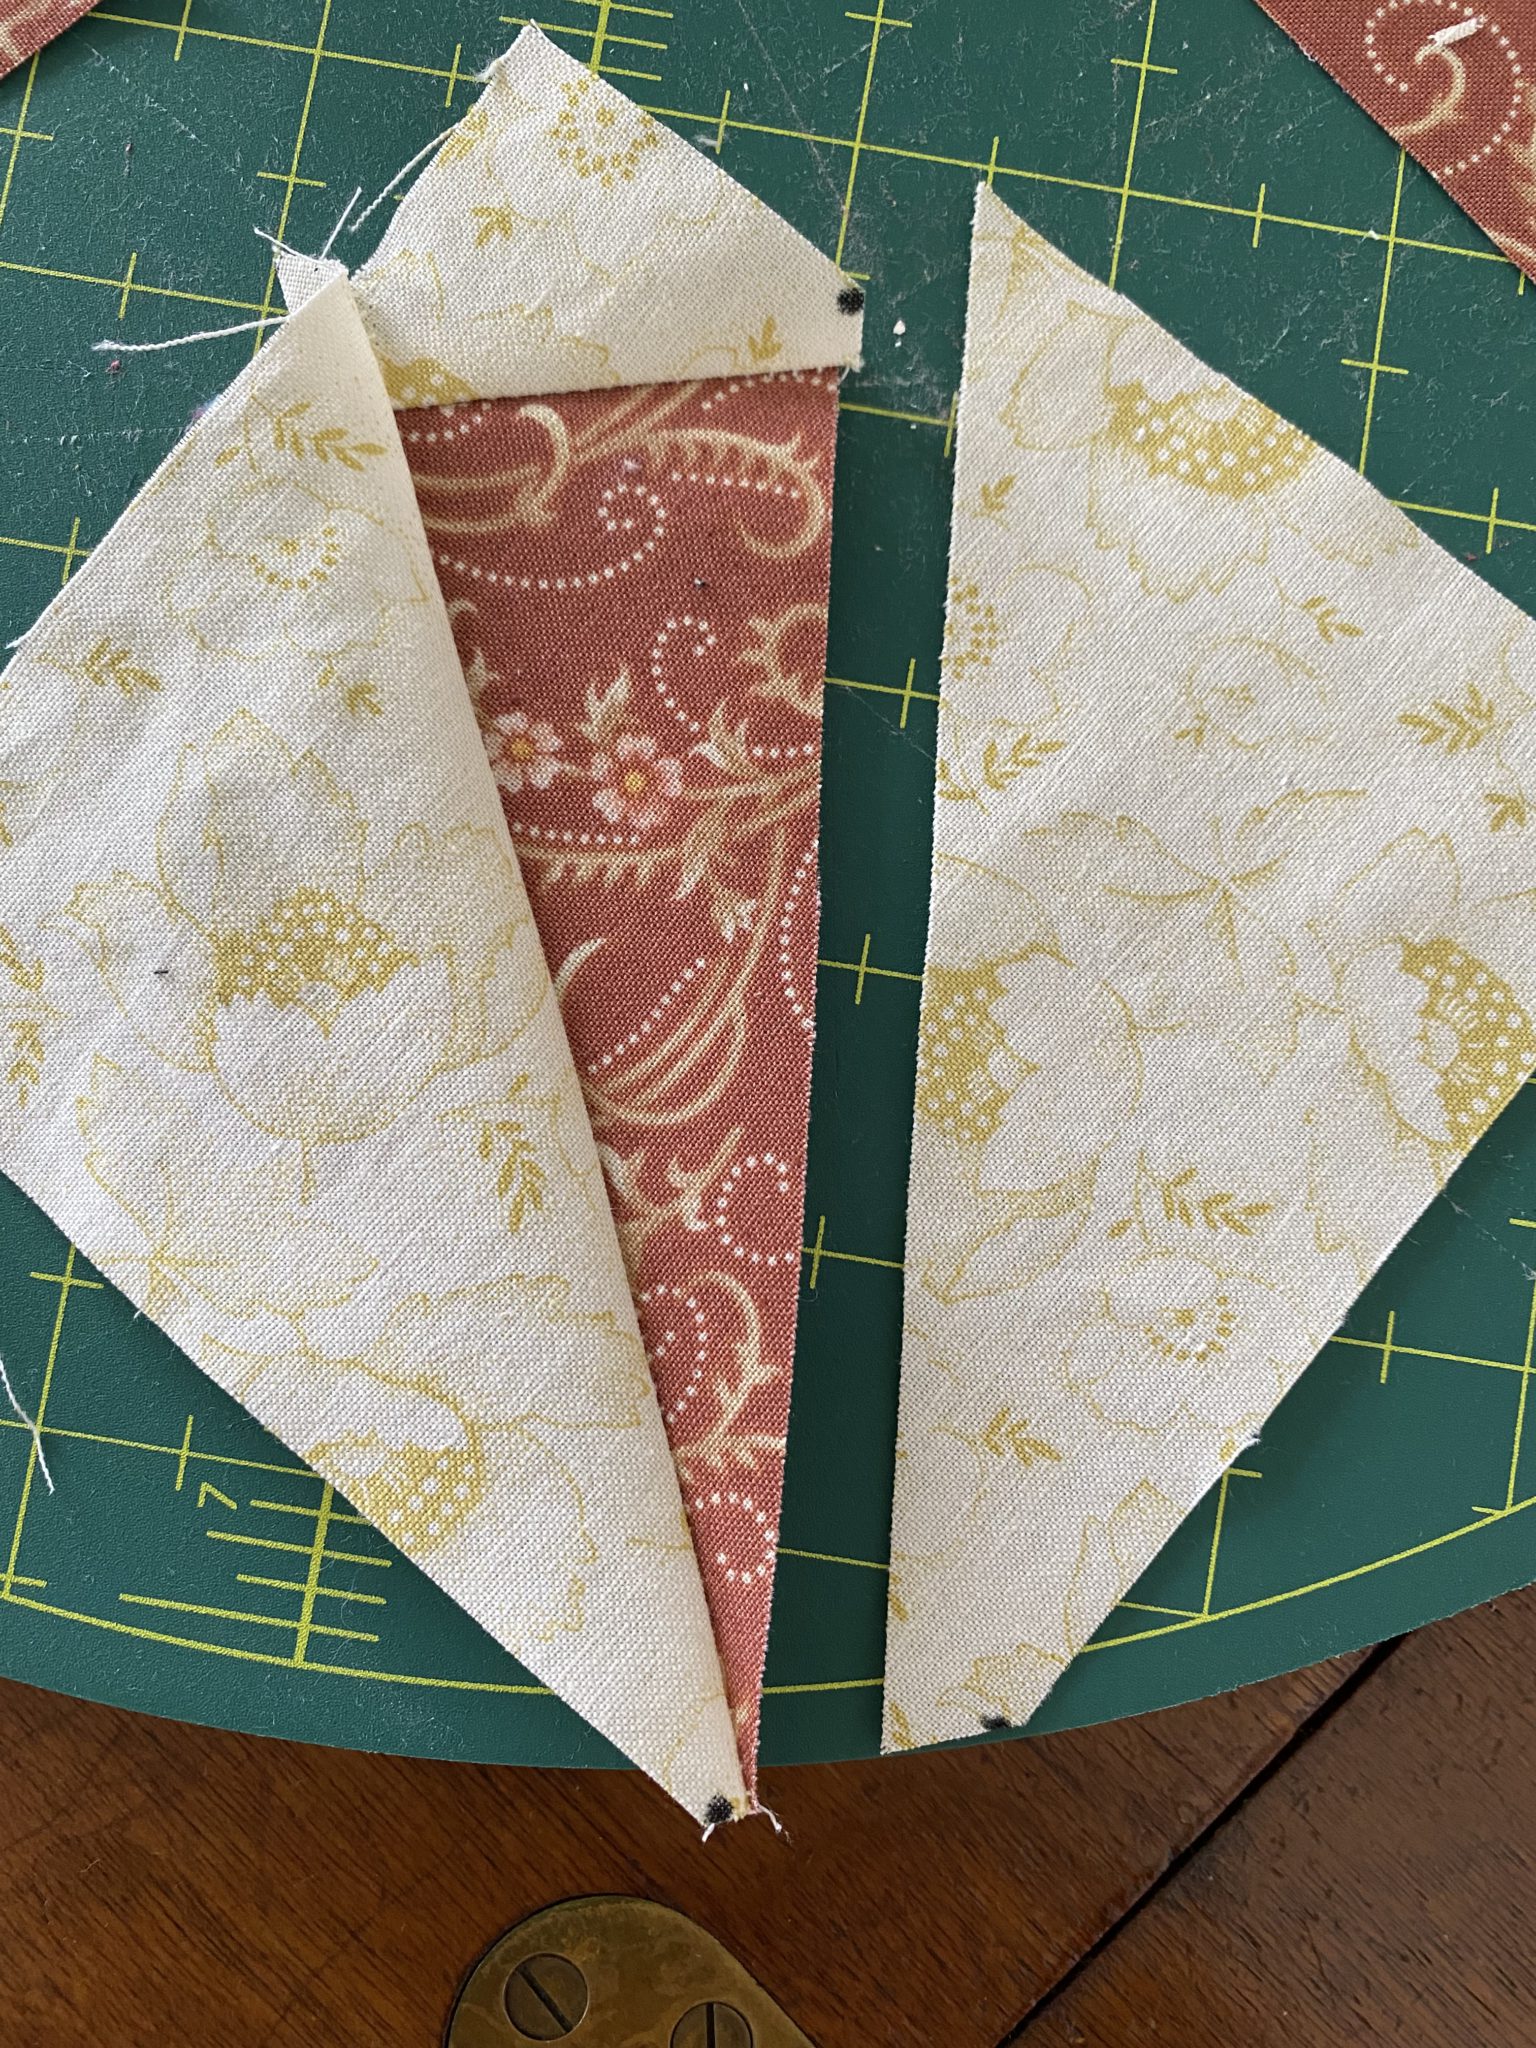
Repeat sewing the seams for the remaining three units.
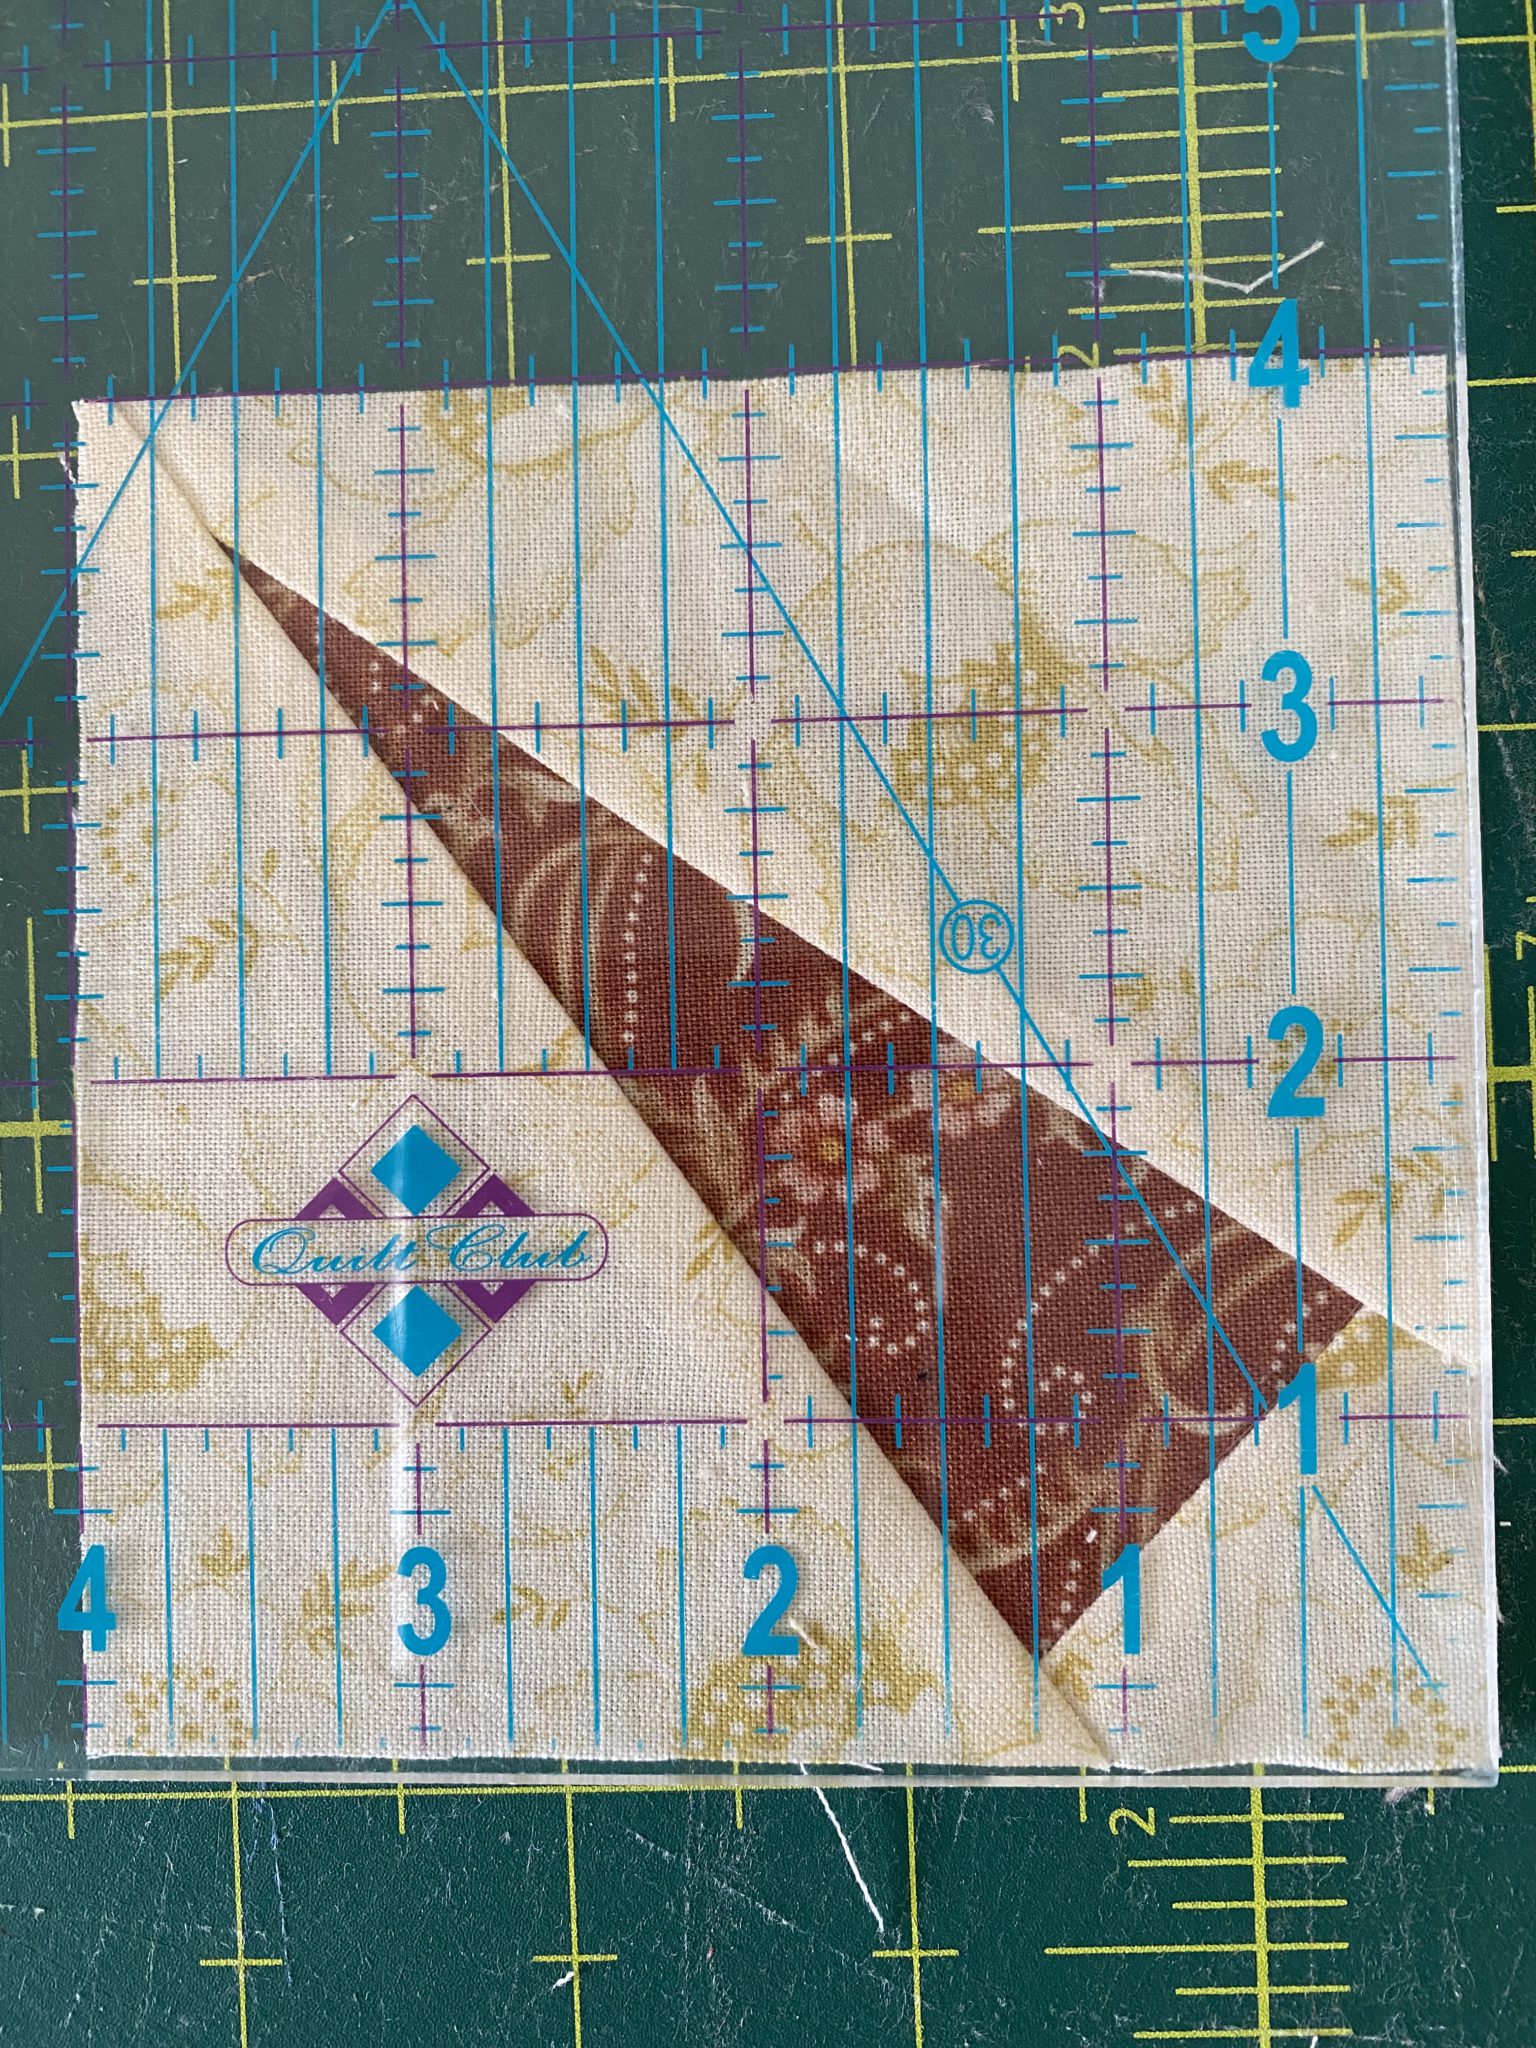
Trim each unit to 4” square beginning from the two sides which will be innermost, ensuring that for those two inner sides of each unit, the distance of the seam allowance where the two colours meet on each side is as close as possible to 1/4” as pictured. Actually, looking at the enlarged photo, now I can see that mine is a little too wide.
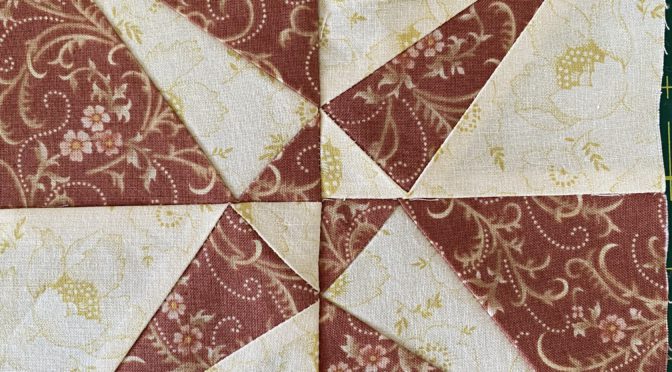
Sew the four completed squares together as a four patch with the two colours opposing each other. Ensure that all the triangles are meeting in the centre to make the ”crossed canoes”. In order to do this make sure that the points are ”kissing” each other and the centre seam is nesting. Do this by adding horizontal pins to the ”kissing points” and sewing as close as possible through where all the seams intersect.
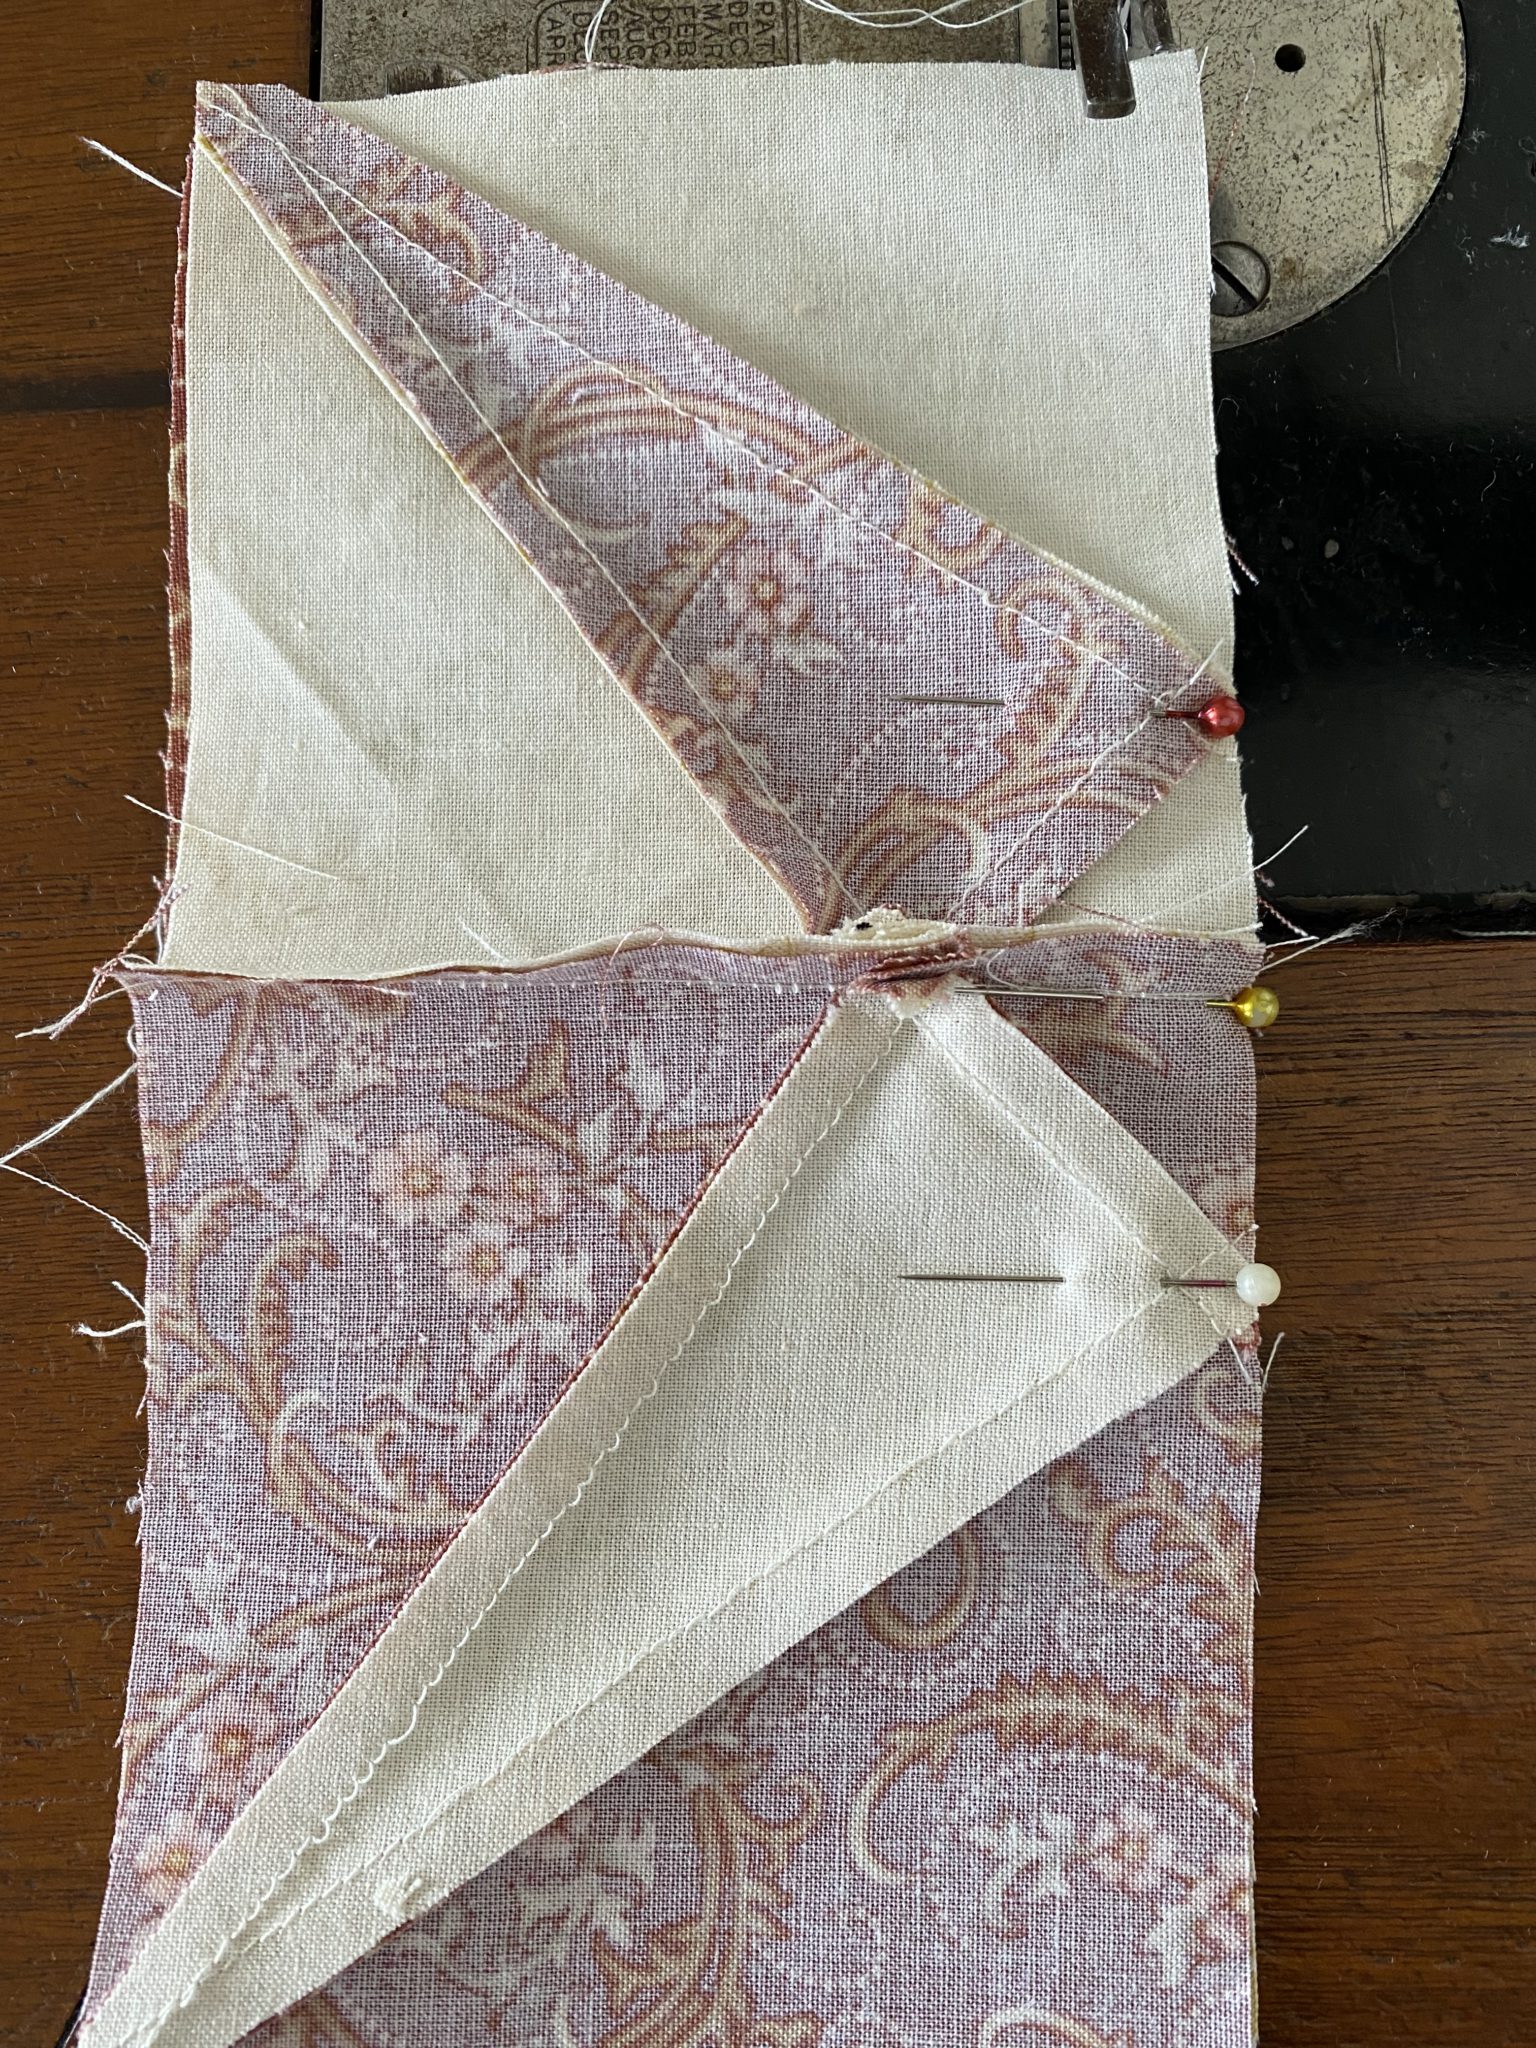
I am using my Singer 15 treadle from 1902. You may notice that my seams are a bit loose and I need to make some adjustments before I go on. Treadle Tinkering
Open the block. Press and trim if necessary.
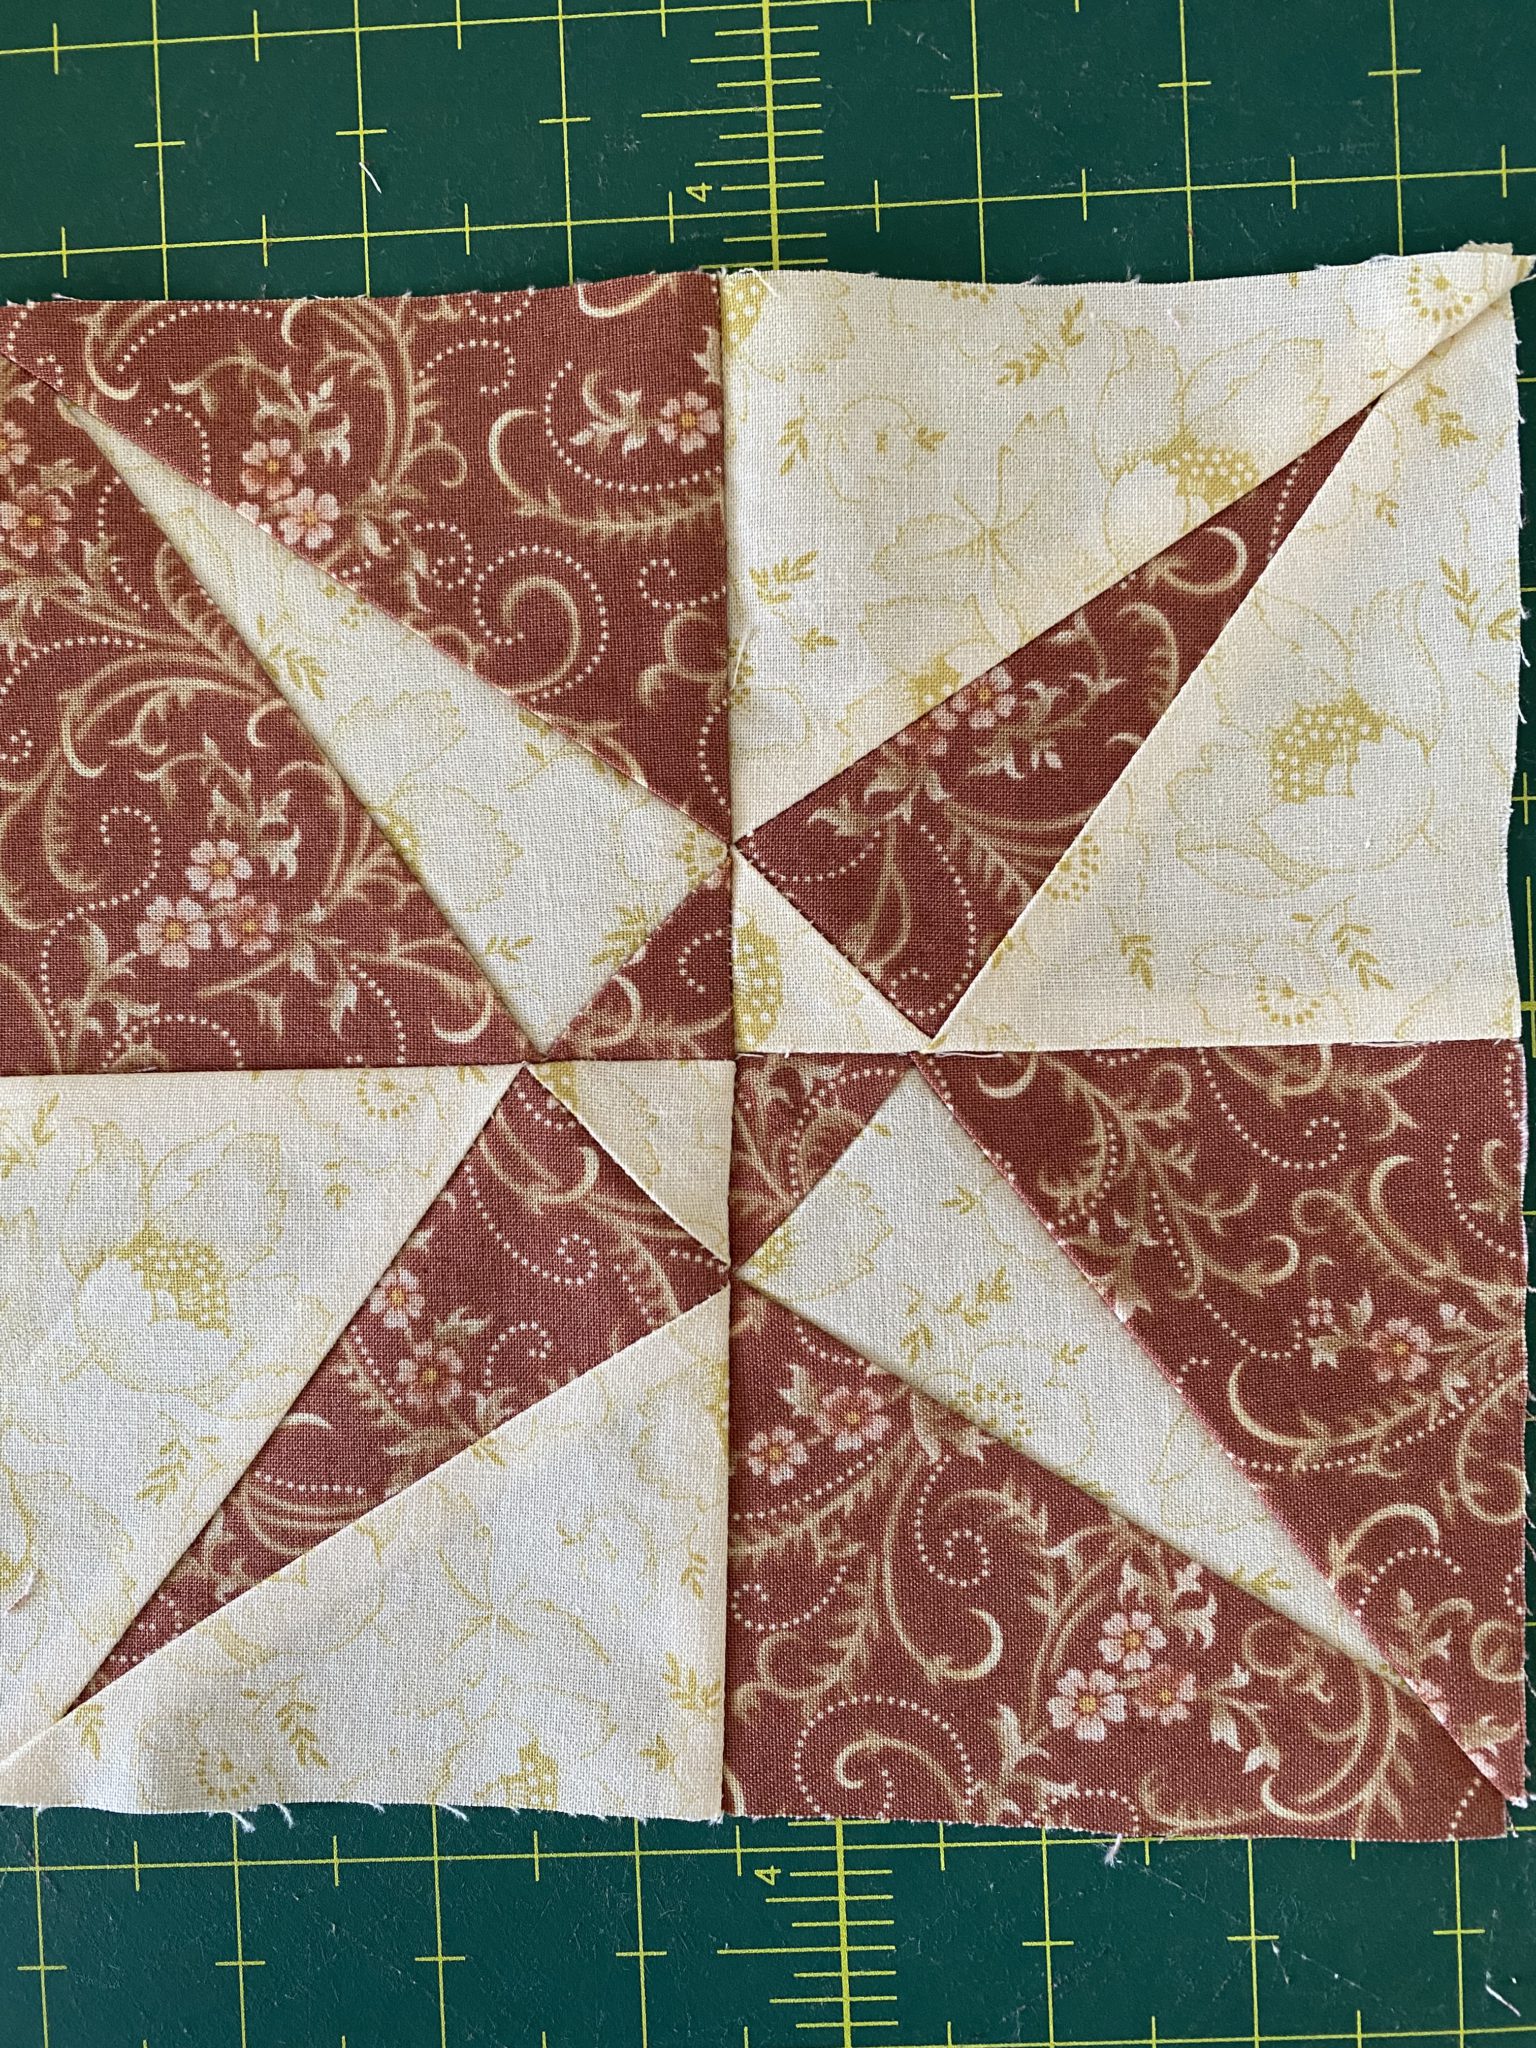
Now you can probably see it took much much longer to explain than it actually takes to do it!
I really hope you enjoy making these Crossed Canoes Blocks Antique Inspired Made Easy.
Here is how my blocks are coming along. I am very pleased with the results so far.
If you enjoyed this post, you may also like these posts for making blocks more easily.
Scrappy Depression Economy Block Made Easy
The Arrowhead Quilt Block Made Easy
Susie’s NEW Flying Geese Quilt Blocks Scrappy Style
Scrappy Yankee Puzzle Block Made Easy
Have a fabulous weekend. Hope you can touch some fabric or do some sewing.
Susie © 2022

With this method the pointy points are not 1/4 inch from the edge, they will when completely sewn together end approx 1/2 inch away from the edge. Is this correct? It does make piecing the completed blocks together a lot easier, but aren’t the points supposed to go right to the edge?
Hi Patricia, thank you for your question. When you make your blocks, you could trim a little from the outside of the completed block if you would like your points closer to the edge. I wanted to make sure that I didn’t lose the points when sewing the blocks together so there is a little extra wiggle room. It is up to you….
I too like this pattern, less waste, no templates, no paper piecing., woo hoo!
Any advice on how to adjust the measurements for cutting points if I wanted to start with a 7” block instead of the 5”? I’m on my 3rd try and can’t seem to get it to match up, especially the center ‘canoe seat’. Gosh, I’ve search but looks like you’re the only wise one who’s shared this technique.
I can’t believe this is made with 5″ squares! That enables me to use Precut 5″ squares! I have wanted to make this forever and am so happy to find your instructions here!
Would it be possible to share this info with Jenny Doan of MSQC who could make a 5″ square tutorial out of it for You Tube? Then so many could make this!
Thank you!
Dear Susan, so glad you like it. No thank you. I will be making a YouTube video myself.
I am really liking this pattern…but am going to have to experiment with block size so I can make it bigger.
Thanks so much for Crossed Canoes!