
 Link to this Quilt Story Charm Square Stars “Anika’s Quilt”
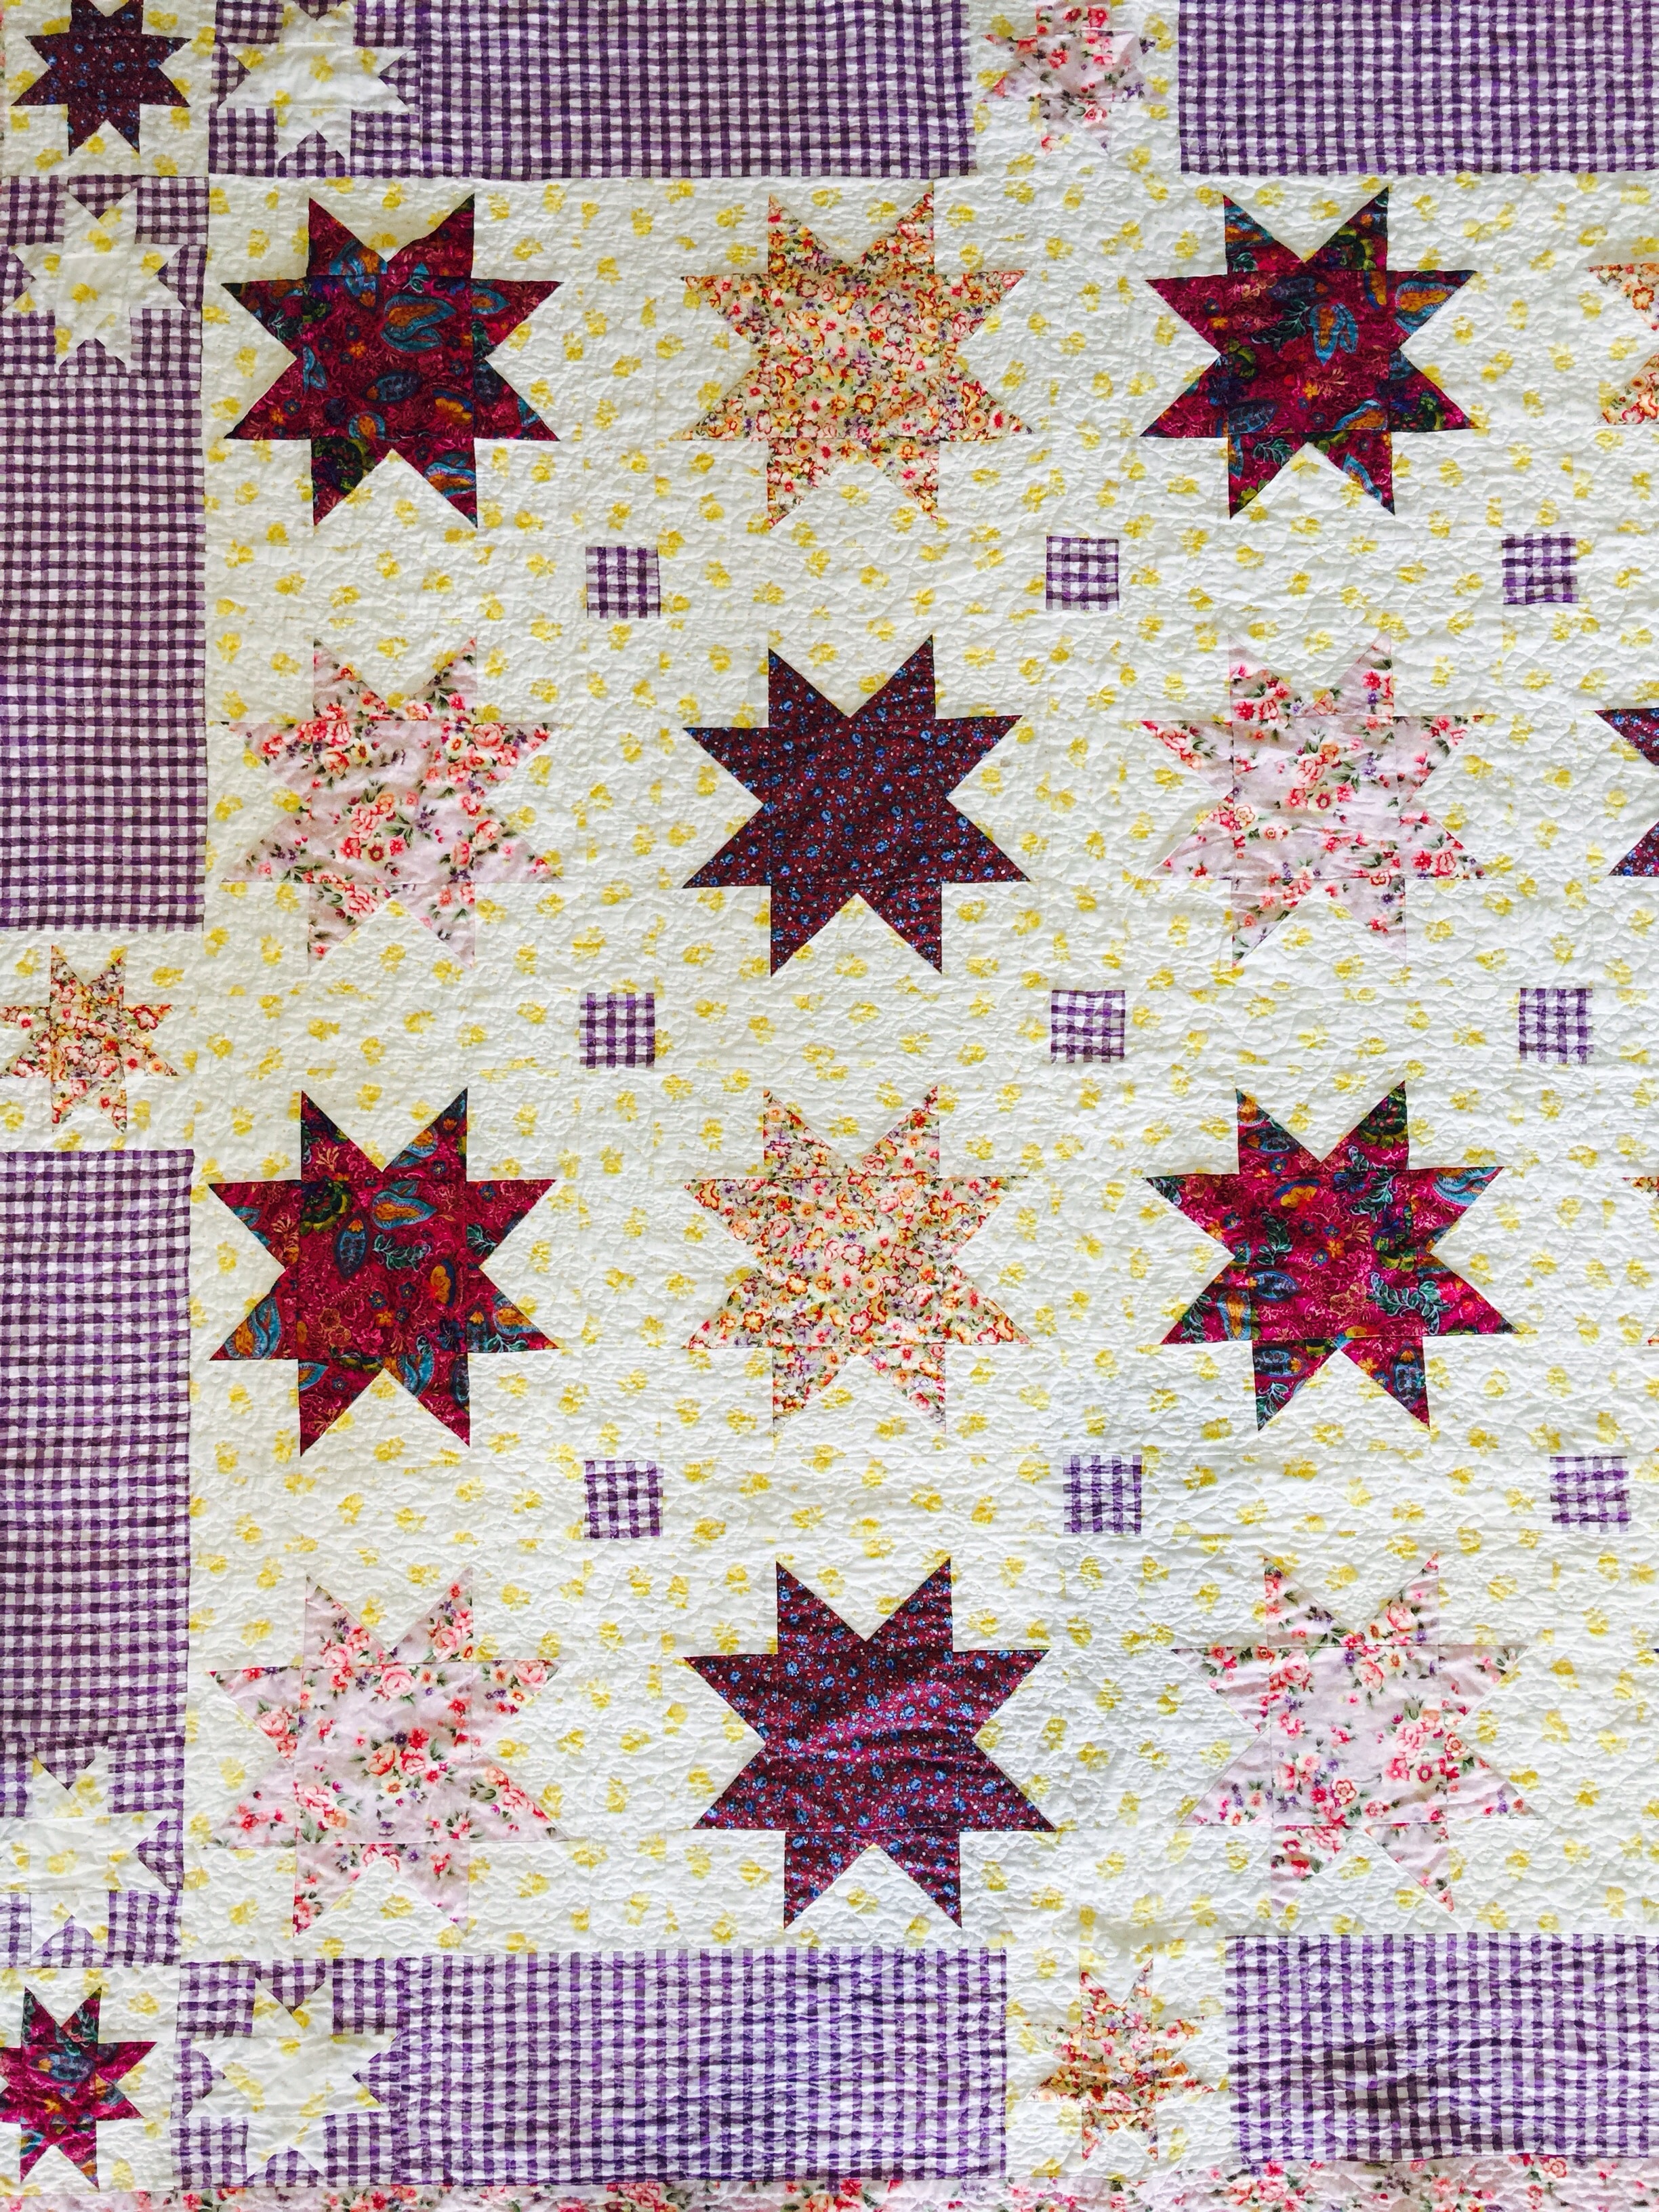
When I made this quilt for my daughter her brief was purple. That’s all. This is what I came up with.
Please read all instructions before commencement. All fabrics have been washed and lightly pressed before cutting. The gingham I used for this quilt is all cotton but came from the dress fabrics department . Therefore it is narrower than quilting cotton.
Ingredients
6 metres of purple and white gingham for the cornerstones and borders and backing. NB Remember when cutting gingham, it is woven, rather than printed. It may be easier to cut with scissors initially so that the checks line up.
Cutting
Cut 72 x 2 1/2″ squares
Cut 2 x 2 1/2′ x 2 1/2″ squares
Cut 8 x 6 1/2″ x 15 1/2″ strips (cut these after the large and small star blocks and quilt centre are completed, just so you can double check the measurements.)
Cut 7 x 2 1/2″ WOF strips for the binding
Cut 6 x 2 1/2″ WOF strips for the second border
Add the two completed strips to each side of the centre charm square strip. Ensure the seams are well nested. Pin to secure. Sew.
Once the unit is constructed. Press carefully.
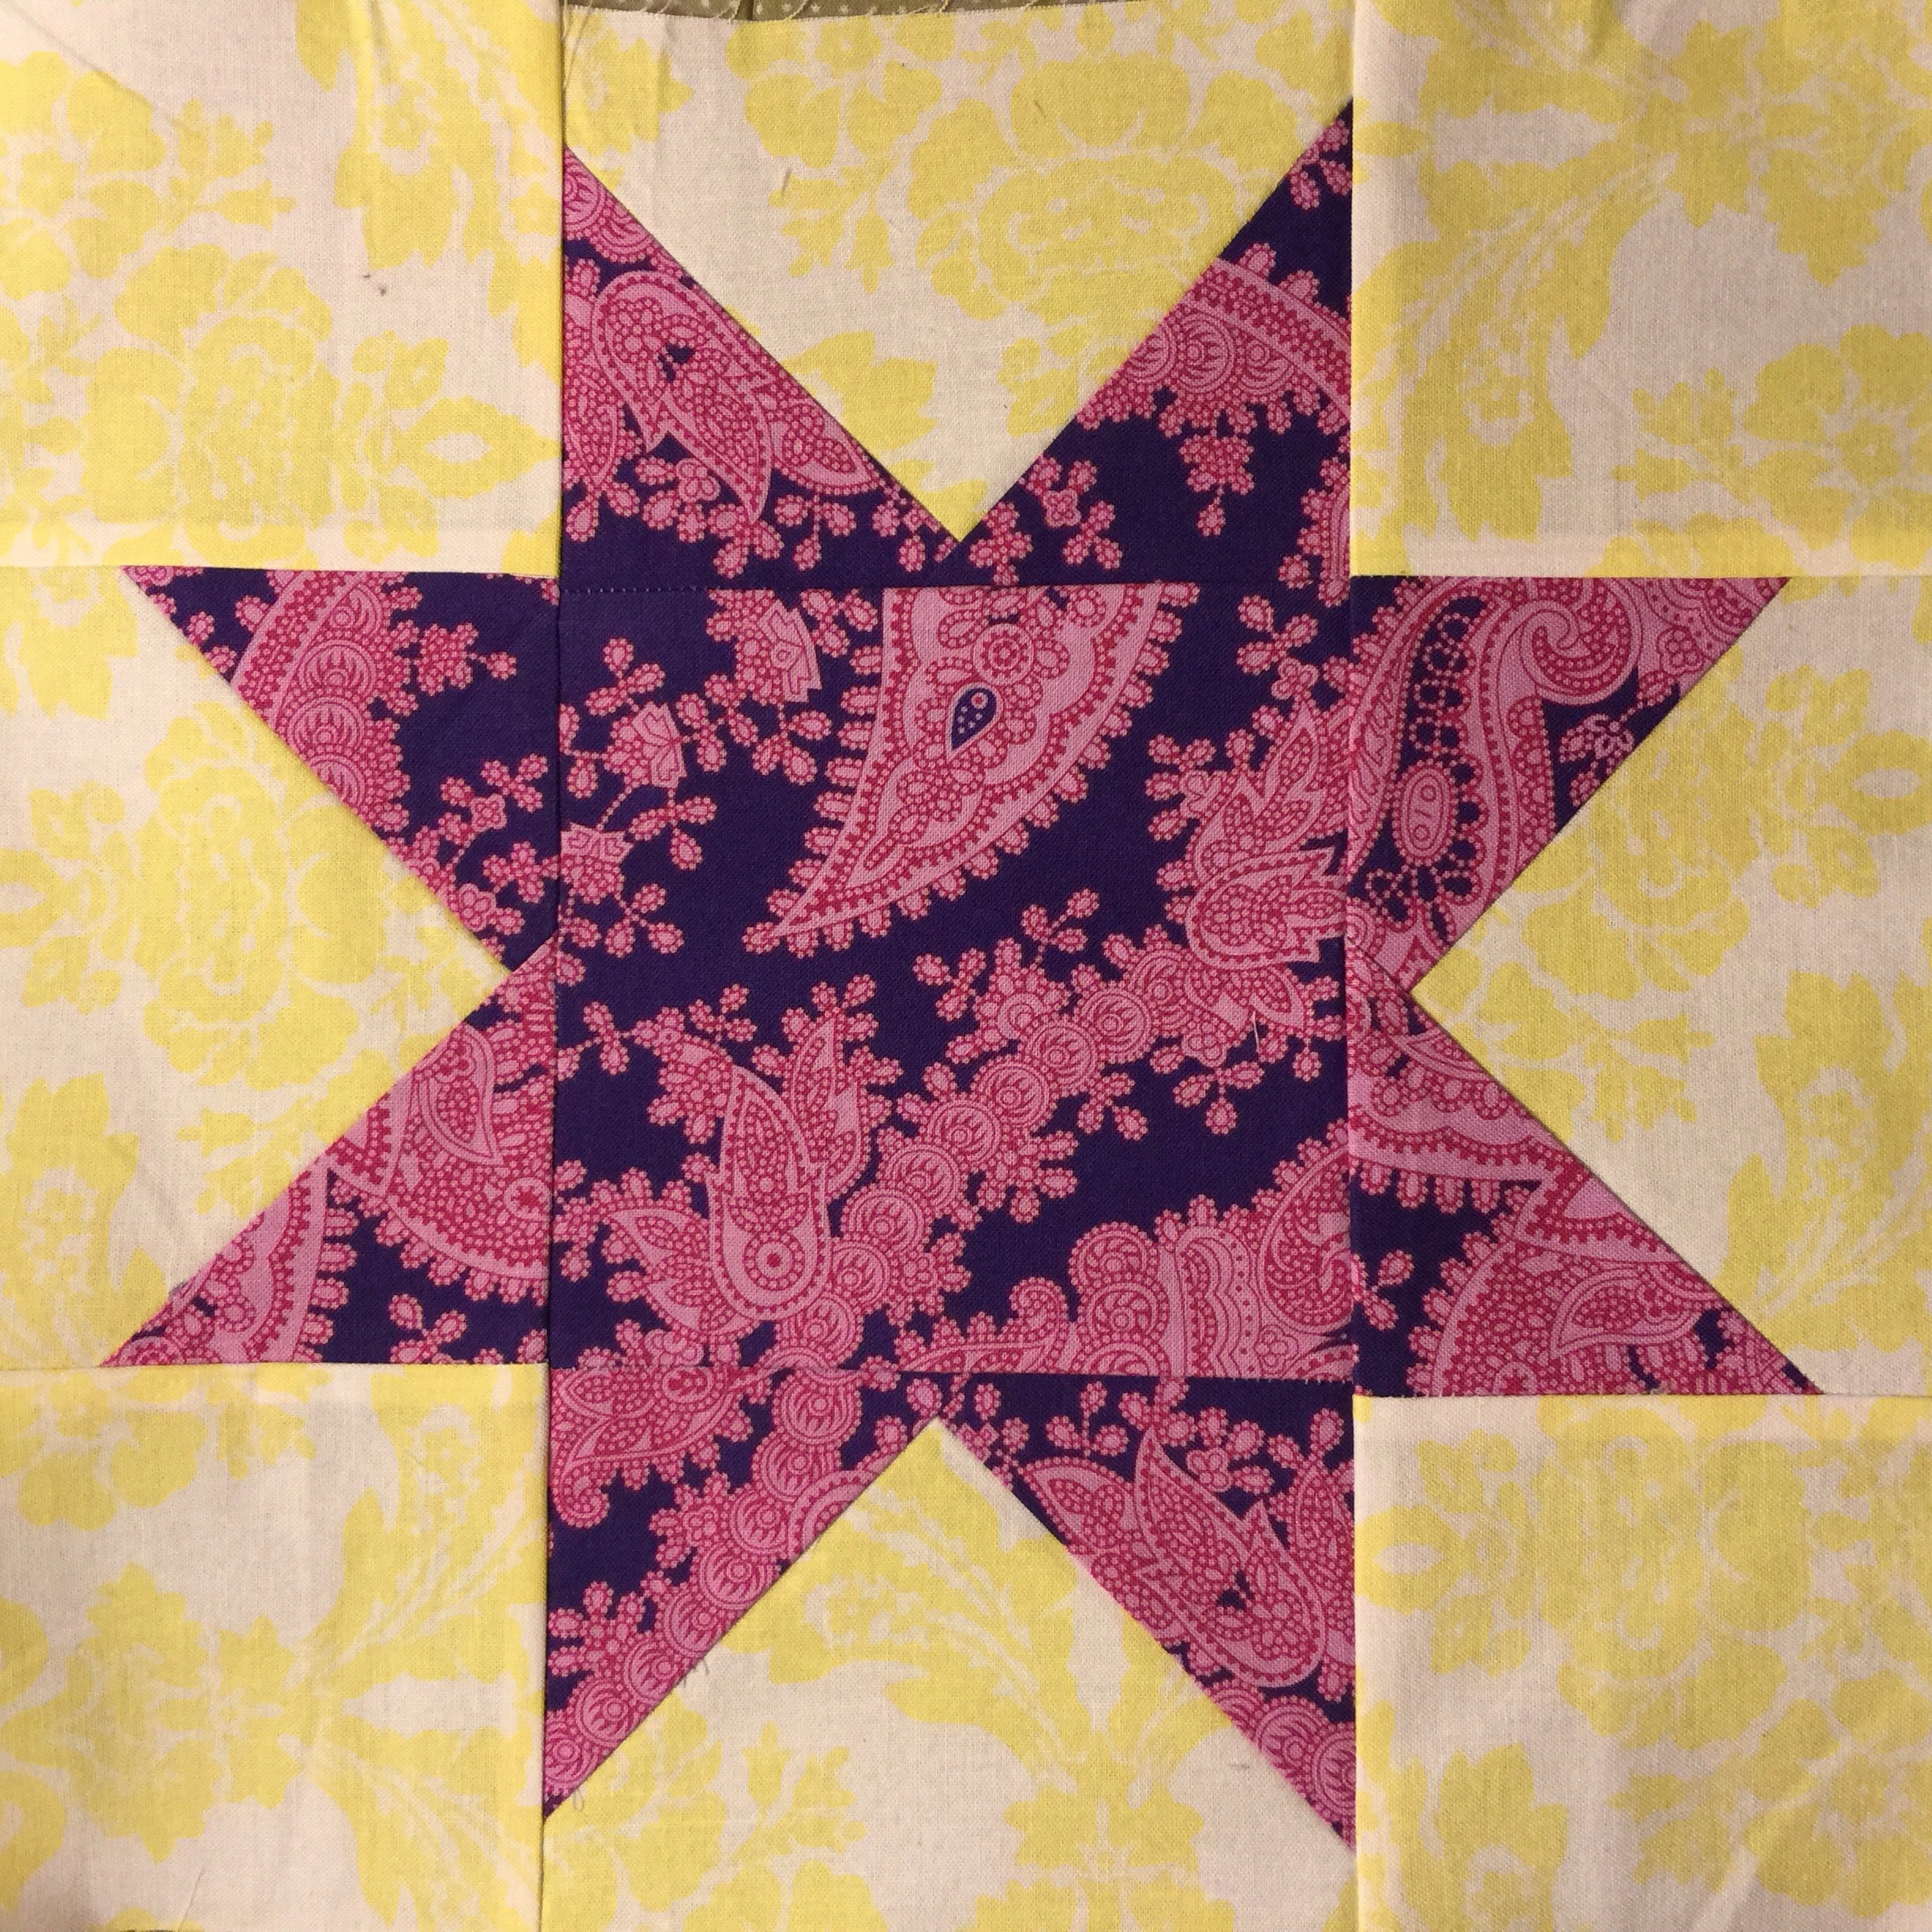
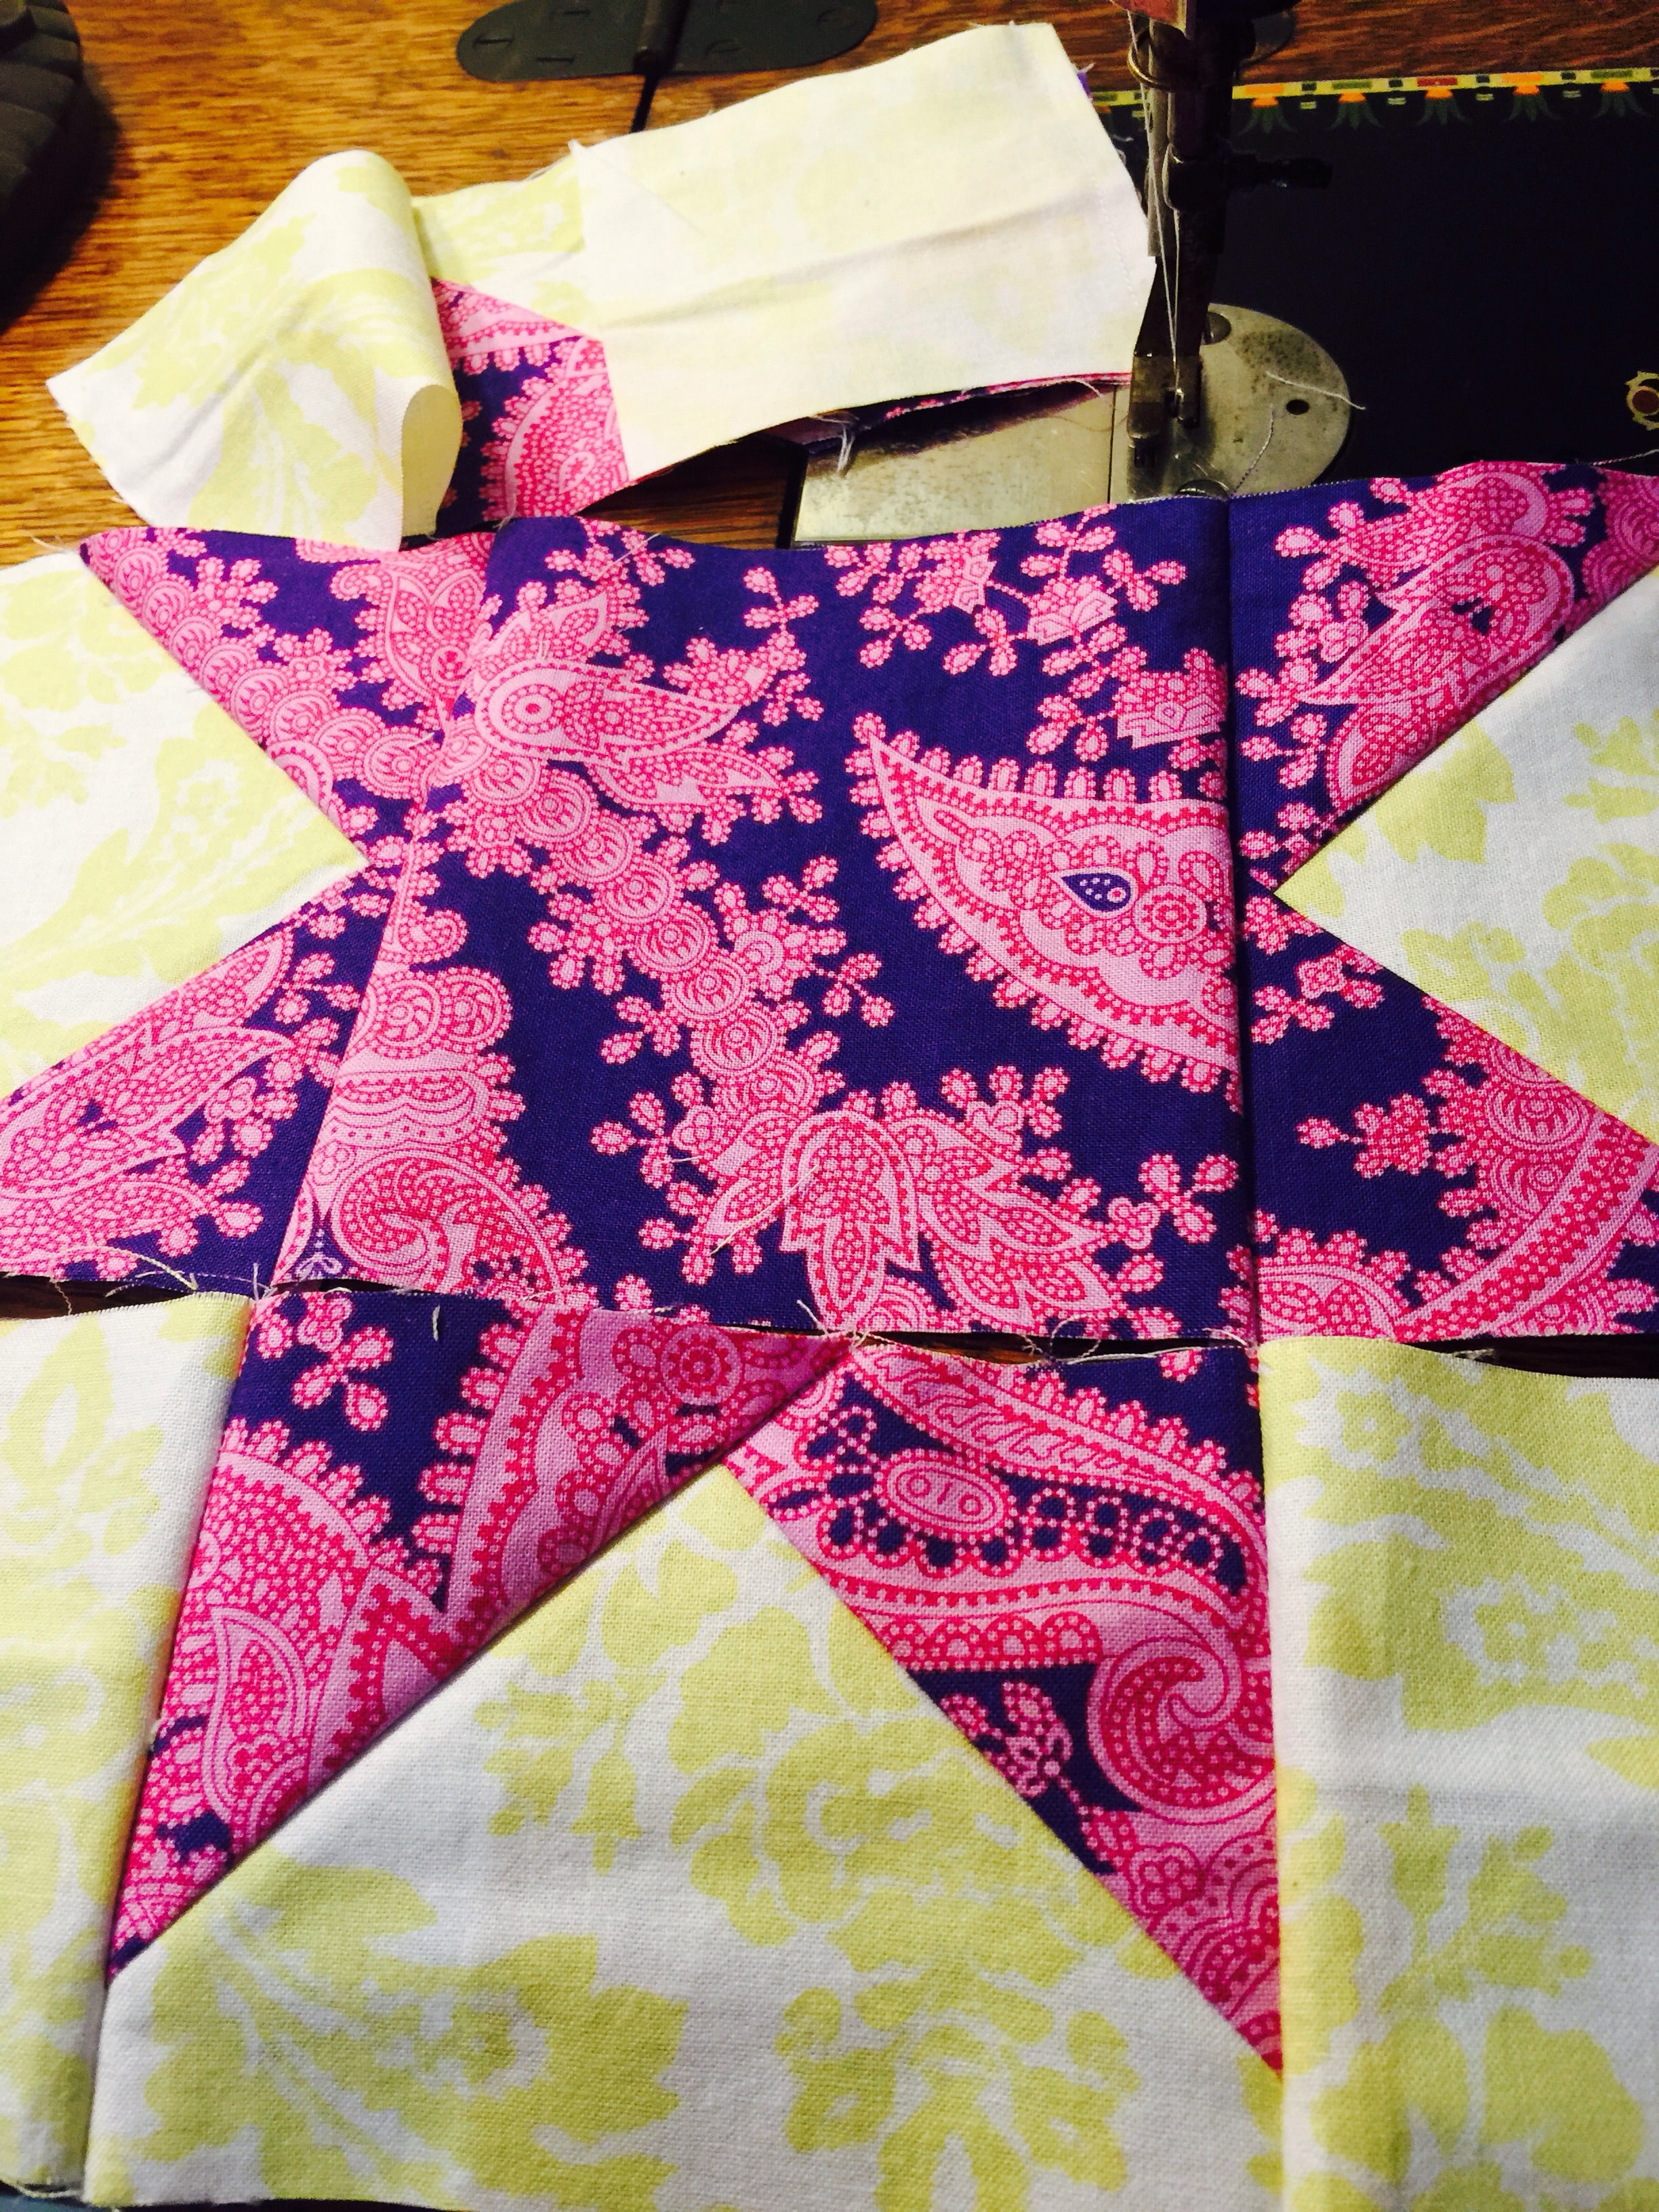
Piece the remainder 15 blocks in the same manner until there are 16 blocks of 4 different colour ways.
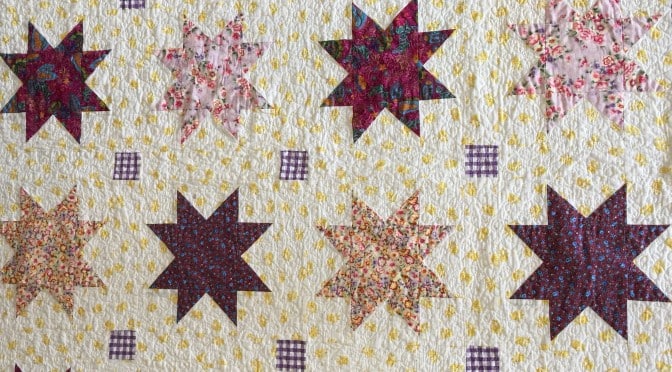
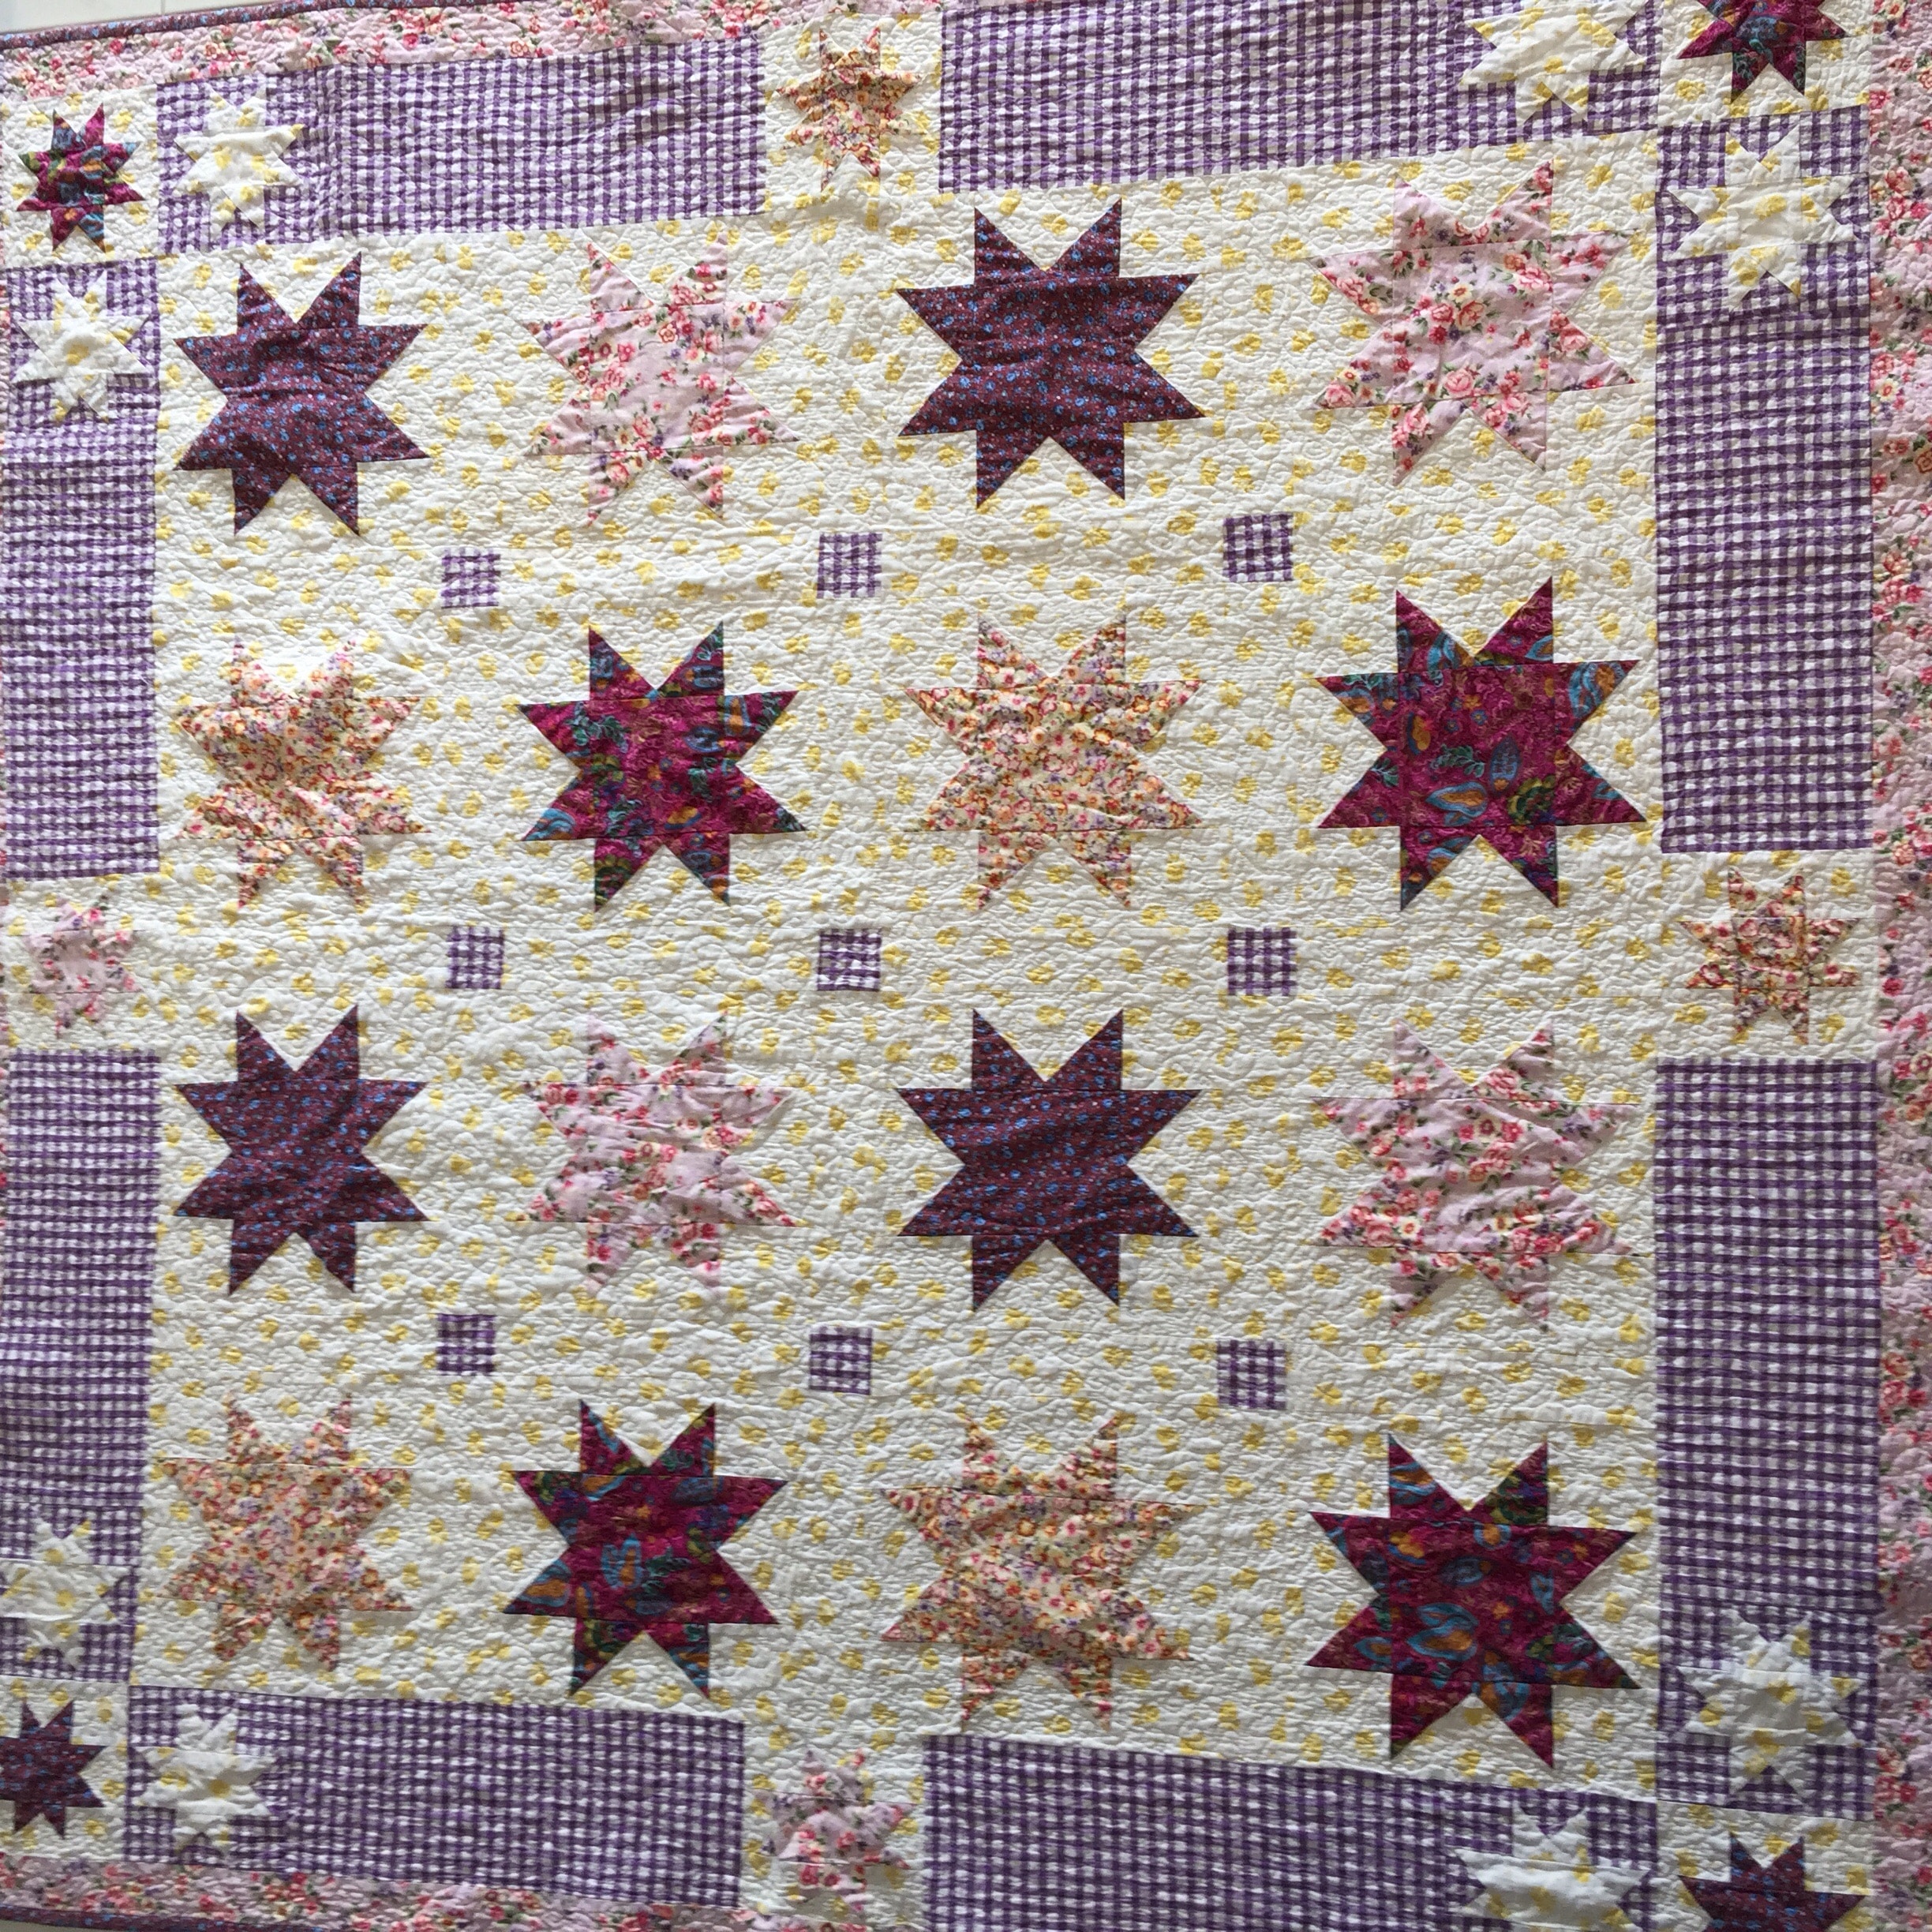
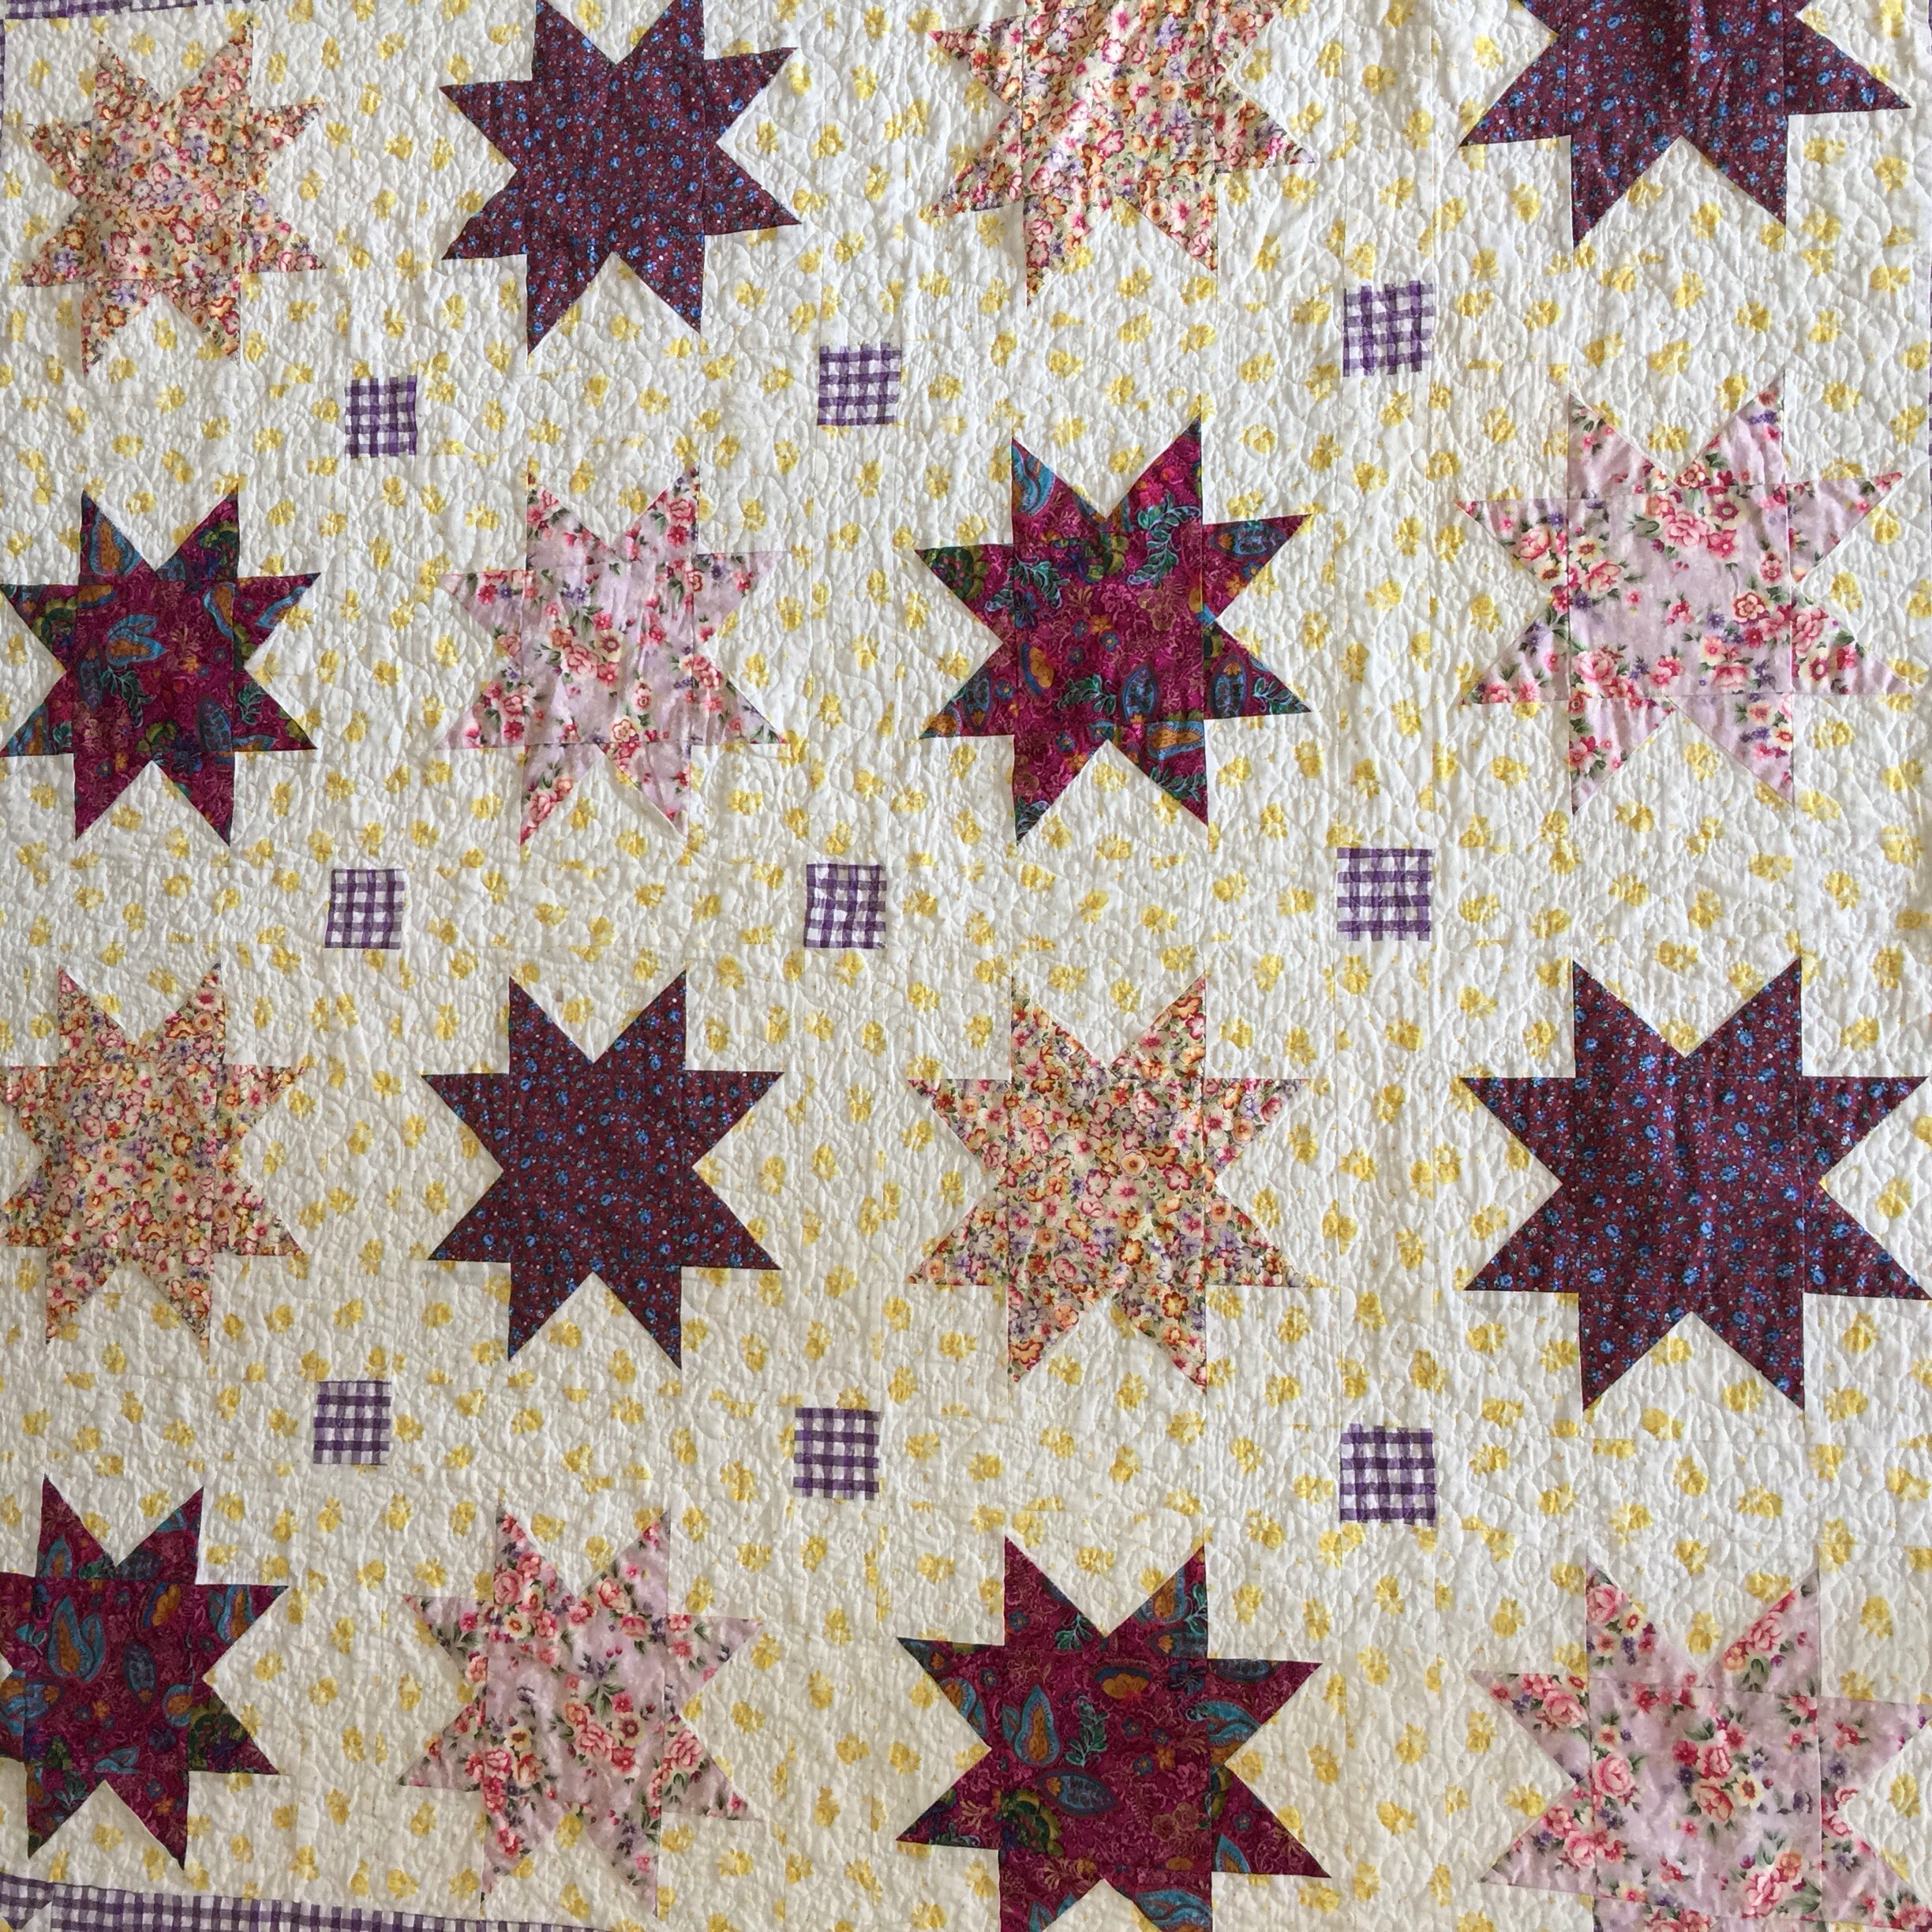
Following the image, lay out the charm square stars alternating light and dark star blocks. Sash the star blocks together with the white/yellow 11′ x 2 1/2″ strips inserting a 2 1/2″ purple gingham square at the inside cornerstone joins.
Once the centre is completed, the next step is the make the small star blocks for the first border.
First Border
To make the first border you will need to construct 2 x 6 1/2″ star blocks of each colour on a yellow white background (8 altogether) and 8 x white / yellow stars on a purple and white gingham background.
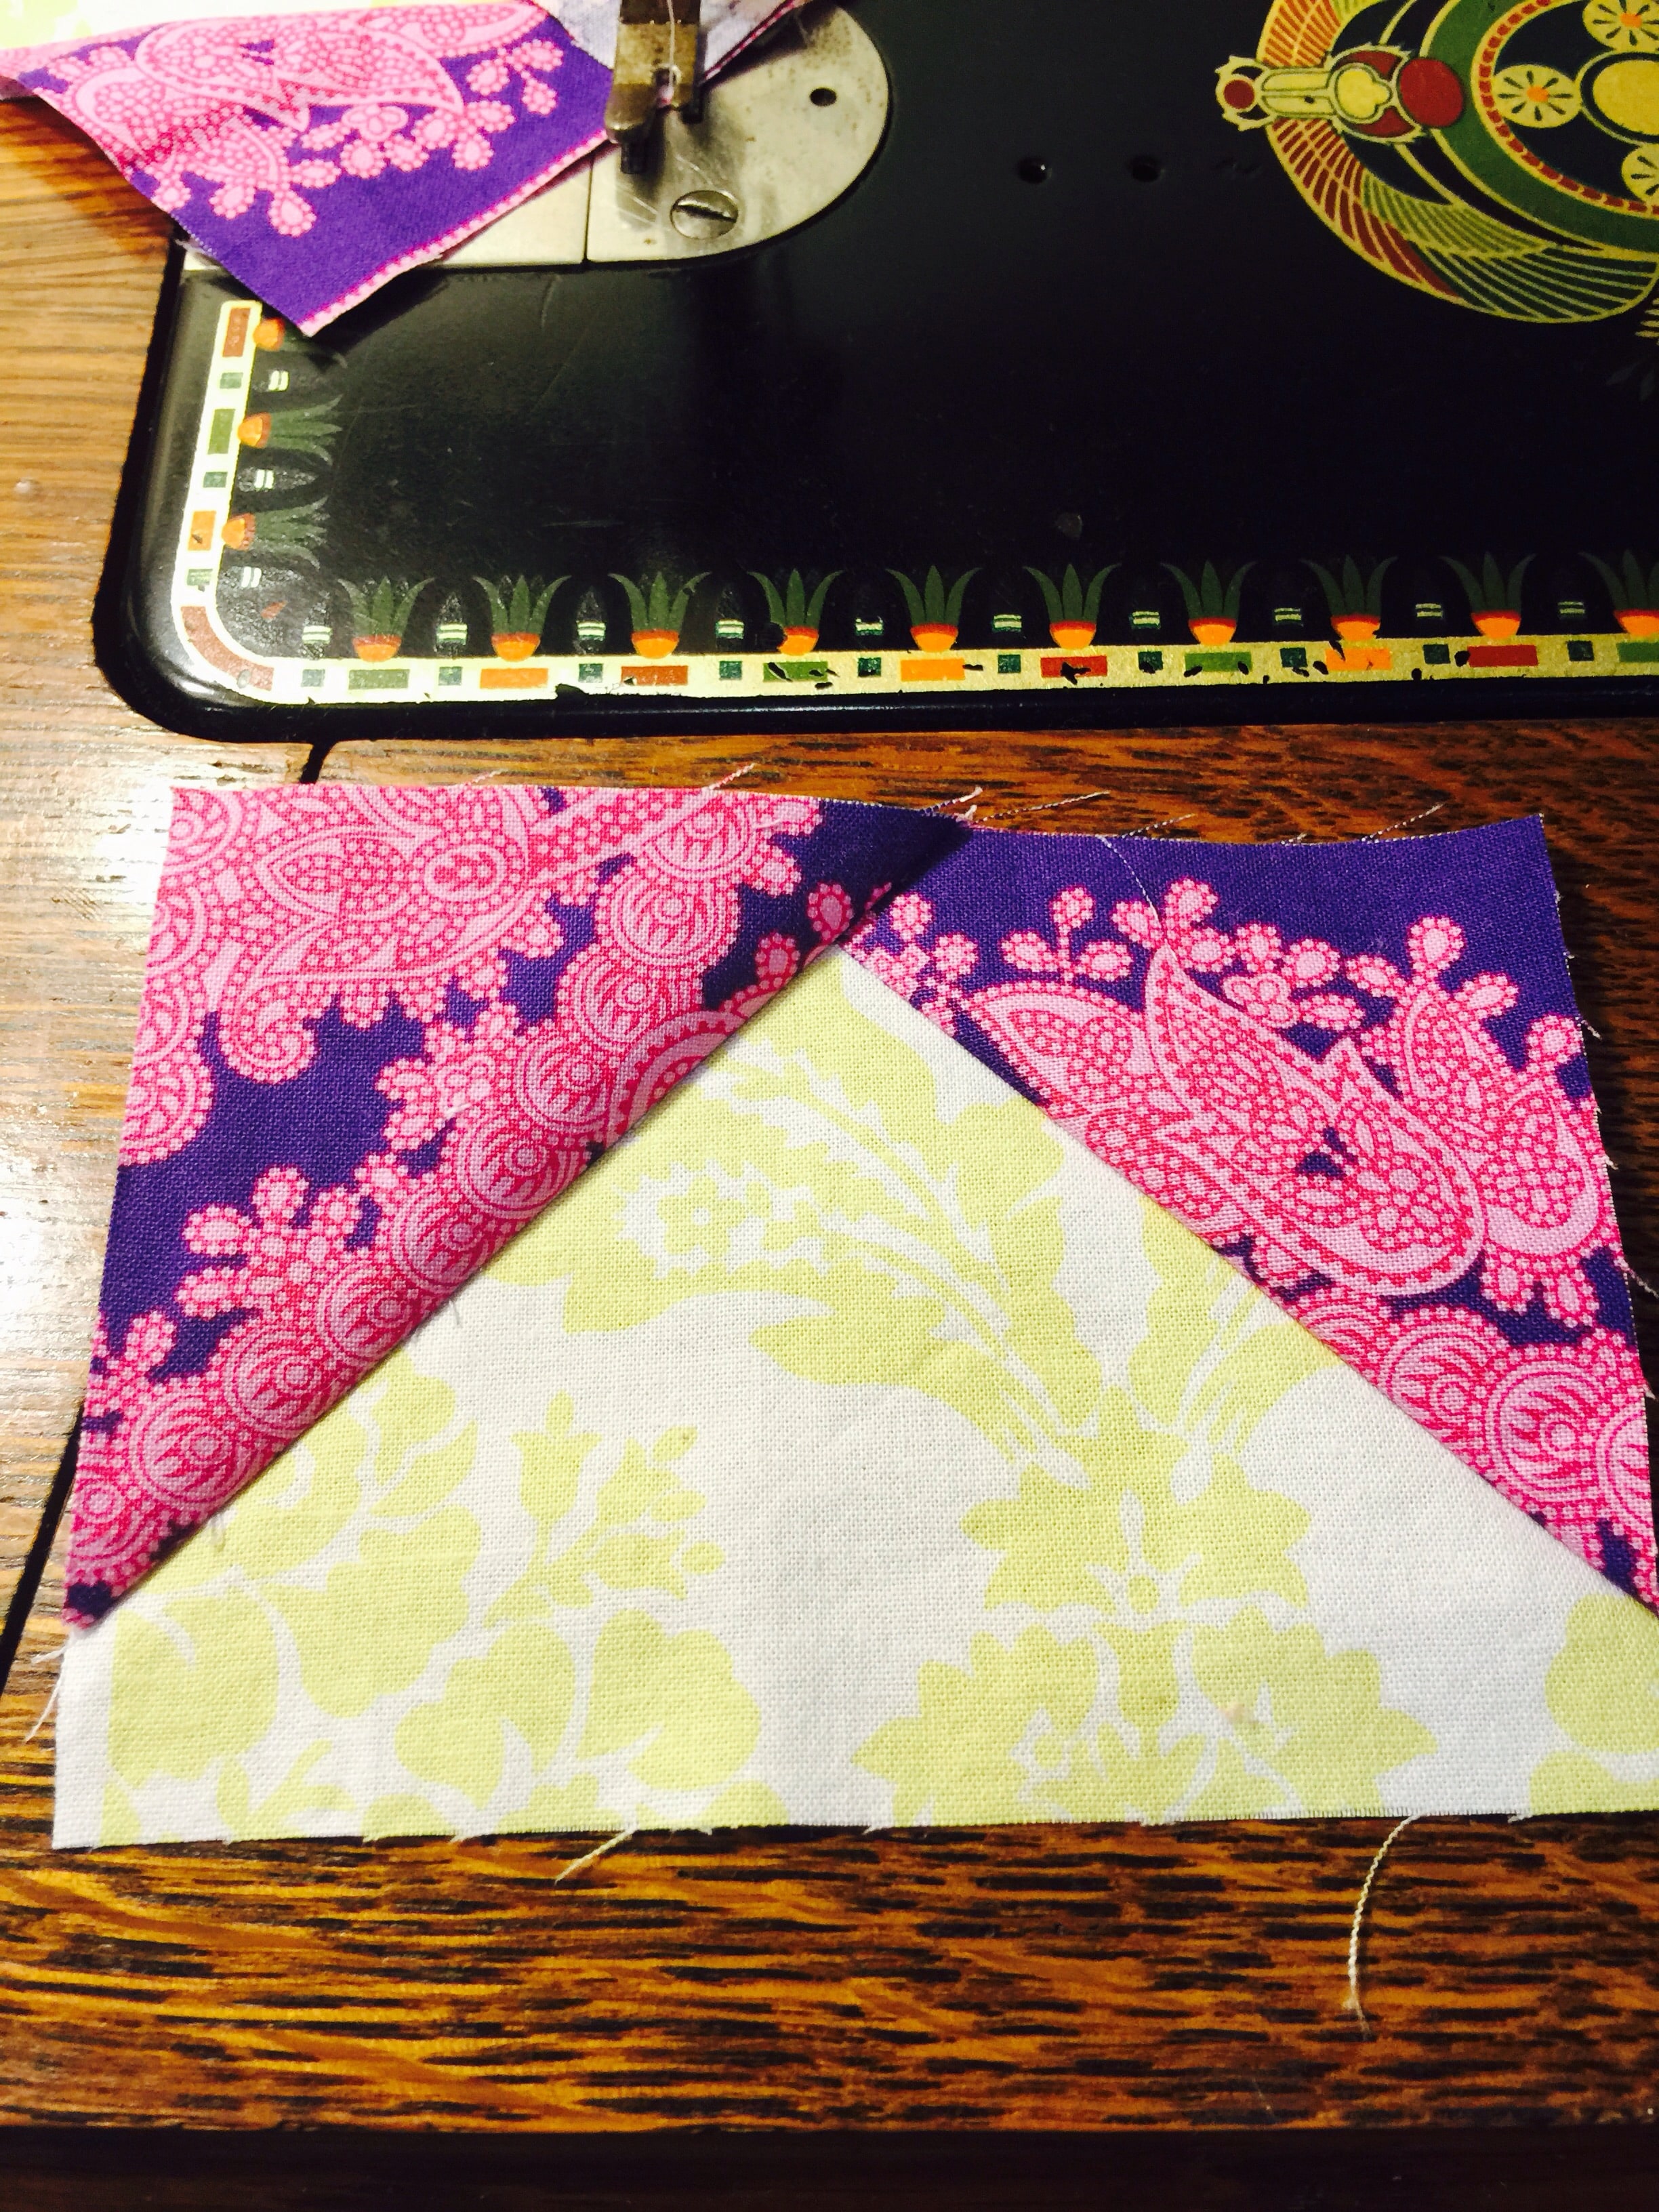
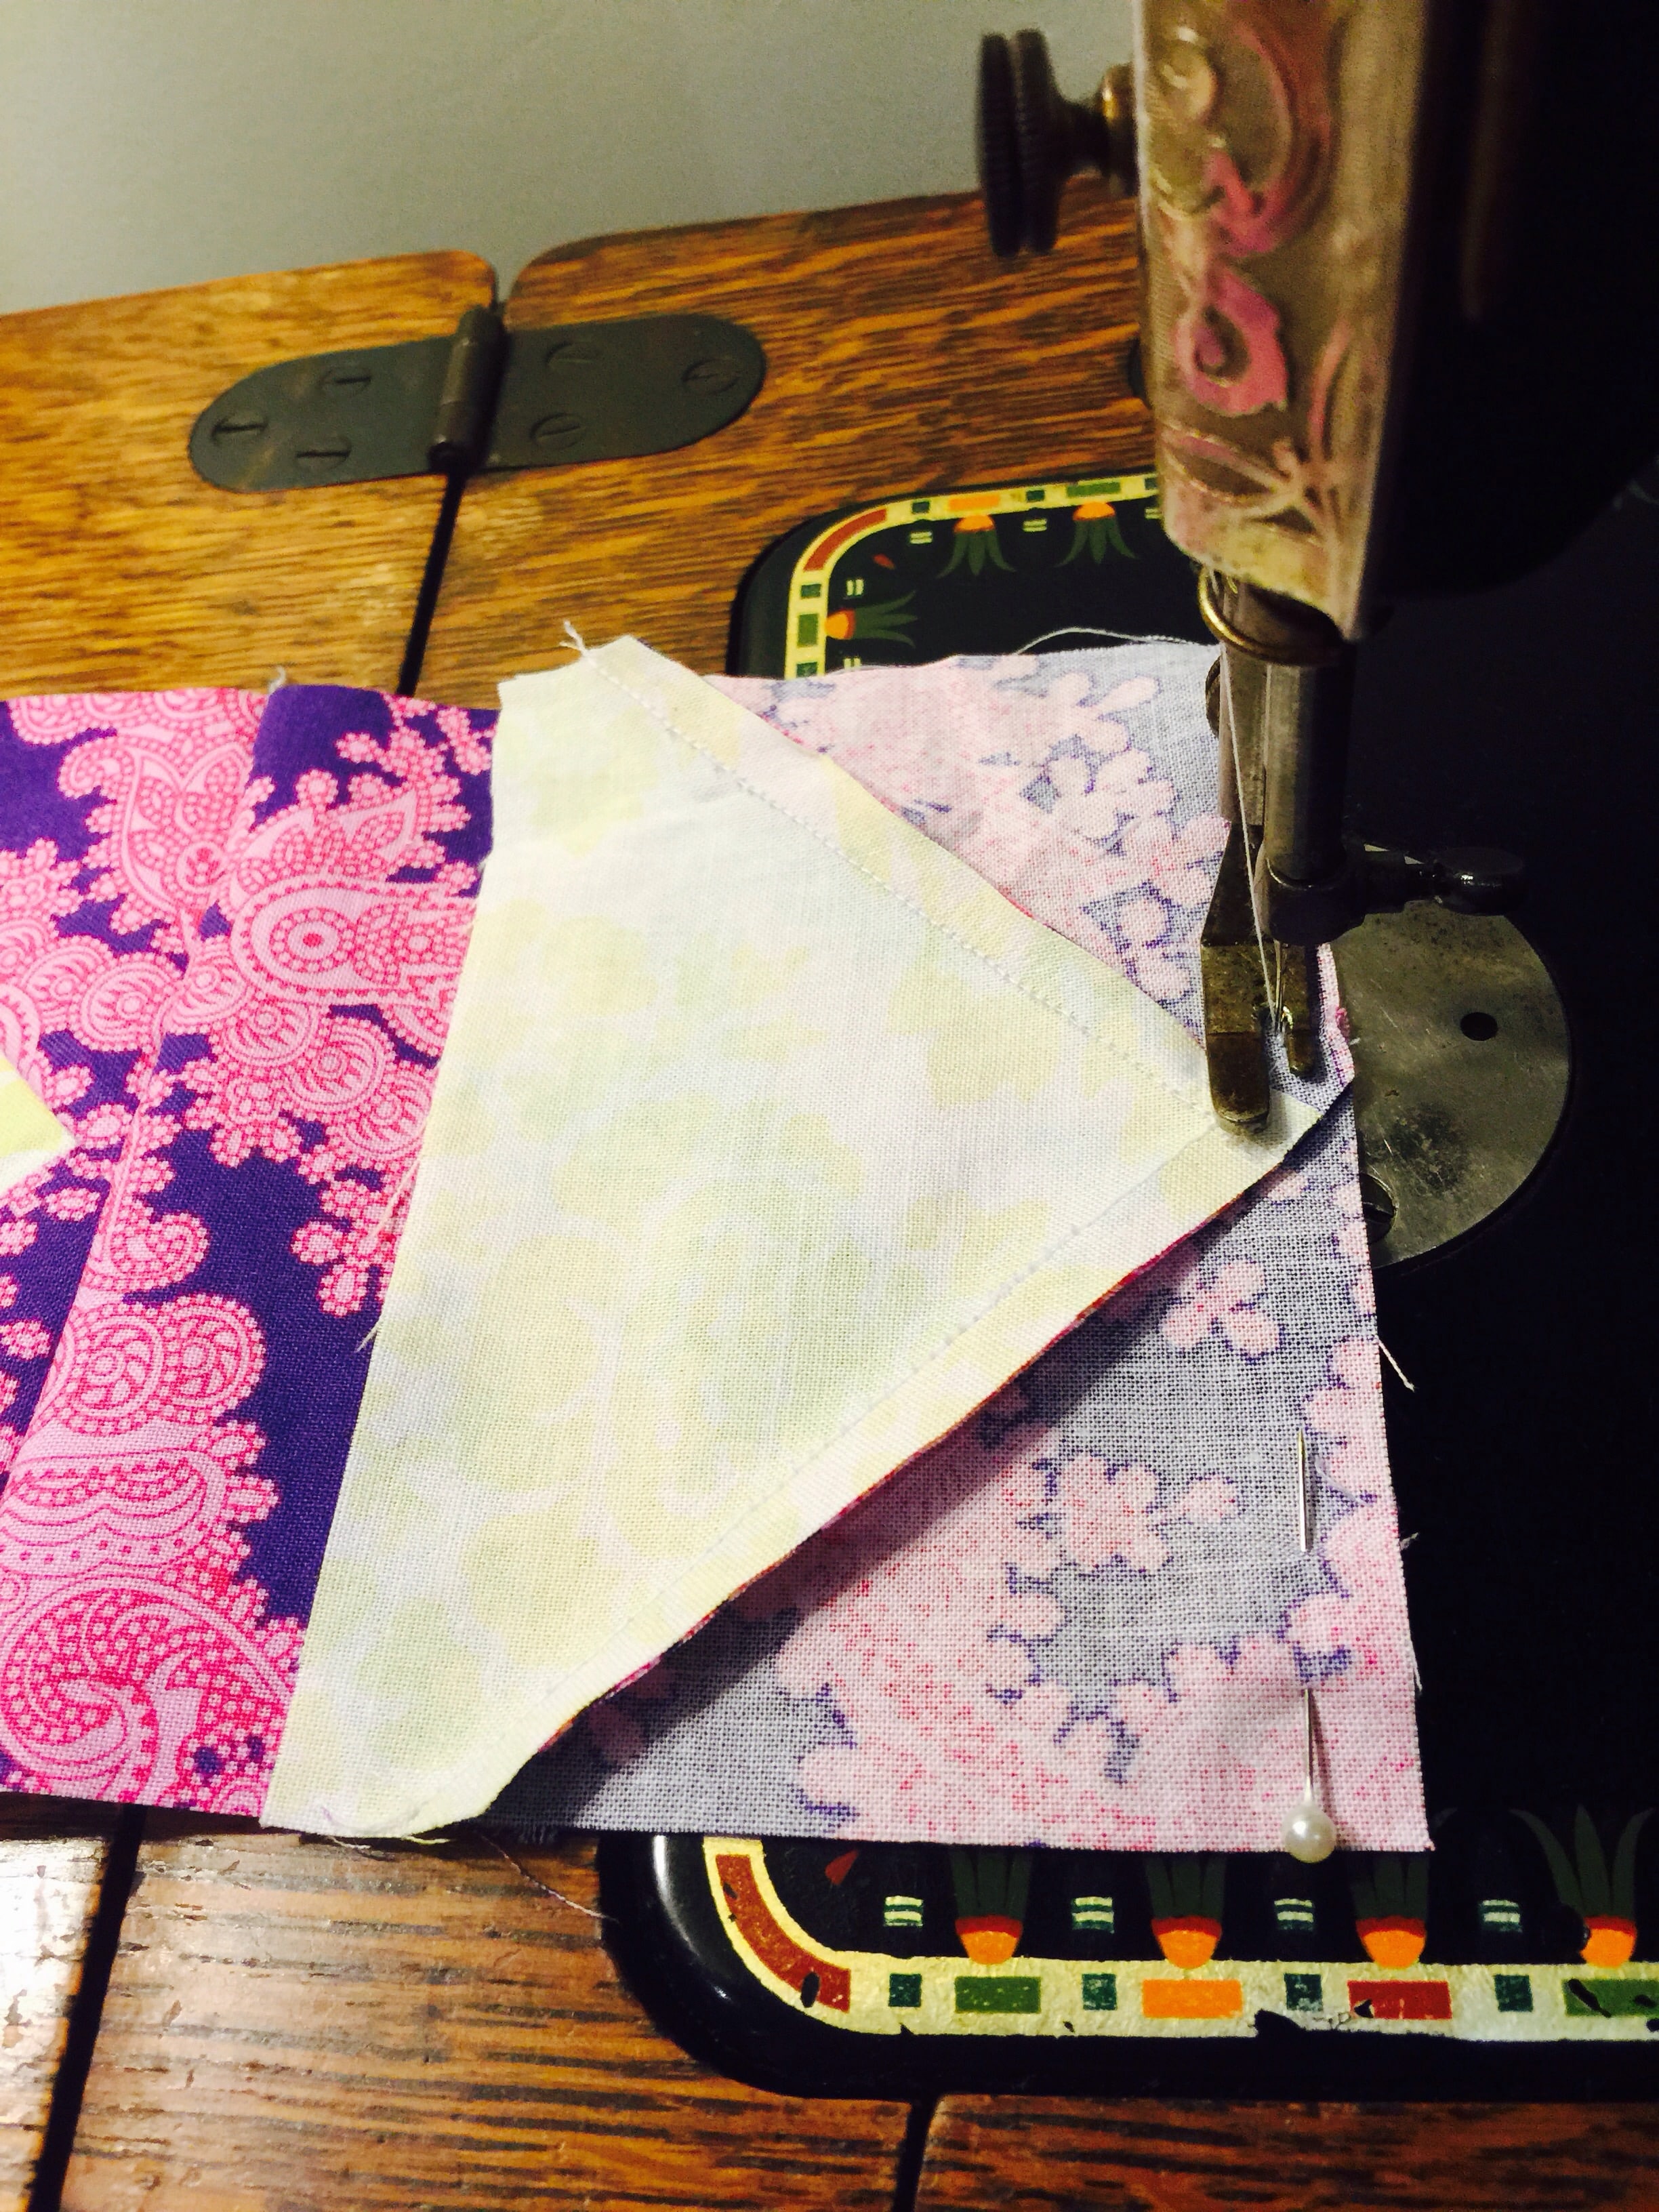
See tutorial on Reabsorption Foundation Triangle Stars Tutorial.
Reabsorbtion Foundation Triangle Stars Tutorial
Once all the stars are completed, to begin the border, place a white/yellow star at the ends of one side. place a coloured star in the centre. The areas in between will have the gingham 6 1/2″ x 15 1/2″ strip. Please check measurements carefully at this stage to be sure. Then cut the strips to fit. Sew the pieces together and check fit. Sew this to one side of the quilt. repeat for the opposite side.
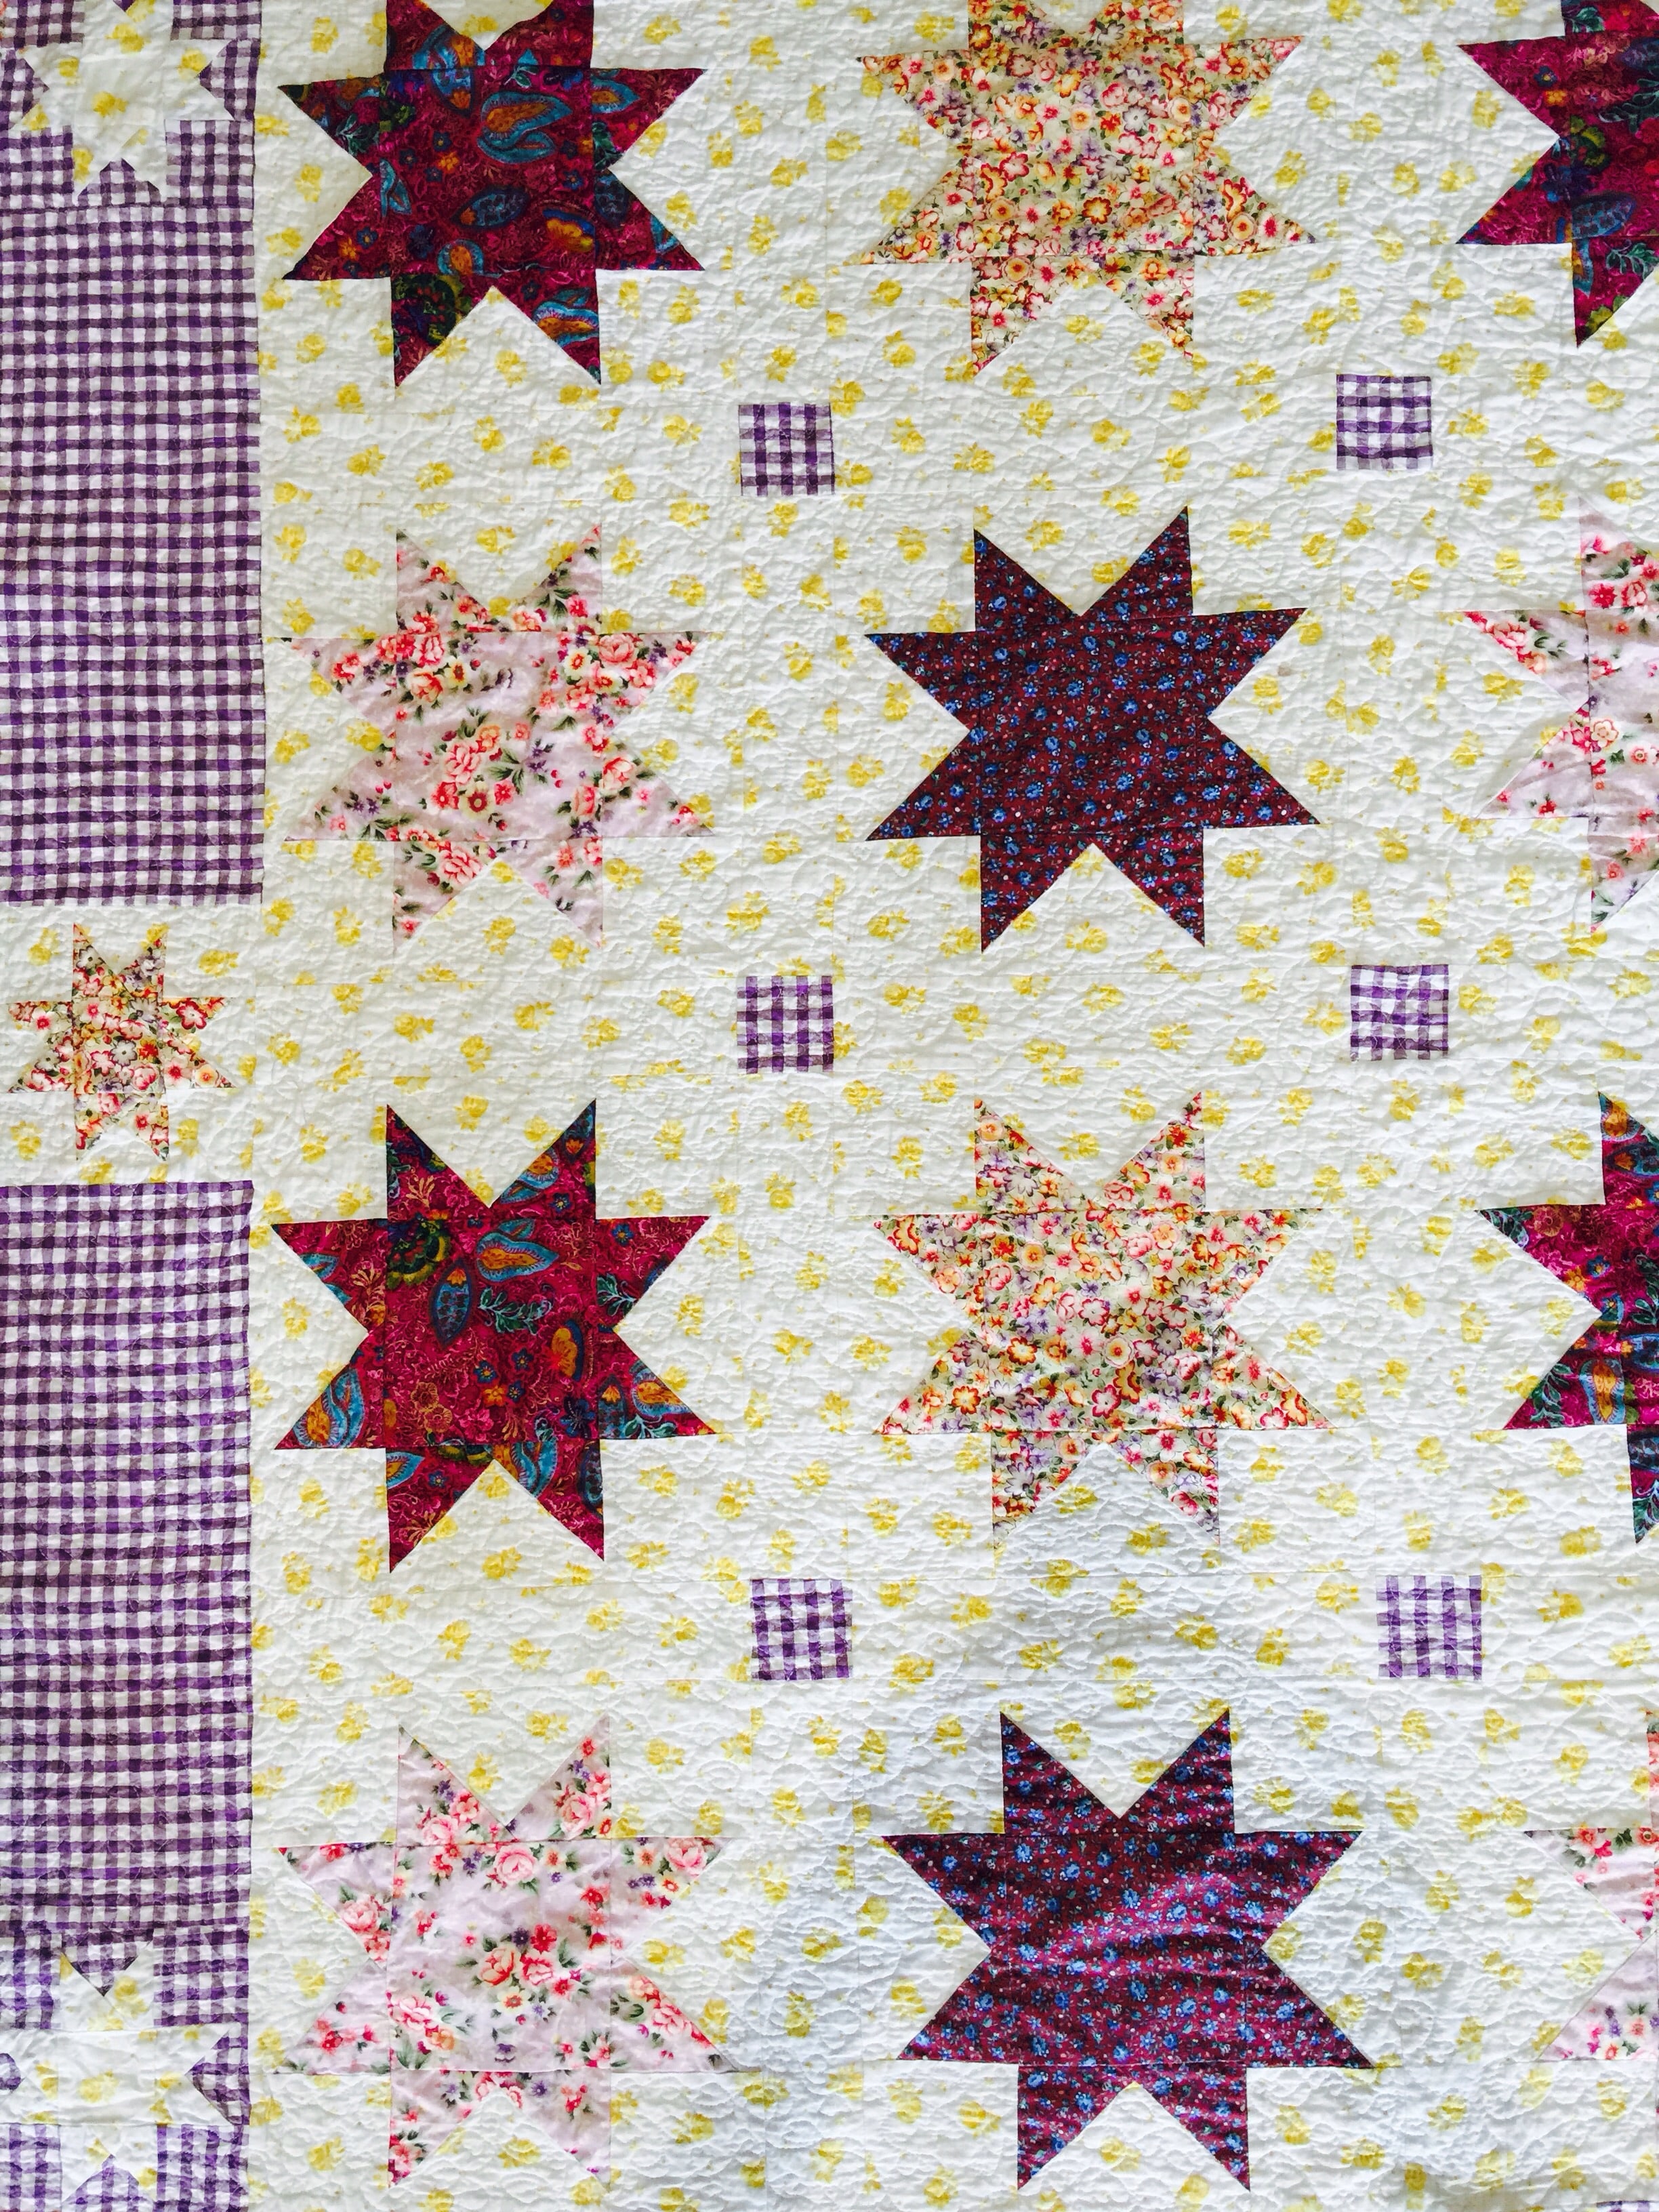
For the two remaining sides sew a coloured star to a white/yellow star followed by the gingham strip another coloured star, a gingham strip, a white/ yellow star then a coloured star. Sew this to one of the remainder sides of the quilt. Repeat this step for the opposite side.
Second Border
Measure the finished size of the quilt through the centre. Cut four matching lavender strips. Sew a lavender 2 1/2″ strip, the length of the finished size to two opposite sides of the quilt. Add a gingham cornerstone to the remainder two strips and then sew to the other two quilt sides.
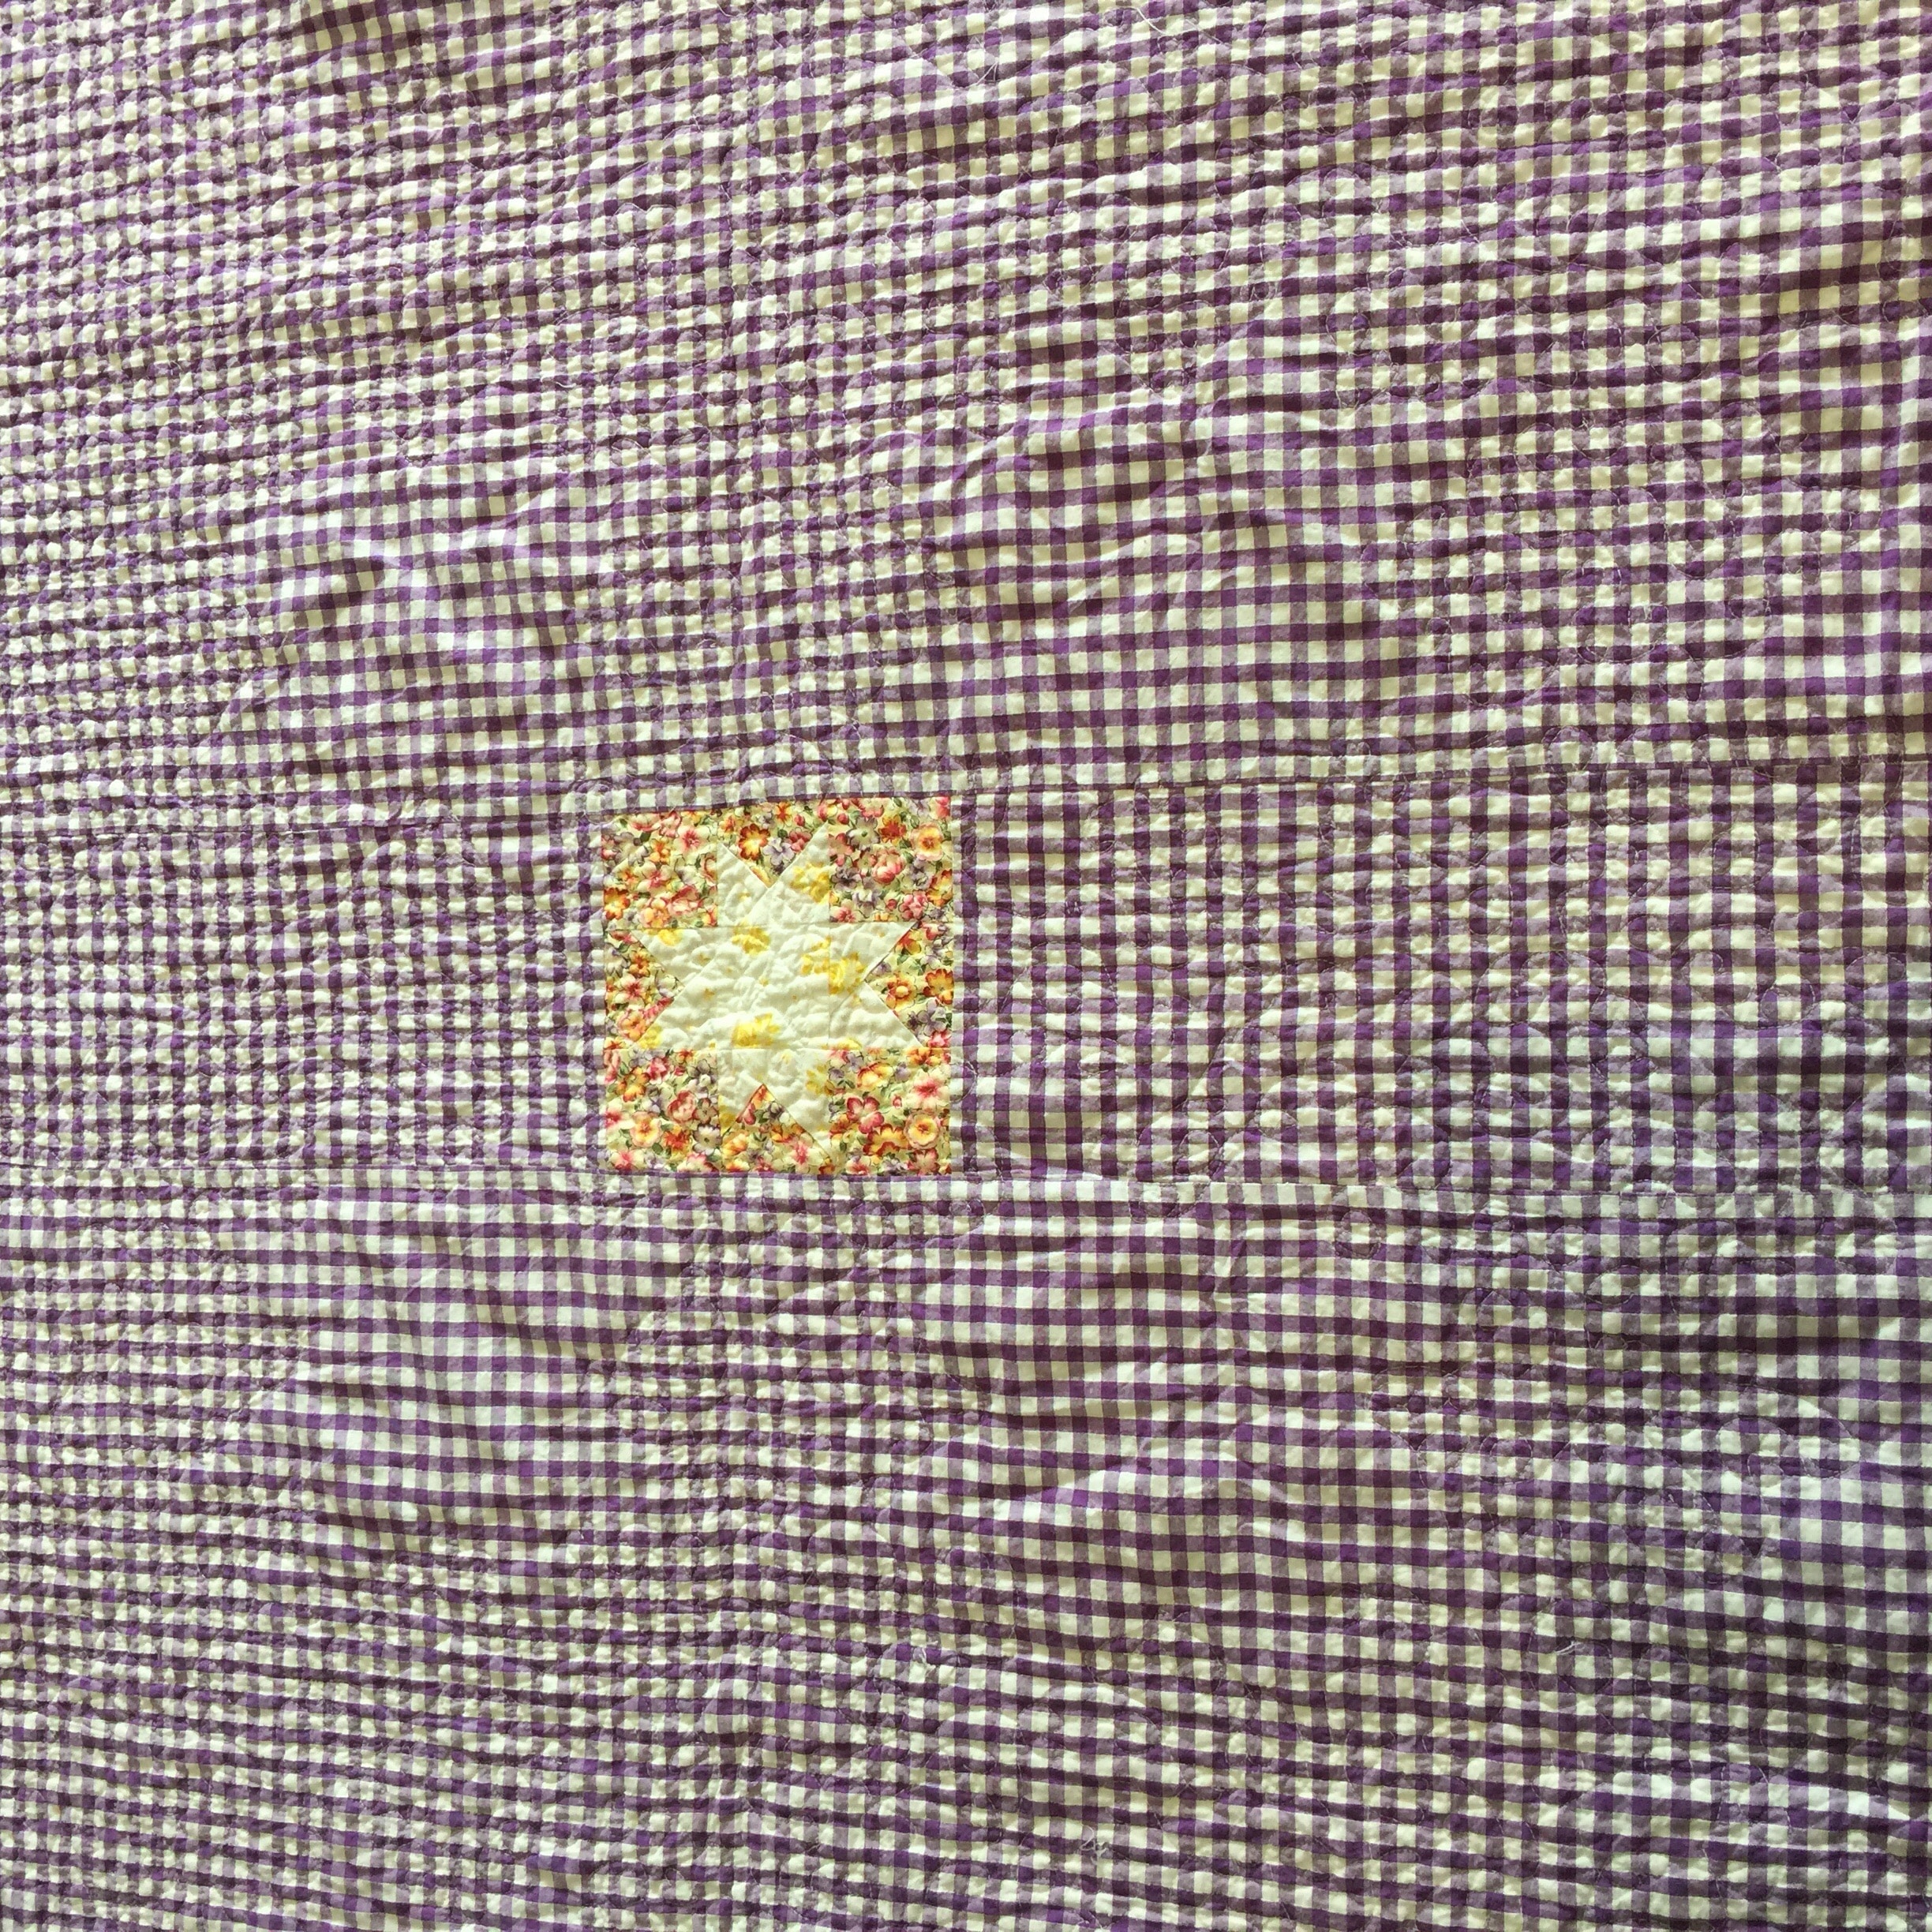
For Anika’s Quilt I made an extra, small star block and used it in the centre of the quilt back. Use the purple gingham to create the quilt back.
Prepare the quilt layers for quilting.
Quilt as desired.
Use the burgundy purple strips to make the binding. Prepare Strips for Binding – Tutorial