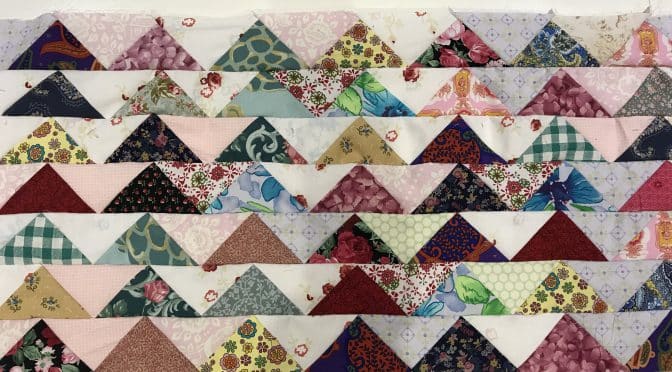
Flying Geese Antique Style Quilt Tutorial – Made Easy
Oh Boy! I’m excited to share this tutorial with you all today!
For the longest time I have have wanted to make a Flying Geese quilt. The reason I’ve hesitated (apart from having too many WIPS (works in progress) already….cough…😁 is that I have been thinking and thinking about how to achieve this in a manner which is more simple. I realise there are many tutorials out there for making them, and they are good but all a little bit too fiddly for my taste.
Having tried many ways, none of them have inspired me to keep going, until recently, I saw an antique quilt and the penny dropped!
So I’ve been experimenting, and this is what I have come up with.
I am really enjoying this process. It takes a little getting used to, but I like it.
Also its very adapatable, you can easily make it using bigger pieces if you like.
I think you will be surprised at how simple it is. And….you can use your scraps. You just need light and dark squares. It will be constructed in a different manner, in strips, but I think it works!
Please take care to ensure your 1/4” seam allowance is correct.
As always all my fabrics have been prewashed. Please read all instructions before commencing.
Requirements for the Flying Geese Antique Style
5” x 5” squares of medium to dark colour fabrics
5” x 5” squares of light prints
Have available extra 5” x 5” squares of the light fabric for finishing the strip ends
Method for making the Flying Geese Antique Style
We will be making the Flying Geese in strips. They will be horizontal strips.
The strips measure 2 1/4” wide. 1 3/4” finished.
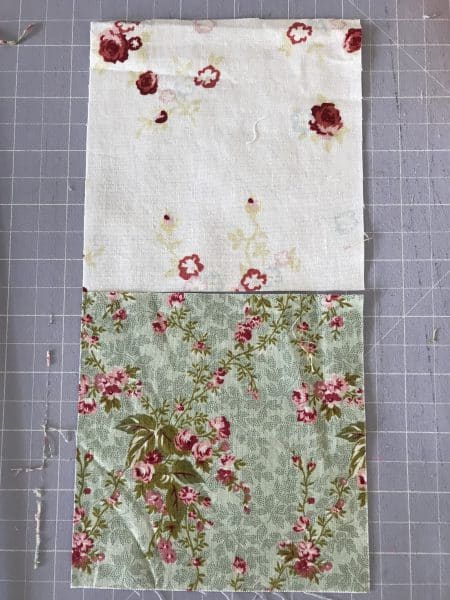
Take a light and a dark 5” x 5” square.
Cut across the squares once on each diagional revealing 4 light and 4 dark triangles. This method of cutting ensures the hypotenuse of every triangle is on the grain of the fabric.
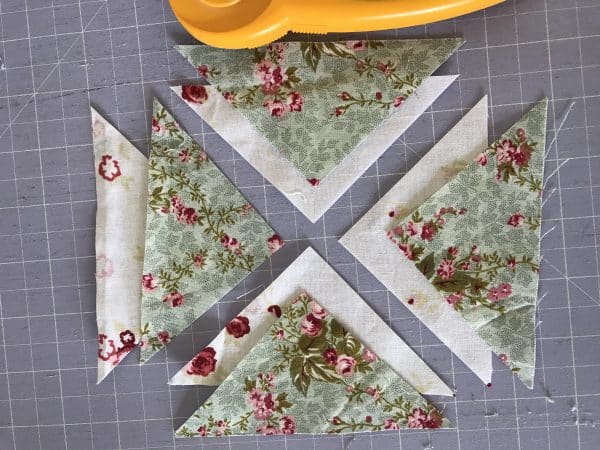
Begin piecing the triangles together. It doesn’t matter if you have the dark or light one on top, but whichever you decide,keep doing it the same way.
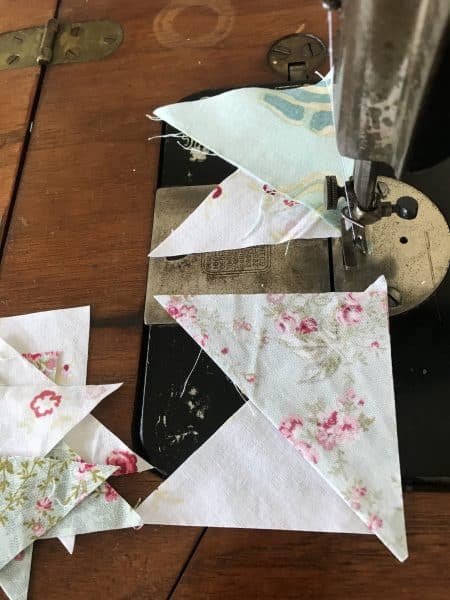
Put a light and a dark triangle right sides together. The hypotenuse of each triangle should intersect. The two right angles of the triangles should oppose each other. The points of the triangles should overlap, such that the seam will be 1/4” at the point of the “doggy ears” overlap. I sure hope this makes sense. Sew a 1/4” seam so that it intersect with the “doggy ears” overlap.
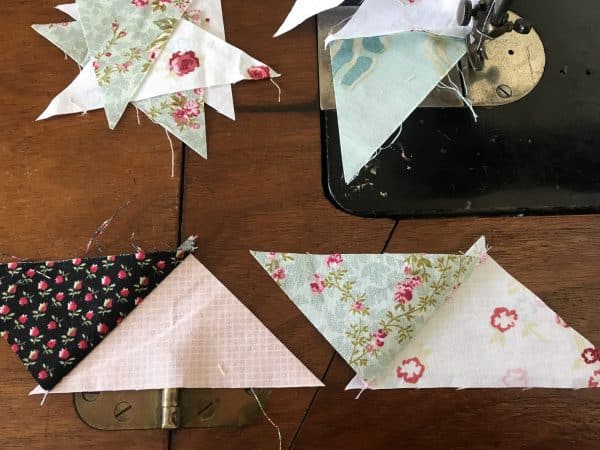
Open the units and they should look like these. The points of the triangles must be at the edge of the joined triangle.
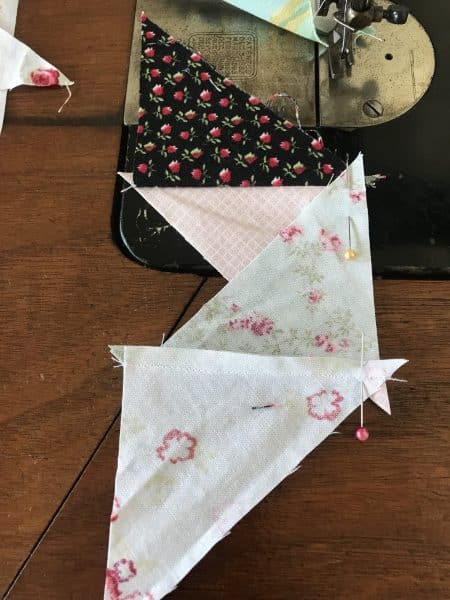
Join two units together using the same method, the light and dark opposing. See how the “doggy ears are overhanging at the point of where the seam should be.
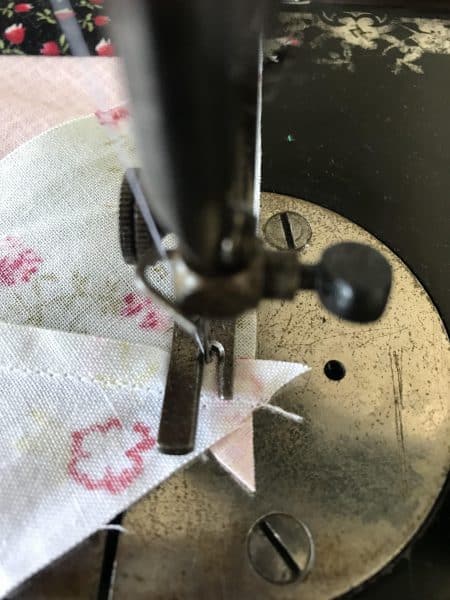
Here is a close up so that you can see where the seams should intersect.
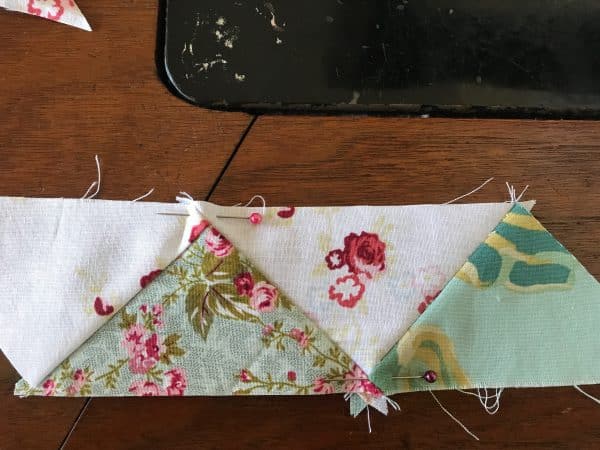
Now open the two units and it should look like this. See how the line of top and bottom should be straight. I have placed the pins so that you can see that I have a 1/4” seam allowance above / below the points of the triangles.
This technique does require accuracy. It may take a few goes to get the technique perfected.
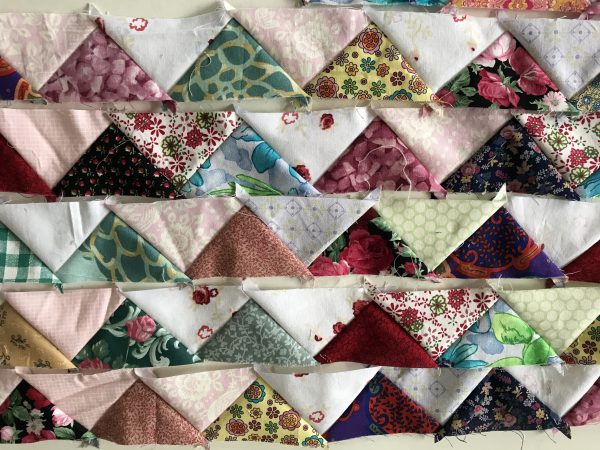
Make strips as long or short as you like. I am making my strips with 10 dark triangles. Add an extra light triangle to the end of each strip so that you will have a light triangle on each end. Once all the strips are sewn together, then the light ends can be rotary cut to straighten the edges. This will be the only waste.
I want to show you some of my first strips. You can see that I lost some of the points because I wasn’t careful enough with sewing my triangles and also I was still experimenting with the technique. I think I will leave them in anyway, as a reminder to self.
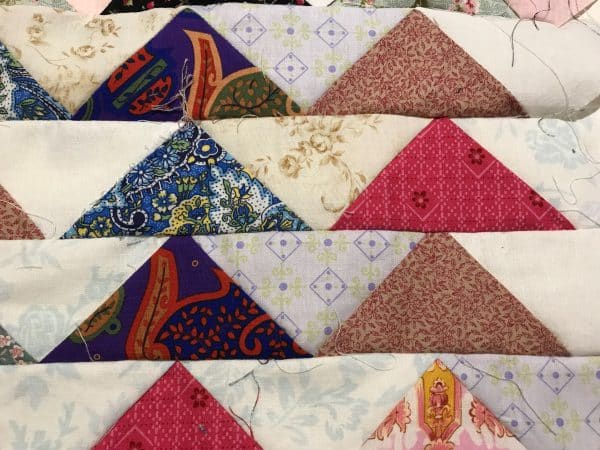
When sewing the strips together please pin carefully to align them correctly and ensure your points are preserved. Sew the strips together alternating the direction, to prevent bowing of the top. Sew together maybe sets of four strips, then put them together.
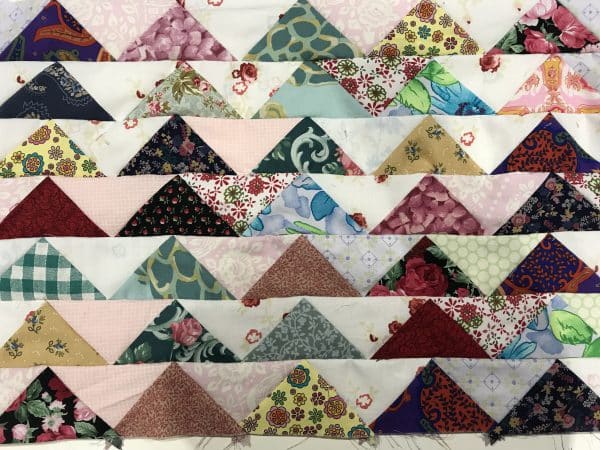
I really hope you enjoy this tutorial.
My quilt is still in progress, I will post again when there is more to see.
All the best,
Susie
If you enjoyed this post, you may also like,
Vintage Twist Baby Quilt & Tutorial
Or this post,
Or, this one….

