“End of Day” Quilters Small Gathering / Gift Basket.
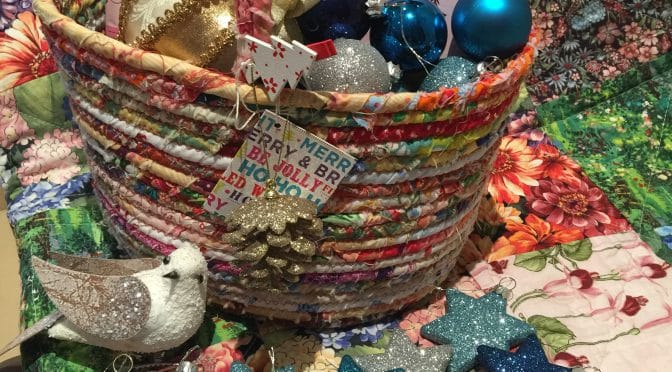
I recently found a very old, small antique cane basket in a thrift store. I was rather taken with it, so I purchased it for the grand sum of three dollars! When I waked into another store holding this basket, another lady, exclaimed “I want that basket”. There is just something about it, even with decades of dust. So that little basket came home with me. I gave it a good wash and it became my inspiration for today’s basket. There is just something so appealing about the size and the shape … so I am sharing this idea with you.
Now when the strings have been saved, and the rope has been wrapped, here is a small basket project! See the links below on preparing the strings and wrapping the rope.
For this basket, you will need about one skein plus a little more of wrapped rope.
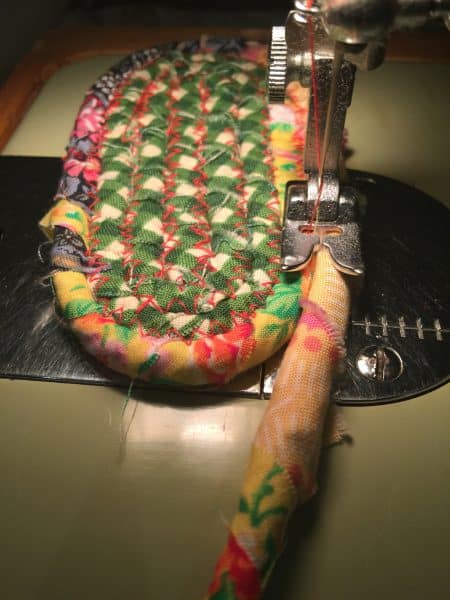
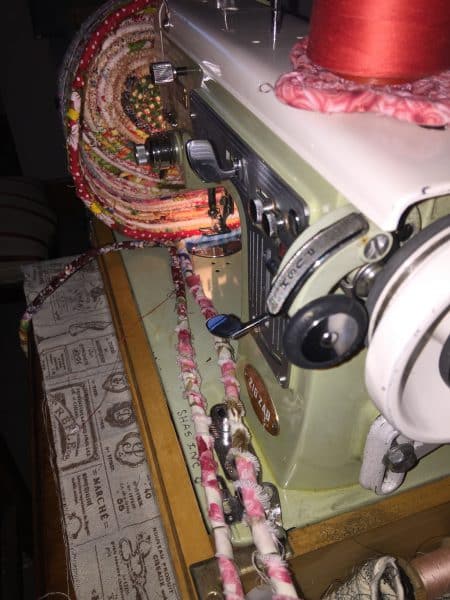
Begin by folding back a length of about three inches of the beginning of the rope back on itself. Today I’m using a red thread, and I am sewing this basket on my early 1960s Myer Victor Zig-Zag sewing machine. Begin zig-zag stitching ensuring that each side of the rope is caught into the stitches.
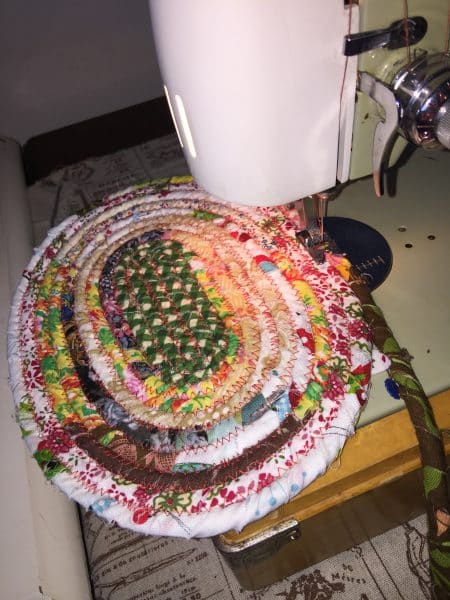
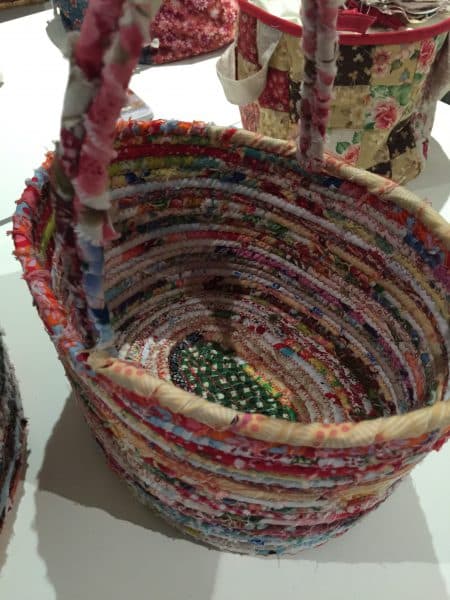
Work slowly, keep the needle in the down position when stopping and turning the piece. Continue in the same manner and complete 11 rows.
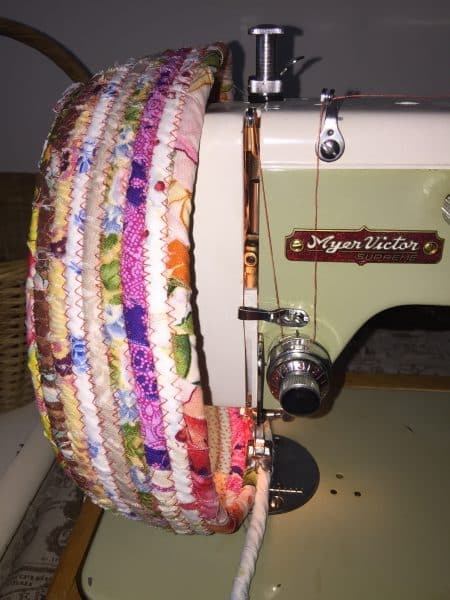
Once the 11 rows for the base are completed, tilt the base for the nex row and continue to stitch keeping the base vertical to the machine.
Continue for.another 20 rows or until the side = approximately 5 1/2 inches.
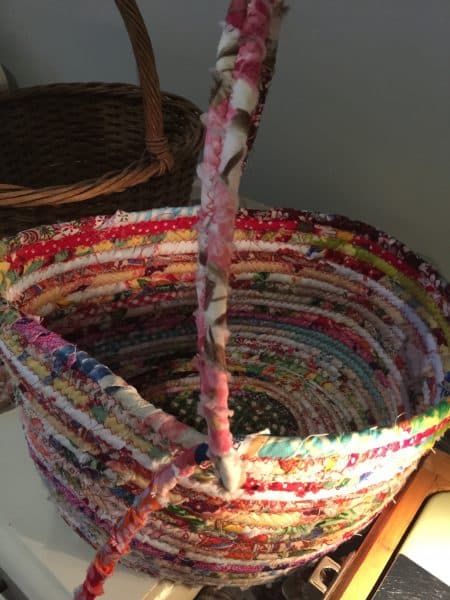
Stop about half way along one long side, Move the rope so that there is a 17″ length at 45 degrees to the basket the double it back. Sew along the centre to make the handle.
Attach to the opposite side of the basket. Continue sewing the rope for the remainder of the row. Trim and finish at the beginning of the handle.
Reinforce the handles to the basket with some hand stitching.
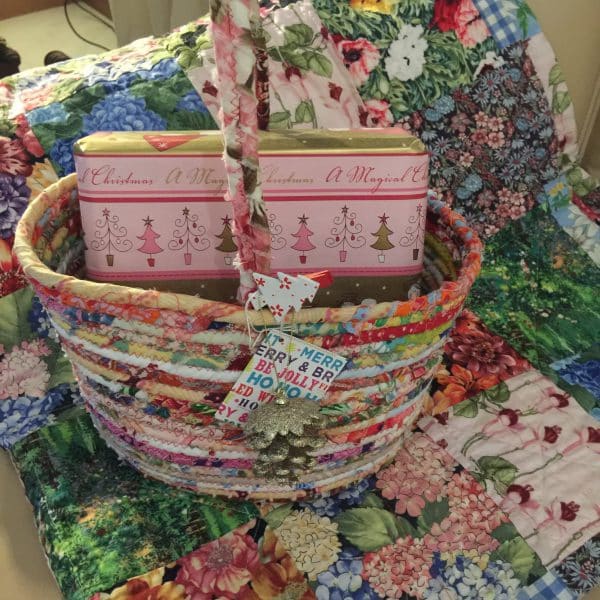
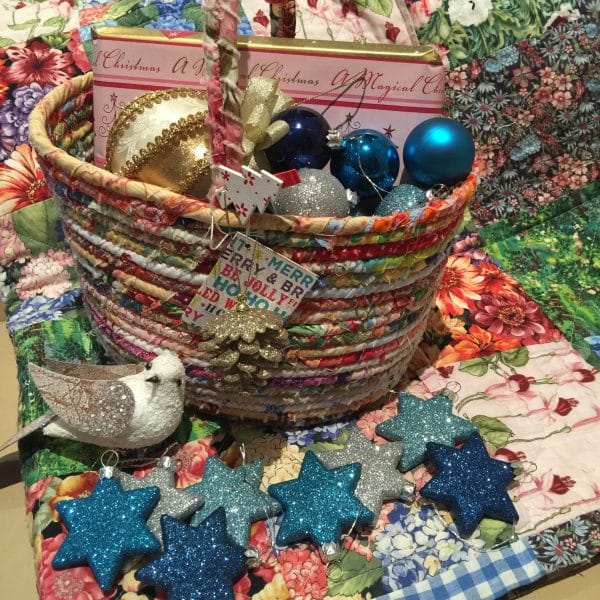
Fill with whatever you like, fruit, hand made preserves, Christmas gifts … it’s up to you!
Merry Christmas to you all!

I save the selvages from my fabric. This appears to be a perfect project to use them on. So glad I have been saving for awhile. I hated throwing all that “fabric” away.
hello Susie, I love your baskets, and of course am having a go at making one, however after pinning the base and already to zig zag, i cant get the rope under my foot, a Bernina sewing machine. Do I put it on darn, I tried that but of course it doesnt move along . wonder if you can give me a tip.
thanks from lyndy
Dear Lyndy. If it’s any constellation, starting is the most difficult. I’m hoping that you are using the 6mm rope. Don’t use any pins once you put it under the presser foot. Just put the work under the presser foot. Do a few stitches at a time. Backststich if necessary. Turn the work a little at a time. Once the coil is started it should just flow. Please feel free to PM me on FB.
Following
Hi Susie, I love this picture based tutorial, makes total sense when I see how it’s done step by step. I noticed that there are stitches on the outside of the bag as well – did you zig zag the inside and the outside? It doesn’t mention that in the instructions – unless I missed it…
Thanks again!
Dear Valerie, thank you for your comment. When constructing the bag using the zig-zag stitches, the stitches go all the way through the covered rope so they appear on the outside too. Hope that makes sense?
Thank you for the pictorial!!! How strange life is! I was just commenting last night on someone’s basket they made about how y daughter and I want to learn to make these. We have been saving strips of fabric for some time! Thank You!!!!!
I save the selvages from my fabric. This appears to be a perfect project to use them on. So glad I have been saving for awhile. I hated throwing all that “fabric” away.