Hello Dear Friends and Readers and welcome to todays post.
A few months ago I was contacted by the past president of the Australian Quilters Association. She had seen my Great Granny Stars Quilt and Pattern on Instagram and thought that it would be a good pattern for her group to undertake. So she asked me if I would like to come to Surrey Hills, Melbourne in June to do a trunk show of my quilts. That was in February and I had just finished the top but it was not quilted.
This is quite a large quilt being 88 ½” x 104 ½”. I decided to hand quilt it, however it had to be ready by June. So I set myself the challenge!
One of the lovely things about hand quilting is that it is a great way to keep warm in the cooler months and enjoy our hobby in a very relaxed way. I use a headlight in the evenings which makes it easy.
Method for Hand Quilting the Great Granny Stars Quilt
I basted the whole quilt with lots of quilting safety pins. The hand quilting is all done in straight line quilting. I did not mark the quilt. I used the diagonal direction of the Great Granny Blocks as the inspiration for the hand quilting. I quilted through all the center’s of all the squares of the Scrappy Great Granny Blocks Scrap Great Granny Square Block Tutorial
Here you can see some of the beginnings of that process. For those of you who like a bit more detail, I am using a no. 9 quilting needle and a single thread of Gutermann Quilting cotton – colour pearl 919 40wt with a quilting hoop.
Great Granny Stars Hand Quilting Finish susies-scraps.com
Great Granny Stars Hand Quilting Finish susies-scraps.com
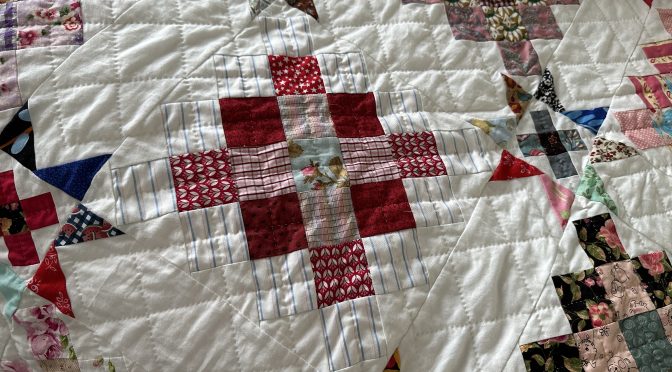
Essentially this has amounted to the whole quilt being quilted in an approximately a 2” grid pattern. The next photo shows a lot of that progression.
Great Granny Stars Hand Quilting Finish susies-scraps.com
Now at this stage most of the blocks have been quilted and I am now quilting the sashings and all around the border.
Great Granny Stars Hand Quilting Finish susies-scraps.com
I needed to be quite diligent and try to do a little bit most days otherwise it was not going to be finished for the trunk show. Here is a view of some of the back and the diagonal 2” grid pattern.
Great Granny Stars Hand Quilting Finish susies-scraps.com
I did get it all quilted and bound by June so about four months of hand quilting in all.
Here is a close up of part of the front.
Great Granny Stars Hand Quilting Finish susies-scraps.com
Hello Dear Friends and Readers and welcome to today’s post. Now that Christmas is pretty much behind us, it is nice to begin to get back to my current Great Granny Stars project which I have been working on. Before we start I will add that you really can use a lot of scraps up to make this quilt. If you are really really feeling dedicated you may even consider a scrappy binding too which would use even more!
For those of you who are regular visitors you may also notice that we have decided to get rid of all the advertisements on the site. In my personal opinion Google had made things way too … ahem. It looks so much better. ????
If you have been following along with the Great Granny and Mini Granny blocks you may well enjoy the challenge of putting this very scrappy quilt together. Here we are on the final part of the Scrappy Great Granny Quilt revival to which we will add some stars to give it a bit of twinkle! I will add the links to all the blocks so that you can catch up if you missed out. Scrap Great Granny Squares Quilt Revival
All requirements for the quilt will be in this post.
All fabrics have been washed and lightly pressed before use.
All seams based on 1/4”
Finished size approximately 88 ½” x 104 ½”
Please read all instructions before commencing. Don’t forget to save all your triangle off cuts to join in with another quilt project later! ????
Fabric Requirements for the Great Granny Stars Quilt
6 yards/metres (approximately) of scrap assorted print fabric
6 yards/metres of white homespun
1 yard/metre in your colour/print choice for the binding
Batting piece approximately 100” x 115”
Backing fabric approximately 110” x 120”
Cutting Instructions for the Great Granny Stars Quilt
From the assorted print fabrics cut:
1288 of 2 ½” x 2 ½” squares
and 210 of 1 ½” x 1 ½” squares
From the white homespun cut:
36 of 4” width of fabric strips. Subcut 106 of 4” x 12” strips for the Star Sashings and the border.
14 of 4 1/2” width of fabric strips. Subcut 108 of 4 ½” x 4 ½” ” squares. Cut each square once on each diagonal to reveal 432 setting triangles for the 36 Great Granny Square blocks.
9 of 3” width of fabric strips.
Subcut 72 of 3” x 3” squares. Cut each square once on the diagonal to reveal 144 corner triangles for the Great Granny Square Blocks.
Subcut an extra 46 of 3” x 3” squares cut once on each diagonal to make the setting triangles for the Mini Granny Square blocks
3 of 2” width of fabric strips. Subcut 92 of 2” x 2” squares, cut once on the diagonal to reveal 184 corner triangles for the Mini Granny Square blocks
Making the blocks for Great Granny Stars Quilt
Instructions for each of the parts of the Great Granny Stars Quilt are in these links.
Make 26 half sashing blocks using the 26 of 4” x 4” white homespun squares in the same manner as the Star Sashings using only 2 of the 2 ½” x 2 ½” of 52 of the remainder 2 ½” x 2 ½” assorted squares on one side of each square. Reserve 22 of the plain 4” x 12” white homespun sashing pieces to alternate with half sashing blocks and 4 of the Mini Granny’s for the final cornerstones.
Assembling the Great Granny Stars Quilt
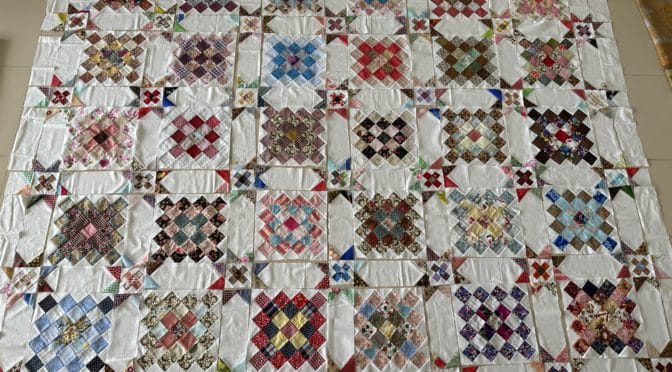
Lay out the 36 of Scrap Great Granny Squares blocks in a 5 x 6 configuration leaving a 4” gap between each block.
Great Granny Stars Quilt and Pattern susies-scraps.com
Great Granny Stars Quilt and Pattern susies-scraps.com
Lay out the Scrappy Star Sashings blocks Scrappy Star Sashings, so that they are lying next to each Scrap Great Granny Square Block. 7 rows of 6 for each direction.
Great Granny Stars Quilt and Pattern susies-scraps.com
For the Border Add a Half Star Sashing Square to the edge of each of the Mini Granny Blocks on the perimeter to complete the stars.. Put the four leftover Mini Granny Blocks in the last four corners as the cornerstones.
Great Granny Stars Quilt and Pattern susies-scraps.com
Put the remainder 22 plain white sashing pieces in between each Half Star Sashing square
Great Granny Stars Quilt and Pattern susies-scraps.com
Assemble the Great Granny Stars Quilt
Now that all the pieces are laid out, assemble the quilt in the same manner. I like to use a scaffolding method. Beginning from the top right hand corner beginning to sew the quilt pieces together by chain sewing the first two columns of pieces together, Do not clip apart. At the end of the column go back to the top and add the next column in the same manner. Continue until all the pices have been included.,
Great Granny Stars Quilt and Pattern susies-scraps.com
Here you can see how the chaining threads act as a scaffolding for the whole quilt.
Great Granny Stars Quilt and Pattern susies-scraps.com
Now turn the whole quilt and sew all the rows. It should be easy to achieve nice alignment because of the chaining threads.
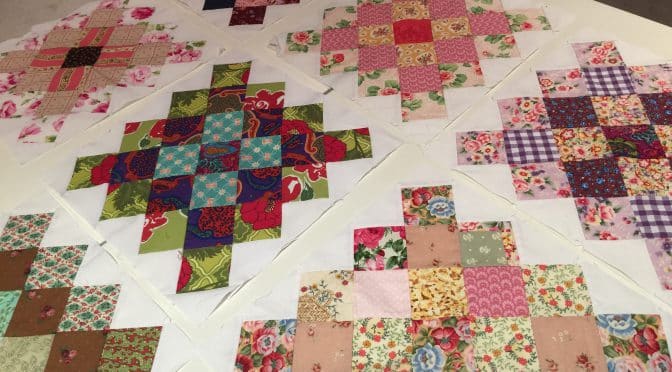
Hello Dear Friends and Readers. Enchanting, endearing and enduring is how I feel about this old fashioned block. Like so many things, everything old is new again. The look of these blocks emulates the look of crocheted Granny squares, but much larger of course. This block will be delightful in whatever fabrics are used, whether they be ultra modern, traditional, brights, pastels, checks and plaids, novelty prints, solids or florals, like I’m using today.
Scrap Great Granny Square Block Tutorial susies-scraps.com
Use whatever you already have in your stash. It’s fun to group them into blocks of fabrics which look happy together. Small amounts of lonely scraps, including directional prints, will find their place!
Scrap Great Granny Square Block Tutorial susies-scraps.com
Traditionally,these blocks would have been hand pieced in order to join them together with same size squares on point However, for speed, these will be machine pieced so a straight sashing border can be added in between.
This is how I do it.
I’m making these blocks with scrap 2 1/2″ squares. You will need a background fabric for the setting triangles (and later for sashings). It’s probably best to choose your background fabric from the beginning. I’m using plain white homespun.
This makes a 12“ x 12“ square block
Ingredients for one Scrap Great Granny Square Block
Each block will require 25 of 2 1/2″ x 2 1/2″ squares
1 x centre square
Round 1 requires 4 squares
Round 2 requires 8 squares
Round 3 requires 12 squares
Scrap Great Granny Square Block Tutorial susies-scraps.com
Each round can be in matching squares, or squares with similar themes or colorways or as scrappy as you prefer.
From the background fabric cut;
3 of 4 1/2″ x 4 1/2″ squares cut once on each diagonal to reveal 12 setting triangles
2 of 3″ x 3″ squares cut once on a diagonal to reveal 4 corner triangles.
Scrap Great Granny Square Block Tutorial susies-scraps.com
Find a place close to your sewing machine, or use a flat box, tray or your cutting mat, to lay out the block. Begin by laying out your squares in a pleasing arrangement, in rounds. Lay out the side setting triangles.
Scrap Great Granny Square Block Tutorial susies-scraps.com
Beginning from the top left of one corner, sew the diagional rows together, one at a time. Incorporate the setting triangles too. Only finger press at this stage.
Complete one row at a time. Then go back and sew all the rows together keeping the order correct. Ensure the seams are nesting.
Scrap Great Granny Square Block Tutorial susies-scraps.com
Lastly add the corner triangles. Press and trim the block. It’s amazing how many odd scraps can be turned into beautiful blocks!
Trim the block to 12“ x 12“
Scrap Great Granny Square Block Tutorial susies-scraps.com
Make some more. This is a Singer 66 sewing machine. C1923.
Scrap Great Granny Square Block Tutorial susies-scraps.com
In no time you will have enough for a lap quilt, baby quilt or table runner at the very least!
Scrap Great Granny Square Block Tutorial susies-scraps.com
If you are enjoying these blocks, you may also enjoy these tutorials.