Tag Archives: 2’ strips

Veterans Cross Quilt Part 4 Making the Borders

Veterans Cross Quilt Part 4 Making the Borders

Hello Dear Friends and Readers and a warm welcome to today’s post. Today I will share Part 4 of the Veterans Cross Quilt. We will be adding the borders. I was quite pleased at the result as I like the way that the borders intersect with the quilt design. You will see what I mean as we go along.

These are the previous posts about this Veteran’s Cross Quilt top. Veterans Cross Quilt Block

Veterans Cross Quilt Part 2

Veterans Cross Quilt Part 3 – Making the Sashings Block

Let’s get to it.

Requirements and Cutting

For the Veterans Cross Quilt Borders

Red solid fabric ½ Yard/ Metre. Cut 8 of 2” Width of Fabric strips. Sub cut 20 of 8” strips and 72 of 2” x 2” squares.

From the light blue tone on tone (same as used in the Sashings Blocks Veterans Cross Quilt Part 3 – Making the Sashings Block) Cut 3 of 2” Width of Fabric strips. Sub Cut 48 of 2” x 2” squares.

Navy Print. Cut 24 of 2” x 2” squares.

From a White solid background fabric. Cut 24 of 2” x 2” squares.

Burgundy with white print. Cut, 2 of 2” Width of Fabric strips. Sub cut 44 of 2” x 2” squares.

Navy solid fabric, approximately 1/3 Yard / Metre. Cut 5 of Width of Fabric strips. Sub Cut 96 of 2” x 2” squares.

Dark Burgundy print fabric, approximately 1/3 Yard / Metre. Cut 6 of 2” Width of Fabric strips. Sub Cut 48 of 5” strips.

Veterans Cross Quilt 1st Border

Using the 48 light blue tone on tone and the 24 navy print squares. Sew a light blue tone on tone square to each side of one of the navy print squares.

Construct 24 of these units. Press. Use 6 of these units for each side. Beginning and ending with one of these units sew 5 of the red 2” x 8” strips alternately with these units to make a long strip. Make four of these strips.

Veterans Cross Quilt Part 4 Making the Borders susies-scraps.com

Sew two of these strips to two opposite sides of the quilt matching seam allowances where they intersect.

To the ends of tthe remainder two of these strips attach one red 2” square. Sew these two strips to the other sides of the quilt top.

Veterans Cross Quilt Part 4 Making the Borders susies-scraps.com

Veterans Cross Quilt 2nd Border

Using the 24 of white solid 2” squares, sew a red solid 2” square to each side of the white squares to make 24 units.

Sew a burgundy with white print square to each side of a red solid square. Make 20 of these units.

Begining with a solid navy 2” square, attach a white and red unit, followed by a navy square, then sew a burgandy and red unit to the end of that, then a navy square. Continue alternating these units with a navy square in between until you have used 6 of the white/red units and 5 of the burgandy/red units. Finish with a navy square.

Make four of these border strips the same way. I made these on my vintage Singer 201K treadle. Singer 201K Treadle C1947

Veterans Cross Quilt Part 4 Making the Borders susies-scraps.com

Sew one of these strips to two opposing sides of the quilt top, matching the seam allowances.

To the remaining two strips, sew burgundy with white print 2” square to each end of both strips. Now sew these two borders strips to the other two sides of the quilt top.

Veterans Cross Quilt Part 4 Making the Borders susies-scraps.com

Veterans Cross Quilt 3rd Border

Take 12 of the dark burgundy 5” strips. Beginning and ending with a burgandy strip sew a long strip alternating each with a navy 2” square.

Repeat to make 4 strips the same.

Sew one of these to two opposing sides of the quilt top.

To the remaining two strips, sew a 2” navy square to each end and then sew these two strips to the other sides of the quilt top. Then the borders are complete.

Veterans Cross Quilt Part 4 Making the Borders susies-scraps.com

I hope you enjoy making this quilt. Next week’s post will show how I quilted this top.

If you enjoyed this post, you may also like

Uneven Nine Patch Quilt Pattern Antique Style

Happy stitching,

Susie

© Susan Stuklis 2026
Woven Pine Tree Quilt Block

Woven Pine Tree Quilt Block

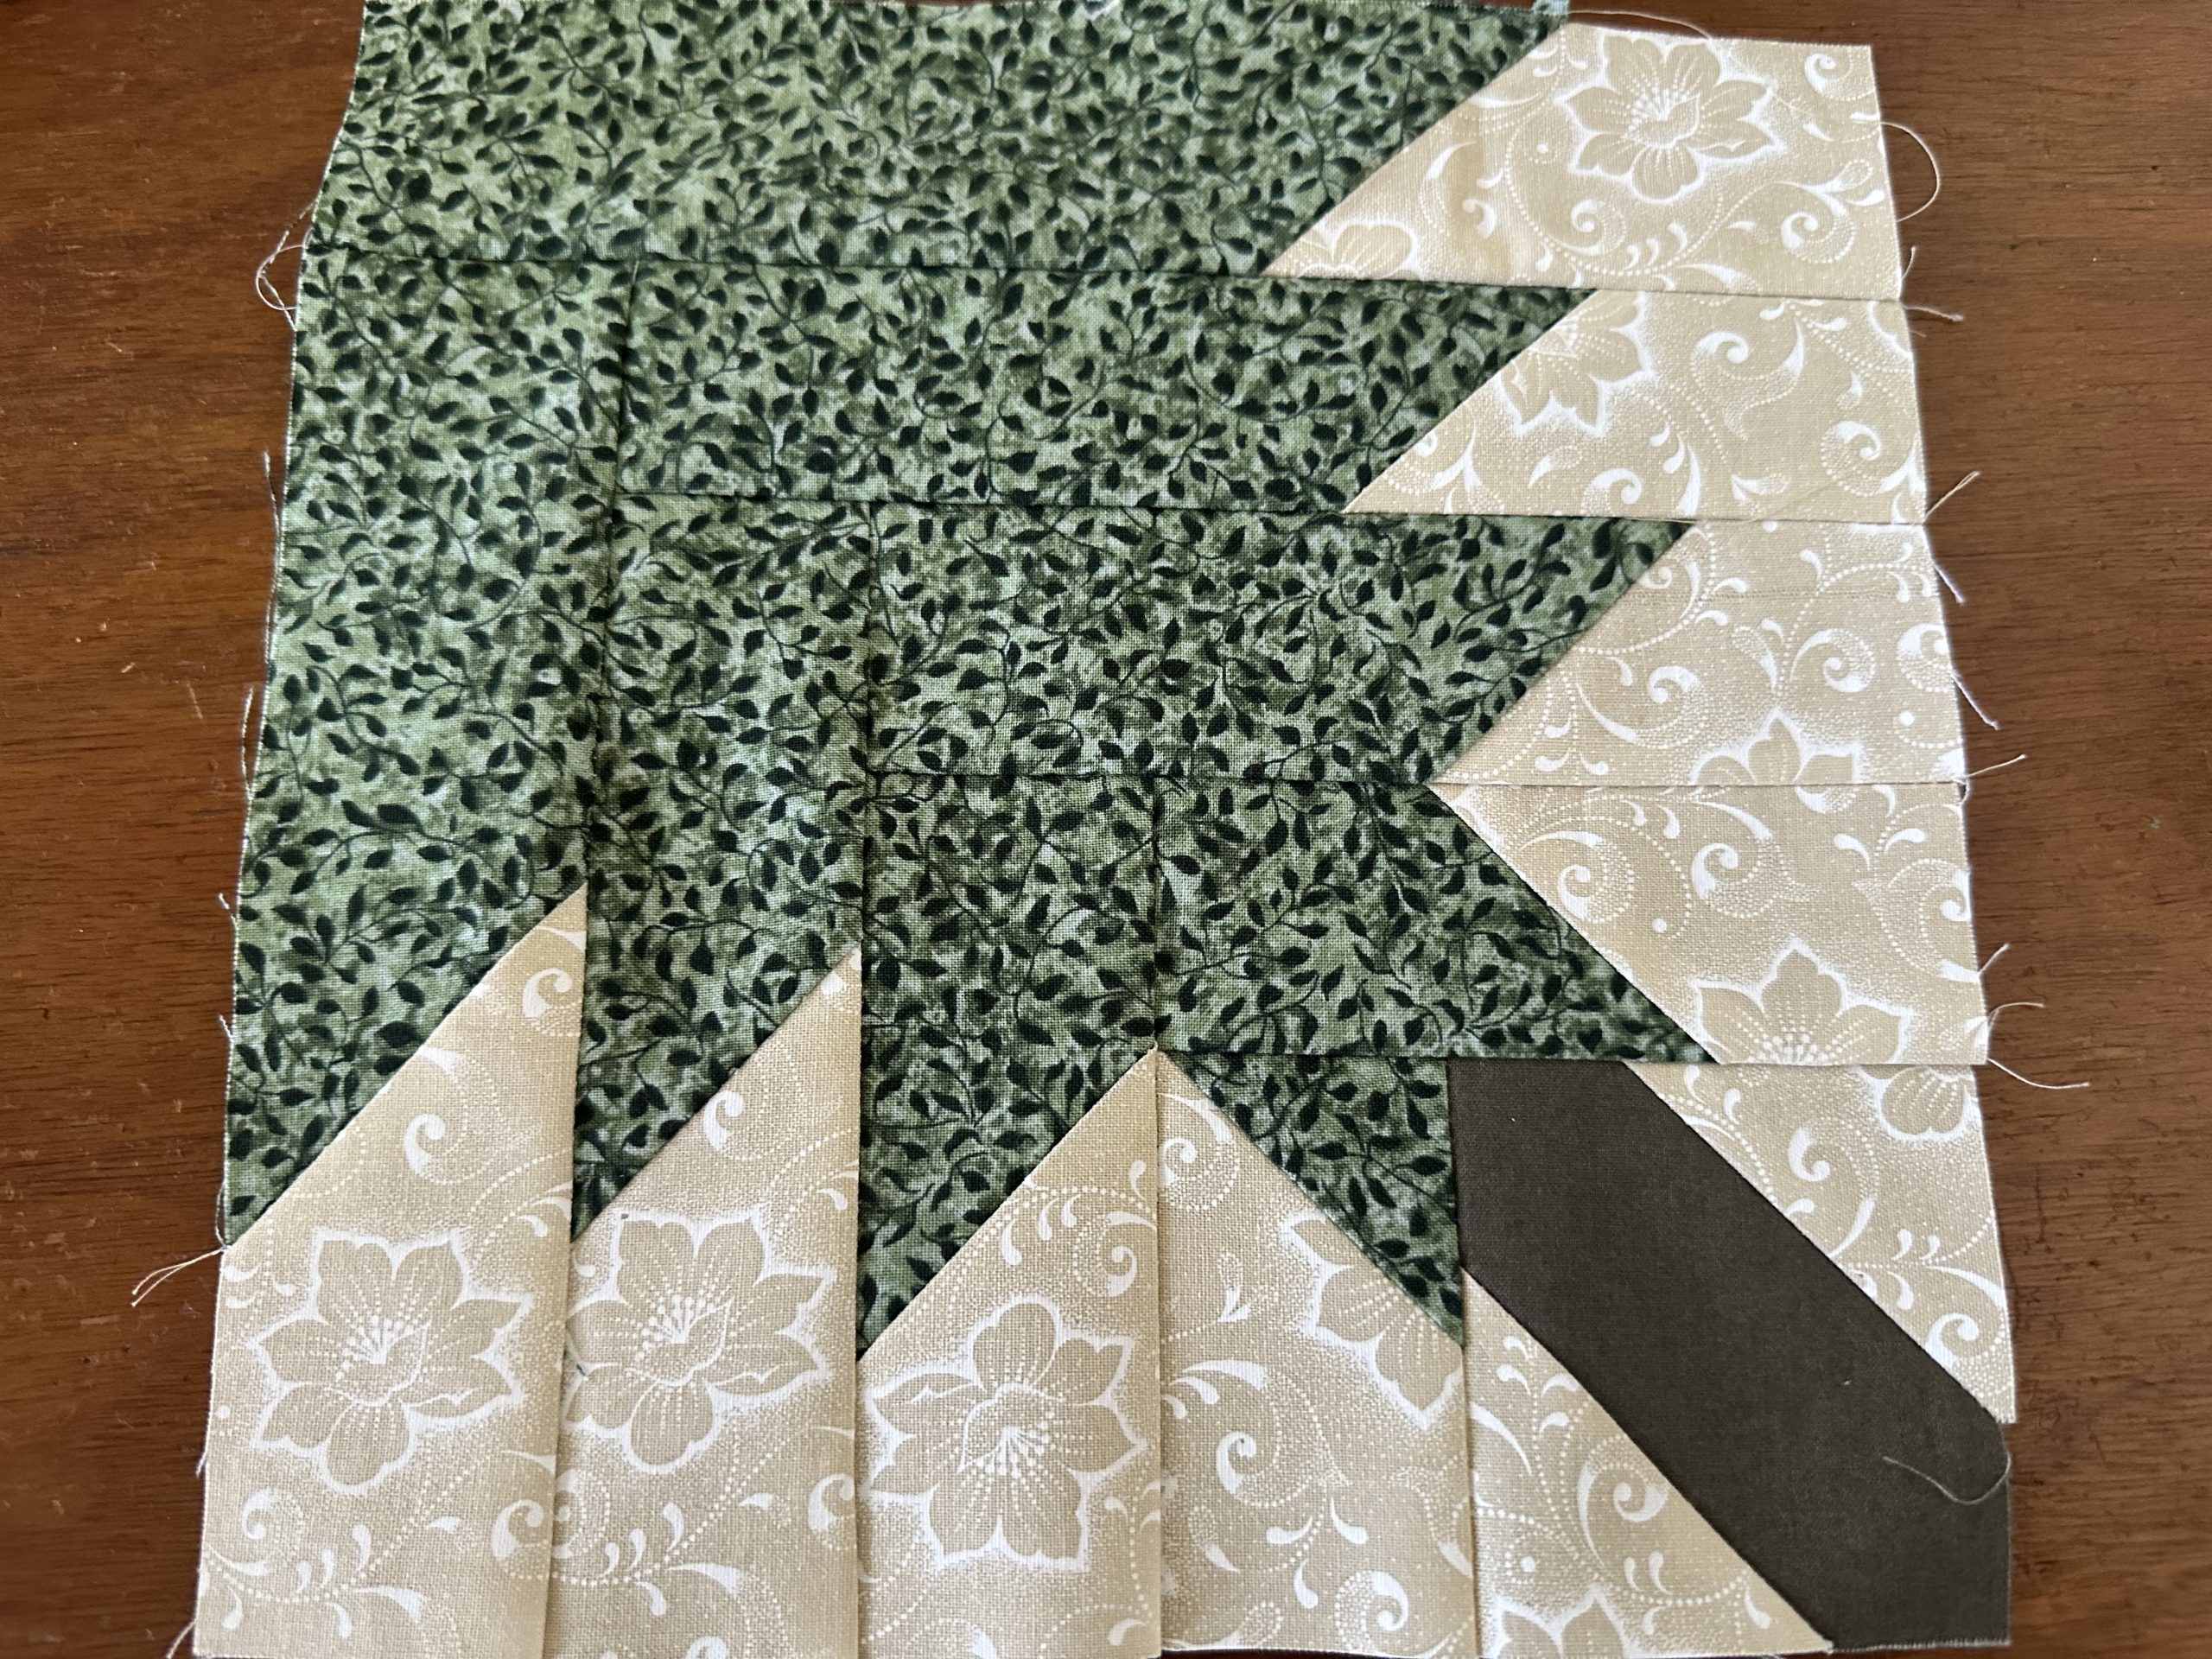
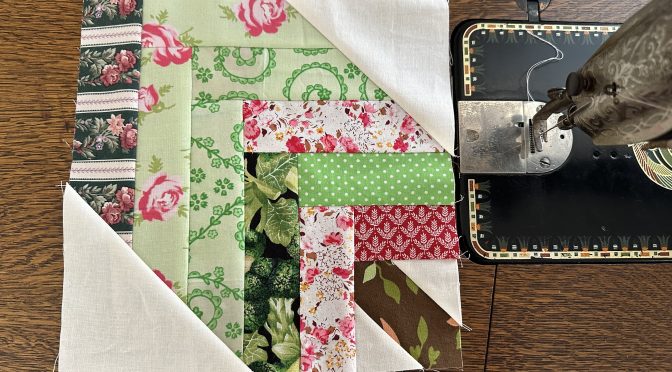
Hello Dear Friends and Readers and welcome to today’s post. Christmas is coming and there’s nothing like the smell and look of a fresh pine tree for Christmas.. With that in mind, I thought we could make some Pine Tree Blocks which I am calling Woven Pine Tree Quilt Block. I came up with this idea during the process of making these recent Christmas Pine Tree Half Log Cabin Block

As most of you would know I am truly inspired by antique and vintage quilts. If you have ever seen antique Pine Tree or Tree of Life quilt, you would know that this block involves the piecing of many half square triangle units. These would take some considerable time to make.

Today the block I am sharing with you is a similar shape but way way easier to construct!

This quilt block is based on the Log Cabin Variation – Scrappy Half Log Cabin or Quarter Log Cabin Quilt Block Tutorial

I realized that this could easily make a Pine Tree Quilt Block, which would be both scrappy and easy to put together. Log Cabin Blocks really are the perineal quilt block of all time and are also so adaptable! I think that we should proceed without any further ado.

So get out your Christmas fabrics or any red and green scraps (or colours of your choice) to make these blocks.

Block size 10 1/2” x 10 1/2”

All seams are based on 1/4 inch. All the strips are cut at 2″ width.

All the strips in this block can be as scrappy as you like or they could be in a solid of your choice or you can mix up green and red to make it more like a decorated Christmas tree. Or use various greens and blues would be another suggestion. It is up to you.

Requirements for Woven Pine Tree Quilt Block

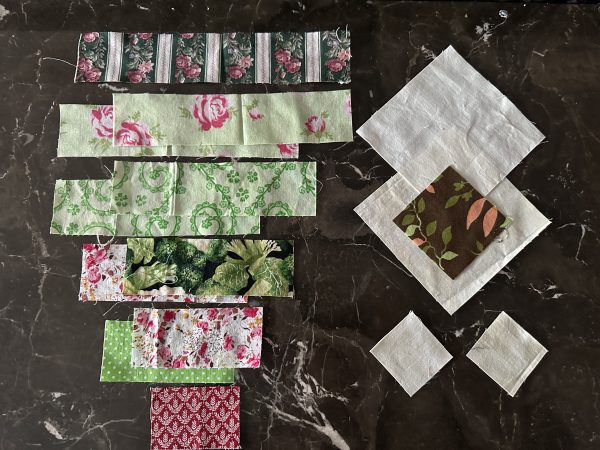
One of 3“ x 3“ brown coloured. square.

Two of 2“ x 2“light coloured background squares

One of 3″ x 2″ strip

Two of 4 1/2” x 2” strip

Two of 6″ x 2″ strip

Two of 7 1/2” x 2″

Two of 9” x 2”

One of 10 1/2” x 2″ strip

Two of 5“ x 5“ light coloured background squares. .

Woven Pine Tree Quilt Block susies-scraps.com

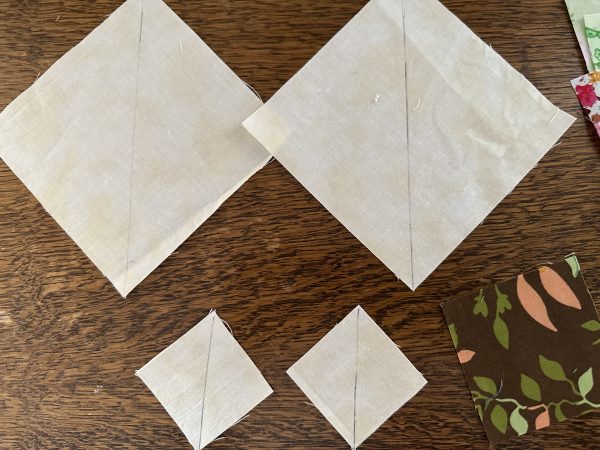
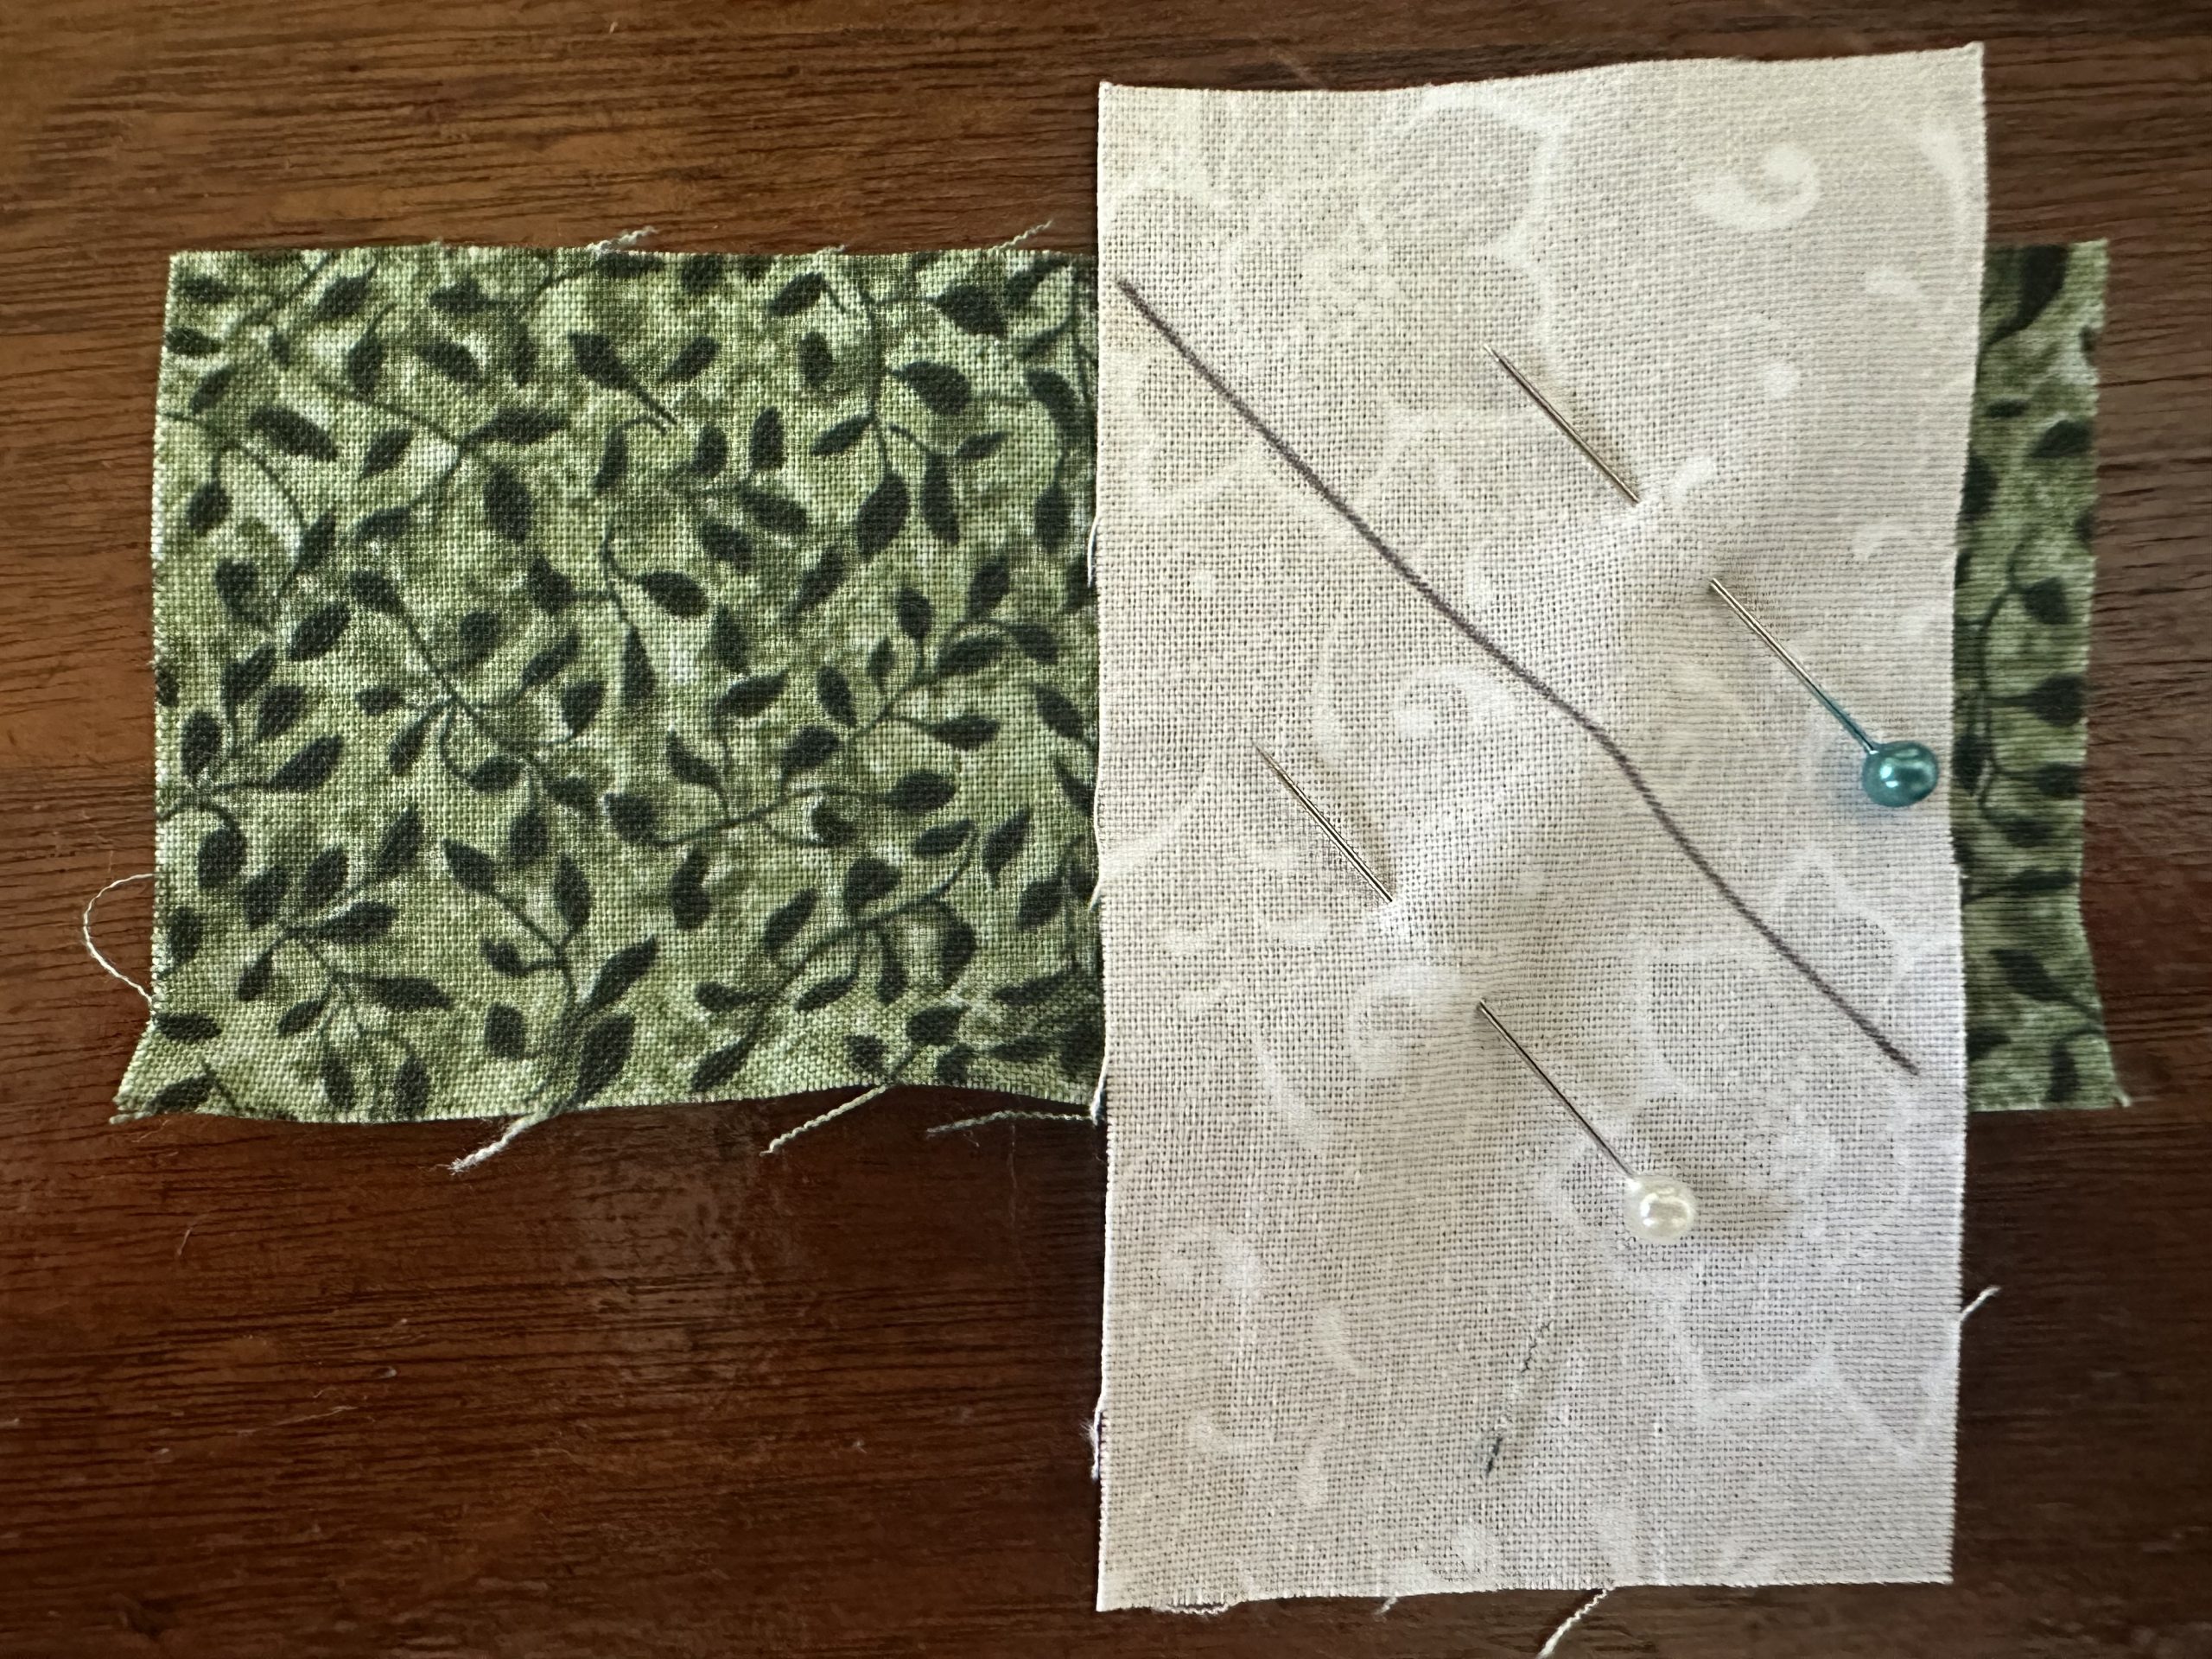
Draw a diagonal line on the wrong side of the four background squares.

Woven Pine Tree Quilt Block susies-scraps.com

Assembling the Woven Pine Tree Quilt Block

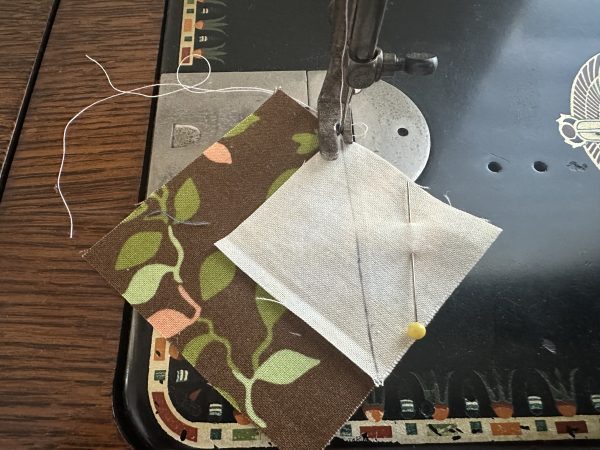
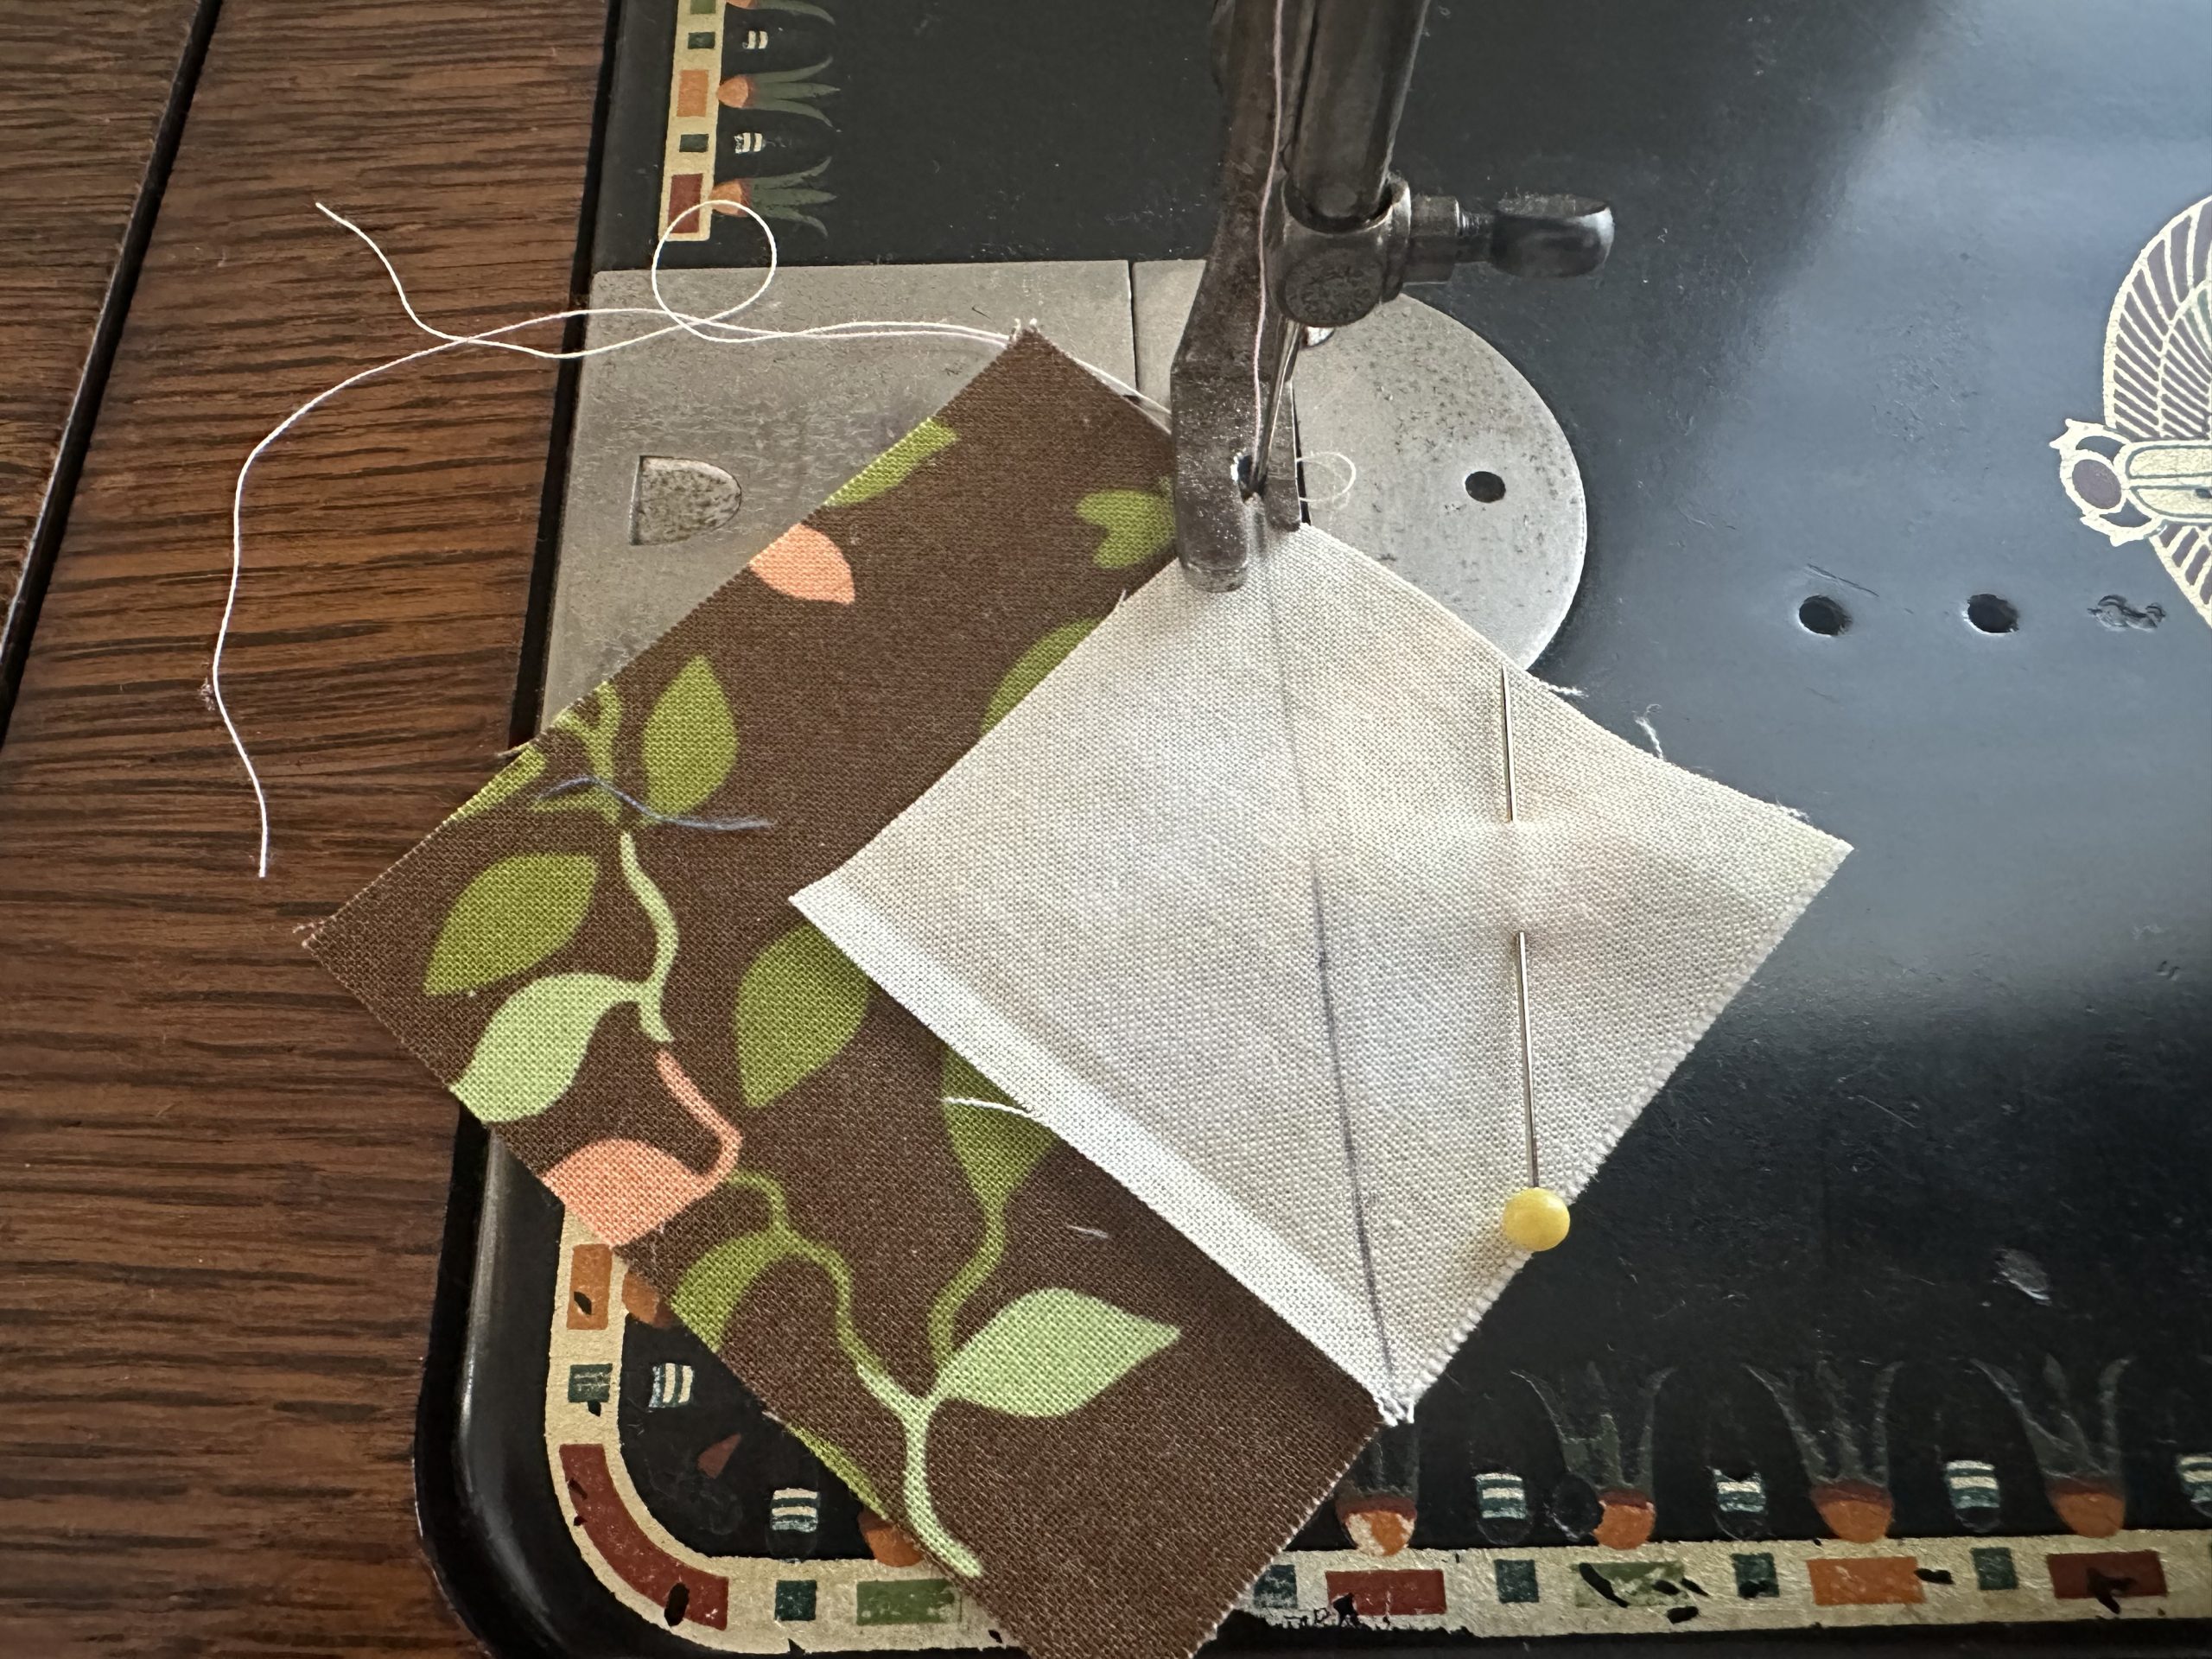
Place a 2″ background square to one side of the 3″ x 3“ brown square right sides together. Sew diagonally down the 2 ” square using the drown line as your guide. Bear in mind, it can be a good idea to sew slightly one thread to the right so that when you trim the excess from the square, and fold it back, it will still be at 3″ x 3″.

Woven Pine Tree Quilt Block susies-scraps.com

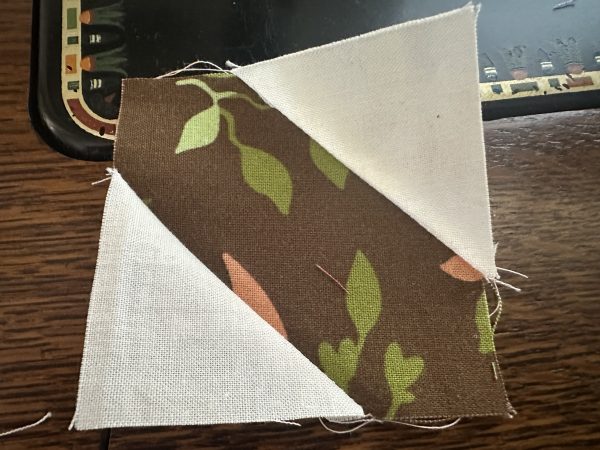
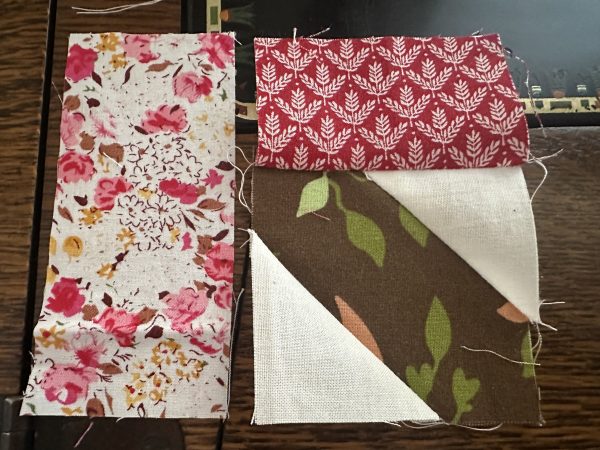
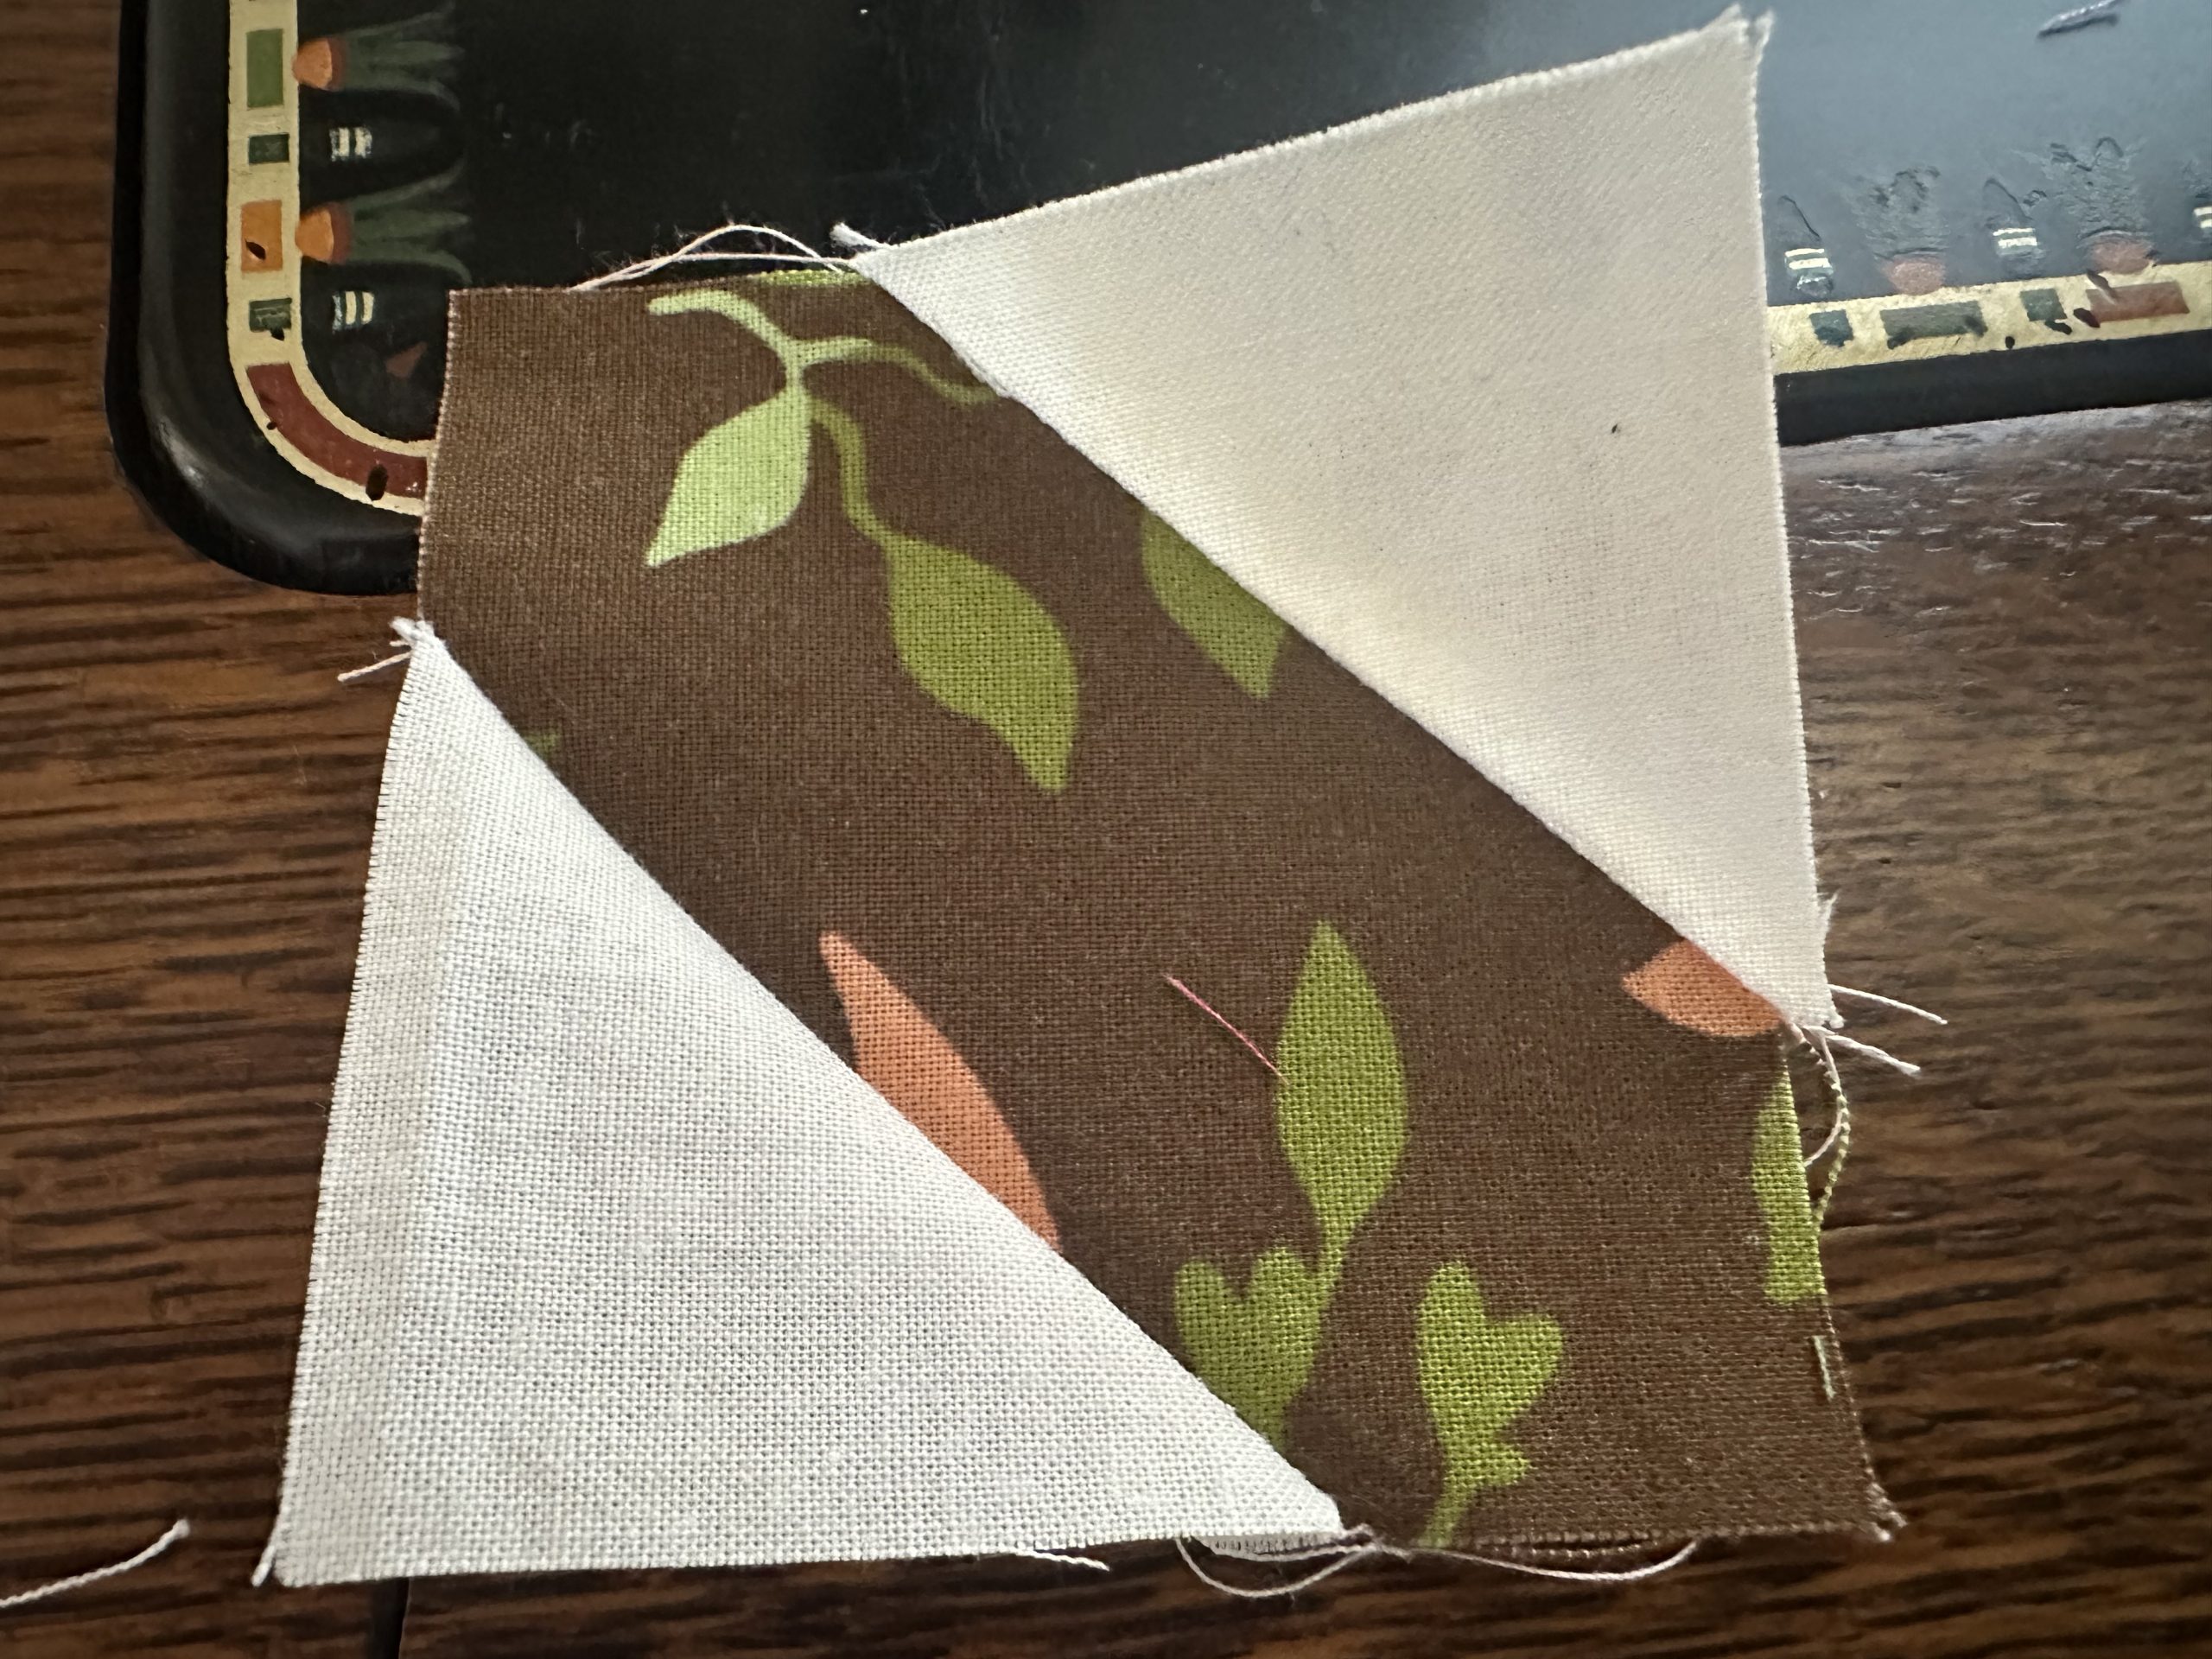
Trim back to the seam to 1/4 of an inch. Press toward the corner. Do the same for the opposite corner. Press. This is now your tree trunk.

Woven Pine Tree Quilt Block susies-scraps.com

With right sides together, sew a 3“ x 2“ strip to the top side one side of the pine tree trunk.

Woven Pine Tree Quilt Block susies-scraps.com

Press toward the strip.

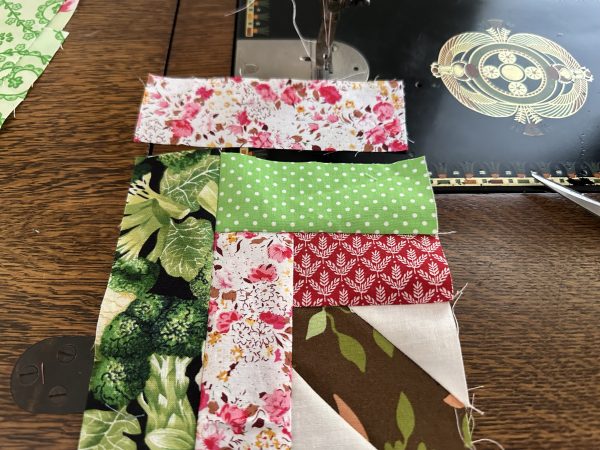
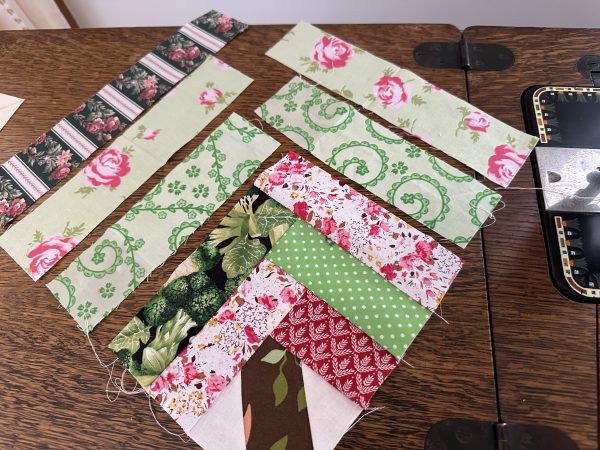
To the opposite side, sew a 4 1/2” x 2” strip in the same manner. Continue adding the rest of the strips alternately to the same way to the same two sides using the quarter inch seam and pressing between each addition.

Woven Pine Tree Quilt Block susies-scraps.com

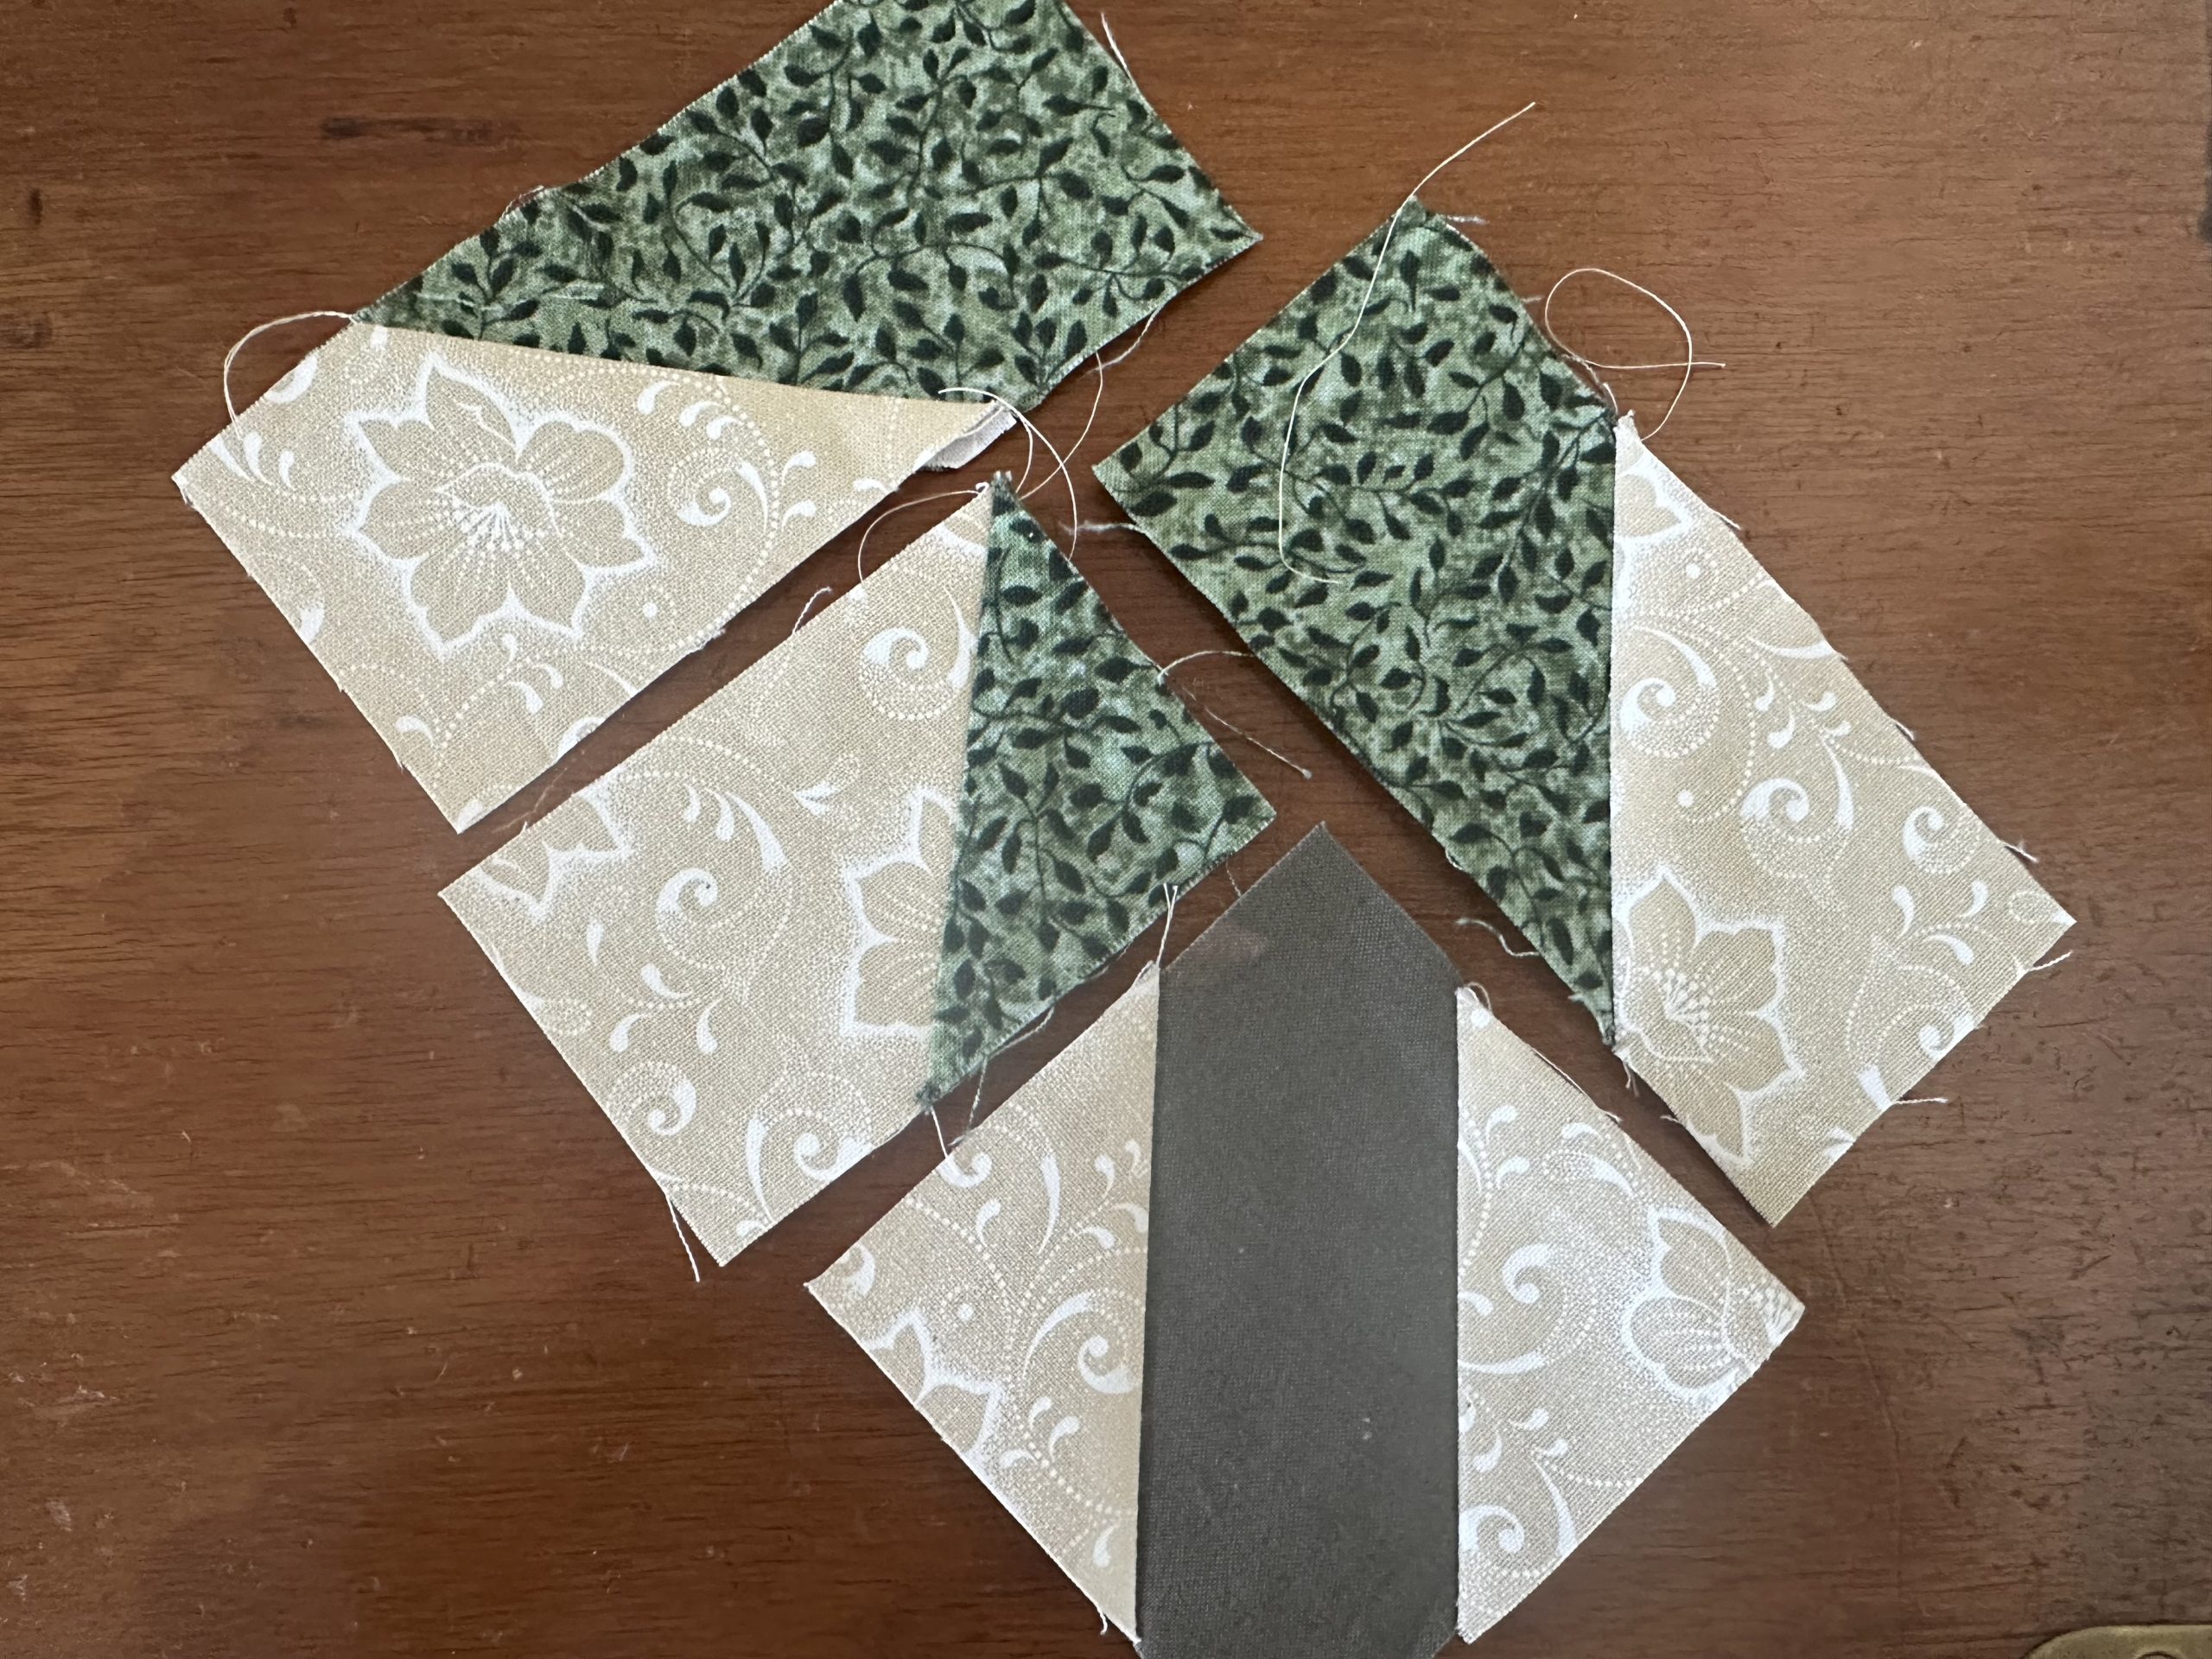
Here is the half log cabin with a tree trunk.

Woven Pine Tree Quilt Block susies-scraps.com

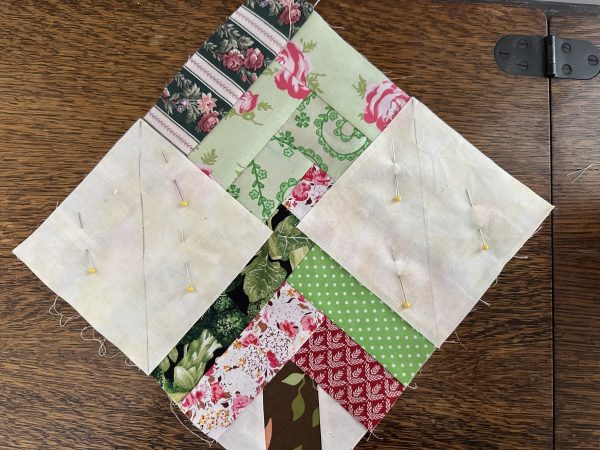
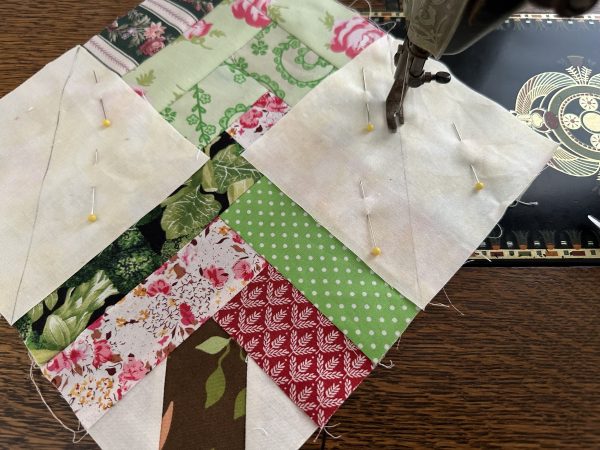
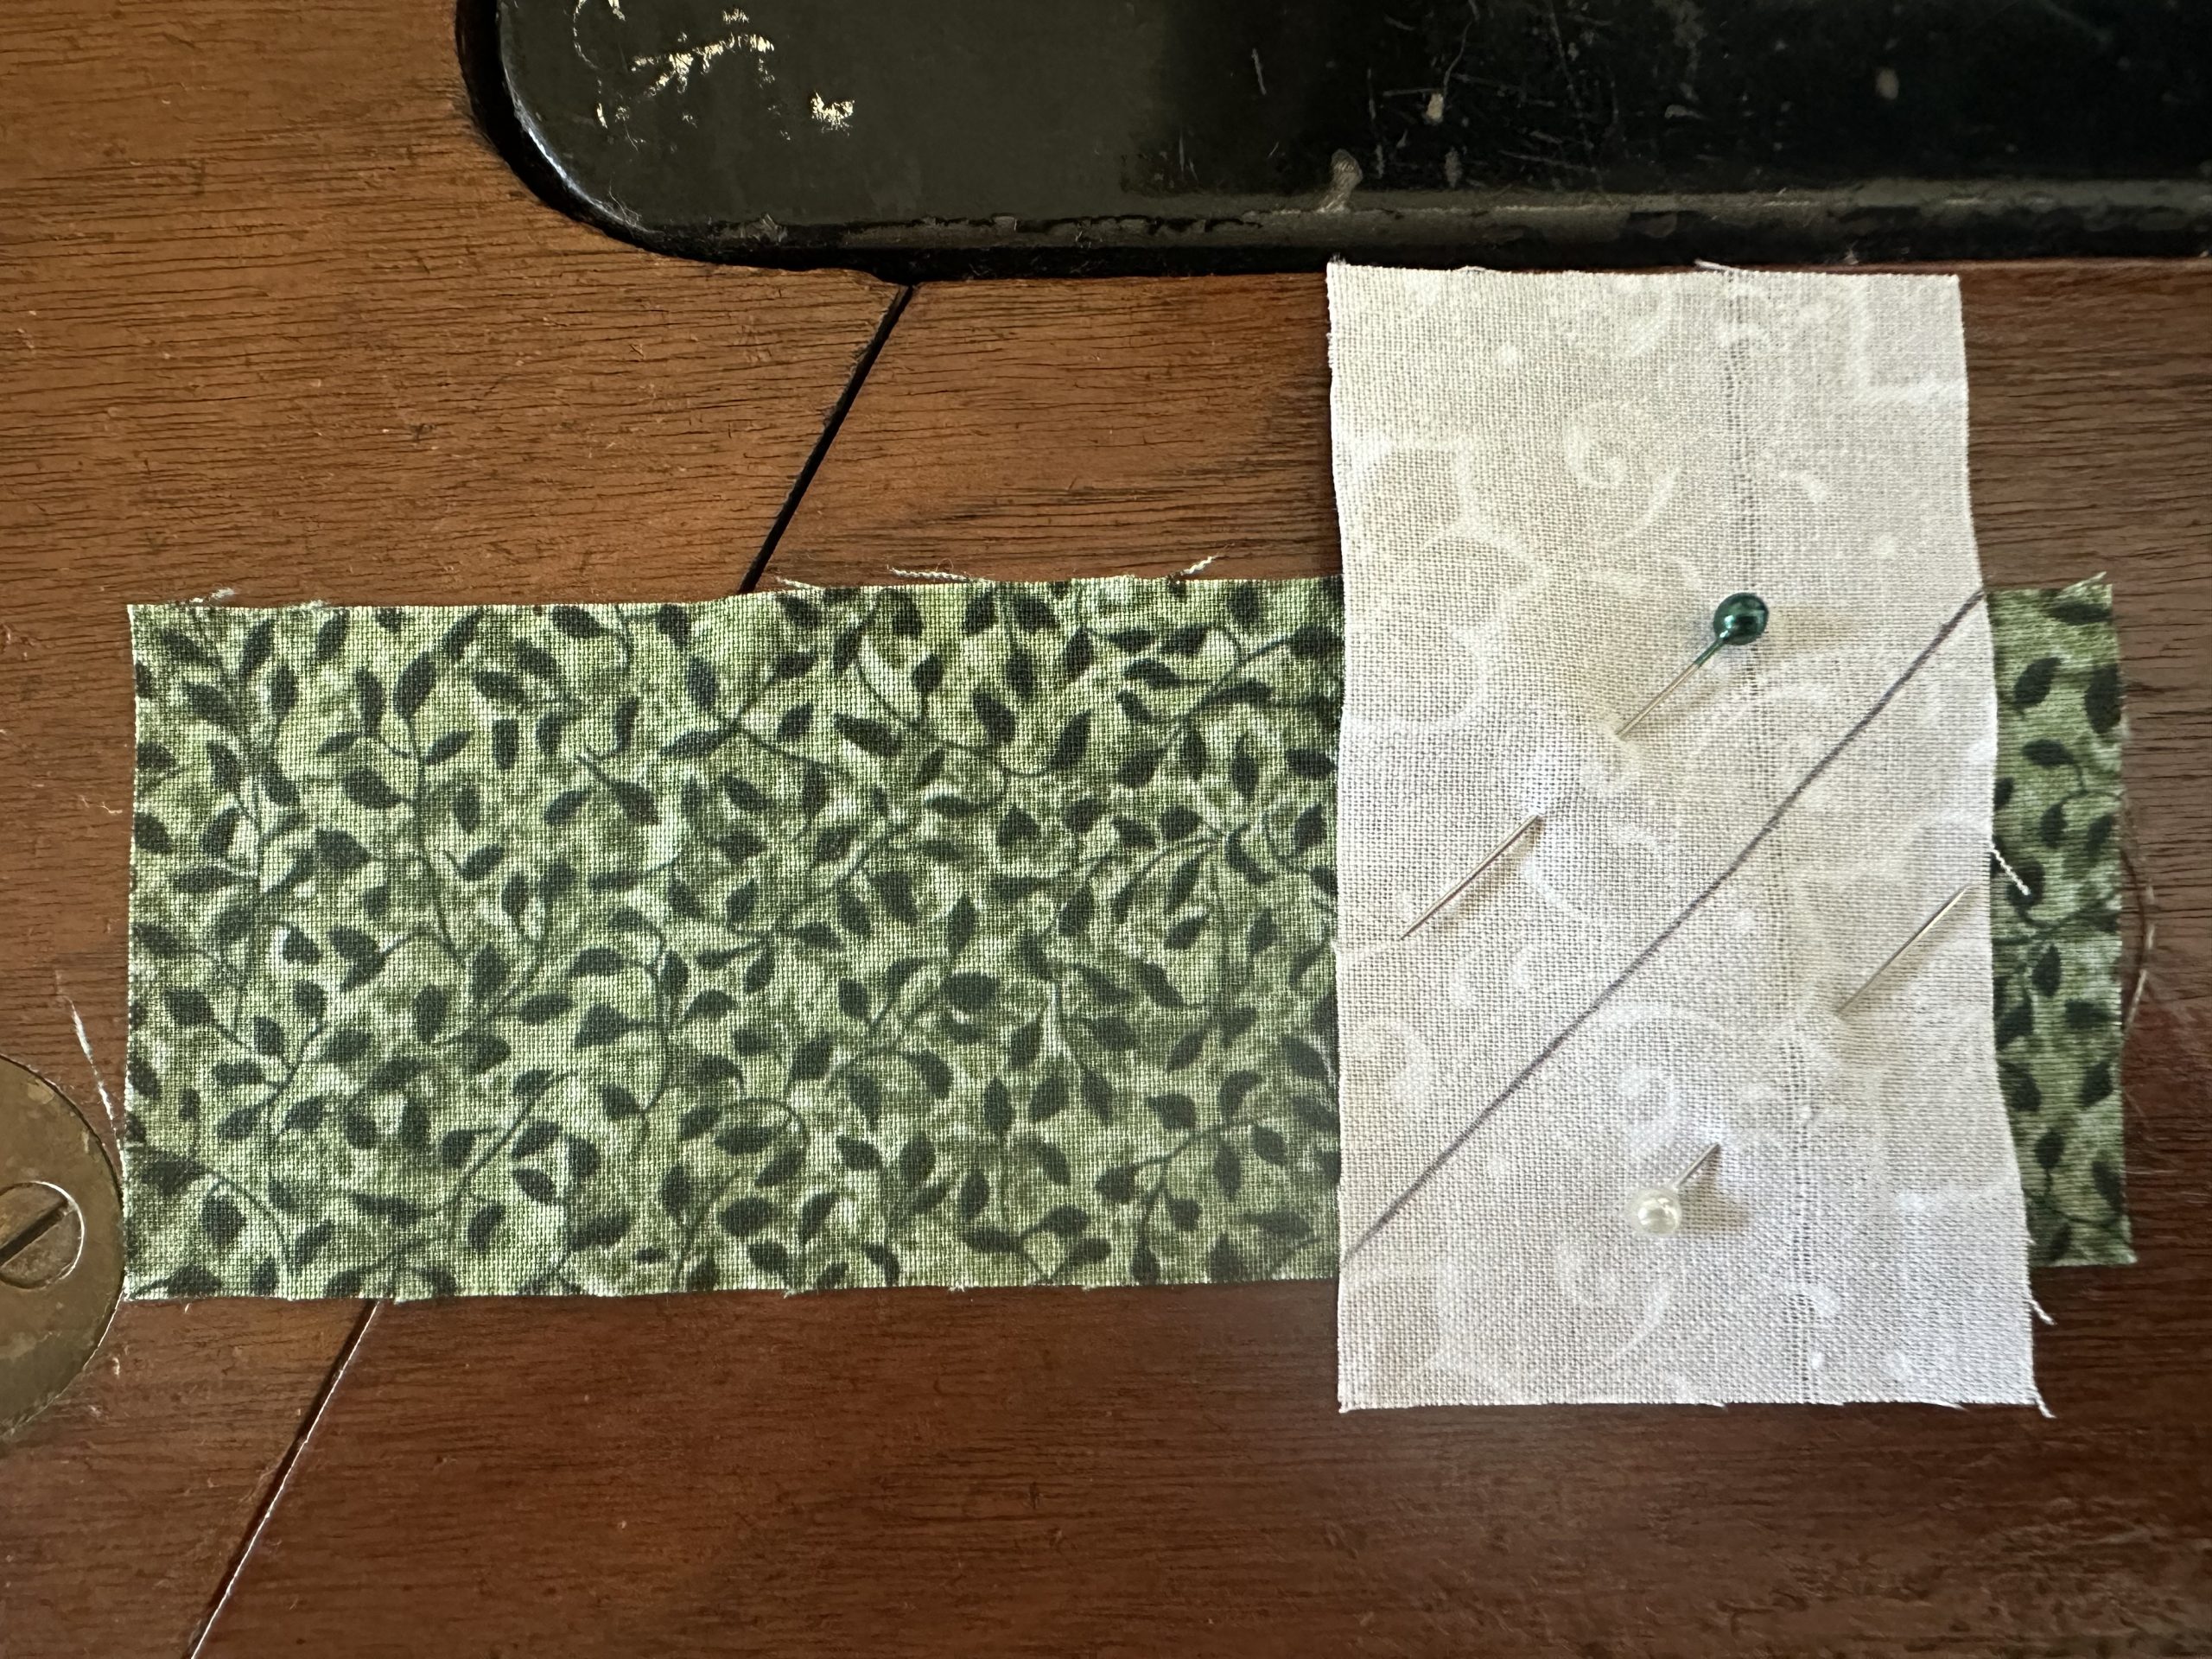
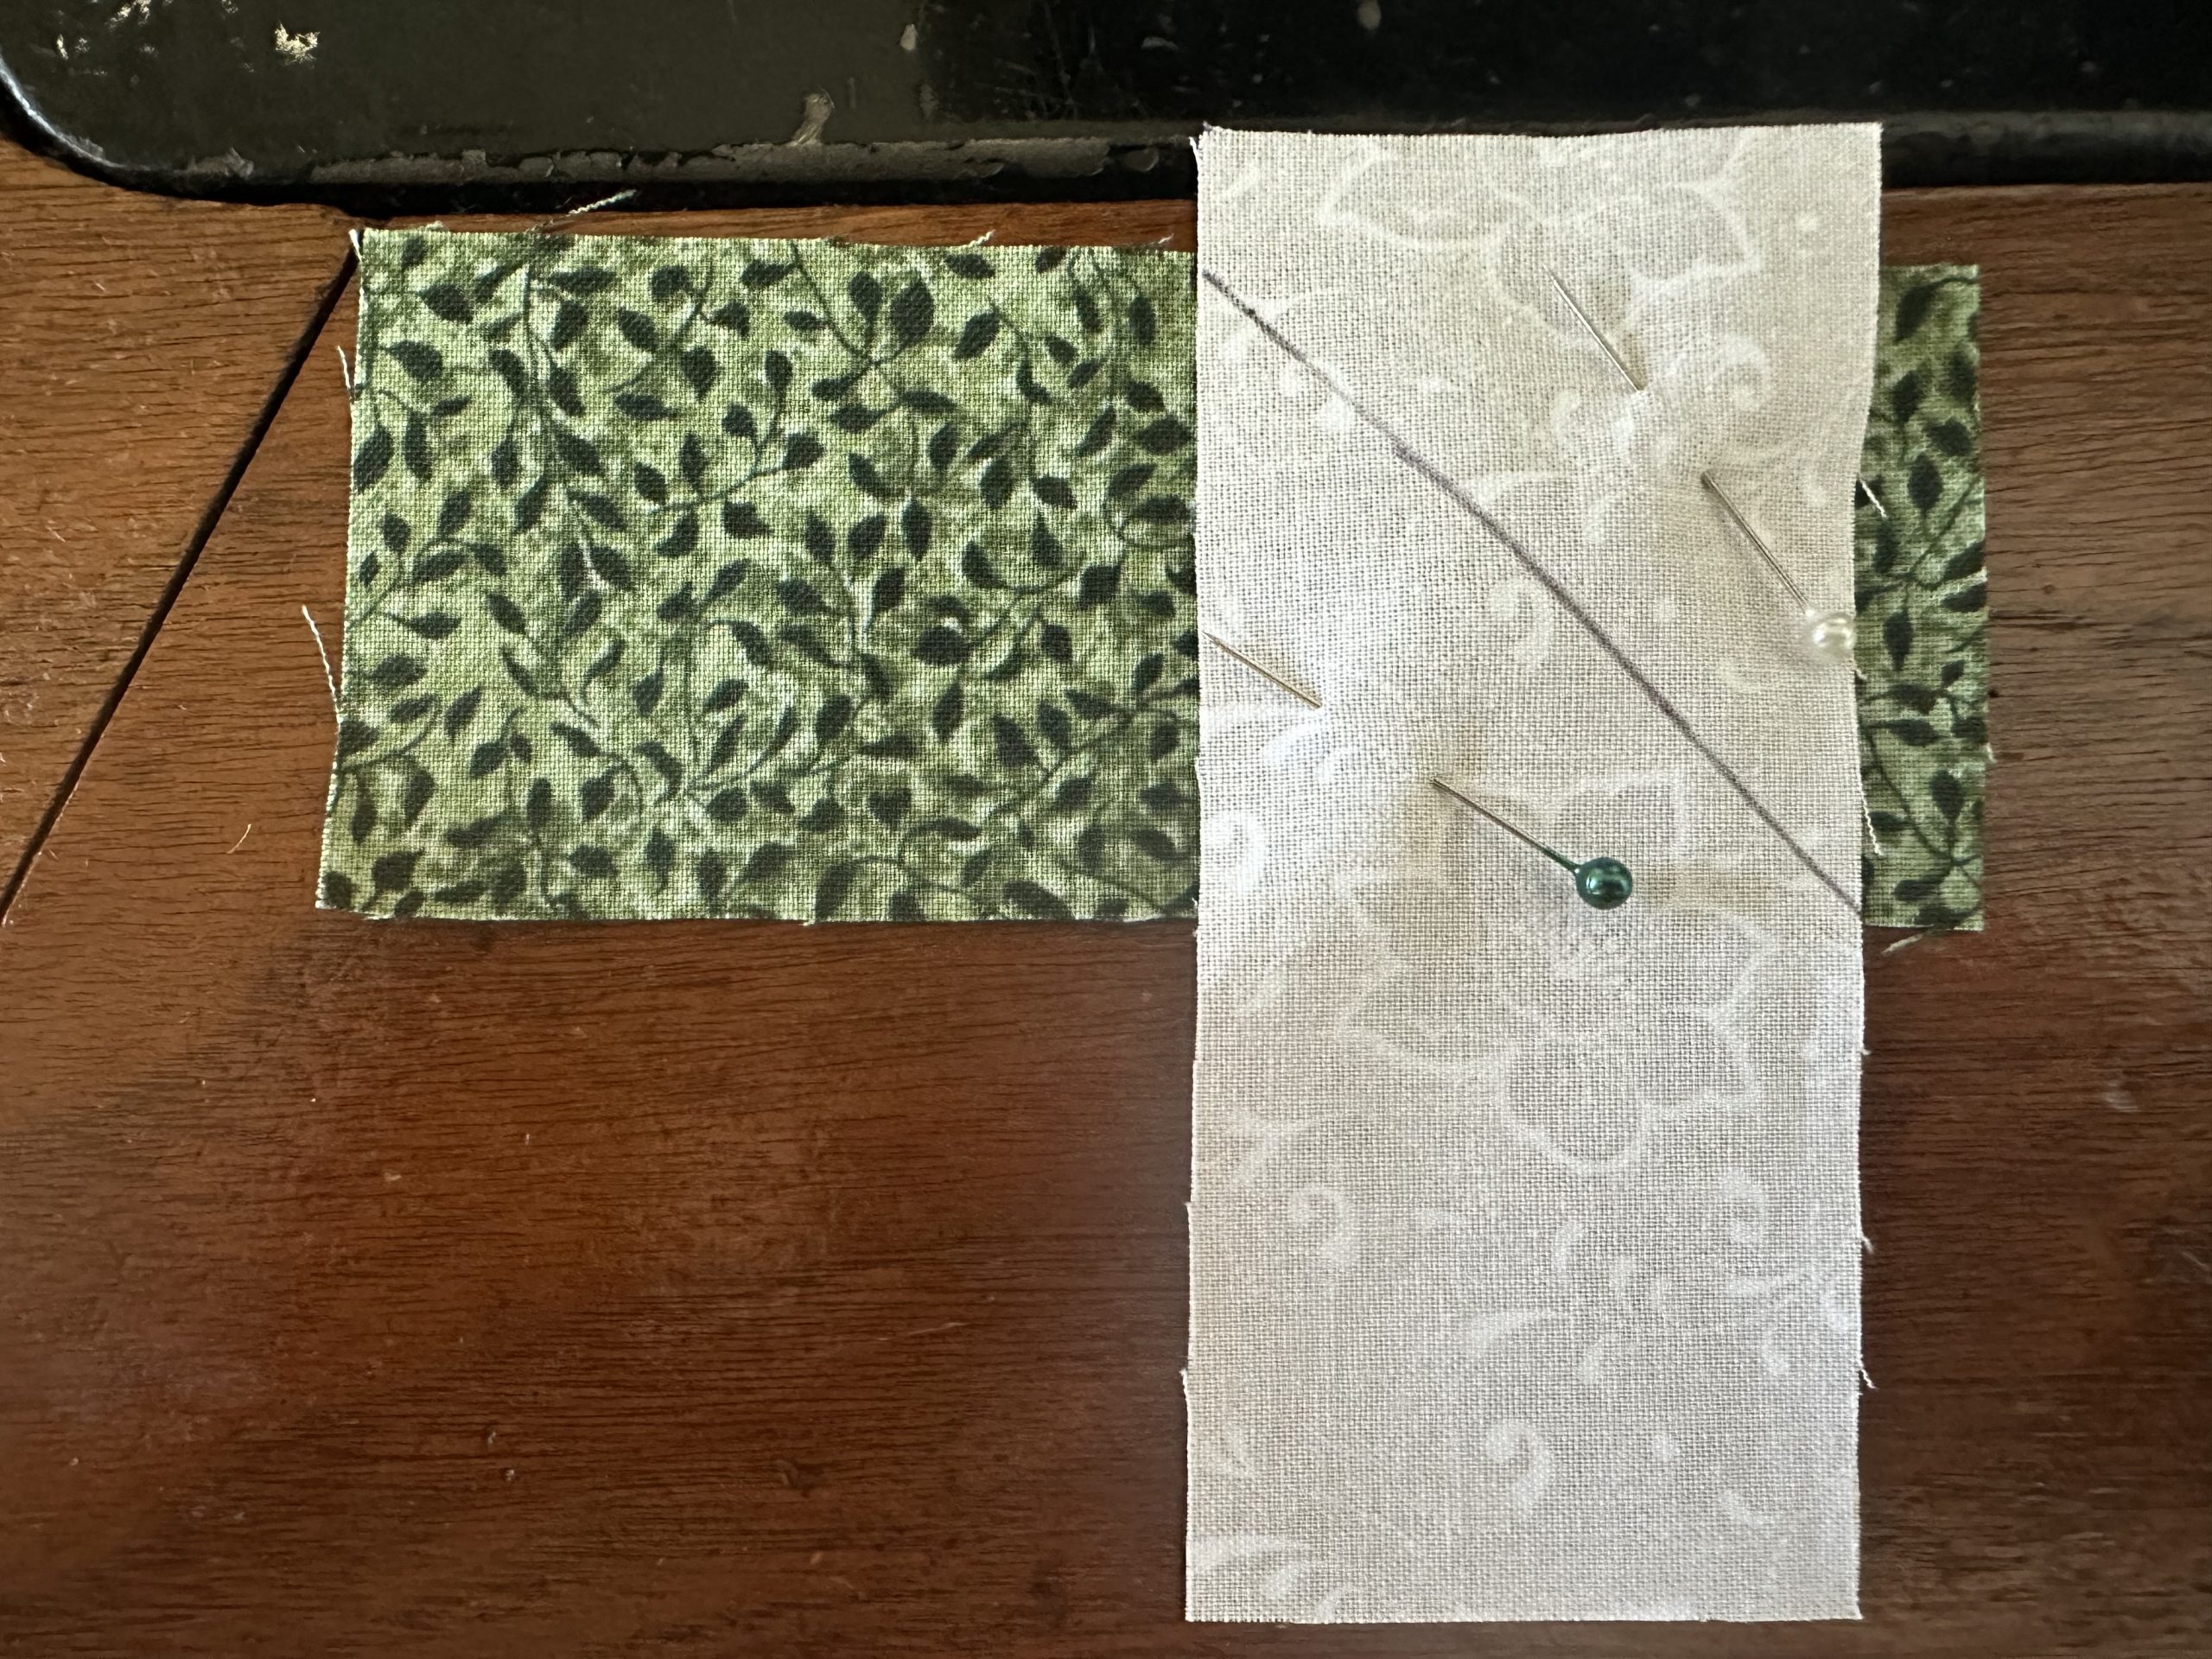
Place a 5″ background square to one corner of the side of the tree right side together. The drawn line should be vertical. Use the line as a guide to sewing.

Woven Pine Tree Quilt Block susies-scraps.com

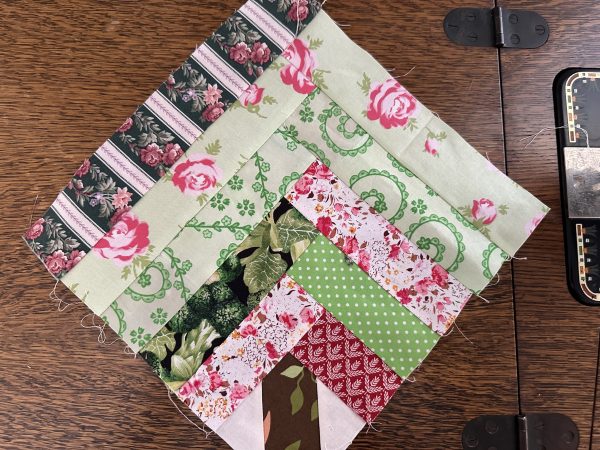
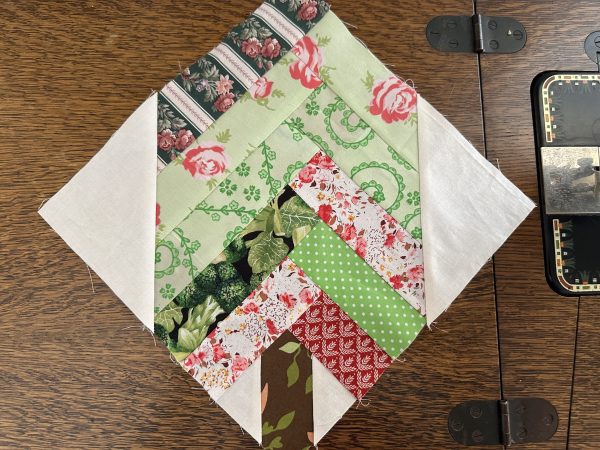
Do the same to the opposite corner. Trim out the excess from underneath these two corners. Press the block flat.

Woven Pine Tree Quilt Block susies-scraps.com

This Woven Pine Tree Quilt Block, can now be the basis for quilt or table runners for Christmas or it would make terrific placemats or potholders. You can leave them sitting on their sides or you could set them on point. Whatever is your fancy…. Use up some scraps for these. You can use scrappy background, fabrics or make them all the same. To my mind. scrappy is always great. It’s amazing how little bits of old fabric can look beautiful when you bring them all together..

Christmas always seems to come up so quickly! I hope this can inspire you to do a little bit of Christmas sewing too.

If you are enjoying this post, you may also like,

Christmas Stars Table Runner and Pattern

Hexagon Star Snowflake Trivet

quilted christmas scrappy string stockings

String Pot Holders or Trivets for Christmas

and if you prefer something larger, how about this

Thousand Pyramids Quilt

All the best,

Susie

© Susan Stuklis 2024

Christmas Pine Tree Half Log Cabin Block

Christmas Pine Tree Half Log Cabin Block

Hello Dear Friends and Readers and a warm welcome to today’s post. For those of you who are new to susies-scraps.com I would encourage you to read the welcome. Welcome to susies-scraps.com. This is a happy blog and exists purely for the love of it. You will find it a relaxing place to come and browse or inspire your creativity . The site is advertisement free. No monies are generated from this blog.

It is not that long until Christmas and most of us feel some urgency to get organised for the big day! To that end, today’s post is a Christmas Pine Tree Half Log Cabin block which I hope you will all enjoy.

I would like to alleviate some recent confusion. It would appear that a post has been generated using the image from my Half/Quarter Log Cabin Block. To that end, people have been searching for a Christmas Tree Block on my site in relation to that post which used my image without my knowledge. (Just to be clear, I don’t know the origins of that post… Maybe it’s AI?) Here is the link to the Half/quarter log cabin block which I posted sometime ago.

Log Cabin Variation – Scrappy Half Log Cabin or Quarter Log Cabin Quilt Block Tutorial

So I have created this rather sweet block and I hope you will enjoy making one or some of these. Just one would make a nice hot pad, or a few could be a table runner or a bag. Or they would make a lovely Christmas quilt. It is up to you. A few embellishments could also be nice like buttons or big stitch quilting.

All seams based on 1/4″ except where expressed otherwise.

Block size 9″ x 9″.

Requirements for the Christmas Pine Tree Half Log Cabin Block

Two of green 2″ Width of Fabric Strips

One white or cream 2″ Width of Fabric Strip

(19 pieces in total)

One 3″ x 3″ brown square

From the green strip cut:

2″ x 1

4 ½” x 2

5″ x 1

6″ x 2

6 ½” x1

7 ½” x1

From the white strip cut:

2″ x 2

3″ x 1

3 ½” x 3

4 ½” x 2

5″ x2

Christmas Pine Tree Half Log Cabin Block susie's-scraps.com
Christmas Pine Tree Half Log Cabin Block susie’s-scraps.com

Making the Christmas Tree Trunk

Place a 2″ x 2″ white square, right sides together onto one corner of the 3″ x 3″ brown square. Sew diagonally down the 2 ” square using the drown line as your guide. Bear in mind, it can be a good idea to sew slightly one thread to the right so that when you trim the excess from the square, and fold it back, it will still be at 3″ x 3″.

Christmas Pine Tree Half Log Cabin Block susie’s-scraps.com

Trim back to the seam to 1/4 of an inch. Press toward the corner. Do the same for the opposite corner. Press. This is now your tree trunk.

Christmas Pine Tree Half Log Cabin Block susie's-scraps.com
Christmas Pine Tree Half Log Cabin Block susie’s-scraps.com

The Log Measurements for the Christmas Pine Tree Half Log Cabin Block

1 of 3″ x 2″

2 of 4 ½” x 2″

2 of 6″ x 2″

2 of 7 ½” x 2″

1 of 9′

Making the Logs for the Christmas Pine Tree Half Log Cabin Block

This step will require creating the branches of the pine tree by joining the green and white strips. Then each log will be added to the centre trunk block just like a Quarter Log Cabin. Log Cabin Variation – Scrappy Half Log Cabin or Quarter Log Cabin Quilt Block Tutorial

Please bear in mind that the angles of the branches will mirror each other so careful placement is needed.

The pieces will be connected as would be done for connecting binding strips.

Lay the green 2″ x 2″ square at the right hand end of the the 2″ x 3″ white strip. Sew on the diagonal, to cover the bottom right hand corner. Trim and fold back to form the first left bough.

Christmas Pine Tree Half Log Cabin Block susie's-scraps.com
Christmas Pine Tree Half Log Cabin Block susie’s-scraps.com

First right bough. Lay a 3 ½” white strip atop of a 4 ½” green strip at right angles allowing approximately 3/8th of an inch overhang for each piece as would be done if joining binding strips. I have marked it to show the sewing line. Sew along the line. Trim excess. Press. Trim from the green end if necessary to 4 ½”.

Christmas Pine Tree Half Log Cabin Block susie's-scraps.com
Christmas Pine Tree Half Log Cabin Block susie’s-scraps.com

Repeat this step to make the second left bough. This is what you should have so far.

Christmas Pine Tree Half Log Cabin Block susie's-scraps.com
Christmas Pine Tree Half Log Cabin Block susie’s-scraps.com

Second Right Bough. Take a 6″ green strip and lay a 3 ½” white strip towards the right end as previously but with the white end hangin over the top. The stitching line will run from right to left and from top to bottom in a diagonal direction as marked. Trim the log from the green end if necessary to. make it 6″.

Christmas Pine Tree Half Log Cabin Block susie's-scraps.com
Christmas Pine Tree Half Log Cabin Block susie’s-scraps.com

Third Left Bough. Take a 5 inch green strip and a 4 1/2 inch white strip. Lay the white. strip face down on the green strip again with the 3/8 inch overhang on each end, but with the white strip hanging down towards you. The seam will go from left to right and top to bottom diagonally as marked. trim off the excess from behind. Trim from the white end of this log if necessary to measure 6 inches in length.

Christmas Pine Tree Half Log Cabin Block susie's-scraps.com
Christmas Pine Tree Half Log Cabin Block susie’s-scraps.com
Christmas Pine Tree Half Log Cabin Block susie's-scraps.com
Christmas Pine Tree Half Log Cabin Block susie’s-scraps.com

Third Right Bough. Use the 6 1/2 inch green strip and lay a 4 1/2 inch white strip at the right end again with 3/8 of an inch overhang of each strip. The sewing line will go from right to left and top to bottom diagonal. Cut of excess from behind. Press and trim from the white end to 7 ½”

Fourth Left Bough. Take a 6″ Green and one 5″ white. Place the white Strip the at the Right end of the Green Strip with the white tail hanging down towards you. Sew together with the 3/8th of an inch overhang as previously. Sew diagonally. from left to right and top to bottom. Trim out from behind. Press and trim from the white end if necessary to measure 7 ½”.

I know we’re almost there!!!

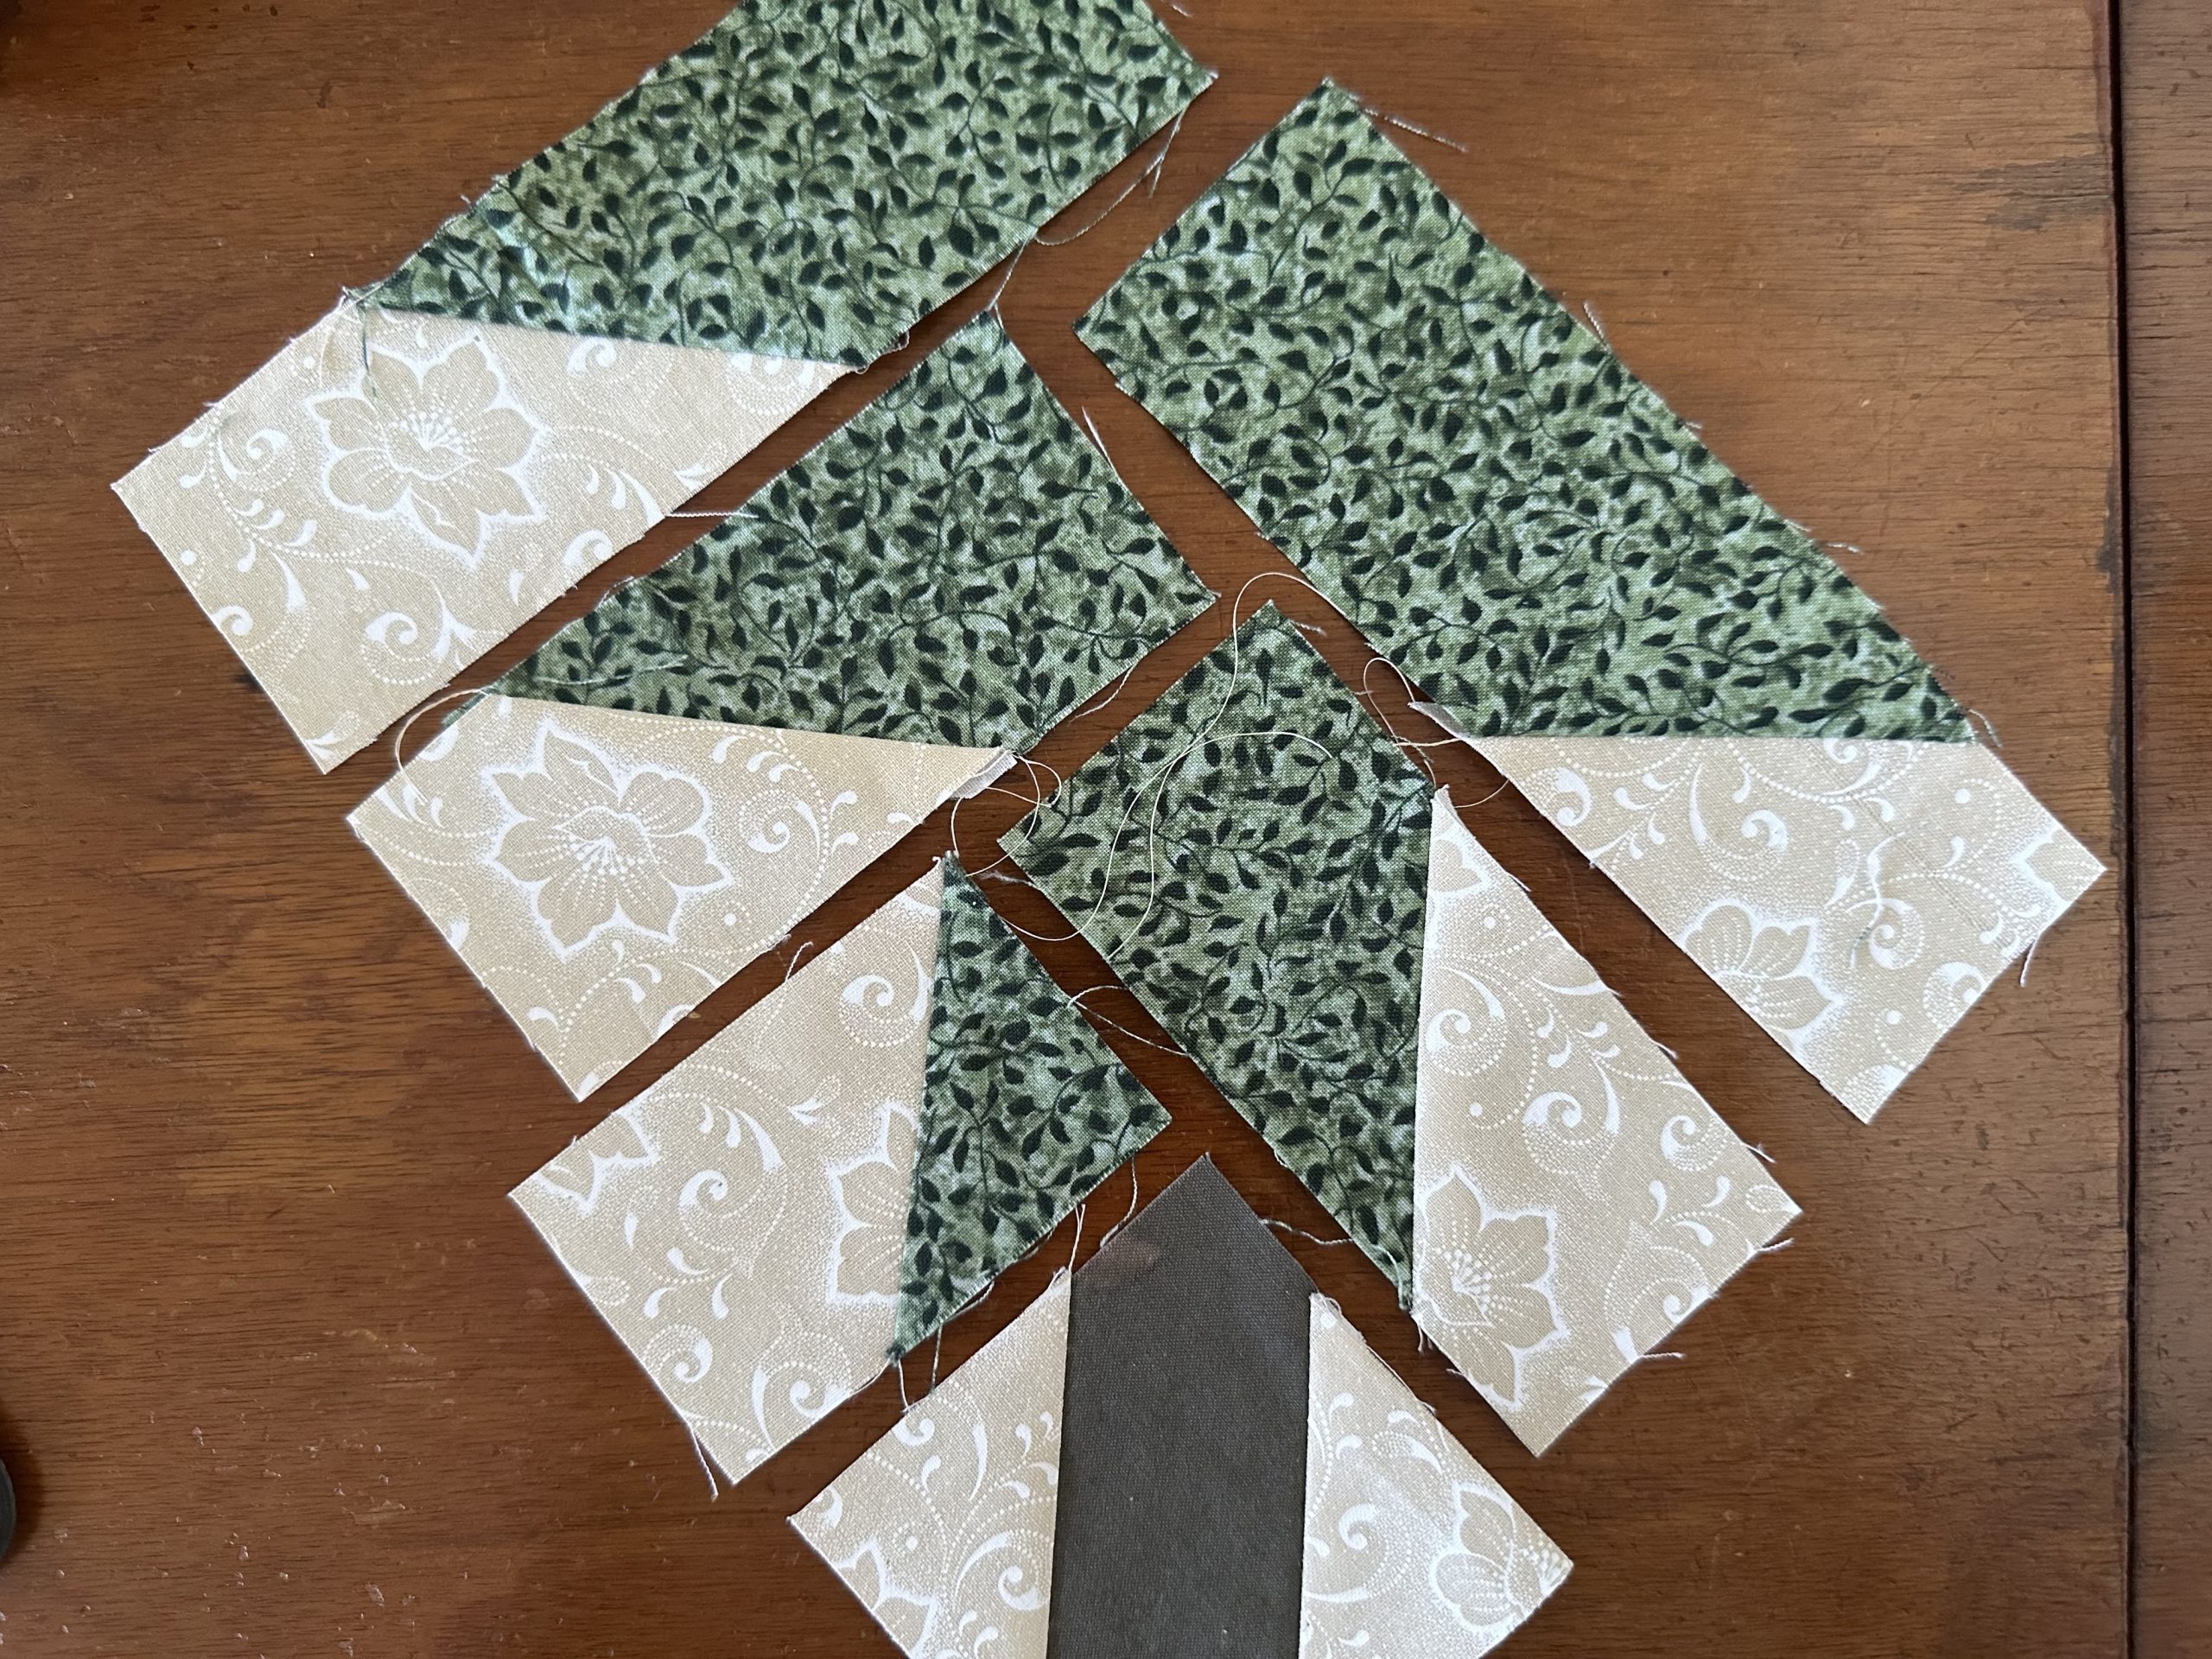
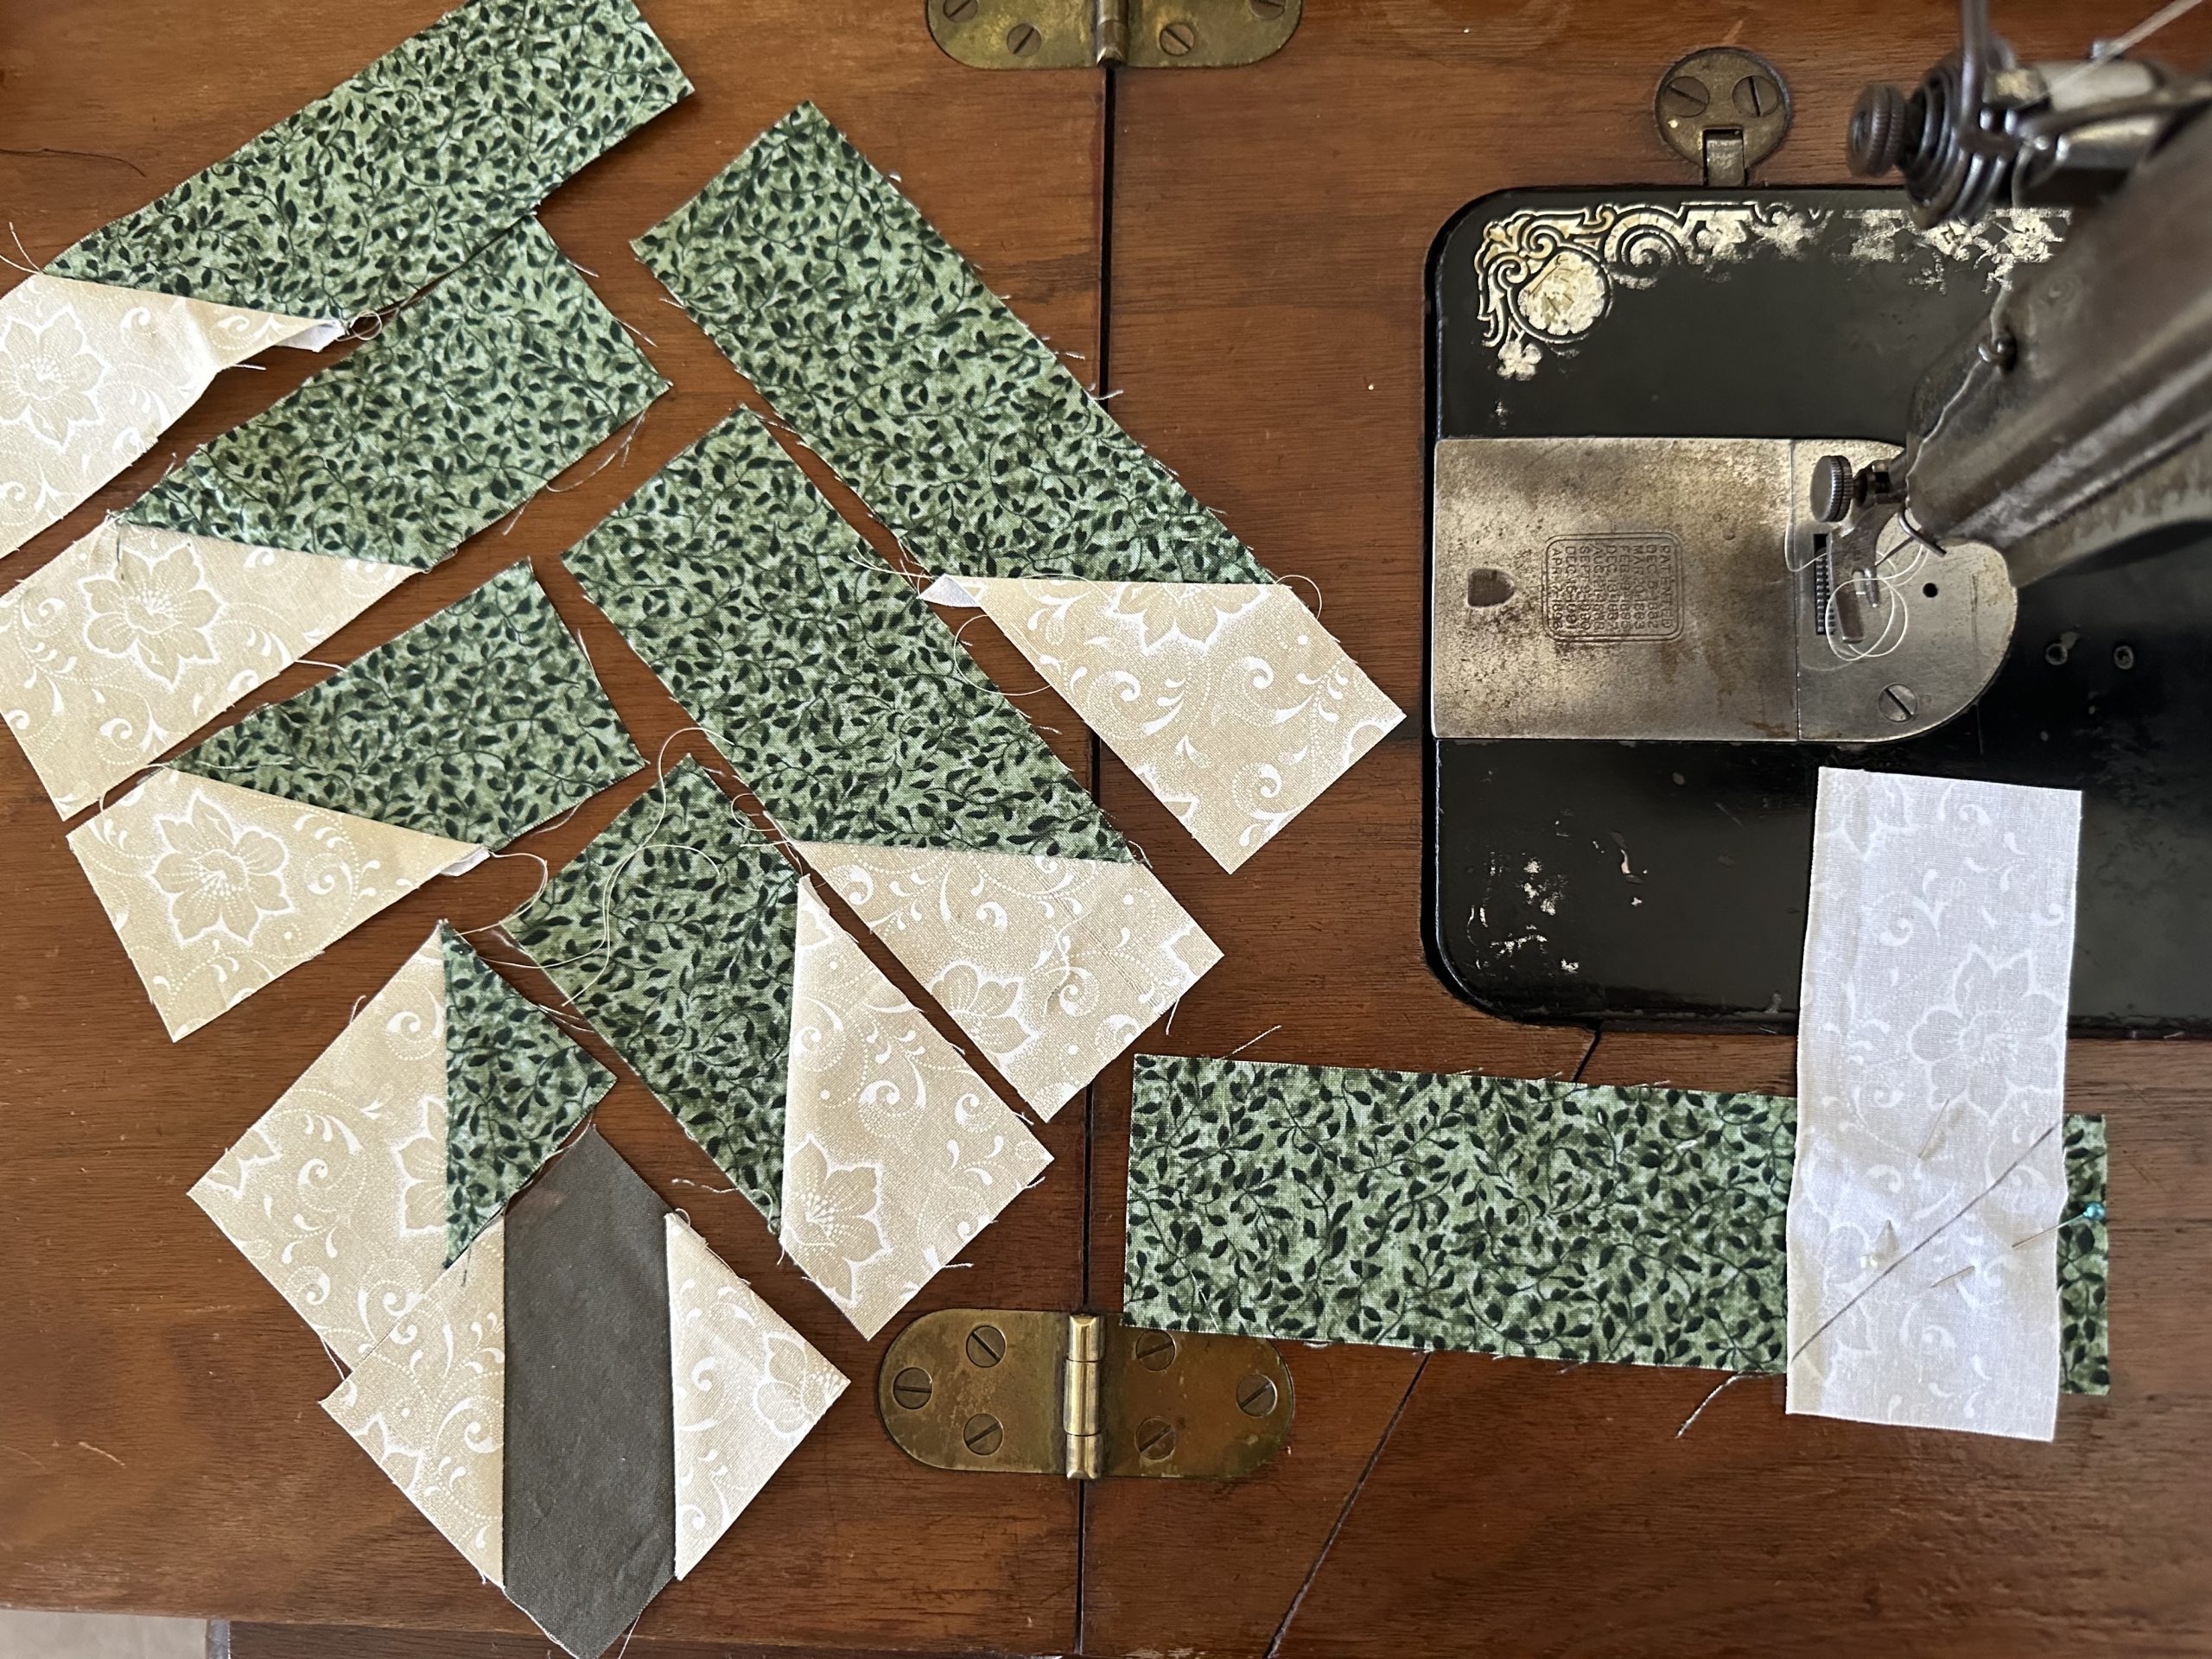
Fourth Right Bough. This is the last one. Take the 7 ½” green and a 5″ white strip. Place the white strip at the right end of the Green strip with the excess towards the top and three eights of an inch overhang on each side of the strips. Sew diagonally from right to left and top to bottom. Trim. Press. This log should measure 9″.

Christmas Pine Tree Half Log Cabin Block susie's-scraps.com
Christmas Pine Tree Half Log Cabin Block susie’s-scraps.com
Christmas Pine Tree Half Log Cabin Block susie's-scraps.com
Christmas Pine Tree Half Log Cabin Block susie’s-scraps.com

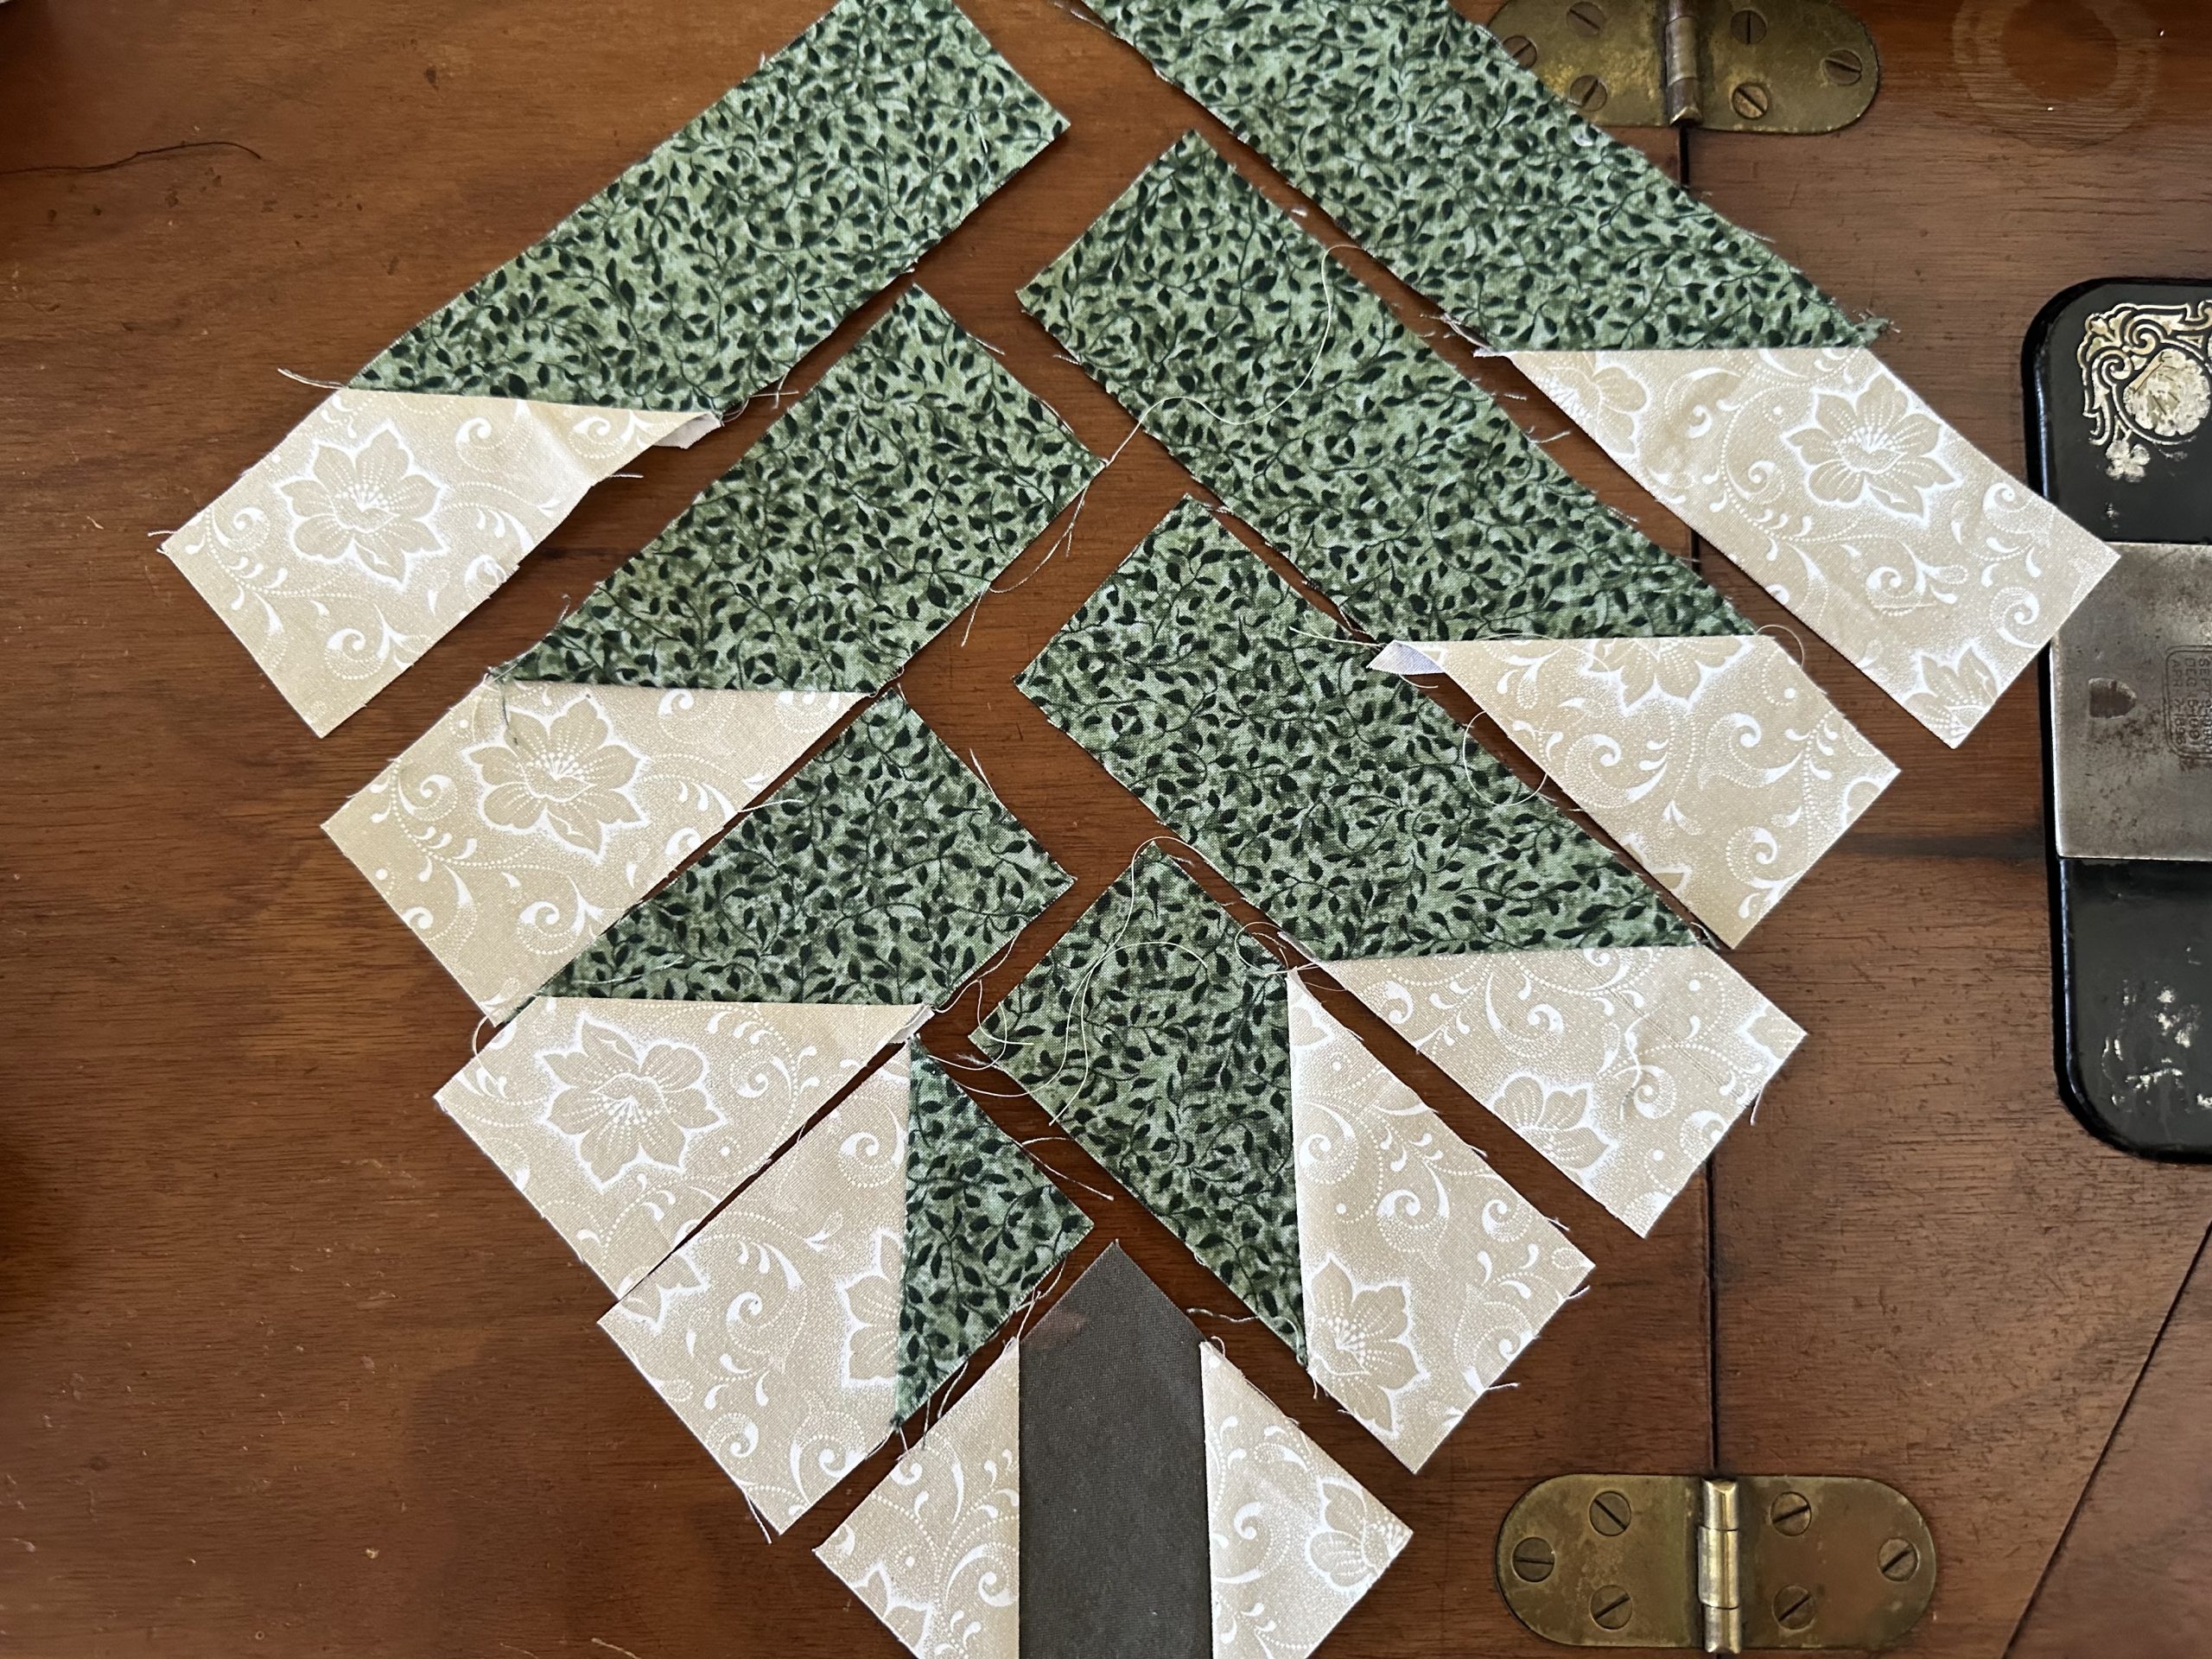
All the logs are ready. if you have come this far, you are doing very well! Now for the easy bit.

Assemble the Christmas Pine Tree Half Log Cabin Block

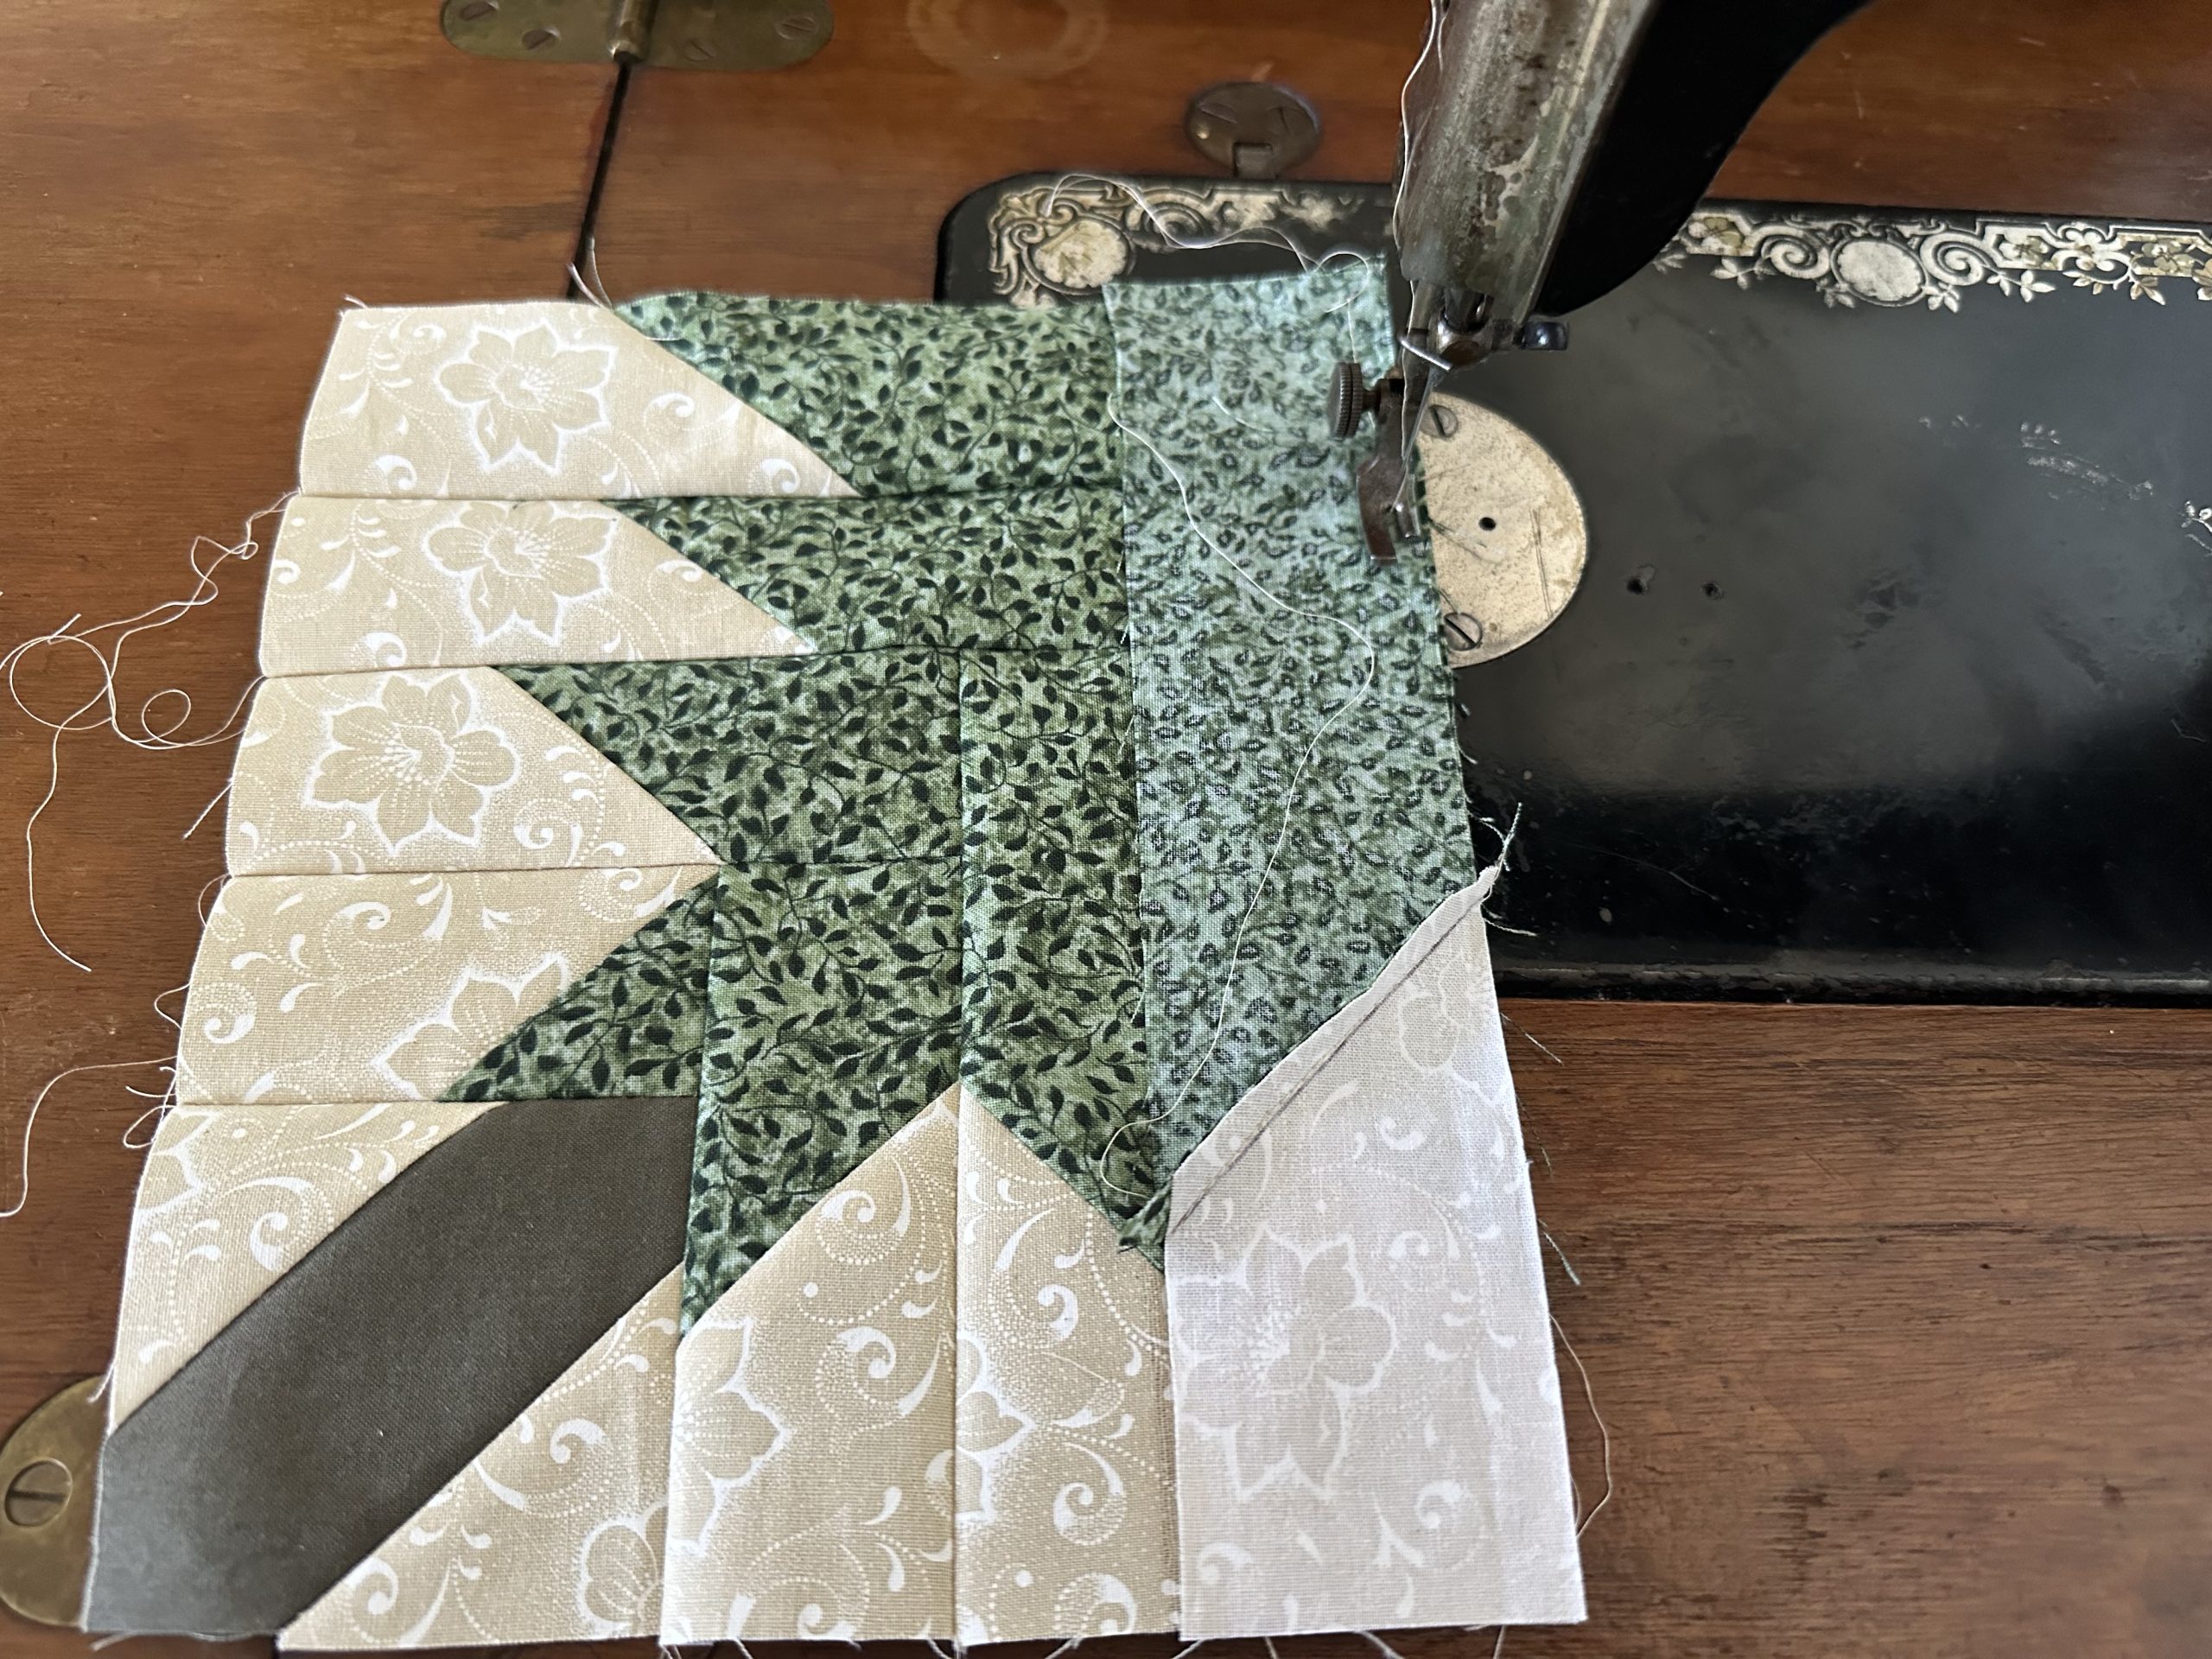
Assemble the Log Cabin block commencing from the trunk block and the first left bough followed by the first right bough. Alternate sewing each bough until completed.

Christmas Pine Tree Half Log Cabin Block susie's-scraps.com
Christmas Pine Tree Half Log Cabin Block susie’s-scraps.com
Christmas Pine Tree Half Log Cabin Block susie's-scraps.com
Christmas Pine Tree Half Log Cabin Block susie’s-scraps.com

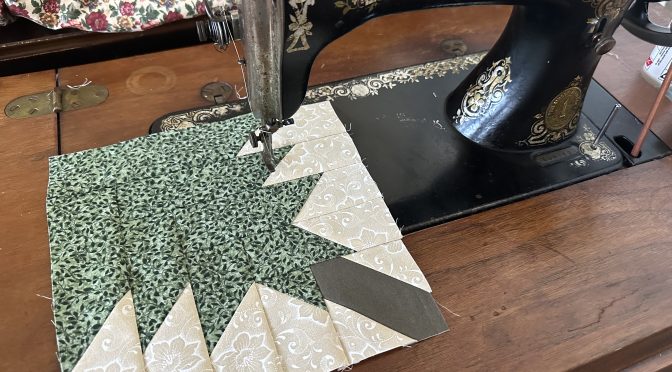
There is the Christmas Pine Tree Half Log Cabin Block! Today I made this block on a Singer 1901 Treadle. Treadle Tinkering

I hope you enjoyed this post and it helps you get into the spirit of Christmas!

Here are some others you may like…

Diamond Stars Christmas Table Runner

Last Minute Christmas Pudding (This pudding is delicious, easy and economical)

Christmas Stars Table Runner and Pattern

quilted christmas scrappy string stockings

What’s Cooking?…Talking Turkey 2 – Don’t Stuff the Buff

© Susan Stuklis 2024

Rings Eternal Quilt

Rings Eternal Quilt

Hello Dear Friends and Readers, and a warm welcome to today’s post. Today I would like to share the blocks I have been making lately and how they came together as a quilt. I had so many 2 1/2” squares, and I really was determined to use them up. Of course it is scrappy and incredibly simple. But with a good effect I believe. And the good news is that you can easily use up up several metres of your scraps. All the odd ones will fit in too!

My only decision in the blocks was to choose whether my scraps were dark or light. I think this is nice, because sometimes we just like to get to the machine and do some almost mindless sewing that’s relaxing and easy to do, especially when all your squares are cut and ready.

This quilt could really use any scrappy colour away that you choose. Plaids or shirtings would look good for the sashings as well. Only now that I have completed the top, I realised this would be a good design to use for making a memory quilt from shirts or clothing or fabrics you have used in the past. All the scraps will be welcome. So let’s get to it. This is a fun quilt that I think you will enjoy making.

Please read all instructions before commencing.

All fabrics were pre-washed before cutting. To Wash or Not to Wash?….This is the Question

All seam allowances based on one quarter inch.

Finished quilt size 81” x 62”

Requirements for the Rings Eternal Quilt

48 of the Sixteen Across Quilt Blocks are required to make the quilt. Click on the link for the instructions.

Sixteen Across Quilt Block (Make 48 of these blocks)

480 medium to dark value 2 ½” x 2 ½” squares (approximately 2 1/4 yds/mtres) and

288 light value 2 ½” x 2 ½” squares (approximately 1 3/4 yds/metres required to make the 48 of Sixteen Across Quilt Blocks

For the sashings, cornerstones and border

138 of 2” x 8 1/2″ assorted strips in various blues and greys (approximately 2 yards/metres)

50 of 2” x 2” white squares ( 1 fat quarter)

47 of 2” x 2” black squares (1 fat quarter)

Rings Eternal Quilt susies-scraps.com

Making the Rings Eternal Quilt

Make 48 of the Sixteen Across Quilt Block.

Assemble all requirements as listed above.

Make 12 of the Rings Eternal Quilt Blocks. For this you will need all of the Sixteen Across Quilt Block plus 48 of the assorted Sashing strips and 12 of the white Centre squares.

Use the link for the Rings Eternal Quilt Block to make the 12 blocks. Instructions are in the link.

Rings Eternal Quilt Block susies-scraps.com

Here is how the blocks are looking.

Rings Eternal Quilt susies-scraps.com

Make the Double Sashings for the Rings Eternal Quilt

Assemble 31 of the 2“ x 2“ black squares, and 62 of the 2“ x 8 1/2″ assorted sashing strips.

Rings Eternal Quilt susies-scraps.com

Make the double sashIngs by chain piecing. To one end of a 2” x 8 1/2″ sashing strip lay down a 2” x 2 “black, square right side down and sew the seam. To the opposite end of the black, square lay the short end of another sashing strip right side down and sew the seam. Repeat to make 31 double sashing strips.

Press all the Sashing strips

Rings Eternal Quilt susies-scraps.com

Assemble the Rings Eternal Quilt

To assemble the quilt, layout, the 12 Rings Eternal Quilt Block in a 3 x 4 configuration. Lay the double sashIng strips in between all the Rings Eternal Quilt Block and around the perimeter of the quilt top. At add a 2” x 2” white, square to the gaps in between the double sashing strips 20 will be required.

Rings Eternal Quilt susies-scraps.com

Sew the quilt top together, beginning with one white 2” x 2” cornerstone and a double Sashing strip, next is a second Sashing strip placed vertically, and a Rings Eternal Quilt Block. Keep repeating until the top is all scaffolded together. See image below. Then turn the whole quilt to complete all the rows in the other direction. ensure that for each seam allowance that all of the seams from the blocks are laying correctly and flat.

Rings Eternal Quilt susies-scraps.com

Make the Final Border

Use the remainder, 28 Sashing strips and 33 cornerstones to make the final border. Make sure that the cornerstones are alternating in colour from the adjacent cornerstone in other words, black next to white and white next to black.

Press the quilt top and prepare batting and backing.

That’s it. Ready to be quilted. Any questions? You can always mail me at [email protected].

Thank you for joining me on this scrappy quilting journey.

If you enjoyed this post, you may also like,

Tea Time for Alice Mini Quilt

Arkansas Cross Roads Quilt

Floral Coins Blocks Charmed By Monkeys Quilt Pattern

Charm Printz Quilt & Tutorial

Happy stitching,

Susie

© Susan Stuklis 2023