
Lessons in Log Cabin Blocks
Hello Dear Friends and Readers,
Today I would like to share with you some thoughts on Log Cabin Blocks. Log Cabin can be a truly scrap project. The one I will share with you today has the whole gamut of fabric types.
A couple of months ago my friend Lyn showed me some quilt tops that she had made from her “Bedford Day”. Her tops were extremely appealing. 💕 Thank you Lyn! This is a wonderful quilting workshop where a group of quilters get together and make a quilt top from a precut kit in the design / fabrics you choose.
The fabrics come from donations, the designs from Lessa Segal and Faye Packham and the money is donated to Bedford Industries. The event was hosted with Orange Tree Quilters.
On the day, there were quite a number of designs to choose from. One was a Round or Curved Log Cabin with nine rings. I new this was the one for me, as I thought the challenge would do me good. I have always wanted to give that a try and besides it was all cut!!! Awesome!.
As soon as I sat down a lady opposite to me said “ oh you be careful with that!” …….Luckily I knew what she meant….
Although “Log Cabin” is often a quilt that learners traditionally started with, and it might appear simple, there are definitely a few tricks and traps.
Log Cabin is a very old design. Historically it dates back to Ancient Egypt as you can see here. www.womenfolk.comquilt_pattern_history And you might be interested to know that traditionally it was foundation pieced.
Irregular Triangle Foundation & Tutorial
The Foundation method of piecing would eliminate a lot of the traps associated with Log Cabin. It was also sometimes made as a folded Log Cabin. manx-log-cabin-a-special-technique Because it was Foundation pieced /and or folded there was a lot of fabric in weight and seams, therefore it was not uncommon for the quilt to be tied rather than quilted.
So when Marion invited me to join her for the day I thought it sounded great!
We went along to the workshop . I took a lovely little vintage Elna along with me to sew on.
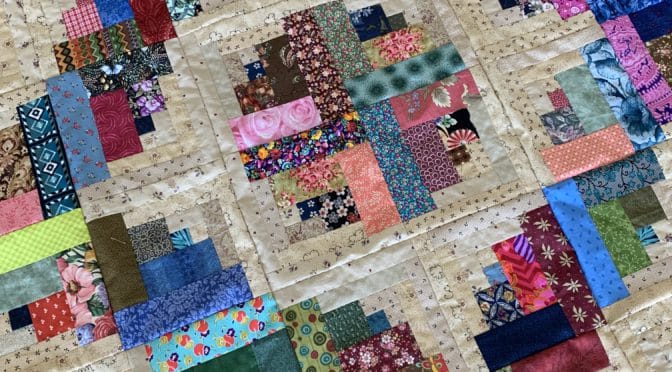
The first quilt I saw, was the one I chose. It is made with Round Log Cabin Blocks. They called it Claytons Log Cabin.
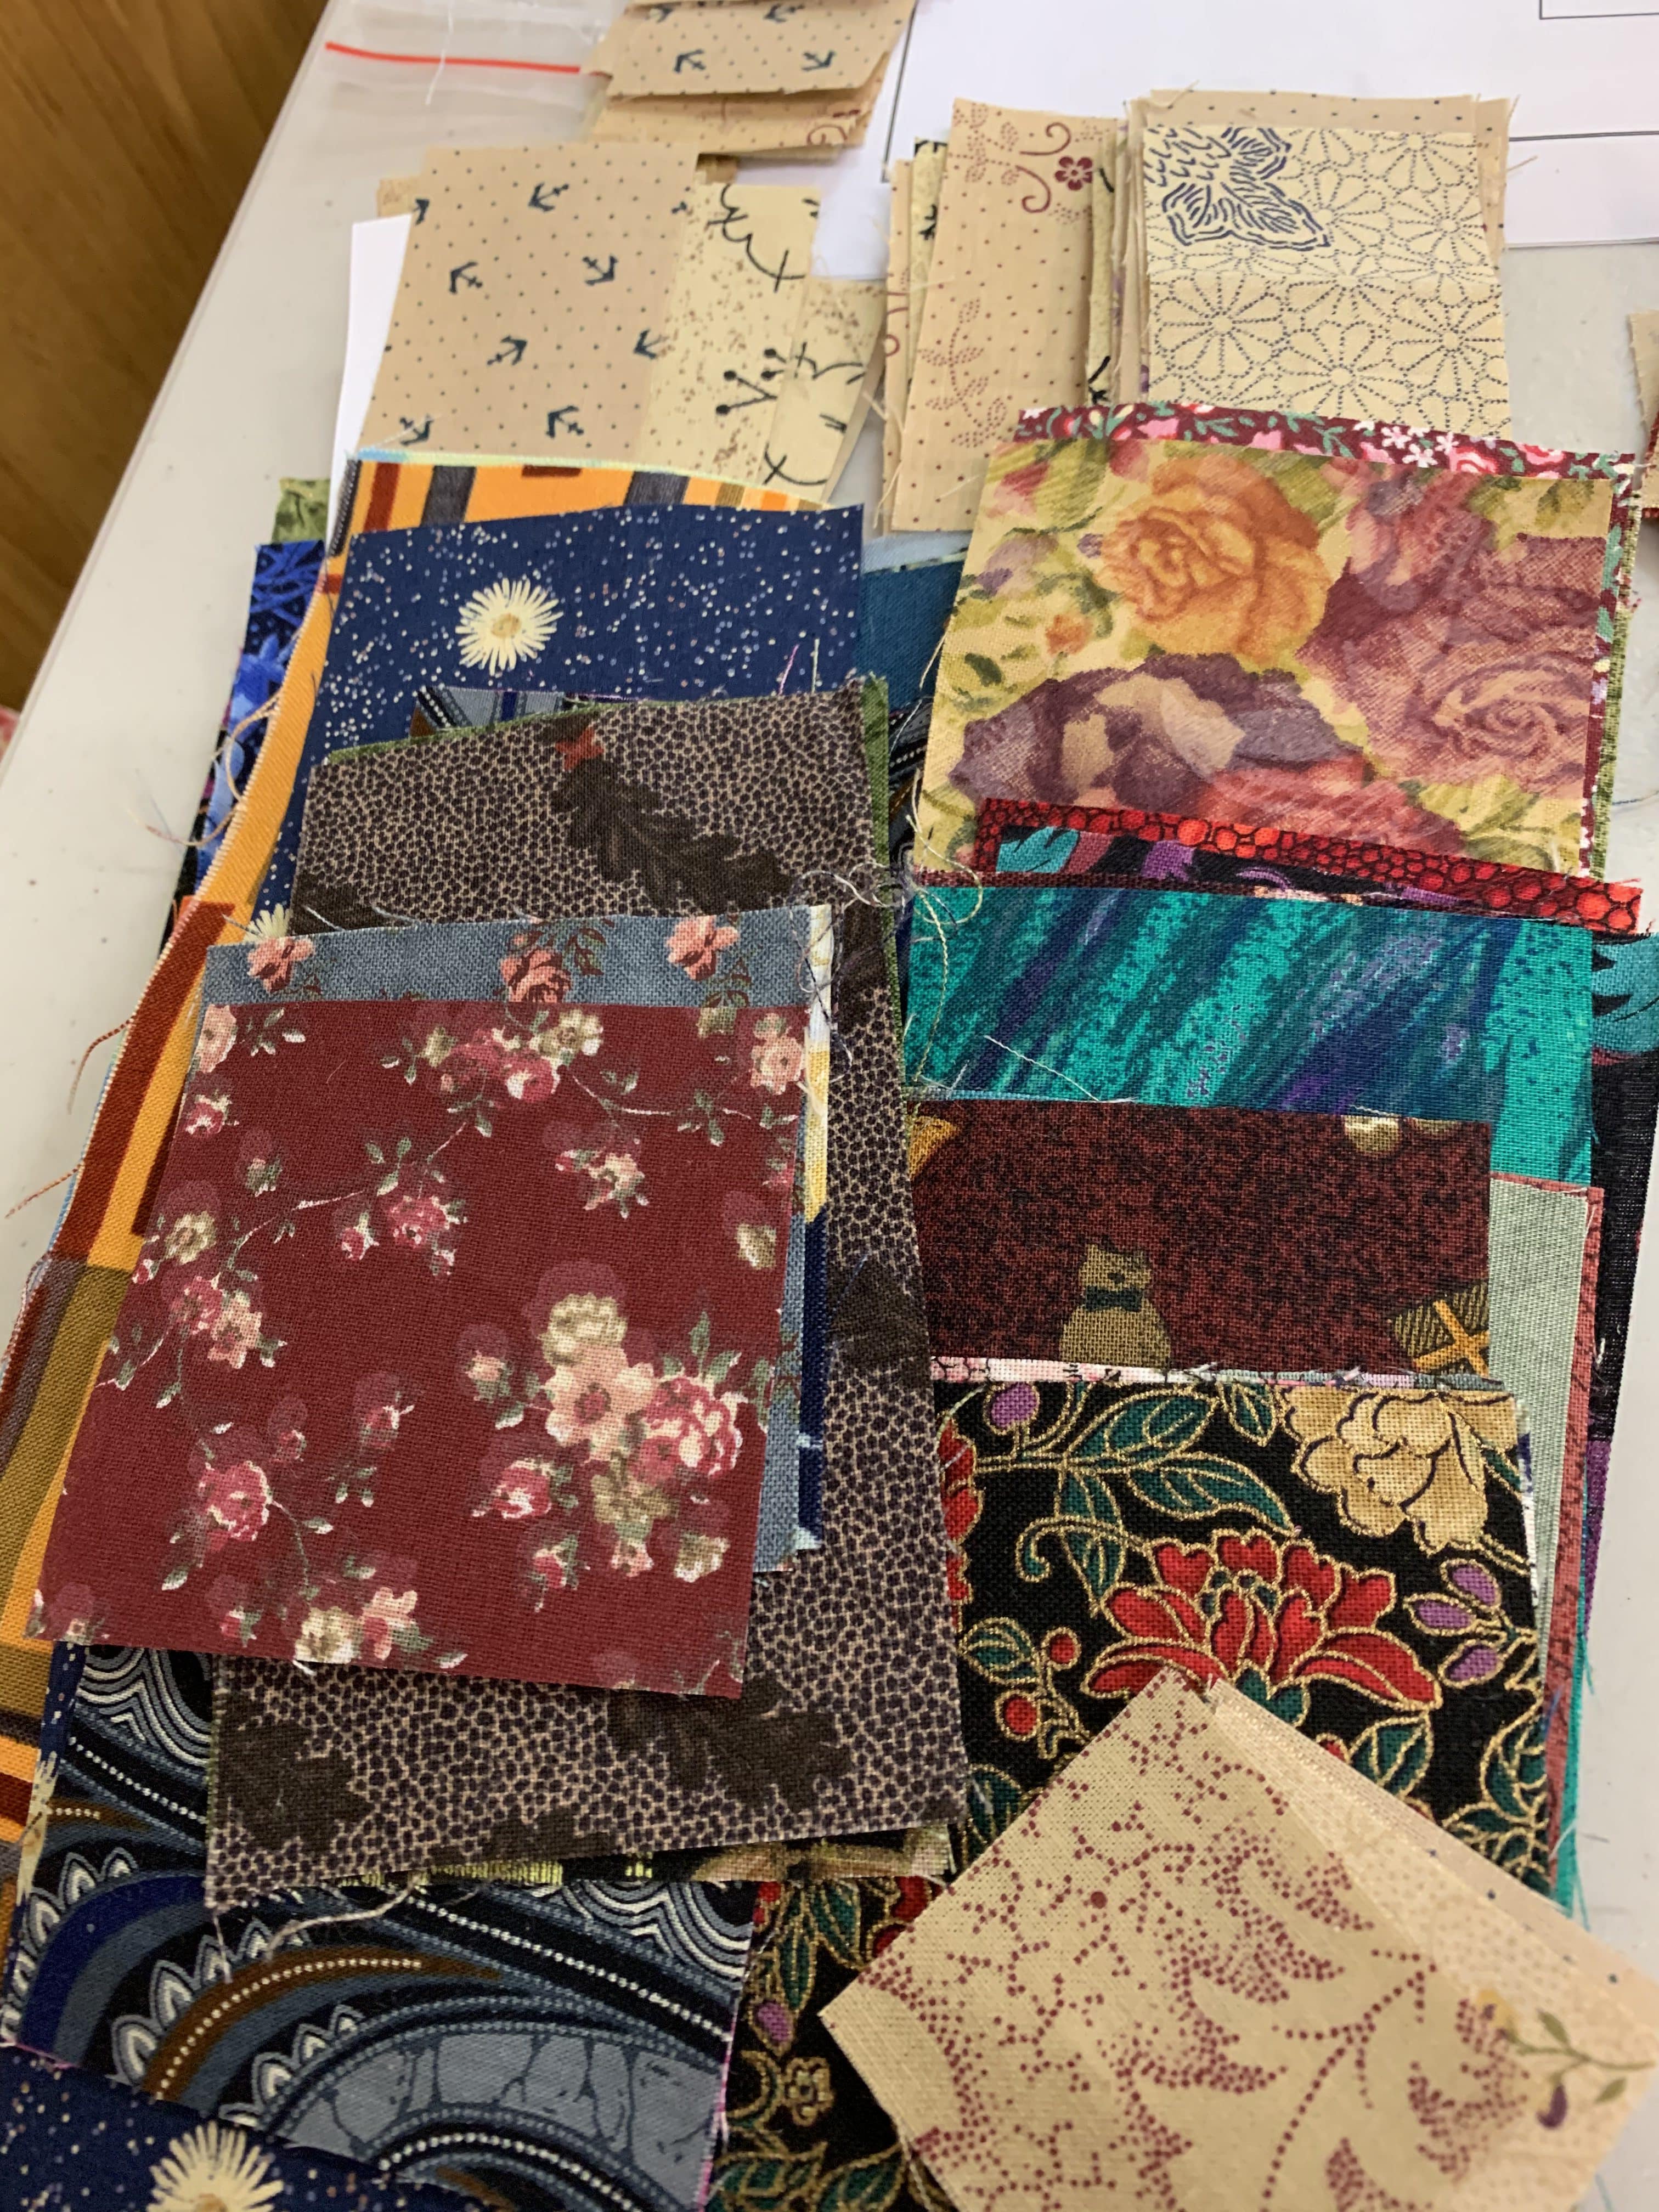
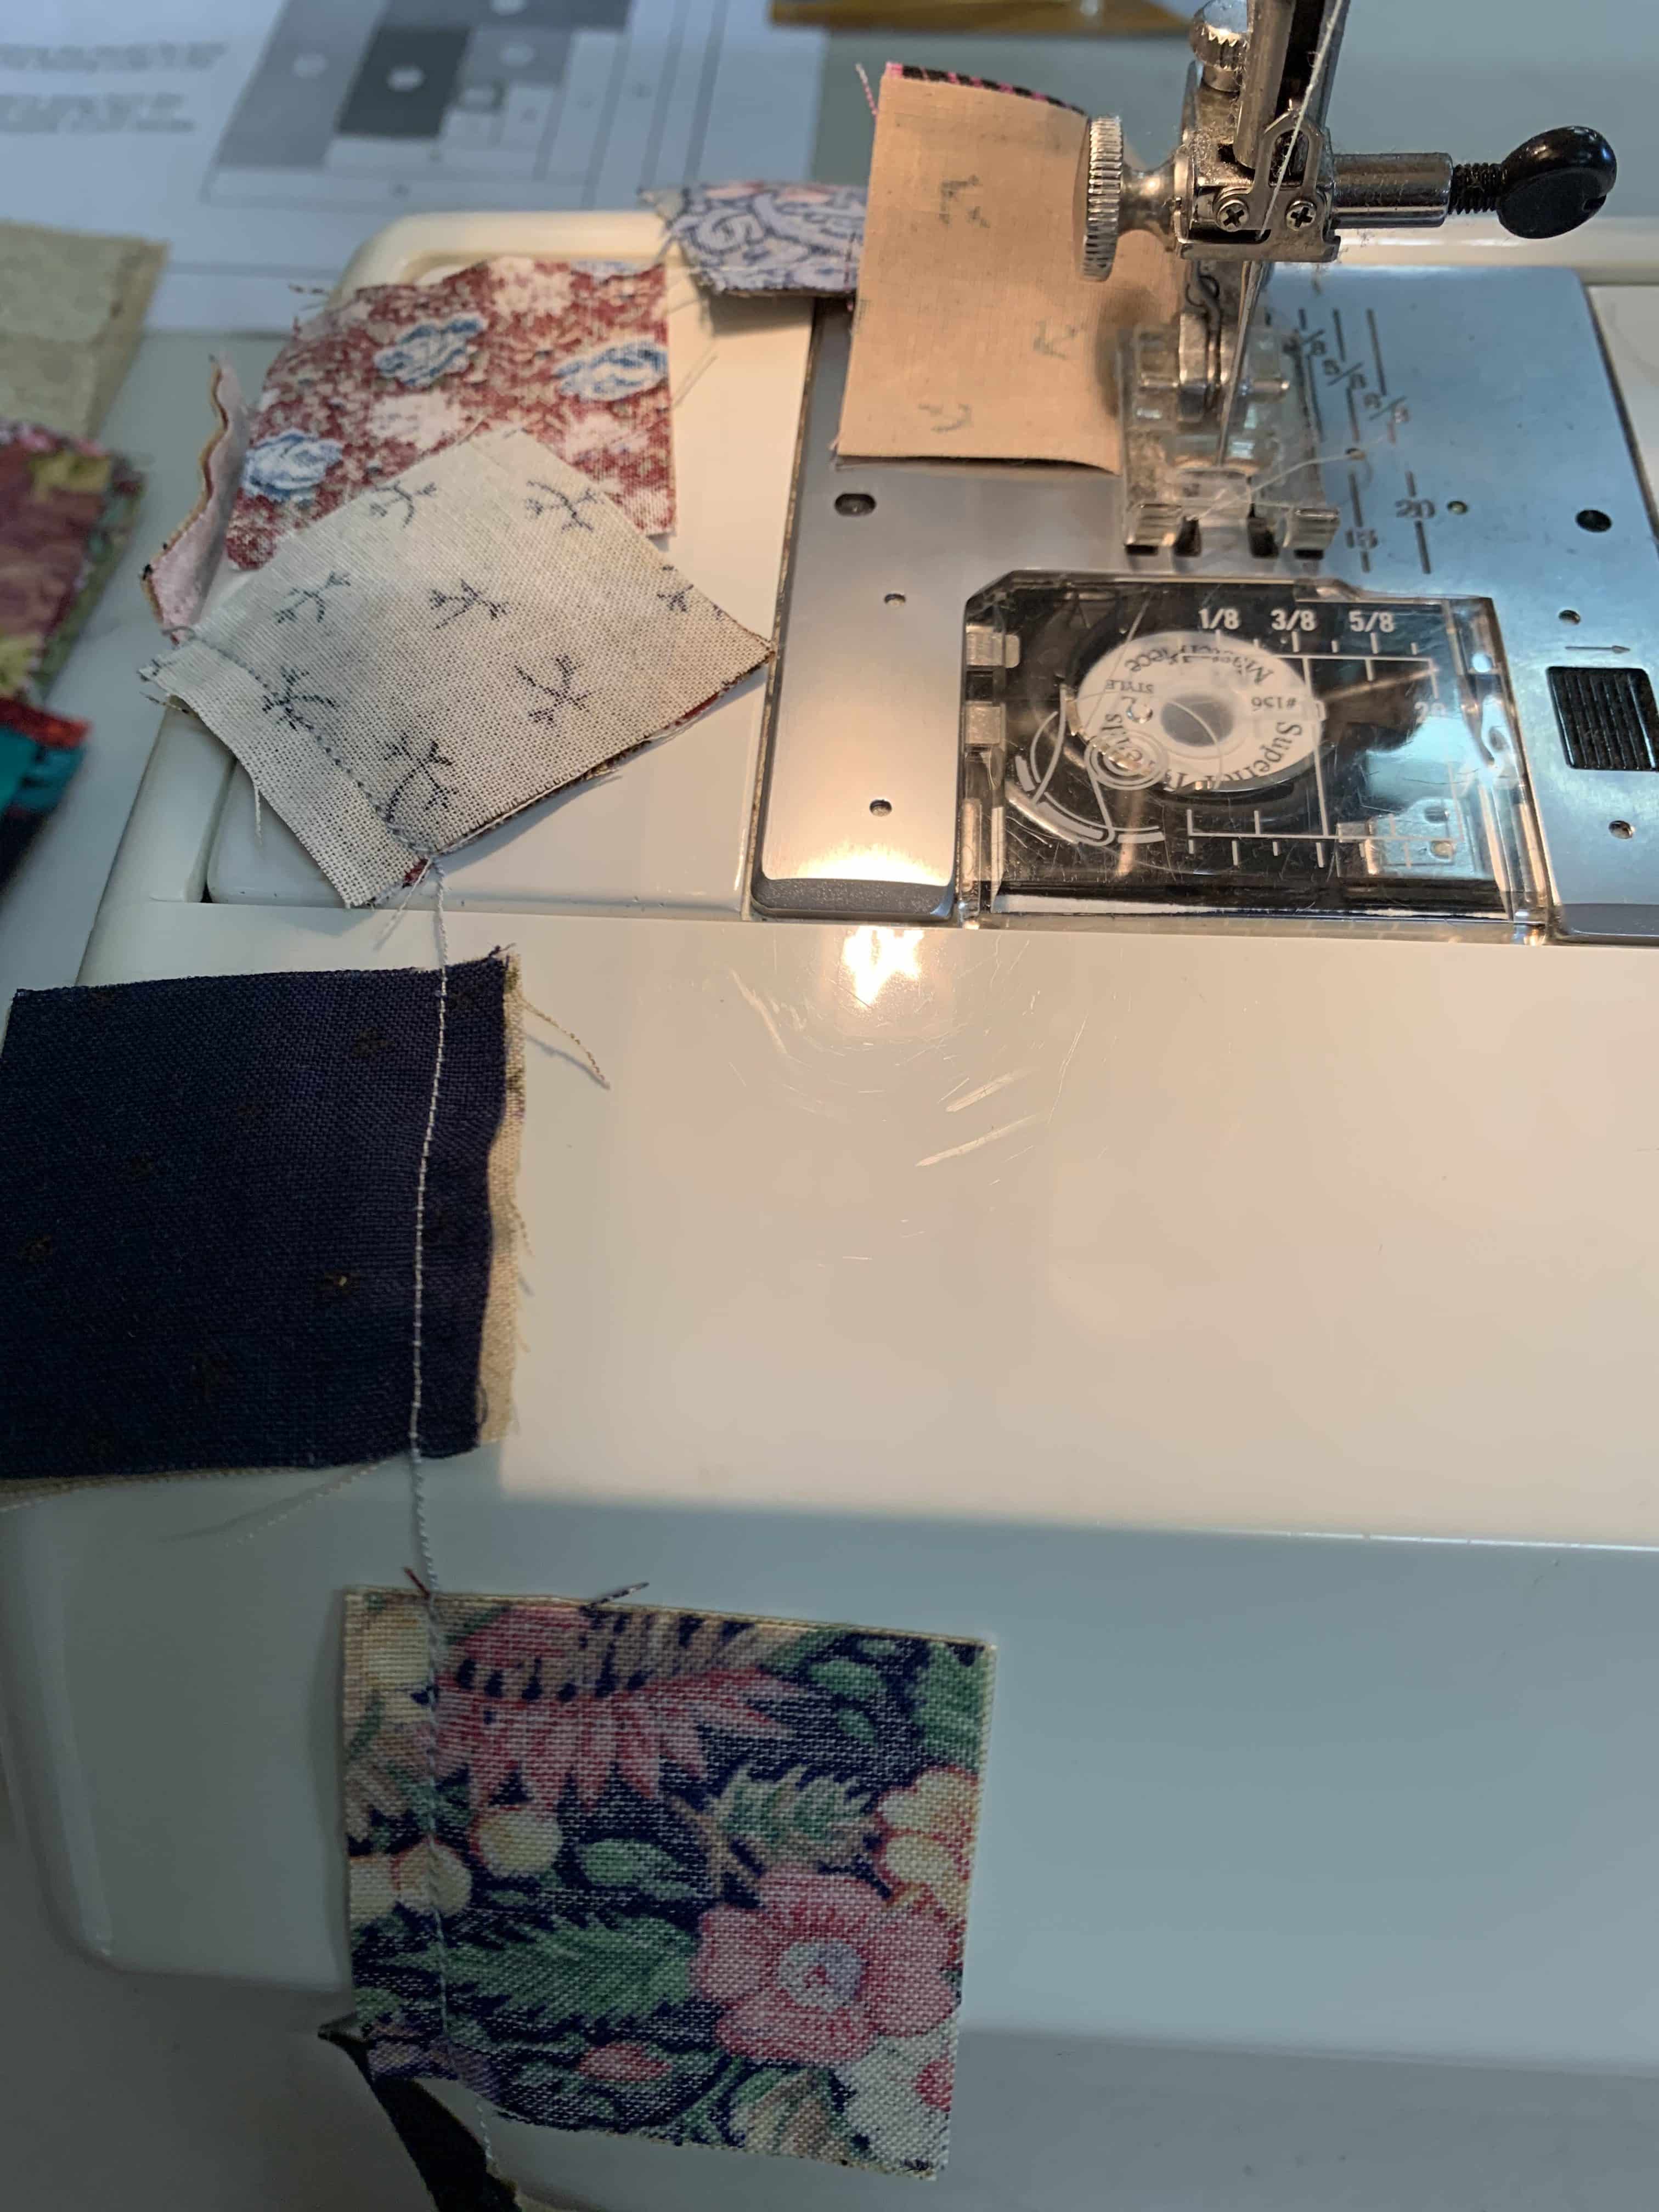
It was Ready, Set, Go, to pick out the kit of your choice ! A fun way to start the day! Here is some of my kit fabric.
Full disclaimer, the fabrics I could see on the top of the pack looked quite pretty. But when I picked it up, someone said, oh those fabrics are pretty old. Well that didn’t bother me. But, when I opened the pack, some of them seemed quite unfitting and ugly to my taste. I‘ve put some of the nicer ones on top to show you.
Here we are ready to start sewing. So I thought I would share my tips on Log Cabin.
Today, we can appreciate that the construction is different to the historical, and therefore we need to allow for that in our piecing.
Of course if you are wanting to make an art quilt like the beautiful Gees Bend quilts or wonky blocks, then please disregard the following.
Tips for successful Log Cabin
I believe it is important to work with fabric which has been prewasshed. This may be especially important when working with scraps as they all shrink at different rates .
Accurate precutting of all the strips will ensure that you can check how you are going with each seam as the pieces should fit exactly. These pieces are all cut from 1 1/2” and 2 1/2” strips.

This is one block in particular, where the accuracy of your 1/4” seam allowance is important. With each strip which is sewn on, there will be amplification of any error if the seam is off.

Do finger press, or similar, between each piece. I use my wooden thing. This will make sure that the seam allowance is going in the direction you want. It will make pressing of the block super easy!
Do make sure that the orientation of your blocks is correct and the same for each block. It is very easy to add to the wrong side of the block I definitely made this mistake a few times and had to unpick!!!

If you are working with unwashed fabrics as I was, because it was a precut “kit” do not use steam in your iron as this will shrink the fabric and cause distortion of your blocks.

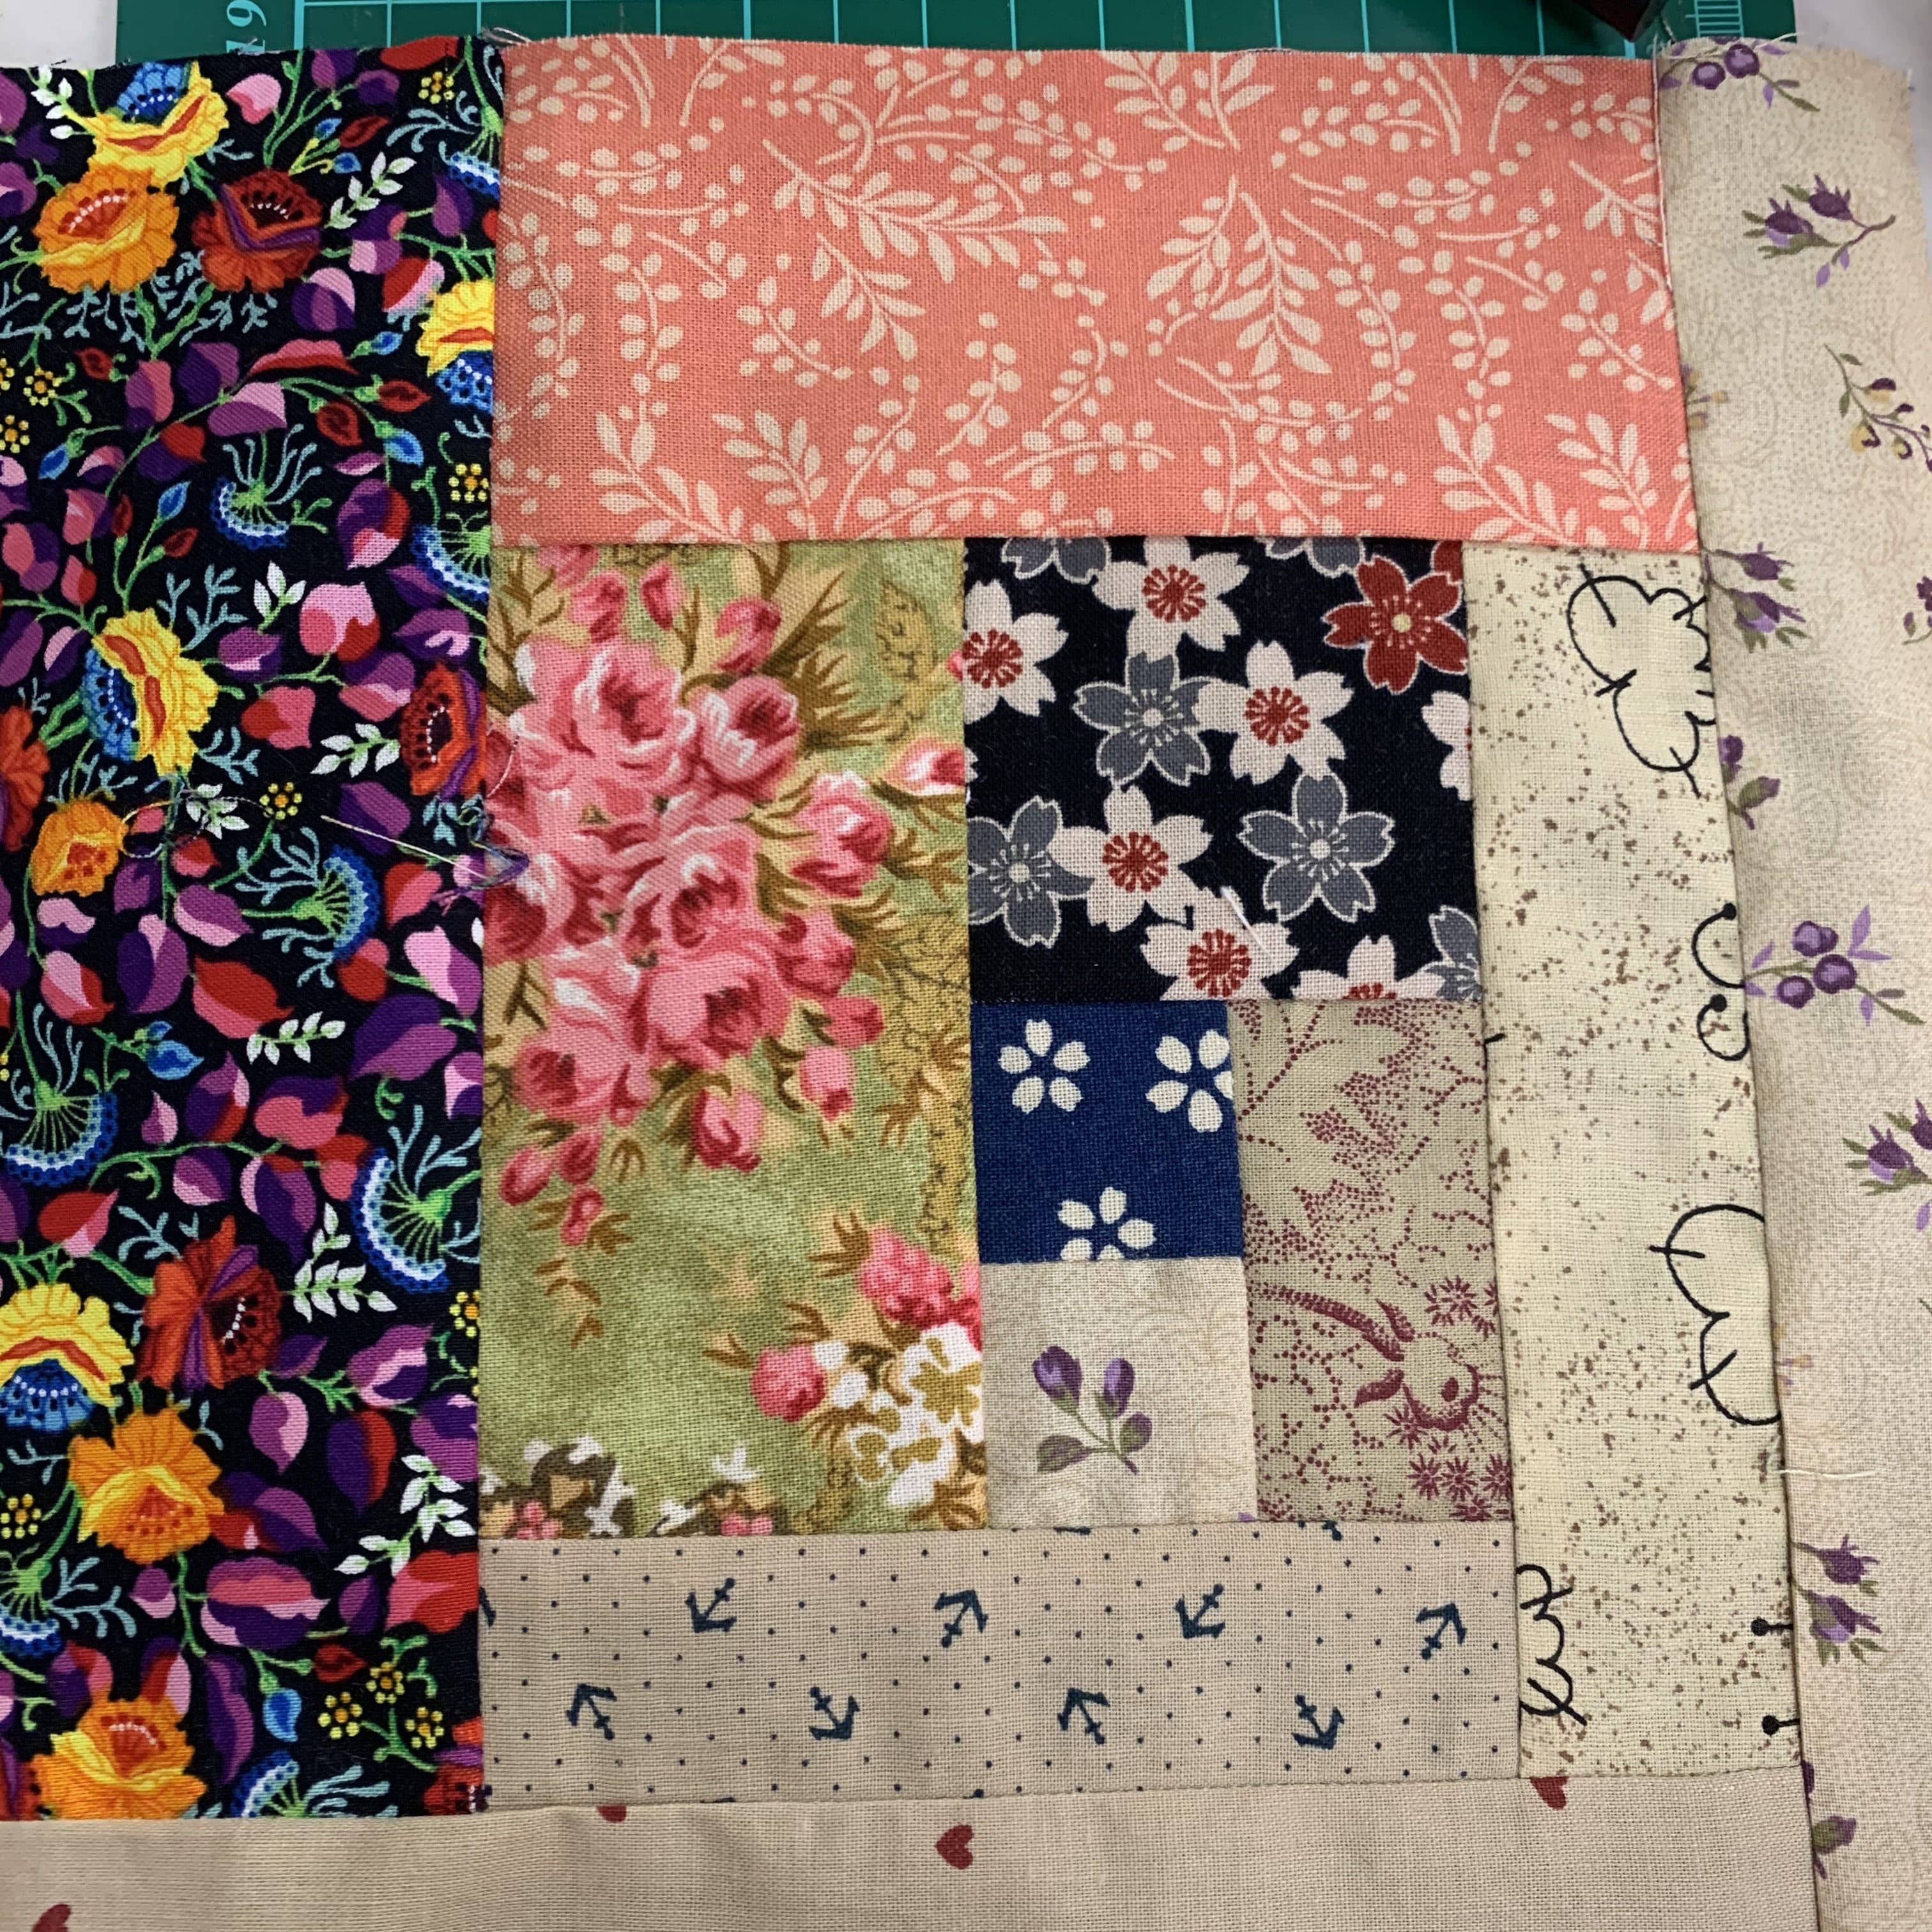
Do make a couple of practice blocks to test your seam allowance. Here is my first block. It measures 8 1/2” x 8 1/2”. There are 11 pieces in each block, beginning with the 1 1/2” squares.
You absolutely can do some quick chain piecing once you are confident of your seam allowance.
This was the suggested layout for the quilt. There are 36 blocks.
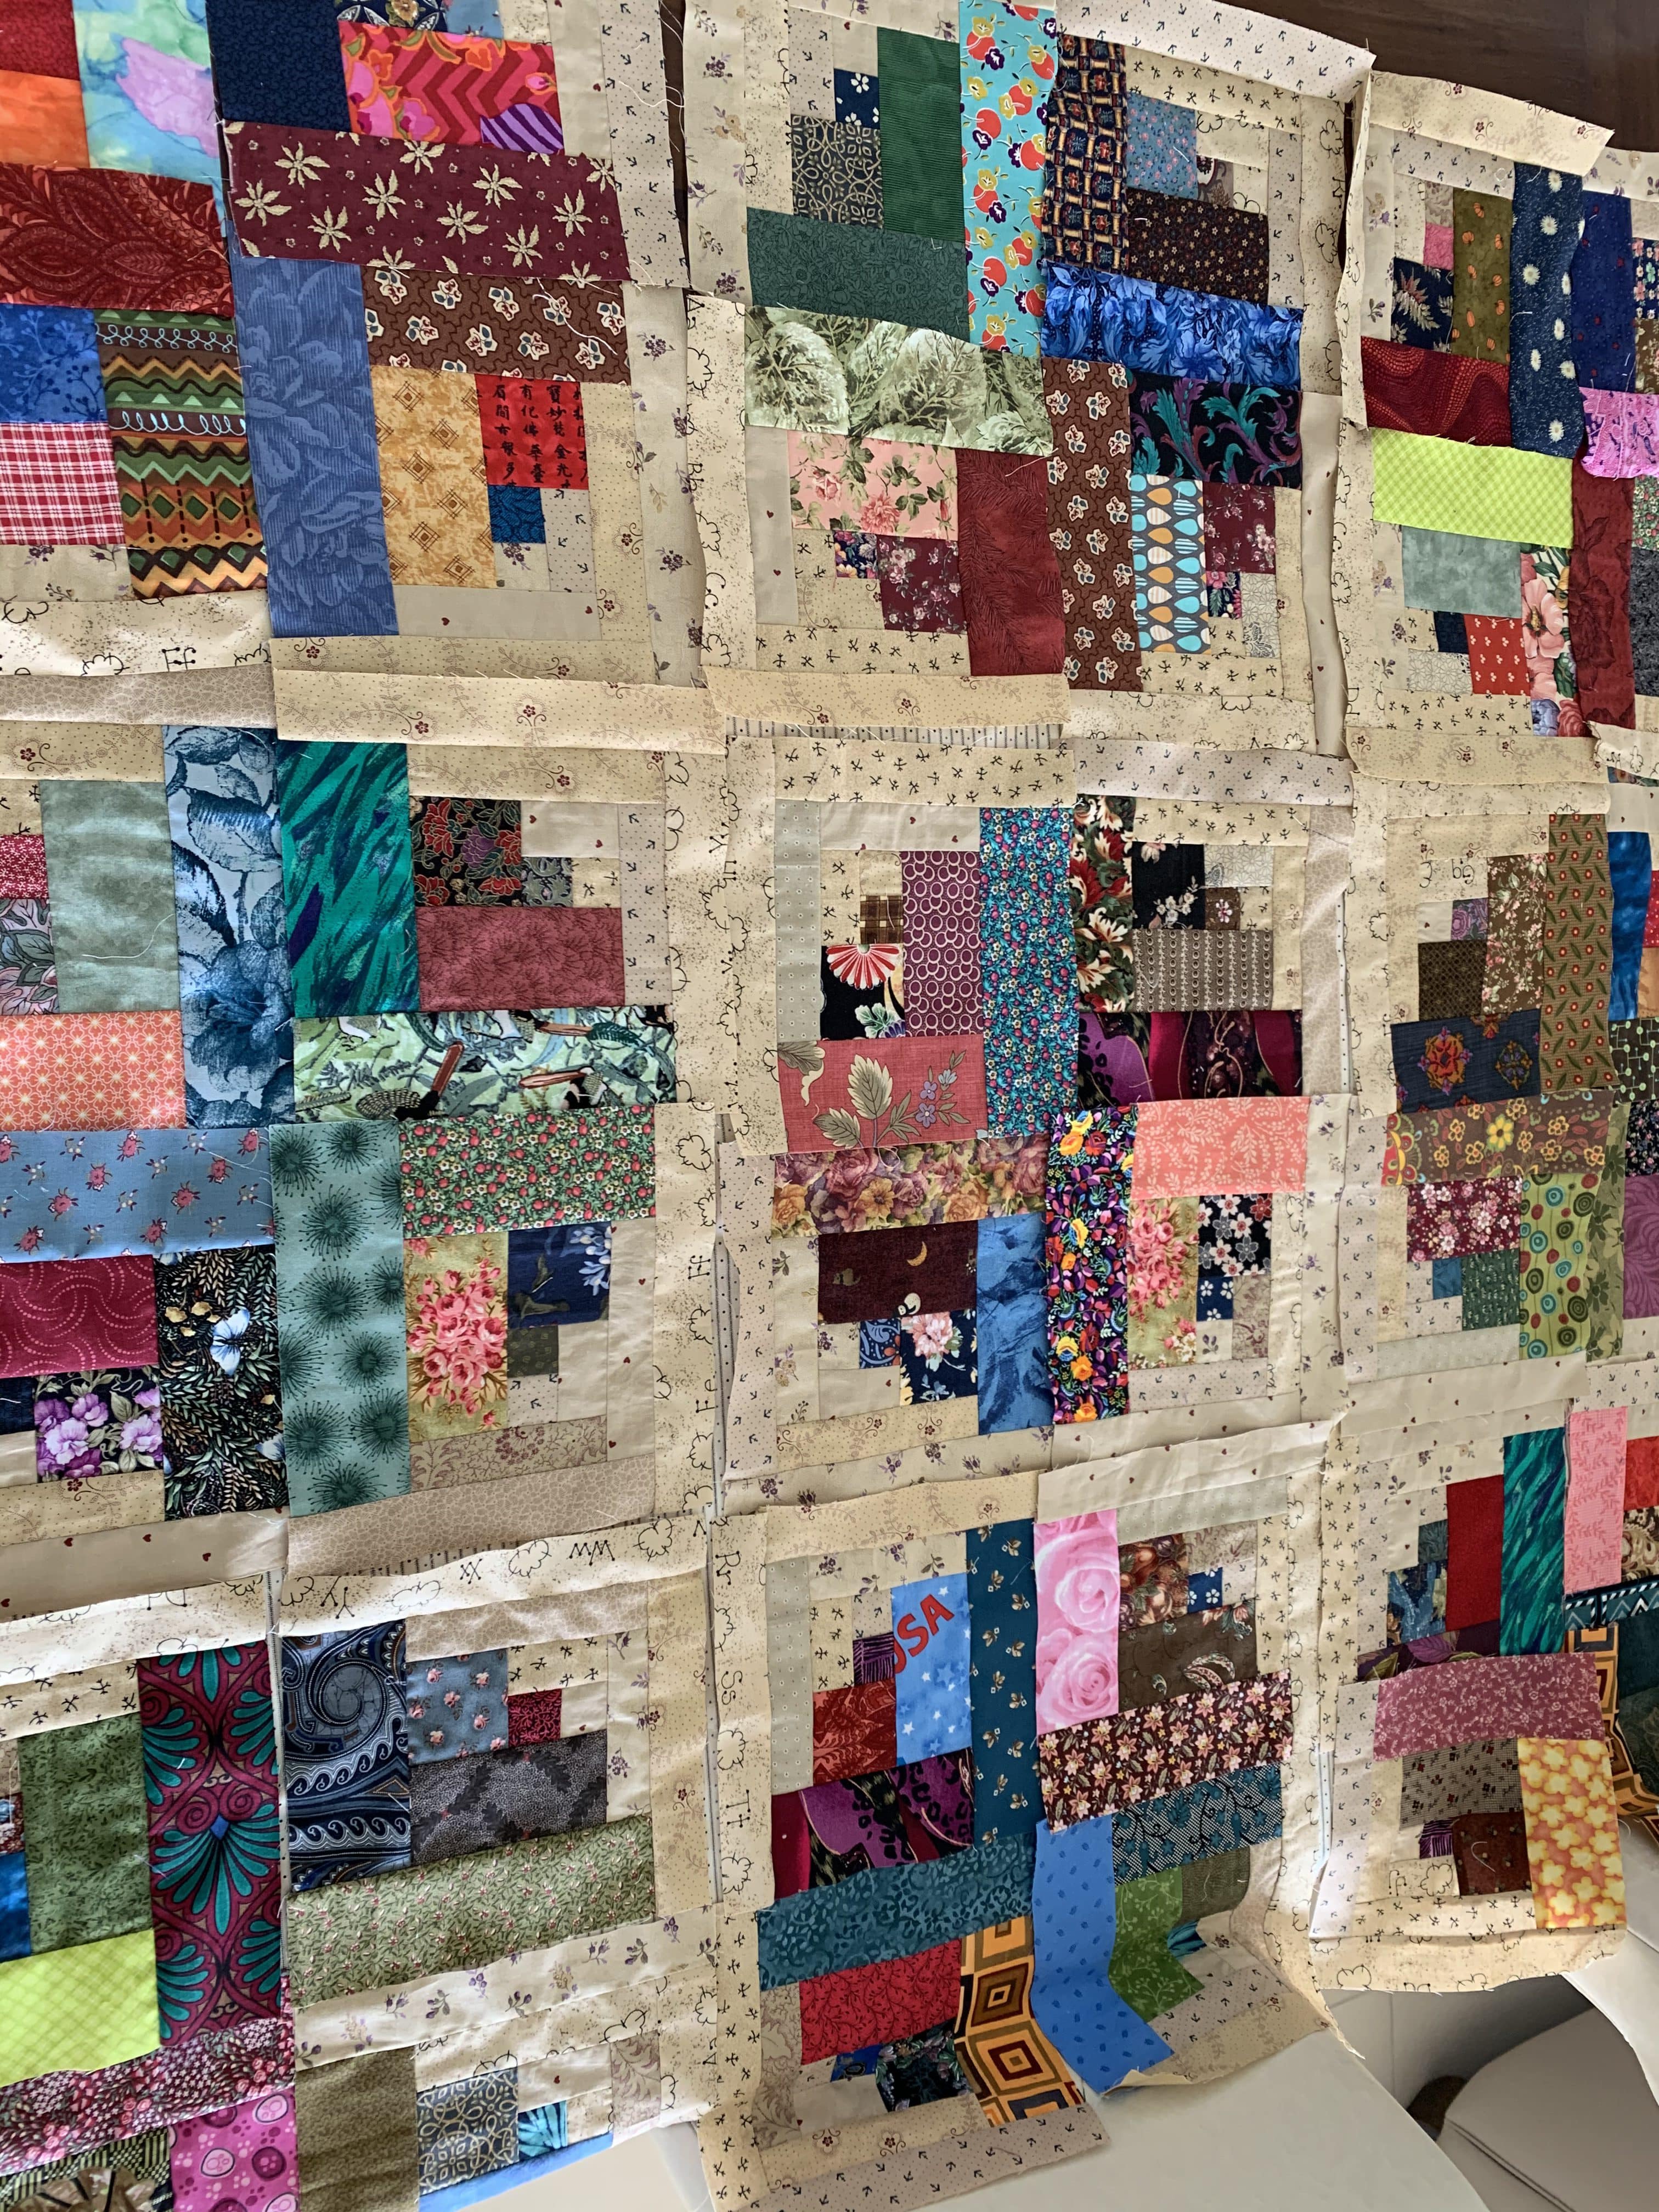
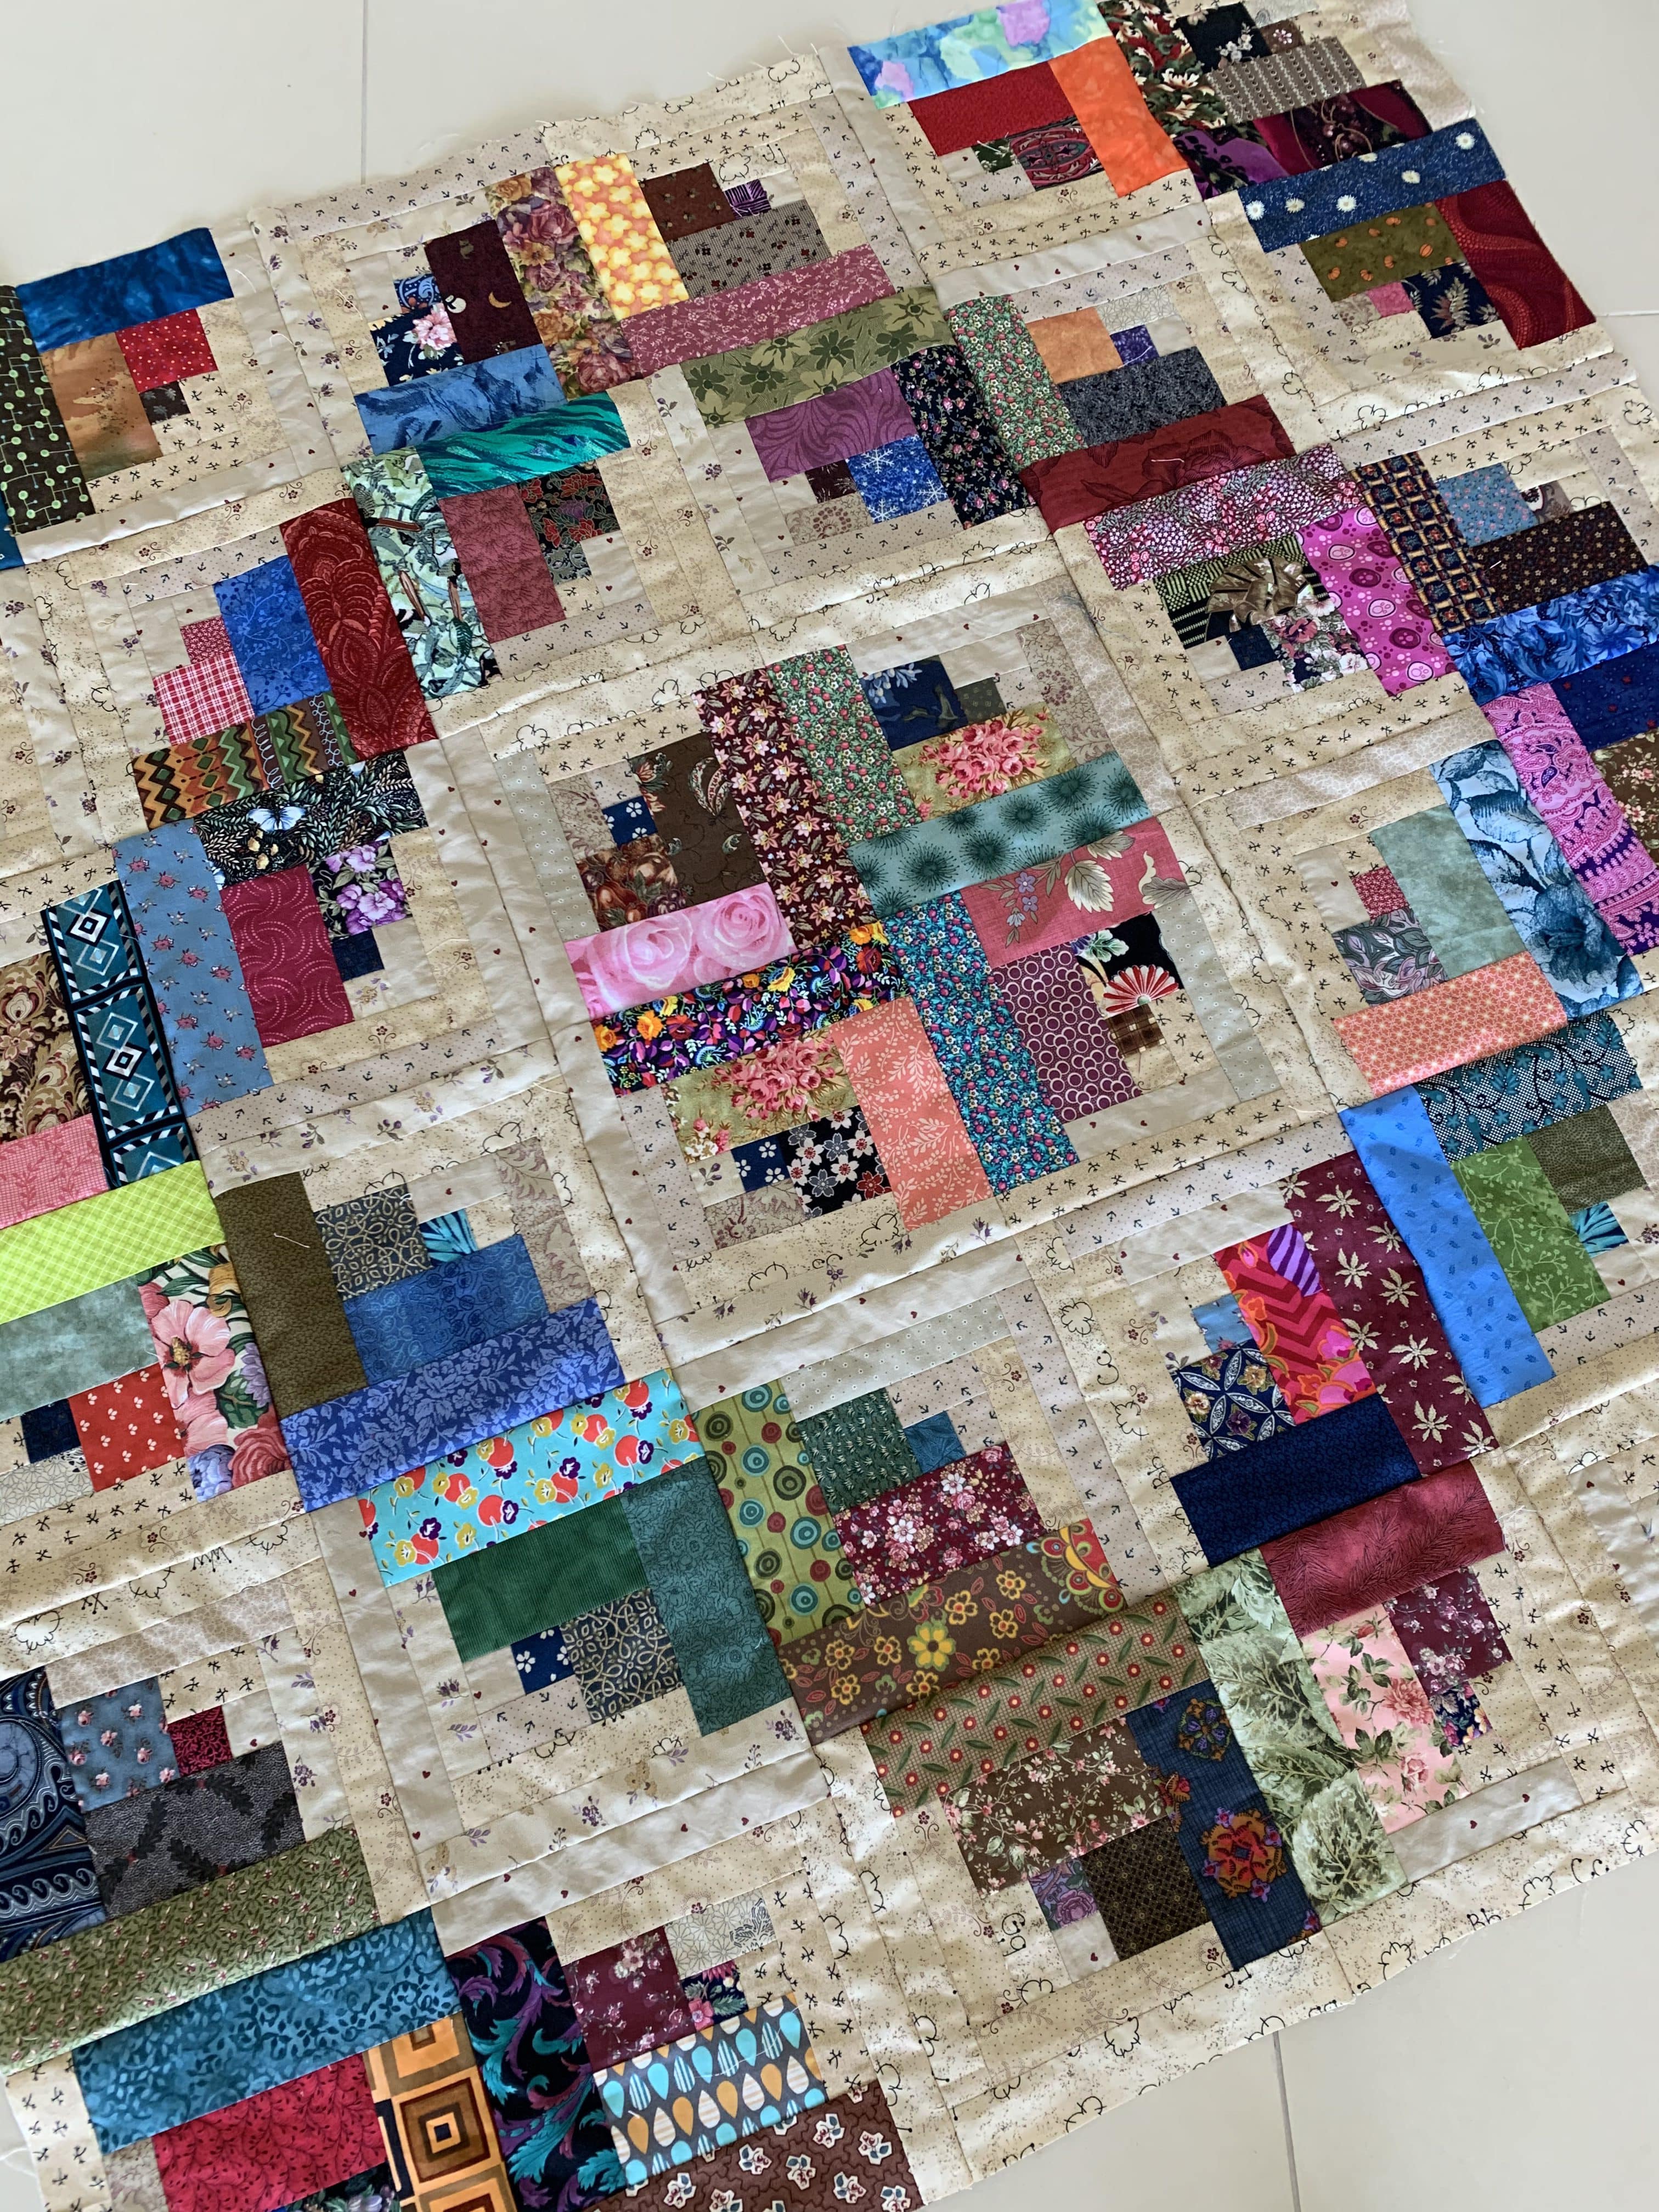
However, I decided to do this.
Loads of fun! Aren’t scraps amazing! What I did learn with this quilt top is that the “ugly“ fabrics took On a beauty of their own. When its all put together they literally shine in their own way. Ive learnt that you can be even more brave than you think with scraps. Even the ones I thought I didn’t like turned out to be terrific.
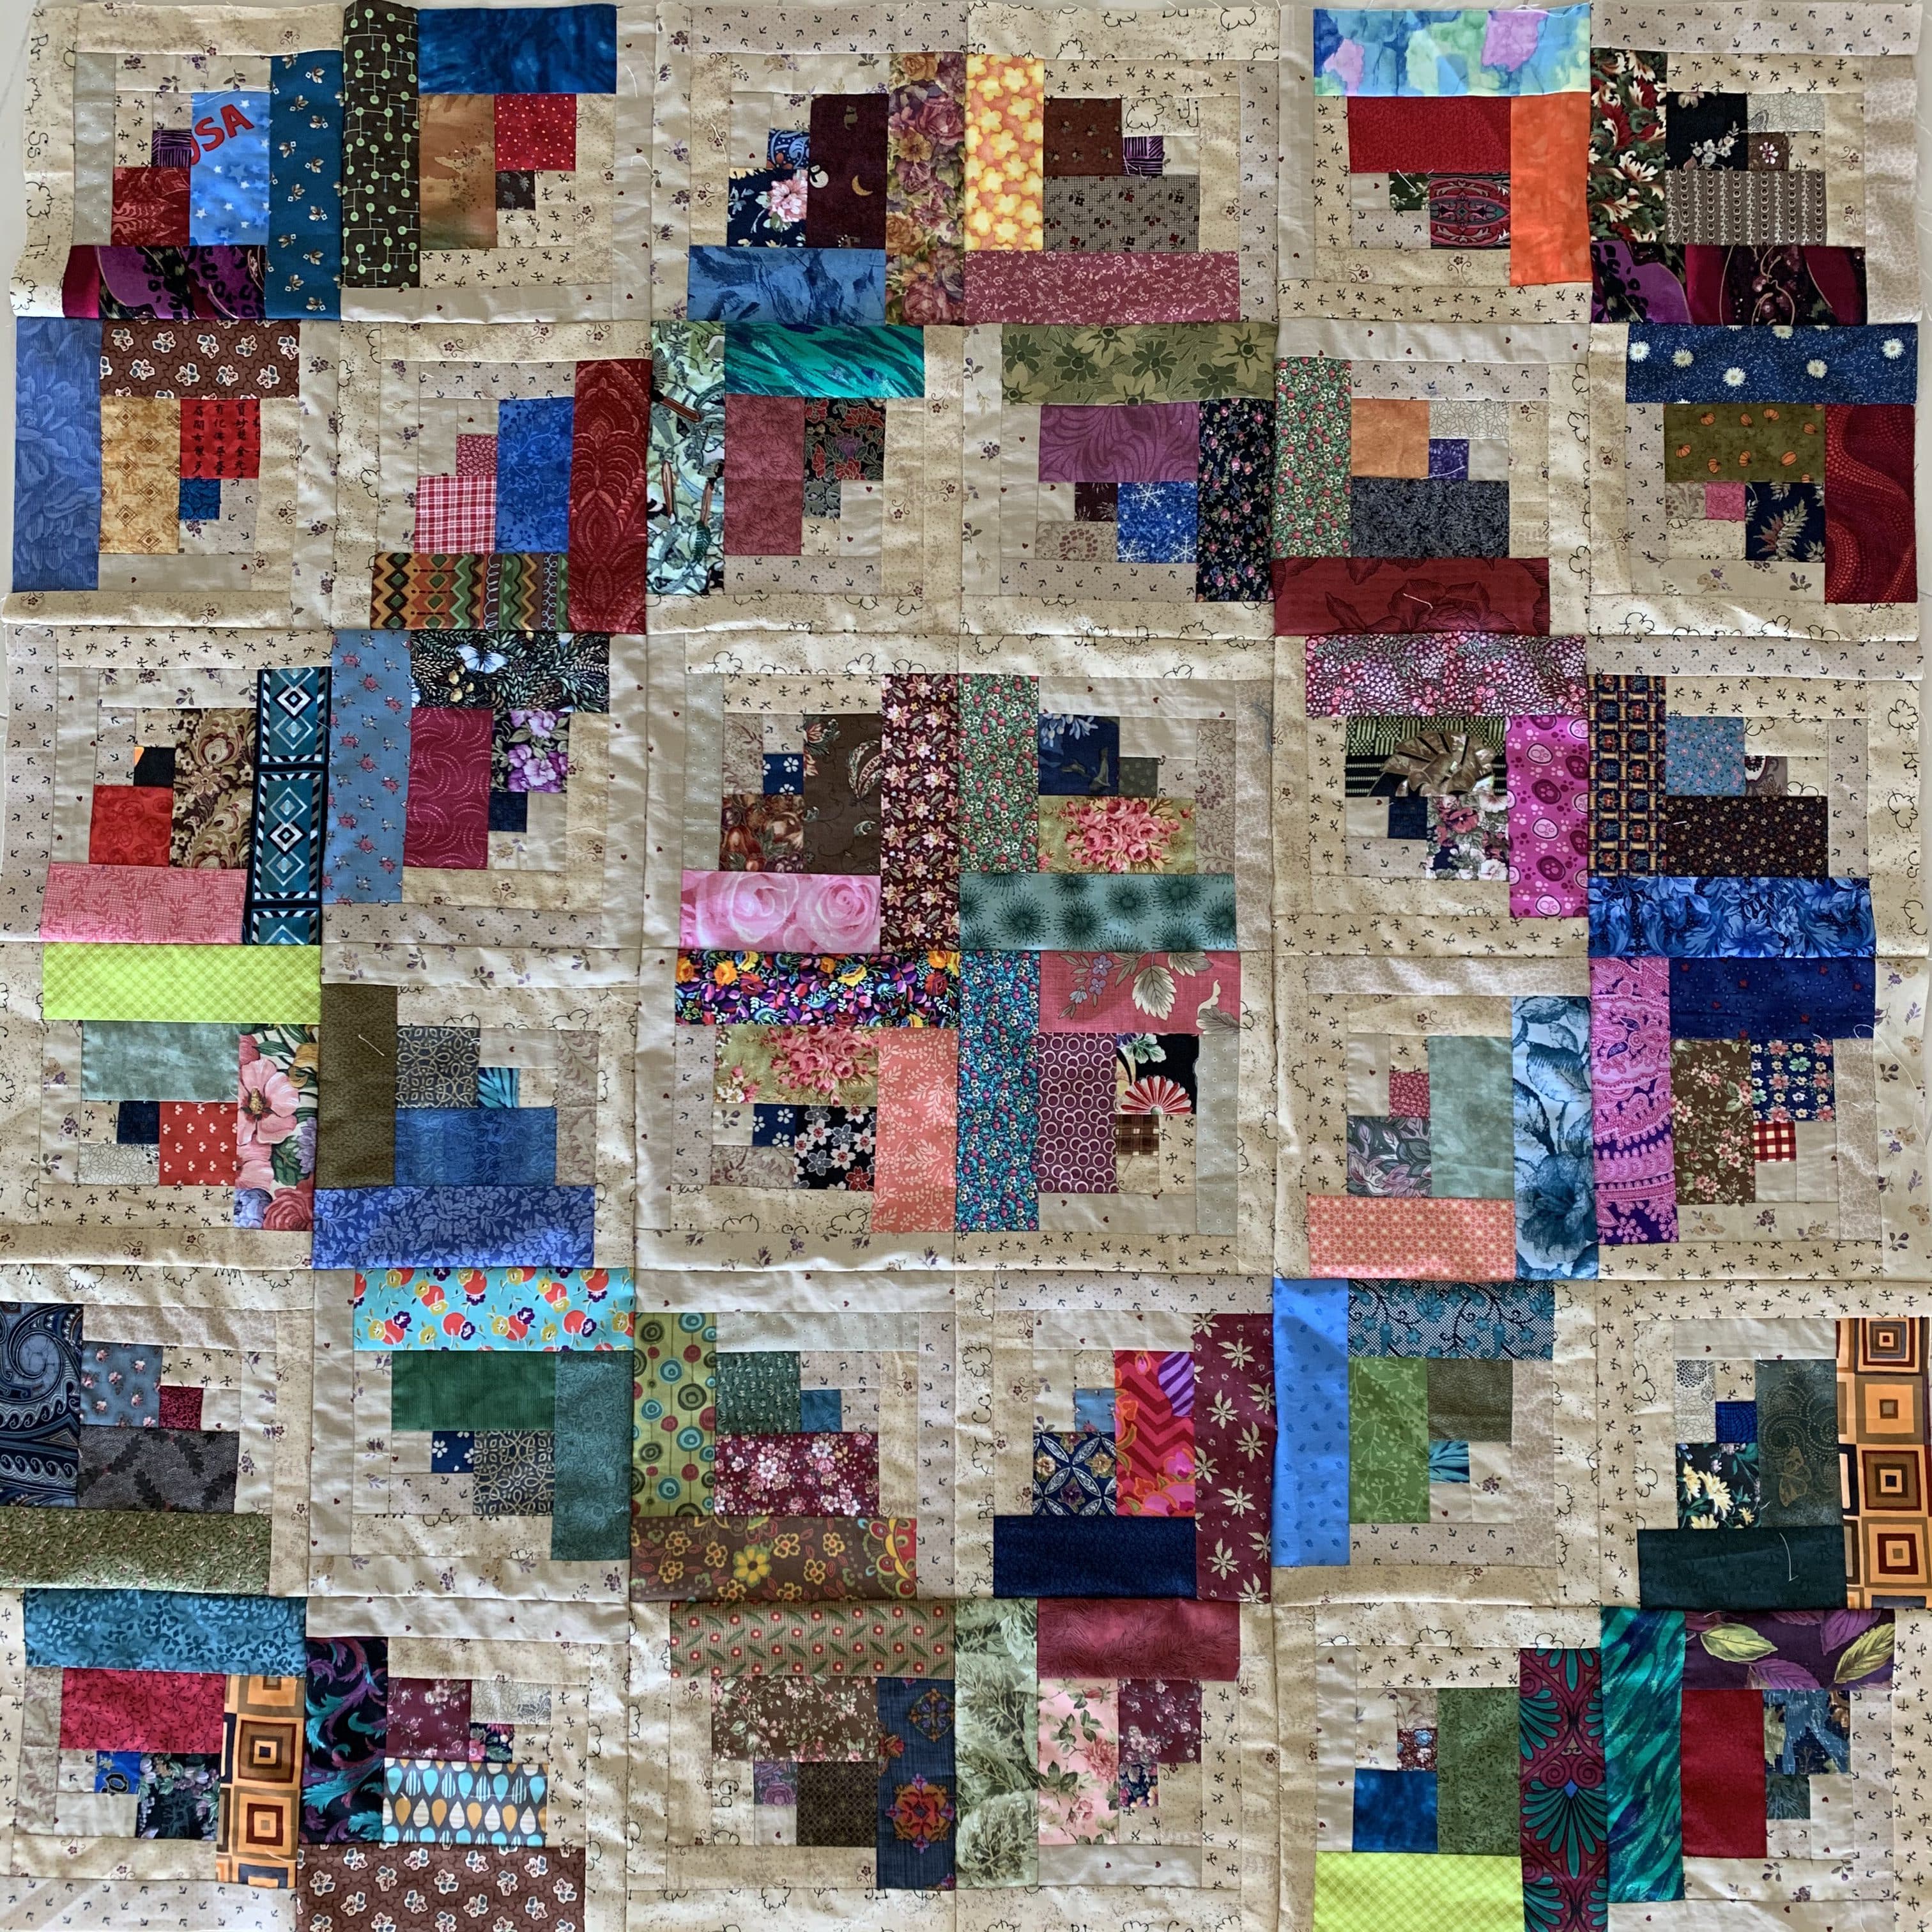
I suppose you could call this a Curved Barn Raising. This quilt top is approximately 46” square.
The possibilities for Log Cabin layouts and blocks really is infinite.
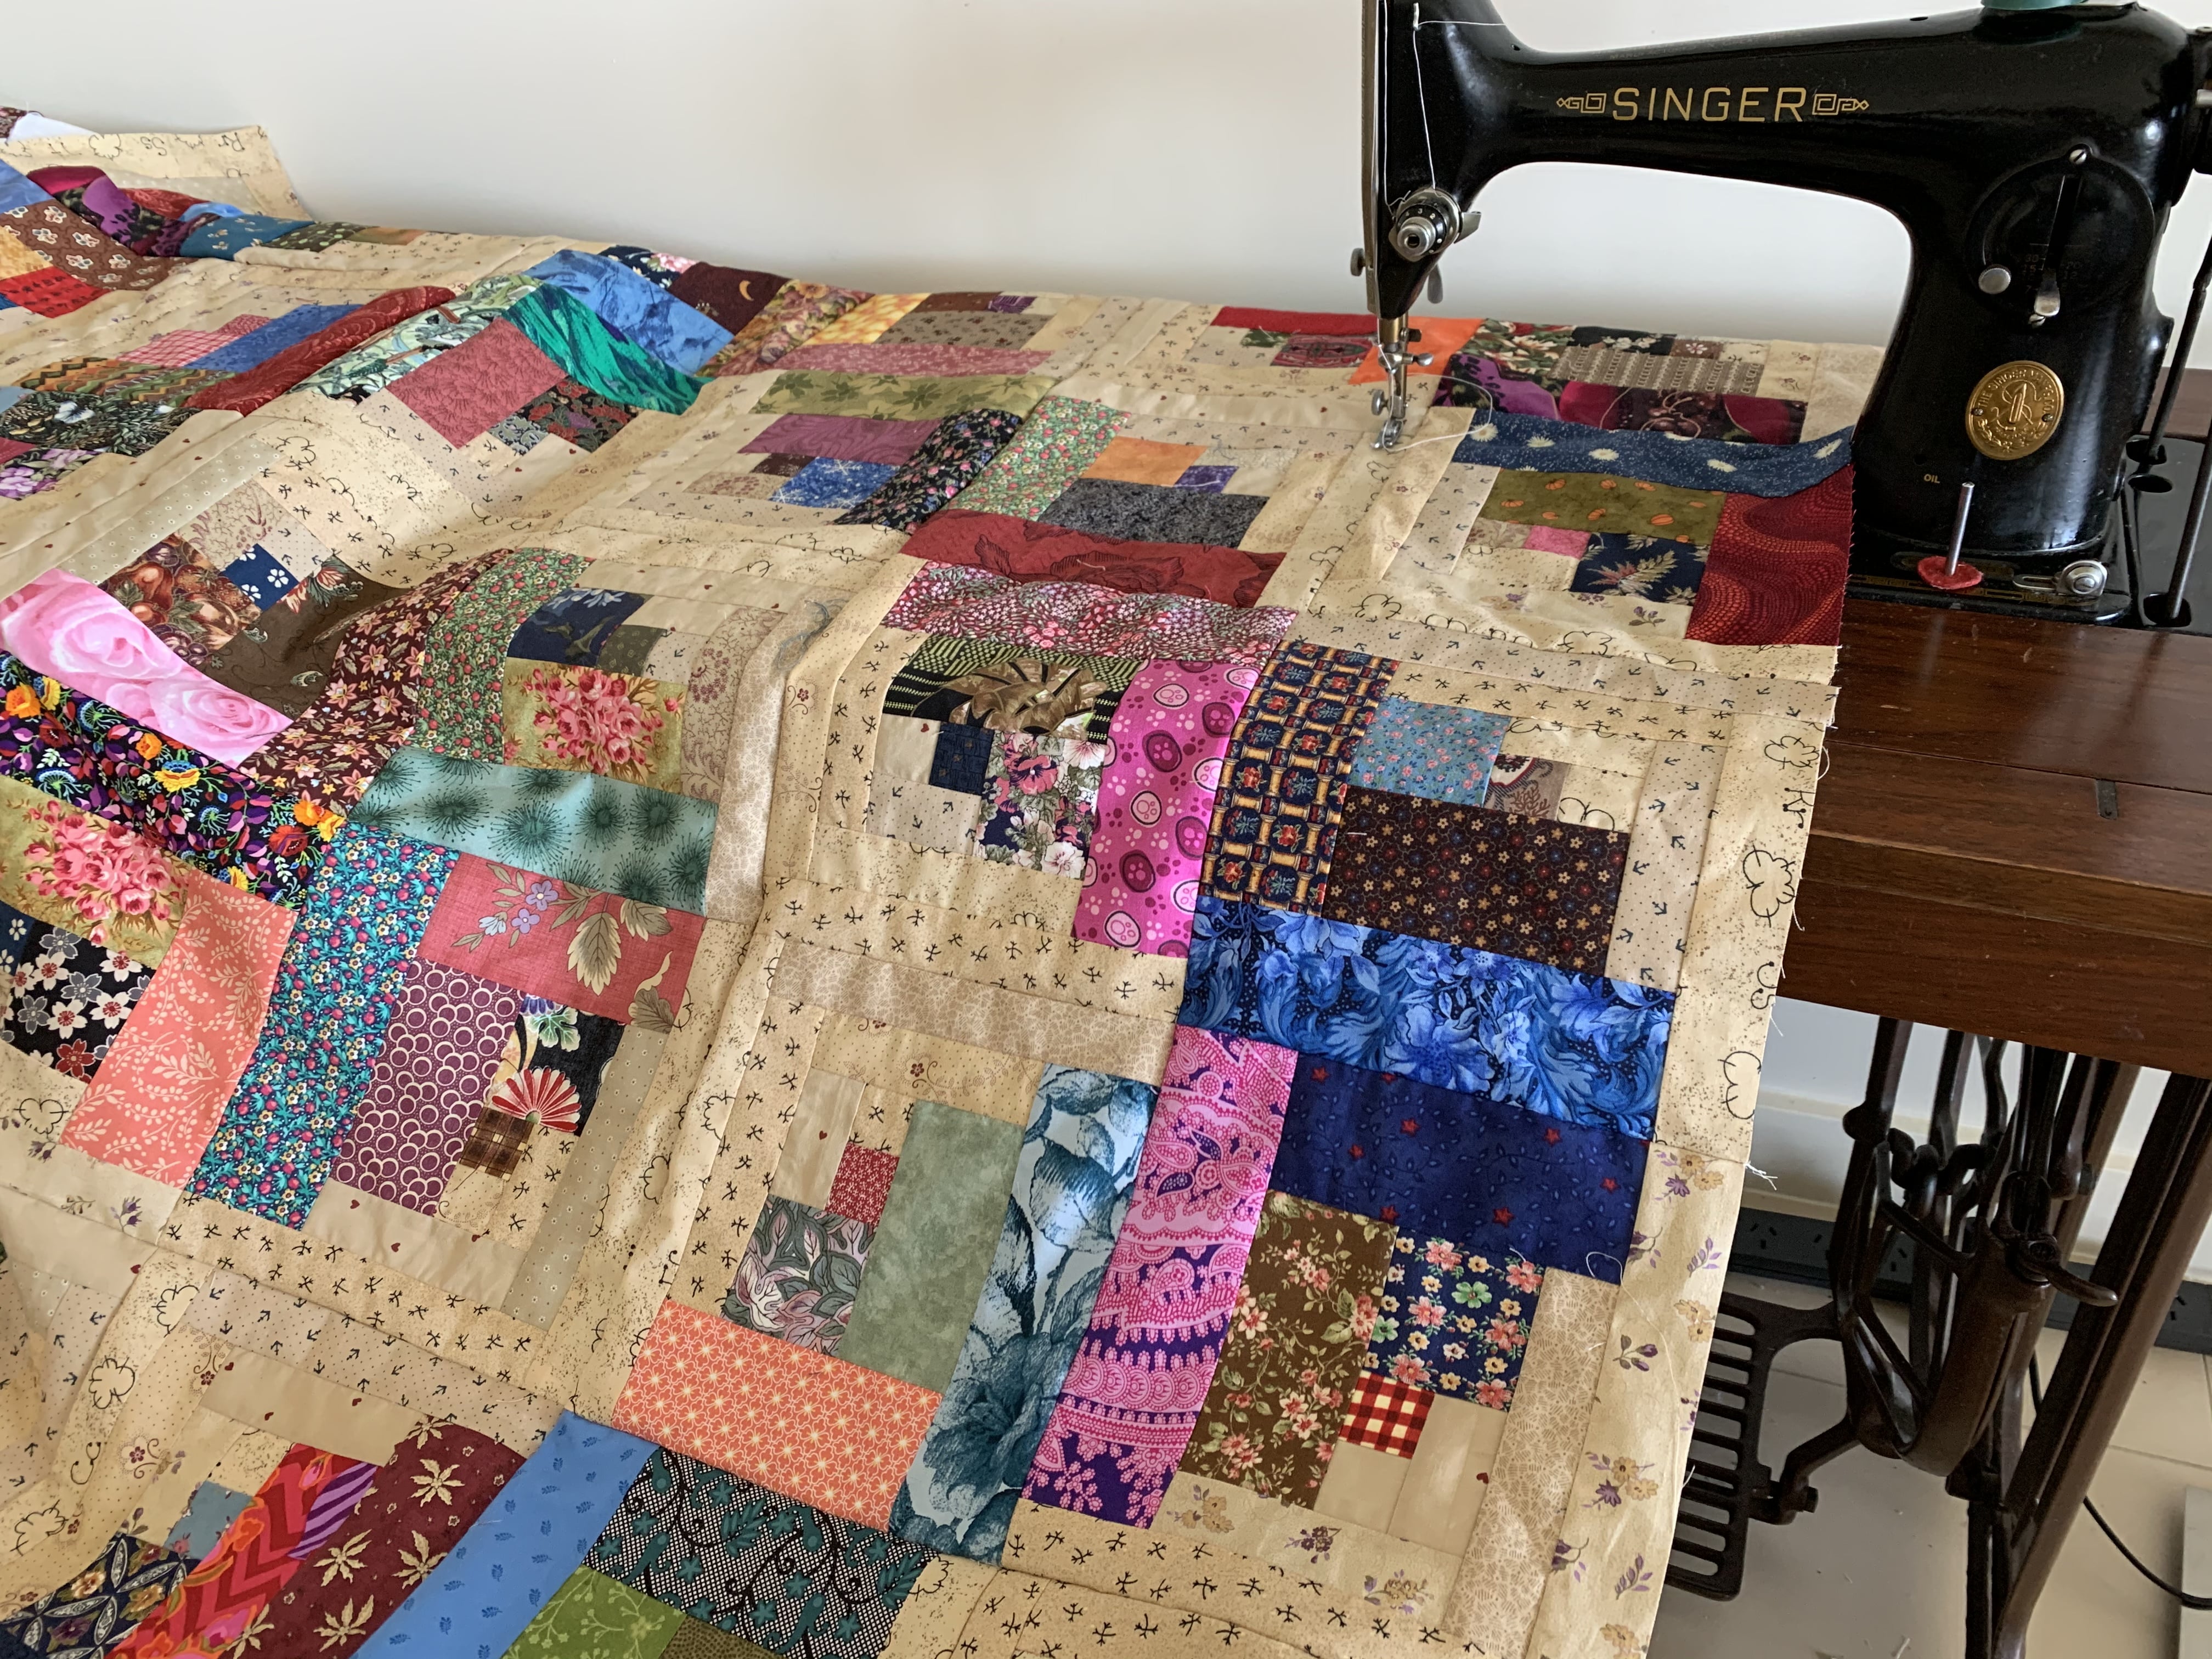
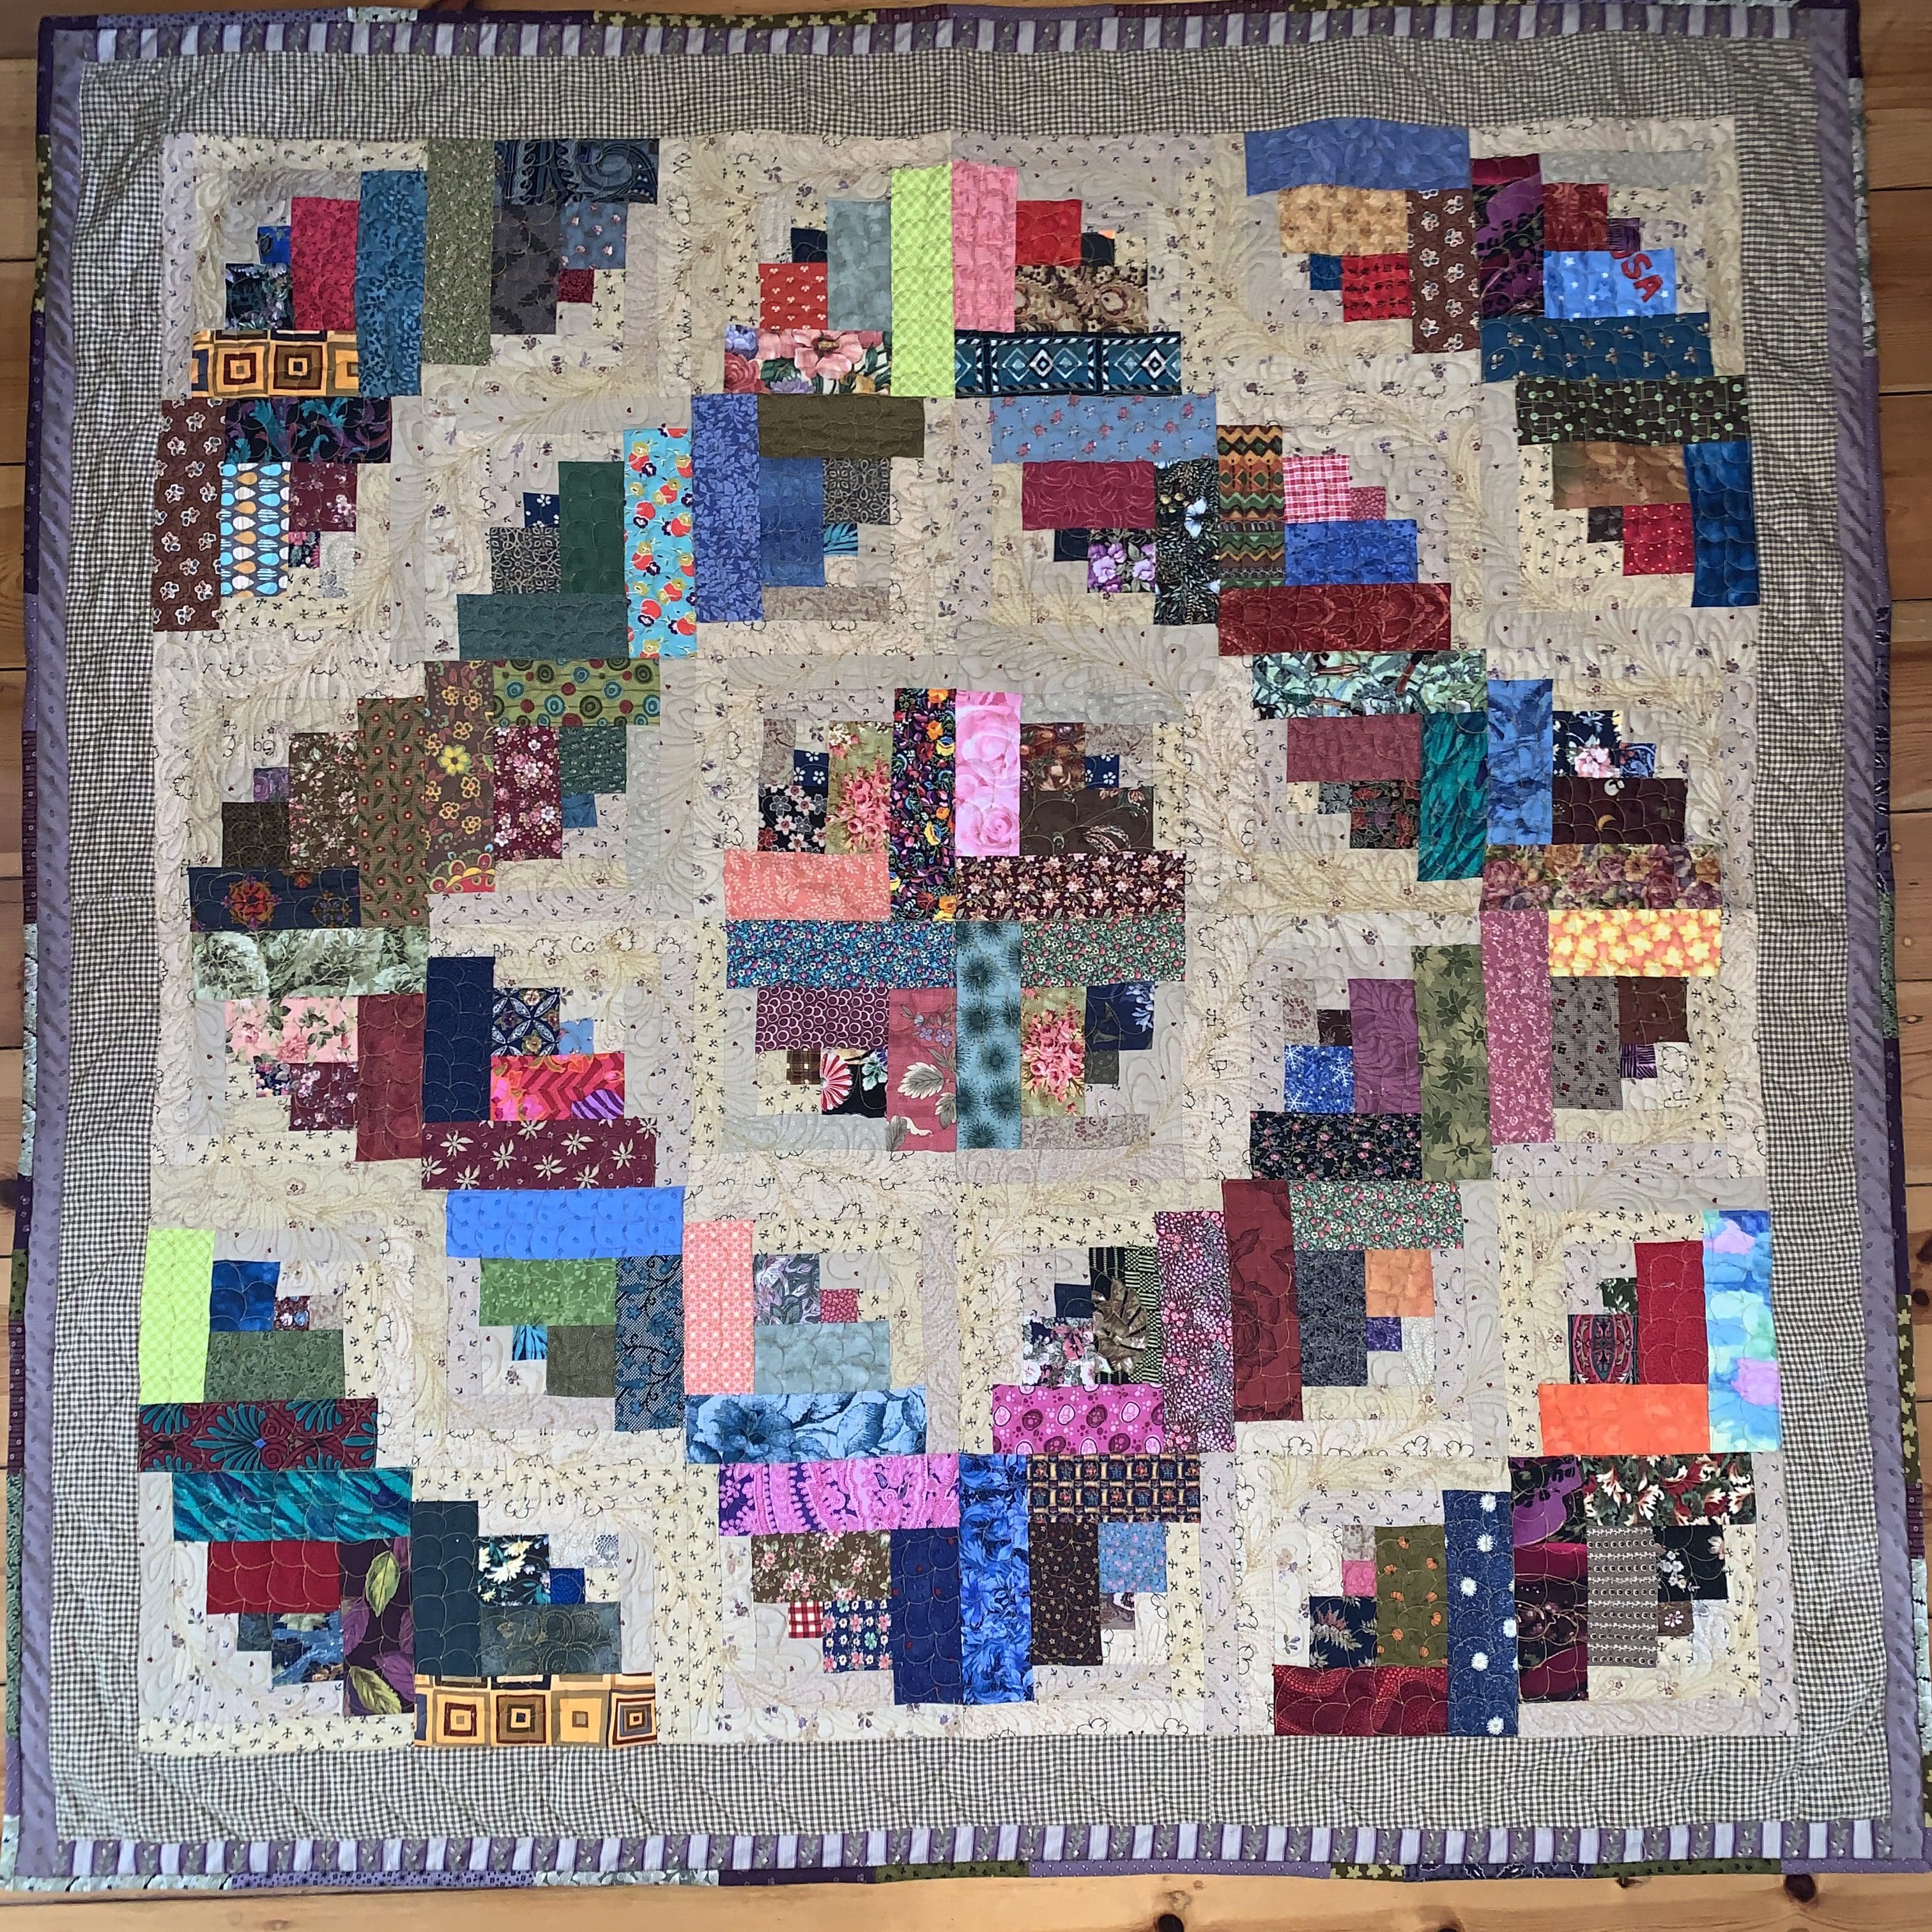
I decided to add a couple of borders this quilt top to make it a little larger. After adding the borders it is approximately 55” square.
I think it has framed it quite nicely. Then I quilted it quite densely. You can read about how I decided to quit it here.
Log Cabin Free Motion Quilting
Happy Piecing! If you enjoyed this post, you may also like
and, if you prefer squares….
Floral Fantasy Friendship Four Patch Finale
And, just in case you want a foundation pieced inspiration….
Crazy Little Strings & Diamond Charms Quilt Block and Tutorial
And Foundation Triangles Tutorial
All the best,
Susie
©Susan Stuklis February 2020