Tag Archives: Diamond Circles

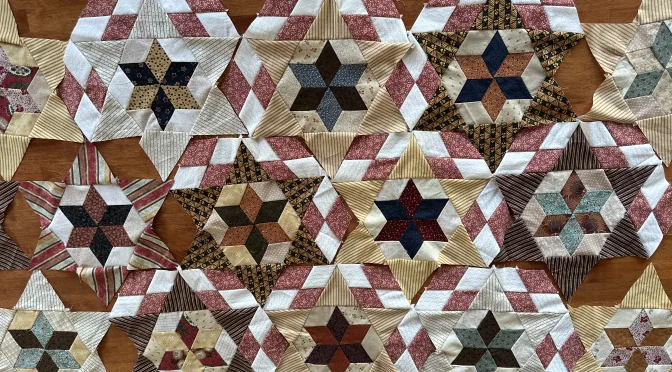
Hexagon Stars Diamond Circles Quilt

Hexagon Stars Diamond Circles Quilt

Hello Dear Friends and Readers, and a warm welcome to today’s post. This will be the final of Hexagon Stars Diamond Circles Quilt.

Hexagon Stars Diamond Circles Quilt Susie’s-scraps.com

This post will primarily discuss the fabric requirements and cutting. All the links listed will give instructions for each part of the construction.

For those of you, who are new to this quilt, it is all rotary cut from strips and hand pieced. Quilt as desired. I chose to hand quilt this one.

I was delighted to finish this quilt for my son. It started about four years ago as a portable hand stitching project from Civil War Reproduction print scraps. Here are all the previous posts and instructions all the parts of making this quilt.

Stitching by the Pool – Six Pointed Stars Antique Inspired

Six Pointed Hexagon Stars Antique Inspired Part 2

Star Points for Hexagon Stars Antique Inspired – Part 3 Star in a Star

Hexagon Stars Quilt Antique Inspired – Part 4 Diamond Circles

Hexagon Stars Diamond Circles Quilt – Part 5 Making the Columns

Hand Quilting Hexagon Stars and Diamond Circles Commenced

Finished quilt size 82” x 89”.

Fabric Requirements and Cutting

Part One Stitching by the Pool – Six Pointed Stars Antique Inspired

For the Six Pointed Stars;

From at least 42 assorted 2 1/2” width of fabric strips in medium and dark prints. (approximately 3 yards/metres or a jelly roll) for the six pointed stars. Sub Cut 252 60 degree diamonds to make 42 of the Six Pointed Stars Antique Inspired.

Part Two Six Pointed Hexagon Stars Antique Inspired Part 2

From assorted neutral fabrics cut 42 of 2 1/2” strips. Sub Cut 252 of 60 degree diamonds from assorted light coloured neutral fabrics. As many different neutrals as available. Use a neutral jelly roll or approximately 3 yards / metres assorted neutral fabrics.

Part Three Star Points for Hexagon Stars Antique Inspired – Part 3 Star in a Star

12 assorted striped fabrics for the large star points. At least 3 yards / metres in total.

Cut 22 of 4 3/4 width of fabric strips. Sub Cut 266 of 60 degree triangles for the large star points and includes 14 extra to finish two of the opposing sides of the quilt.

Part Four Hexagon Stars Quilt Antique Inspired – Part 4 Diamond Circles

2 yards / metres of a white tone on tone fabric. Cut 23 of 2 1/2” width of fabric strips. Sub Cut 276 of 60 degree diamonds.

2 yards / metres of a rose pink print. Cut 23 of 2 1/2” width of fabric strips. Sub Cut 276 of 60 degree diamonds.

Construct 138 completed pink and white diamonds made from the 276 white and 276 rose print diamonds.

Putting the Hexagon Stars Diamond Circles Quilt Together

Follow the instructions for Hexagon Stars Diamond Circles Quilt – Part 5 Making the Columns

Quilting Suggestion

Hand Quilting Hexagon Stars and Diamond Circles Commenced
Simple Approach to Hand Quilting susies-scraps.com

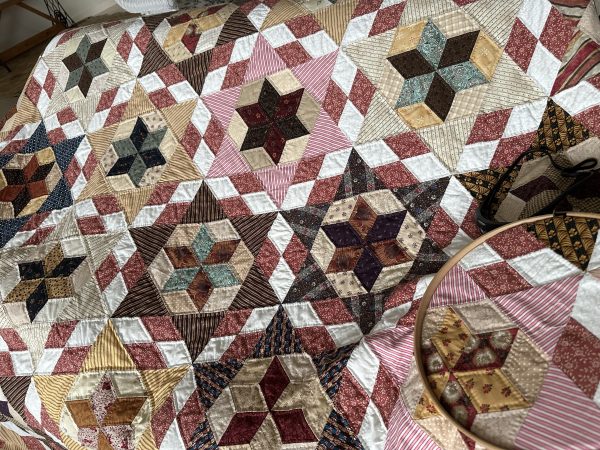
Hand Pieced and Hand Quilted Hexagon Stars Diamonds Circles

Hexagon Stars Diamond Circles Quilt susies-scraps.com

This is a wonderful quilt to make. The journey was lovely. It is a good size and I really like the antique look. Maybe you will join me? Feel free to email me with any questions or comments.

Hexagon Stars Diamond Circles Quilt Susie’s-scraps.com

Happy quilting making and may peace be with you all.

If you enjoyed this post, you may also like

Starmania Trip Around the World Quilt

Grandmother’s Flower Garden Quilt Like Grandma Used to Make

Great Granny Stars Quilt and Pattern Making a Mystery Quilt – Part 2

The Spinner Quilt – Part 3

Susie

© Susan Stuklis 2026
Hexagon Stars Diamond Circles Quilt – Part 5 Making the Columns

Hexagon Stars Diamond Circles Quilt – Part 5 Making the Columns

Hello Dear Friends and Readers and welcome to today’s post. I am excited to be putting this quilt top together now. Here is the link to the previous post Hexagon Stars Quilt Antique Inspired – Part 4 Diamond Circles

For those of you who may have missed earlier posts, I started this top as a portable hand piecing project two years ago. Stitching by the Pool – Six Pointed Stars Antique Inspired

That might seem like a long time but it also shows the cumulative benefit of time and what can be done in spare moments. In all honesty I have really enjoyed the process. The trick is to make sure that some pieces are prepared and organised into a little project bag which is ready to go at any time. Here is a link to the project bags I use.

Patchwork Celebration Bags – Antique Japanese Style – Tutorial

During the last 18 months when my MIL was ill, it was a comforting therapy to have with me as we often travelled interstate to help her whilst she was ill and to be with her.

I can highly recommend having a hand piecing project within easy reach, as we never know what lies ahead……

Anyhow, this is not a negative post, I have just returned from a yoga retreat, which was a true challenge for sure. My aim is to try and stay as fit and flexible as possible so that I can keep on doing the things I love including maintaining this blog and making quilts which I can share with you all. Whilst on retreat I was able to put my columns together in the evenings.

Hexagon Stars Diamond Circles – Making the Columns

I have made seven columns and in the last post I showed how I added three of the four patch diamonds to most of the stars like this. Hexagon Stars Quilt Antique Inspired – Part 4 Diamond Circles

Hexagon Stars Diamond Circles Quilt - Part 5 Making the Rows susies-scraps.com

There will be four full columns of six stars alternating with three columns of five stars with a half star at each end. Here are the two different columns.

Hexagon Stars Diamond Circles Quilt - Part 5 Making the Rows susies-scraps.com
Hexagon Stars Diamond Circles Quilt – Part 5 Making the Rows susies-scraps.com

In order to finish the columns of five star blocks I cut a star block in half with the rotary cutter.

Hexagon Stars Diamond Circles Quilt - Part 5 Making the Rows susies-scraps.com
Hexagon Stars Diamond Circles Quilt – Part 5 Making the Rows susies-scraps.com

It is just a matter of stitching the stars together into the columns, then the seven columns are ready to be stitched together.

Hexagon Stars Diamond Circles Quilt - Part 5 Making the Rows susies-scraps.com
Hexagon Stars Diamond Circles Quilt – Part 5 Making the Rows susies-scraps.com

These are added to the ends of the three columns of five stars.

Hexagon Stars Diamond Circles Quilt - Part 5 Making the Rows susies-scraps.com
Hexagon Stars Diamond Circles Quilt – Part 5 Making the Rows susies-scraps.com

Here are all the seven columns laid out ready to be sewn together.

Hexagon Stars Diamond Circles Quilt - Part 5 Making the Rows susies-scraps.com
Hexagon Stars Diamond Circles Quilt – Part 5 Making the Rows susies-scraps.com

Hexagon Stars Diamond Circles – Finishing the Sides

I cut four of the rose pink and white diamonds in half to fill in at the ends of the four columns of six stars.

Hexagon Stars Diamond Circles Quilt - Part 5 Making the Rows susies-scraps.com
Hexagon Stars Diamond Circles Quilt – Part 5 Making the Rows susies-scraps.com

I understand that this may not be the most correct way to finish these ends, however, the truth is, that I ran out of the rose pink fabric so it was the best solution. Finished is better than perfect! Besides that it simplifies the process.

For the sides I added leftover triangles previously cut from making the hexagon stars. and a half triangle at the four corners to square it up.

Hexagon Stars Diamond Circles Quilt - Part 5 Making the Rows susies-scraps.com
Hexagon Stars Diamond Circles Quilt – Part 5 Making the Rows susies-scraps.com

Hand Stitching the Seven Columns Together

I found it most helpful to use binding clips to hold the columns together while I was stitching them. It’s way easier than using pins and it avoids being pricked by the pins during the process. Because it’s necessary to pivot along each column to accommodate the triangles and diamond shapes, the binding clips hold the fabric in place nice and firmly. this makes the process very easy and enjoyable.

Hexagon Stars Diamond Circles Quilt - Part 5 Making the Rows susies-scraps.com
Hexagon Stars Diamond Circles Quilt – Part 5 Making the Rows susies-scraps.com

I will be looking forward to hand quilting this top.

I hope you are enjoying some stitching today.

Ifyou enjoyed this post, you may also like,

Scrappy Diamonds Blocks

Grandmother’s Flower Garden Quilt Like Grandma Used to Make

Scrappy Diamonds Kaleidoscope Beauty Star Medallion Quilt – Part 3

Susie

© Susan Stuklis 2024

Hexagon Stars Quilt Antique Inspired – Part 4 Diamond Circles

Hexagon Stars Quilt Antique Inspired – Part 4 Diamond Circles

Hello Dear Friends and Readers and welcome to today’s post. I had a beautiful email from Karen M who was keen to know how the next part of our Hexagon Stars Antique Inspired was progressing.

Today, I am going to show you the next step in these Hexagon Stars and how we are going to put them together. I’ve been itching to get onto this project and like many of us. I probably have had too many on the go, but having said that, this is the nature of being a textile artist. We never stop wanting to create! I think that’s a good thing. Just because textiles are our medium, does not mean that we need to limit our artistic abilities because it happens that our art is so tangible and also utilitarian .

So here we are with a lovely handpiecing project. The reason I have slowed down on this one is not because of lack of motivation, but more because it began as a travel project, but now the stars are growing so I need to be doing this more at home.

I am very happy with how they are coming along and loving the antique look. Here are the links to the first three parts;

Stitching by the Pool – Six Pointed Stars Antique Inspired

Six Pointed Hexagon Stars Antique Inspired Part 2

Star Points for Hexagon Stars Antique Inspired – Part 3 Star in a Star

Requirements for Hexagon Stars Quilt Antique Inspired – Part 4 Diamond Circles

White on white print 2 ½” width of fabric (WOF) strips

Rose/burgundy pink 2 ½” width of fabric (WOF) strips

Cutting the Diamonds for Hexagon Stars Quilt Antique Inspired – Part 4 Diamond Circles

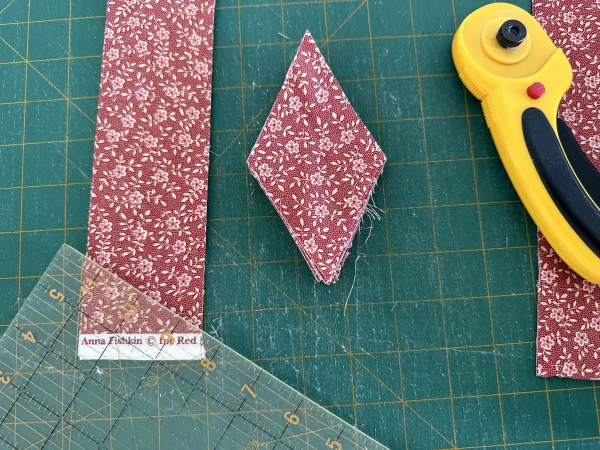
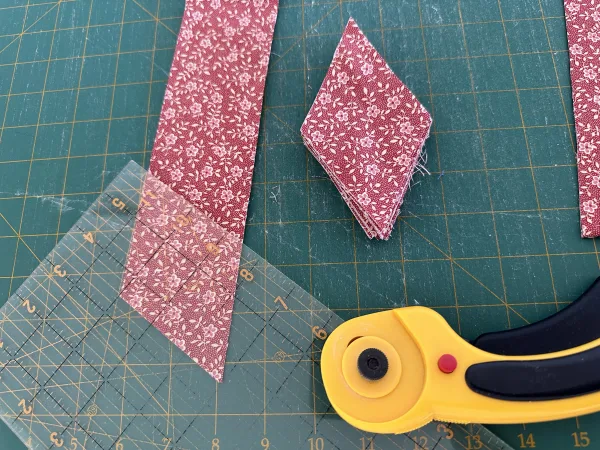
From the white on white and rose/burgundy 2 ½” WOF strips, place the 60° line of your ruler the top edge of the strip. Make the first cut. Move the ruler along 2 ½” keeping the 60° line on the top edge. Cut 2 ½“ diamonds from the strips. Approximately 12 diamonds can be cut from each strip.

Make the first cut near the end of the strip with the 60° mark at the top edge of the WOF strip as pictured below. My strip is folded into four.

Hexagon Stars Quilt Antique Inspired - Part 4 Diamond Circles susies-scraps.com
Hexagon Stars Quilt Antique Inspired – Part 4 Diamond Circles susies-scraps.com

After the first cut, move the ruler up so that the 2 ½“ mark on the ruler lines up with the first cut. Then cut along the edge to make the first set of diamonds.

Hexagon Stars Quilt Antique Inspired - Part 4 Diamond Circles susies-scraps.com
Hexagon Stars Quilt Antique Inspired – Part 4 Diamond Circles susies-scraps.com

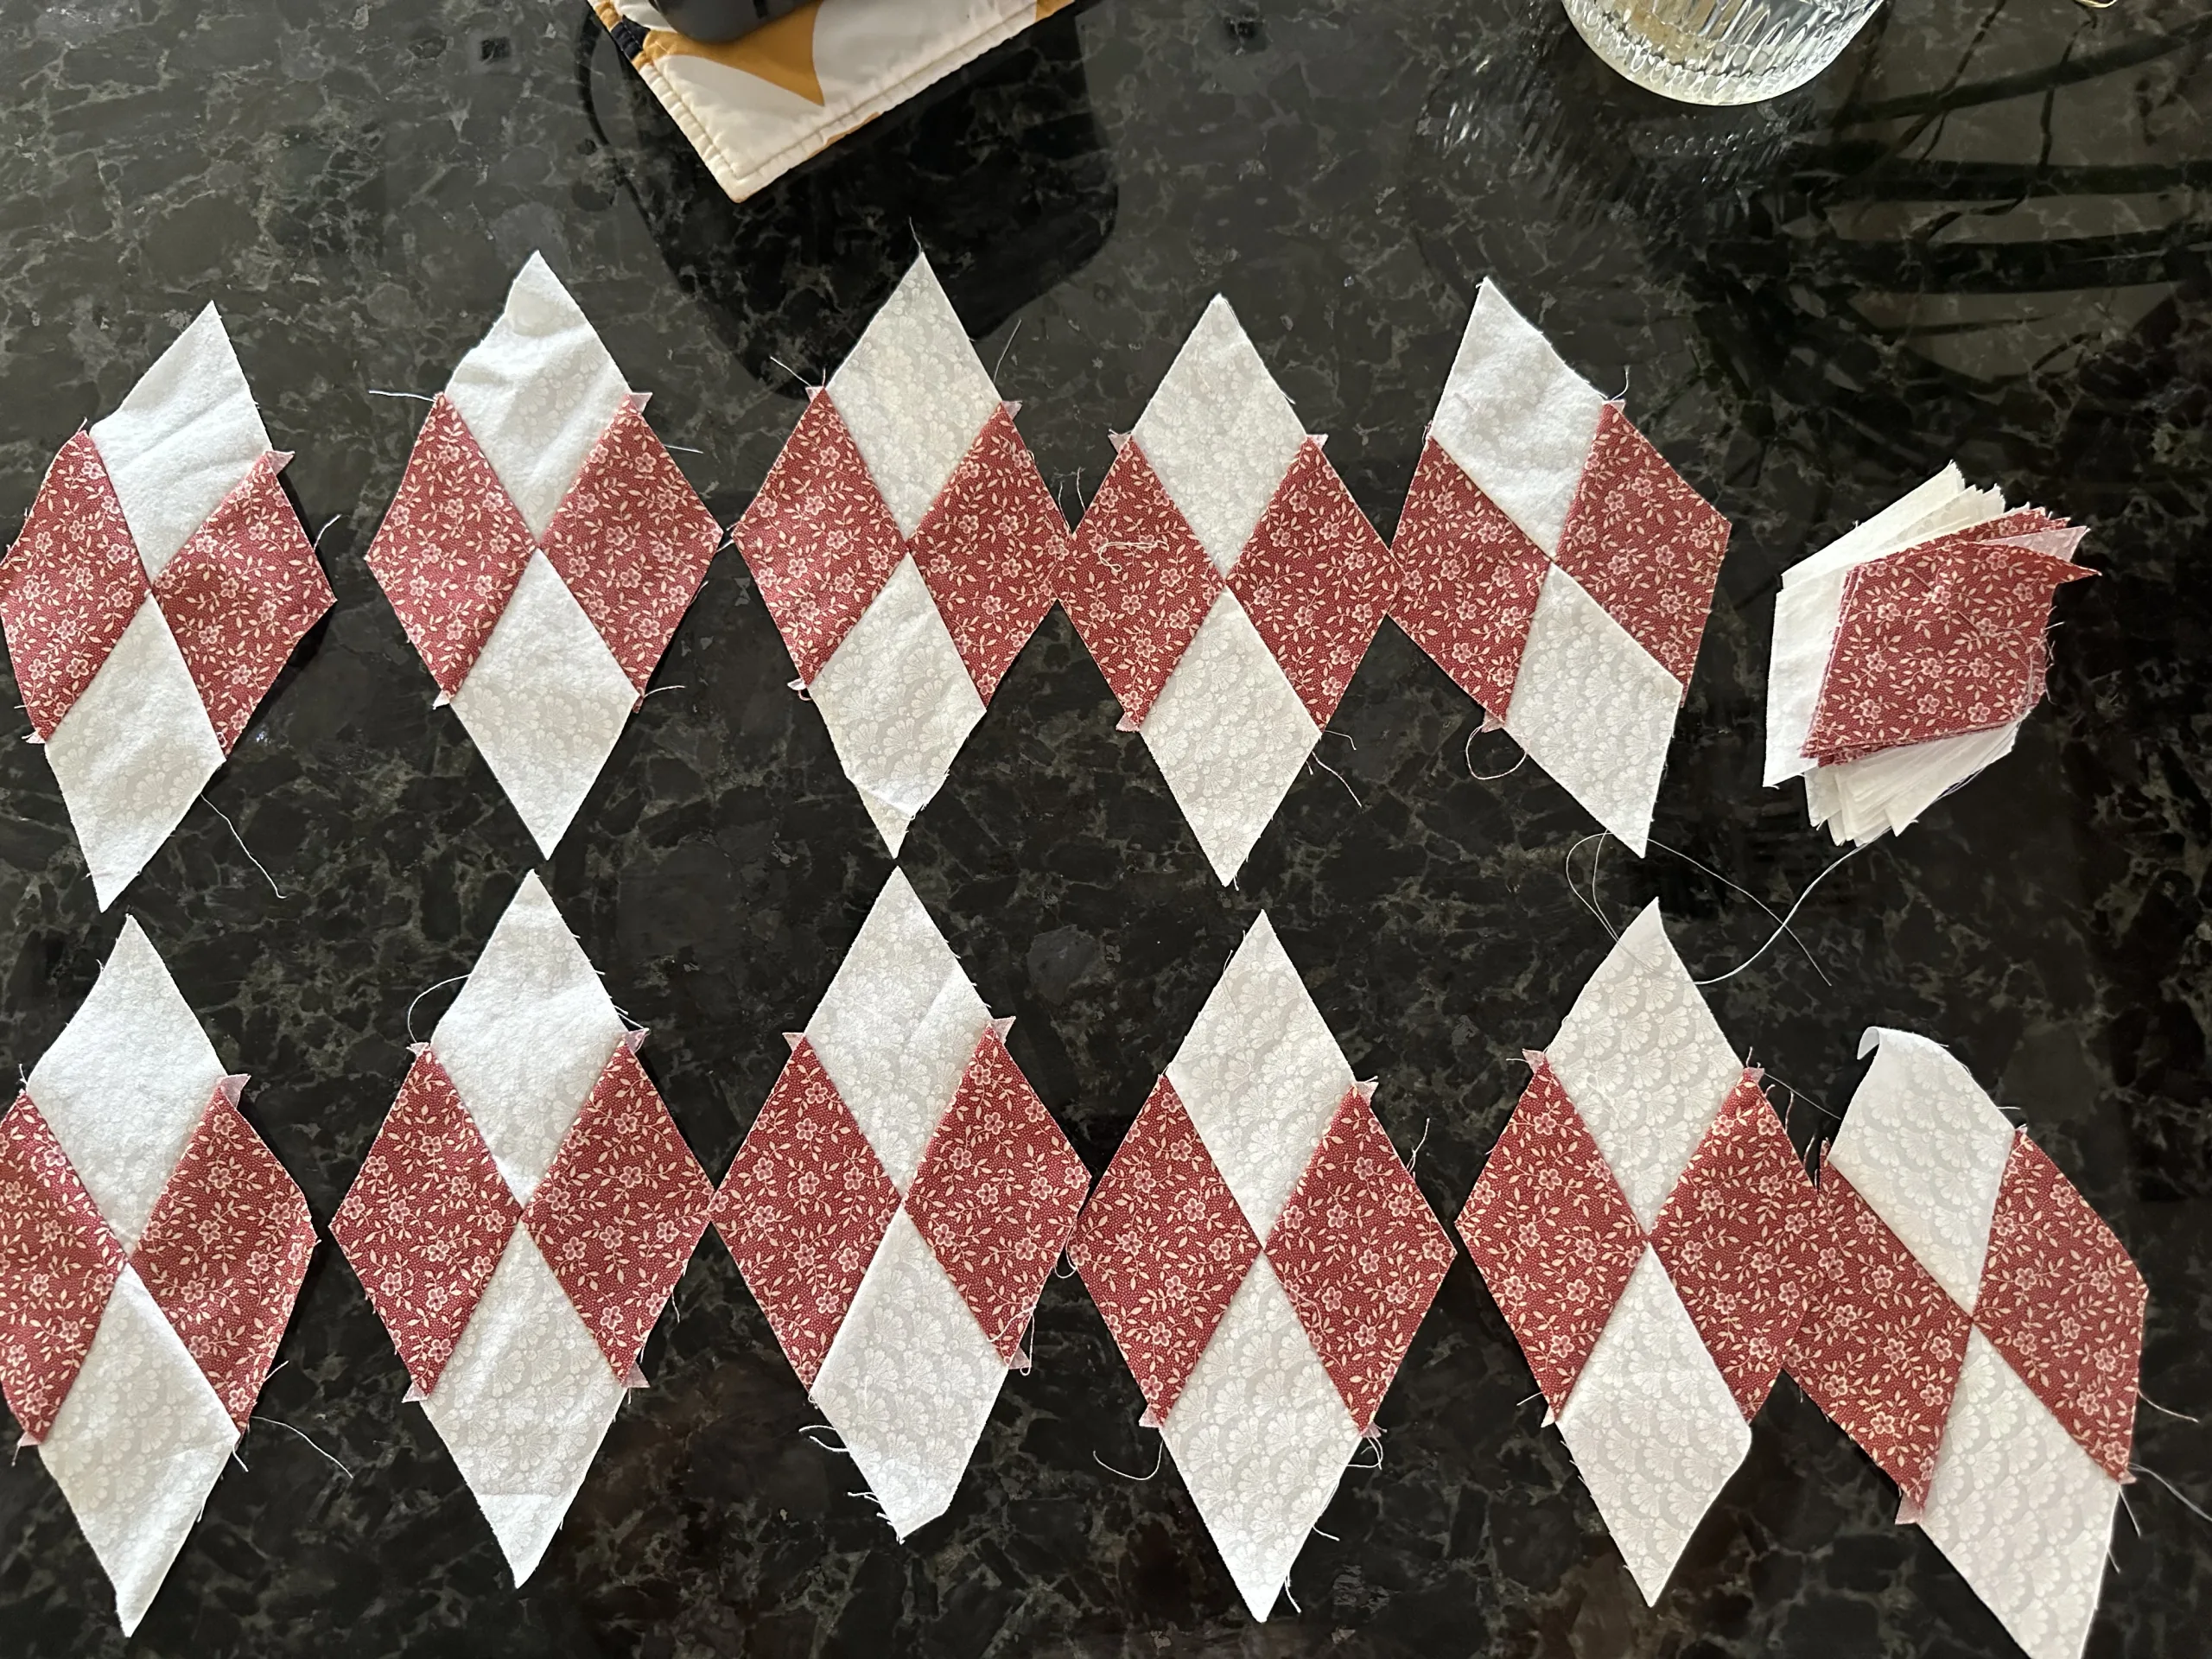
Making the Rose Pink and White Diamonds

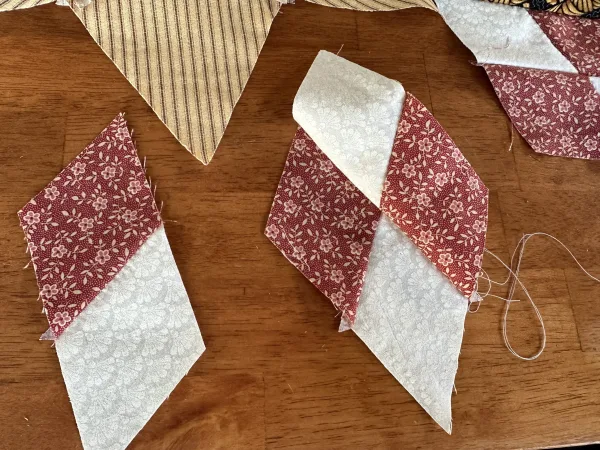
As for constructing the hexagon stars, now we will stitch together 60°, diamonds from the white on white and rose/burgundy diamonds.

Layout your diamonds, two of the rose pink on the sides and the two white diamonds at each end.

Hexagon Stars Quilt Antique Inspired - Part 4 Diamond Circles susies-scraps.com
Hexagon Stars Quilt Antique Inspired – Part 4 Diamond Circles susies-scraps.com

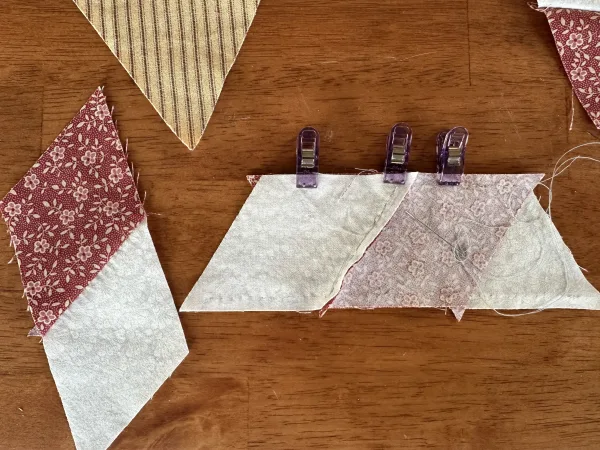
Make sure that the white diamonds are at the sharp ends. This is important for the pattern placement. At this point I found that using binding clips is a nice way of holding the pieces together ready for stitching. This also avoids getting pin pricks.

Hexagon Stars Quilt Antique Inspired - Part 4 Diamond Circles susies-scraps.com
Hexagon Stars Quilt Antique Inspired – Part 4 Diamond Circles susies-scraps.com

Hand stitch the diamonds together using a quarter inch seam and small stitches, taking care to keep the centre point nice and crisp. Here is how the diamonds are looking.

Sew the Rose Pink and White Diamonds to the Hexagon Stars

Hexagon Stars Quilt Antique Inspired - Part 4 Diamond Circles susies-scraps.com
Hexagon Stars Quilt Antique Inspired – Part 4 Diamond Circles susies-scraps.com

Line up a rose pink and white diamond to the edge of one of the Hexagon Stars Star Points for Hexagon Stars Antique Inspired – Part 3 Star in a Starright sides together. Beginning approximately 1/4“ from the end begin stitching using small stitches until approximately 1/4“ from the end of the side of the diamond. The last stitch should be at the 120 degree corner at the base of the star points.

Using the binding clips to hold the pieces together works well here too.

Now pivot the diamond so that the adjacent side now lines up with the next side of the adjacent star point. Continue stitching until 1/4“ from the end.

Attach three diamonds in the same manner to each Hexagon Star along one side as pictured below.

Hexagon Stars Quilt Antique Inspired - Part 4 Diamond Circles susies-scraps.com
Hexagon Stars Quilt Antique Inspired – Part 4 Diamond Circles susies-scraps.com

At this stage, I’m not sure exactly how many diamonds we will need. Just ensure that you have sufficient white on whites and rose/burgundy prints to make a good number of diamonds. Obviously we can still be using scraps of strips of fabrics as long as they are in a similar colour, to give strength to the design. This is how they are starting to look. These are not stitched together yet, but I hope he can see how adding three diamonds to one side will make them easy to fit together when it comes time to stitch them together.

Hexagon Stars Quilt Antique Inspired - Part 4 Diamond Circles susies-scraps.com
Hexagon Stars Quilt Antique Inspired – Part 4 Diamond Circles susies-scraps.com

Thank you for joining me today and thank you Karen M for inspiring me to get moving on this next installment of Hexagon Stars Quilt Antique Inspired – Part 4 Diamond Circles. . Best wishes to you all.

If you enjoyed this post, you may also like

Hexagon Star Snowflake Trivet

Hexagons Charming Free and Easy

While We Wait

If you prefer a machine stitched project, you might enjoy my previous post Rings Eternal Quilt

Susie

© Susan Stuklis 2023