Amish Hexagons from Circles – Part 4 Coming Together
Hello Dear Friends and Readers and a warm welcome to today’s post. Today I will share the next installment of of Amish Hexagons from Circles. This is a hand stitching project. For those of you who have been following along, you may already appreciate that I love to have a hand stitching project on the go, concurrently with machine stitched works. It is really very nice to have a little project for all those moments when time is available but a machine isn’t. This can extend to traveling, waiting for appointments or to pick someone up or evenings when it’s nice to put one’s feet up and still have a needle in hand. While We Wait
A Helpful Tool
Normally, I am not in the habit of recommending or promoting products, however in this instance I would like to share that I have been using these Clover sharp needles for this project. They really are sharp and make sewing 🧵 these hexagons very easy. Hexagons from Circles
Amish Hexagons from Circles – Part 4 Coming Together susies-scraps.com
The Coming Together – Round Four
In the previous post of this project Amish Hexagons from Circles Round Three Making A Floral Path I showed how I used many different floral fabrics to complete the 3rd round of the units. Now it is time to put them together. I decided to to use a pale pink solid fabric as my background. The reasoning for this is, I believe, that this quilt will have an antique appearance. I felt that it would be complementary to all the other fabrics. As a note, I have several metres of this pale pink solid fabric fabrics to cut my circles. Each unit will require 24 of the 3” circles.
Amish Hexagons from Circles – Part 4 Coming Together susies-scraps.com
Amish Hexagons from Circles – Part 4 Coming Together susies-scraps.com
Making Unit 2
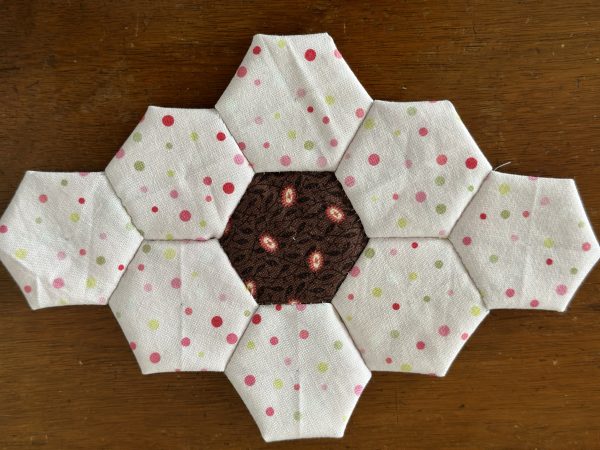
Then they will be joined together using two of these initial units Hexagon Flowers Antique Inspired By adding three of the pale pink units to each one will form a triangle shaped unit. We can call this Unit 2. As pictured below.
Amish Hexagons from Circles – Part 4 Coming Together susies-scraps.com
Amish Hexagons from Circles – Part 4 Coming Together susies-scraps.com
Make two of the Unit 2 for every one of the first unit. These units are the bridge for the Floral Path rounds.
This, incidentally, makes it very easy to join the rows together. Making a Grandmothers Garden quilt can be somewhat challenging as normally the units are offset. By adding a bridging unit, it allows for creating rows which can then be sewn together later. I hope that makes sense.
Amish Hexagons from Circles – Part 4 Coming Together susies-scraps.com
Progress So Far
This is how it looks so far. I still have plenty do do, however this will give an idea of how the top is coming together.
Amish Hexagons from Circles – Part 4 Coming Together susies-scraps.com
Thank you for joining me today. Feel free to email me with any questions or comments.
That might seem like a long time but it also shows the cumulative benefit of time and what can be done in spare moments. In all honesty I have really enjoyed the process. The trick is to make sure that some pieces are prepared and organised into a little project bag which is ready to go at any time. Here is a link to the project bags I use.
During the last 18 months when my MIL was ill, it was a comforting therapy to have with me as we often travelled interstate to help her whilst she was ill and to be with her.
I can highly recommend having a hand piecing project within easy reach, as we never know what lies ahead……
Anyhow, this is not a negative post, I have just returned from a yoga retreat, which was a true challenge for sure. My aim is to try and stay as fit and flexible as possible so that I can keep on doing the things I love including maintaining this blog and making quilts which I can share with you all. Whilst on retreat I was able to put my columns together in the evenings.
Hexagon Stars Diamond Circles – Making the Columns
There will be four full columns of six stars alternating with three columns of five stars with a half star at each end. Here are the two different columns.
Hexagon Stars Diamond Circles Quilt – Part 5 Making the Rows susies-scraps.com
In order to finish the columns of five star blocks I cut a star block in half with the rotary cutter.
Hexagon Stars Diamond Circles Quilt – Part 5 Making the Rows susies-scraps.com
It is just a matter of stitching the stars together into the columns, then the seven columns are ready to be stitched together.
Hexagon Stars Diamond Circles Quilt – Part 5 Making the Rows susies-scraps.com
These are added to the ends of the three columns of five stars.
Hexagon Stars Diamond Circles Quilt – Part 5 Making the Rows susies-scraps.com
Here are all the seven columns laid out ready to be sewn together.
Hexagon Stars Diamond Circles Quilt – Part 5 Making the Rows susies-scraps.com
Hexagon Stars Diamond Circles – Finishing the Sides
I cut four of the rose pink and white diamonds in half to fill in at the ends of the four columns of six stars.
Hexagon Stars Diamond Circles Quilt – Part 5 Making the Rows susies-scraps.com
I understand that this may not be the most correct way to finish these ends, however, the truth is, that I ran out of the rose pink fabric so it was the best solution. Finished is better than perfect! Besides that it simplifies the process.
For the sides I added leftover triangles previously cut from making the hexagon stars. and a half triangle at the four corners to square it up.
Hexagon Stars Diamond Circles Quilt – Part 5 Making the Rows susies-scraps.com
Hand Stitching the Seven Columns Together
I found it most helpful to use binding clips to hold the columns together while I was stitching them. It’s way easier than using pins and it avoids being pricked by the pins during the process. Because it’s necessary to pivot along each column to accommodate the triangles and diamond shapes, the binding clips hold the fabric in place nice and firmly. this makes the process very easy and enjoyable.
Hexagon Stars Diamond Circles Quilt – Part 5 Making the Rows susies-scraps.com
I will be looking forward to hand quilting this top.
Hello Dear Friends and Readers and a warm welcome to today’s post. Recently, I had the loveliest email from a lady named Janet, who said she is 88, still quilting and loving it. She told me that she always makes her hexagons from circles. I found this very inspiring and so I thought I would follow advice from a very experienced and expert quilter and give it a try. Thank you Janet!
Maybe you are familiar with this process and although I do remember seeing it years ago, I have never used this method before and I am excited to give it a try today.
This lady said her hexies turned out perfect every time. That is an excellent recomendation! The only issue I guess, is working out the size of the circle to calculate the size of the finished hexagon.
Remembering that the hexagons are measured by the length of the side of the hexagon.
Requirements – Making Hexagons from Circles
This project will not cost you anything extra and you can recycle some things you have at home. Basic tools only are required. These are scissors for fabric and some all purpose scissors for cutting the templates, a pencil or marker, a needle and thread and your fabric scraps of course. No need to run to the shops! You can get started right away. Don’t you just love that? When inspiration strikes there is no delay!
By the way, I find this to be very gentle on the hands. No awkward cutting with rulers and rotary cutters.
Making template circles, will be my guide for cutting the fabric circles. I can honestly say this seems like a brilliant idea to me because once all the circles are marked, that can be a very nice evening project of cutting out the marked fabric circles. Also, if one was inclined to fussy cut, it would be very easy to mark circles over the right side of the fabric using a clear plastic template.
Just as an aside, In my honest opinion, cutting out actual hexagons is a bit of a pain. I have tried it and it was very time consuming. Then there is the traditional method of English Paper Piecing. I made my first ones like this Hexagons Charming Free and Easy. However paper templates are still required and it does make for quite a few extra steps.
I will use a whole lot of scraps and mark circles on them, just as you would if you were cutting out dough for scones or biscuits.
Very little thread is required to make each hexagon.
Making Templates for Hexagon Circles
I decided to make a test group of templates so that I could wok out the sizes of the circles required. In the first instance I gathered some lids and small containers to use to make the templates. I used an empty cardboard pasta box and an empty clear plastic bottle to make some experimental templates. Empty plastic milk bottles would be good too. If you wanted a non slip template you could use sandpaper sheets. Janet uses a CD as her template which is brilliant as it’s a perfect circle and easily replaceable.
Here is my collection so far.
Hexagons from Circles susies-scraps.com
I drew around the various size lids onto the cardboard and plastic circles and cut them out with all purpose scissors and measured them.
Cutting the Fabric Circles for Hexagons
Now it is a matter of using the templates of your choice to mark the fabric circles.
Lay the template on your fabric. use a pen or pencil to draw around the circle. Use small fabric scissors to cut out the circle. I cut several at a time.
Use a clear template if you wish to fussy cut. Here you can see the various template circles I made and the resulting hexagons.
Hexagons from Circles susies-scraps.com
Stitching the Hexagons from Circles
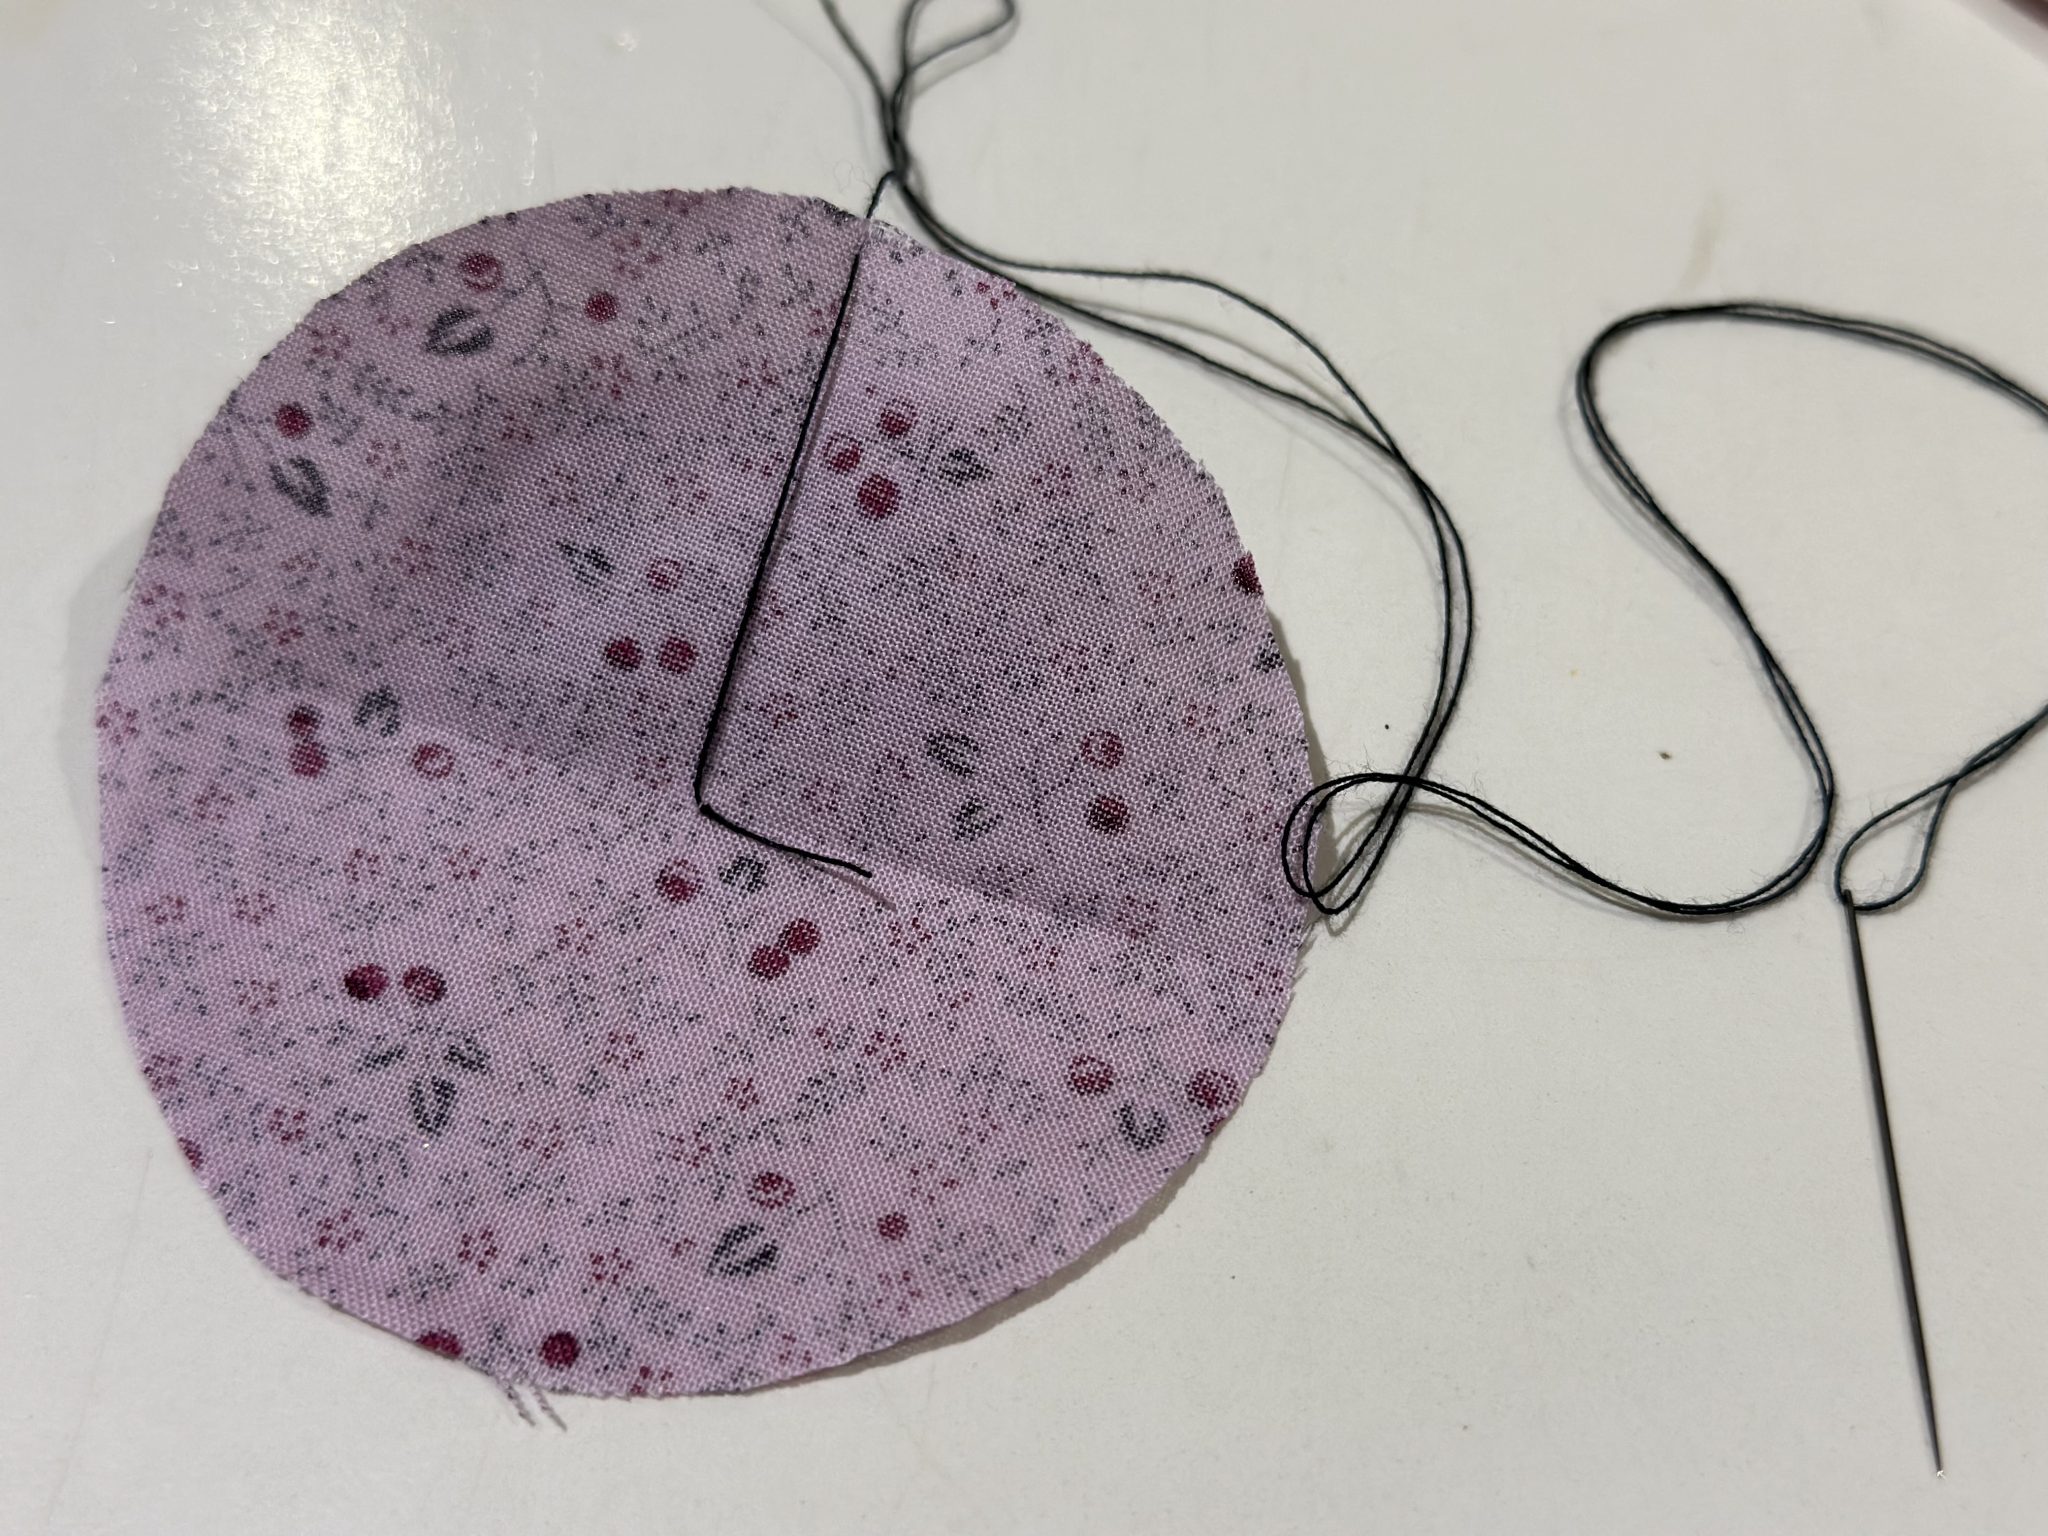
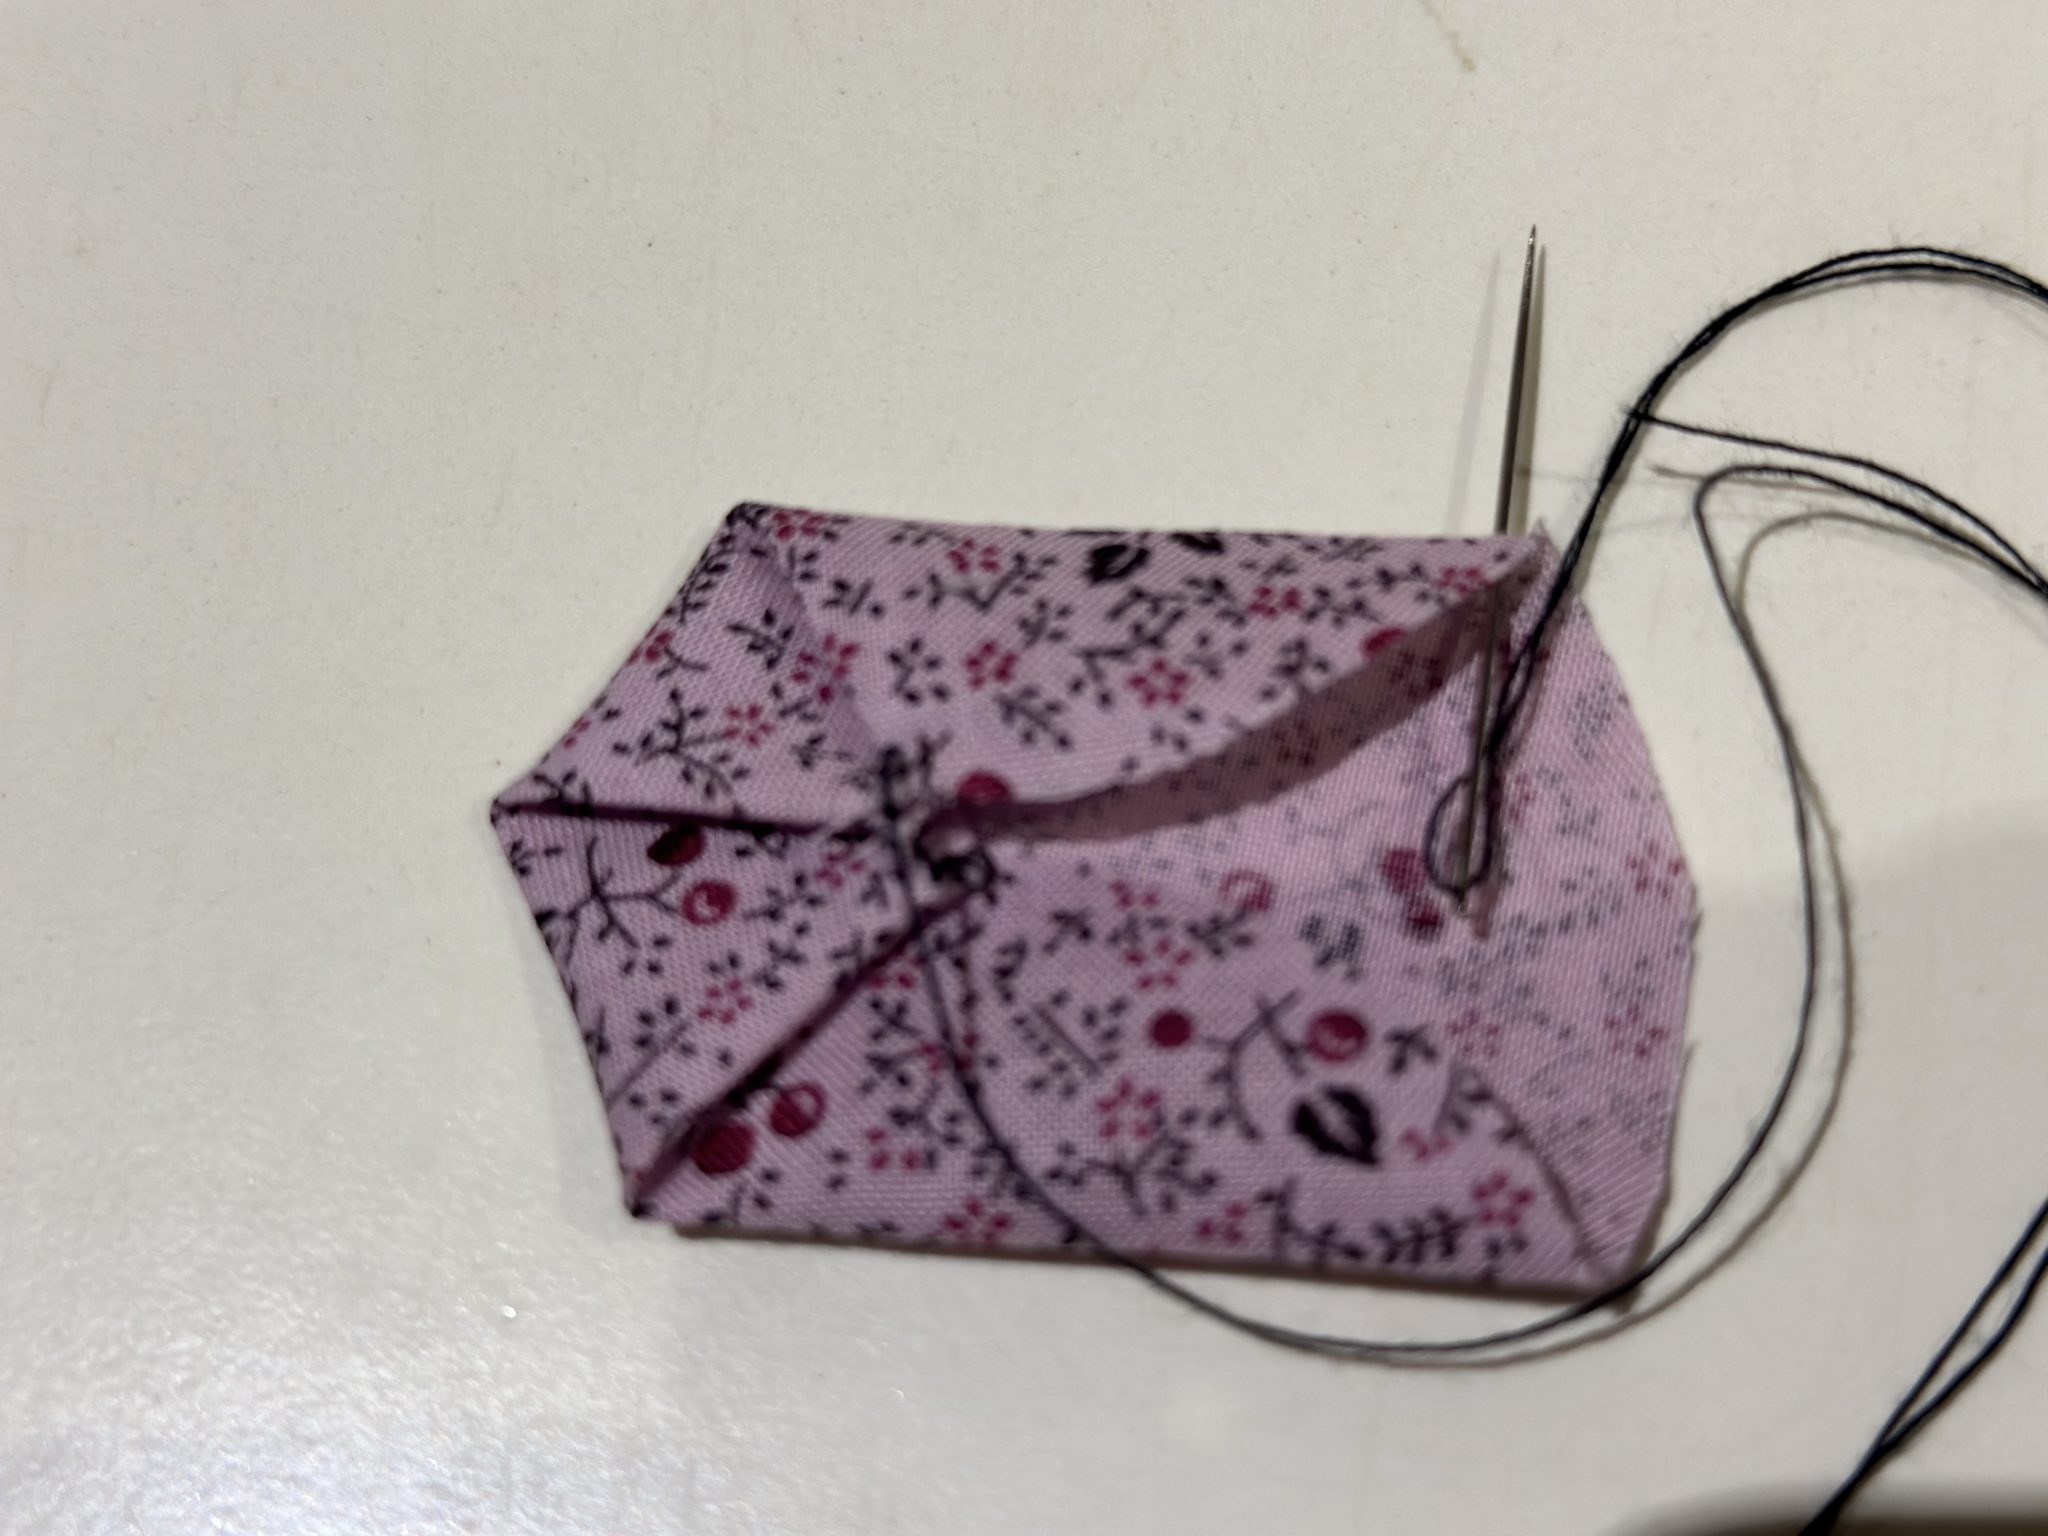
Once the circles are ready, fold each circle (only do this as you are about to sew) in half and then in quarters and lightly finger press just to find the centre of the circle.
With your needle and a neutral thread, thread pick up one or two threads from the centre of the circle. Secure that stitch. (I have used a black thread merely to demonstrate)
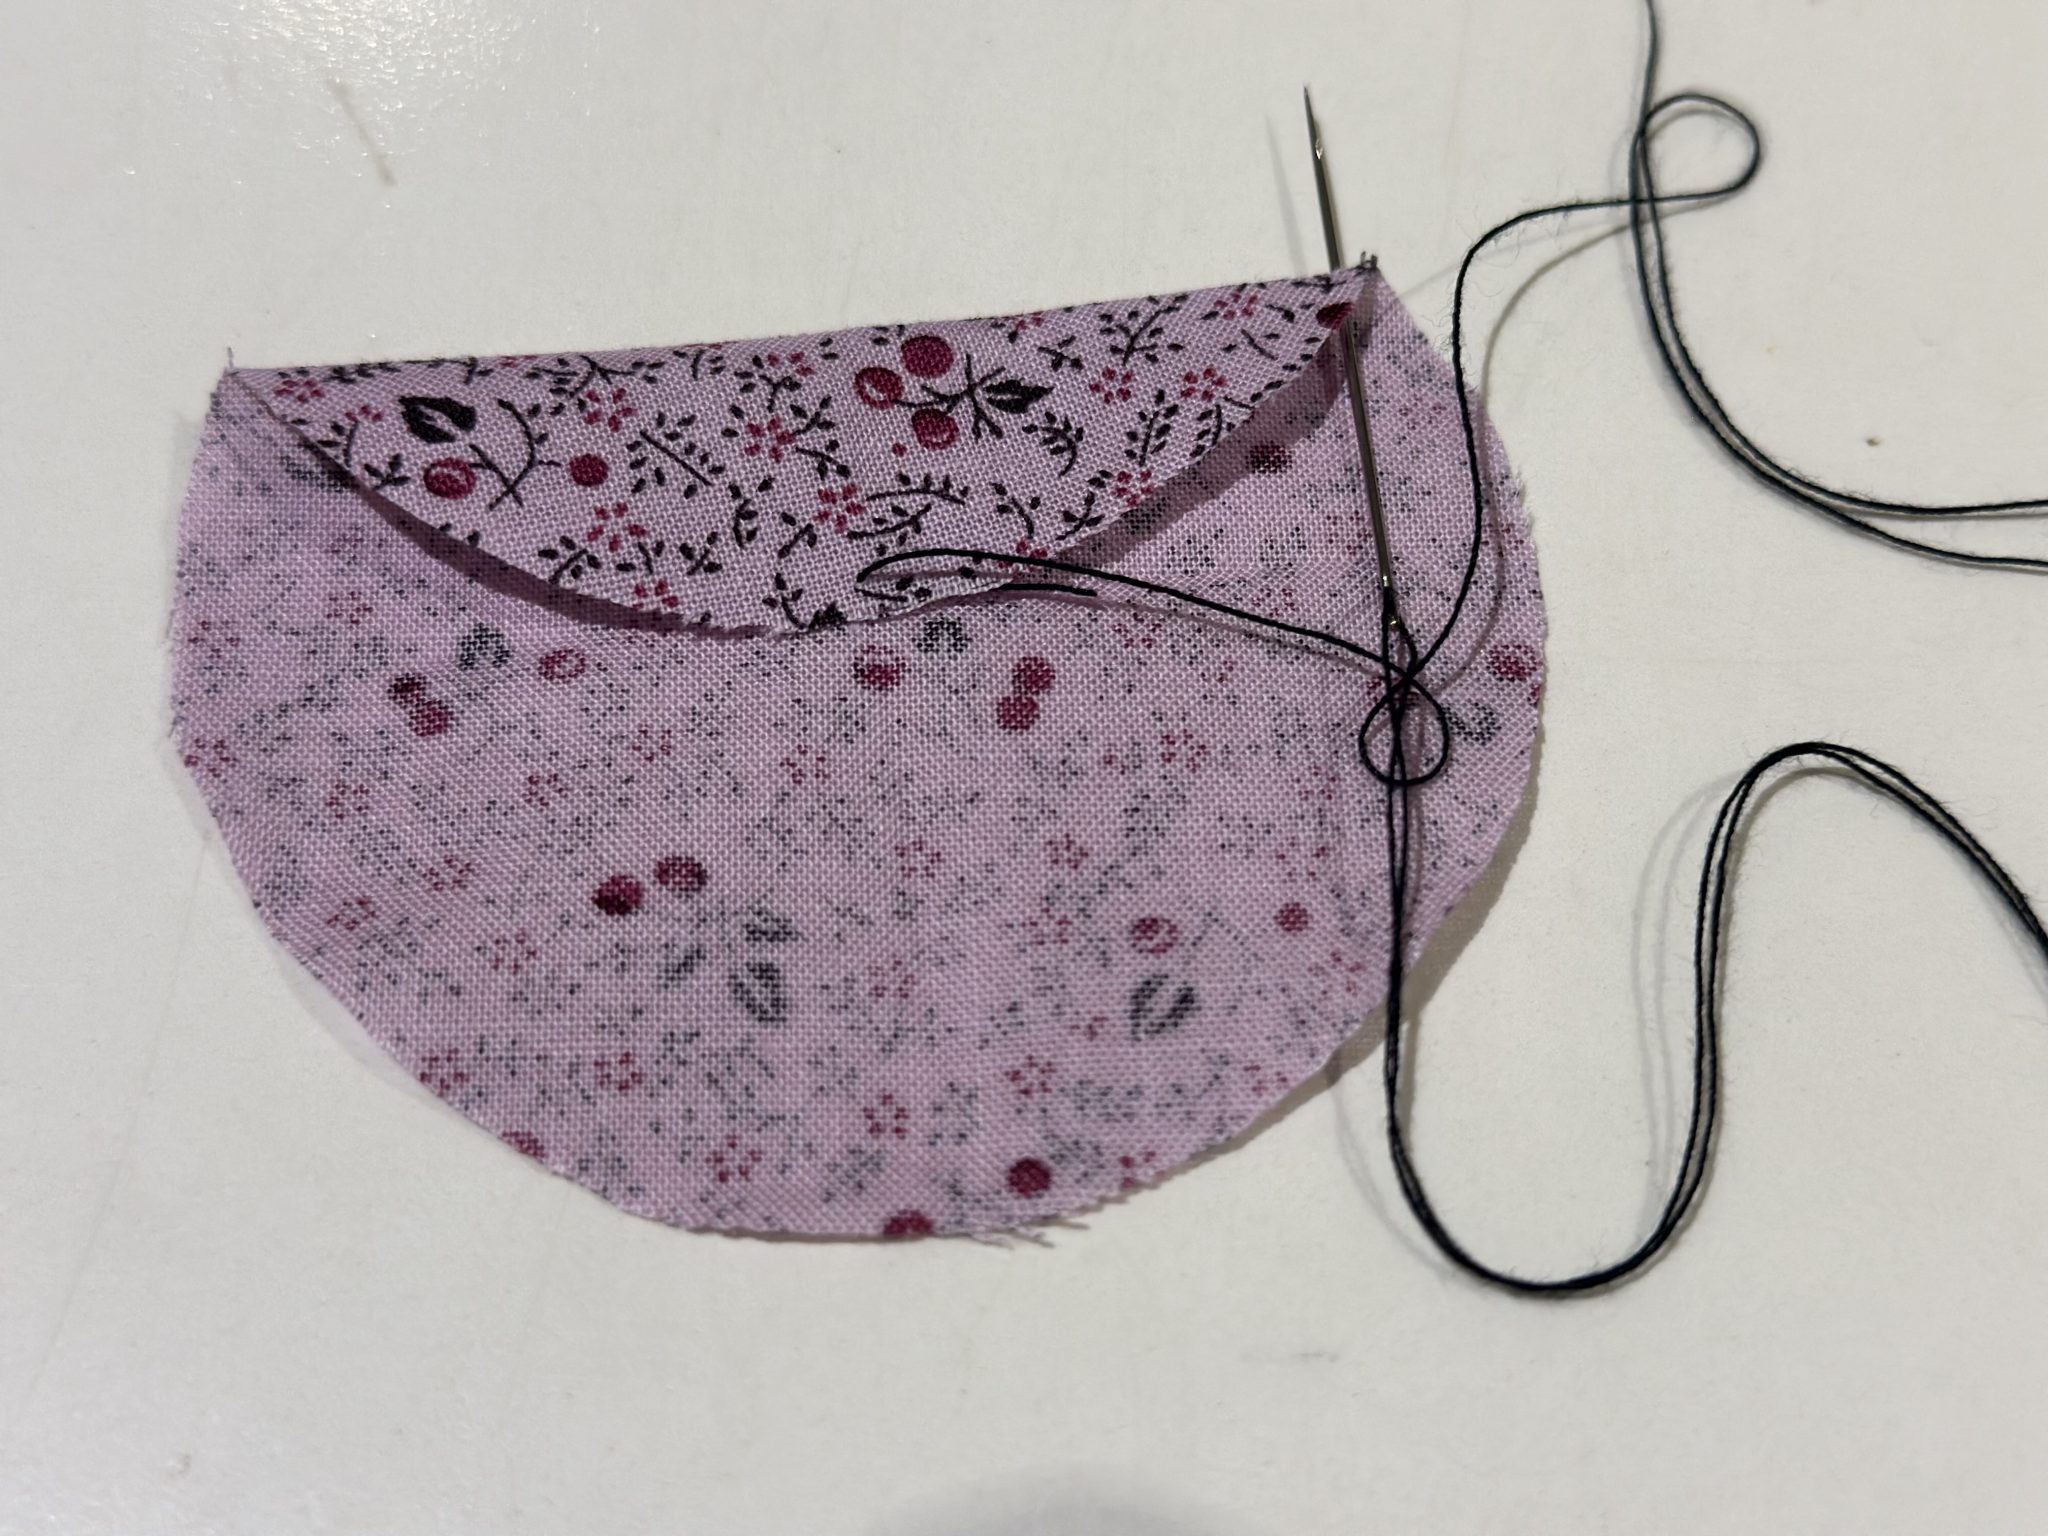
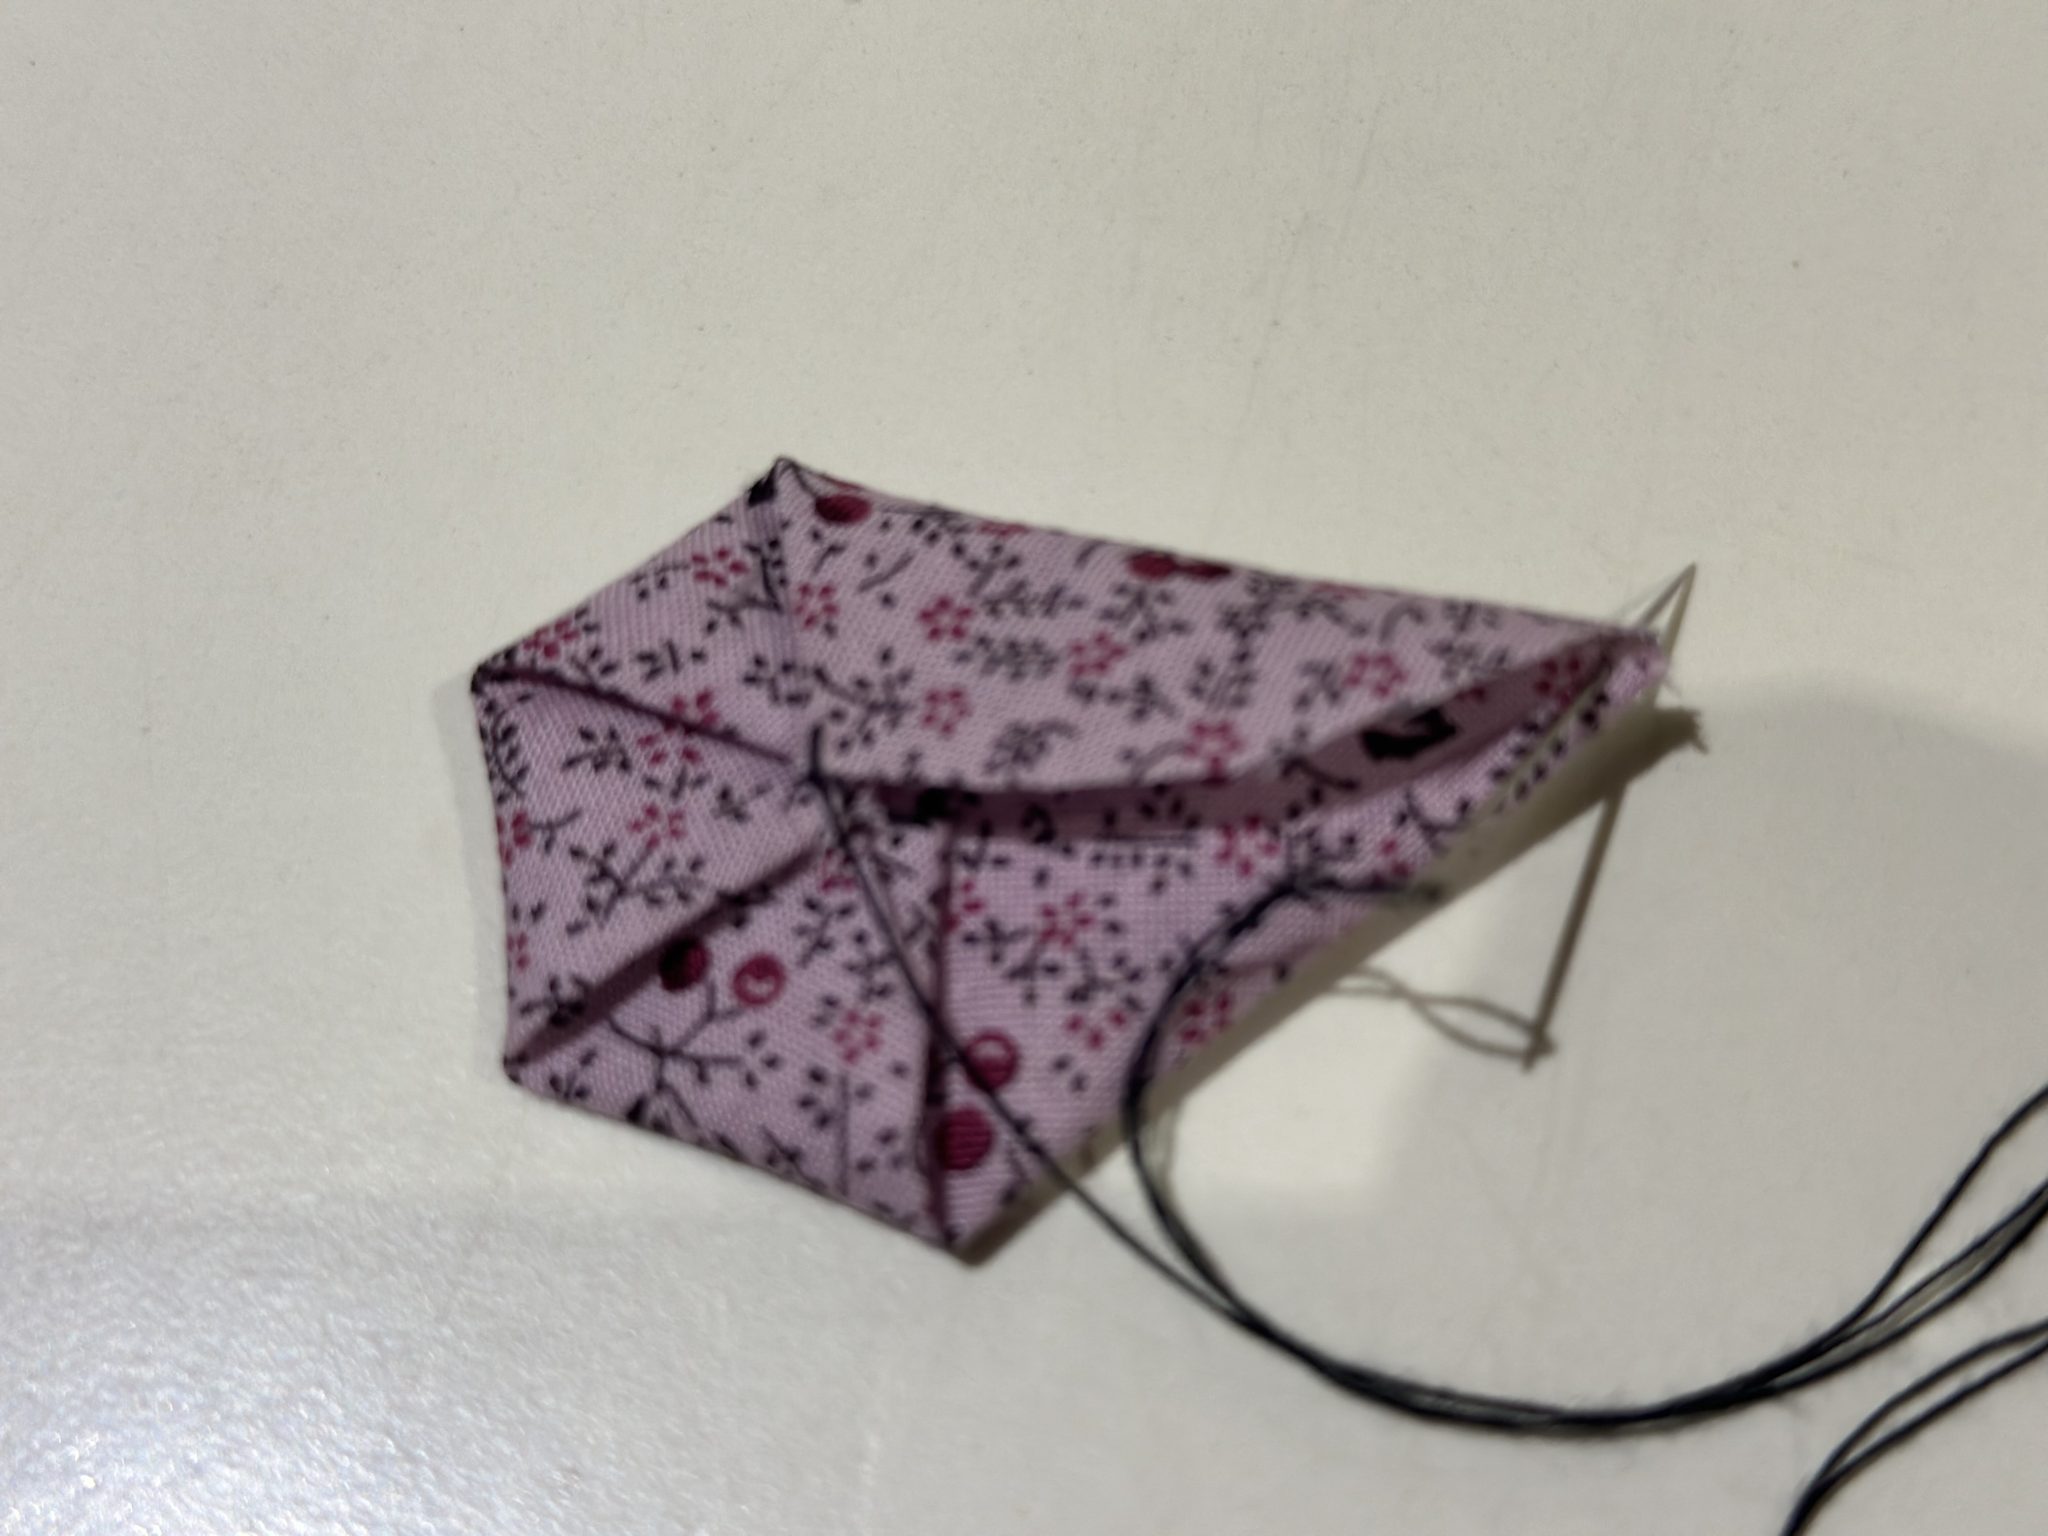
Then sew through the edge of the circle just a few mm or about a 1/8″ from the edge and bring that edge to the centre.
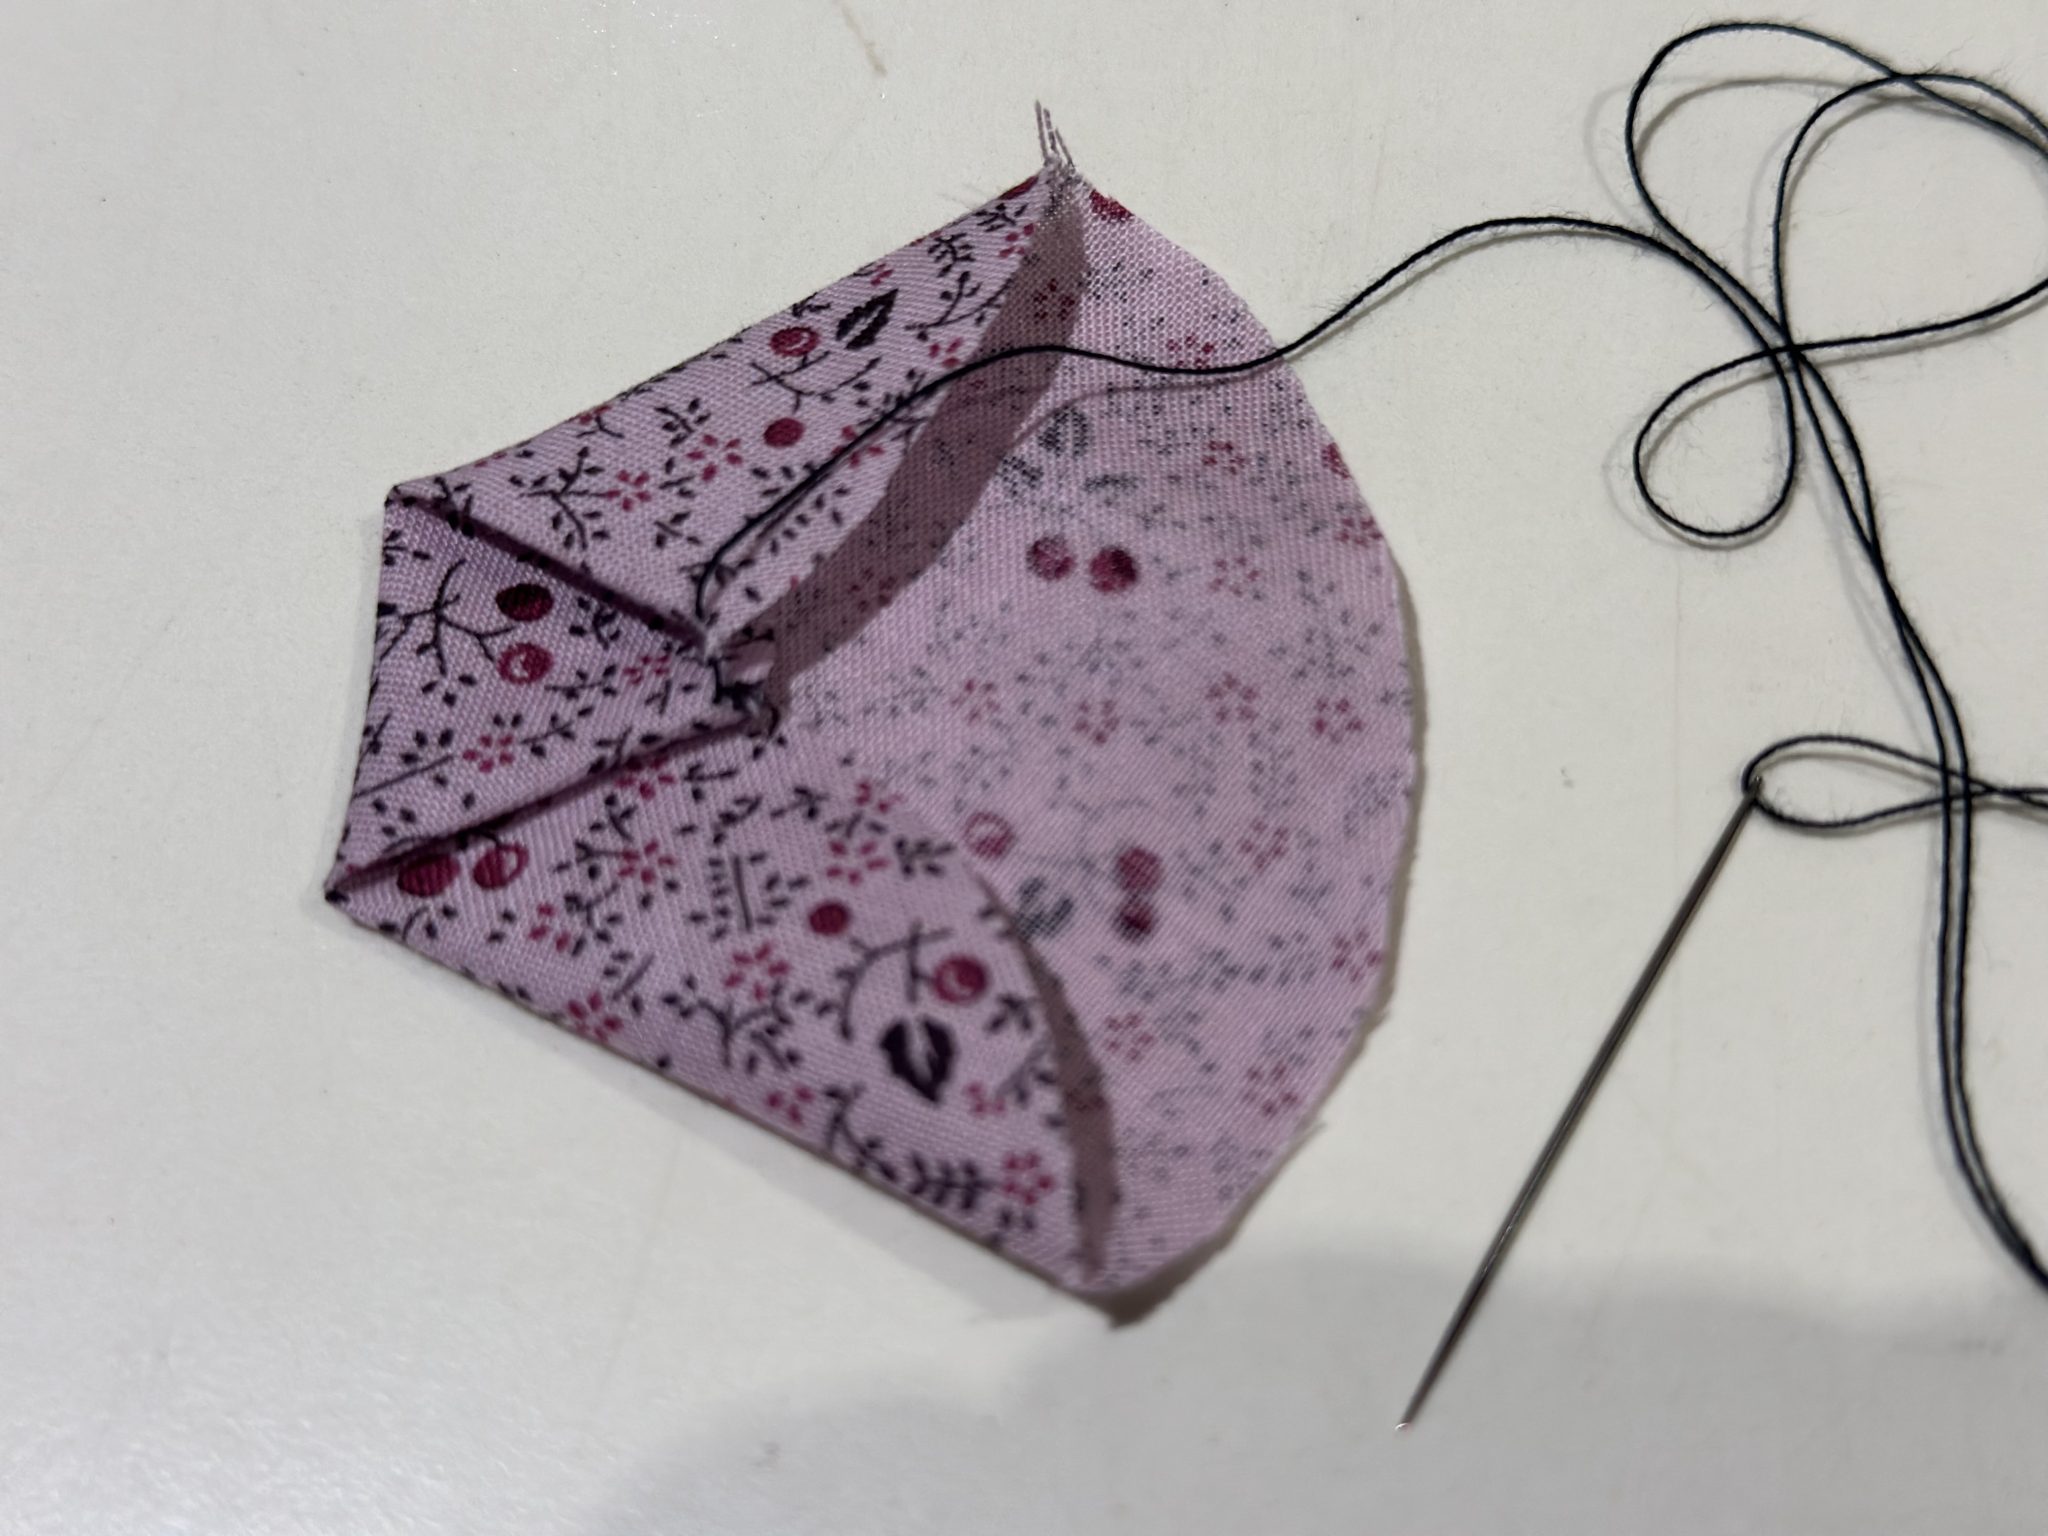
Lightly finger press the fold then put your needle through the edge of the pressed fold near the point using the same distance from the edge of the fabric. Bring that to the centre. and finger press the fold. The first side is made.
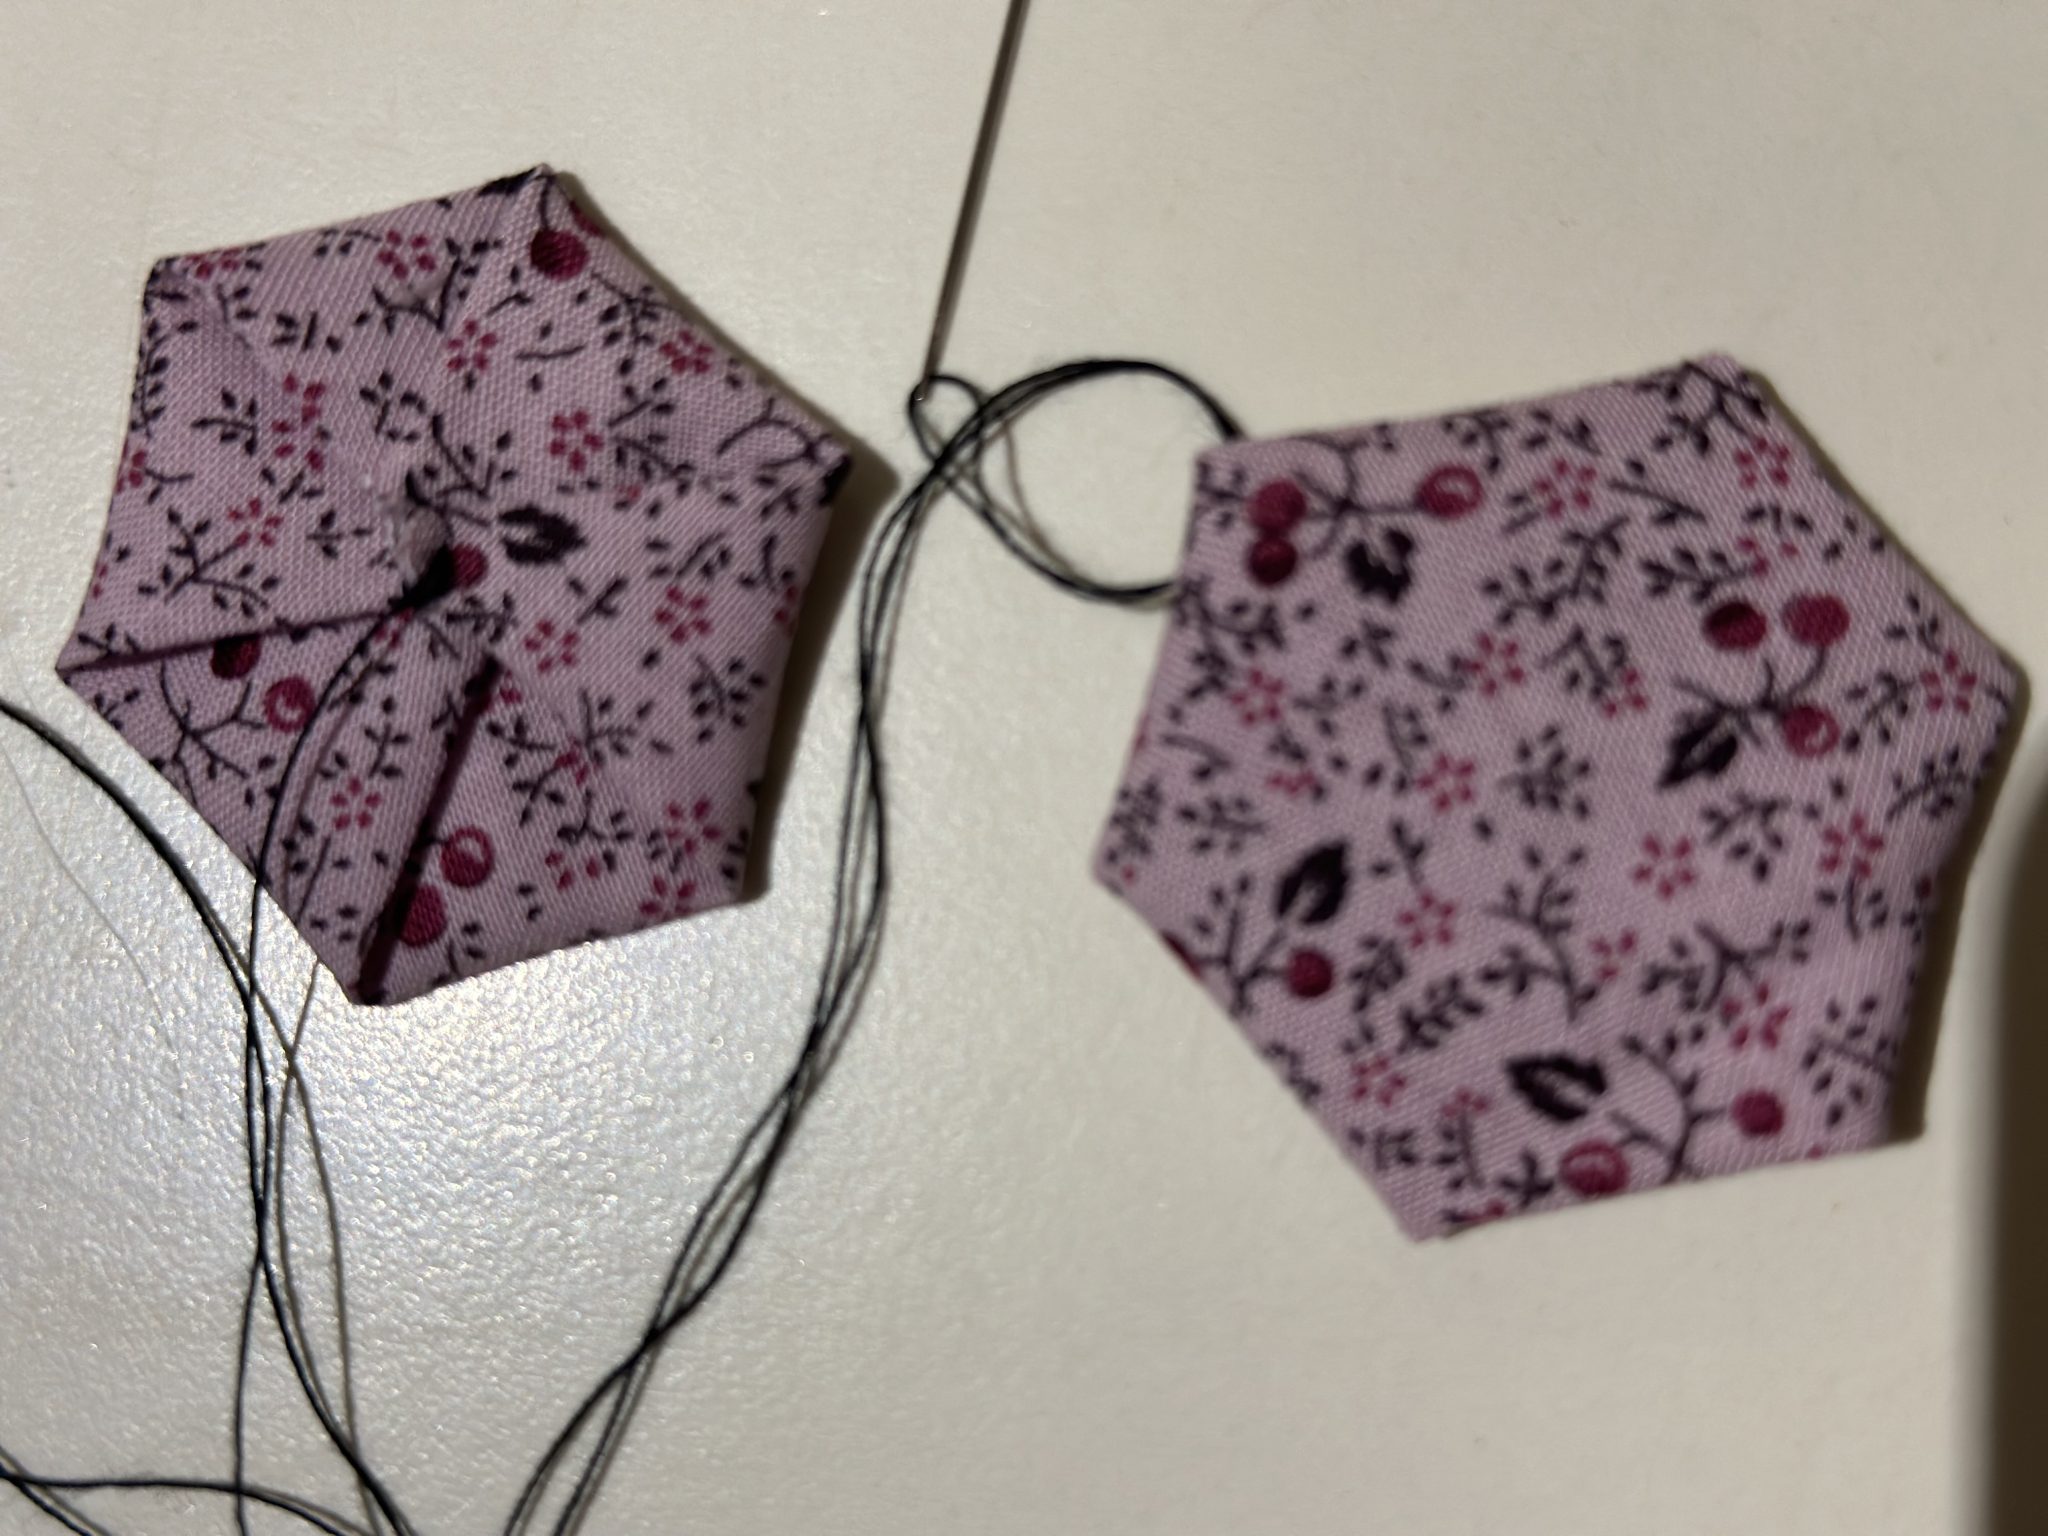
Repeat until all six sides of the hexagon are made.
Secure your stitch.
Hexagons from Circles susies-scraps.comHexagons from Circles susies-scraps.com
It us also possible to leave out step one. This is a bit tricker and will require more practice to make it even.
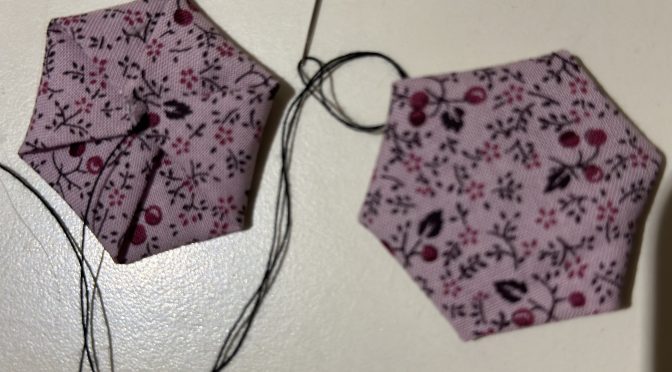
These are some of my experimental hexies. I think they turned out rather well.
Hexagons from Circles susies-scraps.com
Here is what they look like from the back. Rather neat, don’t you think?
Hexagons from Circles susies-scraps.com
NOTE There may be a slight anomaly in the size of the edges of the hexagons. Don’t worry. I believe this is due to the natural warp, weft and bias of the fabric. This will occur inherently because of the differing directional stretch of the fabric. Once they are sewn together it doesn’t matter. I think that preparation of the fabric is much more important, but that’s just me.
Here are some articles – you can decide for yourself.
Here is a rough guide to achieving the size of hexagon that you would like to make from a circle. Hexagon size is measured from the side of the hexagon, You will need to make your own test just to be sure.
1 3/4″ circle = hexagon of 1/2″
2″ circle = hexagon 9/16″
2 1/4″ circle = hexagon of 5/8″
2 1/2″ circle = hexagon of 3/4″
2 3/4″ circle = hexagon of 7/8″
3″ circle = hexagon of 15/16″
3 1/4″ circle = hexagon of 1″
3 1/2″ circle = hexagon of 1 1/8‘
4” circle = hexagon of 1 1/4” (scant)
4 1/8″ circle = hexagon of 1 1/4″
4 1/2” circle = hexagon of 1 3/8”
4 3/4″ circle = 1 3/8″ hexagon (same as Janet’s CD)
5″ circle = 1 1/2″ hexagon
Hexagons from Circles susies-scraps.com
I am happy to say that I think I have found my next portable hand piecing project! How about you?
Star Points for Hexagon Stars Antique Inspired – Part 3 Star in a Star
Hello Dear Friends and Readers, welcome to today’s post. Today we will continue with this hand, piecing project. If you have been following along, you will know that that this is my current portable project. I like to take a project along with me when I can’t be near a sewing machine. Although it is slow stitching, it is rather satisfying to achieve something in time which might have otherwise been wasted. Here are the links to part 1 and 2.
As it turns out this star shape is ancient in its history and has been seen in various cultures East and West for millennium. Like the hexagons themselves they are perpetual in the way the shape can appear to be never ending. Applying that concept to quilt making when working with hexagon or six pointed shapes means it can be hard to decide where to delineate the edges of the quilt. But rest assured we will find the edge!
Today is part three of this project. For this part, you need to find some striped fabrics from your stash. ( These could be reproduction style fabrics) This is a good opportunity to use some of those stripes which you might not have had a use for. I am going to use a few different kinds. By using the stripes, it will give the stars a radiating effect which I think will add to the movement within this quilt top. Essentially we will end up with a star within a star!
In order to prepare your triangles, you will need to cut width of fabric strips., four and three-quarter inches wide.
Preparing the Triangles for the Hexagon Stars – Requirements
Preparing the Triangles for the Hexagon Stars – Cutting
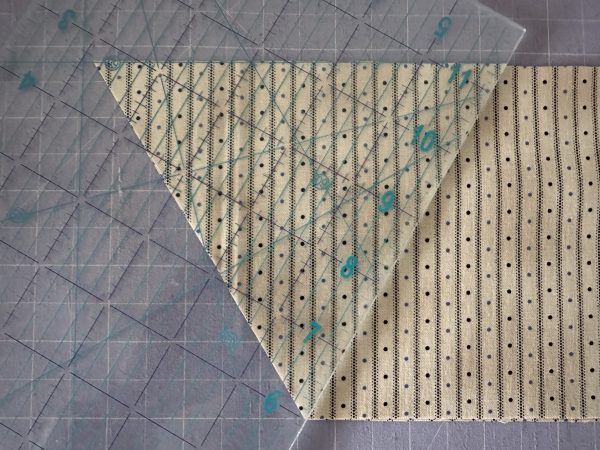
Cut the triangles using the 60 degree line on your ruler. That should yield approximately 12 – 13 triangles per strip. In this next image the 60 degree mark is at the top of the strip. Make the cuts by alternating the ruler position for each cut along the strip.
Star Points for Hexagon Stars Antique Inspired – Part 3 Star in a Star Susies-scraps.com
To make the next cut, rotate the ruler so that the 60 degree line s now on the left hand edge. Continue to rotate the ruler to make each cut until the strip becomes too short. Please note that after cutting each side of the triangles should measure 5 ½”. Therefore 5 ½” x 5 ½” x 5 ½”. The height will still measure 4 3/4”.
Star Points for Hexagon Stars Antique Inspired – Part 3 Star in a Star Susies-scraps.com
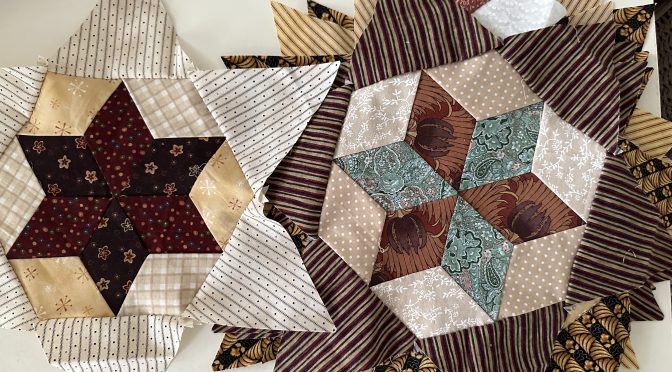
Six triangles will be required for each star. Lay out the six triangles so that the stripes radiate out from the centre hexagon.
Star Points for Hexagon Stars Antique Inspired – Part 3 Star in a Star Susies-scraps.com
TIP
It is worth noting at this time that we are now working with some longer bias seams with the triangles. At this point treat your stars carefully and avoid stretching on the seams. Personally I would let the fabrics relax themselves. I will do very gentle pressing once all of the blocks are completed at the end if necessary.
Stitching the Triangle Points to the Hexagon Star
Allow, the triangles to overhang each end of one side of the hexagon by approximately 1/4 inch. Right sides together, begin and end stitching at least one quarter inch from the corner edge. This will allow for free ends to nest nest nicely after all the triangle points have been added. I have stitched it in red so that it will show up for the photo. Please use a neutral thread which matches your fabrics.
Star Points for Hexagon Stars Antique Inspired – Part 3 Star in a Star Susies-scraps.com
Once the first triangle has been added, turn back and gently finger press. Bring the needle to the right side of the work. Lay down the second triangle right sides togther and stitch in the same manner.
Star Points for Hexagon Stars Antique Inspired – Part 3 Star in a Star Susies-scraps.com
Here is one completed Hexagon Star with Star points added.
Star Points for Hexagon Stars Antique Inspired – Part 3 Star in a Star Susies-scraps.com
And here is my little stack so far.
Star Points for Hexagon Stars Antique Inspired – Part 3 Star in a Star Susies-scraps.com
Here are the links to part four and part five of putting this Hexagon Stars top together.
Hello Dear Friends and Readers. and welcome to todays post. I thought I would share with you my bias binding finish for the Grandmothers Garden Quilt like Grandma Used to make. I have noticed over the years reading posts about hexagon quilts, that one of the questions often asked is “How will I finish the edges of my quilt?“because obviously they are for the most part not straight.
I think from my point of view there are a few options. I think it will also depend on the size of the hexagons to some extent.
One method is to appliqué the edges to a finishing border, which is a great idea especially if the quilt needs to be a bit bigger or you feel like it needs “framing“.
The next method would be to just straighten the edges using a rotary cutter. Personally I didn‘t want to do that. Or, on a similar note, make partial hexagons to fill in the edges to make them straight. This is what I opted to do for two of the sides where there were empty half hexagon shapes and that seemed logical for those two sides.
The next method is to let the hexagon shapes be the feature and just bind the zig zag edges. This is what I did for the other two sides. I just finished hand quilting this quilt. Here is the link All In Hand – Lessons In Hand Quilting
Obviously the bias binding is cut on the bias. Rather thasn reinventing the wheel, here is a nice short video on how to fold and cut the fabric. I used this method from Red Hart Quilts.. https://www.youtube.com/watch?v=_dgB4Hc_Xe4
Bias Binding for Hexagon Quilt susies-scraps.com
Requirements for the Bias Binding for Hexagon Quilt
I cut at least 10 metres of bias binding for finishing the
Joining the pieces together was a cinch as all the ends were already cut at a 45 degree angle. My binding strips are 2 1/2″ wide.
Bias Binding for Hexagon Quilt susies-scraps.com
After joining all the lengths together and rolling up the length it was time to attach it to the quilt edges.
Attaching the Bias Binding to an Uneven Edge
Bias Binding for Hexagon Quilt susies-scraps.com
When applying the binding I sewed up to “V“ point keeping the needle down then pivoting the binding fabric to realign it with the quilt edge.
Bias Binding for Hexagon Quilt susies-scraps.com
Then sew to the point of the hexagon stopping 1/4“ from the corner, needle down and pivot the quilt and the binding fabric to realign the edges again continuing in this manner until all the binding was applied.
Bias Binding for Hexagon Quilt susies-scraps.com
It was not necessary to make any folds in the binding edge as would normally be done for right angle corners. that is the beauty of making bias binding which has some stretch.
Then it was just a matter of handstitching the binding to the back of the quilt.
Bias Binding for Hexagon Quilt susies-scraps.com
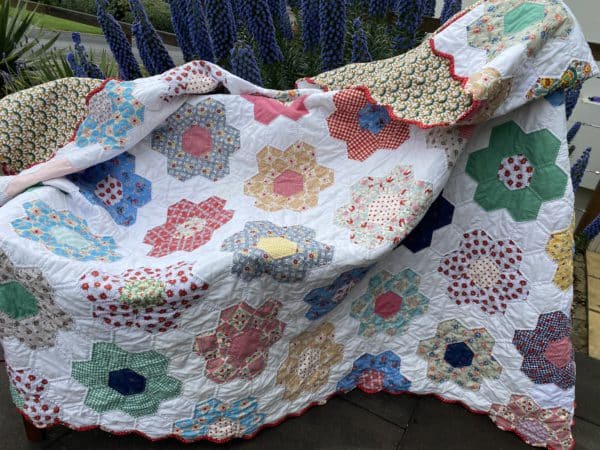
Here is the finished quilt.
Bias Binding for Hexagon Quilt susies-scraps.com
It is a pretty good day finishing a hand made quilt. ????
Bias Binding for Hexagon Quilt susies-scraps.com
Thank you for joining me today. If you enjoyed this post, you may also like