
Hexagon Stars Quilt Antique Inspired – Part 4 Diamond Circles
Hello Dear Friends and Readers and welcome to today’s post. I had a beautiful email from Karen M who was keen to know how the next part of our Hexagon Stars Antique Inspired was progressing.
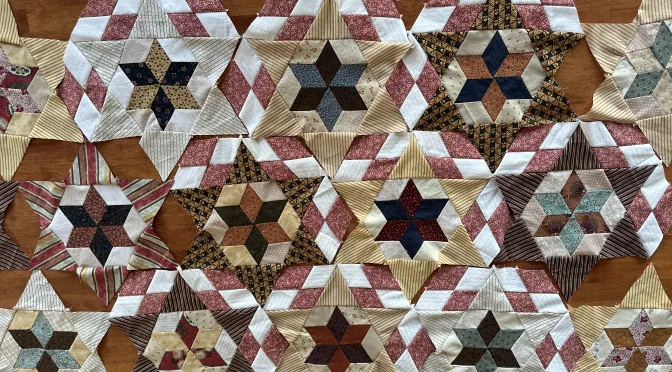
Today, I am going to show you the next step in these Hexagon Stars and how we are going to put them together. I’ve been itching to get onto this project and like many of us. I probably have had too many on the go, but having said that, this is the nature of being a textile artist. We never stop wanting to create! I think that’s a good thing. Just because textiles are our medium, does not mean that we need to limit our artistic abilities because it happens that our art is so tangible and also utilitarian .
So here we are with a lovely handpiecing project. The reason I have slowed down on this one is not because of lack of motivation, but more because it began as a travel project, but now the stars are growing so I need to be doing this more at home.
I am very happy with how they are coming along and loving the antique look. Here are the links to the first three parts;
Stitching by the Pool – Six Pointed Stars Antique Inspired
Six Pointed Hexagon Stars Antique Inspired Part 2
Star Points for Hexagon Stars Antique Inspired – Part 3 Star in a Star
Requirements for Hexagon Stars Quilt Antique Inspired – Part 4 Diamond Circles
White on white print 2 ½” width of fabric (WOF) strips
Rose/burgundy pink 2 ½” width of fabric (WOF) strips
Cutting the Diamonds for Hexagon Stars Quilt Antique Inspired – Part 4 Diamond Circles
From the white on white and rose/burgundy 2 ½” WOF strips, place the 60° line of your ruler the top edge of the strip. Make the first cut. Move the ruler along 2 ½” keeping the 60° line on the top edge. Cut 2 ½“ diamonds from the strips. Approximately 12 diamonds can be cut from each strip.
Make the first cut near the end of the strip with the 60° mark at the top edge of the WOF strip as pictured below. My strip is folded into four.

After the first cut, move the ruler up so that the 2 ½“ mark on the ruler lines up with the first cut. Then cut along the edge to make the first set of diamonds.

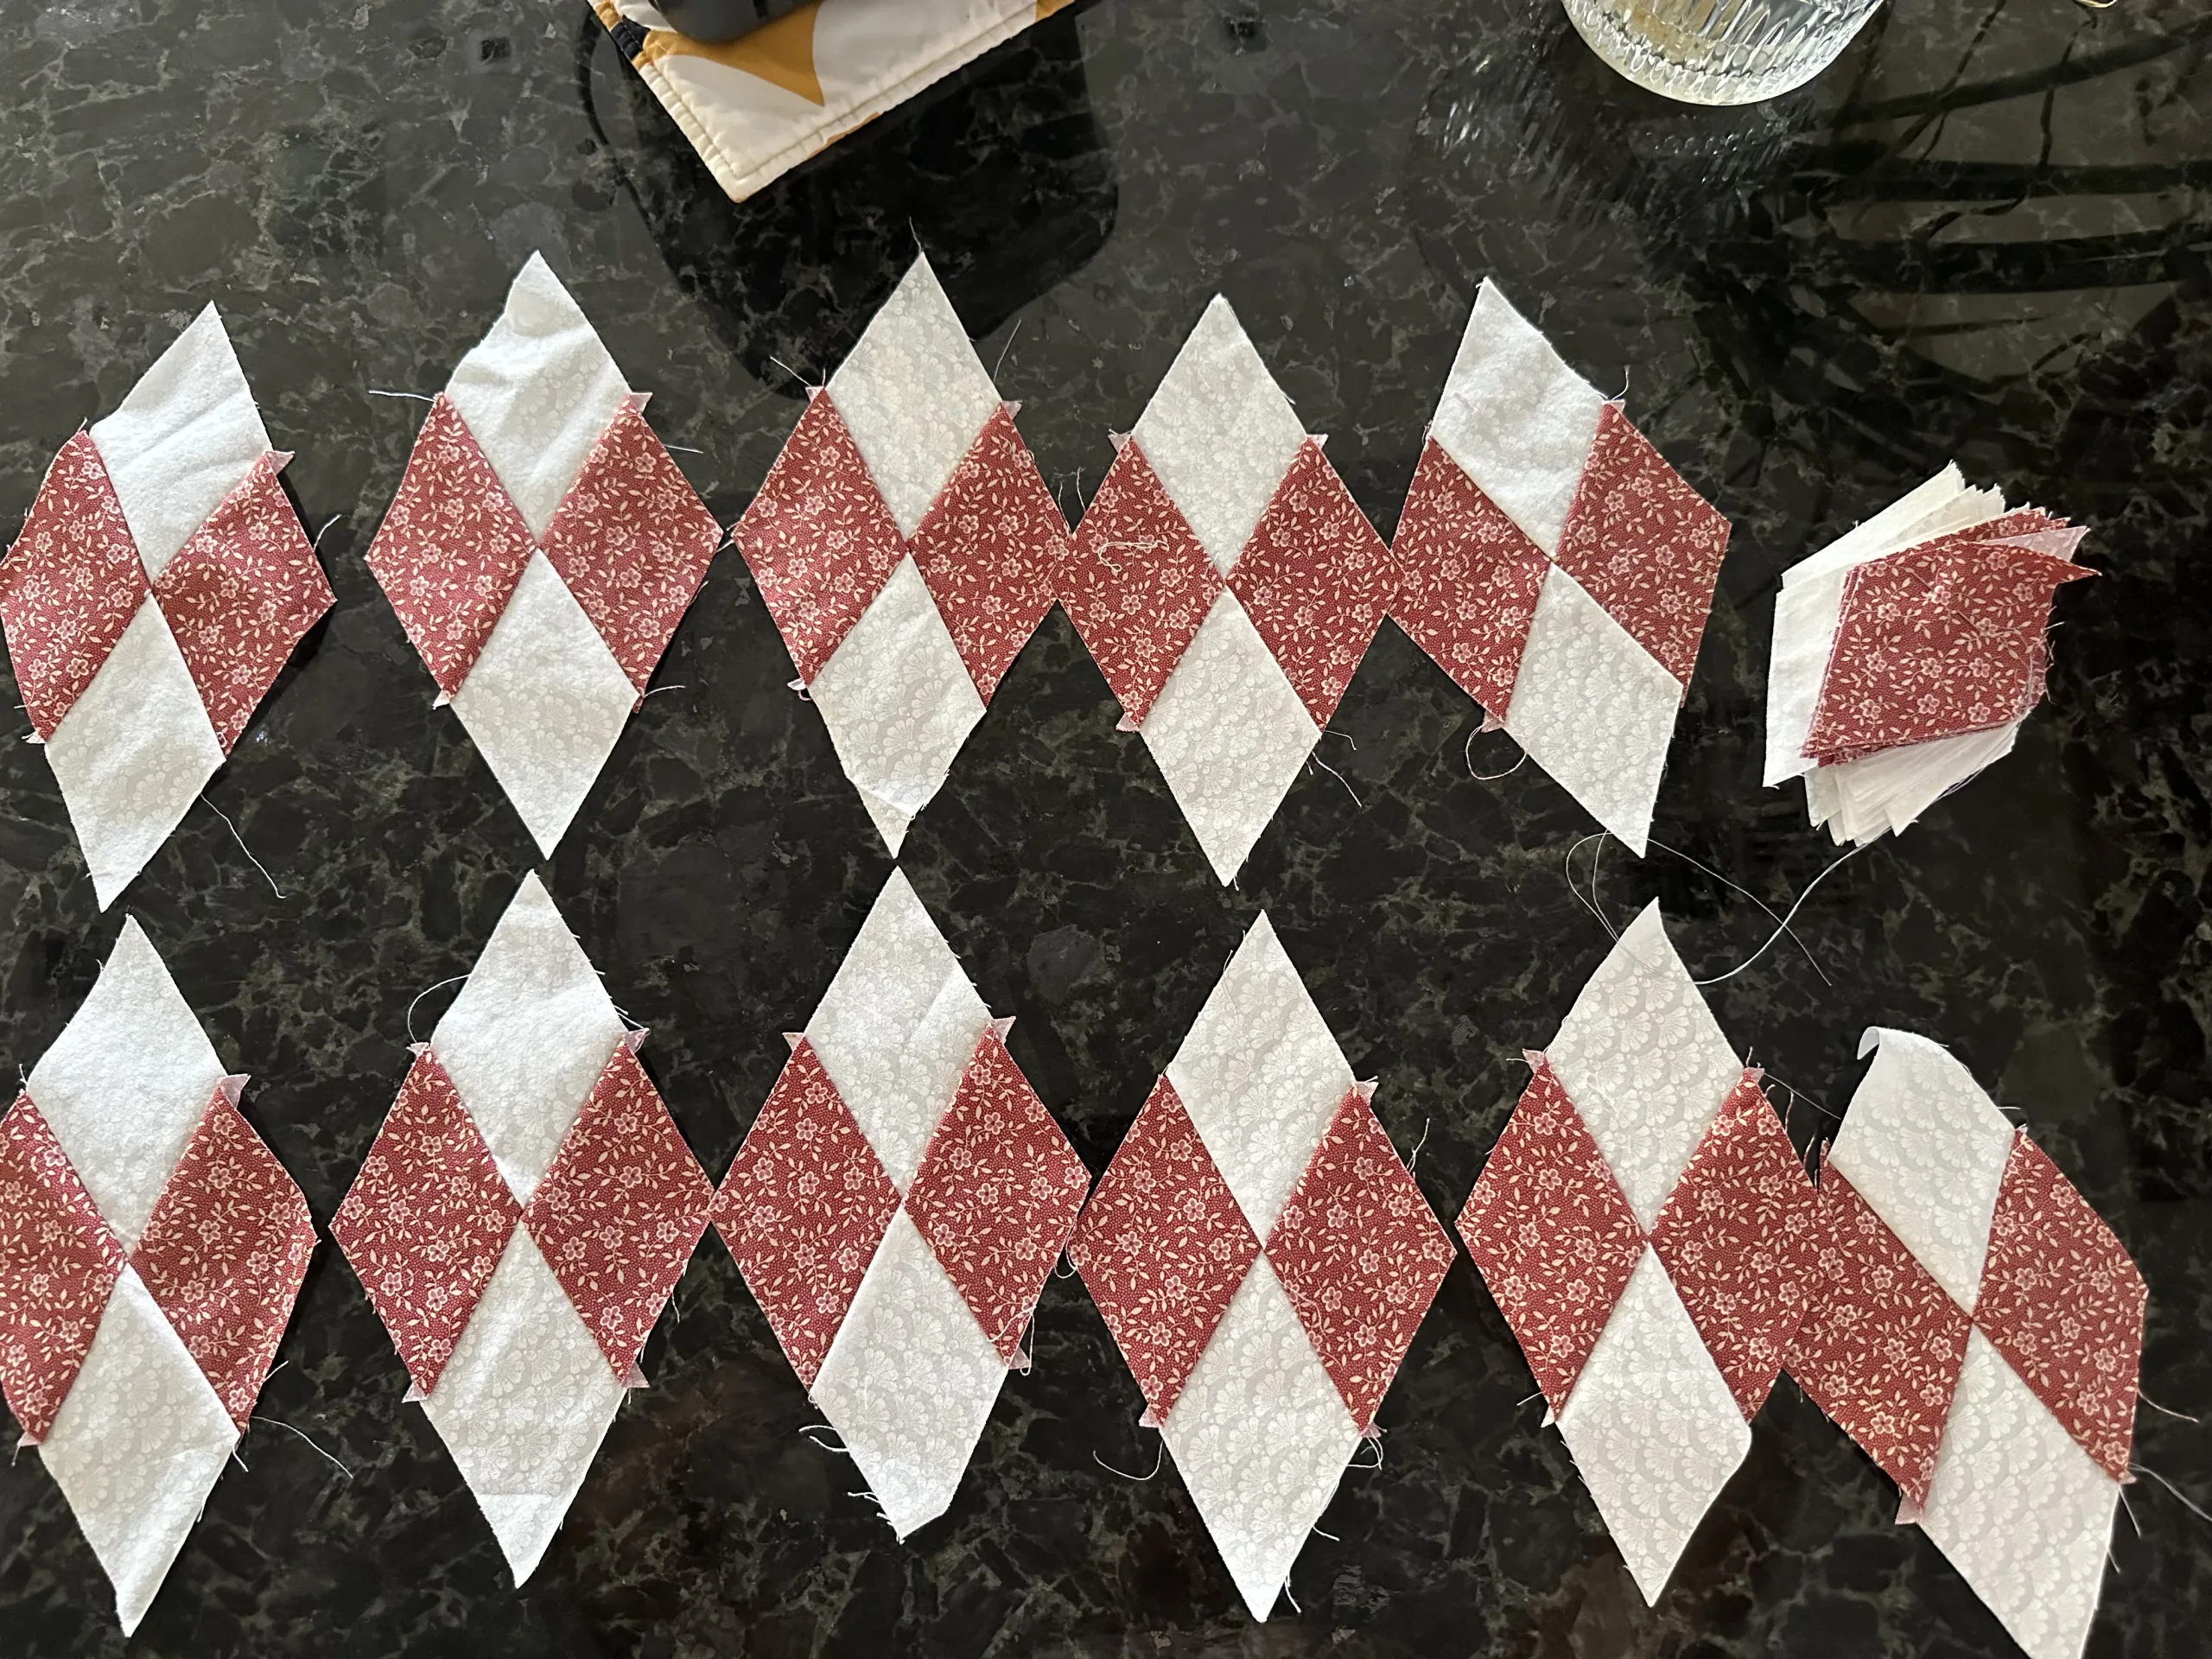
Making the Rose Pink and White Diamonds
As for constructing the hexagon stars, now we will stitch together 60°, diamonds from the white on white and rose/burgundy diamonds.
Layout your diamonds, two of the rose pink on the sides and the two white diamonds at each end.

Make sure that the white diamonds are at the sharp ends. This is important for the pattern placement. At this point I found that using binding clips is a nice way of holding the pieces together ready for stitching. This also avoids getting pin pricks.

Hand stitch the diamonds together using a quarter inch seam and small stitches, taking care to keep the centre point nice and crisp. Here is how the diamonds are looking.
Sew the Rose Pink and White Diamonds to the Hexagon Stars
Line up a rose pink and white diamond to the edge of one of the Hexagon Stars Star Points for Hexagon Stars Antique Inspired – Part 3 Star in a Starright sides together. Beginning approximately 1/4“ from the end begin stitching using small stitches until approximately 1/4“ from the end of the side of the diamond. The last stitch should be at the 120 degree corner at the base of the star points.
Using the binding clips to hold the pieces together works well here too.
Now pivot the diamond so that the adjacent side now lines up with the next side of the adjacent star point. Continue stitching until 1/4“ from the end.
Attach three diamonds in the same manner to each Hexagon Star along one side as pictured below.

At this stage, I’m not sure exactly how many diamonds we will need. Just ensure that you have sufficient white on whites and rose/burgundy prints to make a good number of diamonds. Obviously we can still be using scraps of strips of fabrics as long as they are in a similar colour, to give strength to the design. This is how they are starting to look. These are not stitched together yet, but I hope he can see how adding three diamonds to one side will make them easy to fit together when it comes time to stitch them together.

Thank you for joining me today and thank you Karen M for inspiring me to get moving on this next installment of Hexagon Stars Quilt Antique Inspired – Part 4 Diamond Circles. . Best wishes to you all.
If you enjoyed this post, you may also like
Hexagons Charming Free and Easy
If you prefer a machine stitched project, you might enjoy my previous post Rings Eternal Quilt
Susie
© Susan Stuklis 2023