
Sashiko Free Motion Quilting for Antique Inspired Scrappy Broken Dishes Lap or Cot Quilt
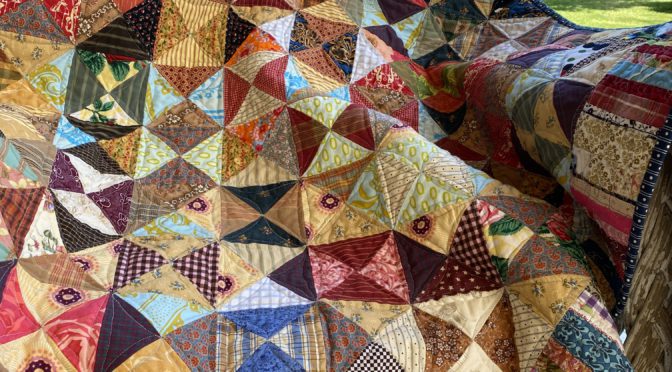
Hello Dear friends and Readers, I recently finished a quilt for my little grandson. After much thought I decided to use a Sashiko style design for the quilting. I really couldn’t imagine how else to quilt it because of all of the intersecting angles of the quilt other than straight line quilting or hand quilting. I thought this would give the best effect for this patchwork pattern.
I started by doing a few blocks to secure the quilt top and then kept going to do the entire quilt. It does require frequent turning of the quilt to achieve the design, however I believe it was well worth it. I will show you a picture of the back of the quilt shortly so that you can see how the design looks.
I think this quilt should last the test of time with this secure quilting and the design style will mean it’s something he can keep for ever, if he so chooses.
Here is a link to the quilt top instructions.
Scrappy Broken Dishes Quilt – Antique Inspired
I used an electric Singer 201K with a free motion quilting foot.

susies-scraps.com
In completing each Sashiko arched seam, I found that the challenge was to judge the length of the arch as it differs in length depending on which side of each triangle is being quilted.
In other words, because each triangle is an Isoscelles right angle triangle, the hypotenuse is significantly longer than the opposite and adjacent side of each triangle and the corner angles are much tighter.
Here is some triangle refresher in case you are interested.
https://www.mathsisfun.com/triangle.html

susies-scraps.com
You may notice than my seams are way less than perfect. However, I think it got better as I went along. Improving quilting skills takes practice. I have to say that sometimes perfection really is the enemy of the good. Sometimes it just has to be done. The nice thing is that when the quilting was finished, even though there was a fair bit of difference in each seam, the overall pattern looks pretty good and has given the quilt a lot of strength and stability.
Here is a close up look at the back.

susies-scraps.com
And then the whole of the back.

susies-scraps.com
For the piano key border I quilted lots of loops to make it secure.

susies-scraps.com
Here is the finished quilt.

susies-scraps.com
It is such a nice feeling to finish a quilt, Isn’t it?
Hopefully he will get plenty of use from it.

susies-scraps.com
If you enjoyed this post and are still seeking some inspiration, you may also like these.
Pinwheel Medallion Quilt – Baby Quilt
Antique Nine Patch with Sashiko Quilt
Stars and Crosses Band Quilt Pattern
Happy quilting. What will you sew today?
Susie