
End of Day Quilters Clothes Hangers Tutorial
Hello my dear readers! This is my favourite kind of a post to share! Basically a free project. Use what you already have at your fingertips!
Can a girl really have too many decent clothes hangers? I don‘t think so!
I have consistently thrown out so many wire hangers over the years, because I thought they weren’t much good. And you can’t even give them away, no-one wants them. Throw them into recycle – sure – where they end up is dubious…….
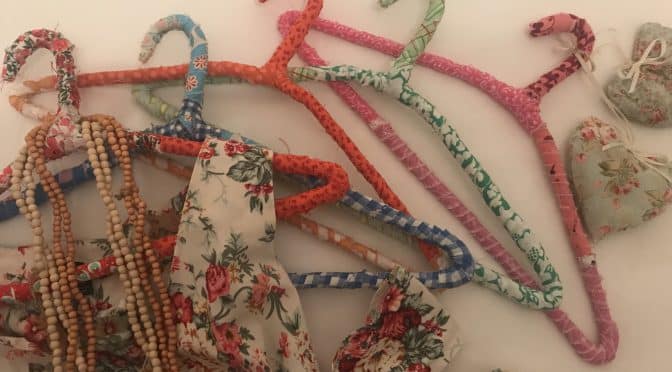
I do appreciate a good clothes hanger. The best ones are special gifts that have been made for me. They are pretty, soft and the clothing sits nicely on them.
My inspiration is a pile of batting strips (otherwise useless and why I kept them – well this must have been the reason), plus, all the strips of fabric from straightening up the edges of fabric when cutting for quilts and my End of Day Quilters baskets, of course! Here is a link to those.
End of Day Quilters Basket – Tutorial
So if you have these ingredients lying around, turn them from useless to useful and beautiful! And it is a lovely way to tidy up too, for both your sewing space and wardrobe.
Only one caviet. I always pre wash my fabric to preshrink, remove sizing and chemicals and, to ensure colourfastness. In this case don’t use fabrics which could stain your clothes.
To Wash or Not to Wash?…This is the Question
This is how I did it.
Ingredients for the End of Day Quilter’s Clothes Hangers
Wire coat hangers
Strips of waste cotton quilting fabric 1 1/2" width or less
Strips of waste batting 1 1/2" width or less
Needle and neutral or matching thread

Method
Beginning at the neck of a wire hanger, wrap a batting strip, firmly, at a 45° angle towards the hook. On reaching the tip, continue wrapping back towards the neck to complete a second layer of batting.

Use the same method to wrap the rest of the hanger. Complete a second layer of batting.

Take the fabric strips, ( I sorted mine into colour groups) beginning at the tip of the hook carefully and firmly begin wrapping the fabric strip. Use pins if necessary to keep the fabric in place. Continue wrapping, again using a 45° angle adding fabric strips as you go.

Continue until the hanger is completely covered.

Once the hanger is covered, take your needle and thread and using small surface stitches to anchor the fabric, stitch through the layers of batting going right around the whole hanger. Place extra stitches at the hanging tip and fabric joins to secure.

Enjoy hanging your clothes, and a tidier sewing space!

If you enjoyed this post, you may also like
And……