Tag Archives: Depression Era Quilts

Vintage Style String Me Along

Vintage Style String Me Along

Hello Dear Friends and Readers and a warm welcome to today’s post. I have spent about one month in Western Australia and that time has been amazing and so interesting. If you follow me on FB or Insta you can see some of the photos there.

Now I am black home and it’s good to be here. My sewing room has been calling and I must say it is somewhat of a mess and needing a good tidy up! I thought I would start with a box of scraps which was doing nothing. A collection of all sorts of odd shapes and different fabric lines, chucked into the box from various different projects over time. In order to make some room and be able to get back to some basic machine stitching, i decided to make some string blocks with this fabric.

Vintage Style String Me Along susies-scraps.com

I sorted out the pieces and cut them very roughly into odd strips. Better pieces of fabric I cut into strips and added to my pile which may be used for a log cabin in the future. Lessons in Log Cabin Blocks It didn’t take that long and can be way more fun than hauling yardage. The piles of strips look very nice and my pile of rough strings gave a sense of achievement. As always, there is more fabric than anticipated and I’m pretty sure I can create at the very least, a baby quilt or a lap quilt.

In the pile I also have two old thin pillow coverings, so I cut them up to use as the foundation for the string blocks. My vision is a vintage style looking quilt which is homey and full of delightful strings. Depression era quilts were sometimes made of strings of fabric in this manner in order to use what was already available and then recycled into a quilt top. This lead to some very pretty quilts with a lovey mixture of fabrics. They often used the fabric feedsack bags to make clothing and quilts. It is a great look. The way the blocks will be positioned will give plenty of interest.

Begining by placing a string in the centre of the foundation block on the diagonal, making sure that it overhangs the edges. Cover with another string, right sides down lining up the sewing edges as much as possible. Sew, making at least a 1/4” seam. Make two blocks at a time so that it keeps the flow going and doesn’t use as much thread. Press the fabric strip open. I use a wooden thing or finger press well before adding the next strip. I even used up old bobbin thread which is actually great because now my bobbins are cleaned up as well!

Vintage Style String Me Along susies-scraps.com

This is how it looks from the back before trimming. It may look a little distorted because the foundry=tion was very thin however that will not matter once the block is trimmed.

I remember PJ from Quilting time in Dixie saying that she used old thin sheets for the foundation blocks and that seemed like an excellent idea to me.

In order to keep this as simple as possible I used my regular 6” ruler to cut the fabric into 6” x 6” squares to use for the foundations. This made it very easy to trim the blocks after pressing. this is how it looks from the front before trimming.

Vintage Style String Me Along susies-scraps.com

I used my trusty old treadle to make these blocks. Having been out of use for a while she responded to a good oiling. That is one of the advantages of this machine. The maintenance is easy, just give a good oiling! Treadle Tinkering

Vintage Style String Me Along susies-scraps.com

I plan to put the blocks together like this. I really like the pattern and it looks good from every side. I hope you can feel inspired dot make some string blocks. Loads of fun. It doesn’t require over thinking which means that it progresses very quickly.

Vintage Style String Me Along susies-scraps.com

If you enjoyed this post, you may also like these other string projects.

Any String Goes – Pineapple Improvisational String Quilt Blocks

String Pot Holders or Trivets for Christmas

quilted christmas scrappy string stockings

Crazy Little Strings – Diamond Charms Quilt Block and Tutorial

Pink Strings Table Mat

String Feeder QAYG Bib

“End of Day” Quilters Basket – Free Tutorial

Thank you for joining me today and as always I wish you happpy stitching.

All the best, Susie.

© Susan Stuklis 2026

Scrap Great Granny Squares Quilt Revival

Scrap Great Granny Squares Quilt Revival

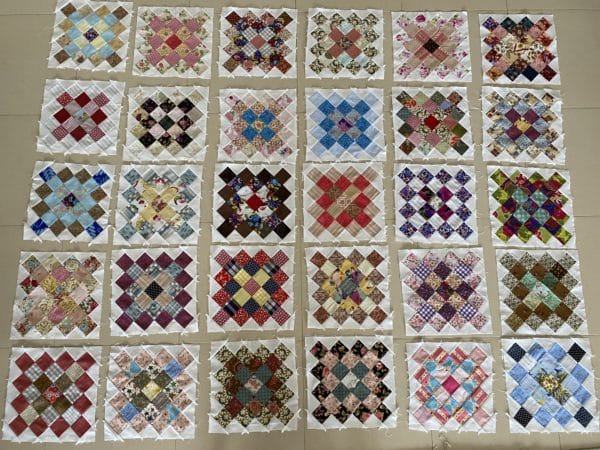
Hello Dear friends and Readers, I first posted about making Scrappy Great Granny Square Blocks a few years ago now. Sadly the blocks got put away in a drawer to be looked at some other time…… I still really love these blocks and as you all know, I am all about the scraps.

The good news is that my stash of 2 1/2“ x 2 1/2“ squares had steadily grown, so I thought it is time to revive this project and make some more! So today I am sharing the progress of these blocks. I believe it is a very good sign when a project is still very appealing even if time has gone by.

It is really good to know that this block works well with all scraps. You will see from the photos that even directional prints or odd squares can find a nice home here in these blocks. Another positive is that even if you only have one of a particular square, it can become the centre square or it can join in on a round with other similar colour squares.

The only extra thing required is some background fabric. I have used white but there is no reason why you couldn’t choose any other colour or even black as the background. (lots of granny Square crocheted rugs had a black background) here is some history of the crochet Granny Square https://www.hanjancrochet.com/history-of-the-granny-square/ How it came to be a quilt block I really do not know.

Here is a link to my original tutorial which will give the requirements and method for the blocks.

All the blocks are trimmed to 12“ x 12“

Requirements for the Scrap Great Granny Squares Blocks

Scrap Great Granny Square Block Tutorial

See how these directional prints can work. Some of these fabrics are bits left over from borders and backings but they are still pretty and they are good fabrics so they will add to the overall movement in the quilt when they all come together eventually.

Scrap Great Granny Squares Quilt Revival susies-scraps.com

In truth it would have been easy to throw some of these bits out, but as you can see it was worth the trouble to cut them up into useable squares.

This is how I do that

Cut Up Your Quilting Off-cuts

It actually takes a lot of work to cut these up from yardage however if you have leftovers and cut those bits up at the end of a project, all those beautiful bits can be incorporated into another even more lovely quilt with so much variation.

My Singer 201k treadle has been getting a bit of a workout. It is fun and relaxing. I like to lay out the blocks onto a firm portable surface ( a cutting mat or lazy Susan ???? is great ) and then take it to the machine and put the block together.

Scrap Great Granny Squares Quilt Revival susies-scraps.com

So here are my blocks so far. I am going to make some more. not sure yet how many….but that is part of the adventure, don’t you think!

Scrap Great Granny Squares Quilt Revival susies-scraps.com

Maybe you will join me for Scrap Great Granny Square Block Tutorial

If you enjoyed this post, you may also like

Grandmother’s Flower Garden Quilt Like Grandma Used to Make

Antique Nine Patch with Sashiko Quilt

Old Italian Blocks Quilt Finish Antique Tile Block Made Easy Tutorial

Happy sewing

Susie

© Susan Stuklis

Quilting Hydrangeas

Quilting Hydrangeas 

Hello Dear Friends and Readers,

There is so much sadness in the world at the moment.  I thought we needed some cheering up.  And what better way than by working a a project that is uplifting?  I am trying to finish a quilt tonight… well that might be a tad ambitious…it will not be tonight, but bit by bit….  I have completed the outline quilting.  This was done by stitching in the ditch around all the plain areas of the quilt.  This stabilises the quilt and makes it easier to do the free motion quilting.  Now I am Quilting Hydrangeas because I just love them!  Hydrangeas have big pom pom style clusters of flower heads, in many differing colours including whites, blues, reds, pinks and lavenders, depending on the soil type.  Nature is the ultimate inspiration and I really go out of my way to reflect that in my quilts.

susies-scraps.com
Quilting Hydrangeas Free Motion

Actually,  I was just remembering, after a family bereavement, many years ago now, my friend Heather brought me a beautiful bunch of Hydrangeas from her garden.   They were much like these, pictured above.   I think they are gorgeous and they can be kept as dried flowers too.   They look just as wonderful as their fading papery petals slowly dry and they will keep for years.  I have to say they brought me much comfort….seems so small, but it matters, I have never forgotten them, thank you Heather.   In these times, I believe any comfort matters and that is why I’m sharing this with you all today.

susies-scraps.com
Quilting Hydrangeas Free Motion

Here is the quilt.  Just a simple one.  I was given these vintage reproduction fabrics, by my friend Jill and I wanted to do them justice by incorporating them into a vintage style design.  Hence the plain lemon background.

The pattern is inspired from a vintage quilt, created into a modern version for quick construction.  Sadly, it may now appear that the inspiration gleaned from a Depression Era quilt, may be all too  real at this moment in time…..

The quilt pattern is here.

Vintage Trellis Charm Quilt

I’m stitching the Free Motion Quilting on a Singer 201K.  This is an electric machine.  I have several tops that need quilting and this girl is pretty fast (the machine I mean!) ????

I know I have mentioned before…but if by chance you happened across one of these machines in your travels, take it home if you can…..

Vintage Singer 201K and FMQ

Now, back to the quilting….there is still a ways to go…

susies-scraps.com
Quilting Hydrangeas Free Motion

Here is a bit more of an idea of how it’s going to look in the next photo.

susies-scraps.com
Quilting Hydrangeas Free Motion

This Quilting Hydrangeas pattern I have created by making a very small four petal flower in the centre and then fanning out with four larger square petals around it.  Each flower is approximately 1 1/2” diameter.

To move onto the next flower, just stitch a line to the next spot, and try to incorporate that line into the side of one of the petals of the next flower, trying to keep the flowers reasonably close to each other just as they are on a hydrangea flower head, until the space is filled.

susies-scraps.com
Quilting Hydrangeas Free Motion

Now, back to some more free motion quilting.

In the meantime, I hope you all stay safe.   Just in case you missed my mask pattern, here is the link.

Duck Bill Personal Face Mask Made Easy

Maybe you can put some flowers into your life and quilts.  By the way, you probably know, but Hydrangeas can be propagated from cuttings.  Here is how.  They are like the gift that keeps giving, year after year.

Hydrangea Propagation

If you enjoyed this post, you may also like or be inspired by these posts,

Quilting Nasturtiums Free Motion & Singer 201K Treadle

Or

Quilting Folk Art Roses Free Motion Treadle

and

Quilting Daisies

All the best,

Susie

© Susan Stuklis 2020

Grandmother’s Flower Garden Quilt in Progress

Grandmother’s Flower Garden Quilt in Progress

Dear Friends and Readers,

You may remember sometime back I shared with you my hexagons. This is the link to the post.

Hexagons Charming Free and Easy

That project has been on the backburner for a while as I was enjoying working on these Periwinkle Blocks.

Periwinkle Block Made Easy

How nice it is to have hand sewing on the go as a portable project.  I have previously written a post about the benefits of having a hand piecing project on the go, you can read in the next link. I’ve updated it with a great sewing tip from my friend Ellie M. Please check it out here….

While We Wait

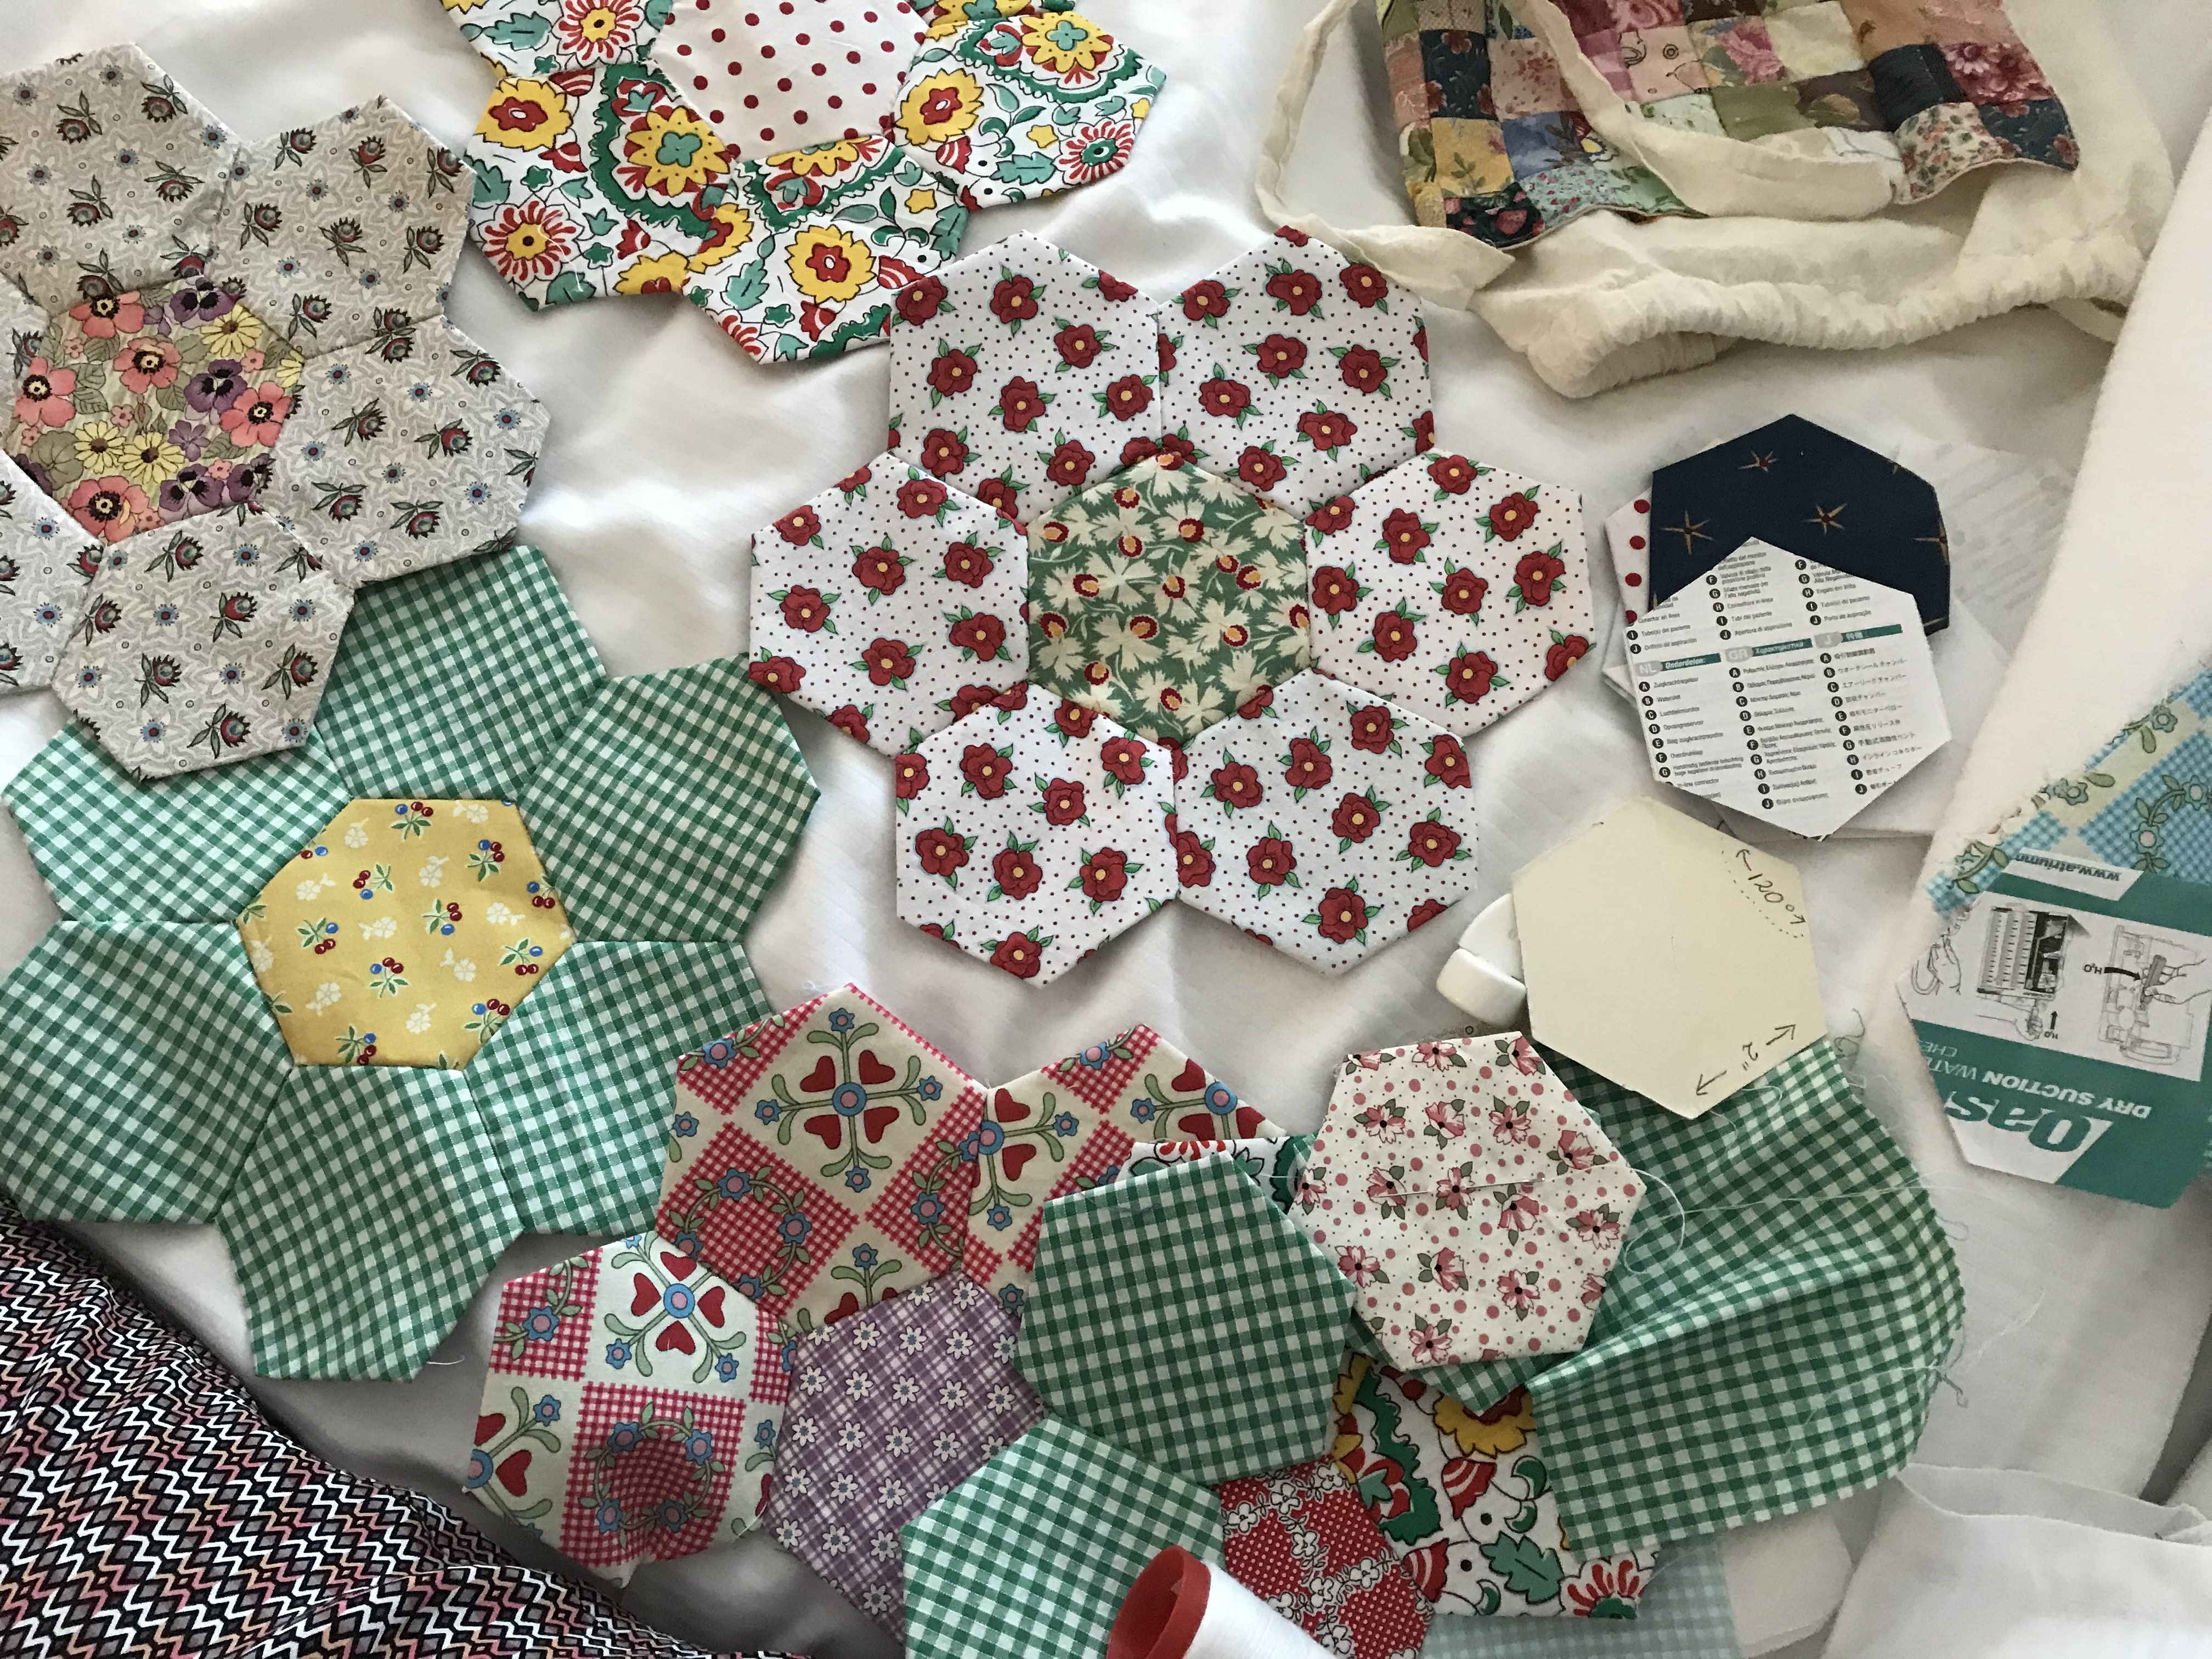
Anyhow…. It is time to revisit the hexies!  I’m carrying them around with me.  The aim is to achieve that 1930’s Art Deco type of look. It’s very easy on the eye and it just looks “happy” to me – and that’s always a good thing, a little happiness, don’t you think?

Here are some the flowers coming together.  They are whip stitched together, with a locking stitch every few stitches, so that they don’t come undone.  The flowers are made with 2″ hexagons so the results are quick! ????

And this how they are coming together.  They will be joined together with plain white hexagons.

Still a long way from finished. But still…….every stitch helps.

If you have considered making a Grandmother’s Garden Quilt, but have not embarked because it’s hand sewing, this style of project might suit, because it’s not as overwhelming as one made with very small hexagons.

This project is continued here.

Growing Grandmother’s Garden

Happy stitching,

Susie

If you enjoyed this post, you may also enjoy,

Orange Peel Quilt and Pattern

and…

Hand Pieced Spool Blocks with Instructions

and

Vintage Flower Garden Cot Quilt