Tag Archives: Vintage Style Quilts

Hand Quilting Great Granny Stars With Lessons in Straight Line Quilting

Hand Quilting Great Granny Stars With Lessons in Straight Line Quilting

Hello Dear Friends and Readers, I hope you are enjoying susies-scraps.com Ad Free!!!???? Also I need to mention, for those of you concerned about cookies, you only need to accept or reject that notice once, and you will not see that banner again. It is part of the compliance of having a web site.

Today is a post script to the Great Granny Stars Quilt. It has now been completes but these are some the lessons I learned along the way.

Great Granny Stars Quilt and Pattern

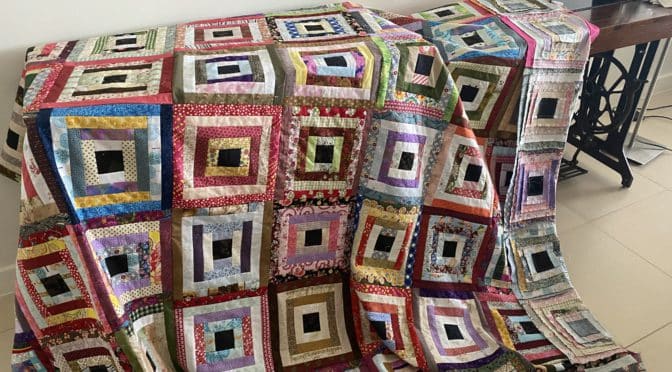
Here it is laid out with batting and backing. I have used a plain white backing and batting which is nice and white.

Great Granny Stars Quilt and Pattern susies-scraps.com

There are lots of good reasons to hand quilt this one. It is a pretty big quilt and while I could do it on a machine I think the result will be better with hand quilting.

Nothing fancy, just lots of straight lines is my plan. So far I have quilted diagonally through the centre of all the Great Granny Blocks Scrap Great Granny Square Block Tutorial and the Scrappy Star Sashings Scrappy Star Sashings to create a big diagonal grid. This has stabilised the whole quilt and now made it easier to continue with the rest.. I did not mark the quilt as I am just following the direction of the pattern of the blocks.

Today I am sharing some of the progress and hopefully inspiring you to do a bit of hand quilting.

If you are stuck at home or even not feeling well, this is an excellent way to pass some time but still achieve something closer to a finished quilt.

In a previous post All In Hand – Lessons In Hand Quilting I discussed some of the lessons I have learned so far with hand quilting. Today I will add something further to these comments.

More About The Hoop

What I have realised with this quilting practice is that it is not a good idea to alter the tension on the hoop unnecessarily. My experience has been that altering the hoop tension will also lead to altering the stitch lengths. A very tight hoop will mean that the stitches will be larger as the tension in the hoop will increase the difficulty of the rocking of the needle motion. A looser hoop will enable smaller stitches as the needle can come in an out of the quilt more easily.

Hand Quilting Great Granny Stars and Lessons In Straight Line Quilting

A Bent Needle

As the quilting progresses it is not unusual for the quilting needle to develop a bit of a bend (or even break) with the tension which is applied to it. A bent needle can lead to deviated stitches so change the needle when you suspect it is no longer straight.

Hand Quilting Great Granny Stars and Lessons In Straight Line Quilting

Cleaning Up the Seam Allowances

Rookie mistake, but, having a completely white background does mean that some stray threads and slightly excessive seam allowances of the darker fabrics will show through and create a bit of a shadow. I thought that I had cleaned it up quite well. however it does demonstrate that being a bit more vigilant would pay off!

It is all a learning curve.

As a post script. I had a lovely comment from Gretchen. She advised getting a superfine crochet hook which can carefully remove some of those stray threads from under the quilt top. Great advice for us all. Thank you Gretchen. ????

Hand Quilting Great Granny Stars and Lessons In Straight Line Quilting

That is all for today. Hope you are finding time to stitch. I will post again with further progress down the track.

Hand Quilting Great Granny Stars and Lessons In Straight Line Quilting
Hand Quilting Great Granny Stars and Lessons In Straight Line Quilting susie’s-scraps.com

If you enjoyed this post, you may also like

Hand Quilting Scrappy Thousand Pyramids and

Bias Binding for Hexagon Quilt and

Scrappy Jacob’s Ladder Quilt Reimagined

Happy sewing.

Susie

© Susan Stuklis 2023

Scrap Great Granny Squares Quilt Revival

Scrap Great Granny Squares Quilt Revival

Hello Dear friends and Readers, I first posted about making Scrappy Great Granny Square Blocks a few years ago now. Sadly the blocks got put away in a drawer to be looked at some other time…… I still really love these blocks and as you all know, I am all about the scraps.

The good news is that my stash of 2 1/2“ x 2 1/2“ squares had steadily grown, so I thought it is time to revive this project and make some more! So today I am sharing the progress of these blocks. I believe it is a very good sign when a project is still very appealing even if time has gone by.

It is really good to know that this block works well with all scraps. You will see from the photos that even directional prints or odd squares can find a nice home here in these blocks. Another positive is that even if you only have one of a particular square, it can become the centre square or it can join in on a round with other similar colour squares.

The only extra thing required is some background fabric. I have used white but there is no reason why you couldn’t choose any other colour or even black as the background. (lots of granny Square crocheted rugs had a black background) here is some history of the crochet Granny Square https://www.hanjancrochet.com/history-of-the-granny-square/ How it came to be a quilt block I really do not know.

Here is a link to my original tutorial which will give the requirements and method for the blocks.

All the blocks are trimmed to 12“ x 12“

Requirements for the Scrap Great Granny Squares Blocks

Scrap Great Granny Square Block Tutorial

See how these directional prints can work. Some of these fabrics are bits left over from borders and backings but they are still pretty and they are good fabrics so they will add to the overall movement in the quilt when they all come together eventually.

Scrap Great Granny Squares Quilt Revival susies-scraps.com

In truth it would have been easy to throw some of these bits out, but as you can see it was worth the trouble to cut them up into useable squares.

This is how I do that

Cut Up Your Quilting Off-cuts

It actually takes a lot of work to cut these up from yardage however if you have leftovers and cut those bits up at the end of a project, all those beautiful bits can be incorporated into another even more lovely quilt with so much variation.

My Singer 201k treadle has been getting a bit of a workout. It is fun and relaxing. I like to lay out the blocks onto a firm portable surface ( a cutting mat or lazy Susan ???? is great ) and then take it to the machine and put the block together.

Scrap Great Granny Squares Quilt Revival susies-scraps.com

So here are my blocks so far. I am going to make some more. not sure yet how many….but that is part of the adventure, don’t you think!

Scrap Great Granny Squares Quilt Revival susies-scraps.com

Maybe you will join me for Scrap Great Granny Square Block Tutorial

If you enjoyed this post, you may also like

Grandmother’s Flower Garden Quilt Like Grandma Used to Make

Antique Nine Patch with Sashiko Quilt

Old Italian Blocks Quilt Finish Antique Tile Block Made Easy Tutorial

Happy sewing

Susie

© Susan Stuklis

Scrappy Housetop Log Cabin Variation Quilt Top Vintage Inspired

Scrappy Housetop Log Cabin Variation Quilt Top Vintage Inspired

Hello Dear Friends and Readers, I know I have been on a bit of a Log Cabin fest recently, but hey, the scraps are being put to good use. If you have been joining me on this journey I would really like to encourage you to use those scraps especially the ones you don’t care for that much! They will be transformed!! ????

I have to admit to feeling a sense of accomplishment today. I have cut up lots of 1 1/2” fabric strips ready for making this Scrappy Housetop Log Cabin Variation Quilt Top Vintage Inspired. (Technically it is a Courthouse Steps variation)

Honestly this is quite a lot of fabric, collectively approximately 8 yards / metres of scraps which are going to have a home in this Scrappy Housetop Log Cabin Variation Quilt Top Vintage Inspired.

For this quilt top, my constant is the black centre squares, which are also scrappy. I have used all kinds of prints without discriminations, so it is a true scrappy quilt. In this quilt there is a myriad of prints including novelty, plaids, brights, batiks, reproductions, florals, directional prints, plaids, ginghams, shirtings, solids, moderns and Japanese prints. All I had to decide is whether they were light or dark!

Previously I posted the directions for making the block here.

Log Cabin Variation – Scrappy Housetop Log Cabin Block Tutorial

Here is what I started with. Looks like a mess, don’t you think? All the strips need to be sorted into light or dark, as best as possible.

My vintage inspiration is here, https://www.soulsgrowndeep.org/gees-bend-quiltmakers.

Block size 10 1/2“ x 10 1/2“.

Finished quilt top size 80 1/2“ x 90 1/2“.

TIP

If you can’t decide whether it is light or dark, make sure it lies next to a more contrasting fabric, OR, for example if you need light but it looks more medium, turn it over and use the reverse,

 Scrappy Housetop Log Cabin Variation Quilt Top Vintage Inspired susies-scraps.com
Scrappy Housetop Log Cabin Variation Quilt Top Vintage Inspired susies-scraps.com

Now they are all cut up and ready to go! Check it out

 Scrappy Housetop Log Cabin Variation Quilt Top Vintage Inspired susies-scraps.com
Scrappy Housetop Log Cabin Variation Quilt Top Vintage Inspired susies-scraps.com

Requirements for the Scrappy Housetop Log Cabin Variation Quilt Top Vintage Inspired

72 of black centre squares 2 ½ x 2 ½

All the strips are cut from 1 ½” width of fabric strips. The cutting goes quite quickly because we are using 2 each of each strip size and fabric for each block.

Light strips – 144 each of 2 ½, 4½”, 6 ½”, 8 ½” lenghts.

Dark Strips – 144 each of 4 ½”, 6 ½”, 8 ½” and 10 ½“ lenghts.

Follow the instructions for making the blocks as written in the post Log Cabin Variation – Scrappy Housetop Log Cabin Block Tutorial as previously mentioned. Here is how they are beginning to look after about 20 blocks.

 Scrappy Housetop Log Cabin Variation Quilt Top Vintage Inspired susies-scraps.com
Scrappy Housetop Log Cabin Variation Quilt Top Vintage Inspired susies-scraps.com

I like the dramatically visual effect that the black centres help create along with the contrasting light and dark fabrics,

Scrappy Housetop Log Cabin Variation Quilt Top Vintage Inspired susies-scraps.com

Here I have made 40 blocks. They are not put together yet. They look pretty striking.

I have been sewing all these blocks by treadle. Its very nice just being in the zone. I think its a bit like meditation. Very enjoyable and relaxing. no stress as they are just scraps!

Now I have made the 72 blocks. Here are the blocks laying out. not pressed yet.

 Scrappy Housetop Log Cabin Variation Quilt Top Vintage Inspired susies-scraps.com
Scrappy Housetop Log Cabin Variation Quilt Top Vintage Inspired susies-scraps.com

Now the blocks have been nicely pressed and I am sewing them together. Im using this Singer 201k treadle which is such a beautiful little stitcher. She sews like a dream.

Singer 201K Treadle C1947

 Scrappy Housetop Log Cabin Variation Quilt Top Vintage Inspired susies-scraps.com
Scrappy Housetop Log Cabin Variation Quilt Top Vintage Inspired susies-scraps.com

TIP

When sewing the quit together, after sewing the first column of blocks, pin the edges of the first column of blocks together. This prevents the blocks from getting tangled as the subsequent columns are added. This is a great time saver! ????

Build the Scrappy Housetop Log Cabin Variation Quilt Top Vintage Inspired

Warning!! Ha ha, this is a very easy quilt top to put together. There is very little seam matching except for joining the blocks and ensuring the seams are nicely nested!!

When laying out the blocks I have alternated the blocks so that there is no seam matching.. That is the last long 10 1/2“ strips of each block alternate, vertical horizontal vertical and so on.

 Scrappy Housetop Log Cabin Variation Quilt Top Vintage Inspired susies-scraps.com
Scrappy Housetop Log Cabin Variation Quilt Top Vintage Inspired susies-scraps.com

I like to chain sew the whole quilt top together by adding all the blocks in columns and then turning the whole top to sew all of the rows. This scaffolding technique makes building the quilt very easy and the seams lay nicely. See the tip above for a smoother experience. This link explains this technique using a small block.

36 Patch Postage Stamp Blocks Tutorial

I have set these blocks in a 8 x 9 blocks configuration. here it is coming together on my little Singer 201k treadle.

TIP

I used an extra table next to the machine to help support the weight of the quilt top.

 Scrappy Housetop Log Cabin Variation Quilt Top Vintage Inspired susies-scraps.com
Scrappy Housetop Log Cabin Variation Quilt Top Vintage Inspired susies-scraps.com

Here is my final layout of the Scrappy Housetop Log Cabin Variation Quilt Top Vintage Inspired.

 Scrappy Housetop Log Cabin Variation Quilt Top Vintage Inspired susies-scraps.com
Scrappy Housetop Log Cabin Variation Quilt Top Vintage Inspired susies-scraps.com

I think is is a a great way to use up a lot of scraps!

Scrappy Housetop Log Cabin Variation Quilt Top Vintage Inspired susies-scraps.com

If you enjoyed this post you may also like

Lessons in Log Cabin Blocks

Weekend Scrappy Half Log Cabin Quilt -Vintage Inspired

Baby Steps Quilt

Crazy Little Log Cabin Coasters

Log Cabin Free Motion Quilting

I hope you can do some sewing or cutting today.

Susie

© Susan Stuklis 2022

Weekend Scrappy Half Log Cabin Quilt -Vintage Inspired

Weekend Scrappy Half Log Cabin Quilt -Vintage Inspired

Hello Dear Friends and Readers and welcome to another scrappy episode! I have to confess to a feeling of accomplishment with this quilt top. It really does use the scrap strips up!! Not only, are they used up, but it is a very rewarding way to clean up the sewing space! With this project, I have incorporated every scrap without prejudice into it. Even things I didn’t like that much, they went in. I have learned from my previous Log Cabin Free Motion Quilting that the pieces of fabric that I thought were the most unsuitable, turned out to be the highlights in the quilt. The less they match, the better it is. This is a very achievable quilt top.

I believe it is turning scraps into art. The beauty is revealed when one stands back from the finished top. Here is a nice concise article about log cabin quilts and their design history.

https://www.womenfolk.com/quilt_pattern_history/logcabin.htm

With this Weekend Scrappy Half log Cabin Quilt – Vintage Inspired, not only is it a big top but all those bits have become something. It is also a good time to let go, and not overthink the placement of the blocks. Meaning, these blocks can also be made to create many of the patterns which are achievable with the traditional Log Cabin design, however, I am going to just let the scraps do their thing. There is so much going on. I am setting the blocks straight, all the same way, no border. There is just a mad and wonderful array of colours and prints and and variation of light and dark which keep the eyes moving over the quilt.

Preparing all the strips for the blocks Log Cabin Variation – Scrappy Half Log Cabin or Quarter Log Cabin Quilt Block Tutorial was a lot of fun and I set them up in nice little heaps, so I could just whizz them through on my faithful old treadle. Look at all those lovely strips and colours.

Weekend Scrappy Half Log Cabin Quilt - Vintage Inspired susies-scraps.com
Weekend Scrappy Half Log Cabin Quilt – Vintage Inspired susies-scraps.com

I also realised that the maths for this is just fantastic. I worked out that by making the 72 blocks, it is actually the equivalent of almost 8 yards or metres of fabric, which was already in pieces or small strips. anyway. That is a lot of fabric and no hauling out big yardage to cut.

Every block actually uses the equivalent of two width of fabric strips. (Apart from the centre square). Isn’t that great! Another advantage, is that it is easy to calculate how many of each strip length is required as it is the same for each block. For example, I am making 72 blocks, so I will need 72 of 10 1/2” dark strips and so on..…

So go ahead, make a cot quilt with 12 blocks, a lap quilt with 16 or 20 blocks or a medium bed quilt with 36 or 42 blocks, or a big queen one with the 72 blocks like this one.

Finished quilt size 80½” x 90½”

Requirements for the Weekend Scrappy Half Log Cabin Quilt – Vintage Inspired

72 of 3” x 3” Red Squares

All strips are cut from 2” widths in light and dark.

Light Strips 72 lengths each of 3”, 4½”, 6”, 7½, 9”

Dark strips – 72 lengths each of 4½”, 6”, 7½”, 9”, 10½”

Tutorial for making the 72 blocks Log Cabin Variation – Scrappy Half Log Cabin or Quarter Log Cabin Quilt Block Tutorial

Making the Weekend Scrappy Half Log Cabin Quilt – Vintage Inspired

Follow the instructions for making each of the blocks as posted here Log Cabin Variation – Scrappy Half Log Cabin or Quarter Log Cabin Quilt Block Tutorial

Here is some of the progress. laying out the Scrappy Log Cabin Blocks to see how they will look.

Weekend Scrappy Half Log Cabin Quilt Vintage Inspired susies-scraps.com

Now is the fun of putting them together. Here are 72 blocks all laid out on the floor ready to be put together. It will look better when they are sewn together.

Weekend Scrappy Half Log Cabin Quilt - Vintage Inspired susies-scraps.com
Weekend Scrappy Half Log Cabin Quilt – Vintage Inspired susies-scraps.com

Here we go. I am using my trusty Singer 15K from 1902. She makes a beautiful stitch. Treadle Tinkering I sewed all the vertical seams first. This is done by sewing nine sets of two together in a chain piecing manner. Do not cut the chains. Then go back to the start of that vertical row and sew another nine blocks to the sides of the second row. Again, do not cut the chains. Repeat for rows, four, five, six, seven and eight. Now all the 72 blocks are together.

Weekend Scrappy Half Log Cabin Quilt - Vintage Inspired susies-scraps.com
Weekend Scrappy Half Log Cabin Quilt – Vintage Inspired susies-scraps.com

TIP

Optional: Sew some seams of a block from another project between the rows to keep the chain chain going easily, then snip the seam end between the block and the quilt top. This saves having a lot of extra thread ends to tidy up and some progress can be made on some other project. See image below.

Weekend Scrappy Half Log Cabin Quilt - Vintage Inspired susies-scraps.com
Weekend Scrappy Half Log Cabin Quilt – Vintage Inspired susies-scraps.com

Now carefully lay out the top and check that all the blocks are facing the same way. Now turn the quilt top to begin sewing all the horizontal seams in the same manner. It will be easy as the chains are holding the whole piece together. Ensure that the seams are facing in the correct direction and pin for ease as the seams are quite long. sew the eight horizontal seams.

Weekend Scrappy Half Log Cabin Quilt - Vintage Inspired susies-scraps.com
Weekend Scrappy Half Log Cabin Quilt – Vintage Inspired susies-scraps.com

I should mention that this layout means there is minimal seam matching and consequently minimal seam bulk. Also all the seams are laying out in the same directions which will ensure success.

Weekend Scrappy Half Log Cabin Quilt - Vintage Inspired susies-scraps.com
Weekend Scrappy Half Log Cabin Quilt – Vintage Inspired susies-scraps.com

I am not adding a border to this quilt top.

Here is the Weekend Scrappy Half Log Cabin Quilt – Vintage Inspired all laid out. I have chosen a big bold bright print for the backing which I have prepared and it is now ready for pinning and quilting. I think I will bind it in red…..

Weekend Scrappy Half Log Cabin Quilt - Vintage Inspired susies-scraps.com
Weekend Scrappy Half Log Cabin Quilt – Vintage Inspired susies-scraps.com

While I was cutting the strips, any leftovers were trimmed into 2” squares to add to my scrap bag. I am pleased with how quickly this top came together and it has used a good amount of scraps. Maybe you see one of these coming up in your weekend soon?

If you enjoyed this post, you ,may also like

New York City Blocks

Vintage Twist Baby Quilt & Tutorial

Cut Up Your Quilting Off-cuts

Happy Stitching,

Susie

© Susan Stuklis 2022

Grandmother’s Flower Garden Quilt Like Grandma Used to Make

Grandmother’s Flower Garden Quilt Like Grandma Used to Make

Hello Dear Friends and Readers, today I will share my journey and the instructions for making a simple Grandmother’s Flower Garden Quilt Like Grandma Used to Make. I have been at this project for years, and although that may seem like a negative, in fact, that is not the case. I kind of call this a Clayton’s Quilt. (That is code for the quilt you make, when you are not making a quilt). You may ask, how can that be? Well this started life as a hand work / travel project. This was done at times when I would not have been able to sew, certainly not with a machine. These moments being when travelling or watching television and other times when just waiting for some reason. So you can see that although it may have taken a long time, in fact I could have been idle at those times and instead I have this top.

I feel like it was a good learning experience too. My initial thoughts were to make this quilt top as our foremothers may have been made years ago. I wanted to experience that process myself, rather than buying precut papers or fabrics. I used the English Paper Piecing method. I cut all my own papers from brochures. I made the hexagons as 2” hexagon because I thought that might be quicker. Here is how I did that.

Hexagons Charming Free and Easy

You can cut your papers from brochures too or print some out and cut those. If you don’t want to cut your own papers, I noticed in a quilt shop today that you can buy them for about $10- for 100 papers.

I used fabric from my stash and picked out fabric which I feel somewhat emulates Art Deco style fabrics like feedsacks. Bright but with limited colour schemes and often with white in the design.

I thought about how these quilts would have been made in the past and I decided to use 5” x 5” squares of fabric. Somehow, that seemed logical to me and I imagined that maybe most ladies would not have necessarily cut out the hexagon shapes from the fabric . Today by chance I read a tale about someone finding a vintage / antique Grandmother’s Flower Garden quilt which was incomplete and still had the papers in it. Guess what….??? The maker used squares of fabric too! It made me feel quite justified in my decision. Actually, I found it helpful to have that bit of extra fabric when wrapping it around the papers prior to sewing them together.

Well now I have put the last stitches into the top and prepared it for quilting. I made a bit of a day of it as i have done before. I call it backing day!

Backing Day!

I had some fabric which I thought would be ideal for this quilt. It has lots of green and tan in a very stylised pattern. I was able to join the fabric easily matching the pattern (sometimes this is a pain) but not this time.

Here she is, all layed out. It will probably take some time to quilt but thats okay with me because the journey has been pleasurable so far.

If you would like to make one, here are the requirements and instructions. It is a good size.

Finished size 77” x 96”

This is a hand piecing project. All fabric was washed and lightly pressed prior to commencement

Previous posts about this quilt.

Growing Grandmother’s Garden

Here is a lovely article which outlines the history fo Grandmother’s Flower Garden Quilts.

http://www.womenfolk.com/quilt_pattern_history/mosaic.htm

Grandmother’s Flower Garden Quilt Like Grandma Used to Make susies-scraps.com

Requirements for Grandmother’s garden Quilt Like Grandma Used to Make

7 1/2 yards / metres of solid white background fabric like white homespun

1/3 yard / metre of 24 assorted fabrics. I chose bright simple prints with white in the background OR 32 assorted fat quarters (or the equalivent in scraps)

675 of 2” paper hexagons (2″ is the measure of each side)

Cutting the fabric for the Grandmother’s Garden Quilt Like Grandma Used to Make

From the solid white homespun – cut 35 of 5” strips across the width of the fabric. Subcut 273 of 5” x 5” squares.

Cut 3 of 3” strips across the width of the fabric. Subcut 24 of 3” x 5” oblongs,

From the assorted fabrics, cut 5” strips across the width of the fabric. Subcut390 of 5” x 5” squares.

Making the Hexagons

See this post for making the hexagon templets and stitching the fabric squares over the templets. Hexagons Charming Free and Easy

Sewing the Hexagons into Flowers

From the assorted fabrics make 50 flowers of 7 hexagons each, with one in the centre being different and the surrounding six hexagons in the same fabric like this.

Grandmother’s Flower Garden Quilt Like Grandma Used to Make susies-scraps.com

Make eight half flowers of one centre hexagon and four hexagons of matching surrounding fabrics.

Grandmother’s Flower Garden Quilt Like Grandma Used to Make susies-scraps.com

Make 273 white hexagons.

Make 24 white half hexagons using 24 of the papers folded in half and using the 3” x 5” pieces of fabric to wrap the half hexagons.

Sewing the Grandmother’s Garden Like Grandma Used to Make together

Hexagons are amazing shapes when you consider the potential for the infinite and ingenious patterns which can be created. Just ask the bees. https://www.scientificamerican.com/article/the-surprising-architecture-in-bees-honeycombs/

For this quilt, it is a very simple layout. I found it easiest to make the quilt in long rows with three white hexagons in between each flower as pictured below. Then add in the missing background white hexagon and join the long rows together. Each row is offset from the previous row.

Grandmother’s Flower Garden Quilt Like Grandma Used to Make susies-scraps.com

Make Five rows of six flowers with three white hexagons in between each flower and each end of the row.

Make four rows of five hexagons with three hexagons in between each flower and add one of the half flowers to each end of the row of five.

Grandmother’s Flower Garden Quilt Like Grandma Used to Make susies-scraps.com

Alternate the rows beginning and ending with a row of six whole flowers, filling in the missing background white hexagons as you go. Nine rows altogether.

To finish, sew in the 24 half hexagons on the outside of the two end rows to make the edge straight.

Grandmother’s Flower Garden Quilt Like Grandma Used to Make susies-scraps.com

There it is. A simple Grandmother’s Flower Garden Quilt top Like Grandma Used to make.

Now I have backed this top and I’m about to start Hand quilting it.

From small beginnings. This quilt top could also be mede with scraps that you have in your stash.

Here is the link to the quilt after it was hand quilted and bound.

Bias Binding for Hexagon Quilt

If you enjoyed this post, you may also like

Hexagon Star Snowflake Trivet

Orange Peel Quilt Blocks Pattern

Hand Pieced Spool Blocks with Instructions

Hope you can make something in times when you might not have thought you could.

While We Wait

Happy stitching

Susie

©️ Susan Stuklis 2022