Tag Archives: Four patch quilts

Pinwheels On Point Blocks – Made Easy

Pinwheels On Point Blocks – Made Easy 

Hello Dear Friends and Readers,   I do not think I ever tire of pinwheels.  Do you?  They are especially nice when the points are clean and  they are quick to make!.  Pinwheels are always so cheery and create movement in a quilt.  I wasn’t really planning on making any at the moment….. however, have just had a lovely email from Michelle.  Her request, was whether it is possible to make a quick pinwheel block, similar to Scrappy Pinwheel in a Square, but not scrappy, as seen in this post.

Scrappy Pinwheel in a Square

I was immediately intrigued myself.  As you know putting blocks on point will require more work when setting the blocks.  Of course it would be nice to set them on point without much effort.,,,,,   So I had a think about it, and this is what I came up with.   However, I must remind you that this is an unconventional block construction because it means that the edges will be on the bias, however if you treat them gently it will work well and come together very quickly.  Also the pinwheel points always come out so nice and crisply.  For that reason, I love it.

For this tutorial, you will need to make two blocks at a time.  Also the pinwheels will each flow in the opposite direction.  Fun!!!

Anyhow, this is how I did it..

All seams based on 1/4”.

Makes two blocks 6 1/2“ x 6 1/2”.

Requirements for two Pinwheels On Point Blocks – Made Easy 

4 of 3″ x 3 ” dark squares

4 of 3″ x 3″ light squares

2 of 5 1/2″ x 5 1/2″ background squares

susies-scraps.com
Pinwheels On Point Block – Made Easy

Arrange the eight 3” x 3″ squares into two four patches alternating the dark and light fabric in each block. Sew the four patches together.

susies-scraps.com
Pinwheels On Point Block – Made Easy

Turn over and cut the little connecting thread at the intersection and spin your seams.

Press.

susies-scraps.com
Pinwheels On Point Block – Made Easy

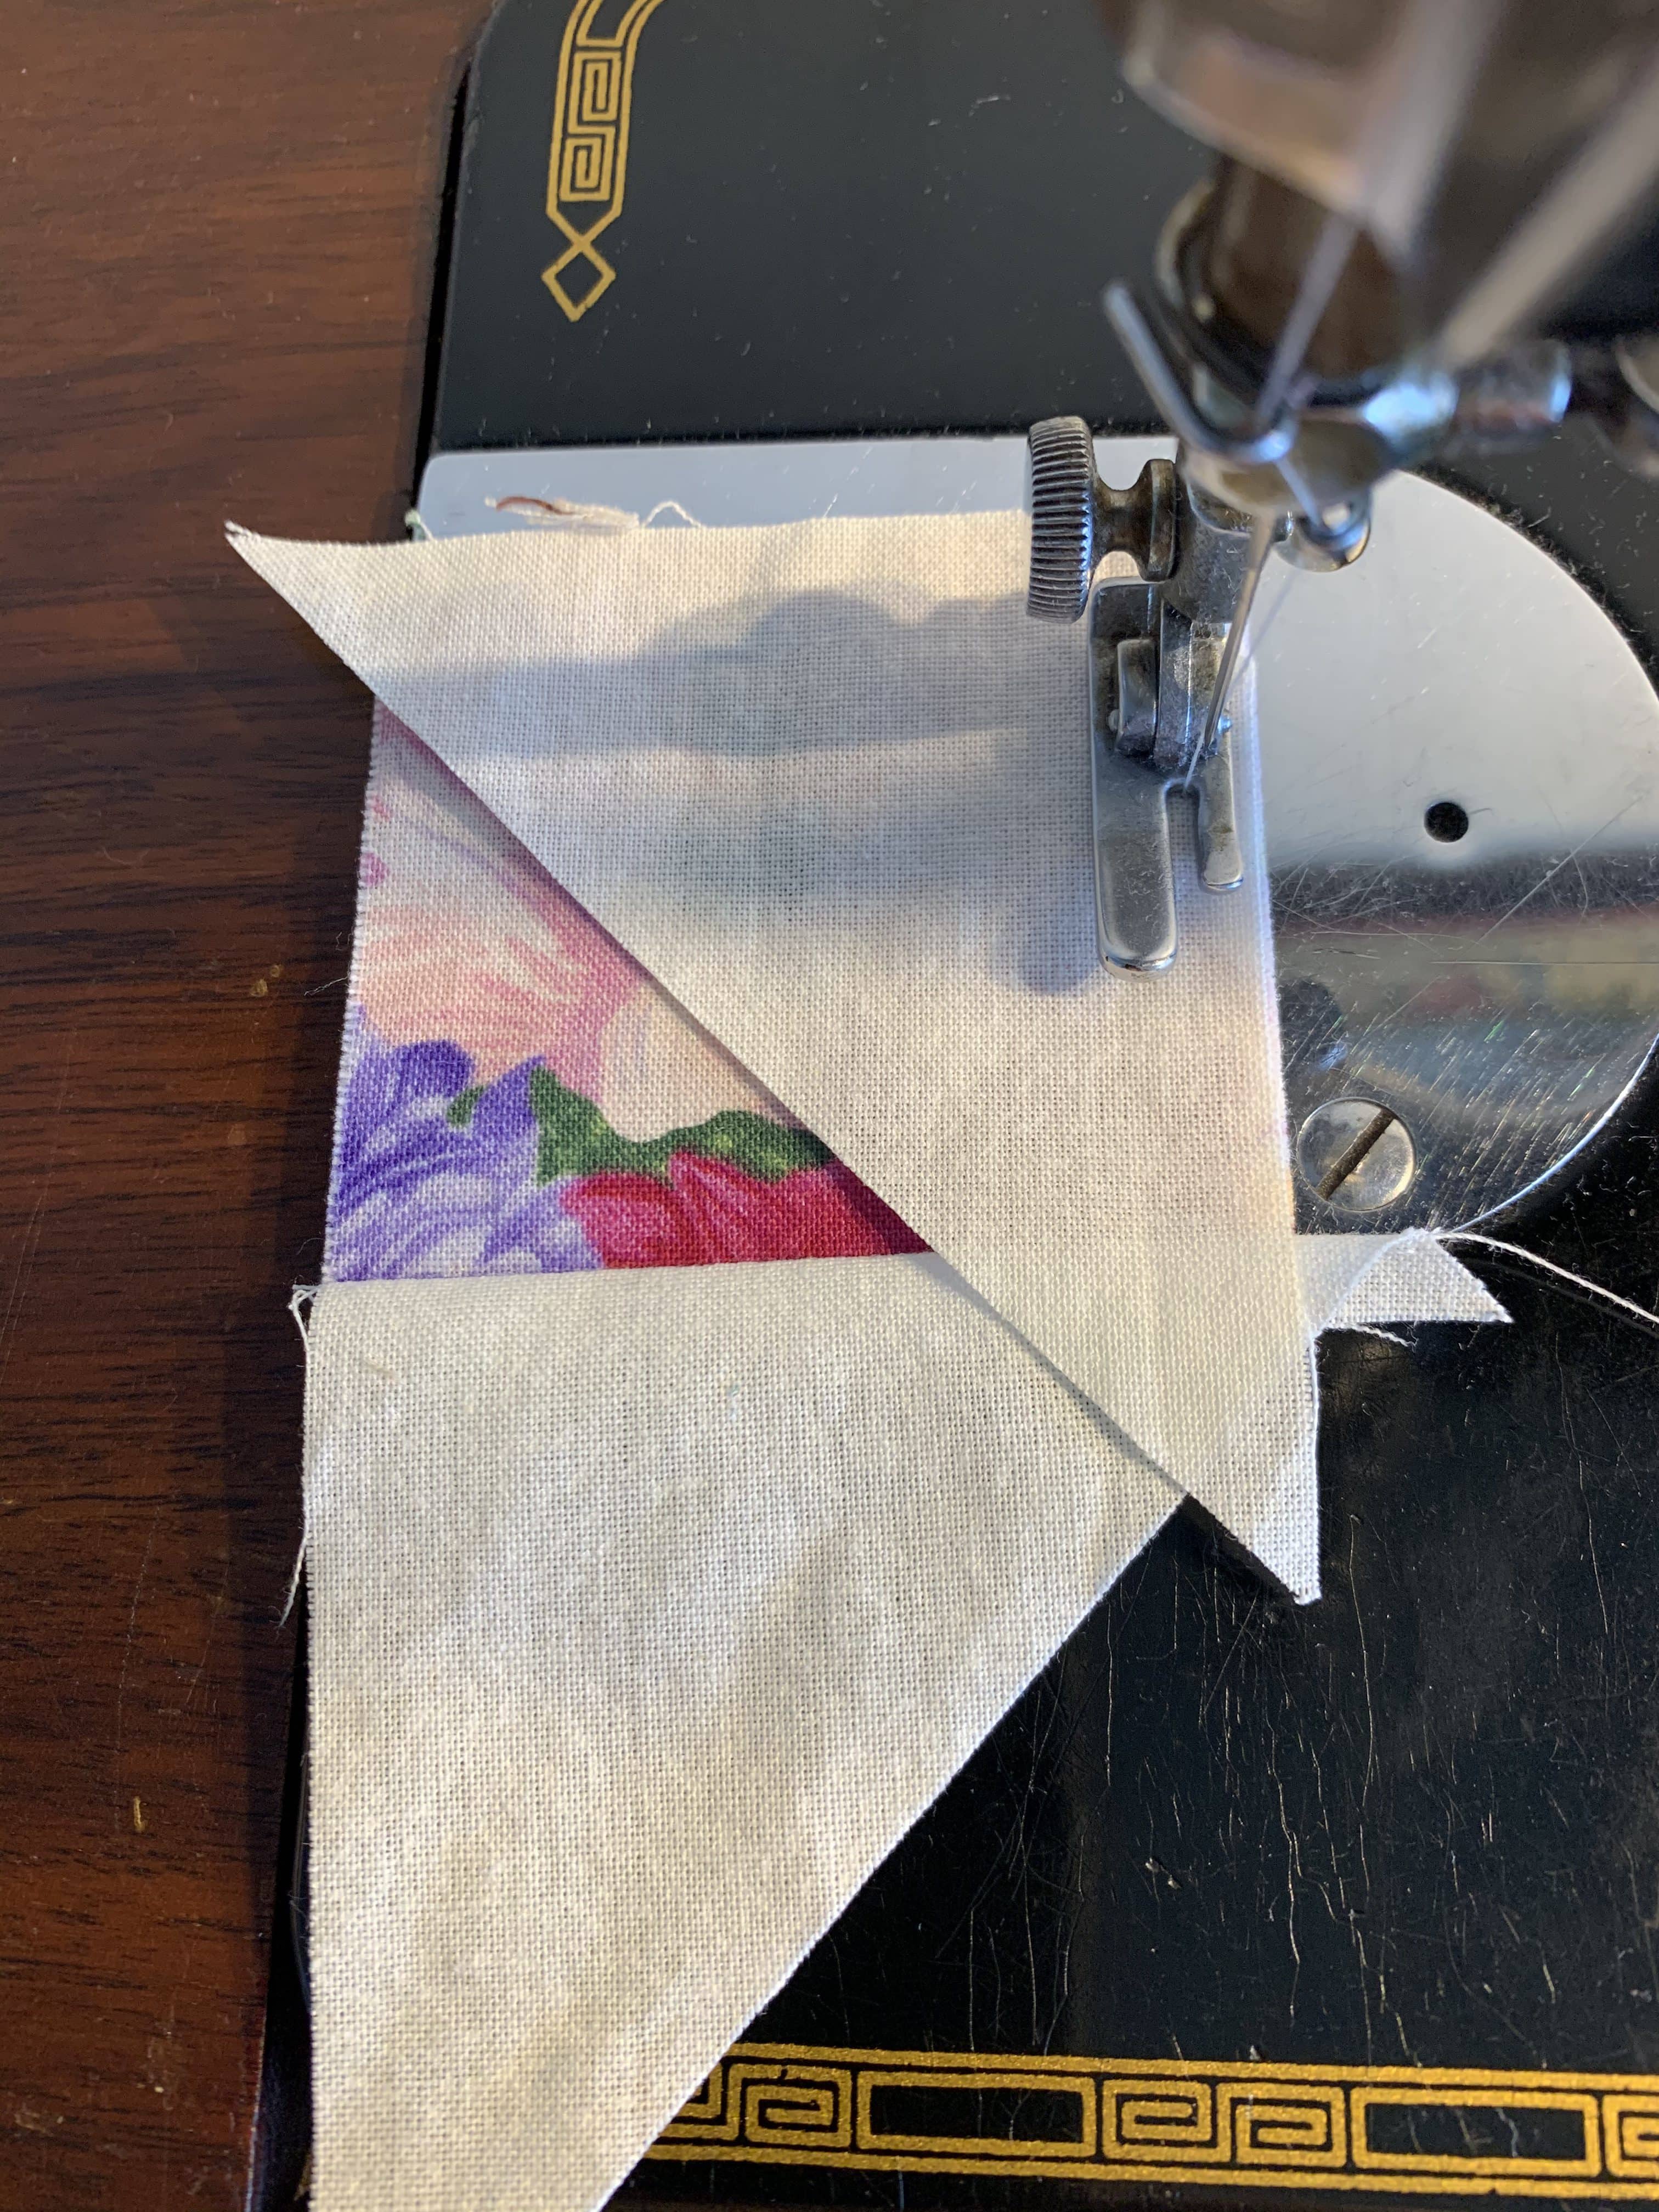
lLay a four patch right sides together with the 5 1/2″ x 5 1/2” background square.  Sew a 1/4″ seam around the perimeter.

susies-scraps.com
Pinwheels On Point Block – Made Easy

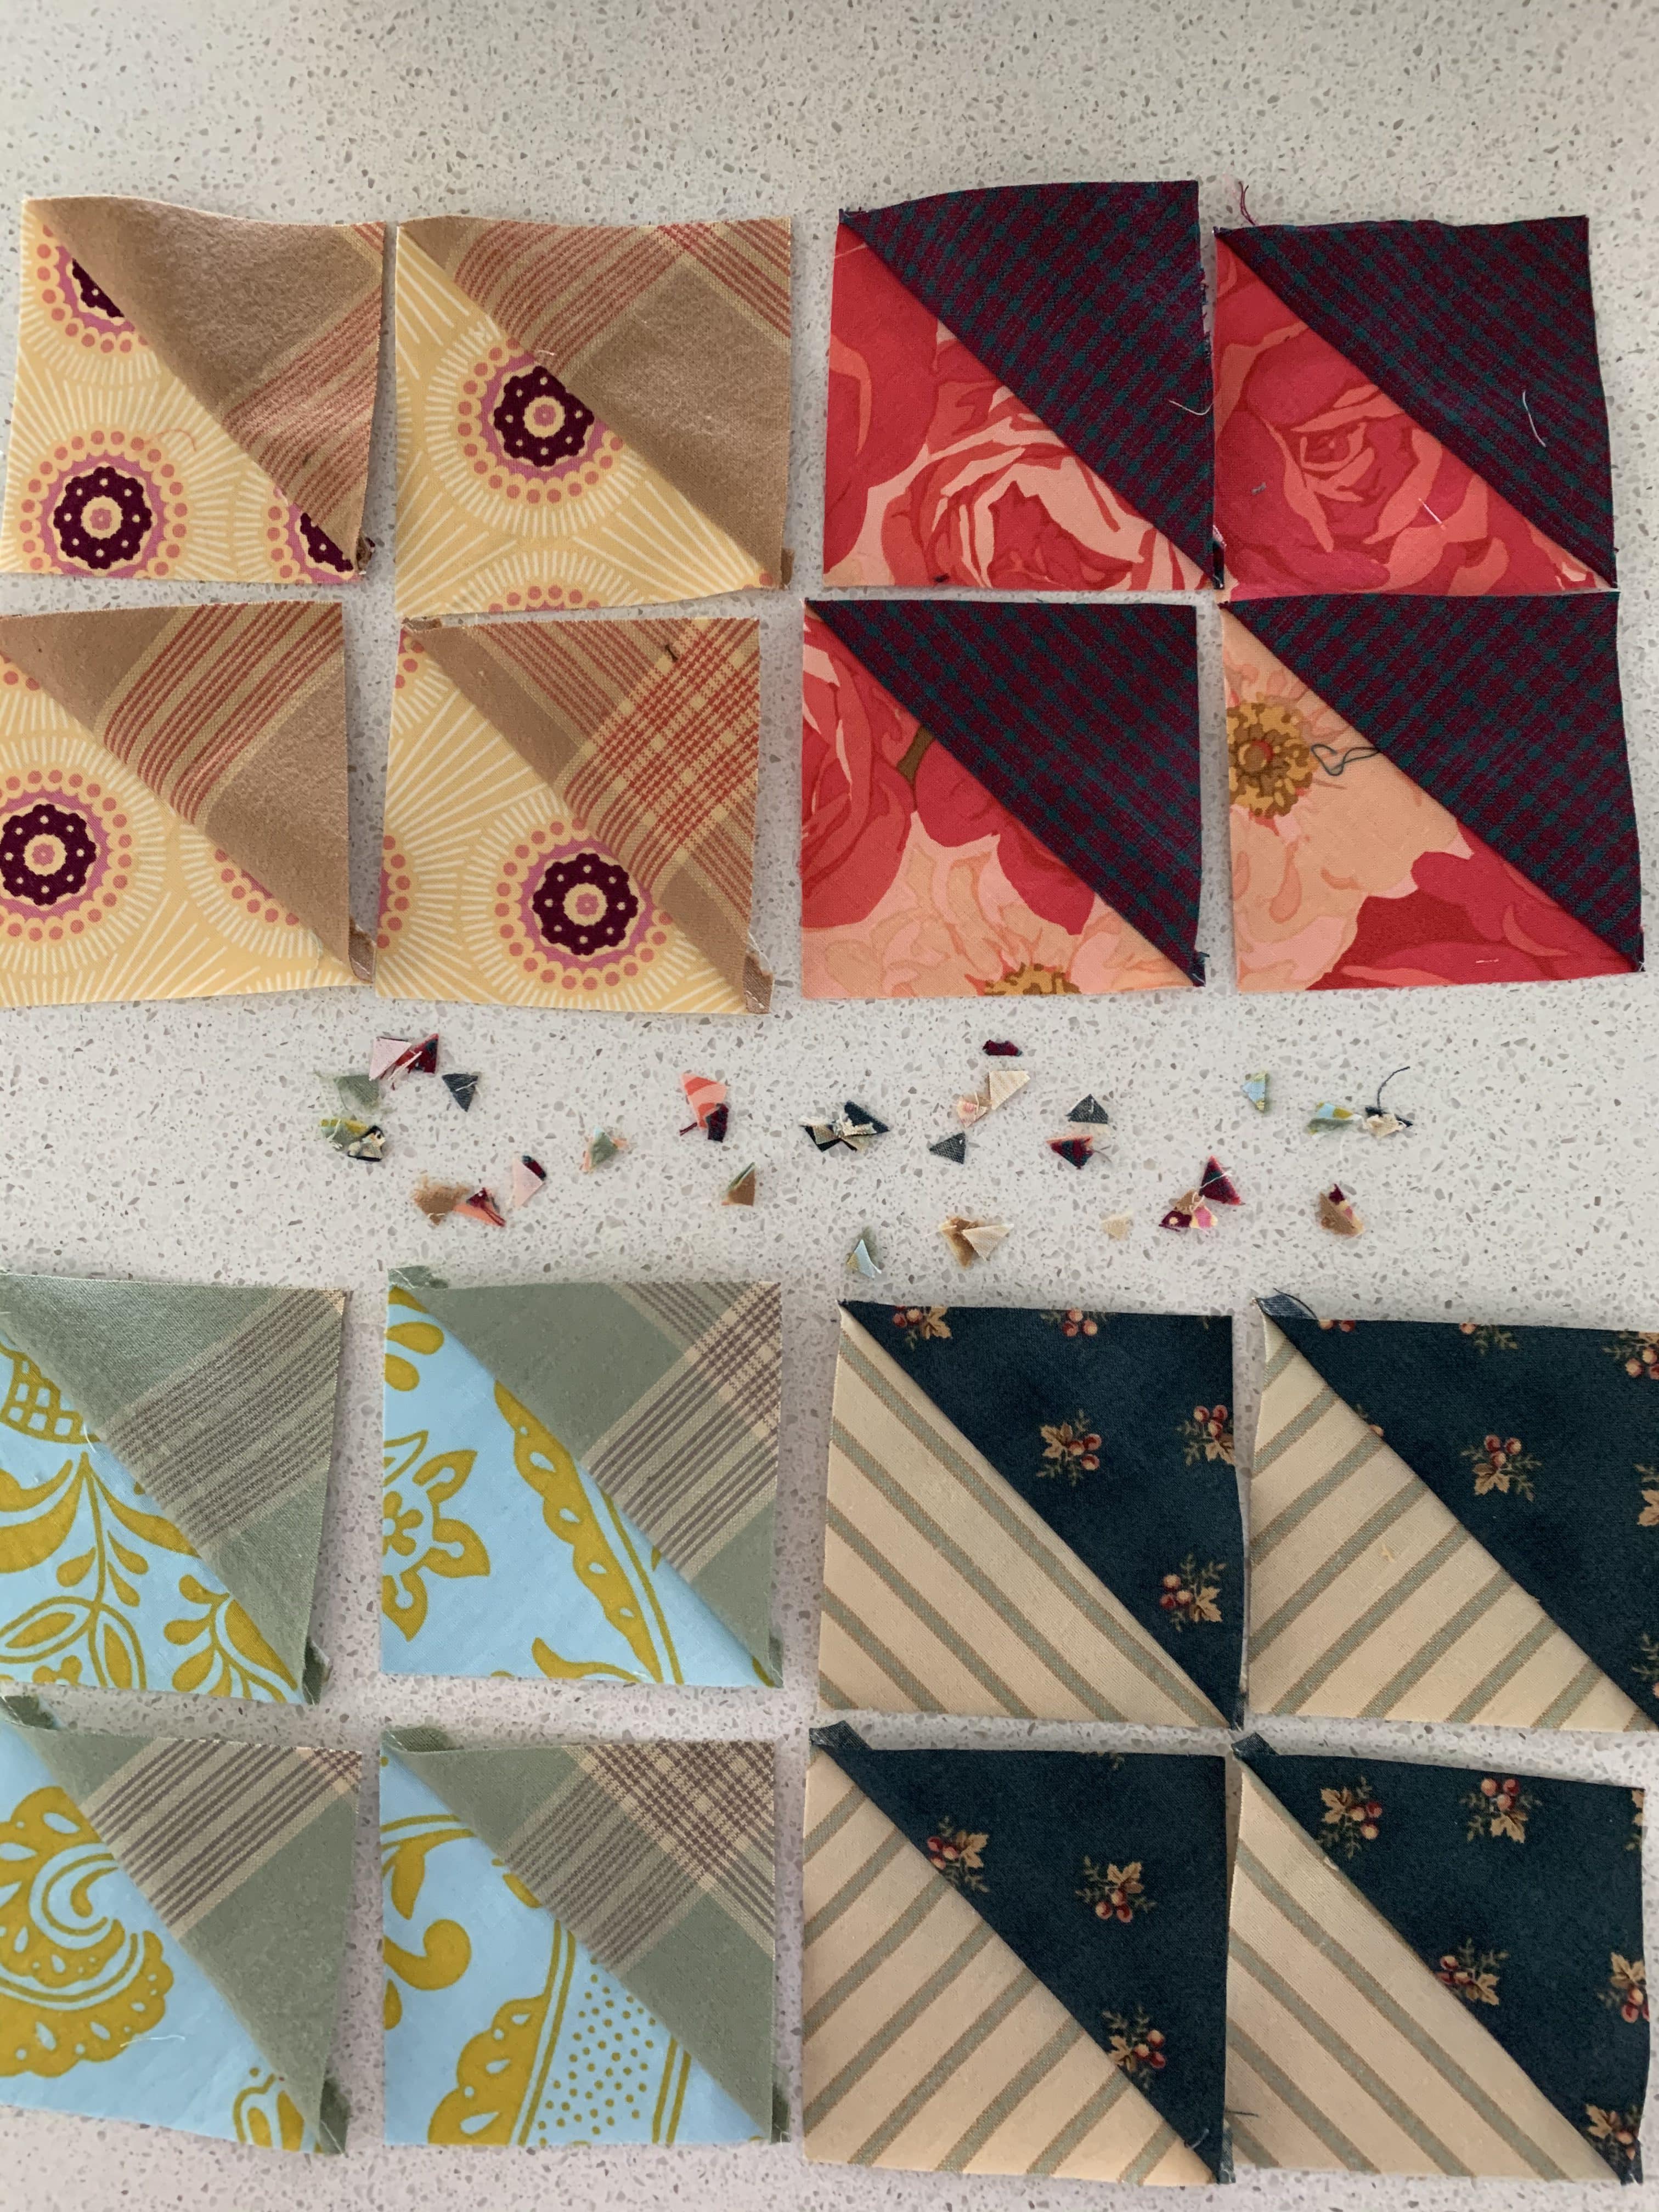
Take to the cutting board.  Carefully cut once on each diagonal.

susies-scraps.com'
Pinwheels On Point Block – Made Easy

Remove the excess little triangles from the centre. .

susies-scraps.com
Pinwheels On Point Block – Made Easy

Open the units. Finger press. Trim off the doggy ears.

susies-scraps.com
Pinwheels On Point Block – Made Easy’

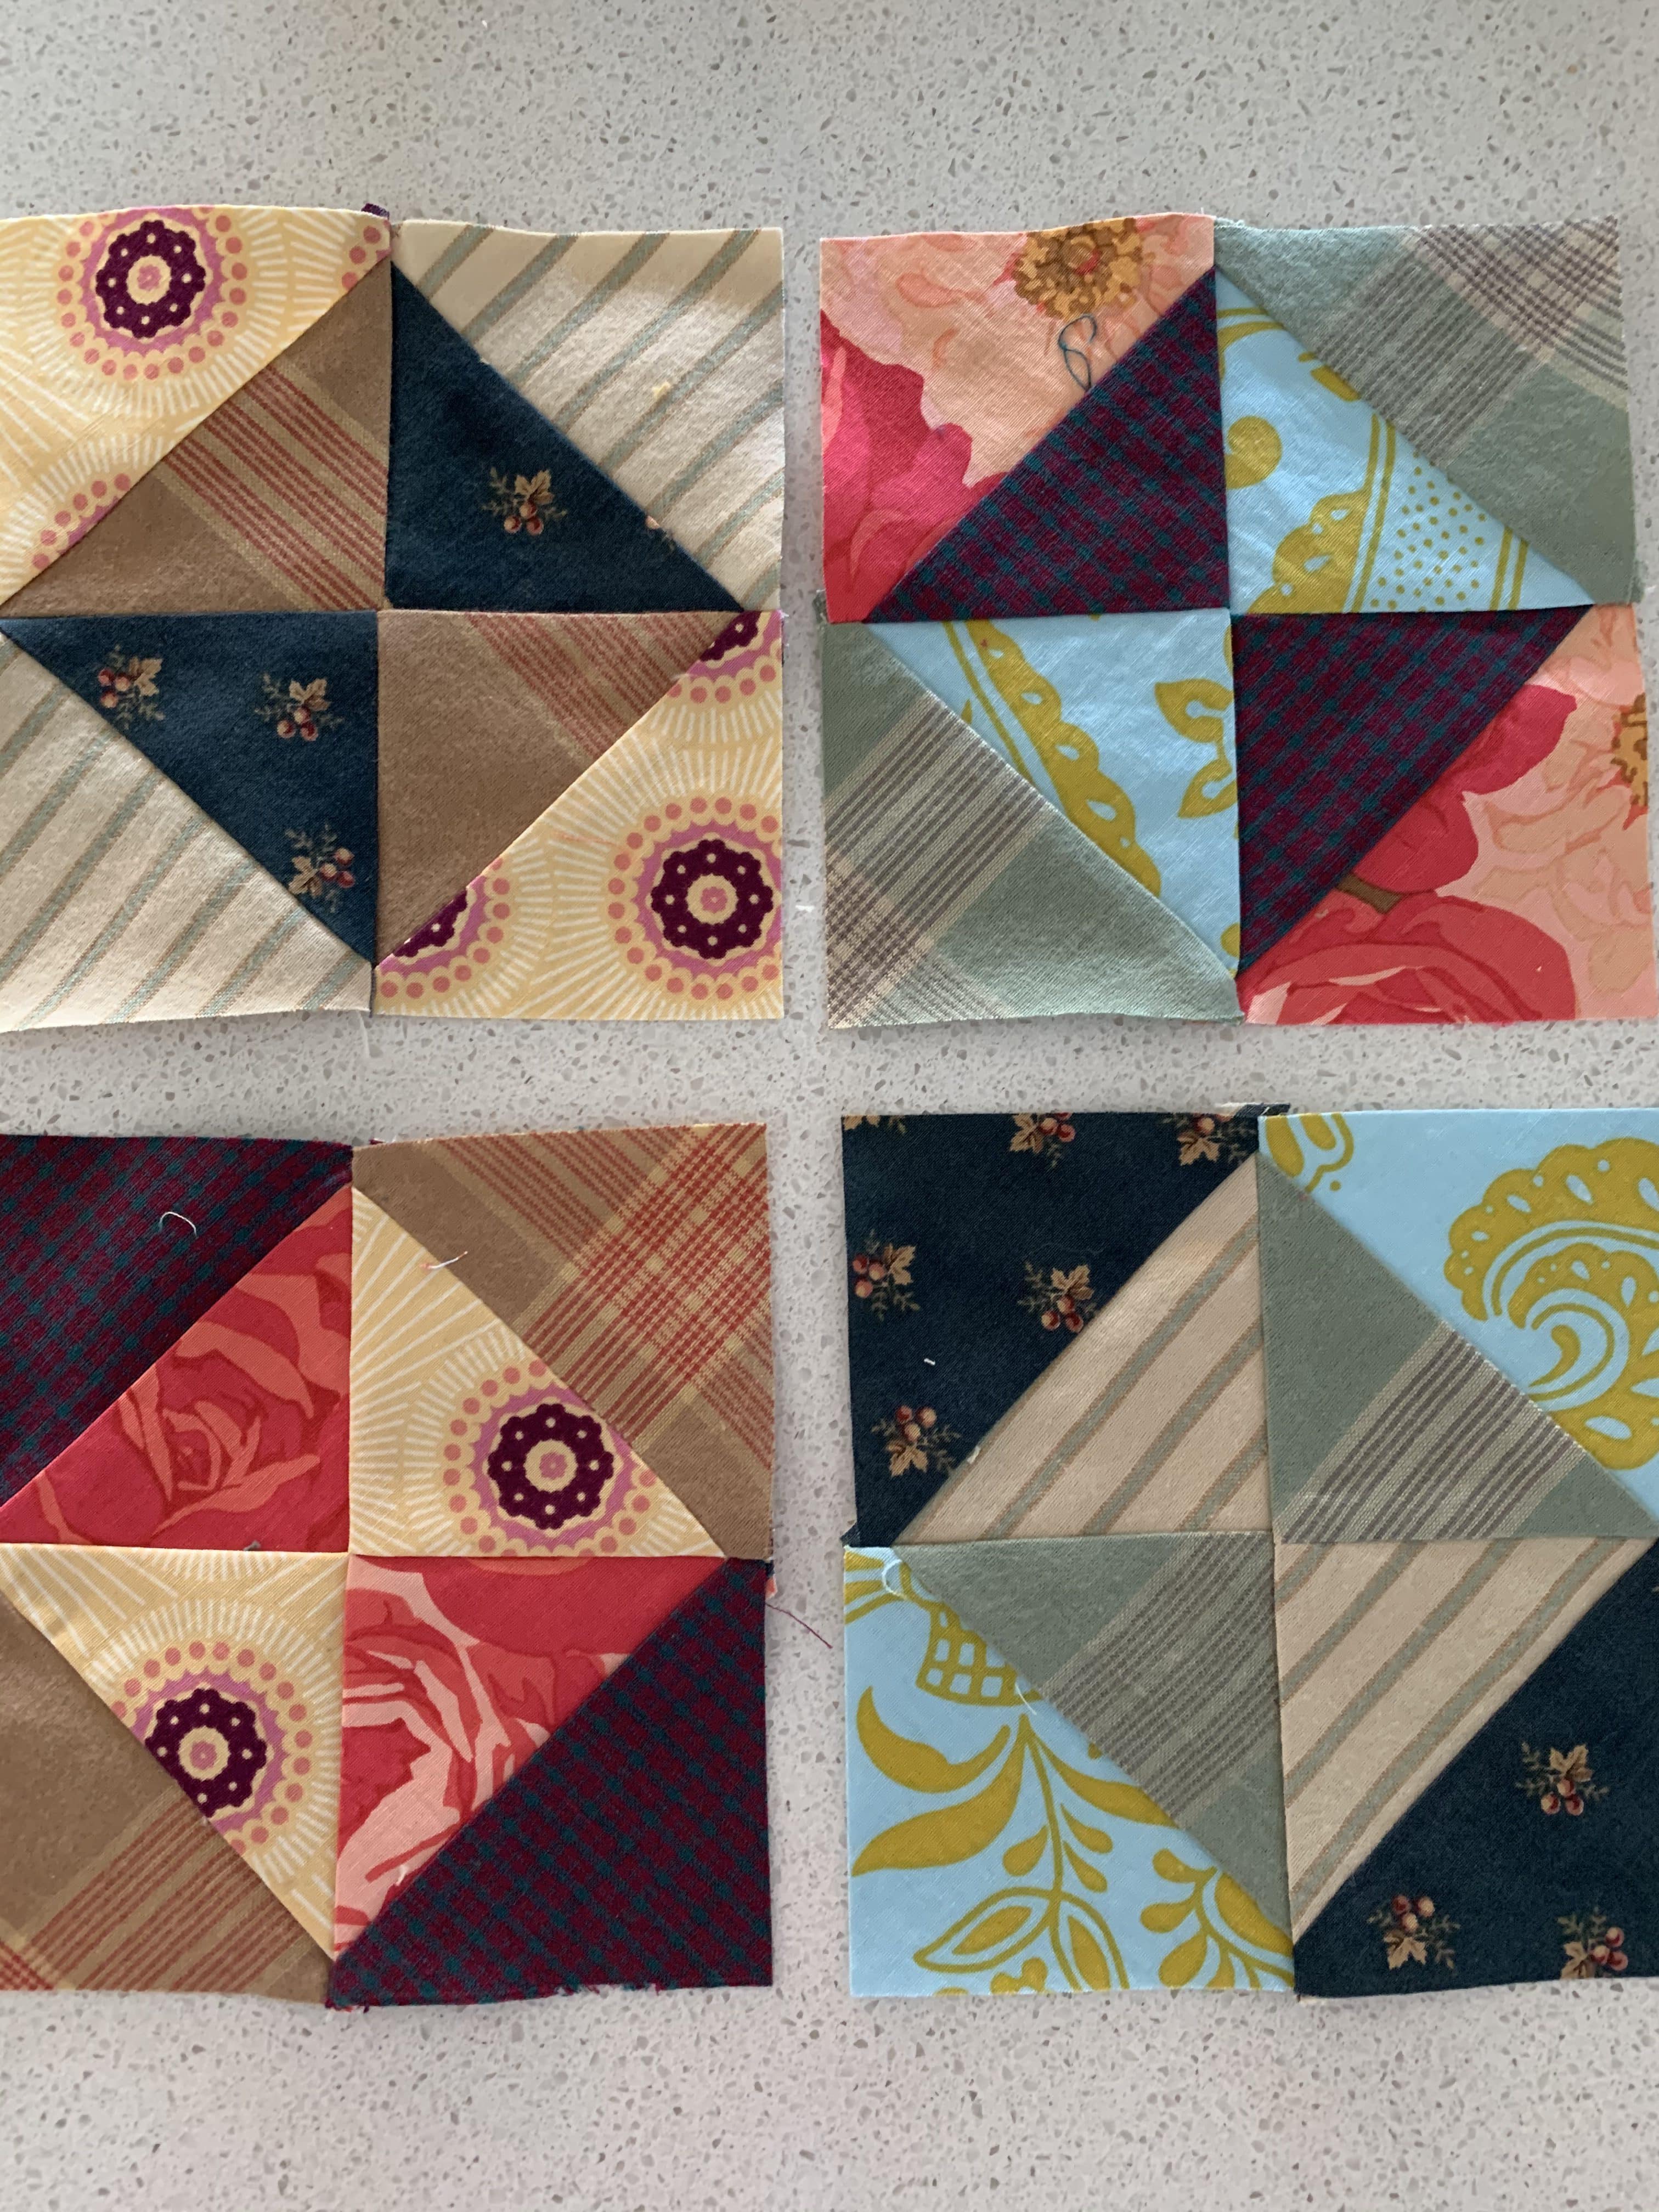
Use two units from each of the sets and arrange into two pinwheel blocks.

susies-scraps.com.
Pinwheels On Point Block – Made Easy

Sew together like a four patch.

susies-scraps.com
Pinwheels On Point Block – Made Easy

Tun over and spin the seams at the back to make the blocks nice and flat.

susies-scraps.com
Pinwheels On Point Block – Made Easy.

Gently press the blocks.

susies-scraps.com
Pinwheels On Point Block – Made Easy

There we are.  That was fun!  Nice and quick too.  I feel another baby quilt coming on……I hope you enjoy them.

If you liked this post you may also like,

Endless Scrappy Pinwheels Block

Scrappy Yankee Puzzle Block Made Easy

Half Square Triangle Units Fast and Multiple – Tutorial

and here are three other Pinwheel Quilts you might like.

I Spy Pinwheels Quilt and Pattern

Framing Pinwheels Quilt and Pattern

and

Solid Bold Pinwheels Quilt Pattern

Happy stitching,

Susie

© Susan Stuklis 2021

Scrappy Snowball in Snowballs Block

Scrappy Snowball in Snowballs Block

Hello Dear Friends and Readers,

Gosh I’m busting!  I have been working on a new block I want to share with you all.  It’s based on an old favorite but put together with lots of scraps.

We all have scraps left over from other quilt projects.  It doesn’t really matter how far into your quilting journey you are, there will be some scraps.  It doesn’t matter if they are matching or random, they are still scraps. And they are still good fabric.  I have a bag in which I save 2” scraps which are all leftovers from previous projects.  It’s quite good just to cut a few leftovers saving your hands getting fatigued because its just cutting a few over time.  This sure helps to keep the sewing space tidy.  It just keeps filling up.  It is quite a delightful surprise when I delve into it.  This little bag can easily sit next to my machine or in my lap and I can start sewing.  That is one of the things I just love about scrapppy quilts.  Having pieces precut means start sewing if the mood strikes.  Here is my little bag.

susies-scraps.com
Scrappy Snowball in Snowballs Block

The planning of quilts and cutting when dealing with large pieces of fabrics is quite a procedure.  I can really get myself into a major mess, hauling out fabrics to try to put together to coordinate them for a particular design.  It can often take quite a while and I wind up feeling like a pussycat who has been given a big ball of wool and played until she is in quite a tangled state.  Do you ever feel like that?   By that time, there is no more time left for sewing and I just have a big mess.

Not today!  I only had to cut one plain fabric and the rest is ready.  I can sit at my treadle and begin!  How civilized is that!  For my background, I’m an using a cream homespun, other suitable fabrics would be light scraps or any solid to give contrast and continuity to the scraps.

Okay!  Let’s get to it.  I have a lot of 2“ square scraps.  Do you?  Before you decide…..think about it….maybe you have some scraps lying around that need to be cut into something useful.

All seams based on 1/4”.

Block size 11” x 11”

Requirements for the Scrappy Snowball in Snowballs Block

29 of 2“ x 2“ scrap squares

4 of 5“ x 5“ background squares (cream homespun)

Small Scissors

susies-scraps.com
Scrappy Snowball in Snowballs Block

Method of Construction for the Scrappy Snowball in Snowballs Block

Place a 2“ square face down on one corner of a 5“ background square.

susies-scraps.com
Scrappy Snowball in Snowballs Block

Sew across the diagonal of the 2“ square.  This can be “eyeballed“,  (If you are not comfortable you can rule a diagonal line across the back of the 2“ square and then sew across the diagonal.)  Leaving 1/4“ seam allowance, cut away the excess fabric using small scissors.  Finger press the snowball triangle towards the corner.  Repeat for the other three corners.

susies-scraps.com
Scrappy Snowball in Snowballs Block

Make the other three snowball blocks in the same manner.

With the remainder of the 2” x 2” squares make two strips of three and one strip of seven squares joined together.

susies-scraps.com
Scrappy Snowball in Snowballs Block

Using a set of three squares attach two snowball blocks together.  Repeat for the other two snowball blocks. Finger press.

susies-scraps.com
Scrappy Snowball in Snowballs Block

Put the set of seven squares in between the two joined snowball blocks.  Take care to ensure that the centre square is well nested and the seam allowances face away from the centre square of each side so that the block sits nicely.

susies-scraps.com
Scrappy Snowball in Snowballs Block

Sew down each side.  Press the block.  Now you can see the scrappy snowball emerge in the centre of the snowball blocks.  Pretty cute hey! And fun to make.

susies-scraps.com
Scrappy Snowball in Snowballs Block

Here is a few more.

susies-scraps.com
Scrappy Snowball in Snowballs Block

If you like working with 2” scraps, here are a few others which may also take your fancy!

Four in Nine Patch Block Tutorial

Around the Garden In Scraps Block

Postage Stamp Blocks

and these

Charmed Nine Patch and Snowball Recipe

Wendy’s Way Snowball Table Quilt

Well I hope you can get a chance to do some sewing today.  And enjoy some of those scraps!  Remember a few at a time can soon add up to something wonderful!

All the best,

Susie x

susies-scraps.com
Scrappy Snowball in Snowballs Block

© Susan Stuklis 2020

Broken Dishes Block Totally Scrappy – Made Easy

Broken Dishes Block Totally Scrappy – Made Easy

Hello Dear Friends and Readers, I just have to share this idea with you.  For ages now I have been thinking about making a Broken Dishes quilt. I just love those blocks, and although the concept is pretty simple, I believe they always make delightful quilts.  The antique and vintage images of quilts I have seen. never fade in desirability in my mind.

Well, wouldn’t you know it, recently  Bonnie Hunter posted one of her quilt images with lovely inspiring words on a vintage Broken Dishes which was all scrappy.  My goodness – I was inspired!! Immediately , I thought of my Scrappy Pinwheel in a Square and some other blocks I have made easy (which I will link below).  I couldnt help thinking this could also be made super easy, so I set to work!

I have a small set of plaid fabrics which I thought would be perfect to incorporate, and as I always say, “Everything is Good with Gingham” (and other checks and plaids too),

Scrappy broken dishes style blocks have been popular in antique Dutch quilts and give a particularly appealing look which really has lasted the test of time.  This would have taken some considerable time to do when trying to achieve lots of different fabrics for each block.

These Broken Dishes blocks can be achieved with a moderated colour scheme, or fabric style, or, just go for it, and use random scraps.  It think the only caveat would be to have some light and dark contrast or colour contrast.

Today I am going to show you how you can make this great block very scrappy with minimal effort – and sorry, I‘m not followIng all “rules“ with this one….????

This pattern is suitable for precut charm squares, or you can cut your own, which is generally my preference.

These blocks can also be achieved by the conventional method using 16 of 3 ½” x 3 ½” squares in 8 different  fabrics.

Signature Pre-Cuts from Your Stash

Please read all instructions before beginning.

Unit size 3″ x 3″.

Block size 5 ½” x 5 ½”

Requirements for Totally Scrappy Broken Dishes Block

8 of 5” x 5” squares.  They should all be different.

susies-scraps.com
Broken Dishes Block Totally Scrappy – Made Easy

Method for Broken Dishes Block Totally Scrappy – Made Easy

Set the eight 5” x 5” squares right sides together into four pairs.

susies-scraps.com
Broken Dishes Block Totally Scrappy – Made Easy

Sew a 1/4” seam around the outside of each set.

susies-scraps.com
Broken Dishes Block Totally Scrappy – Made Easy

Now there should be four sets like this.

susies-scraps.com
Broken Dishes Block Totally Scrappy – Made Easy

Using a rotary cutter and ruler, carefully cut once on each diagonal to reveal 16 sets of 2 half square triangles.  Please be aware that all the edges are on the bias, so handle with care, do not stretch.

susies-scraps.com
Broken Dishes Block Totally Scrappy – Made Easy

Finger press each seam to the dark side.  Trim each unit to 3″ x 3″.

susies-scraps.com
Broken Dishes Block Totally Scrappy – Made Easy

Trim each unit to 3″ x 3″.

susies-scraps.com
Broken Dishes Block Totally Scrappy – Made Easy

Now you can mix them up into sets of four as you like.

susies-scraps.com
Broken Dishes Block Totally Scrappy – Made Easy

Carefully stitch them together like a Four patch.  For more ideas on four patches click this link Four Patch Favourite because they are a great “building block“ For quilts.

susies-scraps.com
Broken Dishes Block Totally Scrappy – Made Easy

Give a gentle press to the blocks.

susies-scraps.com
Broken Dishes Block Totally Scrappy – Made Easy

Not a bad result!

Then make some more.  ????

There are the blocks!

TIP – I usually press seams to one side, however, I did learn with this block it can be very useful to open the seams.  This will help the blocks lay much flatter where several seams converge. it will make it much easier to quilt too.  ( I learned the hard way)

susies-scraps.com
Broken Dishes Block Totally Scrappy – Made Easy

Here is the next instalment on Broken Dishes Block Totally Scrappy – Made Easy!

Scrappy Broken Dishes Quilt – Antique Inspired

If you enjoyed this post, you may also like,

Hourglass Super Fast Blocks Tutorial

The Arrowhead Quilt Block Made Easy

Antique Tile Block Made Easy Tutorial

The Spinner Blocks Made Easy Part 1

Hope you can get some sewing done today!

All the best,

Susie

© Susan Stuklis 2020

The Spinner Blocks Made Easy – Part 1

The Spinner Blocks Made Easy – Part 1

Hello Dear Friends and Readers,

It seems we are living in very challenging times….  The Corona virus, (now named SARS-CoV-2) is changing the world as we know it at a rapid pace.  I really hope you are all taking care of yourselves and staying home as much as possible until the storm passes.

It is also worrying to see line ups in stores and restrictions on essential items.  As scrap quilters, I believe we are very good at making the best of what we have available.  Before we start on todays block, I would like to add that if you have potatoes, you can always make something.  They are a very versatile and nutritional food.  They have seen many populations through very difficult times in history.  One of my favourite ways to use them is by making Gnocchi.   They are easy, filling, and I always find so satisfying to make.   Here is a link to how to make them in case you would like to.

What’s Cooking? Making Gnocchi

Today I think it would be prudent to use something you already have so that there is no need to go out!  I know you are always looking for great ways to use your scraps, and this block is absolutely no exception.   I really believe this design would work well with any style of fabrics providing there is  sufficient contrast of the small triangles.  This block can be used with scraps you already have.  If you have some already cut out it will make good use of them!

A long long time ago, I made some of these blocks.  The problem was, I couldn’t decide how to set them.  I chose to challenge myself because it does contain triangles, but with an easy method of construction. The method is good.  It requires only minimal trimming if at all.  However, the block looks quite busy with scraps.

The Spinner block pattern was published by Nancy Page in the 1930’s, however I believe the design predates the publication.  Recently I saw an antique quilt in which these blocks had been set like pinwheels, as later published by Nancy Page,  When they are put together it is so much easier to see the secondary pattern coming through.

I think I really have a renewed love for this block as I have soooo many 2 1/2” squares, 3” squares and 5” squares, already cut so why not sew up some more!

Block size 9 1/2” x 9 1/2”

Requirements for one Spinner Block Made Easy

4 of 5”’ x 5” squares in medium to dark fabrics, cut once on the diagonal (use four for a block, keep four for another block)

4 of 3” x 3” squares in a light fabric cut once on the diagonal

4 of 2 1/2” x 2 1/2” squares in medium to dark fabric.

Making The Spinner Block Made Easy

The Spinner Block is made up of four units.  The main thing is to make sure that when you set the units, that they are all facing in the same direction, just as you would for any Pinwheel Block.

Lets get started.

To make one of the units.

Using a scant 1/4” seam, sew the short side of one one light triangle to one side of a 2 1/2” square.  Finger press the seam.

Sew a second light triangle to the adjacent side of the 2 1/2” square so that the hypotenuse of both triangles will line up once the triangle is turned back.

Finger press, I use my wooden thing, to turn back the second triangle.  Do not trim yet.

Place this pieced triangle on top of the larger triangle which was cut from a 5” square.  Sew a more generous 1/4” seam so that your seam allowance is close but not completely intersecting the point where the pieces all join.

Turn back.  Finger press.  Trim off the doggy ears.  The unit should measure 4 1/2” x 4 1/2”.

Quite sharp.  Repeat to make four units altogether.

Place in a pinwheel arrangement.  Make sure that the pinwheels are all facing in the same direction.  Sew together using a 1/4” seam allowance, like a four patch.

Definitely a good scrappy project!

This is how they look when they are put together.  You can see that secondary diagonal pattern crossing through.

If you are ready to make some more of these Spinner Blocks, here is the link to Part 2

The Spinner Quilt Part 2

If you enjoyed this post, I believe you may also like,

Treadling on Monkey Wrench Blocks + Tutorial

Endless Scrappy Pinwheels Block

Irregular Triangle Foundation & Tutorial

Take care,

Susie

Around the Garden – In Scraps – Block

Around the Garden – In Scraps – Block

If you are looking for pretty…. and scrappy inspiration, I think I just might have  it covered today!

Hello, hello Dear Friends and Readers!

You might have noticed in the past that I like to work with squares.  Today it is 2″ x 2″ square scraps.  Whenever I finish a project, this is what I like to do!

I believe that 2” squares are like the magic squares.  This is the fabric which could easily go in the bin but instead of doing that, cut these little pieces as you go and be amazed at the amount and variation you will have.  I think by weight equivalent, I have about 2 yards of fabric here already cut.  That could be equal to about 700 squares.  Now that is what I call a good amount!  Ready for a quilt!  All these squares are true scraps, I am not going for a theme, but of course you could.  The unifying fabric will be the background.

Cut Up Your Quilting Off-cuts

Around The Garden in Scraps Block susies-scraps.com

and….if you are wondering how to store them…

Quilt Pantry

Just a thought!

Anyhow…. I have so many 2″ x 2″ scraps, here is the block which I have decided to make.  Here is my burgeoning bag which is very full of 2’ x 2” scrap squares.  I am using this little beauty, a Singer 201K treadle.  She has a great story.

Singer 201K Treadle C1940

Around The Garden in Scraps Block susies-scraps.com

These blocks are going to be super sweet when joined together, however, I do have a plan, can you guess??

Ingredients for one 9 1/2″ x 9 1/2″ Around the Garden – In Scraps – Block

16 of 2” x 2” scrap coloured squares
4 of 2” x 2” cream quilters muslin or homespun
4 of 3 1/2” x 3 1/2” cream quilters muslin or homespun

Around The Garden in Scraps Block susies-scraps.com

Lay out 3 of the 2″ x 2″ scrap coloured squares and 1 of the 2″ x 2″ muslin squares into a four patch. Sew together. Repeat to make three more units like this. Finger press the units as you go ensuring the the seam allowances are pressed away from the light muslin squares.  Use the remainder 4 of 2″ x 2″ coloured scrap squares to make one more four patch.

Around The Garden in Scraps Block susies-scraps.com

Now assemble the units together as a nine patch. The coloured four patch in the centre and the four patches with the muslin squares on each corner with each muslin square pointing towards the centre four patch.  Lay the four of 3 1/3″ x 3 1/2″ muslin squares in between the four patches like this.

Around The Garden in Scraps Block susies-scraps.com

Sew together as a nine patch.

Around The Garden in Scraps Block susies-scraps.com

It should look like this.

Around The Garden in Scraps Block susies-scraps.com

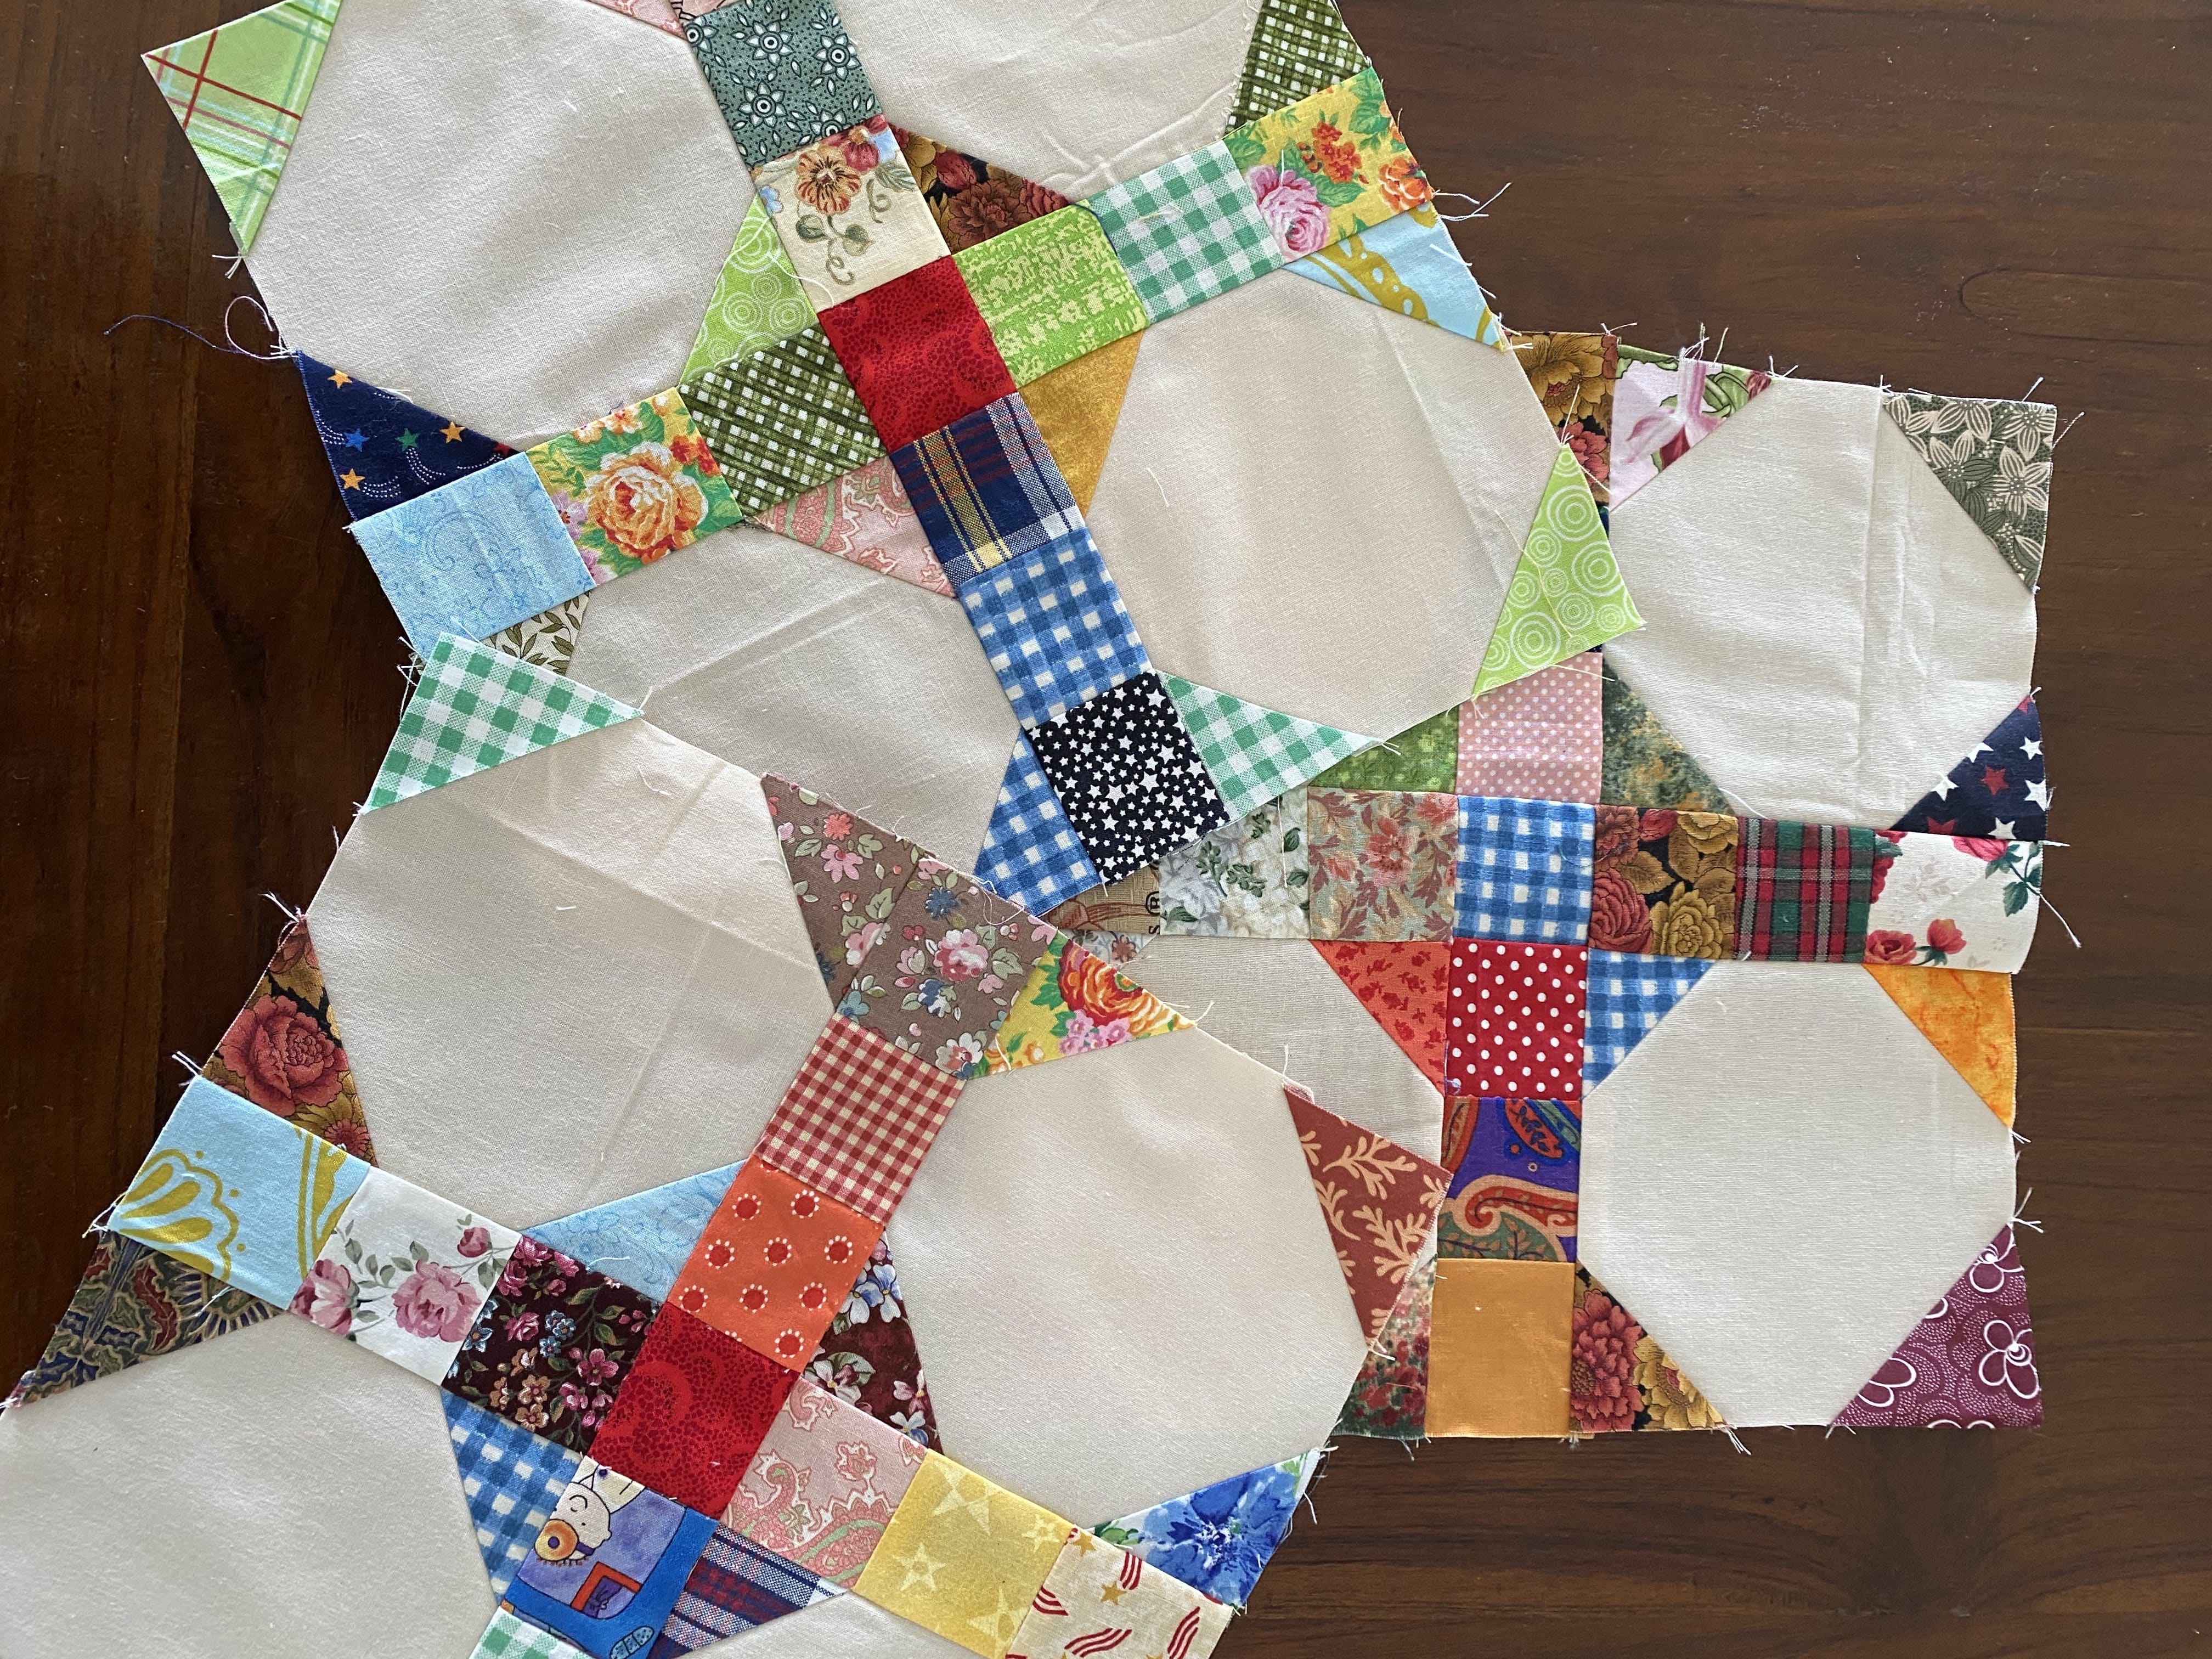
Here is a few more. I haven’t pressed them yet.

Around The Garden in Scraps Block susies-scraps.com

And here is a few more.  I like the emerging crosses when the blocks abut each other.  There is a nice background space for quilting.  I think there could be many fun ways of setting or sashing these blocks.  Let your imagination go!

Around The Garden in Scraps Block susies-scraps.com

You can see how I have decided to use these blocks here.

It Feels Like Rain

If are cutting your scraps or have a collection of 2” x 2” squares to use, here are some other posts using 2” x 2” squares you might like too!

Charmed Nine Patch and Snowball Recipe

or this one

Quilted Scrap Fabric Basket Upsize It Tutorial

or…this one

Fettered Friendship Stars Quilt Pattern Bordered

Oh wait…. here is another…

Stars and Crosses Band Quilt Pattern

And not to forget an old favourite

36 Patch Postage Stamp Blocks Tutorial

Happy sewing!

Susie