Tag Archives: Scrappy Strings

Vintage Style String Me Along

Vintage Style String Me Along

Hello Dear Friends and Readers and a warm welcome to today’s post. I have spent about one month in Western Australia and that time has been amazing and so interesting. If you follow me on FB or Insta you can see some of the photos there.

Now I am black home and it’s good to be here. My sewing room has been calling and I must say it is somewhat of a mess and needing a good tidy up! I thought I would start with a box of scraps which was doing nothing. A collection of all sorts of odd shapes and different fabric lines, chucked into the box from various different projects over time. In order to make some room and be able to get back to some basic machine stitching, i decided to make some string blocks with this fabric.

Vintage Style String Me Along susies-scraps.com

I sorted out the pieces and cut them very roughly into odd strips. Better pieces of fabric I cut into strips and added to my pile which may be used for a log cabin in the future. Lessons in Log Cabin Blocks It didn’t take that long and can be way more fun than hauling yardage. The piles of strips look very nice and my pile of rough strings gave a sense of achievement. As always, there is more fabric than anticipated and I’m pretty sure I can create at the very least, a baby quilt or a lap quilt.

In the pile I also have two old thin pillow coverings, so I cut them up to use as the foundation for the string blocks. My vision is a vintage style looking quilt which is homey and full of delightful strings. Depression era quilts were sometimes made of strings of fabric in this manner in order to use what was already available and then recycled into a quilt top. This lead to some very pretty quilts with a lovey mixture of fabrics. They often used the fabric feedsack bags to make clothing and quilts. It is a great look. The way the blocks will be positioned will give plenty of interest.

Begining by placing a string in the centre of the foundation block on the diagonal, making sure that it overhangs the edges. Cover with another string, right sides down lining up the sewing edges as much as possible. Sew, making at least a 1/4” seam. Make two blocks at a time so that it keeps the flow going and doesn’t use as much thread. Press the fabric strip open. I use a wooden thing or finger press well before adding the next strip. I even used up old bobbin thread which is actually great because now my bobbins are cleaned up as well!

Vintage Style String Me Along susies-scraps.com

This is how it looks from the back before trimming. It may look a little distorted because the foundry=tion was very thin however that will not matter once the block is trimmed.

I remember PJ from Quilting time in Dixie saying that she used old thin sheets for the foundation blocks and that seemed like an excellent idea to me.

In order to keep this as simple as possible I used my regular 6” ruler to cut the fabric into 6” x 6” squares to use for the foundations. This made it very easy to trim the blocks after pressing. this is how it looks from the front before trimming.

Vintage Style String Me Along susies-scraps.com

I used my trusty old treadle to make these blocks. Having been out of use for a while she responded to a good oiling. That is one of the advantages of this machine. The maintenance is easy, just give a good oiling! Treadle Tinkering

Vintage Style String Me Along susies-scraps.com

I plan to put the blocks together like this. I really like the pattern and it looks good from every side. I hope you can feel inspired dot make some string blocks. Loads of fun. It doesn’t require over thinking which means that it progresses very quickly.

Vintage Style String Me Along susies-scraps.com

If you enjoyed this post, you may also like these other string projects.

Any String Goes – Pineapple Improvisational String Quilt Blocks

String Pot Holders or Trivets for Christmas

quilted christmas scrappy string stockings

Crazy Little Strings – Diamond Charms Quilt Block and Tutorial

Pink Strings Table Mat

String Feeder QAYG Bib

“End of Day” Quilters Basket – Free Tutorial

Thank you for joining me today and as always I wish you happpy stitching.

All the best, Susie.

© Susan Stuklis 2026

Pink Strings Table Mat

Pink Strings Table Mat

Hello Dear Friends and Readers, and a warm welcome to todays post and to a bright New Year for 2023. I am in the mood for string projects and I hope you will be too.

In today’s post I am sharing with you all this little, Pink Strings Table Mat It is a quick project. I have definitely enjoyed making and using all the potholders, trivets, dish mats, kettle quiltlets and coasters I have made over time. These are very useful household items and not to forget they can make lovely small gifts as well. This mat can be useful to protect a table top or even as a placemat if preferred. I really like the way all the strings play together to make a unique table mat. Using lots of fabric strings and a Quilt As You Go (QAYG) method gives the Pink Strings Table Mat a lot of structure and makes it extra sturdy.

A Quilt As You Go Project

If you are not familiar with Quilt As You Go methods, it is a way of quilting the project during construction rather than after. Some examples of this can be sewing an “X” on two layers of fabric with one layer of flannel or batting in between which is often done when making rag quilts. Another method is making a small potholder quilt and then quilting and binding it. This method is then repeated as many times as desired and then they are hand stitched all together to make a larger quilt. Because each small piece was already quilted then this is also a form of QAYG. In todays example I will show how the item is quilted at the same time as each piece of fabric is added to the fabric and batting base.

Tips on Fabric Strings

For more tips on using fabric strings, see the previous post of String Pot Holders or Trivets for Christmas

I will give the requirement to make one Pink Strings Table Mat.

My suggestion is making two at a time to make the process more efficient because you are chain piecing and saving thread. If you only want to make one then I suggest piecing some other blocks in between.

Seam allowance is variable.

Finished size 12” x 18”

Requirements to make the Pink Strings Table Mat

1 of backing fabric 14” x 20” (a fat quarter could be used)

1 of Batting piece 14” x 20”

Approximately 40 leftover fabric strings at least 14” long each using prints of pinks apricots browns teal greens and light greens

2 of width of fabric strips 2 1/4” wide for the binding

Today I am using a Singer 15 treadle which is 120 years old. Learn to Treadle

Pink Strings Table Mat susies-scraps.com

Making the Pink Strings Table Mat

Lay out the backing fabric right side down and top with the batting piece. Make sure that the two pieces are aligned and smooth out carefully with your hands so that it is nice and flat.

Beginning at the centre of the mat, lay down one fabric string on the mat so that it slightly overhangs each side of the mat right side facing up. Lay a second string right side down on top of the first string so the the edges on the right edge of the two strings are aligned as much as possible. sew along that edge using an approximate 1/4” seam allowance. It does not have to be accurate as long as the edges are contained. Open up the second string and press toward the batting. Add the next string in the same way, right side down on top of the second string. sew along the right edge. Open up and press toward the batting. Finger press or roller press along the seam to open it up.

Continue adding strings in the same manner. If you are making two as I did, then keep going to the next mat and interchanging between the two mats.

Pink Strings Table Mat susies-scraps.com

Keep going until the mat is completely covered to the ends of the mat.

Take to the cutting mat and use a rotary cutter and ruler to trim the mat so that it measures 12” x 18”. the mat is already quilted because it is a QAYG project.

Pink Strings Table Mat susies-scraps.com

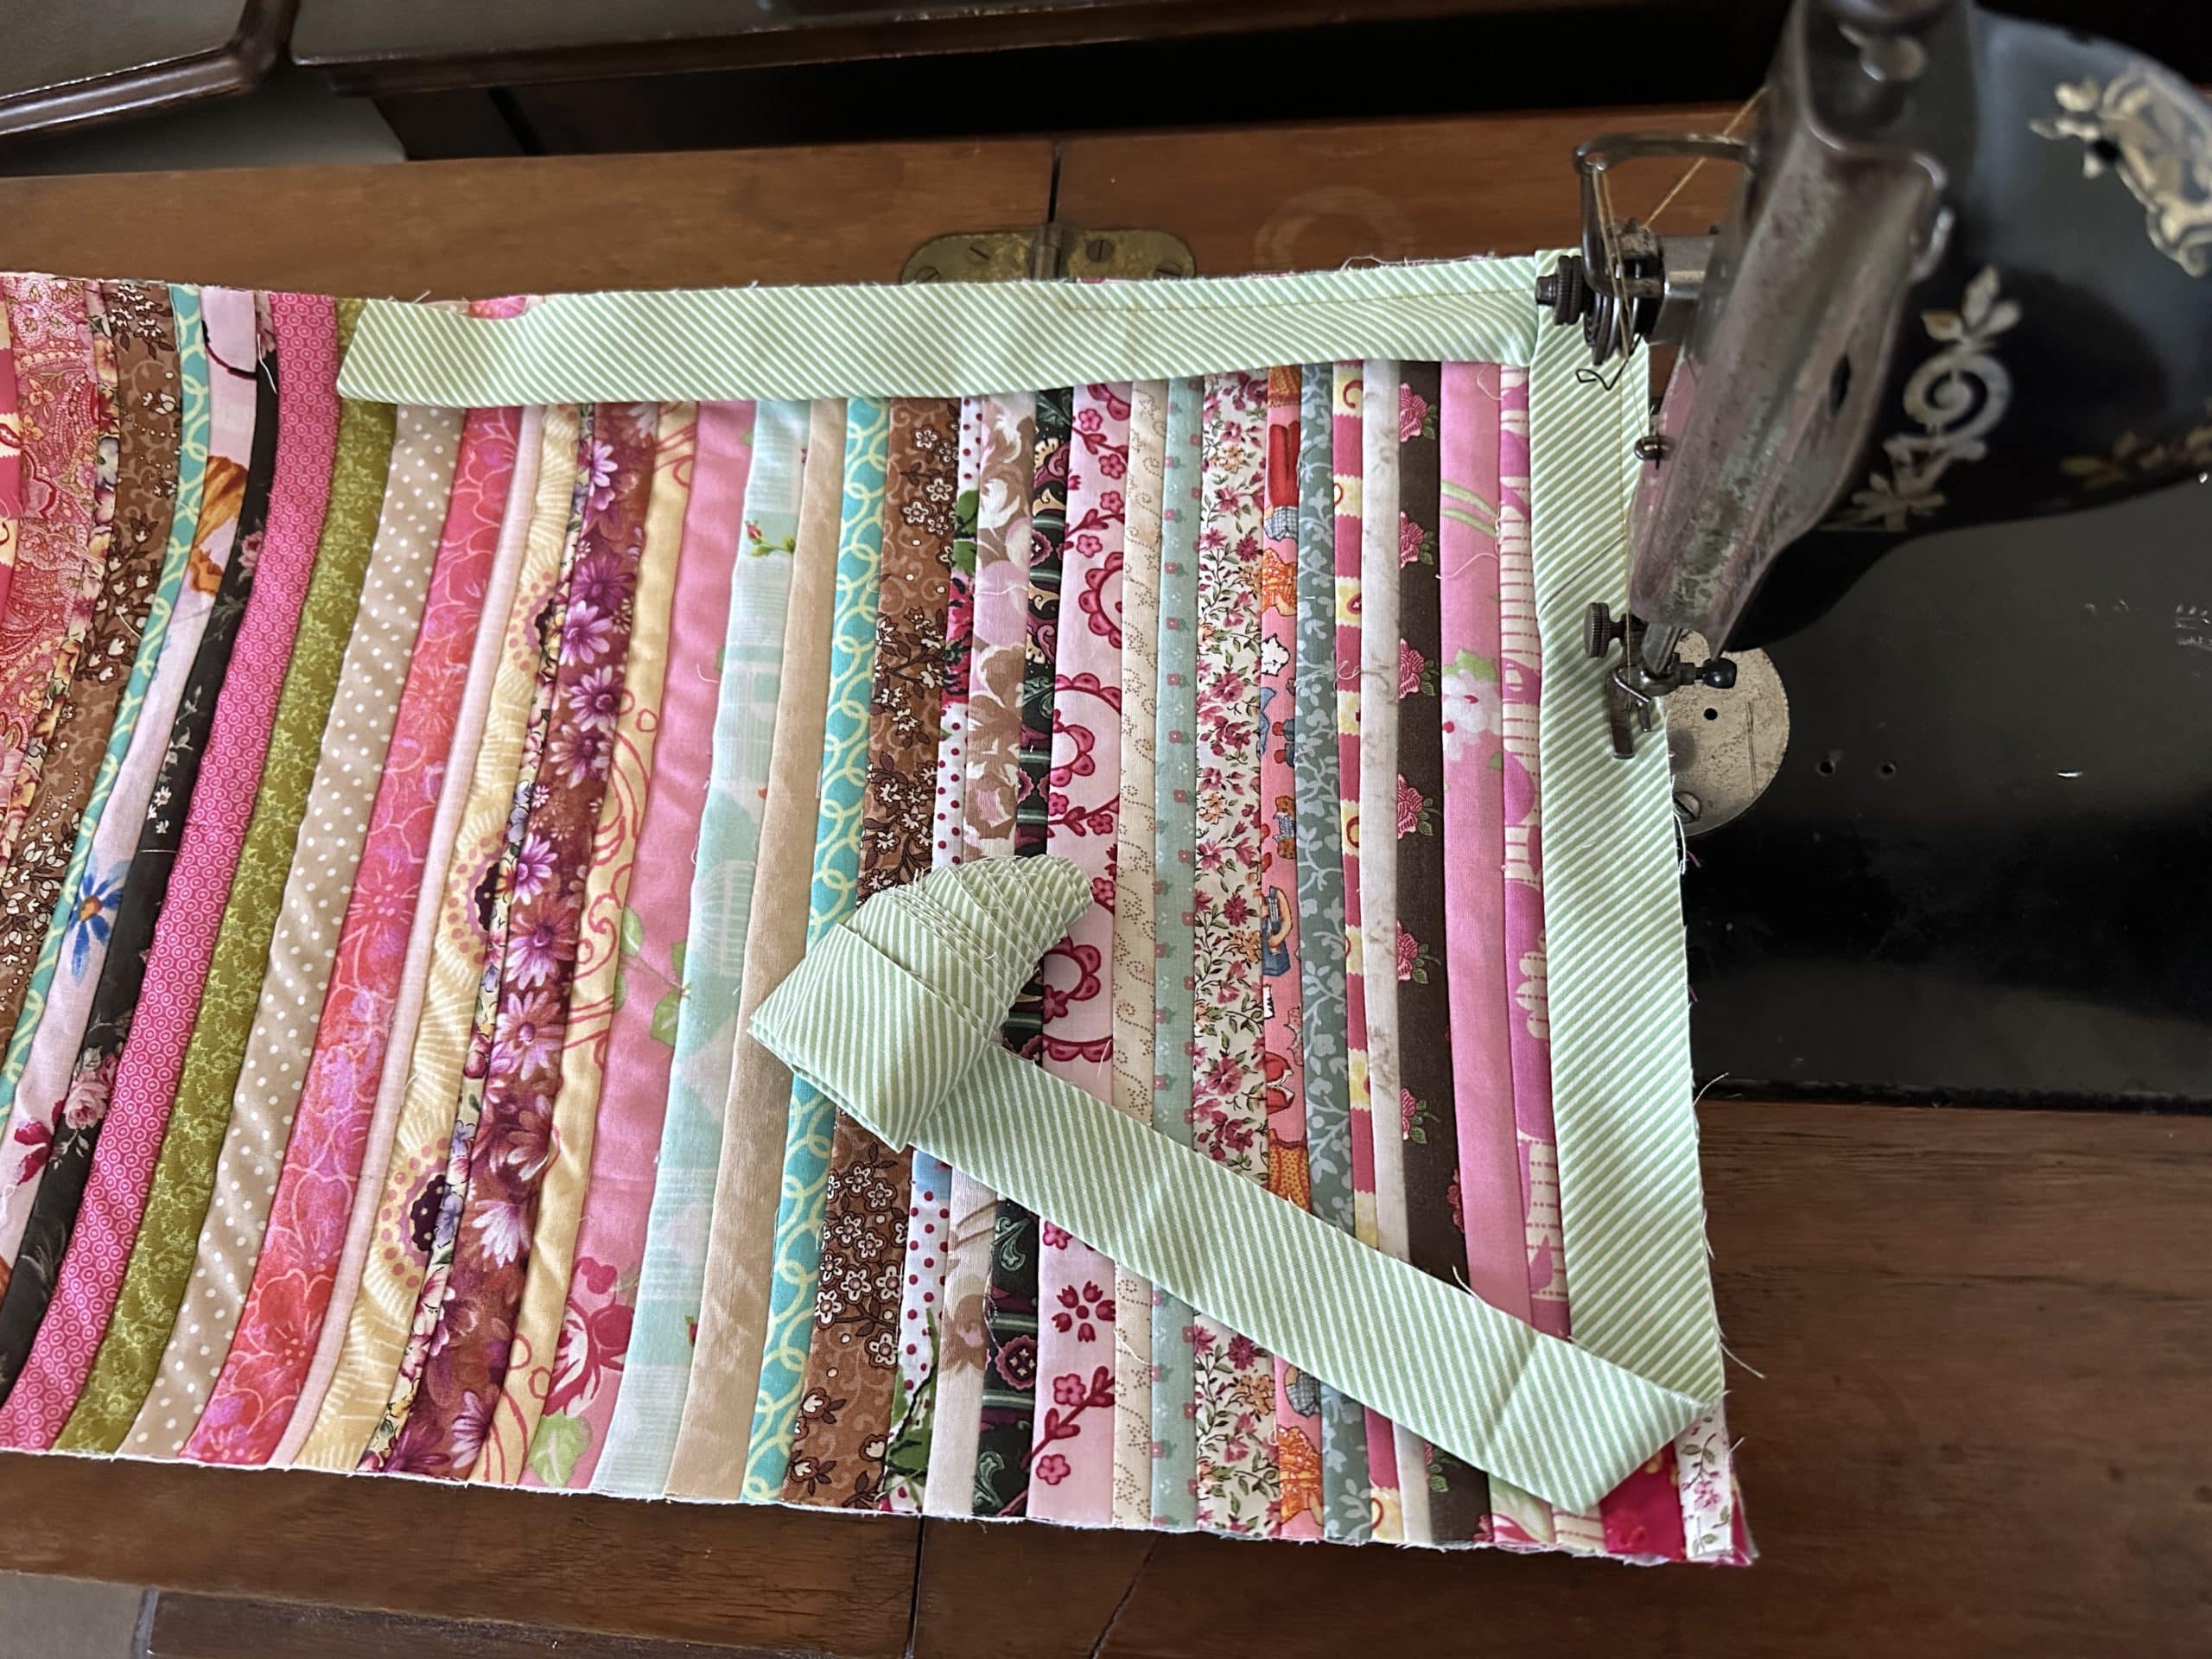
Join the binding strips together using a 45 degree angle.

Attach the binding strips to the front edge of the mat.

Pink Strings Table Mat susies-scraps.com

Turn to the back and hand stitch in place. Quick Bind Every Time – Tutorial

Pink Strings Table Mat susies-scraps.com

Here is the two finished mats after the binding was attached.

Pink Strings Table Mat susies-scraps.com

Happy New Year!

Wishing you all a very Happy New Year. I hope you feel inspired to use up some of your leftover fabric strings.

If you enjoyed this post, you may also like some of these related projects.

Strings n Things

Crazy Little Strings – Diamond Charms Quilt Block and Tutorial

if you are a real fan of using up fabric strings you might also like this

“End of Day” Quilters Basket – Free Tutorial

If you are looking for larger table toppers here are two suggestions…

Wendy’s Way Snowball Table Quilt

Tea Time for Alice Mini Quilt

And a fun QAYG Hobo Bag Pattern

Happy sewing

Susie

© Susan Stuklis 2023